

Page 1
1
Zero Clearance
Installation Instructions
IS 500 LE / IS 800 LE Models
Pecan Engineering Pty Ltd
13 Acorn Road
Dry Creek
South Australia 5094
Email info@pecan-eng.com.au
Phone: (08) 8349 8332
Fax: (08) 8260 6643
Page 2

2
Contents
SAFETY PRECAUTIONS ........................................................................................ 3
PARTS SUPPLIED ................................................................................................. 4
INSTALLATION INFORMATION ............................................................................ 4
INSTALLATION CHECKLIST .................................................................................. 4
INSTALLATION IN DETAIL .................................................................................... 5
DIMENSIONS ........................................................................................................................... 5
CLEARANCE TO COMBUSTIBLE MATERIALS ........................................................................... 6
FLOOR PROTECTOR (HEARTH) ................................................................................................ 7
VENTILATION .......................................................................................................................... 7
CLADDING ............................................................................................................................... 8
POWER SUPPLY FOR FAN ....................................................................................................... 9
FLUE REQUIREMENTS ............................................................................................................. 9
SUGGESTED FRAMING ..................................................................................... 10
Page 3

3
SAFETY PRECAUTIONS
Most building regulatory Authorities in Australia require any wood heater installation to
comply with Installation Standard AS/NZS 2918:2001. Different states and councils may have
varying regulations. Check local building regulations before installing the appliance.
All Blaze wood heaters have been tested to ensure that they will meet the appropriate
safety Standard requirements if the instructions in this manual are followed. As the safety
and emissions performance can be affected by altering the appliance, no modifications are
allowed without written permission from the manufacturer.
WE RECOMMEND THAT THE INSTALLATION OF YOUR NECTRE WOOD HEATER BE CARRIED
OUT BY A QUALIFIED INSTALLER.
WARNING: THE APPLIANCE AND FLUE SYSTEM SHALL BE INSTALLED IN ACCORDANCE WITH
AS/NZS 2918:2001 AND THE APPROPRIATE REQUIREMENTS OF THE RELEVANT BUILDING
CODE OR CODES.
WARNING: APPLIANCES INSTALLED IN ACCORDANCE WITH THIS STANDARD SHALL
COMPLY WITH THE REQUIREMENTS OF AS/NZS 4012 & AS/NZS 4013 WHERE REQUIRED BY
THE REGUALTORY AUTHORITY, I.E. THE APPLIANCE SHALL BE IDENTIFIABLE BY A
COMPLIANCE PLATE WITH THE MARKING ‘TESTED TO AS/NZS 4012 & AS/NZS 4013’.
ANY MODIFICATION OF THE APPLIANCE THAT HAS NOT BEEN APPROVED IN WRITING BY
THE TESTING AUTHORITY IS CONSIDERED TO BE IN BREACH OF THE APPROVAL GRANTED
FOR COMPLIANCE WITH AS/NZS 4012 & AS/NZS 4013.
CAUTION: MIXING OF APPLIANCE OR FLUE-SYSTEM COMPONENTS FROM DIFFERENT
SOURCES OR MODIFYING THE DIMENSIONAL SPECIFICATION OF COMPONENTS MAY RESULT
IN HAZARDOUS CONDITIONS. WHERE SUCH ACTION IS CONSIDERED, THE MANUFACTURER
SHOULD BE CONSULTED IN THE FIRST INSTANCE.
CAUTION: CRACKED AND BROKEN COMPONENTS, EG. GLASS PANELS OR CERAMIC TILES,
MAY RENDER THE INSTALLATION UNSAFE.
Pecan Engineering Pty Ltd accept no liability whatsoever for interpretation of AS/NZS
2918:2001.
Page 4

4
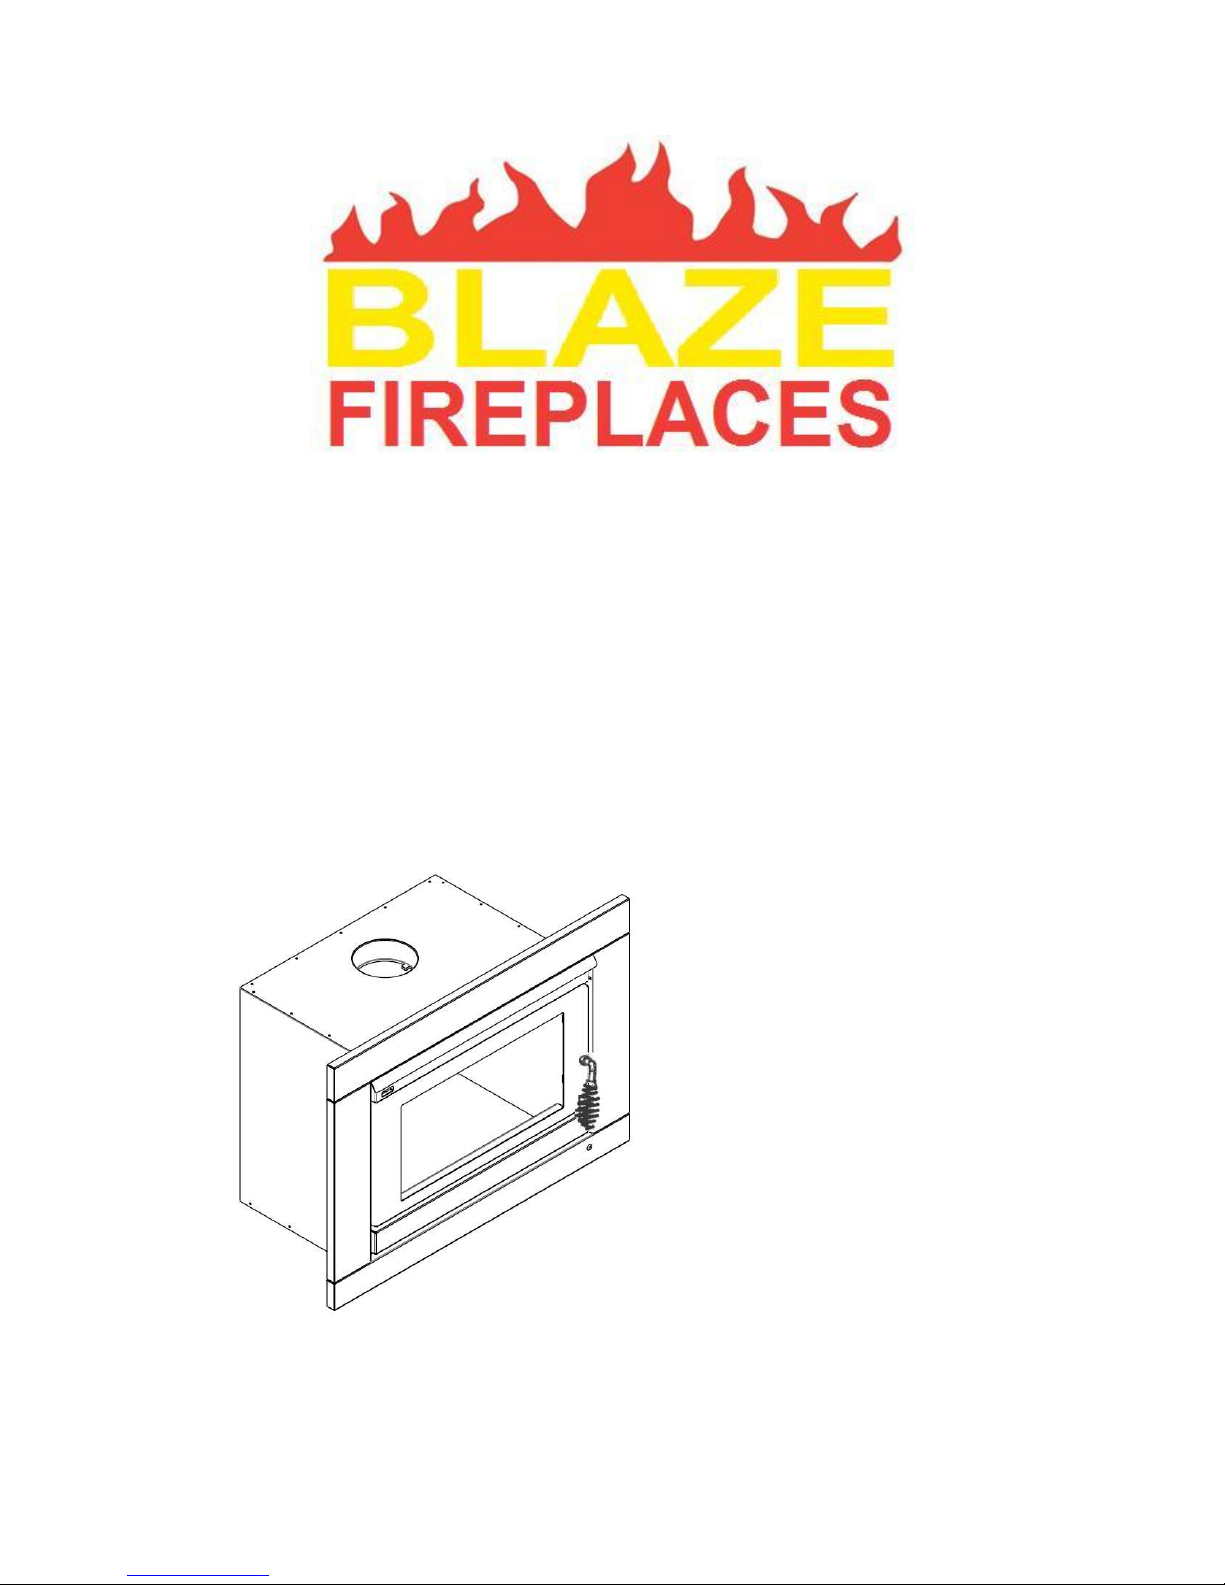
PARTS SUPPLIED
Blaze IS 500 LE / IS 800 LE heater (includes facia trim and fan)
Zero clearance box for IS 500 LE / IS 800 LE
INSTALLATION INFORMATION
A licensed accredited installer should install all wood heaters. Please ask retailer to locate an
installer.
All warranty is void unless installed by an authorised installer.
INSTALLATION CHECKLIST
*Refer to next page for more detailed instructions
Minimum clearances to combustible materials:
IS 500 LE
IS 800 LE
Rear wall clearance (within the enclosure)
35mm
35mm
Side wall clearance to cladding (within the enclosure)
145mm
195mm
Side wall clearance to framing (within the enclosure)
100mm
150mm
Side wall clearance (in front of the heater)
550mm
550mm
Clearance above (within the enclosure)
175mm
200mm
Ceiling clearance
1100mm
1100mm
Flue Requirements:
Standard 150mm diameter double cased flue kit (AS 2918)
Additional double casings, i.e. 200mm and 250mm diameter casings, to extend from
the top of the zero clearance box to the standard flue kit casings at the ceiling
penetration
Clearance between outer casing and ceiling minimum of 25mm, e.g. 300mm hole in
ceiling
Floor Requirements if floor is heat sensitive:
If base of heater is a 250mm or more above the floor, floor protector must be
minimum thickness of 6mm cement sheet or equivalent extending no less than
300mm in front of door opening and 200mm either side
If base of heater is less than 250mm from floor, floor protector must be minimum
thickness of 22.5mm cement sheet or equivalent extending no less than 600mm in
front of the door opening and 200mm either side, and continue under the zero
clearance box.
Other Requirements:
Front wall of enclosure must be comprised of non-combustible material
Enclosure around heater must include vents top and bottom
Set up for fan to be connected to mains power supply, e.g. Install power socket in
enclosure with extension cord to fan.
Page 5

5
INSTALLATION IN DETAIL
The Blaze IS models can be built into a wall enclosure and may be elevated above the floor.
The wall enclosure may be constructed of non-combustible material such as masonry or
Hebel blocks or may be constructed of timber and steel framing, and clad with plaster board
and fibre-cement sheet.
Installation must comply with the standard AS/NZS 2918:2001 (Domestic Solid Fuel Burning
Appliances – Installation).
DIMENSIONS
IS500LE Zero Clearance Box
(Outer Box Dimensions)
IS800LE Zero Clearance Box
(Outer Box Dimensions)
Page 6

6
CLEARANCE TO COMBUSTIBLE MATERIALS
The clearances from the zero clearance box to combustible materials must not be less than
the following:
IS 500 LE
IS 800 LE
A – Rear wall clearance (within the enclosure)
35mm
35mm
B – Side wall clearance to cladding (within the enclosure)
145mm
195mm
C – Side wall clearance to framing (within the enclosure)
100mm
150mm
D – Side wall clearance (in front of the heater)
550mm
550mm
– Clearance above (within the enclosure)
1
175mm
200mm
– Ceiling clearance
2
1100mm
1100mm
Note: Plaster board cladding over a timber frame is classed as a combustible surface.
1
Clearance above (within the enclosure) = minimum clearance from the top of the zero
clearance box to any combustible material above.
2
Ceiling clearance = distance from top of zero clearance box to the ceiling cannot be less
than the minimum clearance specified.
Brick veneer stud
A – Rear wall clearance
B – Side wall clearance to cladding
C – Side wall clearance to framing
D – Side wall clearance
Example zero
clearance enclosure
Blaze IS500LE / IS800LE heater
inside zero clearance box
Page 7

7
FLOOR PROTECTOR (HEARTH)
The floor protector must be constructed of non-combustible material with a thermal
conductivity no greater than 0.33W/m °K, such as compressed cement sheet.
1) If the base of the heater is 250mm or more above the floor, the zero clearance box may
be supported on 12mm thick plywood or equivalent, and must be no greater than
900mm wide (this ensures adequate ventilation from the lower air vents past the zero
clearance box). The plywood may then be supported on ordinary structural timber.
2) If the base of the heater is less than 250mm above the floor, then the zero clearance box
must be supported on non-combustible material such as steel C-section or Hebel blocks.
3) If the heater is to be installed at floor level, then the floor protector in front of the
enclosure must continue through and under the zero clearance box.
The dimensions of the floor protector are dependent on the height above the floor at which
the heater is installed:
Height above
floor
IS 500 LE
IS 800 LE
Width
Depth in front
of door opening
Thickness
Width
Depth in front
of door opening
Thickness
Ground level
900
450*
22.5
1000
600*
22.5
Less than 250mm
900
450*
22.5
1000
600*
22.5
250mm or more
900
300
6
1000
300
6
Note: *These dimensions do not include the floor protector continuing to extend under the
zero clearance box.
Dimensions are in millimetres, mm. These are the minimum dimensions required,
and may be increased for aesthetic reasons.
VENTILATION
The enclosure around the zero clearance box must be ventilated. Vents with a minimum free
area of 9800mm² must be fitted top and bottom giving a total minimum free area of
19600mm².
The purpose of the vents is to allow cooler air to be drawn into the enclosure through the
bottom vent, and warm air out through the top vent via natural convection back into the
room.
The lower air vents must not be installed any higher than 200mm above the floor, and the
upper vents any lower than 215mm from the ceiling.
Page 8

8
Suggested examples of venting include:
In the side walls of the enclosure top and bottom as seen in the suggested framing
further below.
Above and below the heater in the front wall of the enclosure.
If heater is set into an internal wall, bottom and top vent(s) could be in the adjacent
room behind.
CLADDING
The front wall of the enclosure must be clad with non-combustible material such as
compressed cement sheeting. This must extend vertically from the floor protector to a
minimum height of 1100mm above the top of the zero clearance box. The non-combustible
cladding must extend horizontally no less than 180mm either side of the zero clearance box.
Important – the bottom edge of the facia surround of the IS500LE and IS800LE finishes 5mm
below the inside bottom surface of the zero clearance box. After fitting the zero clearance
box into the framing (may choose to screw it down so doesn’t move thereafter) and the hole
in the front cladding is being cut, ensure that the bottom edge of the opening is not below
the inside bottom surface of the zero clearance box. Otherwise the facia surround will not
cover the hole in the cladding.
Excluding the non-combustible cladding surrounding the zero clearance box, any additional
cladding required may be in combustible material such as normal Gyprock.
Inside bottom surface of zero
clearance box
Bottom edge of cut-
out in front cladding
20mm
Page 9

9
To facilitate ease-of-access to the fan’s power supply, the lower right corner of the front
cladding (as shown below – location relative to facia) will need to be notched so that the
extension cord can be fed through the wall. It is recommended that the notch is no greater
than 50x50mm so that the facia covers the entire hole.
POWER SUPPLY FOR FAN
Provide a power point in the cavity under the heater for connecting the fan in the heater. If
the cavity under the heater will not be accessible once the heater is installed (such as
through a removable vent) then ensure an extension cord long enough to reach out of the
front of the opening is lying in the base of the cavity. When connecting the lead from the fan
to the extension cord, it is suggested to tape the connection in the event that if the fan may
require removal and the lead has to be pulled through the 50x50mm notch.
FLUE REQUIREMENTS
Install a 150mm diameter double cased flue kit to comply with AS 2918. The double casing
must extend from the top of the zero clearance box all the way through to the top where the
flue terminates. A hole of 300 mm diameter is required in the ceiling with a minimum 25 mm
clearance between any combustible material and the 250 mm outer casing.
Page 10

10
SUGGESTED FRAMING
The diagram on the next page shows a suggested wall enclosure for the Blaze IS 500 LE / IS
800 LE heaters. Assuming a ceiling height of 2400mm, a timber frame has been constructed
using 90x45mm timber, 2400mm high, 1200mm wide, and 565mm deep.
A non-combustible material such as cement sheeting is used on the front wall, and standard
Gyprock or equivalent can be used on the side walls.
Vents have been positioned top and bottom on both side walls.
This construction complies with the minimum clearance requirements.
The height of the heater above the floor and/or the width of the enclosure may be varied as
long as it meets the minimum clearances to combustible materials as detailed previously.
Note: Additional supports should be used to support the weight of the heater, zero
clearance box and flue system. These have not been shown in the drawing.
Page 11

11
 Loading...