

Page 1
smartTV appstore
User guideUser guide
Bedienungsanleitung
Instrucciones de uso
Guide de l’utilisateur du
téléviseur
Guida utente
Instrukcja obsługi
Guia do usuário
Page 2
EN
Important safety instructions
CAUTION
RISK OF ELECTRIC SHOCK
DO NOT OPEN
Please, read these safety instructions and respect
the following warnings before the appliance is
operated:
In order to prevent re
spread, always keep candles
and other open ames away
from this product.
• TV with the weight of more than 20 kg must be lifted and carried by at
least two people.
• Be careful! This TV does not contain any parts which could be repaired
by the user. In case of afault, contact the producer or the authorized
service. The contact with certain parts inside the appliance might
endanger your life. The guarantee is not provided for the faults caused
by non-professional interactions!
• If the supply cord is damaged, it must be replaced by the manufacturer,
its service agent or similarly quali ed persons in order to avoid a hazard.
• Do not remove the rear part of the appliance.
• This appliance is designed for receiving and reproduction of video and
sound signals. Any other use is strictly forbidden.
• The ideal distance to watch TV is approximately ve times longer of the
diagonal of the screen The light striking upon the screen from other light
sources can cause re ections and make the quality of the picture worse.
• Please, ensure the su cient ventilation and appropriate distance of the
appliance from other pieces of furniture.
• Install the product at least 5 cm from the wall for ventilation.
• The TV set is designed to be used in moderate climate.
• The TV set is designed exclusively for the operation in adry place. When
using the appliance outside, please, make sure it is protected against
moisture (rain, splashing water). Never expose the appliance to moisture.
• Do not place any containers with water on the appliance, such as vases,
etc. These containers might get pushed over, which would endanger
electric safety. Place the appliance exclusively on at and stable surfaces.
Do not place any objects such as newspaper or blankets, etc. on or under
the appliance.
• Make sure the appliance does not stand on any power cables as they
might get damaged. Mobile phones and other devices such as WLAN
adapters, monitoring cameras with wireless signal transmission, etc.
might cause electromagnetic interference and they should not be
placed near the appliance.
• Do not place the appliance near heating elements or in aplace with
direct sunshine as it has anegative e ect on cooling of the appliance.
Heat storage is dangerous and it can seriously reduce the lifetime of
the appliance. In order to ensure the safety, ask the quali ed person to
remove the dirt from the appliance.
• Try to prevent the mains cable or (if it is part of delivery) mains adapter
damage. The appliance can only be connected with asupplied mains
cable/adapter.
• Storms are dangerous for all electric appliances. If the mains or aerial wir-
ing is struck by the lightening, the appliance might get damaged, even if
it is turned o . Thus you should disconnect all the cables and connectors
of the appliance before the storm.
• To clean the screen of the appliance use only adamp and soft cloth. Use
only clean water, never detergents or in no case dissolvents.
• Position the TV close to the wall to avoid the possibility of it falling when
pushed.
The instructions shown below are asafer way to set up the TV, by fixing
it to the wall, avoiding the possibility of it falling forwards if pulled. This
will prevent the TV from falling forward and causing injury. This will also
prevent the TV from damage.
This method is used if the TV is placed on aglass surface or you do not
wish to screw anything into your furniture.
Ensure that children do not climb or hang onto the TV.
For this type of installation you will need afastening chord
A) Using one/both of the top wall-mounting holes and screws (the
screws are already supplied in the wall mounting holes) fasten one end
of the fastening chord/sto the TV.
B) Secure the other end of the fastening chord/sto your wall.
• To use this model TV as aPC/laptop monitor it will need to be connected
via the VGA input, it cannot be used as aPC/laptop monitor via the HDMI
input. The HDMI Input is provided to view digital content with compatible external devices.
• The software on your TV and the OSD layout can be changed without
notice.
Warning:
• Never connect any external devices to alive appliance. Switch o not
only the TV but also the devices which are being connected! Plug the
appliance plug into the wall outlet after connecting the external devices
and the aerial!
• Always make sure there is free access to the appliance main switch and
to its mains plug.
• The appliance is not designed for ause in aworkplace tted with
monitors.
• The systematic use of headphones at high volume might lead to irrevers-
ible hearing damage.
• Ensure environmental disposal of this appliance and any components
including batteries. When in doubt, please, contact your local authority
for details of recycling.
• While installing the appliance, do not forget that furniture surfaces are
treated with various varnishes, plastics, etc. or they might be polished.
The additions contained in these products might cause destruction of
base material of appliance stand. This will result in the holdovers of this
material stuck to the furniture surface, which are di cult to remove, if
not even impossible.
• The screen of your TV responds to the top quality requirements and it
was checked in details for accidental faulty pixels several times. Due to
the technological properties of the manufacturing process, it is not possible to eliminate the existence of asmall number of faulty points on the
screen for 100% (even with maximum care while production provided).
These faulty pixels are not considered faults in terms of guarantee
conditions, if their extent is not greater than the boundaries de ned by
DIN norm.
Important information regarding use of video
games, computers, captions and other xed image
displays.
• The extended use of xed image program material can cause aper-
manent “shadow image “ on LCD screen (this is sometimes incorrectly
referred to as “burnout to the screen“). This shadow image is then
permanently visible on the screen in the background. It is apartly
irreversible damage. You can avoid such adamage by respecting the
following instructions:
• Reduce the brightness/contrast setting to aminimum viewing level.
• Do not display the xed image for along period of time. Avoid display-
ing of:
» Teletext time and charts,
» TV/DVD menu, e.g. DVD contents,
» In the „Pause“ mode (hold): Do not use this mode for along time,
e.g. while watching aDVD or avideo.
» Turn o the appliance if you are not using it.
Page 3

3
Batteries
• Observe the correct polarity when inserting the batteries.
• Do not expose batteries to high temperatures and
do not place them on locations where the temperature might increase quickly, e.g. near the re or on
the direct sunshine.
• Do not expose batteries to excessive radiant heat,
do not throw them into the re, do not disassemble
them and do not try to recharge unrecoverable batteries. They could leak out or explode.
» Never use di erent batteries together or mix
new and old ones.
» Dispose of batteries in an environmentally friendly way.
» Most of the EU countries regulate the disposal of batteries by law.
Cd
Disposal
• Do not dispose of this appliance as unsorted municipal
waste. Return it to adesignated collection point for the
recycling of WEEE. By doing so, you will help to converse
resources and protect the environment. Contact your
retailer or local authorities for more information.
3D Safety Information*
• If you watch the 3D imaging too closely or for along period of time, it
may harm your eyesight.
• Watching the TV or playing video games that incorporate 3D imaging
with the 3D glasses for along period of time can cause drowsiness,
headaches or fatigue to you and/or your eyes. If you have aheadache, or
otherwise feel fatigued or drowsy, stop watching the TV and take arest.
• Pregnant woman, seniors, persons with heart problems or persons who
experience frequent drowsiness should refrain from watching 3D TV.
• Some 3D imaging may cause you to duck or dodge the image displayed
in the video. Therefore, it is best if you do not watch 3D TV near fragile
objects or near any objects that can be knocked over easily.
• Please prevent children under the age of 5 from watching 3D TV as it
may a ect their vision development.
Warning for photosensitization seizure:*
• Some viewers may experience aseizure or epilepsy when exposed to
certain factors, including ashing lights or images in TV or video games.
If you or anybody from your family has ahistory of epilepsy or seizure,
please consult with your doctor before watching 3D TV. Also certain
symptoms can occur in unspeci ed conditions without any previous
history. If you experience any of the following symptoms, immediately
stop watching the 3D imaging and consult adoctor: dizziness or light
headedness, visual transition or altered vision, visual or facial instability,
such as eye or muscle twitching, unconscious action, convulsion, loss of
conscience, confusion or disorientation, loss of directional sense, cramps,
or nausea. Parents should monitor their children, including teenagers,
for these symptoms as they may be more sensitive to the e ects of
watching 3D TV.
Risk of photosensitization seizure can be reduced
with the following actions.*
• Take frequent breaks from watching 3D T V.
• For those who have vision that is di erent in each eye, they should
watch the TV after taking vision correction measures.
• Watch the TV so that your eyes are on the same level as the 3D screen
and refrain from sitting too closely to the TV.
• Do not watch the 3D imaging when tired or sick, and avoid watching the
3D imaging for along period of time.
• Do not wear the 3D glasses for any other purpose than viewing 3D
imaging on a3D TV.
• Some viewers may feel disoriented after watching 3D TV. Therefore, after
you watch 3D TV, take amoment to regain awareness of your situation
before moving.
* - only for TVs with 3D function
Notes on Digital TV function
• Any functions related to Digital TV ( ) will only work in countries or areas
where DVB-T/DVB-T2 (MPEG-2 and H.264/MPEG-4 AVC) digital terrestrial
signals are broadcast or where you have access to a compatible DVB-C
(MPEG-2 and H.264/MPEG-4 AVC) cable service. Please con rm with
your local dealer if you can receive a DVB-T/ DVB-T2 signal where you
live or ask your cable provider if their DVB-C cable service is suitable for
integrated operation with this TV.
• Your cable provider may charge a fee for their services, or require you to
agree to its terms and conditions of business.
• This TV set complies with DVB-T/DVB-T2 and DVB-C speci cations, but
compatibility with future DVB-T/DVB-T2 digital terrestrial and DVB-C
digital cable broadcasts are not guaranteed.
• Some Digital TV functions may not be available in some countries/areas
and DVB-C cable may not operate correctly with some providers.
Parental Note
• This television includes many advanced features that allow it to access
di erent applications including some internet web sites, chat rooms and
social networks.
• It is recommended that if the product is to be used by children under
the age of 18, it should be under parent or guardian supervision.
• If you do not wish your child to use the internet features, you should not
set up network setting. Alternatively, you can disconnect the Ethernet
cable or Wi-Fi USB stick if you do not wish to have access to these
features.
Page 4
EN
What is included in the box
Supply of this TV includes following parts:
• 1x TV
• 1x Remote control
• 2x AAA batteries
• 1x USB wireless key
• 1x User guide
• 1x Stand
• 1x Stand neck
• 1x RF cable
• 1x TV stand installation packet
• 3D glasses (Only for models with 3D function)
Attaching the Stand
Please follow the instructions in the Stand installation lea et, located
in the accessories bag.
Getting started - initial set up
1. Using the RF cable supplied, connect the
TV to the TV Aerial wall socket. Connect
the power cable to the Electrical outlet.
2. Insert USB wireless key to USB input.
3. Turn on the device with marked ON/
OFF switch
4. Insert the batteries supplied into the
Remote control and press the Standby
button to power on the TV.
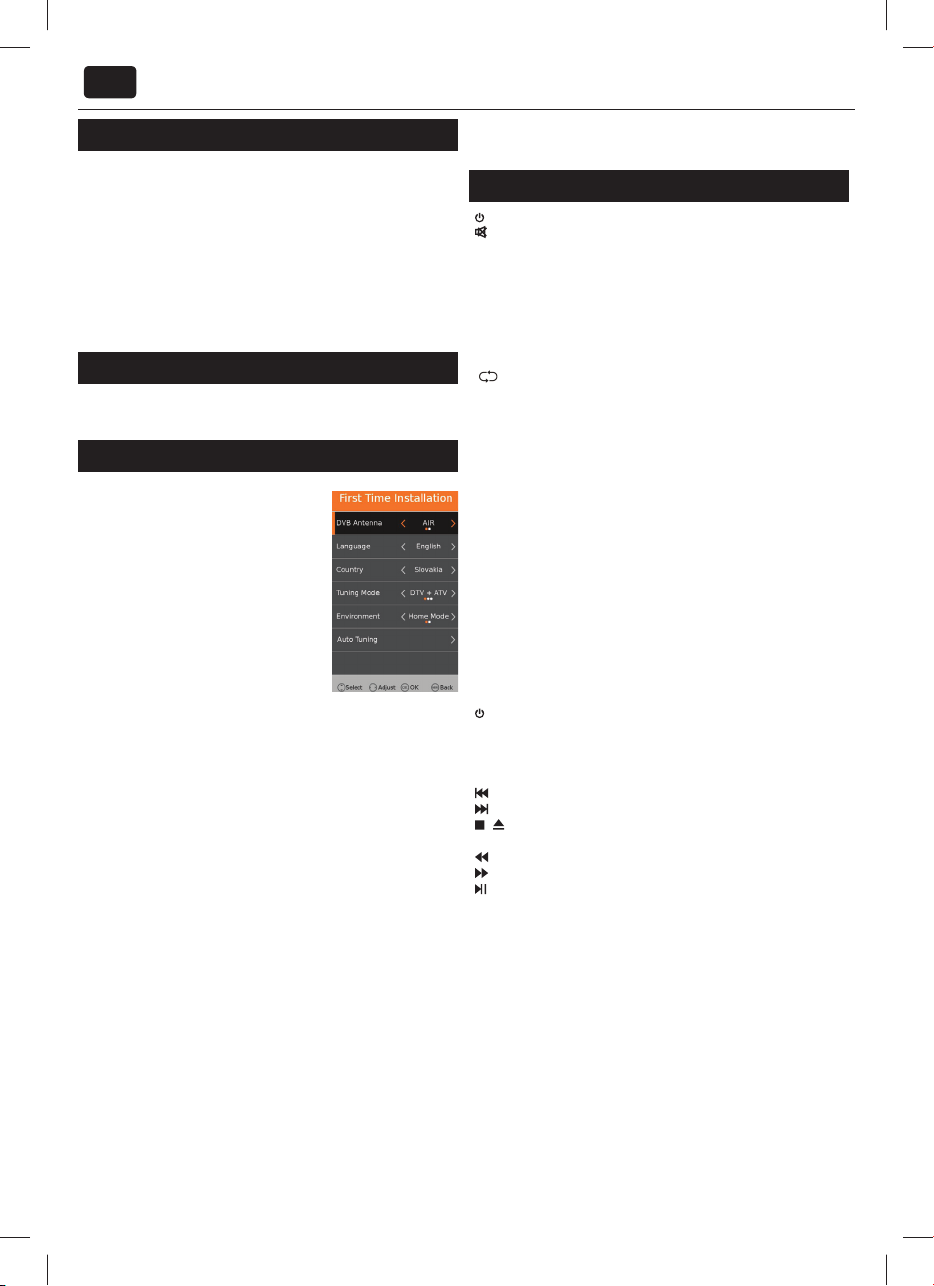
5. You will be now welcomed with the First
Time Installation screen.
If it does not appear, on the remote control,
please press [MENU] then 8-8-8-8 and the menu will appear.
If you wish to make changes to any of the default settings, use the
scroll ▲/▼/◄/► buttons. To exit this menu at anytime, press [EXIT ]
button.
6. Please set desired settings in FIRST TIME INSTALLATION screen.
DVB Antenna - Select the type of digital broadcasting.
You can choose between Air (DVB-T) or Cable (DVB-C).
Language - Set the TV Menu language.
Country - Set the desired country.
Tunning Mode - Choose if you want to tune only Digital (DTV)
Analogue (ATV) or both Digital and Analogue (DTV + ATV)
Operator - Select Cable provider. If your cable operator is not listed
select Others. (Avaliable only if DVB Antenna is set to CABLE)
Environment - Power saving setting
To save energy please select Home Mode.
LCN - Set LCN to ON if you want to arrange channels by provider
preferences (only applies to DVB-T and DVB-C channels).
7. Press [Auto Tuning] button to start the tuning process.
8. Optional channel presets DVB-C:
Keep all default settings as recommended.
If DVB-C channels are not found, contact your network provider for the
valid "Network ID". Then perform anew search. Press the [MENU], select
"Network ID" and enter the network ID.
TIP: If you are missing channels, the reason for this is likely to be signal
strength, you should consider connecting signal booster and re-tuning the TV.
TIP: As part of our continuing e orts to reduce energy consumption, we added
anew Home Mode feature (appears on the rst installation screen). This
function helps reduce energy consumption up 15% compared to other modes.
The image brightness is reduced using Home Mode. If this setting does not suit
your environment, you can choose from other modes (Note: the Store mode is
the optimal default mode, but consumes 15% more than the Home Mode).
Remote control
STANDBY – Switch on TV when in standby or vice versa.
MUTE – Mute the sound or vice versa.
DTV– Switch to digital TV source.
RADIO - TV/RADIO – Switch to Digital and switch between TV and radio
in Digital mode.
USB – Switch to USB source.
ATV – Switch to analog TV source.
DVD – SMART TV Menu
0 – 9 – to select aTV channel directly.
TV GUIDE – Opens the 7 Day TV Guide (Digital mode).
– To return to the previous channel viewed.
VOL ▲/▼ – To increase / decrease the sound level.
S.MODE - Scrolls through sound mode options
P.MODE - Scrolls through picture mode options
FAV – To display favourites menu.
CH ▲/▼ – To increase or decrease the channel being watched.
(▲/▼/◄/►/ OK) – Allows you to navigate the on-screen menus and adjust
the system settings to your preference.
MENU – To display OSD menu.
EXIT – To exit all menus.
SOURCE – To display the input/source menu.
INFO – Press once for now/next channel information. Press twice for
programme information about current programme.
ASPECT – To switch the screen between the di erent picture formats.
SLEEP – Press repeatedly to cycle through the sleep options.
AUDIO – To change the audio language (if available).
SUBTITLE – To switch the dialogue at the bottom of the screen (on/o ).
TEXT – Teletext mode - To enter Teletext
TEXT HOLD - HOLD - Teletext mode - Hold current page which is displayed
TEXT/ DVD ZOOM - DVD mode - Teletex t Mode - To zoom in
ZOOM - DVD mode - Teletex t Mode - To zoom in
DISPLAY – To switch o the screen when listening to radio
DVD MENU1 – DVD mode - To display the DVD disc menu
Rec2 – PVR mode - PVR Record
DVD SETUP1 – DVD mode - To display the DVD setup menu
Rec List2 – PVR mode - Opens the list of recordings.
– To restart the current chapter
– To advance forward to the next chapter
/
– To stop the playback / To EJECT the disc press/hold the button for
4 seconds.
– To play in fast rewind mode.
– To play in fast forward mode.
– To play/pause
GOTO1 – DVD mode - To go to aspeci c chapter
A-B1 – DVD mode - Press once to set point, press asecond time to
return to point
ANGLE1 – DVD mode - Select di erent angle of DVD (if available)
REPEAT – DVD mode1 - USB mode -To repeat playback
REVEAL – Teletext mode - To reveal or hide the hidden words
SIZE – Teletext mode - To change the display size in Teletext mode
TITLE1 – To display the DVD disc menu
D. DIS1 – To display the current disc information
INDEX – Teletext mode - To display the index page
Red Green Yellow Blue button- Additional teletext and OSD functions
3D button3 - Switches between 3D type settings
1 - available only for TVs with DVD players
2 - available only with PVR function
3 - Available only for TVs with 3D function
Page 5
5
TV buttons & Source menu
Vol+ Volume up and menu right
Vol- Volume down and menu left
CH+ Programme/Channel up and menu up
CH- Programme/Channel down and menu down
MENU Displays Menu/OSD
SOURCE Displays the input source menu
STANDBY Standby Power On/O
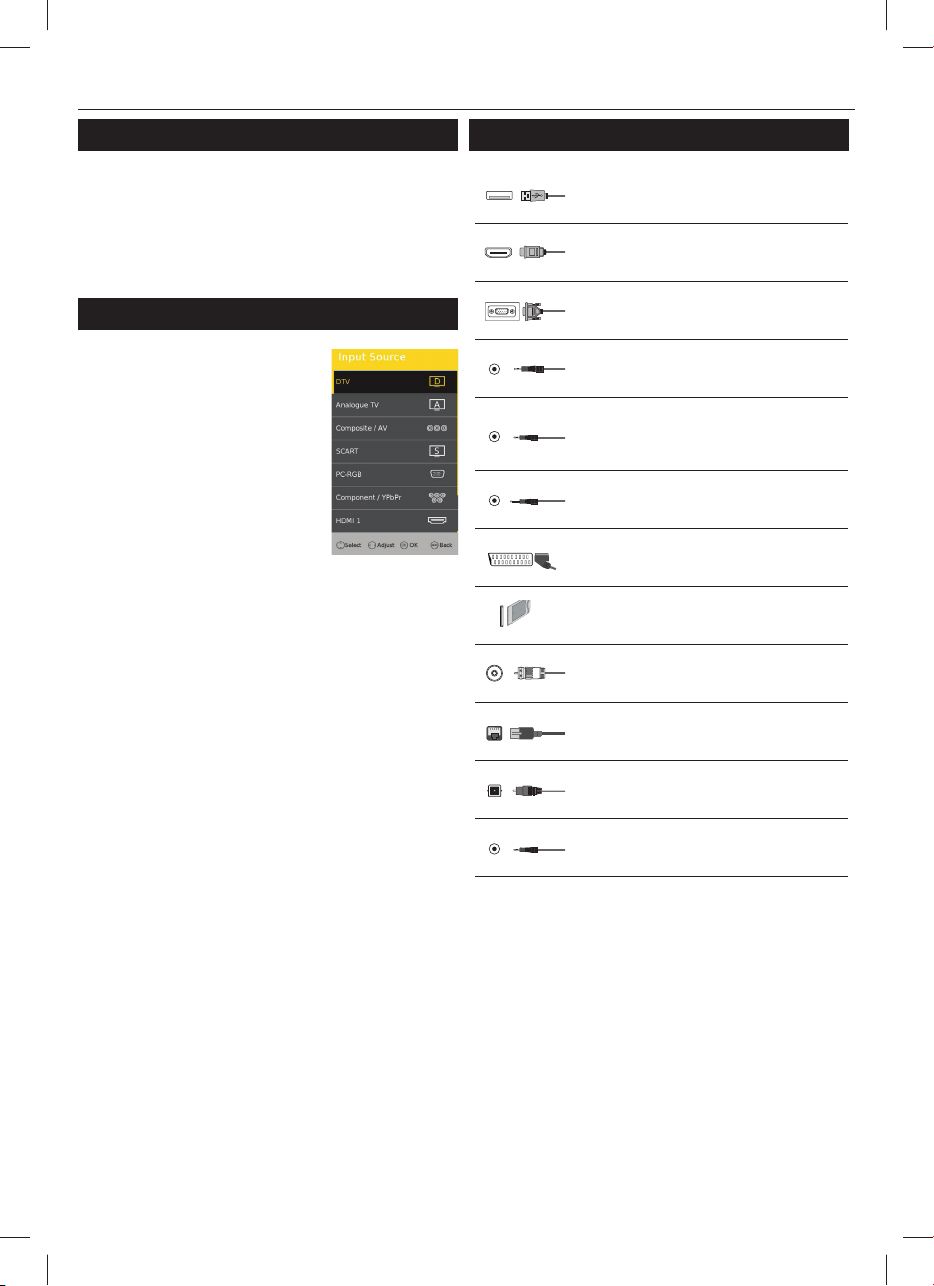
Choosing Mode Input/Source
To switch between the di erent input/
connections.
a) Using the buttons on the remote control:
1. Press
[SOURCE/ AV] - The source menu will
appear.
2. Press
[▼] or [▲] to select the input you
require.
3. Press
[OK].
b) Using the buttons on the Television:
1. Press
[SOURCE].
2. Scroll up / down using
the input/source you require.
3. Press
Vol+ to change input/source to the
one selected.
CH+/ CH- buttons to
Connections
USB 1,2
USB-Input
HDMI 1, 2, 3
HDMI-Input 1, 2, 3
VGA(PC)
VGA PC-Input
VGA (PC) Audio In
3.5mm PC audio input
Mini AV
VIDEO (CVBS) Input & Component / Video L/R audio
input
Mini YPbPr
Mini Component HD Input
SCART
SCART-Input
CI Card IN
SCART input
RF In
RF / TV Aerial Input
RJ 45
Ethernet
DIGITAL Audio Out
Digital Optical Audio output
HEADPHONES
3.5mm Headphone output
Page 6

EN
TV Menu navigation
To access this menu, press [MENU] button on the remote control. To enter
amenu press
settings, use the scroll (▲/▼/◄/►) buttons. To con rm any settings press
[OK] button. To exit this menu at anytime, press [EXIT] button.
[OK]. If you wish to make changes to any of the default
Picture
Picture Mode - Choose from
the following presets.
Standard - Default settings
Dynamic - Recommended settings
for fast moving pictures
Mild - Set to be lighter in
colour and less bright
Personal - Lets you manually
alter all the settings
Economy - Consume 15% less energy.
Contrast - Picture contrast setting
Brightness - Picture brightness setting.
Saturation - Colour saturation setting
Sharpness - Picture sharpness setting.
Colour Temperature - Choose from the following presets.
Standard - Default settings
Warm - Increases red within the picture
Cold - Increases blue within the picture
Aspect Ratio - Picture format varies depending on the channel/broadcast.
There are anumber of di erent options to best meet your needs.
Auto-Automatically displays the best picture format.
So the picture is in the correct position. May have
black lines at the top/bottom and/or sides.
4:3 - Displays the 4:3 picture in its original size.
Side bars are shown to ll the 16:9 screen.
16:9 - Fills the screen with aregular 16:9 signal.
Zoom 1/2 - The picture is the correct proportion
but zoomed in to ll the screen.
Point to Point - Stretch signal to ll the screen.
Noise Reduction - Picture signal noise reduction
3D *
TIP: For the best 3D picture e ect, watch your TV from vertical angle +/- 10°.
3D Type - 3D Type- When connecting a3D product sometimes
the picture maybe displayed incorrectly; choose from the
following settings to correct this. You can toggle these
settings by pressing the ’3D' button on your remote.
3D o - Turns 3D o
Auto - Automatic 3D mode setting.
Side by Side - 3D format is commonly used in 3D broadcasting,
works by halving the horizontal resolution of videos to store left
and right eye images in each frame. It e ectively displays up to 960
x 1080-pixel pictures to each eye, enabling TV stations to telecast
3D content at amuch lower bandwidth compared with 3D Blu-ray
discs. Typical supported resolutions are limited to 720p and 1080i
for 3D TV programs. Users will need to manually select the correct
3D format to properly display side-by-side 3D content on a3D TV.
Top Bottom - 3D format is alternative for 3D broadcast, which is
pretty similar to side-by-side 3D except that it halves the vertical
resolution instead. It e ectively displays up to 1920x540 pixel
pictures to each eye. The higher pixel count is generally considered
more suitable for displaying panning motion in sports programs.
Frame - As its name suggests, this format stacks the left and
right eye images in each frame to retain the content’soriginal
resolution for the best 3D pictures. Most, if not all, 1080p 3D Blu-ray
movie discs and 720p PS3 3D games are produced utilizing this
technique. Another key di erentiator is that all 3D TVs should
be able to automatically detect frame-packing 3D signals and
correctly display the content without user intervention.
L/R Switch- change picture sequence for di erent viewing.
2D to 3D- Changes the picture from regular 2 dimensions to 3 (3D). Please
note as content is being changed by the TV the e ects are limited
3D Depth - Depth of pictures converted from 2D to 3D.
3D to 2D- Changes the picture from 3D to regular 2 dimensions (2D).
* - Only for models with 3D function
PC
Screen - VGA settings.
Auto Adjust - Lets you automatically
con gure the television to be
used as acomputer monitor.
Horizontal Position - Changes the
horizontal position of the picture.
Vertical Position - Changes the
vertical position of the picture.
Clock - increase picture size.
Phase - To adjust delay time of phase in
order to reduce the noise of picture
TIP: If the computer is left in-active
for aperiod of time, the television
will switch into a‘sleep’ state (the screen will power o to save
power). To switch back on press the standby button.
TIP: If you do not press any buttons for 10 seconds, the menu
will automatically exit. You can change the length of time before
the menu exits automatically - see ‘OSD Timer’ section.
Page 7
7
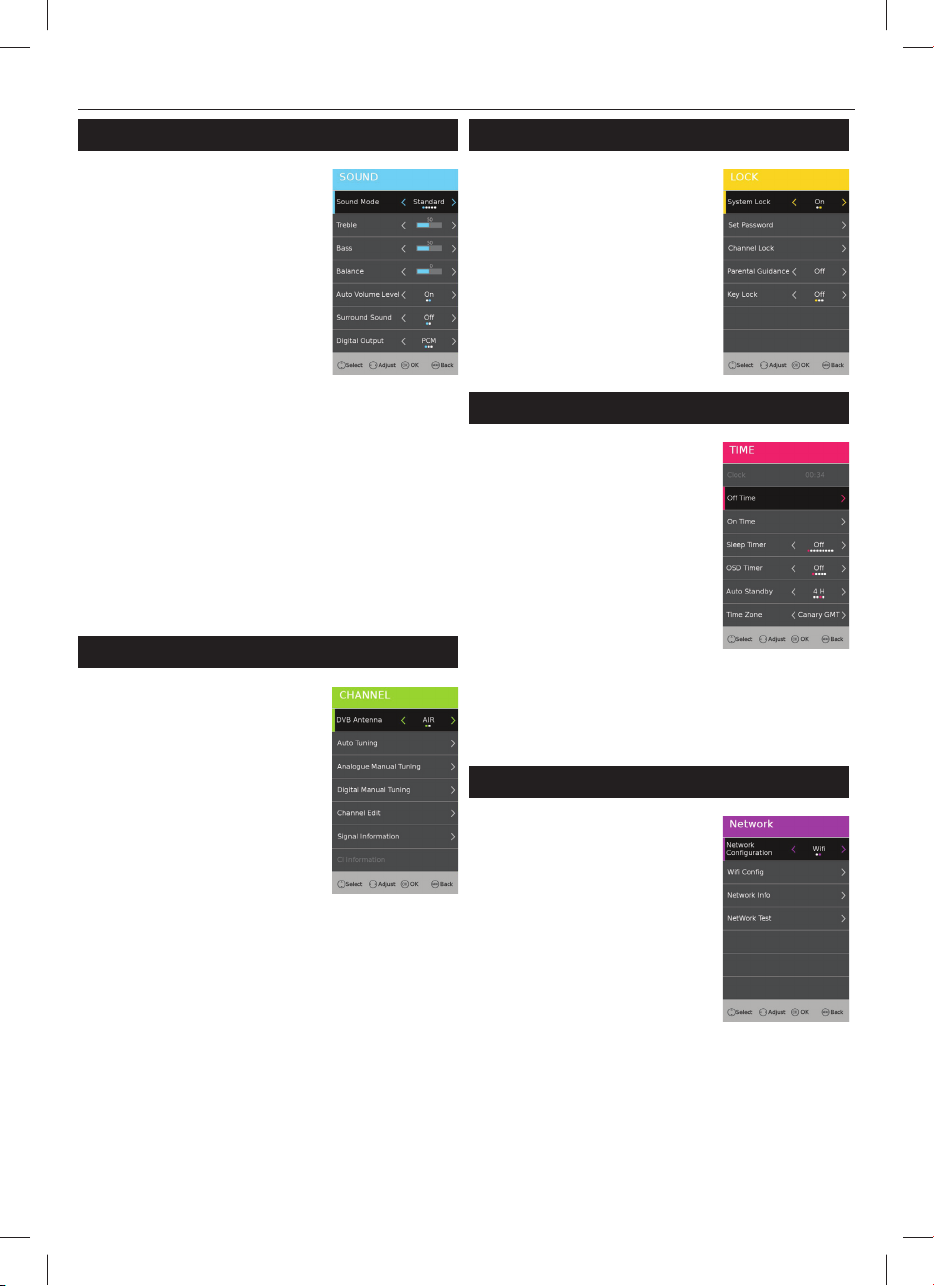
Sound
Sound Mode - Choose from
the following presets
Standard - Default settings
Music - Emphasises music over voices
Movie - Provides live and
full sound for movies
Sport - Emphasises sound for sports
Personal - Selects your
personal sound settings
Tip: Equalizer sound levels can only be adjusted
when the sound mode ‘Personal’ is selected.
Treble - To adjust the level of high
frequency within the sound.
Bass -To adjust the level of low frequency within the sound.
Balance - To switch the sound between the left and right speakers.
Auto Volume Level (AVL) - When ‘on’ is selected, the volume
will stay at aconstant level regardless of input/source.
Surround Sound - Allows you to turn surround sound ON or OFF.
Digital Output - This is the digital COAX Audio
output. Choose from the following options:
O - O
Auto - Selects the best settings automatically
PCM- Select this option if you are connecting to aStereo
Hi- via coax cable (Pulse-code modulation (PCM) is
adigital representation of an analogue signal)
AD Switch - Additional sound track for visually impaired.
Available only on selected DTV shows.
AD volume - Volume of aditional track for visually impaired.
Channel
DVB Antenna - Set the type of DTV signal
Air - Terrestrial (DVB-T)
Cable - Cable (DVB-C)
Auto Tuning - Allows you to retune the
television for all digital channels, digital
radio stations and analogue channels.
Analogue Manual Tuning - Allows you
to manually tune your analogue signal.
Digital Manual Tuning - Allows you to
manually tune your digital signal.
Channel Edit - Allows you to delete,
skip and add favourite channels.
Signal Information
- Information about DVB signal.
CI Information - Pay per view services require a“smartcard” to be
inserted into the TV. If you subscribe to apay per view service the
provider will issue you with a‘CAM’ and a“smartcard”. The CAM can
then be inserted into the COMMON INTERFACE PORT (CI Card In).
Recorded List - List of recorded TV shows.
Schedule List - Lists your programme reminders.
OAD - Switch on/o OAD updates
OAD Scan - Allows you to scan for OAD (Over Air Download) updates
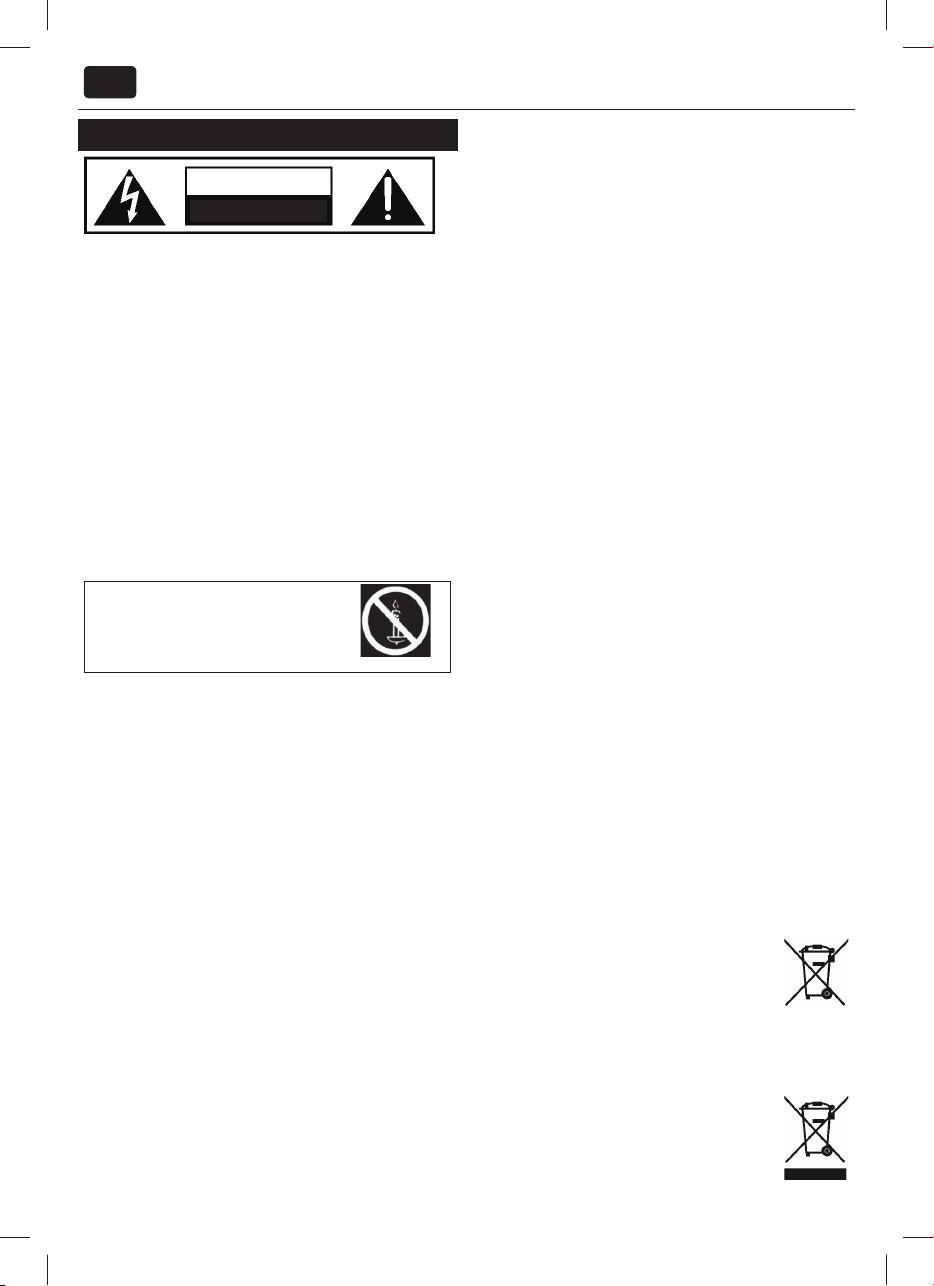
Lock
To access the lock menu enter
default password 0000.
System Lock - Allows you to
lock or unlock the menu.
Set Password - Change the default password.
Channel lock - Lock speci c TV channels.
Parental Guidance - Lock TV channels
based on age restriction.
Key Lock - Lock the TV buttons.
O - All TV buttons are unlocked
Partial - Only Standby button is unlocked
Full - All TV buttons are locked
Time
Clock - Set the date and time. Date and
time is set up automatically in DVB mode.
O Time - Allows you to set aspeci c
time for your TV to turn o .
On Time - Allows you to set aspeci c time
for your TV to turn on, the channel it will
then display, the source it will be on and
also the volume. This function can then be
toggled to repeat every day or acertain day.
Sleep Timer - Lets you set the sleep
timer so the television automatically
switches o after aset amount
of time. O -> 10min -> 20min ->
30min -> 60min -> 90min -> 120min -> 180min -> 240min.
OSD Timer - Lets you adjust the amount of time the On
Screen Menu stays on the screen before disappearing.
Auto standby - Adjustment for the auto standby in
hourly increments: O -> 3h -> 4h -> 5h.
Time Zone - Change your current time zone.
Network
To connect the TV to network via
Wi-Fi, please insert Wi-Fi USB key
in to USB input. Wi-Fi USB key is a
part of standard accessorie.
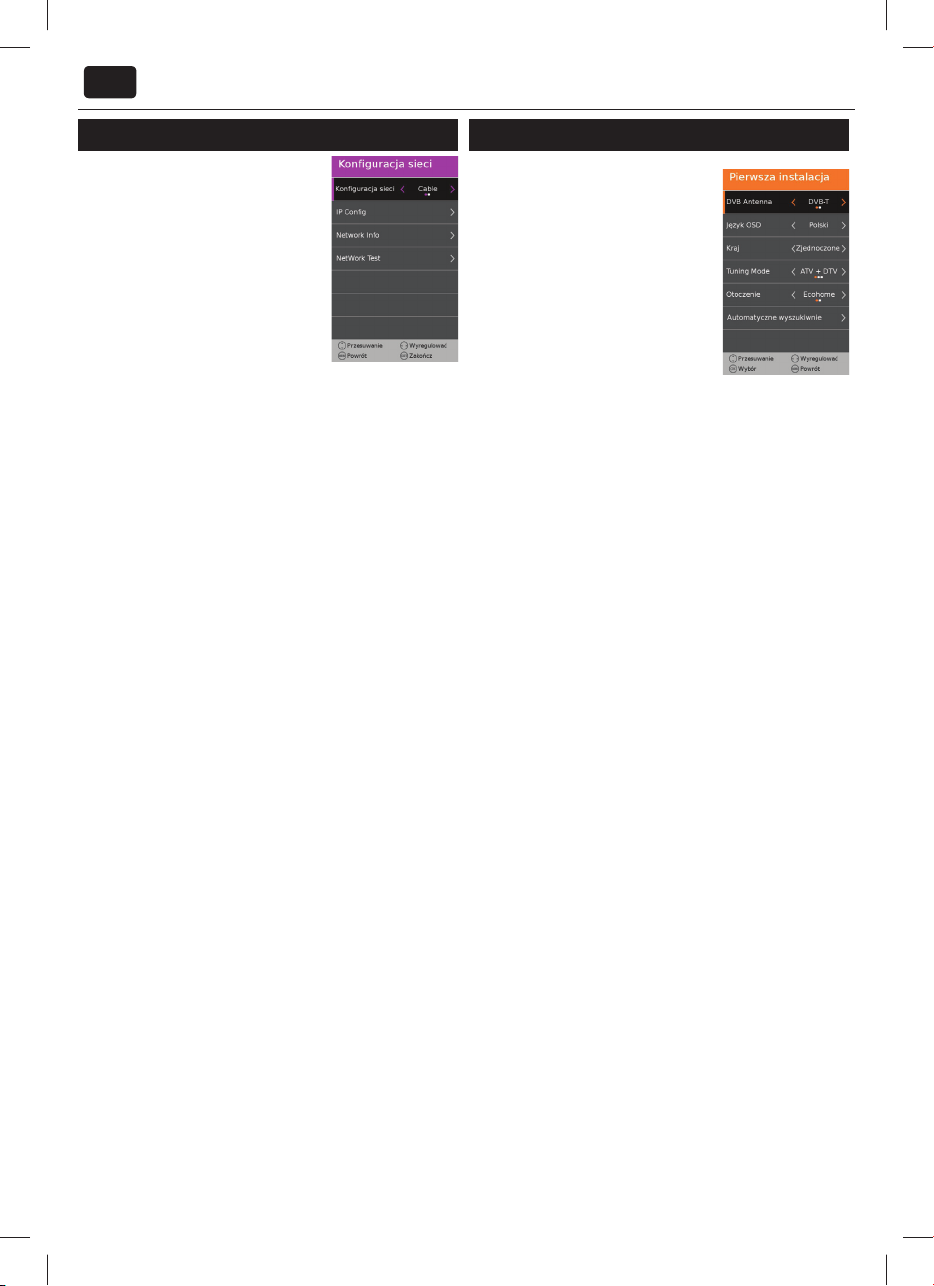
Network Con guration - Select your
connection type. You can choose
between Wi-Fi and Cable.
IP con g - LAN network connection settings
Auto - Will automatically connect the TV
to your home network (this is the default
setting and is highly recommended)
Manual - Allows you to
manually change the
IP, Netmask , Gateway and DNS information.
Wi-Fi con g - Wireless network connection settings
Wi-Fi auto search - Automatically search for available wireless
networks.
Select desired Wi-Fi network and enter password
if network is password protected. Once password
accepted, you would not be asked for it anymore.
NOTE: Connection process may long few minutes for
establish, please be patient. Automatic re-connection
Page 8

EN
during TV power on process would also take a time.
Network info - Information about network settings
Network test - Network connection test
Setting
Language - Allows you to change
the language of the menu.
Audio Language - Allows you to change
audio language on selected DVB channels.
Subtitle Language - Allows you to change
subtitles language on selected DVB channels.
Hearing Impaired - If signal provides support
for the hearing impaired, the subtitles can
be played by pressing the “Subtitle”. If you
set Hearing Impaired ON and switch to
achannel with supports for hearing impaired
subtitles will be activated automatically.
Blue Screen - Changes the
background when there is no input between transparent and
ablue background (Only available on some sources).
PVR File System - PVR Recording options
Select disk - Select USB por t and disk partition
TimeShift Size - Set size time of shift bu er.
Format Start - You can format connected USB storage device to FAT
32 le system.
WARNING: ALL DATA ON THE USB DEVICE WILL BE DELETED
Speed check - Tests write speed of connected USB storage devices.
First Time Installation - Starts the rst time installation.
Software Update (USB) - From time to time we may release new
rmware to improve the operation of the television (available
to download). This menu lets you install the new software/
rmware onto the television. Further details of how to do this
will be issued with the rmware. Contact the helpline or refer to
the www.umc-slovakia.sk/products-support/smart/ website.
NOTE: TV will search for new release of software every time it is turned on
automatically. If new software is found, it will ask if you would like to download
and install it. If you select "Yes" TV will upgrade to latest software version.
Reset Factory Default - This resets the menus to factory settings.
Set wallpaper- Application menu background.
HDMI CEC* - Allows you to operate devices
connected via HDMI with TV remote control.
Device list - Allows you to access devices menu and
operate the menu using TV remote control.
HDMI CEC - Turn on and o HDMI CEC functions
Auto standby - Automatically turn on/
o connected devices via HDMI CEC
HDMI ARC - Sends audio signal from terrestrial/satellite broadcast
via HDMI to the AV receiver without using any additional audio
cables, this functions is available only on HDMI 2 output.
* - HDMI CEC must be supported by connected device.
Application
TIP: To access SMART TV Menu anytime press DVD button
on remote control or select if from TV menu.
NOTE: Please wait while TV connect to Wi-Fi. It may take a
few minutes after you switch on TV. First time you need to set
up network connection as is described on page xx.
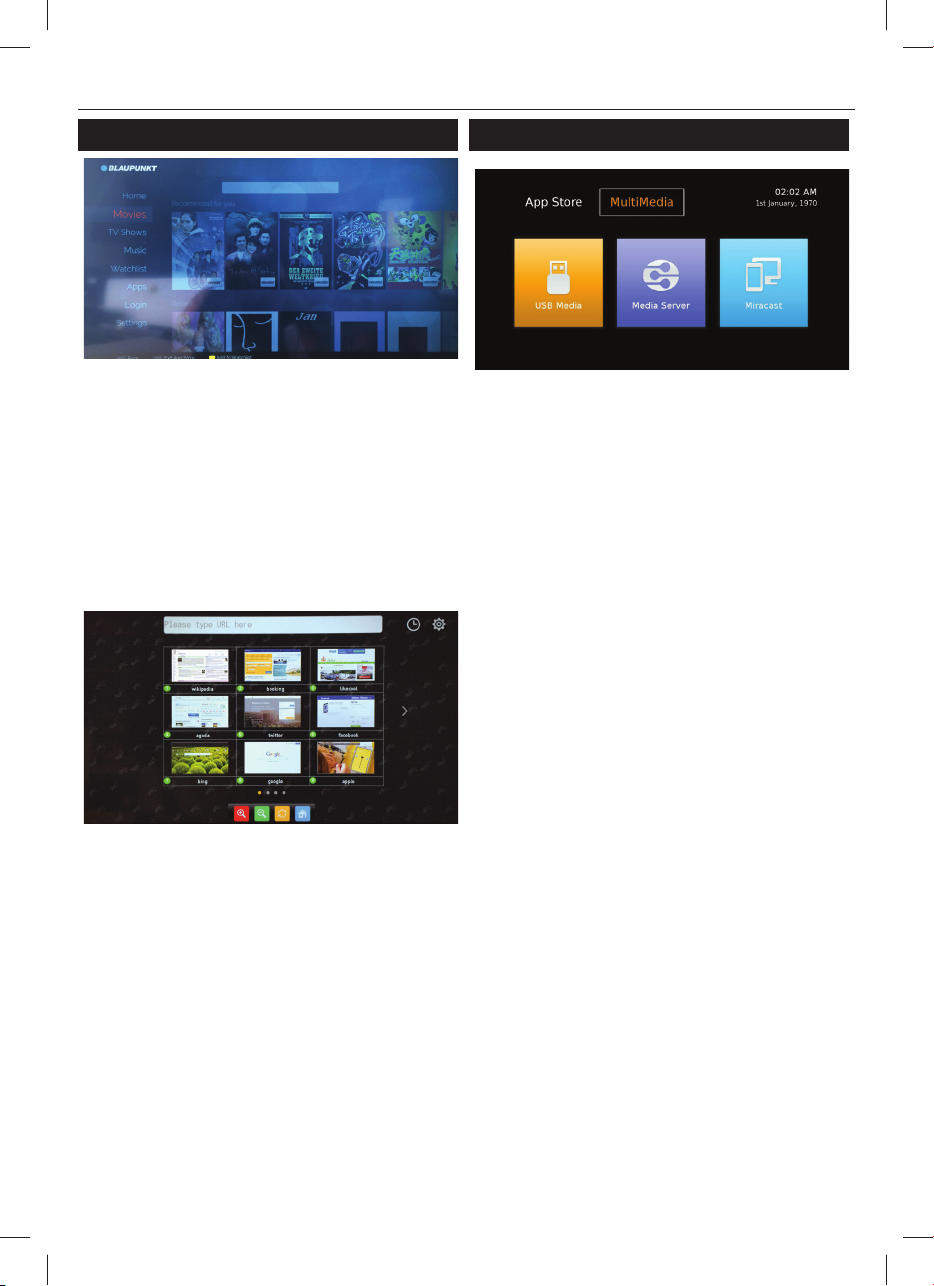
AppStore
You can navigate the menu using the scroll ▲/▼/◄/► buttons. To con rm
the item you wish to play/view press [OK] button. For one step back press
[Menu] button, and to access additional functions use the colored buttons.
To leave Appstore press [EXIT] button.
Home - home screen with recommended movies
and recently opened applications
Browser - Opens default web browser.
Red Button - Zoom in
Green Button - Zoom out
Yellow Button - Refresh page
Blue Button - Return to browser home screen.
Movies - List of available Movies
TV Shows - List of available TV shows
Music - List available of Music and Music videos
Watchlist - List of movies you add to watch later.
Apps - List of available application
Login - Create an account or login to existing
account to personalize your AppStore.
Settings - Filter application based on selected languages.
NOTE: To meet our customers demands, we are improving our
products. As a result of our ongoing e orts new applications
will be added continuously to the AppStore. Applications and
content in AppStore can be changed without notice. Some of
functions and content may not be available in your country.
Page 9

9
Multimedia
Multimedia - Multimedia mode o ers playback of various types of
content that you have saved on your USB Memory Stick. The content
will be divided into Photo, Music, Movie and File based on le type.
1. You can navigate through the menu using the scroll ▲/▼/◄/►but-
tons. To con rm the item you wish to play/view press [OK] button.
2. Select the drive you require. (If your drive only has 1 partition you
will only see 1 item).
3. You can now access the item. Press OK to view.
4. While viewing you may control the item playback modes by using
the remote control buttons or by invoking playback navigation
menu and selecting on-screen buttons ▲/▼/◄/► and [OK]
Multimedia DLNA DMP - Automatically search for digital media
servers (DMS) connected to your home network and provide
playback and rendering of content form media servers
NOTE: Media server is not provided by TV manufacturer, you can
download third party software and install it your computer or NAS.
Miracast - Allows you to view content from your smart phone on TV screen.
NOTE: Function is available only on selected smart phone.
7 Day TV Guide
TV Guide is available in Digital TV mode. It provides information about
forthcoming programmes (where supported by the Digital channel). You
can view the start and end time of all programmes and on all channels for
the next 7 days and set reminders.
1. Press
[TV GUIDE]. The following 7 Day TV Guide will appear.
2. Navigate through the menu using
You can now:
Record selected TV channel and TV show by pressing the RED button.*
Set areminder by pressing BLUE.
View aprevious day by pressing GREEN.
View the next day by pressing YELLOW.
on about the selected post
3. Press
[EXIT] to exit the 7 day TV Guide.
* - only for models with recording function
▲/▼/◄/►.
[INFO] shows detailed informati-
Read Speed - 20 MB/s(Mega Byte Per Second)
Write Speed - 6 MB/s(Mega Byte Per Second)
Pause Live TV (Time Shift) *
Pausing Live TV is very simple.
- Press the play/pause button and the television will pause and the live
content will be recorded. To resume watching press play/pause again.
- Press fast forward to go forward in arecording (i.e. to skip adverts).
- Press fast rewind to go back in arecording (i.e. if you fast forwarded
too far).
TIP: When you switch the TV to standby or change channel the Time Shift
memory is wiped. To restart time shift you must press play/pause button.
One Button Record
At any point in time you may decide to record the current channel that you
are watching. To do this you need to press the [REC] button.
TIP: This television contains one TV tuner, therefore it can
only record the channel you are watching or record one
channel while the television is in standby mode.
Note: USB record function is only available in Digital TV mode. Due to
copyright laws and illegal copying/recording it is not possible to record to/
from any other input/output source.
* - only for devices with built in PVR function
Product che
Supplier: Blaupunkt
Model: 40/148Z; 40/133Z
Energy E ciency class: A+
Visible screen size (diagonal): 102 cm / 42"
On mode average power consumption: 40W
Annual energy consumption*: 59 kWh/year
Standby power consumption: <0,5 W
O mode power consumption: 0 W
Screen resolution: 1920 (W) x 1080 ( H)
* - Energy consumption XYZ kWh per year, based on the power consumption of the television operating 4 hours per day for 365 days. The actual
energy consumption will depend on how the television is used.
USB Record - Digital mode*
Built into this television is aUSB record facility. This function is available in
Digital mode when used in conjunction with acompatible USB memory
stick or USB Hard drive. The bene ts of this are as follows:
• Pause live TV and then playback, fast forward and rewind (up to live TV).
• One button record, if you decide you want to record the current
programme.
• Easy programmable recording from the 7 day TV Guide
• Record TV and watch back on your computer/laptop.
Due to the nature of the product, it is necessary to use ahigh speed USB
memory stick (as the TV reads from and writes to the memory stick at the
same time, some memory sticks may not be suitable).
Minimum Speci cation - USB Memory Stick
Page 10
PL
Ważne zalecenia bezpieczeństwa
UWAGA!
RYZYKO PORAŻENIA PRĄDEM
OTWIERAĆ
Prosimy uważnie przeczytać poniższe zalecenia.
Przed uruchomieniem urządzenia powinni
Państwo przeczytać wszystkie zalecenia dotyczące
bezpieczeństwa ieksploatacji.
Ostrzeżenia
• Żeby zapobiec niebezpieczeństwu pożaru, porażeniu prądem elektrycz-
nym albo uszkodzeniu odbiornika telewizyjnego, nie należy go narażać
na działanie pyłu, deszczu, ani wilgoci inie umieszczać na nim, ani w
jego pobliżu naczyń wypełnionych cieczą.
• Odbiornika telewizyjnego nie należy umieszczać w zamkniętym miejscu,
należy zapewnić, żeby otwory wentylacyjne zżadnej strony odbiornika
nie zostały niczym zasłonięte.
• Jeśli przewód zasilający jest uszkodzony, musi zostać wymieniony przez
producenta, jego przedstawiciela serwisowego lub osobę o odpowiednich kwali kacjach w celu uniknięcia zagrożenia.
• Odbiornik telewizyjny iwszystkie jego części, łącznie zbateriami należy
likwidować w sposób, który nie zagraża środowisku naturalnemu. W
razie wątpliwości, co do sposobu recyklingu prosimy kontaktować się w
odpowiednią instytucją.
Żeby zapobiec powstaniu
pożaru, prosimy nie zbliżać się
do tego produktu zotwartym
ogniem.
Bezpieczeństwo
• Należy uważać, żeby odbiornik telewizyjny nie stał na przewodzie
zasilającym, ponieważ przy jego ciężarze może uszkodzić przewód
zasilający istworzyć poważne zagrożenie.
• Obok telewizora nie kładziemy telefonów komórkowych, głośników, ani
innych urządzeń, których pole magnetyczne albo fale radiowe mogą
spowodować zakłócenia w pracy odbiornika telewizyjnego. Jeżeli
zakłócenia są widoczne, to urządzenie powodujące te zakłócenia należy
odsunąć jak najdalej od odbiornika telewizyjnego.
• Do wyłączania odbiornika należy korzystać zdwubiegunowego
wyłącznika, który jest umieszczony zboku, pod spodem albo w tylnej
części TV. Wyłącznik musi być łatwo dostępny.
• Baterie (zasilacz bateryjny albo zainstalowane baterie) nie mogą być
narażone na nadmierną temperaturę, którą może
• Zainstaluj produkt najmniej 5 cm od ściany w celu wentylacji.
• Telewizor jest przeznaczony do stosowania w klimacie umiarkowanym.
Konserwacja
• Urządzenie czyścimy miękką, suchą ściereczką. Jeżeli jego powierzchnia
jest szczególnie brudna do czyszczenia korzystamy zmiękkiej ściereczki
zwilżonej w wodzie zmydłem albo w słabym roztworze płynu do mycia
naczyń.
• Do usuwania zanieczyszczeń przyklejonych do ekranu LCD/LED stosuje-
my preparat do czyszczenia szkieł okularów.
• Do czyszczenia urządzenia nie używamy alkoholu, rozpuszczalnika albo
benzyny.
• Przed użyciem chusteczki impregnowanej należy starannie przeczytać
załączoną do niej instrukcję.
OSTRZEŻENIE: jeżeli woda albo inna ciecz przedostanie się do telewizora
przez powierzchnię ekranu, może to być przyczyną awarii.
Pakowanie
• Najbezpieczniejszym sposobem transportu wyrobu jest oryginalne
pudełko/karton – prosimy zachować opakowanie na taką okoliczność.
• W przypadku serwisu gwarancyjnego, naprawy albo innego transportu,
pudełko/karton będzie potrzebny. Serwis gwarancyjny nie będzie
możliwy do przeprowadzenia, jeżeli telewizor nie zostanie właściwie
zapakowany.
• Instrukcja montażu telewizora na ścianie. Jeśli nie jesteś w stanie
połączyć śrubami telewizora zdostarczonym elementem montażowym
do montażu TV na ścianie, sugerujemy, aby zabezpieczyć produkt śrubą
zuchem oraz specjalną plombą.
Za każdym razem upewnij się że dzieci nie mają możliwości wieszania
się, wspinania oraz poruszania powieszonym TV.
Poluzowany uchwyt może być przyczyną poważnych urazów dla
Ciebie iTwoich dzieci. Plomba bezpieczeństwa powinna znajdować się
pomiędzy TV aścianą.
• Oprogramowanie telewizora imenu OSD mogą ulec zmianie bez
powiadomienia
• Aby korzystać zodbiornika modelu jak komputer PC/Laptop monitor
będzie musiał być podłączony poprzez wejście VGA, nie mogą być
stosowane jako PC / Laptop poprzez wejście HDMI. Wejście HDMI
służy do wyświetlenia zawartości cyfrowej zkompatybilnych urządzeń
zewnętrznych.
Ważne informacje dotyczące korzystania zgier
video, komputerów, specjalnych napisów albo
wyświetlania nieruchomych obrazów.
• Nadmierne korzystanie zmateriałów znieruchomymi obrazami może
spowodować trwały cień na ekranie LCD. Ten obraz będzie widoczny w
tle w trakcie odbierania zwykłych programów, jako nieruchomy, stacjonarny symbol. Ten t yp nieodwracalnego uszkodzenia ekranu LCD/LED
można zminimalizować podejmując następujące kroki:
1. Zmniejszając ustawioną jasność/kontrast na minimalny akceptowalny poziom,
2. Skracając czas wyświetlania nieruchomego obrazu,
3. Wyłączając nieużywany telewizor.
• Przykłady obrazów, na które trzeba zwrócić uwagę (to nie jest
wyczerpująca lista), to m.in.:
» logo kanałów TV, na przykład: wyświetlane logo kanałów komercyj-
nych zcenami – najczęściej są jasne inieruchome; ruchome imniej
kontrastowe gra ki raczej nie powodują starzenia się ekranu;
» wyświetlany zegar;
» teletext: - nie oglądajmy stacjonarnej strony przez dłuższy czas;
» menu TV/DVD, na przykład: spisy treści dysków DVD;
» tryb pauzy - nie zostawiajmy na dłużej TV w trybie pauzy, na
przykład przy oglądaniu DVD albo video.
Ważne – jeżeli już dojdzie do powstania cienia na obrazie/wypalenia ekranu, to już nie zniknie inie podlega to naprawie gwarancyjnej.
Baterie
» Przy wkładaniu baterii należy przestrzegać ich
poprawnej polaryzacji.
» Nie korzystamy razem zróżnych typów baterii inie
mieszamy nowych baterii ze starymi.
» Baterie likwidujemy w sposób przyjazny dla
środowiska naturalnego.
» W różnych krajach sposób likwidacji baterii podlega różnym przepi-
som. Prosimy to sprawdzić we właściwym organie administracji.
Cd
Jak należy likwidować ten produkt?
• Nie wyrzucać zużytych urządzeń elektrycznych ielekt-
ronicznych, baterii iakumulatorów razem zodpadami
komunalnymi, ze względu na obecność niebezpiecznych
dla środowiska substancji.Tego typu odpady należy
Page 11

11
przekazać do punktu zbiórki w celu poddania recyklingowi. Informacja
opunktach zbiórki dostępna jest ulokalnych władz samorządowych lub
w placówkach handlowych.
3D – zalecenia bezpieczeństwa*
• Oglądanie telewizji 3D igranie w gry wideo 3D zużyciem okularów 3D
przez dłuższy czas może spowodować senność, bóle głowy, zmęczenie
idyskomfort widzenia. Jeśli odczuwasz, któryś zpowyższych objawów,
przerwij oglądanie TV iodpocznij.
• Kobiety w ciąży, osoby starsze, osoby, które mają problemy zsercem oraz
cierpiące na częste zasłabnięcia nie powinny oglądać obrazów 3D.
• Podczas oglądania TV 3D możliwe są emocjonalne reakcje na obrazy, w
tym gestykulacja. Zalecane jest zapewnienie odpowiedniej przestrzeni
iusunięcie przedmiotów, które łatwo ulegają zniszczeniu.
• Dzieci poniżej 5 roku życia nie powinny oglądać TV 3D. Ich zmysł wzroku
dopiero rozwija się.
Ostrzeżenie przed efektami migotania światła*
• Niektóre osoby oglądające TV 3D lub grające w gry wideo 3D, mogą
doznać ataku epilepsji lub innych nietypowych symptomów zpowodu
migającego obrazu. Osoby, które miały w przeszłości ataki epilepsji,
powinny skonsultować zlekarzem czy mogę oglądać TV 3D.
• W związku ze specy cznymi warunkami w czasie oglądania obrazu
3D, mogę pojawić się nietypowe objawy, które nie miały wcześniej
miejsca. Jeśli odczuwasz, któryś znich natychmiast przerwij oglądanie
TV iskontaktuje się zlekarzem: zawroty głowy, uczucie pustki w głowie,
zniekształcone lub rozmazane widzenie, wrażenie rozbieganego widzenia, tiki iskurcze twarzy, konwulsje, utrata świadomości, dezorientacja,
zagubienie, zaburzenia sensoryczne, mdłości. Dzieci imłodzież są
bardziej wrażliwe na stymulację przez światło dlatego rodzice powinni
nadzorować oglądanie TV 3D.
Zalecenia mające na celu zminimalizowanie efektów
migotania światła iryzyka epilepsji*
• Podczas oglądania TV 3D należy często robić przerwy.
• Osoby, uktórych występuje różnica pomiędzy widzeniem na lewe
iprawo oko, powinny najpierw skorygować tę różnicę.
• Obraz 3D powinien znajdować się na tym samym poziomie co wzrok. Nie
wolno siedzieć zbyt blisko TV.
• Nie należy oglądać TV 3D w przypadku zmęczenia iprzez zbyt długi
okres czasu.
• Nie wolno używać okularów 3D do innych celów niż oglądanie obrazów
3D.
• Osoby, które po obejrzeniu TV 3D odczuwają dezorientację, powinny
odczekać kilka chwil przed wstaniem zmiejsca.
* - tylko dla modeli 3D
Uwaga rodzicielska
• Ten telewizor zawiera wiele zaawansowanych funkcji, które pozwalają
do różnych aplikacji łącznie niektórych stron internetowych, czatów i
portalispołecznościowych.
• Zaleca się, że jeśli produkt ma być używany przez dzieci poniżej 18
rokużycia, powinny być pod kontrolą rodzica lub opiekuna prawnego
Jeśli nie chcesz, aby Twoje dzieci uzywaly z funkcji internetowych należy
skon gurować ustawienia sieci.
• Alternatywnie, można odłączyć kabel Ethernet lub Wi-Fi USB, jeśli nie
chcesz mieć dostęp do tych funkcji.
Informacje dotyczące funkcji Telewizji Cyfrowej
• Wszystkie funkcje dotyczące Telewizji Cyfrowej ( ) dostępne są tylko
w krajach lub na obszarach, gdzie nadawane są sygnały cyfrowej
telewizji naziemnej DVB-T/DVB-T2 (MPEG-2 i H.264/MPEG-4 AVC) lub w
miejscach, w których istnieje dostęp do kompatybilnych z urządzeniem
sygnałów kablowych DVB-C (MPEG-2 i H.264/MPEG-4 AVC). Prosimy
skontaktować się z lokalnym sprzedawcą, aby ustalić, czy w miejscu
Państwa zamieszkania można odbierać sygnały DVB-T/DVB-T2 lub
zwrócić się do dostawcy usług kablowych o informacje, czy oferowane
przez niego usługi DVB-C będą dostępne w zakupionym odbiorniku TV.
• Państwa dostawca usług kablowych może doliczyć dodatkową opłatę za
swoje usługi lub poprosić o podpisanie stosownej umowy.
• Zakupiony model telewizora jest dostosowany do odbioru sygnałów
telewizji naziemnej DVB-T/DVB-T2 oraz kablowej DVB-C, nie można jednak zagwarantować jego kompatybilności z tworzonymi w przyszłości
programami w formacie DVB-T/DVB-T2 lub DVB-C.
• W niektórych krajach lub regionach pewne funkcje Telewizji Cyfrowej lub
kablowej DVB-C mogą być niedostępne
Page 12
PL
Co zawiera opakowanie
Podaż tego telewizora obejmuje następujące części:
• 1x TV
• 1 x pilot
• 2 x bateria AAA
• 1x Wi-Fi klucz USB
• 1 x Instrukcja obsługi
• 1 x podstawa telewizora
• 1x krk
• 1 x Przewód RF
• 1 x pakiet instalacyjny
• 3D okulary (tylko dla modeli 3D)
Mocowanie podstawy
Należy postępować zgodnie zinstrukcjami aby zainstalować stojak,
znajduje się w torebce zakcesoriami
Zaczynamy – ustawienia początkowe
1. Za pośrednictwem dostarczonego
przewodu RF podłączamy TV do gniazda
antenowego TV. Przewód zasilający
włączamy do gniazdka sieciowego.
2. Włóż klucz USB do bezprzewodowego
wejścia USB.
3. Telewizor włączmy wyłącznikiem
głównym umieszczonym na boku TV.
4. Dostarczone baterie wkładamy do
pilota iwłączamy TV naciskając przycisk
Standby.
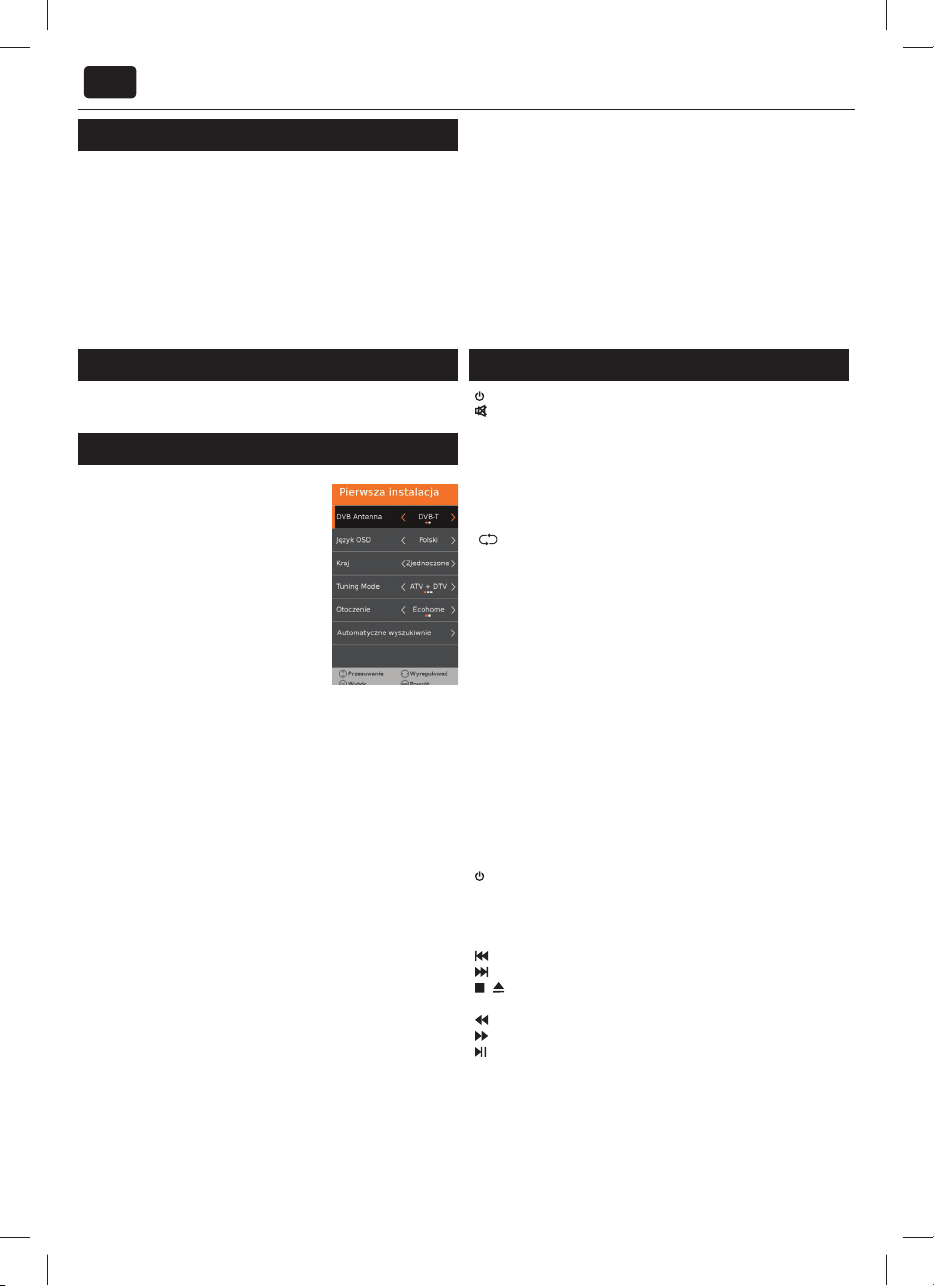
5. Proszę ustawić odpowiednie ustawienia
w Pierwszej instalacji.
Jeśli nie pojawi się, na pilocie zdalnego sterowania naciśnij [MENU]
następnie 8-8-8-8 i pojawi się menu. Jeśli chcesz wprowadzić zmiany
do każdego z ustawień domyślnych, należy użyć przycisków ▲ / ▼
/ ◄ / ►. Aby wyjść z tego menu w dowolnym momencie, naciśnij
przycisk [EXIT].
6. Proszę ustawić odpowiednie ustawienia w Pierwszej instalacji.
DVB Antenna -
cyfrowego. Można wybrać pomiędzy DVB-T i DVB-C.
Język OSD - Ustawienie języka Menu TV.
Kraj - Ustawić żądany kraj.
Tuning Mode - Wybierz, czy chcesz, aby dostroić tylko cyfrowe (DTV)
analogowe (ATV) lub zarówno analogowe i cyfrowe (DTV + ATV)
Operator - Wybierz operatora telewizji kablowej. Jeśli operator
kablowy nie znajduje się na liście wybierz inne. (Dostępne tylko wtedy,
gdy jest ustawiona antena DVB)
Otoczenie
Aby zaoszczędzić energię wybierz Tryb domowy.
LCN - Ustaw LCN na WŁ. jeśli chcesz zorganizować kanały przez
dostawcę (dotyczy tylko DVB-T i DVB-C kanałów).
7. Naciśnij przycisk [Automatyczne wyszukiwnie], aby rozpocząć
proces strojenia.
8. Następnym krokiem jest wybór t ypu nadawania cyfrowego. Można
wybrać pomiędzy DVB-T i DVB-C. Analogowa część jest przeszukiwana
automatycznie, ponieważ większość sieci kablowych zawiera kilka
sygnałów analogowych.
Naciskając OK na pilocie zdalnego sterowania rozpoczynamy
strojenie.
9. Opcjonalne ustawienia kanałów DVB-C:
Zachowaj wszystkie ustawienia domyślne, jak to jest zalecane.
Następnym krokiem jest wybór typu nadawania
- ustawienie oszczędzania energii
Jeśli wyszukiwanie kanałów nie powiodło się, skontaktuj się zdostawcą
dla transmisji ważny „Network ID“. Powtórz wyszukiwanie kanałów.
Naciśnij [MENU] Wybierz „Automatyczne wyszukiwanie“ iwpisz ID sieci.
Rozpocznij wyszukiwanie przez naciśnięcie [OK].
TIP: W ramach naszego stałego rozwoju zmniejszenia zużycia energii,
dodaliśmy dodatkową funkcję do tej telewizji onazwie “ Ecohome
“(widać to po raz pierwszy podczas instalacji). Pobór mocy przy użyciu
Ecohome funkcje jest około 15 % niższy niż w niektórych innych
trybów. Jasność obrazu jest zredukowana przy użyciu Ecohome funkcji.
Jeśli ta funkcja nie jest odpowiednie dla środowiska przeglądania
można wybrać inne tryby w razie potrzeby. (Należy pamiętać,tryb
“ Professional” jest dla optymalnego ustawienia obrazu domyślnie,
jednak pobór mocy to około 15% wyższy niż w trybie “ Ecohome “)
Pilot
STANDBY – Przełączenie TV do trybu gotowości iodwrotnie
MUTE – wyciszenie dźwięku iskasowanie wyciszenia
DTV – Przełączanie do cyfrowego źródła
RADIO – Przełączanie się pomiędzy TV iradiem w trybie cyfrowym
USB – Przełączenie na źródło USB
ATV – Przełączenie na analogowe źródło TV
DVD – SMART TV Menu
0 – 9 bezpośredni wybór kanału TV.
TV GUIDE – Otwiera siedmiodniowy program TV, (tryb cyfrowy).
– Powrót do wcześniej oglądanych kanałów
VOL ▲/▼– Zwiększenie/zmniejszenie poziomu siły głosu
SMODE- Wybieramy znastępujących opcji trybów dźwięku
P MODE- Wybieramy znastępujących opcji trybów obrazu
FAV – Wyświetlenie menu ulubionych pozycji
CH ▲/▼ – Zwiększanie albo zmniejszanie numeru oglądanego kanału
(▲/▼/◄/►/ OK) – Umożliwia przechodzenie prze on-screen menu
izmianę ustawień systemowych zgodnie zWaszymi preferencjami
MENU – Wyświetlenie OSD menu
EXIT – Wyjście ze wszystkich menu
SOURCE – Wyświetlenie menu wejście/źródło
INFO – Naciskamy raz dla uzyskania informacji oaktualnym/następnym
kanale. Naciskamy dwa razy dla uzyskania informacji programowej oaktualnym programie
ASPECT – Przełączanie pomiędzy różnymi formatami obrazu
SLEEP – Kolejno naciskając przechodzimy opcje układu czasowego
AUDIO – Zmiana języka dźwięku, (jeżeli jest dostępna)
SUBTITLE – Włącz/Wyłącz dialog w dolnej części ekranu
TEXT – Tryb Teletext - Uruchomienie teletextu
TEXT HOLD - Tryb Teletext - Zatrzymanie aktualnie wyświetlanej strony
TEXT DVD ZOOM - Tryb teletextu - tryb DVD - Zbliżenie
DISPLAY – Wyłączenie ekranu podczas słuchania radia
DVD MENU1 – tryb DVD - Wyświetlanie menu dysku DVD
Rec2 – PVR mode - Nagrywanie tego, co jest w telewizji
DVD SETUP1 – tryb DVD - Wyświetlanie ustawień menu DVD
Rec List2 – PVR mode - Otwiera nagrany wcześniej zapis.
– Ponowne włączenie aktualnego katalogu
– Przejście w przód do kolejnego katalogur
1
/
– Zatrzymanie odtwarzania. / Wysunięcie dysku - naciśnij przycisk
na 4 sekundy
– Odtwarzanie w trybie szybkiego przewijania wstec.
– Odtwarzanie w trybie szybkiego przewijania w przód.
– Odtwarzanie/pauza
GOTO1 – tryb DVD – Przejście do konkretnego rozdziału.
A-B1 – tryb DVD – Naciskamy raz, żeby ustawić punkt, naciskamy drugi raz,
żeby wrócić do punktu
ANGLE1 – tryb DVD - Wybór innego kąta DVD, (jeżeli jest dostępny)
REPEAT – tryb DVD1 - tryb USB - Odtwarzanie powtarzane
REVEAL – Tryb Teletext* – Wyświetlanie albo ukrywanie tekstu
SIZE – Tryb teletextu - Zmiana wielkości wyświetlacza w trybie Teletext
Page 13
13
TITLE1 – tryb DVD - Wyświetlanie menu DVD Tryb Teletext*
D. DIS1 – tryb DVD - Wyświetlanie aktualnej informacji odysku
INDEX – Tryb Teletext – Wyświetlanie strony indeksoweju
Czerwony Zielony Żółty Niebieski przycisk- Dodatkowa telegazeta
ifunkcje OSD
3D przycisk
1 - Funkcje dostępne tylko dla TV zodtwarzaczem DVD
2 - Funkcje dostępne tylko dla TV bez odtwarzacza PVR
3 - Funkcje są dostępne tylko dla telewizorów 3D.
3
- Przełączanie pomiędzy ustawieniami typu 3D
Przyciski na telewizorze
Vol+ Zwiększenie siły głosu imenu w prawo
Vol- Zmniejszenie siły głosu imenu w lewo
CH+ Program/Kanał imenu do góry
CH- Program/Kanał imenu w dół
MENU Wyświetlenie Menu / OSD
SOURCE Pokaż początkowe menu główne
STANDBY Tryb gotowości włączony/wyłączony
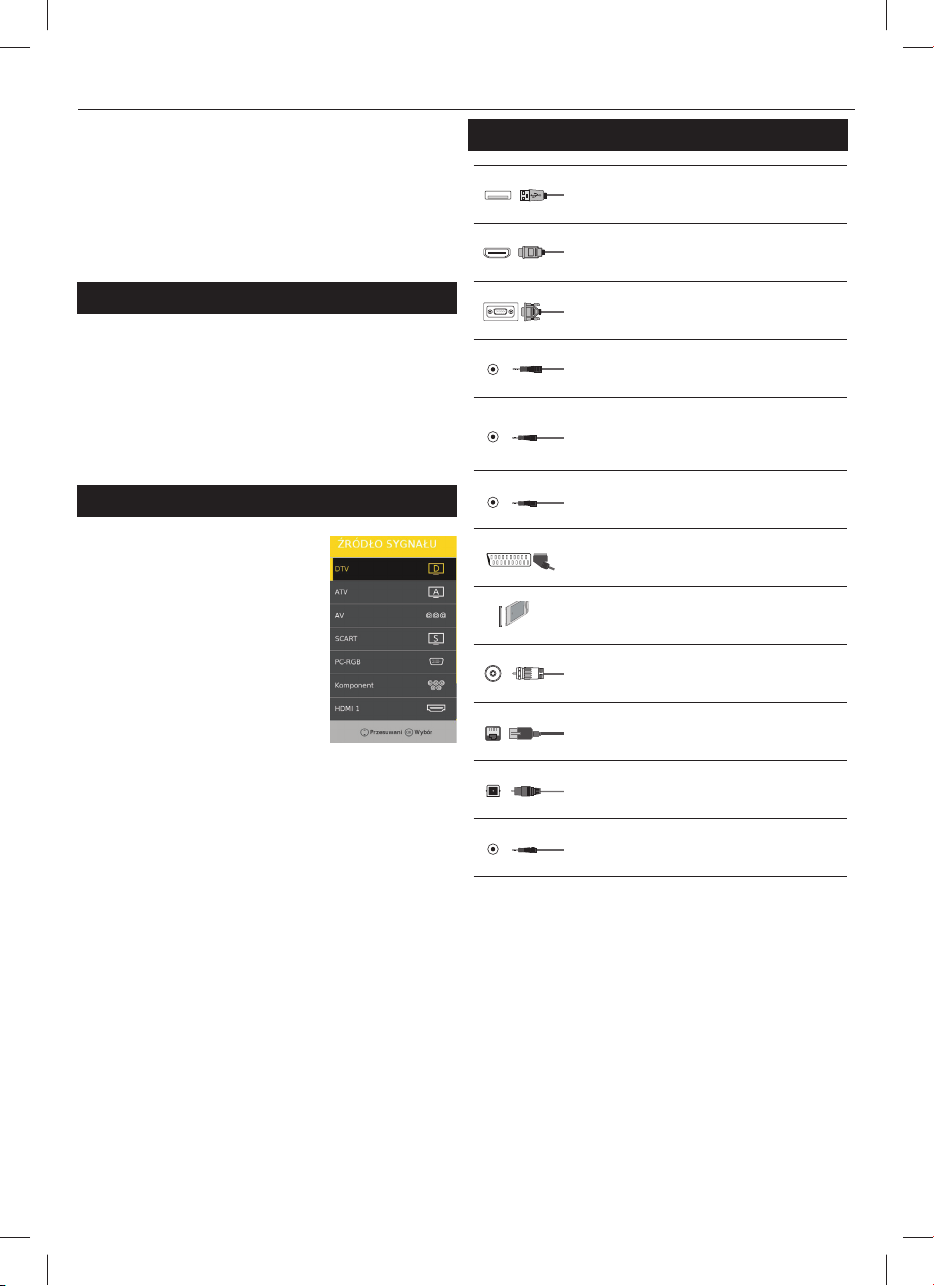
Wybór trybu wejście / źródło
Przełączanie pomiędzy różnymi wejściami /
podłączeniami.
a) Wykorzystanie przycisków na pilocie
zdalnego sterowania.
1. Naciskamy [SOURCE/ AV] – pojawi się
źródłowe menu.
2. Naciskając [
3. Naciskamy [OK].
b) Wykorzystanie przycisków w telewizorze.
1. Naciskamy [SOURCE].
2. Przesuwamy w górę/w dół za pomocą
3. Naciskając Vol+ zmieniamy wejście/źródło na wybrane.
▼] albo [▼] wybieramy
odpowiednie wejście.
przycisków CH+/ CH- na odpowiednie
wejście/źródło.
Podłączenia
USB 1,2
Port USB
HDMI 1, 2, 3 in
Wejście HDMI 1, 2, 3
VGA(PC)
Wejście VGA-PC
VGA (PC) Audio In
PC wejście audio 3,5 mm
Mini AV
VIDEO (CVBS) wejście & Component / Video L/R audio
wejście
Mini YPbPr
Mini Wejście składowych HD
SCART
Wejście SCART
CI Card IN
Zwykłe połączenie modułu wejściowego
RF In
Wejście antenowe
RJ 45
Ethernet
DIGITAL Audio Out
Cyfrowe optyczne audio wyjście
HEADPHONES
wyjście słuchawkowe 3,5 mm
Page 14

PL
TV menu
Do menu wchodzimy naciskając przycisk [MENU] na pilocie. Do menu
wchodzimy naciskając [OK]. Jeżeli chcemy zmienić jakiekolwiek
wcześniejsze ustawienie, korzystamy zprzycisków ▲/▼/◄/► strzałek.
Każde ustawienie zatwierdzamy przyciskiem [OK]. Menu możemy opuścić
w każdej chwili, naciskając przycisk [EXIT].
Obraz
Ustawienia obrazu - możemy
wybierać pomiędzy następującymi,
dokonanymi wcześniej ustawieniami
Standard - Wybrane wcześniej ustawienie
Dynamiczny - Ustawienie zalecane
przy szybko zmieniającym się obrazie
Łagodny - Ustawienie daje łagodniejsze
kolory imniejszą jasność
Personalny - Umożliwia Wam ręczną
zmianę wszystkich ustawień
Ecohome - Zużywa 15% mniej energii.
Kontrast - Ustawia równowagę
między czernią abielą
Jasność - Zwiększenie albo zmniejszenie jasności obrazu
Nasycenie - Zwiększenie intensywności barw od czerni do bieli
Odcień - Umożliwia Wam podkreślanie albo osłabianie odcieni obrazu
Ostrość - Zwiększenie albo zmniejszenie ostrości obrazu
Temperatura koloru - wybieramy znastępujących,
dokonanych wcześniej ustawień
Normalna - Wybrane wcześniej ustawienie
Ciepła - Podkreślony czerwony kolor w obrazie
Zimna - Podkreślony niebieski kolor w obrazie
Pomiar stron - Format obrazu może się zmieniać zależnie od kanału/
nadajnika. Istnieje dużo różnych możliwości zaspokojenia Waszych potrzeb.
Automat - Automatycznie dobierany jest najlepszy format obrazu.
Taki, że obraz jest we właściwym położeniu. Mogą jedynie wystąpić
czarne pasy w górnej/dolnej części ekranu i/albo po jego bokach.
4:3 - Format 4:3 jest wyświetlany w pierwotnej wielkości. Do
wypełnienia ekranu 16:9 niezbędne są boczne pasy.
16:9 - Format ekranu zsygnałem regularnym 16:9,
Obraz 4:3 zostanie rozciągnięty wyłącz cały ekran
Powiększenie 1/2 - Obraz ma poprawne proporcje,
ale zbliżamy go, żeby wypełnił cały ekran
Punkt po Punkcie - Rozciąga obraz do pełnego ekranu
Redukcja szumu -wybieramy znastępujących,
dokonanych wcześniej ustawień
Wył - Wyłączenie zmniejszania szumów
Niski - Minimalne ustawienie systemu
Średni - Średnie ustawienie systemu
Wysoki - Maksymalne ustawienie systemu
Standartowy - Ustawienie wstępne
3D kon guracja *
TIP: W celu uzyskania najlepszego efektu 3D, należy oglądać
transmisję pod kątem nie większym niż 10 stopni od osi ekranu.
3D type - Niekiedy podczas połączenia 3D obraz może być
niewłaściwie wyświetlony, w tym przypadku należy zponiżej
tabeli wybrać odpowiednie ustawienia. Ustawienia można
również zmieniać naciskając przycisk 3D na pilocie.
Wyłącz - Wyłącz 3D
Auto - Automatyczne ustawienie trybu 3D.
Jeden koło drugi. 3D Format - 3D Format” jest zazwyczaj używany
przez nadawców w transmisji 3D, zasada działania polega na dzieleniu
rozdzielczości obrazu w pionie na pół ijego przechowywaniu dla
prawego ilewego oka.Technologia pozwala na efektywne wyświetlanie
obrazu w rozdzielczości 960x1080 dla każdego oka umożliwiając
nadawcom transmisję treści 3D w niższej przepustowości w
porównaniu zdyskiem Blu-ray. Typowe obsługiwane rozdzielczości
telewizji 3D są ograniczone do 720p i1080i. Użytkownicy mogą ręcznie
wybrać właściwy format 3D aby wyświetlać materiał 3D na telewizorze.
Góra dół 3D Format - 3D Format “ jest alternatywą dla transmisji
3D która jest bardzo podobna do transmisji typu” jeden obok
drugiego” ztym wyjątkiem że rozdzielczość obrazu jest dzielona
w poziomie anie w pionie. Główna dostępna rozdzielczość to
720 p, system „góra- dół” oferuje 1280 pixeli poziomo. Wyższa
liczba pixeli jest ogólnie uznawana za bardziej korzystną dla
wyświetlania obrazów w ruchu takich jak np. programy sportowe.
Frame Packing - Ten format zachowuje obrazy dla lewego
iprawego oka w każdej ramce tak aby zachować oryginalną
rozdzielczości dla najlepszych obrazów 3D. Większość,ale nie
wszystkie lmy na dysku bluray 3D igry na PS3 są produkowane
zwykorzystaniem tej technologii w rozdzielczości 720p. Inną
kwestią jest fakt, że wszystkie telewizory 3D powinny móc
automatycznie wykryć sygnał 3D nadawany w formacie „Frame
Packing” iwyświetlić go samoczynnie bez udziału użytkownika.
L/R View switch- zmiana kolejności wyświetlania obrazu
2D to 3D- zmiana obrazu z2D na 3D. Proszę zwrócić uwagę,że jeśli
zawartość jest zmieniana przez telewizor to efekt może być ograniczony.
3D Głębokość - Głębokość obrazów przekonwertowanych z 2D do 3D.
3D to 2D - Zmienia obraz 3D na standardowy 2D.
* - tylko dla modeli 3D
PC
Ustawienia automatyczne- Umożliwia
automatyczne skon gurowanie telewizora
do użycia go, jako monitor komputerowy
H-o set - Zmiana poziomego
położenia obrazu
V-o set - Zmiana pionowego
położenia obrazu
Rozmiar - Wzrost wielkości obrazu
Faza - Służy do ustawienia opóźnienia fazy
w celu zmniejszenia szumów obrazu
PODPOWIEDŹ: jeżeli komputer
jest przez pewien czas nieaktywny,
to telewizor przełącza się do stanu
„oczekiwania“, (ekran wyłącza się w celu oszczędności energii). W
celu ponownego uruchomienia go, naciskamy przycisk „stanby”.
Page 15

15
Dźwięk
Pro l - Możemy wybierać spomiędzy
następujących, dokonanych
wcześniej ustawień
Standardowy - Ustawienie początkowe
Muzyka - Zwiększa poziom
muzyki w stosunku do mowy
Kino - Udostępnia żywszy ipełniejsz y
dźwięk podczas lmów
Personalny - Dopasowuje się do
Państwa osobistych preferencji
Sport - Poprawia jakość dźwięku
przy imprezach sportowych
PODPOWIEDŹ: tony wysokie iniskie można
ustawiać tylko przy wybranym trybie dźwiękowym „Użytkownik“.
Wysoki - Służy do ustawienia poziomu tonów wysokich w dźwięku
Bas - Służy do ustawienia poziomu tonów niskich w dźwięku
Balans - Służy do wyrównania poziomu dźwięku
pomiędzy lewymi aprawymi głośnikami
Automatyczny poziom gło. - Po pr zełączeniu na “on” siła głosu
pozostanie na jednakowym poziomie bez względu na wejście/źródło
Surrond Sound - Efekt Surround Sound
Wyjście cyfrowe - Jest to cyfrowe wyjście COAX Audio,
które ustawiamy zgodnie znastępującymi opcjami:
Wył - Wyłączone
Auto - Automatycznie dobiera najlepsze ustawienia
PCM - Tę możliwość wybieramy, jeżeli jesteśmy podłączeni
do urządzenia Stereo Hi- przez przewód koncentryczny
(kodowana modulacja impulsowa (PCM) zwykorzystaniem
cyfrowej postaci sygnału analogowego)
Przełącznik - Zwiększenie albo zmniejszenie siły kompletnego dźwięku
AD głosćność - Wielkość dodatkowego utworu do dla niedowidzących.
AD Przelacznik - Dodatkowa ścieżka dźwiękowa dla osób
niedowidzących. Dostępny tylko w wybranych DTV.
Kanał
DVB Antenna - Ustaw rodzaj sygnału DTV.
Powietrza - naziemna (DVB-T)
Kabel - kabel (DVB-C)
Automatyczne wyszukiwnie - Umożliwia
Wam dostrojenie wszystkich cyfrowych
kanałów telewizyjnych, cyfrowych stacji
radiowych ikanałów analogowych.
Ręczne wyszukiwnie analogowe Umożliwia Wam ręczne dostrojenie
Waszego sygnału analogowego
Ręczne wyszukiwnie DVB–T Umożliwia Wam ręczne dostrojenie
Waszego sygnału cyfrowego
Edycja programów - Umożliwia Wam kasowanie,
przeskakiwanie idodawanie ulubionych kanałów
Informacje osygnale - Informacje owytrzymałości sygnału.
Informacja CI - Usługa oglądania płatnych programów
wymaga, aby do TV była wprowadzona karta „smartcard“.
Jeżeli przystępujecie do usługi płatnych programów, to
udostępniający dostarczy Wam “CAM” i“smartcard”. CAM
wkładamy do złącza COMMON INTERFACE PORT (CI Card In).
Spis narwan - Wyświetla Wasze uwagi do programu.
Lista zajęć - Listy przypomnienia programu.
OAD - Włączanie / wyłączanie aktualizacji OAD
OAD Skan - Umożliwia skanowanie do OAD
(Pobierania bezprzewodowego) aktualizacje.
Blokada
Wstępnie ustawionym hasłem jest 0000.
Będziecie poproszeni owprowadzenie 4
cyfrowego hasła, wpisywanie hasła
kończymy, naciskając przycisk ◄. Do
kasowania korzystamy zprzycisku ►.
Blokada systemowa - Umożliwia Wam
zamykanie iotwieranie menu.
Ustaw hasło - Zmień domyślne hasło.
Blokuj Program - Zablokować
określone kanały telewizyjne.
Blokada dla dzieci - Blokowanie
kanałów telewizyjnych oparte
na ograniczeń wiekowych.
Blokada przycisków - Zablokowanie przycisków TV.
Wył - Wszystkie przyciski TV są odblokowane
Częściowe - Tylko przycisk czuwania jest odblokowany
Pełne- Wszystkie przyciski są zablokowane TV
Czas
Zegar - ustawienie daty iczasu
Czas Wyłączenia - Umożliwia
Wam ustawienie konkretnego
czasu wyłączenie Waszego TV
Czas Włączenia - Umożliwia Wam ustawienie
konkretnego czasu włączenie Waszego TV,
przy czym zostanie wyświetlony kanał, źródło
sygnału isiła dźwięku. Ta funkcja może się
włączać ponownie każdego następnego
dnia albo tylko w wybranym dniu.
Strefa czasowa- Służy do zmiany
aktualnej strefy czasowej
Czasomierz uśpienia - Umożliwia Wam
ustawienie wyłączenia po upływie pewnego czasu tak, żeby telewizor
sam wyłączył się po upływie określonego czasu. Wyłączenie -> 10min ->
20min -> 30min -> 60min -> 90min -> 120min -> 180min -> 240min
Timer OSD - Czas wyświetlania OSD menu
Auto uśpienie - Wyłącza iwłącza funkcję
Strefa czasowa - Zmień swoją strefę czasową.
Page 16
PL
Sieć
Aby podłączyć telewizor do sieci za
pośrednictwem Wi-Fi, włóż klucz USB Wi-Fi
w celu wejścia USB. Wi-Fi klucz USB jest
częścią wyposażenia standardowego.
Kon guracja sieci - Pozwala ręcznie ustawić
ustawienia sieci w telewizorze. Możesz wybrać
pomiędzy Wi-Fi i połączenia kablowego.
IP con g - ustawienia połączenia sieci LAN
Auto - Automatycznie podłączyć telewizor
do sieci domowej (jest to ustawienie
domyślne i jest bardzo zalecane)
Manual - Jest zaawansowana
opcja i pozwala na
ręczną zmianę IP, Maskę sieci, Bramy oraz DNS.
Wi-Fi kon guracja - ustawienia połączenia sieci bezprzewodowej
Wi-Fi automatyczne wyszukiwanie - Automatyczne wyszukiwanie
dostępnych sieci bezprzewodowych. Wybierz żądaną sieć Wi-Fi i
wprowadź hasło, jeśli sieć jest zabezpieczona hasłem. Jeden raz
hasło akceptowane, następnym razem nie będzie już zadawane.
UWAGA: Proces połączenia może podjąć kilka minut na ustalenie,
prosimy o cierpliwość. Automatyczne połączenie podczas
uruchamiania telewizora może również wymagać trochę czasu.
Network Info - Informacje o ustawieniach sieciowych
Network Test - test połączenia sieciowego
Ustawienia
Język OSD - Umożliwia Wam zmianę języka
menu
Język dźwięku - Umożliwia Wam
zmianę języka dźwięku
Język podtekstów - Umożliwia
Wam zmianę języka podtekstów
Pomoc dla niesłyszących dosłyszący - Jeśli
sygnał zapewnia wsparcie dla niesłyszących, po
naciśnięciu „Subtitle“ będą wyświetlane napisy.
W przypadku ustawienia dla niesłyszących na
wł. iprzełączając się na kanał ze wsparciem dla
niesłyszących, napisy dla osób niedosłyszących
zostaną włączone automatycznie
Ekran niebieski - Jeżeli na wejściu nie ma żadnego sygnału, to
kolor tła zmienia się pomiędzy jasnoniebieskim iciemnoniebieskim
kolorem (do dyspozycji tylko w niektórych źródłach).
PVR System plików - opcje nagrywania PVR
Wybierz dysk - Wybierz port USB i partycji dysku
Funkcja TimeShift Rozmiar - Ustaw czas, rozmiar bufora.
Format Start - można sformatować podłączone
urządzenie pamięci USB do systemu plików FAT 32.
UWAGA: Wszystkie dane z urządzenia USB ZOSTANĄ USUNIĘTE
Szybkoć
Szybkość Check Pierwsza instalacja - Stars the rst time instalation setup.
Aktualizacja oprogramowania (USB) - Od czasu do czasu możemy
pobrać nowe oprogramowanie rmowe w celu poprawienia
funkcjonowania telewizora (można je pobrać). To menu umożliwi Wam
zainstalowanie w telewizorze nowego oprogramowania/ rmware.Więcej
szczegółów osposobie pobierania zostanie udostępnione razem ztym
oprogramowaniem.
www.umc-slovakia.sk/products-support/smart/
NOTE: TV will search for new release of software every time it is turned
on automatically. If new software is found, it will ask if you would like
to download and install it. If you select "Yes" TV will upgrade to latest
software version. Po udanej aktualizacji oprogramowania przed
ponownym uruchomieniem TV usuń pamięć USB ztelewizji.
Ustawienia fabryczne - kasuje menu do poziomu ustawień fabrycznych.
Usatwianie Tapety - Zestaw tła menu aplikacji.
HDMI CEC* - umożliwia obsługę urządzeń podłączonych
prze złącze HDMI pilotem zdalnego sterowania.
Auto Power* - automatyczne włączanie / wyłączanie
urządzeń podłączonych przez złącze HDMI CEC
Device menu* - zarządzanie menu urządzenia
za pomocą pilota do telewizora.
HDMI ARC* - umożliwia przesyłanie sygnału audio ztransmisji
naziemnej / przez HDMI do odbiornika AV bez użycia dodatkowgo
kabla audio. Funkcja ta jest dostępna tylko w złączu (wyjście) HDMI 2.
* - Podłączone urządzenie musi być zgodne zHDMI CEC
Page 17
17
Aplikacije
WSKAZÓWKA: Aby uzyskać dostęp do Smart TV Menu w
dowolnym momencie nacisnąć przycisk DVD na pilocie zdalnego
sterowania lub wybierz z głównego menu telewizora.
UWAGA: Proszę zaczekać TV łączy się z WI-FI. Może to zająć kilka
minut po włączeniu telewizora. Pierwszy raz trzeba skon gurować
połączenie sieciowe, jak jest opisane na stronie xx.
AppStore
Możesz poruszać się po menu za pomocą przycisków ▲/▼/◄/►.
Aby odgrywać lub wyświetlić naciśnij przycisk [OK], przycisk
jeden krok do tyłu Naciśnij przycisk [MENU] aby uzyskać dostęp
i korzystać z funkcji dodatkowej kolorowych przycisków.
Opuścić Appstore naciśnij przycisk [EXIT].
Home - Ekran główny z zalecanych lmów
i ostatnio otwieranych aplikacji
Multimedia
USB media - Tryb Multimedia umożliwia odtwarzanie treści różnych typów,
które są zapisane w Waszej pamięci USB. Prosimy przejść do strony ze
specy kacją techniczną w sprawie kompatybilności typowych plików. Po
przełączeniu na źródło USB na ekranie pojawia się powyższe menu. Treść
zostaje podzielona na Foto, Muzykę, Film iText, zależnie od typu pliku.
1. W menu można się poruszać za pomocą przycisków
strzałek▲/▼/◄/►. Dla potwierdzenia pozycji, którą chcecie
odtwarzać/wyświetlić, naciskamy przycisk [OK].
2. Wybieramy odpowiedni napęd. (Jeżeli Wasz napęd ma 1 miejsce, to
będziecie oglądać tylko 1 pozycję)
3. teraz możecie otworzyć pozycję. Naciskamy OK, żeby ją wyświetlić.
4. Podczas oglądania sterujemy pozycją za pomocą albo naciskamy (i)
ikorzystamy zprzycisków ▲/▼/◄/► i(OK)
Media Server - Automatyczne wyszukiwanie cyfrowych serwerów
multimedialnych (DMS) podłączonych do sieci domowej i zapewnić
odtwarzanie i renderowanie treści z serwerów multimedialnych
UWAGA: serwer mediów nie jest dostarczany przez
producenta telewizyjnego, można pobrać oprogramowania
trzecich osób i zainstalować komputer lub NAS
Miracast - Umożliwia wyświetlanie treści z telefonu na ekranie telewizora.
UWAGA: Funkcja jest dostępna tylko w wybranych telefonów.
Browser - Otwiera domyślną przeglądarkę internetową.
Czerwony przycisk - Powiększanie
Zielony przycisk - Oddalanie
Żółty przycisk - Aktualizuj stronę
Niebieski przycisk - powrót do ekranu głównego przeglądarki
Movies - Lista dostępnych Filmy
TV Shows - Lista dostępnych programów telewizyjnych
Music - Lista dostępna z muzyki i teledysków
Watchlist - Lista lmów, możesz dodać do obejrzenia później.
Apps - Lista dostępnych aplikacji
Login - Załóż konto lub zaloguj się do istniejącego
już konta, aby spersonalizować AppStore.
Settings - Stosowanie ltru na podstawie wybranych językach.
UWAGI: Aby spełnić nasze wymagania klientów, nieustannie ulepszamy
nasze produkty. W wyniku naszych starań będą nowe aplikacje dodawane
ciągłe do AppStore. Aplikacje i treści w App Store mogą być zmieniane bez
powiadomienia.
Niektóre funkcje i treści mogą być niedostępne w Twoim kraju.
Page 18
PL
Siedmiodniowy program tv
Program TV jest dostępny w cyfrowym trybie TV. Udostępnia informacje
oprzyszłych programach (tam, gdzie jest to obsługiwane przez kanał
freeview). Można obejrzeć początki ikońce wszystkich programów na
wszystkich kanałach na kolejne 7 dni, wprowadzić uwagi izaplanować ich
nagrywanie.
1. Naciskamy [TV GUIDE]. Pojawi się program TV na kolejne 7 dni
1. W menu poruszamy się za pomocą▼▲◄►
Teraz można:
Zapis wybrany kanał telewizyjny iprogram TV, naciskając CZERWONY
przycisk.* tylko dla modeli zfunkcją nagrywania
Ustawić przypomnienie naciskając GREEN (ZIELONY)
Program zpoprzedniego dnia można obejrzeć naciskając YELLOW
(ŻÓŁTY)
Program znastępnego dnia obejrzeć naciskając BLUE (NIEBIESKI)
2. Naciskając [EXIT] kończ ymy pracę z7-dniowym programem TV
Nagrywanie USB - Tryb cyfrowy*
Do telewizora jest wbudowane urządzenie nagrywające USB. Ta funkcja
jest dostępna w trybie Digital, kiedy jest użytkowana w połączeniu
zkompatybilnym urządzeniem pamięciowym USB albo ztwardym dyskiem
USB. Zalety są następujące:
• Zatrzymujemy odbiór programu TV apotem odtwarzamy, szybko
przesuwamy do przodu iprzewijamy (na działającym TV)
• Jeden przycisk do nagrywania, którym decydujemy, czy chcemy nagrać
aktualny program
• Łatwo programowane nagrywanie zsiedmiodniowego TV Guide (prze-
wodnika po programach TV)
• Nagrywamy program TV apotem odtwarzamy go na komputerze/
laptopie
Ze względu na charakter wyrobu trzeba zastosować szybkie urządzenie
pamięciowe USB (ponieważ TV odczytuje izapisuje w tym urządzeniu w
czasie rzeczywistym iniektóre urządzenia pamięciowe mogą się okazać
nieodpowiednie)
Minimalna specy kacja – urządzenie pamięciowe USB
Prędkość odczytu - 20 MB/s(Megabajtów na sekundę)
Prędkość zapisu - 6 MB/s(Megabajtów na sekundę)
Zatrzymanie programu TV
(w czasie jego trwania)
Zatrzymanie programu TV jest bardzo proste.
- Naciskamy przycisk play/pause, telewizja zostanie zatrzymana,
aprogram będzie nagrywany. Żeby przywrócić oglądanie programu
naciskamy ponownie play/pause.
- Naciskamy szybkie przesuwanie w przód, żeby przejść dalej
znagrywaniem (t.j. pominąć część programu)
- Naciskamy szybkie przewijanie, żeby wrócić zpowrotem do
nagrywania (tj. jeżeli za szybko przeszliście zbyt daleko).
RADA: jeżeli przełączycie TV w tryb gotowości albo zmienicie kanał, to
kasowana jest pamięć Time Shift, (przesunięcia w czasie). Żeby ponownie
włączyć przesunięcie w czasie, trzeba nacisnąć przycisk play/pause.
Jeden przycisk do nagrywania
Chcąc nagrywać aktualny kanał, który oglądamy, wykonujemy to
naciskając przycisk[REC].
RADA: telewizor zawiera jeden TV tuner, idlatego można
nagrywać tylko ten kanał, który oglądacie albo nagrywać
ten kanał, w którym telewizor jest w trybie gotowości.
UWAGA: funkcja nagrywania USB jest dostępna tylko w trybie TV Digital.
Ze względu na prawa autorskie inielegalne kopiowanie/nagrywanie
nie można nagrywać na/zinnego źródła wejściowego/wyjściowego.
* - tylko dla modeli zPVR
Karta produktu
Producent: Blaupunkt
Model: 40/148Z; 40/133Z
Klasa energetyczna: A+
Przekątna ekranu: 102 cm / 42"
Zużycie energii w trybie włączenia: 40W
Roczne zużycie energii*: 59 kWh/year
Zużycie energii w trybie czuwania: <0,5 W
Zużycie energii w trybie wyłączenia: 0 W
Rozdzielczość ekranu: 1920 (W) x 1080 ( H)
*- Zużycie energii XYZ kWh/rok na podstawie zużycia energii przez
telewizor działający 4 godziny dziennie przez 365 dni. Rzeczywiste
zużycie energii zależy od sposobu użytkowania telewizora.
Page 19

19
Page 20
DE
Aufstellen und Sicherheit
ACHTUNG
GEFAHR EINES STROMSCHLAGS
NICHT ÖFFNEN
Bitte lesen Sie vor der Inbetriebnahme Ihres
Fernsehgerätes diese Sicherheitshinweise sorgfältig
durch und beachten Sie folgende Hinweise:
Bitte stellen Sie niemals Kerzen oder
andere o ene Flammen in die Nähe
des Fernsehgerätes, um das
Übergreifen von Feuer zu verhindern.
• Zum Heben und Tragen eines Fernsehgerätes mit einem Gewicht von
über 20kg sind mindestens 2 Personen erforderlich.
• Achtung! Dieses Fernsehgerät umfasst keine durch den Benutzer
reparierbaren Bauteile. Wenden Sie sich bei Störungen an den Hersteller
oder den autorisierten Service. Die Berührung einiger Teile im Innereien
des Gerätes ist u.U. lebensgefährlich. Schäden die durch unsachgemäße
Eingri e entstehen, unterliegen nicht der Gerätegarantie!
• Wenn das Anschlusskabel defekt ist, darf es nur vom Hersteller, seinem
Serviceunternehmen oder entsprechend quali ziertem Personal ersetzt
werden, um Schäden zu vermeiden.
• Die Rückwand bitte nicht abnehmen.
• Dieses Fernsehgerät ist für den Empfang und die Wiedergabe von Bild-
und Tonsignalen bestimmt. Jede andere Verwendung ist ausdrücklich
ausgeschlossen.
• Der ideale Betrachtungsabstand beträgt etwa das Fün ache der Bild-
schirm diagonalen. Fremdlicht auf dem Bildschirm führt zu Re exionen
und kann die Bildqualität beeinträchtigen.
• Bitte achten Sie auf eine ausreichende Belüftung und sorgen Sie für
genügend Abstand in der Schrankwand oder zu anderen Möbelstücken.
• Bitte montieren Sie das Gerät mindestens mit einem Abstand von
5 cm zur der Wand aus, um eine genügende Belüftung das Gerätes
sicherzustellen.
• Dieses TV Gerät wurde für den Betrieb in gemäßigtem Klima ausgelegt
• Das Fernsehgerät ist ausschließlich für den Betrieb in trockenen Räumen
bestimmt. Sollten Sie es dennoch im Freien betreiben, sorgen Sie unbedingt dafür, dass es vor Feuchtigkeit (Regen, Spritzwasser) geschützt ist.
Setzen Sie das Fernsehgerät keinerlei Feuchtigkeit aus.
• Stellen Sie keine mit Flüssigkeiten gefüllten Gefäße, wie Vasen oder Ähn-
liches, auf das Gerät. Das Gefäß könnte umkippen und die elektrische
Sicherheit beeinträchtige. Platzieren Sie das Fernsehgerät ausschließlich
auf ebenen und stabilen Unterlagen. Legen Sie keine Gegenstände, wie
z.B.: Zeitungen, Decken oder Ähnliches, auf oder unter das Fernsehgerät.
• Achten Sie darauf, dass das Fernsehgerät nicht auf elektrischen
Leitungen steht, da diese dadurch beschädigt werden können. Mobiltelefone oder andere elektrische Funkwellen abstrahlende Geräte wie
WLAN- Adapter, Funküberwachungskamera o.ä. können elektromagnetische Störungen verursachen und sollten nicht in der Nähe des
Fernsehgerätes platziert werden.
• Stellen Sie das Gerät nicht in unmittelbarer Nähe von Heizquellen oder
in der prallen Sonne auf, dadurch wird die Kühlung des Gerätes beeinträchtigt. Wärmestaus sind Gefahrenquellen und beeinträchtigen die
Lebensdauer Ihres Fernsehgeräts erheblich. Lassen Sie sicherheitshalber
Ablagerungen von Zeit zu Zeit von einem Fachmann entfernen.
• Achten Sie darauf, dass das Netzkabel oder (wenn vorhanden) der
Netzadapter nicht beschädigt wird. Das Fernsehgerät darf nur mit dem
beiliegenden Netzkabel/Netzadapter betrieben werden.
• Gewitter stellen eine Gefahr für jedes elektrische Gerät dar. Auch wenn
das Fernsehgerät ausgeschaltet ist, kann es durch einen Blitzschlag
in das Stromnetz und/oder die Antennenleitung beschädigt werden.
Bei einem Gewitter sollten Sie daher immer alle zum Gerät führenden
Stecker und Kabel trennen.
• Reinigen Sie den Bildschirm nur mit einem leicht befeuchteten und
weichen Tuch. Verwenden Sie nur klares Wasser und niemals Reinigungs üssigkeiten oder gar Lösungsmittel.
• Wie nachstehend beschrieben, stellt die Montage des Gerätes an der
Wand eine sichere Variante der Befestigung dar.
Können Sie den Fernseher nicht an seiner Unterlage befestigen,
empfehlen wir Ihnen den Fernseher mit einer Sicherheitsleine und Ösen
schrauben an der Wand zu xieren.
Stellen Sie in jedem Fall sicher, dass Kinder das Fernsehgerät nicht kippen, sich daran hängen oder darauf klettern können. Ein umkippendes
Fernsehgerät kann Ihnen und Ihrem Kind schwerste Verletzungen
zufügen.
Die Sicherheitsleine sollte nicht durch-hängen und horizontal zwischen
Fernseher und Wand angebracht sein.
• Verbinden Sie das Fernsehgerät ausschließlich über den VGA-Eingang
um es als PC/Laptopmonitor zu nutzen. Der HDMI-Eingang dient zum
Anzeigen digitaler Inhalte von kompatiblen externen Geräten.
Hinweis:
• Schließen Sie keine externen Geräte an, wenn Ihr Fernsehgerät
eingeschaltet ist. Schalten Sie vor dem Anschließen auch die anderen
anzuschließenden Geräte aus! Stecken Sie den Netzstecker Ihres
Fernsehgerätes erst dann wieder in die Steckdose, wenn Sie die externen
Geräte und die Antenne angeschlossen haben!
• Sorgen Sie dafür, dass der Netzschalter am Gerät und der Netzstecker
immer frei zugänglich sind!
• Nicht für den Einsatz an Bildschirmarbeitsplätzen
vorgesehen.
• Ständige Benutzung von Ohrhörern bei hoher Lautstärke, kann zu einer
permanenten Schädigung Ihres Hörvermögens führen.
• Sorgen Sie für eine umweltschonende Entsorgung dieses Gerätes, allen
weiteren Bestandteilen und den Batterien. Im Zweifelsfall kontaktieren
Sie bitte die für die Entsorgung zuständige Organisation in Ihrer Nähe.
• Beachten Sie beim Aufstellen des Gerätes, dass Ober ächen von Möbeln
mit den verschiedensten Lacken und Kunststo en etc. beschichtet
sind oder Möbelpoliturne aufgetragen wurden. Sie enthalten oft meist
chemische Zusätze die unter Anderem das Material der Gerätefüße angreifen können. Dadurch können Rückstände auf der Möbelober äche
entstehen, die sich nur schwer oder nicht mehr entfernen lassen.
• Das Display Ihres LCD/LED Fernsehgerätes entspricht den höchsten
Qualitätsanforderungen und wurde bezüglich Pixelfehlern mehrmals
strengstens überprüft. Aufgrund von technologischen Gegebenheiten
ist es (trotz größter Sorgfalt bei der Herstellung von Bildschirmen) nicht
100%ig auszuschließen, dass einige, wenige Bildpunkte Defekte aufweisen. Derartige Pixelfehler können, wenn sie in den spezi schen Grenzen
der DIN Norm liegen, nicht als Gerätedefekt im Sinne der Gewährleistung betrachtet werden.
Wichtige Informationen über den Einsatz von
Videospielen, PCs, Sonder lmtiteln oder der
Darstellung von unbeweglichen Bildern
• Der überwiegende Einsatz von wenig bewegten oder gänzlich unbe-
wegten Bildinhalten kann zu einem sogenannten „permanenten Schattenbild“ auf dem LCD/LED-Bildschirm führen (Fälschlich oft auch als
„Einbrennern“ bezeichnet). Dieses Schattenbild ist dann beim normalen
Gerätebetrieb auf dem LCD/LED-Bildschirm ständig im Hintergrund zu
sehen. Es handelt sich um eine teils irreversible Beschädigung.
Sie können das Risiko einer solchen Beschädigung unter anderem, wie
folgt vermeiden:
Page 21
21
• Die Helligkeit/Kontrast auf das minimal wahrnehmbare Niveau redu-
zieren.
• Bringen Sie keine wenig oder nicht bewegten Bildinhalte über einen lan-
gen Zeitraum zur Anzeige! Vermeiden Sie die permanente Anzeige von:
» Zeitanzeigen oder Videotext-Tafeln
» TV- / DVD-Menüs: z. B. DVD-Inhalte
» Pause-Modus: Belassen Sie das Gerät nicht zu lange im Pause-Mo-
dus, z. B. bei DVD- oder Videowiedergabe
» Schalten Sie das Gerät bei Nichtgebrauch aus.
Batterien
• Bitte beachten Sie beim Einlegen der Batterien die
richtige Polarität.
• Setzen Sie die Batterie nie großer Hitze aus und legen
Sie diese nie an Orte, wo die Temperatur stark ansteigen
kann, wie z. B. in die Nähe eines Feuers oder in direktes
Sonnenlicht.
» Niemals verschiedene Batterietypen und/oder alte/neue Batterien
miteinander verwenden.
» Sorgen Sie für umweltschonende Batterieentsorgung.
» Bitte beachten Sie, dass in den meisten EU Ländern die Batterieent-
sorgung gesetzlich geregelt ist.
Cd
Entsorgung
• Entsorgen Sie dieses Produkt nicht mit normalem Haus-
haltsmüll. Bringen Sie es zu einer dafür vorgesehenen
Sammelstelle für Abfallbeseitigung nach WEEE. So helfen
Sie mit Ressourcen und Umwelt zu schonen.
• Ausführliche Informationen erhalten Sie bei Ihren kom-
munalen Behörden oder in dem Geschäft, in dem Sie das
Produkt gekauft haben.
3D Sicherheitsinformation*
• Wenn Sie 3D Inhalte über einen längeren Zeitraum zu nah betrachten,
kann Ihre Sehfähigkeit beeinträchtigt werden
• 3D Videos/Filme zu schauen oder 3D Spiele mit der 3D Brille zu spielen
kann über einen längeren Zeitraum dazu führen, dass Sie sich schläfrig
fühlen, Kopfschmerzen bekommen oder sich benommen fühlen.
Sollten Sie diese Symptome feststellen, bitte legen Sie eine Pause beim
Fernsehen ein
• Schwangere Frauen, ältere Personen und Personen mit Herzkreislaufpro-
blemen sollten sofort bei einsetzender Müdigkeit und Schwindel auf den
Genuss von 3D-Inhalten verzichten
• Einige 3D Inhalte können Sie dazu verleiten sich zu ducken oder
auszuweichen, deswegen stellen Sie bitte sicher, dass sich keine
zerbrechlichen Gegenstände in Ihrer Nähe be nden, um Verletzungen
zu vermeiden
• Bitte achten Sie darauf, dass Kinder unter 5 Jahren keine 3D Inhalte zu
sehen bekommen, diese können die Entwicklung Ihres Sehvermögens
beeinträchtigen
Warnung für Schlaganfall- und Epilepsie gefährdete
Personen*
• Das Fernsehen kann unter bestimmten Umständen, bei Personen die
Schlaganfall- oder Epilepsie gefährdet sind, zu Problemen führen, durch
schnelle Bildwechsel, grelle Farben und ackernde Bildinhalte
• Wenn Sie oder einer Ihrer Familienangehörigen dahingehend vor-
belastet ist, bitte konsultieren Sie einen Arzt bevor Sie 3D Inhalte am
Fernseher schauen. Auch Personen ohne entsprechende Vorgeschichte
können unter bestimmten Umständen folgende Symptome feststellen:
Benommenheit, Schwindel, verschwommene Wahrnehmung, Muskelzuckungen im Gesichtsbereich, unbewusste Bewegungen, Krämpfe, Verwirrung, Orientierungslosigkeit und Übelkeit. Sollte eins oder mehrere
der erwähnten Symptome bei Ihnen oder Ihren angehörigen auftreten
beenden Sie bitte sofort das Fernsehen und konsultieren Sie gegebenenfalls einen Arzt. Eltern sollten auf Ihre Kinder verstärkt achten, da
Kinder bis in Teenagelalter sensibler auf Reize regieren als Erwachsene.
Hinweise um eventuellen Auswirkungen
vorzubeugen*
• Legen Sie regelmäßige Pausen ein vom 3D Fernsehen
• Personen mit einer Sehschwäche sollten mit entsprechender Sehhilfe 3d
Inhalte anschauen
• 3D Inhalte möglichst frontal zum TV Gerät anschauen und genügend
Abstand zum TV Gerät halten
• Vermeiden Sie es 3D Inhalte zu schauen wenn Sie krank sind oder Sie
sehr müde sind
• Tragen Sie die 3D Brillen bitte nur um 3D Fernsehen zu sehen und nicht
für irgendwelche anderen Belange
• Nachdem Sie das 3D Fernsehen beendet haben, nehmen Sie sich einen
Moment Zeit bevor Sie aufstehen, oder sich bewegen, damit Sie sich
wieder an die Umgebung gewöhnen
* - für TVs mit 3D funktion.
Hinweise zu den digitalen TV-Funktionen
• Die digitalen TV-Funktionen erhalten Sie ausschließlich in den Ländern
oder Regionen, in denen DVT-T/DVB-T2 (MPEG-2 und H.264/MEPG-4AVC)
ausgestrahlt wird oder ein kompatibler DVB-C-Dienst (MPEG-2 und
H.264/MEPG-4AVC) per Kabel verfügbar ist. Bitte klären Sie mit Ihrem
Händler vor Ort, ob diese Dienste bei Ihnen verfügbar sind.
• Für die Nutzung des Kabeldienstes kann Ihr Kabelanbieter, je nach
Vertrag, Gebühren erheben.
• Dieses TV unterstützt DVB-T/DVB-T2 und DVB-C Spezi kationen, jedoch
kann eine Kompatibilität mit zukünftigen digitalen terrestrischen DVB-T/
DVB-T2 und digitalen DVB-C Kabel-Signalen nicht garantiert werden.
• Einige digitale TV-Funktionen können in bestimmten Ländern oder
Regionen, ebenso wie DVB-C Kabeldienste, je nach Anbieter, nicht
korrekt funktionieren.
Jugendschutz
• Dieses TV verfügt über zahlreiche erweiterte Funktionen, die es erlau-
ben, verschiedene Anwendungen wie u.a. Webseiten, Chat rooms oder
soziale Netzwerke aufzurufen.
• Sollten Jugendliche unter 18 Jahren Zugri auf das Gerät haben, emp-
ehlt es sich, das die Eltern oder andere erziehungsberechtigte Personen
das Gerät beaufsichtigen.
• Wenn Sie nicht wollen, das Kinder die Internetfunktionen nutzen, sollten
Sie das Netzwerk nicht kon gurieren. Alternativ können die das Ethernetkabel oder den Wi-Fi USB Stick vom Gerät trennen.
Page 22
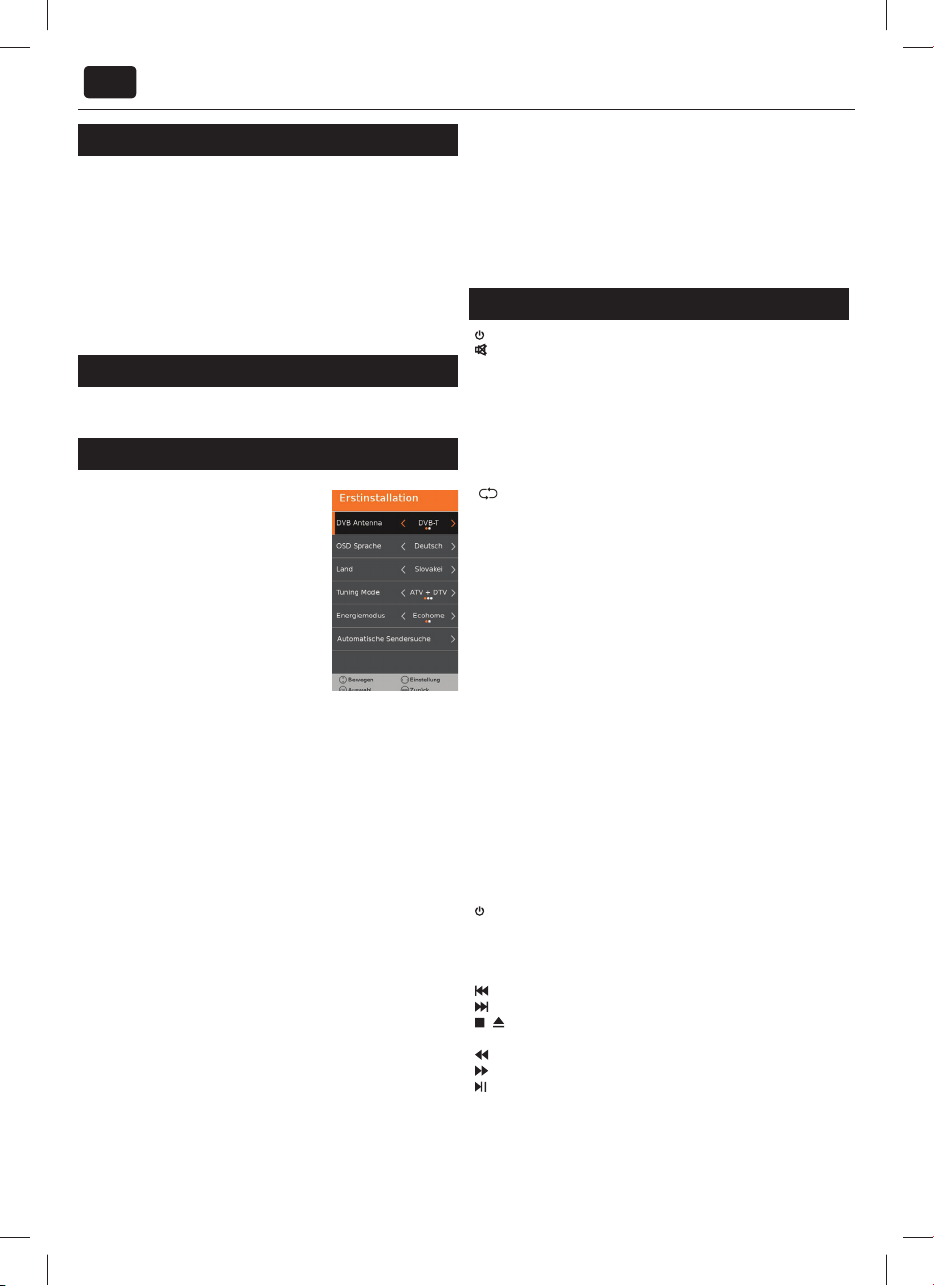
DE
Inhalt der Verpackung
Die Lieferung dieses Fernsehgerätes umfasst folgende Einzelteile:
• 1x TV
• 1x Fernbedienung
• 2x Batterien AAA
• 1x USB wireless key
• 1x Bedienungsanleitung
• 1x Standfuß
• 1x Standfußhals
• 1x RF Antennenkabel
• 1 x TV Installationspaket für Standfuß
• 3D-Brillen (nur für modelle mit 3D funktion )
Aufstellen des Gerätes
Bitte folgen Sie der Aufbauanleitung, diese be ndet sich in der Zubehörtüte Ihres Fernsehgerätes.
Anschließen und Vorbereiten
1. Das Antennenkabel der Hausantenne
in die Antennenbuchse (RF IN) des
Fernsehers stecken. Stecken Sie den
Stecker des Netzkabels in die Steckdose.
2. Stecken Sie den USB wireless key in die
USB Buchse.
3. Das Gerät mit dem an der Unterseite des
Gerätes angebrachten Ein/Aus Schalter
einschalten.
4. Die mitgelieferten Batterien ins
Batteriefach der Fernbedienung einlegen
(Polung beachten) und das Gerät mit der
Standby-Taste einschalten.
5. Auf dem Bildschirm wird die erste Seite des Installationsassistenten
angezeigt.
Sollten Sie keine Anzeige sehen, drücken Sie bitte die Taste [MENU] auf
der Fernbedienung und geben dann die Zeichenfolge 8-8-8-8 ein. Das
Menü wird angezeigt. Wählen Sie den gewünschten Menüpunkt mit den
Richtungstasten ◄►▼▲. Das Menü kann jederzeit durch Anwahl des
Punktes [EXIT] ausgeblendet werden.
6. Bitte wählen Sie die gewünschten Einstellungen bei der
Erstinstallation.
DVB Antenna – wählen Sie die Art des Signals Sie können wählen
zwischen Antenne (DVB-T) oder Kabel (DVB-C).
Language – Wählen Sie die Menü-Sprache
Country – Wählen Sie Ihr Land
Tuning Mode – Wählen Sie, ob Sie nur digitale Kanäle (DTV), nur
analoge Kanäle (ATV) oder beide (DTV und ATV) empfangen wollen
Operator – Wählen Sie Ihren Kabelanbieter. Sollte Ihr Anbieter nicht
in der Liste erscheinen, wählen Sie Andere (nur möglich, wenn die
Übertragungsart auf Kabel gesetzt wurde).
Environment – Energiespar-Einstellungen Um Energie zu sparen,
wählen Sie Home Mode
LCN – Schalten Sie LCN ein, wenn Sie Senderliste des Anbieters nutzen
möchten (nur verfügbar für DVB-T und DVB-C)
7. Drücken Sie [Automatischer Sendersuchlauf], um den Prozess zu
starten
8. Bei vorhandenem Breitband-Kabel (DVB-C):
Wir empfehlen, alle weitern Einstellung auf Standard zu belassen.
Sollten bei DVB-C Empfang einzelne Sender nicht gefunden werden,
erfragen Sie bei Ihrem Netzanbieter die gültige „Netzwerk ID“. Führen
Sie anschließend eine neue Suche durch. Drücken Sie die Taste [MENU],
wählen Sie „Automatische Sendersuche“ aus und tragen Sie hier die
erfragte Netzwerk-Id ein.
TIP: Mit Hilfe der Funktion “Ecohome” reduzieren Sie die Leistungsaufnahme
um ca. 15% gegenüber anderen Modi. Die Bildhelligkeit ist in der
„Ecohome“ - Funktion reduziert. Wenn diese Funktion für Sie nicht
passend ist, können Sie einen anderen Mode auswählen.
ACHTUNG: Der „Demo“ – Modus ist mit optimaler
Bildeinstellung voreingestellt, hat jedoch zirka 15% mehr
Energieverbrauch als im „Ecohome“ - Modus.
Fernbedienung
STANDBY – Schaltet das Gerät ein oder in Bereitschaft
MUTE – Sturmschaltung ein oder aus
DTV –
Zum Digitalempfang und im Digitalmodus zwischen TV
RADIO
- TV/RADIO – Radio umschalten
USB – Zur USB-Quelle umschalten
DVD– Zu Analog TV umschalten
ATV –
Zu Analog TV umschalten
0 – 9 Direkte Programmwahl
TV GUIDE – Ruft im Digitalmodus die elektronische Programmzeitschrift
auf
– Zum zuletzt gesehenen Programm
VOL ▲/▼ – Lautstärke erhöhen / reduzieren
S.MODE - Taste wiederholt drücken, um durch die verschiedenen
Tonwiedergabe-Modi zu blättern
P.MODE - Taste wiederholt drücken, um durch die verfügbaren Videobild-Modi zu blättern
FAV – Favoritenliste
CH ▲/▼ – Schaltet auf den nächst höheren oder niedrigeren Programm-
platz
(▲/▼/◄/►/ OK) – Ermöglichen das Durchblättern im On-Screen-Menü
und individuelle Anpassungen von diversen Geräteeinstellungen.
MENU – Hauptmenü aufrufen / verlassen
EXIT – Alle Menüs verlassen
SOURCE – Quellenmenü anzeigen
INFO – Erstes Betätigen zeigt Information zum aktuellen / nächsten
Beitrag.
Zweimal Betätigen liefert aktuelle Programminfos.
ASPECT – Zwischen verschiedenen Bildformaten umschalten
SLEEP – Wiederholtes Drücken wählt in 15 Minutenschritten die automa-
tische Abschaltzeit
AUDIO – Sprache / Tonspur umschalten (wenn verfügbar)
SUBTITLE – Filmuntertitel ein- oder ausblenden
TEXT – Videotext-Modus - Ö net den Videotex
TEXT HOLD
TEXT/ DVD ZOOM - Videotext-Modus - DVD-Modus - Zoomen
DVD ZOOM
DVD MENU
Rec
DVD SETUP
Rec List
4 Sekunden.
GOTO
A-B
Drücken markiert den Startpunkt, ein weiteres Drücken markiert den
Endpunkt.
ANGLE
- HOLD - Videotext-Modus - aktuell angezeigte Seite anhalten
1
- DVD-Modus - Zoomen
DISPLAY – Schaltet den Bildschirm aus z.B. bei Radioempfang
1
DVD-Modus - Anzeige des DVD-Menüs.
2
– PVR-Modus -Aktuelle Sendung aufnehmen
1
– DVD-Modus - Menü-Anzeige für DVD-Einstellungen
2
– PVR-Modus - Ö net die Liste aufgenommener Beiträge
– Aktuelles Kapitel wiederholen
– Zum nächsten Kapiel springen
/
– Wiedergabe stoppen / Disc auszuwerfen drücken Sie die Taste für
– Schneller Rücklauf
– Schneller Vorlauf
– Wiedergabe / Pause
1
– DVD-Modus – Kapitel wählen.
1
– DVD-Modus - Markiert eine bestimmte Abspielsequenz. Einmal
1
– DVD-Modus - Verschiedene Betrachtungswinkel wählen (DVD
Page 23

23
Option).
REPEAT – DVD-Modus
In einigen Menüs erhalten die farbigen Tasten zusätzliche Funktionen,
beachten Sie die Untertitel in den Menüs.
REVEAL – Videotext-Modus - Verdeckte Informationen ein- oder ausblenden.
SIZE – Videotext-Modus - Ändert die Größeder Bildschirmanzeige im
Videotext-Modus
1
TITLE
– DVD-Modus - Zur Anzeige des DVD-Titelmenüs
1
D.DIS
– DVD-Modus - Auskünfte über aktuelles Medium
INDEX – Videotext-Modus - Indexseite anzeigen
Rot Grün Gelb Blau Tasten - In einigen Menüs erhalten die farbigen
Tasten zusätzliche Funktionen, beachten Sie die Untertitel in den Menüs.
3
3D Taste
- Taste wiederholt drücken, um durch die verschiedenen
3D-Modi zu blättern
1 - Funktionen sind nur auf Fernbedienungen, für TVs mit interiertem DVD
Player, verfügbar.
2 - Funktionen sind nur auf Fernbedienungen, für TVs mit PVR, verfügbar
3 - Funktionen sind nur auf Fernbedienungen, für TVs mit 3D.
1
- USB-Modus - Abspielen wiederholen.
TV - Tasten
Vol+ Lautstärke erhöhen / im MENÜ nach rechts
Vol- Lautstärke reduzieren / im MENÜ nach links
CH+ Programmplatz wählen / im MENÜ nach oben
CH- Programmplatz wählen / im MENÜ nach unten
MENU MENÜ bzw. Dialogfenster ö nen
SOURCE Signalquellenmenü ö nen
STANDBY Stand-by Modus ein-/ausschalten
Signalquelle wählen
(Eingang / Quelle)
Zwischen verschiedenen Eingängen / Anschlüssen umschalten:
auf der Fernbedienung:
1. [SOURCE / AV] drücken – Quellenmenü
wird angezeigt
2. Durch [▼] oder [▲] die gewünschte
Signalquelle markieren
3. Mit [O K] bestätigen
am Fernsehgerät:
1. [SOURCE] drücken
2. Mit den Tasten CH+/- die gewünschte
Signalquelle markieren
3. Mit Vol+/- die gewünschte Eingangs- / Signalquelle bestätigen.
Anschlüsse
USB
USB-Eingangsport
HDMI 1, 2, 3
HDMI-Eingang 1, 2, 3
VGA(PC) *VGA PC-Anschluß
VGA (PC) Audio In
3.5mm Klinkenbuchse für PCAudio- Eingang
Mini AV
Videoeingang + Video Audio Eingang / YPbPr Audio
Eingang
Mini YPbPr
Mini HD-Komponenten-Eingang
SCART
SCART-Eingang
RF In
HF-Antennen- / TV-Eingang
RJ 45
Ethernet
CI Card IN
Karteneinschub / CI-Schnittstelle
Digital Audio Out
Digitaler Audioausgang
HEADPHONES
3.5mm Kopfhörerausgang
Page 24

DE
Navigation
Zum Aufrufen des Menüs, bitte die Taste [MENU] auf der Fernbedienung
drücken. Wählen Sie den gewünschten Menüpunkt mit den
Richtungstasten ▼▲►◄. Bestätigen Sie Ihre Auswahl mit der Taste [OK].
Das Menü kann jederzeit durch Drücken der Taste [EXIT] verlassen werden.
Wenn länger als 10 Sekunden keine Taste betätigt wird, wird das Menü
automatisch verlassen. Die Zeit zum automatischen Verlassen ist variabel –
siehe den Abschnitten KONFIGURATION und „Menu Anzeigedauer“ dieser
Anleitung.
Bild
Bildeinstellung – Sie können aus
folgenden Voreinstellungen wählen:
Dynamisch - Lebhafte und
kontrastreiche Bildeinstellung
Standard - Vorgegebene
Grundeinstellung
Mild - Betont weiche Bildeinstellung
Persönlich - Ermöglicht individuelle
Einstellungen bzw. ruft diese auf
Ecohome - Mit Hilfe der Funktion
“Ecohome” reduzieren Sie
die Leistungsaufnahme um
ca. 15% gegenüber anderen
Modi. Die Bildhelligkeit
ist in der „Ecohome“ - Funktion reduziert.
Kontrast - Einstellung für die Grauabstufung *
Helligkeit - Bildhelligkeit erhöhen oder reduzieren *
Saturation - Farbintensität einstellen *
Farbton - Nur bei NTSC anwählbar, dient der Phasenkorrektur
des NTSC Signales.
Schärfe - Bildschärfe erhöhen oder reduzieren *
TIP: Änderungen dieser Werte sind nur bei der
Einstellung „Persönlich“ anwählbar.
Farbtemperatur - Verfügbare Einstellungen:
Normal - Vorgegebene Grundeinstellung mit neutraler Farbwiedergabe
Warm - Bild wirkt durch einen höheren
Rotanteil vom Farbton her wärmer
Kalt- Bild wirkt durch einen höheren Blauanteil vom Farbton her kühler
Bildformat - Hier legen Sie fest, wie Programminhalte
im alten Bildschirmformat 4:3 auf Ihrem modernen
16:9 Gerät dargestellt werden sollen.
Auto - Die Bildposition wird automatisch angepasst.
Abhängig vom gesendeten Bildformat können, je nach
betrachtetem Bildmaterial, an den oberen/unteren und/
oder seitlichen Rändern Schwarzbalken sichtbar werden
4:3 - In dieser Einstellung werden Beiträge im alten 4:3
Format proportional korrekt und unbeschnitten, jedoch
mit seitlichen schwarzen Balken, dargestellt.
16:9 - 16:9 Bildinhalte werden proportional korrekt wiedergegeben,
Bilder im Format 4:3 werden gedehnt angezeigt.
Zoom 1/2 - 4:3 Bildinhalte werden geometrisch korrekt
angezeigt. Das Bild wird hierzu vergrößert und dadurch an
den unteren und oberen Bildrändern beschnitten.
Vollbild - Passt das Bild an die das Bildschirmvoramt
an indem es gestreckt/gestaucht wird.
Rauschunterdrückung - Verfügbare Einstellungen:
3D Einstellungen*
Für den besten 3D E ect, schauen sie in einem
Winkel von +/- 10° auf Ihren TV
3D Type - Es kann manchmal vorkommen, dass das 3D Bild nicht
gleich korrekt dargestellt wird, wählen Sie eine der folgenden
Einstellungen um dies zu korrigieren. Sie können zwischen
den Einstellungen mit der ’3D’ Taste umherschalten.
3D o - Schaltet 3D aus
Side by Side 3D Format - Wird häu g bei kommerziellen
3D Übertragungen verwendet. Dabei wird die horizontale
Au ösung halbiert um in einem Bild die Bilder für rechtes und
linkes Auge zu übertragen. Die Au ösung beträgt deshalb
e ektiv 960 x 1080 Bildpunkte pro Auge. Damit können 3D
Inhalte mit einer niedrigeren Bandbreite übertragen werden als
im Vergleich zu Blue Rays erforderlich ist. Typische unterstütze
Au ösungen sind sind beschränkt auf 720p und 1080i für 3D
Inhalte. Der Anwender muss manuell den Modus Side by Side
3D einstellen um den 3D Inhalt auf einem 3D TV darzustellen.
Top Bottom 3D Forma - Ist eine alternative 3D Übertragungsart,
welche der Side by Side Übertragungsart sehr ähnlich ist, allerdings
wird hierbei die vertikale Au ösung halbiert. Das Top Bottom 3D Format
ist generell besser für Inhalte mit schnellen Kamera Schwenks geeignet.
Frame Packing - Beim Frame Packing werden die informationen
für das linke und rechte Auge in einem Bild gepackt übertragen.
Das ermöglicht, dass die ursprüngliche und beste Au ösung für
den 3D Inhalt zur Verfügung steht. Die meisten 3D Blue-Rays
und PS3 Spiele arbeiten mit dieser Technik. Ein anderer wichtiger
Unterscheidungsfaktor ist, dass der TV dieses Format in der Regel
selbst erkennt und einstellt, ohne das der Nutzer eingreifen muss.
Exchange 3D L/R - Exchange 3D L/R- Ändert die 3D Bild Anordung
2D to 3D - Ändert das Bild von 2 auf 3 Dimensionen
(3D). Bei dieser umrechnung sind die 3D E ekte
3D Depth - Tiefe des Bildes wird von 2D auf 3D konvertiert
3D to 2D - Ändert das Bild von 3D zur regulären
2 dimensionalen Ansicht (2D)
* - nur für modelle mit 3D funktion
Page 25

25
PC
Autom. Einstellung - Die erforderlichen
Einstellungen werden,
soweit möglich, automatisch getätigt.
H. Position - Zum Verändern der
horizontalen Bildposition.
V. Position - Zum Verändern der
vertikalen Bildposition.
Größe - Zum Verändern der Bildgröße.
Phase - Dient zur Einstellung der
Phasenlage des Monitorbildes.
ACHTUNG: Wenn Sie Ihren PC eine bestimmte
Zeit nicht benutzen, schaltet Ihr Fernsehgerät
automatisch in den Stand-by Modus (um Energie
zu sparen), der Bildschirm schaltet sich aus. Um
den Bildschirm wieder einzuschalten, drücken Sie bitte die Stand-by Taste.
HINWEIS: Nach Anwahl der Eingangsquelle „PC“ wird an Stelle des Display
Menüs das PC-Setup Menü mit anderen Auswahlmöglichkeiten angezeigt.
To n
Ton Pro l - Sie können aus folgenden
Voreinstellungen wählen:
Standard - Vorgegebene Grundeinstellung
Musik - Optimiert für einen
dynamischen Kinosound
Film - Voreinstellung für ein
betont lebendiges Klangbild
Sport - Hebt die menschliche Stimme
gegenüber anderen Tönen hervor
Persönlich - Ermöglicht individuelle
Einstellungen bzw. ruft diese auf
Höhen - Zur Anhebung /
Absenkung von Hochtönen *
Bässe - Zur Anhebung
/ Absenkung von Tieftönen *
TIP: Änderungen dieser Werte sind nur in der Einstellung „Persönlich“ anwählbar.
Balance - Stellt das Laustärkeverhältnis zwischen
linkem und rechtem Lautsprecher ein
Autom. Lautstärke - In dieser Einstellung werden die Eingangspegel
der unterschiedlichen Eingänge und Programmplätze
auf gleichem Niveau gehalten, so werden unangenehme
Lautstärkesprünge beim Umschalten vermieden.
Surround Sound - Surround Sound EIN oder AUS
SPDIF Mode - (Digitaler Coax-Audio Ausgang). Wählen Sie aus den
folgenden Einstellungen diejenige, die Ihrer Audio-Anlage entspricht:
Aus - Ausgeschaltet
Auto - Erkennt und wählt automatisch die optimale Übertragungsart
PCM - Für Stereo-Hi-Fi-Anlage mit elektrischem Digital-Audio Eingang
wählen Sie „Pulse Code Modulation“ (ein digitales Tonformat)
AD Schalter - zusätzliche audio kanal für Sehbehinderte
Nur verfügbar auf ausgewählten DTV kanäle.
AD pegel - Lautstärke des Zusatzkanals für Sehbehinderte
Sendersuche
DVB-Antenna - Wählen Sie die Art des Signals
Air - terrestrisch (DBV-T)
Cable - Kabel (DVB-C)
Automatische Sendersuche -
Vollständiger Sendersuchlauf mit
länderspezi scher Auswahlmöglichkeit.
Manuelle Analog Suche - Neue
analog empfangbare Programme
suchen und hinzufügen.
Manuelle DVB-T Suche - Einzelne, neue
digitale Programme suchen und hinzufügen.
Programme bearbeiten - Hier
können einzelne Kanäle gelöscht,
verschoben, ausgeblendet
und zur Favoritenliste hinzugefügt werden.
Signalinformation - Informationen über das DVB Signal.
CI - Informationen - Zeigt bei Verwendung eines CA-
Moduls Informationen zum verwendeten Modul und zur
eingesetzten „Smartcard“. Die im Weiteren angezeigten
Informationen sind abhängig vom verwendeten CA-Modul
und können ggf. nicht in der unter „KONFIGURATION“ >>
„MENU Sprache“ gewählten Sprache angezeigt werden!
Timerliste- Listet alle programmierten Ereignisse auf.
Aufnahmeliste - Liste der Aufzeichnungen.
OAD - OAD Updates anzeigen Ja/Nein
OAD Scan - Erlaubt Ihnen, nach OAD (Over Air
Downloads) Updates zu suchen
Schutz
Das Standardpasswort lautet: 0000
System sperren – Unter diesem Menü-Punkt
können bestimmte Gerätefunktionen gesperrt
werden, um z.B. bestimmte Programmplätze
für Kinder bzw. beim Geräteeinsatz im
Hotel unzugänglich zu machen oder
die maximal einstellbare Lautstärke zu
begrenzen. Für Änderungen über dieses
Menü ist die Eingabe einer PIN notwendig.
Die voreingestellte PIN lautet: 0000.
Kennwort Setzen - Ermöglicht
Ihnen, das Passwort zu ändern.
Sender sperren - Diese Funktion ermöglicht
erweiterte Programmeinstellungen und Programme zu sperren.
Jugendschutz - Einstellmöglichkeiten im
Elternmodus (Nur bei Digital TV möglich).
Tastensperre - Sperren Sie die Tasten am Fernsehgerät.
OFF - alle TV-Knöpfe sind verfügbar
Partial - Nur der Standby Knopf ist verfügbar
Full - Alle TV-Knöpfe sind gesperrt
Page 26

DE
Uhrzeit
Ur - Zum Einstellen der Uhrzeit. Nach
Suchlauf im DVB Modus ist hier kein Zugri
mehr möglich, da die Uhrzeit automatisch
aus dem Empfangssignal generiert wird.
Ausschaltzeit - Hier können Sie eine
Zeit einstellen, zu welcher sich das Gerät
abschalten soll und - falls gewünscht- in
welchen Intervallen (täglich, wöchentlich
und an welchen Wochentagen).
Einschaltzeit - Hier können Sie eine
Zeit einstellen, zu welcher sich das Gerät
einschalten soll und - falls gewünscht - in
welchen Intervallen (täglich, wöchentlich
und an welchen Wochentagen).
Einschlaf-Timer – Hier legen Sie fest nach welcher Zeit Ihr
Gerät einmalig ausschalten soll. Mögliche Einstellungen sind:
O -> Nicht ausschalten oder nach 10min -> 20min -> 30min
-> 60min -> 90min -> 120min -> 180min -> 240min.
OSD Timer - Hier legen Sie fest, nach welcher
Zeit sich die Menüs ausblenden sollen.
Auto Standby - Einstellmöglichkeit für den automatischen
Standby in Stundenschritten: O -> 3h -> 4h -> 5h.
Zeitzone - Zum Einstellen der örtlichen Zeitzone
- wird nur im DVB-T Modus angezeigt.
Time Zone - Ändern Sie Ihre aktuelle Zeitzone.
Network
Um das Gerät via Wi-Fi mit dem Internet
zu verbinden, stecken Sie bitte den
WI-FI USB Stick in die USB-Buchse; der
USB-Stick ist Teil des Standardzubehörs.
Netzwerk Kon guration - Wählen
Sie Ihren Verbindungstyp. Sie können
zwischen WI-FI und Kabel wählen
IP Kon guration - LAN
Netzwerk-Kon guration
Auto - Verbindet das Gerät
automatisch mit Ihrem Heimnetzwerk
(Standardeinstellung, empfohlen)
Manuell - Erlaubt Ihnen, die
Einstellungen der IP, Netmask, G ateway und DNS zu ändern
Wi-Fi Kon guration - Drahtlos-Netzwerk-Einstellungen
WI-FI Auto – Automatische Suche von verfügbaren Drahtlos-
Netzwerken Wählen Sie das entsprechende WI-FI Netzwerk und
geben Sie, falls erforderlich, das Passwort ein Bei erfolgreicher
Anmeldung wird das Passwort nicht erneut abgefragt
HINWEIS: Der Anmeldungsvorgang kann einige Minuten
dauern. Die automatische Wiederherstellung der Verbindung
während des TV-Betriebs kann ebenfalls ein wenig dauern
Netzwerk Info - Informationen zur Netzwerkverbindung
Netzwerk Test - Verbindungstest
Setting
OSD Sprache - Zur Auswahl der in den
Menüs zu verwendenden Sprache.
Audiosprachen - Ermöglicht die Auswahl
der Audiosprache im Digital-TV-Modus.
Untertitelsprache - Ermöglicht die
Auswahl der ersten Untertitelsprache
im Digital-TV-Modus.
Gehörrosenhilfe - Untertitel
für Hör-geschädigte.
Blauer Bildschirm - Wenn eingeschaltet,
wird bei fehlendem Eingangssignal
ein blauer Bildschirm angezeigt.
PVR File System
- PVR Aufnahme - Einstellungen
Select disk - Auswahl des USB Ports und der Disk-Partition
TimeShift Size - Auswahl der Zeitversetzung
Format Start - Hier können Sie das angeschlossenen USB-
Speichermedium mit dem FAT32-Dateisystem formatieren
WARNUNG: Alle Daten auf dem USBSpeichermedium werden gelöscht
Speed check - Schreibgeschwindigkeit auf den
angeschlossenen USB-Medien wird ermittelt
Erstinstallation - Startet die Erstinstallation.
Softwareupdate (USB) - Von Zeit zu Zeit kann der Hersteller neue
Firmware (zum Herunterladen) zur Verfügung stellen, um Ihr Fernsehgerät
auf technische Neuerungen einzustellen. Dieser Menüpunkt ermöglicht
Ihnen neue Software bzw. ein Firmwareupdate auf Ihrem Gerät
aufzuspielen. Bitte rufen Sie unsere Kunden-Hotline an oder folgen Sie
der im Internet verö entlichten Anleitung „Produktunterstützung“.
HINWEIS: TV sucht, sobald es eingeschaltet wird, automatisch nach
neuen Software-Versionen. Wenn eine neue Version gefunden wird,
fragt es, ob Sie sie herunterladen und installieren möchten. Wenn Sie
„ja“ auswählen, wird das Gerät auf die neueste Version upgedated
Werkseinstellungen - Setzt alle Menüeinstellungen
auf den Auslieferungszustand zurück.
Set wallpaper - Hintergrundbild auswählen
HDMI CEC* - Ermöglicht Ihnen die Steuerung HDMI CEC
geeigneter Peripheriegeräte über die TV Fernbedienung.
Auto-Power* - Automatisches Ein- / Ausschalten
angeschlossenen HDMI CEC fähiger Geräte.
Device Menu* - Ermöglicht Ihnen auf die Gerätefunktionen
zuzugreifen und diese mit der Fernbedienung anzupassen.
HDMI ARC* - Sendet Audiosignale von terrestrischen/Satelitensignalen
über HDMI an ein AV Gerät ohne zusätzliche Audio-Kabelverbindung.
Diese Funktion steht nur am Ausgang HDMI 2 zur Verfügung
* - HDMI CEC muss von den angeschlossenen Geräten unterstützt
werden.
Page 27

27
Application
TIP: um das SMART TV Menü dauerhaft zu aktivieren, drücken Sie den
DVD-Knopf auf der Fernbedienung oder wählen Sie es im TV Menü
HINWEIS: Bitte warten Sie etwas, während sich das Gerät mit Wi-Fi verbindet;
es kann einige Minuten dauern, nachdem Sie das Gerät eingeschaltet haben.
Zuerst müssen Sie die Netzwerkverbindung einrichten, siehe Seite xx
AppStore
Mit den ▲/▼/◄/► Tasten können Sie durch das Menü navigieren.
Um den gewünschten Inhalt anzusehen/abzuspielen, drücken Sie
[OK]. Um einen Schritt zurück zu gehen, drücken Sie die [Menü]Taste, für weitere Funktionen eine der farbigen Tasten.
Um den Appstore zu verlassen, drücken Sie [EXIT]
Home - Hauptbildschirm mit empfohlenen Filmen
und zuletzt genutzten Anwendungen
Browser - ö net den Standard Web Browser
roter Knopf – vergrößern / zoom in
grüner Knopf – verkleinern / zoom out
gelber Knopf – Seite aktualisieren
blauer Knopf – zurück zur Startseite des Browsers
Movies - Liste der verfügbaren Filme
TV Shows - Liste der verfügbaren TV Shows
Music - Liste der verfügbaren Musiktitel und Musikvideos
Watchlist - Merkliste
Apps - Liste der verfügbaren Anwendungen
Login - Erstellen Sie einen neuen Account oder melden Sie sich bei
einem existierenden Account an, um Ihren Appstore zu personalisieren
Settings -Filtereinstellungen, basierend auf
den ausgewählten Sprachen
HINWEIS: Um den Ansprüchen unserer Kunden gerecht zu werden, entwickeln
wir unsere Produkte kontinuierlich weiter. Daraus resultierend werden
immer neue Anwendungen im Appstore verfügbar sein; Anwendungen
und Inhalte im Appstore können sich ohne Ankündigung ändern. Einige
Funktionen und Inhalte können in Ihrem Land eventuell nicht verfügbar sein.
USB Multimedia Player
USB Media - Im USB Modus ist die Wiedergabe verschiedenster, von
Ihnen auf dem USB-Medium gespeicherter, Dateiformate möglich.
Drücken Sie die Taste [USB].
Der Inhalt des USB Sticks wird in verschiedenen Kategorien dargestellt:
Fotos, Musik, Filme, Text. Der Inhalt wird nach Dateitypen sortiert.
Markieren Sie mittels der Richtungstasten ◄► in der Liste die ge-
wünschte Kategorie z. B. „FOTO“. Um diese zu ö nen drücken Sie [OK ],
wählen Ihr Laufwerk aus (in der Regel „C“) und bestätigen nochmals mit
[OK].
Wenn Sie die Markierung eine kurze Zeit auf einem Bild belassen, ö net
sich ein Vorschaufenster und es werden Informationen zu diesem Bild
angezeigt. Drücken Sie jetzt die [OK] Taste, um das Bild in voller Größe
auf dem Bildschirm darzustellen. Für Musik und Filme ergibt sich die
gleiche Vorgehensweise. Auch hier erhalten Sie bereits beim Markieren
einer Datei nützliche Informationen und eine Vorschau angezeigt.
Löschen – Möchten sie eine Datei löschen, markieren Sie diese und drücken anschließend die rote Taste der Fernbedienung.Um die gewählte
Multimediafunktion zu verlassen, wählen Sie die Schalt äche „Zurück“
oder drücken so oft die Taste [EXIT] bis Sie auf der gewünschten Ebene
angekommen sind. Zum Beenden der USB Funktionen, wählen Sie
einfach eine andere Quelle aus (z.B. TV).
Media Server - Automatische Suche nach digitalen
Medienservern (DMS), die mit Ihrem Heimnetzwerk
verbunden sind, und darauf abspielbaren Inhalten
HINWEIS: Media Server werden nicht vom TV Hersteller
bereitgestellt. Sie können Software von Drittanbietern
herunterladen und auf Ihrem Computer oder NAS installieren
Miracast - Erlaubt es, Inhalt von Ihrem
Smartphone auf dem TV zu betrachten
HINWEIS: diese Funktion ist nur auf ausgewählten Smartphones verfügbar
Page 28

DE
Elektronischer Programm-Führer
Der TV Guide ist eine elektronische Programmzeitschrift, die Ihnen schnell
und aktuell eine Übersicht von allen vor programmierbaren Fernsehsendungen gibt.
Mit der Taste [TV GUIDE] rufen Sie die von den Programmanbietern übermittelten Programminformationen auf. Diese übersichtliche Darstellung
bietet Ihnen Informationen zu den gerade laufenden und auch zu später
startenden Beiträgen.
1. Nach drücken der [T V Guide] Taste wird das Programm der nächsten
7 Tage angezeigt
2. Navigieren Sie durch das Menü mit den Tasten ▼▲►◄ Sie können
damit: einen Erinnerungstimer setzen - grüne Taste Sendungen des
Vortages abfragen - gelbe Taste zum nächsten Tag springen - blaue
Taste [INFO] zeigt detailierte Infos zum markierten Beitrag an
3. mit [EXIT ] verlassen Sie den elektronischen Programmführer
USB Aufnahme*
USB Aufnahme im Digitalmodus – Ihr Fernsehgerät ist mit einer „USB
Aufnahmefunktion“ zum Speichern von Fernsehsendungen ausgestattet.
Diese Funktion ist nur im Digitalmodus, und mit einem kompatiblen USBStick oder einer USB-Festplatte verfügbar.
Funktionen
Live TV - Live-Sendung ( TV / Radio) anhalten und
zeitversetzt wiedergeben, Abspielen im schnellen Vor- oder
Rücklauf (bis zur Rückkehr zur Live-Sendung).
Sofort Aufnahme - Schnellaufnahme mit nur einem Tastendruck.
Zeitgesteuerte Aufnahme - einfach programmierbare
Aufnahme mit Hilfe des EPG (Electronic Program Guide).
• Aufnahme von TV- und Radio-Sendungen, Wiedergabe und Archivierung
auf anderen Medien z.B. Laptop.
• Die technischen Gegebenheiten erfordern für diese Funktion die
Verwendung eines High Speed USB Speichersticks.Speziell bei Timeshift
wird gleichzeitig in den Speicher geschrieben und aus ihm gelesen,
daher können nicht alle USB Speichersticks verwendet werden.
• High Speed-USB-Sticks können Sie im Fachhandel erwerben. Diese
stehen mit Speicherkapazitäten von 4GB, 8GB, 16GB und mehr zur Verfügung. Die aktuellsten Spezi kationen und Preise können Sie im Internet
in Erfahrung bringen.
• Mindestanforderung USB-Stick:
» Lesegeschwindigkeit -20 Mps (Megabit pro Sekunde)
» Schreibgeschwindigkeit -6 Mp/s(Megabit pro Sekunde)
USB-Stick einstecken
Den USB-Stick in den USB-Port auf der Geräteseite einstecken. Der Stick
wird automatisch auf seine Kompatibilität geprüft.
Die USB Aufnahme und die USB Aufnahme im Zeitversatz (Time-shift) ist,
wenn die Mindestanforderungen an den Stick erfüllt sind, sofort möglich.
HINWEIS: Wenn das Gerät den USB-Stick nicht erkennt, prüfen
Sie bitte, ob dieser im Dateisystem FAT32 formatiert ist.
Live-Sendung (TV / Radio) anhalten (Zeitversatz) *
Zum Anhalten der Live-Sendungen die Taste drücken. Das Gerät stoppt
die Live-Sendung und zeichnet sie im Hintergrund auf. Drücken Sie die
Taste erneut, um die Live-Sendung mit einem Zeitversatz aber ohne
Informationsverlust weiter anzuschauen.
Zum Vorspulen der Aufnahme, die Taste drücken (z. B. um Werbung
zu überspringen).
Zum Zugrückspulen der Aufnahme, die Taste drücken.
Sofortaufnahme
Durch Drücken der Taste [REC] können Sie sofort (ohne Programmierung)
das aktuell laufende Programm aufnehmen. Abhängig von der
Speicherkapazität wird die Sendung bis zu ihrem Ende aufgezeichnet.
Aufgezeichneten Beitrag ansehen
Nach Drücken der Taste [REC LIST] sehen Sie die Liste
aufgezeichneter Beiträge. Markieren Sie mittels der Richtungstasten
◄►▼▲ in der Liste den gewünschte Beitrag. Drücken Sie dann [OK] und
die Wiedergabe beginnt.
* - nur für modelle mit aufnahmefunktion
Produktmerkmale
Produktmerkmale : Blaupunkt
Modelle: 40/148Z; 40/133Z
Energiee zienzklasse: A+
Sichtbare Bildschirmgröße: 102 cm / 42"
Durchschnittlicher Energieverbrauch: 40W
Jährlicher Energieverbrauch: 59 kWh/year
Standby Energieverbrauch: <0,5 W
O Mode Energieverbrauch: 0 W
Bildschirmau ösung: 1920 (W) x 1080 ( H)
* - Energieverbrauch in xyz kWh pro Jahr, basierend auf dem Energieverbrauch bei einer 4-stündigen Nutzung an 365 Tagen pro Jahr. Der
tatsächliche Energieverbrauch hängt von der tatsächlichen Nutzung des
Geräts ab.
Page 29

29
Page 30

FR
Consignes de sécurité importantes
MISE EN GARDE
RISQUE DE CHOC ÉLECTRIQUE
NE PAS OUVRIR
Veuillez lire attentivement ces consignes de sécurité
et respectez les avertissements suivants avant
d’utiliser l’appareil:
• Ce téléviseur, d’un poids de plus de 20 kg, doit être soulevé et transporté
par deux personnes au moins.
• Faites attention! Ce téléviseur ne contient pas de pièces réparables par
l‘utilisateur. En cas de défaut, contactez le fabricant ou le service agréé.
Le contact avec certaines pièces à l’intérieur de l’appareil peut présenter
un danger de mort. La garantie n’est pas prévue pour les défauts issus
d’interactions non professionnelles!
• Ne retirez pas la partie arrière de l‘appareil.
Pour empêcher la propagation
d’un incendie, gardez toujours
les bougies et autres ammes
nues à distance de se produit.
• Cet appareil est conçu pour recevoir et reproduire des signaux vidéo et
audio. Toute autre utilisateur est strictement interdite.
• A n d'éviter un danger, si le cordon d'alimentation est endommagé, il
doit être remplacé par le fabricant, son agent de service ou un technicien
quali é.
• La distance idéale pour regarder la télévision est d’environ cinq fois la
diagonale de l‘écran. Un éclairage provenant d’autres sources se projetant sur l’écran peut générer des re ets et aérer la qualité d‘image.
• Veuillez prévoir une ventilation su sante et une distance appropriée de
l’appareil par rapport aux autre meubles.
• Installez le produit à au moins 5 cm du mur pour permettre une bonne
ventilation.
• Le téléviseur est conçu pour être utilisé dans un climat modéré
• Le poste de télévision est exclusivement conçu pour fonctionner dans
un lieu sec. Si vous l’utilisez en extérieur, veuillez vous assurer qu’il est
protéger contre l’humidité (pluie, éclaboussures). N’exposez jamais
l’appareil à l’humidité.
• Ne placez pas de conteneurs d’eau sur l’appareil, comme des vases,
etc. Ceux-ci pourraient être renversé, ce qui présenterait un danger
électrique. Placez l’appareil exclusivement sur des surfaces planes et
stables. Ne placez pas d’objet comme un journal ou des couvertures, etc.
sur ou sous l’appareil.
• Veillez à ne pas placer l’appareil sur des câbles d’alimentation électrique,
car cela pourrait les endommager. Les téléphones mobiles et autres
dispositifs comme des adaptateurs de réseau WLAN, des caméras de
surveillance à transmission de signaux sans l, etc. peuvent générer des
interférences électromagnétiques et il ne faut pas les placer à proximité
de l‘appareil.
• Ne placez pas l’appareil près d’éléments chau ants ou dans un lieu
directement exposé à la lumière du soleil, car cela a ecte négativement
le refroidissement de l‘appareil. Le stockage de chaleur est dangereux
et cela peut considérablement réduire la durée de vie de l‘appareil. Pour
assurer la sécurité, demandez à une personne quali ée de retirer la
saleté de l‘appareil.
• Essayez d’éviter d’abîmer les câbles secteur ou (s’il est inclus dans la
livraison) l’adaptateur secteur. L’appareil ne peut être connecté qu’avec
un câble/adaptateur secteur fourni.
• Les orages sont dangereux pour tous les appareils électriques. Si le
câblage secteur ou d’antenne est frappé par la foudre, l’appareil peut
être endommagé, même s’il est éteint. Il faut donc débrancher tous les
câbles et connecteurs de l’appareil avant l‘orage.
• Pour nettoyer l’écran de l’appareil, utilisez uniquement un chi on
humide et doux. N’utilisez que de l’eau propre, jamais de détergent et
surtout aucun dissolvant.
• Ci-dessous, nous décrivons la méthode pour xer le téléviseur à proxi-
mité d’un mur en toute sécurité. Si vous n’arrivez pas à xer le téléviseur
à son support (table) à l’aide d’une vis, nous vous recommandons de le
xer à l’aide d’une sangle et d’un boulon à œil.
Veuillez-vous assurer que les enfants ne peuvent faire basculer le téléviseur, y grimper ou s’y accrocher. Un téléviseur mal xé peut entraîner
de graves blessures à vous et vos enfants. La sangle de sécurité doit être
tendue horizontalement entre le mur et le téléviseur.
• Pour utiliser ce modèle TV comme un PC / ordinateur portable sur-
veillent il aura besoin d'être connecté via l'entrée VGA, il ne peut pas être
utilisé comme un PC / ordinateur portable moniteur via l'entrée HDMI.
L'entrée HDMI est fourni pour visionner du contenu numérique avec des
appareils externes compatibles.
• Le logiciel de la TV et le menu a ché à l’écran peuvent être changés par
le fabricant sans avis préalable
Avertissement:
• Ne connectez jamais des dispositifs externes à un appareil sous tension.
Il faut non seulement éteindre le téléviseur, mais aussi les dispositifs qui
y sont raccordés! Branchez la che de l‘appareil dans une prise murale
après avoir raccordé les dispositifs externes et l’antenne!
• Veillez toujours à prévoir un accès libre à l’interrupteur principal de
l‘appareil et à sa che secteur.
• L’appareil n’est pas conçu pour être utilisé dans un lieu de travail équipé
d‘écrans.
• L’utilisateur systématique des écouteurs à un volume élevé peut entraî-
ner une diminution irréversible de l’acuité auditive.
• Assurez-vous de jeter cet appareil et ses composants, y compris ses piles,
conformément aux normes environnementales. En cas de doute, veuillez
contacter votre autorité locale pour des détails sur le recyclage.
• Lors de l’installation de l’appareil, n’oubliez pas que les surfaces de
meubles sont traitées avec divers vernis, plastiques, etc. ou qu’elles
peuvent être polies. Les additifs contenus dans ces produits peuvent
détruire le matériau de base du pied de l‘appareil. Ceci entraînera une
accumulation de ce matériau dans la surface de meuble, ce qui est
di cile, voire impossible à éliminer.
• L’écran de votre téléviseur répond à des exigences de haute qualité et
les éventuels pixels accidentellement défectueux ont été plusieurs fois
contrôlés en détails. En raison des propriétés technologiques du procédé
de fabrication, il n’est pas possible d’éliminer totalement l’existence
d’une petite quantité de points défectueux sur l’écran (même avec le
soin optimal fourni en cours de production). Ces pixels défectueux ne
sont pas considérés comme des défauts en terme de conditions de
garantie, si leur étendue ne dépasse pas les limites dé nies par la norme
DIN.
Informations importantes concernant l’utilisation de
jeux vidéo, d’ordinateurs, de sous-titres ou d’autres
a chages d’images xes.
• Une utilisation prolongée d’un programme à images xes peut entraîner
une „image fantôme“ permanente sur l’écran LCD (on l’appareil parfois
à tort la „brûlure de l’écran“). Cette image fantôme est alors visible en
permanence sur l’écran en arrière-plan. Il s’agit d’un dommage partiellement irréversible. Vous pouvez éviter un tel dommage en respectant les
instructions suivantes:
• Réduisez le réglage de luminosité/contraste à un niveau d’a chage
minimal.
• N’a chez pas l’image xe pendant une période prolongée. Évitez
d’a cher:
» l’heure et les graphiques de télétexte,
» le menu TV/DVD, par ex. contenu DVD,
Page 31

31
» dans le mode „Pause“ (attente) : N’utilisez pas ce mode pendant
longtemps, par ex. lorsque vous regardez un DVD ou une vidéo.
» Éteignez l’appareil si vous ne l’utilisez pas.
Piles
• Observez la polarité correcte lors de l’insertion des piles.
• - N’exposez pas les piles à des températures élevées et
ne les placez pas dans des endroits où la température
peut augmenter subitement, par ex. près d’un feu ou à la
lumière solaire directe.
• - N’exposez pas les piles à une chaleur rayonnante
excessive, ne les jetez pas au feu, ne les démontez pas et
n’essayez pas de recharger des piles non rechargeables. Elles risqueraient
de furie ou d‘exploser.
» N’utilisez jamais simultanément des piles di érentes ou ne mélan-
gez pas des piles neuves avec des piles usagées.
» Jetez les piles conformément aux normes respectueuses de
l‘environnement.
» La plupart des pays de l’UE réglementent la mise au rebut des piles
par la loi.
Cd
Traitement des déchets d'équipements électriques
et électroniques (DEEE)
• Ne jetez pas cet appareil avec les déchets municipaux
non triés. Rapportez-le à un point de collecte agréé
pour le recyclage des DEEE. En faisant cela, vous aidera
à conserver les ressources et protéger l'environnement.
Contactez votre revendeur ou les autorités locales pour
plus d'informations.
Consignes de sécurité au sujet de la 3D*
• Si vous regardez l'image 3D de trop près ou pour une longue période de
temps, cela peut nuire à votre vision.
• Regarder la télévision ou jouer à des jeux vidéo qui intègrent des images
3D avec les lunettes 3D pendant une longue période de temps peut causer de la somnolence, des maux de tête ou de la fatigue pour vous et /
ou votre yeux. Si vous ressentez des maux de tête, ou vous sentez fatigué
ou somnolent, cessez de regarder la télévision et prenez du repos.
• Les femmes enceintes, les personnes âgées, les personnes sou rant de
problèmes cardiaques ou les personnes qui sou rent de somnolence
fréquente devraient s'abstenir de regarder la télévision en 3D.
• Certaines images 3D peuvent vous amener à essayer d’esquiver ou
d’éviter l'image a chée dans la vidéo. Par conséquent, il est préférable
de ne pas regarder la télévision en 3D à proximité d'objets fragiles ou à
proximité d’objets qui peuvent être facilement renversés.
• Évitez que les enfants de moins de 5 ans regardent la télévision en 3D.
Cela peut a ecter le développement de leur vision.
Avertissement au sujet des crises de photo
sensibilité ou d’épilepsie photosensible:*
• Certains téléspectateurs peuvent éprouver une crise d'épilepsie lorsqu'ils
sont exposés à certains facteurs, y compris les lumières ou images
clignotantes dans les jeux vidéo ou à la télévision.
• Si vous ou quelqu'un de votre famille ades antécédents d'épilepsie ou
de crise de photo sensibilité, veuillez consulter votre médecin avant de
regarder la télévision en 3D. De même, certains symptômes peuvent
se produire dans des conditions non précisées et sans précédent de
crise d’épilepsie. Si vous ressentez l’un des symptômes suivants, cessez
immédiatement de regarder l'image 3D et consultez un médecin: des
étourdissements, transition visuelle ou troubles de la vision, instabilité
visuelle ou du visage, tels que contractions musculaires ou spasmes oculaires, action inconsciente, convulsions, perte de conscience, confusion
ou désorientation, la perte du sens de la direction, crampes ou nausées.
Les parents doivent surveiller ces symptômes chez leurs enfants, y
compris les adolescents, car ils peuvent être plus sensibles aux e ets de
regarder la télévision en 3D.
Les crises de photosensibilité ou l’épilepsie
photosensible peuvent être réduites par les actions
suivantes :*
• Prenez des pauses fréquentes lorsque vous regardez la télévision en 3D.
• Pour ceux qui ont une vision qui est di érente dans chaque œil, ne
regarder la télévision qu’après avoir pris des mesures de correction de
la vision.
• Regardez la TV de sorte que vos yeux soient au même niveau que l’écran
3D et s'abstenir de s’asseoir trop près à la télévision.
• Ne pas regarder l’image 3D lorsque vous êtes fatigué ou malade, et
évitez de regarder l'image 3D pour une longue période de temps.
• Ne portez pas les lunettes 3D pour tout autre but que de visionner des
images 3D sur un téléviseur 3D.
• Certains téléspectateurs peuvent se sentir désorientés après avoir
regardé la télévision en 3D.
• Par conséquent, après avoir regardé la télévision en 3D, prenez un mo-
ment pour reprendre vos esprits avant de passer à une autre activité.
* - Uniquement pour les modèles avec 3D
Remarques sur la fonction de la télévision
numérique
• Toutes les fonctions liées à la télévision numérique () ne fonctionnent
que dans les pays ou régions où des signaux terrestres numériques
(MPEG-2 et H.264 / MPEG-4 AVC) DVB-T / DVB-T2 sont di usés ou si vous
avez accès à un service de câble DVB-C (MPEG-2 et H.264 / MPEG-4 AVC)
compatible . Véri ez auprès de votre revendeur local si vous pouvez
recevoir un signal / DVB-T2 DVB-T ou le téléviseur sera utilisée ou
demandez à votre fournisseur d'accès si leur service de câble DVB-C est
conçu pour un fonctionnement intégré avec ce téléviseur.
• Votre fournisseur de câble peut facturer des frais pour leurs services, ou
vous obliger à accepter ses conditions générales de vente.
• Ce téléviseur est conforme à la norme DVB-T / DVB-T2 et les spéci-
cations DVB-C, mais la compatibilité avec les futures émissions de
télévisions numériques par câble DVB-T / DVB-T2 numérique terrestre et
DVB-C numérique ne sont pas garantis.
• Certaines fonctions de la télévision numérique peuvent ne pas être dis-
ponibles dans certains pays / régions et le câble DVB-C nemérique peut
ne pas fonctionner correctement avec certains fournisseurs.
Remarque parental
• Ce téléviseur comporte de nombreuses fonctionnalités avancées qui lui
permet d'accéder à di érentes applications, y compris certains sites Web,
messageries instantanées et les réseaux sociaux sur Internet.
• Dans le cas d’utilisation du produit par des enfants de moins de 18 ans,
Il est recommandé de le placer sous la surveillance des parents ou d'un
tuteur.
• Si vous ne souhaitez pas que votre enfant utilise les fonctionnalités
d'Internet, il est recommendé de pas con gurer le réseaux. Alternativement, vous pouvez débrancher le câble Ethernet ou la clef Wi-Fi USB si
vous ne voulez pas avoir accès à ces fonctionnalités.
31
Page 32

FR
Contenu de la boîte
Les pièces suivantes accompagnent ce téléviseur:
• 1x TV
• 1x télécommande
• 2x piles AAA
• 1x Clef USB Wi-Fi
• 1x Mode d’emploi
• 1x pied
• 1x le col de support
• 1x câble RF
• 1 x Kit d'installation
• Lunettes 3D (uniquement pour les modèles avec fonction 3D)
Fixation du pied
Veuillez suivre les instructions de la notice d'installation du stand,
située dans le sac d'accessoires
Démarrage – con guration initiale
1. Avec le câble RF fourni, raccordez le
téléviseur à la prise murale de l’antenne
de télévision. Raccordez le câble
d’alimentation électrique à la prise
électrique.
2. Insérez la clef USB Wi-Fi dans le port USB.
3. Allumez l'appareil avec marqué
interrupteur ON/O
4. Insérez les piles fournies dans la
télécommande et appuyez sur le bouton
Veille pour allumer le téléviseur.
Ecran de première installation.
S’il n’apparaît pas, appuyez sur la touche [MENU] de la télécommande,
puis sur 8-8-8-8, et le menu apparaîtra. Si vous souhaitez modi ez des
paramètres par défaut, utilisez les touches de déplacement ▲/▼/◄/►.
Pour quitter ce menu à tout moment, appuyez sur la touche [EXIT].
Sélectionner, les paramètres souhaités dans l'écran de première
installation.
Antenne DVB - Sélectionnez le type de di usion numérique. Vous
pouvez choisir entre air (DVB-T) ou câble (DVB-C).
Langue - Réglage de la langue dans le Menu TV.
Pays - Dé nir le pays souhaité.
Mode Tunning - Choisissez si vous souhaitez uniquement régler en
reception numérique (DTV) ou analogique (ATV) ou analogique et
numérique (DTV + ATV)
Opérateur - Sélectionnez votre fournisseur de câble. Si votre
opérateur de câble ne gure pas en sélectionner d'autres. (Disponible
uniquement si DVB Antenne est dé nie sur Câble)
Environnement – Réglage pour économie d’énergie. Pour économiser
de l'énergie sélectionnez
LCN – si vous souhaitez classer les canaux dans l’ordre (s'applique
uniquement aux chaînes DVB-C et DVB-T) régler LCN sur ON .
7. Appuyez sur Réglage auto pour lancer le processus de réglage.
8. Préréglages de canaux DVB-C en option:
Conservez tous les paramètres par défaut tel que recommandé.
Si des chaînes DVB-C ne sont pas trouvées, contactez votre fournisseur
d'accès pour obtenir le "network ID" valide. Puis e ectuez une nouvelle
recherche. Appuyez sur la touche [MENU], sélectionnez "Recherche
automatique des canaux" et entrez ici l' ID de réseau obtenu. Commencez
votre recherche en pressant [OK].
TIP: S‘il vous manque des chaînes, c’est certainement dû à l’intensité du
signal et vous devriez envisager de connecter l’ampli cateur de signaux et de
ré-syntoniser le téléviseur. Après la syntonisation, l’écran suivant s‘a chera.
TIP: Dans le cadre de nos e orts continus pour réduire la consommation
d'énergie, nous avons ajouté une nouvelle fonction à ce téléviseur,
appelée Ecohome (elle apparaitra sur l’écran de première installation).
En utilisant cette fonction, vous réduirez la consommation énergétique
de votre TV d’environ 15% par rapport aux autres modes. La luminosité
de l’image est réduite lorsque vous utilisez la fonction Ecohome. Si ce
mode n’est pas adapté à votre environnement, vous pouvez choisir un
autre mode si nécessaire. (Veuillez noter que le mode Professionnel est
le mode optimal par défaut, cependant la consommation énergétique
est d’environ 15% supérieure à celle du mode Ecohome).
Télécommande
STANDBY – Allumez le téléviseur lorsqu’il est en veille ou vice-versa.
MUTE – Coupez le son ou vice-versa.
DTV - Règle la source sur la Télévision Numérique Terrestre.
RADIO
- TV/RADIO - bascule entre TV et Radio en mode numérique.
USB – Passe à la source USB.
ATV – Passe à la source de télévision analogique.
DVD – SMART TV Menu
0 – 9 - 0 à 9 pour sélectionner directement une chaîne de télévision.
TV GUIDE – Ouvre le guide TV sur 7 jours (mode numérique).
– Pour retourner à la dernière chaîne regardée.
VOL ▲/▼ – Pour augmenter/réduire le niveau sonore.
P. MODE – Naviguer entre les di érents paramètres image.
S. MODE – Naviguer entre les di érents paramètres audio.
FAV – Pour a cher le menu des favoris.
CH ▲/▼ – Pour passer à la chaîne suivante ou précédente.
(▲/▼/◄/►/ OK) – Vous permet de naviguer dans les menus à l’écran et de
régler les paramètres système selon vos préférences.
MENU – Pour a cher le menu d’a chage à l’écran.
EXIT –Pour quitter tous les menus.
SOURCE – Pour a cher le menu d’entrée/source.
INFO –
Appuyez deux fois pour consulter les informations sur le pro-
gramme en cours.
ASPECT – Pour faire passer l’écran entre les di érents formats d‘images.
SLEEP – Appuyez plusieurs fois pour passer entrer les di érentes options
de mise en sommeil.
AUDIO – Pour modi er la langue audio (si disponible).
SUBTITLE – Pour activer/désactiver les sous-titres en bas de l’écran.
TEXT – Teletext mode – Pour saisir un télétexte
TEXT HOLD
d‘a chage
TEXT/DVD ZOOM - DVD mode
modifier la taille de l'écran en mode télétexte
DVD MENU
Rec
seur.
DVD SETUP
Rec List
précédemment.
bouton pour 4 secondes
GOTO
A-B
deuxième fois pour retourner au point
ANGLE
disponible)
- HOLD - Teletext mode - Mettre en attente la page en cours
1
– Pour agrandir - Mode Télétex te - Pour
DISPLAY – Pour éteindre l’écran lorsqu’on écoute la radio
1
– DVD mode – Pour a cher le menu du disque DVD
2
– PVR mode - Pour enregistrer ce qui s’a che en cours sur le télévi-
1
– DVD mode – Pour a cher le menu de con guration DVD
2
– PVR mode - Ouvre la liste de ce que vous avez enregistré
–Pour redémarrer le chapitre courant.
– Pour passer au chapitre suivant.
/
1– Pour arrêter la lecture. / Pour éjecter le disque Appuyez sur le
– Pour lire en mode de retour rapide.
– Pour lire en mode de retour rapide.
– Pour lire/mettre en pause
1
– DVD mode – Pour accéder à un chapitre spéci que
1
– DVD mode – Appuyez une fois pour dé nir un point, appuyez une
1
– DVD mode – Sélectionner un angle de DVD di érent (si
Page 33

33
REPEAT – DVD mode1 - USB mode -Pour répéter la lecture
REVEAL – Teletext mode – Pour révéler ou masquer les mots masqués.
SIZE – Teletext mode - Pour modi er la taille d’a chage dans le mode
Télétexte
TITLE 1 – DVD mode – Pour a cher le menu de titres du DVD
1
D.DIS
– DVD mode – Pour a cher les informations sur le disque courant
INDEX – Teletext mode – Pour a cher la page d‘index
Boutons Rouge, Vert, Jaune, Bleu
l'a chage à l'écran.
3D jaune 3D
1 -fonctions disponibles uniquement pour les téléviseurs avec lecteur DVD
intégré
2 - fonctions disponibles uniquement pour les téléviseurs avec lecteur de PVR
intégré
3 - fonctions disponibles uniquement pour les téléviseurs avec lecteur de 3D
3
– bascule entre les di érents paramètres 3D.
– Autres fonctions du télétexte et de
Boutons du téléviseur
Vol+ Augmentation du volume et déplacement à droite dans
le menu
Vol- Réduction du volume et déplacement à gauche dans
le menu
CH+ Passage au programme/à la chaîne suivante et
déplacement vers le haut dans le menu
CH- Passage au programme/à la chaîne précédent et
déplacement vers le bas dans le menu
MENU A che le Menu/l’a chage à l‘écran
SOURCE A che le menu de source d‘entrée
STANDBY Veille Mise sous/hors tension
Choix de l’entrée/la source
Pour passer entre les di érentes entrées/
connexions.
a) Utilisation des touches de la
télécommande:
1. Appuyez sur [SOURCE/ AV] – Le menu
Source s‘a che.
2. Appuyez sur [▼] ou [▲] pour sélectionner
l’entrée de votre choix.
3. Appuyez sur [OK].
b) Utilisation des boutons du téléviseur:
1. Appuyez sur [SOURCE].
2. Déplacez-vous vers le haut/bas à l’aide des
boutons CH+/CH- jusqu’à l’entrée/la source
de votre choix.
3. Appuyez sur Vol+ pour changer l‘entrée/la source par celle qui est
sélectionnée.
Connections
USB
Port USB
HDMI 1, 2, 3
Entrée HDMI 1, 2, 3
VGA(PC)
Entrée VGA-ordinateur
VGA (PC) Audio In
Entrée audio ordinateur 3,5 mm
Mini AV
Entrée VIDÉO + Entrée audio composante/vidéo
Mini YPbPr
Entrée HD Mini composante
SCART
Entrée SCART
CI Card IN
Entrée module d’interface commune
RF In
Entrée antenne RF / TV
RJ 45
Ethernet
Digital Audio Out
Sortie numérique Coax
HEADPHONES
Sortie d’écouteur à 3,5 mm
33
Page 34

FR
Fonctionnement du menu TV
Pour accéder à ce menu, appuyez sur la touche [MENU] de la
télécommande. Pour entrer dans un menu, appuyez sur [OK]. Si vous
souhaitez modi ez des paramètres par défaut, utilisez les touches de
déplacement (▲/▼/◄/►). Pour con rmer un réglage, appuyez sur la
touche [OK]. Pour quitter ce menu à tout moment, appuyez sur la touche
[EXIT].
Image
Mode Image - Choisissez entre
les pré-réglages suivants.
Standard - Choisissez entre
les pré-réglages suivants.
Dynamique - Paramètres recommandés
pour des images à mouvement rapide
Doux - pour une couleur plus
claire et moins lumineuse
Personnalisé - Vous permet de modi er
tous les paramètres manuellement
Ecohome - Ecohome consomme
15% d’énergie en moins.
Contraste - Permute
l’équilibrage entre le noir et le blanc.
Luminosité - Augmente ou réduire la luminosité de l‘image.
Saturation - Augmente la couleur à partir du noir et blanc.
Ton - Vous permet d’augmenter ou de réduire
le niveau de teinte dans l‘image.
Netteté - Augmentez ou réduisez la netteté de l‘image.
Température des couleur - Choisissez entre les pré-réglages suivants.
Normale - Paramètres par défaut
Chaude - le rouge dans l‘image
Froide - Augmente le bleu dans l‘image
Ratio d'aspect - Dans l’UE, le format d’image varie
selon la chaîne/di usion. Un certain nombre d’options
di érentes peuvent répondre à vos besoins.
Auto - A che automatiquement le meilleur format d’image.
L’image est dans la position correcte. Peut comporter
des bandes noires en haut/bas et/ou sur les côtés.
Plein écran - A che l’image depuis le di useur sans modi cation.
Zoom 1 / 2 - L’image est dans la proportion correcte,
mais elle est agrandie en plein écran.
4:3 - A che l’image au format 4:3 dans sa taille d‘origine. Des
barres latérales sont a chées pour remplir l’écran 16:9.
16:9 - Remplit l’écran avec un signal 16:9 standard.
Réduction du bruit – Choisissez entre les pré-réglages suivants.
Les paramètres 3D*
Pour un e et d’image 3D optimal, regardez vos
programmes TV avec un angle vertical + / - 10°.
Type de connexion 3D - Parfois, l’image 3D d’un périphérique 3D
peut-être a chée de manière incorrecte. Choisissez parmi les options
suivantes pour corriger cela. Vous pouvez alterner ces paramètres
en appuyant sur le bouton ’3D 'de votre télécommande.
3D o - Désactive la 3D
Side by Side 3D - ce format est couramment utilisé dans la di usion
3D. Il divise par deux la résolution horizontale des vidéos pour
stocker les images pour les yeux gauche et droit dans chaque trame.
Il a che de manière e cace des images jusqu'à 960 x 1080 pixels
pour chaque œil, permettant aux chaînes de télévision de di user
du contenu 3D à une bande passante beaucoup plus faible que la
3D Blu-ray. Les résolutions prises en charge sont limitées à 720p et
1080i pour les programmes TV en 3D. Les utilisateurs auront besoin
de sélectionner manuellement le format correct 3D pour a cher
correctement du contenu 3D side-by-side sur un téléviseur 3D.
Top Bottom 3D - ce format est une alternative pour la di usion
3D, qui est assez semblable à la 3D side-by-side, sauf qu'il divise
par deux la résolution verticale au lieu de la résolution horizontale.
Disponible en premier lieu à une résolution de 720p, la 3D Top
Bottom o re 1280 pixels à l'horizontale. Le nombre élevé de pixels
est généralement considéré comme plus adapté à l'a chage
panoramique de mouvements dans les émissions sportives.
Frame packing (Compression de trame) - Comme son nom
l'indique, ce format empile les images de l’œil gauche et de l’œil
droit dans chaque trame pour conserver la résolution originale
du contenu a n de restituer les meilleures images 3D. La plupart,
sinon tous, des disques Blu-Ray 3D 1080p et des jeux 3D 720p de
la PS3 sont produits en utilisant cette technique. Un autre facteur
clé de di érenciation est que les téléviseurs 3D sont en mesure
de détecter automatiquement les signaux 3D « frame packing » et
d'a cher correctement le contenu sans intervention de l'utilisateur.
Exchange 3D L/R (Échange 3D G/D) - change la
séquence d'images pour un visionnage di érent.
2D à 3D - modi e l’image pour passer de la 2D à la 3D. Veuillez noter que
le contenu est transformé par la télévision, les e ets sont ainsi limités.
Profondeur 3D - Profondeur de photos convertis de la 2D à la 3D.
3D à 2D - change l'image du format 3D au format 2D.
* - uniquement pour les modèles avec fonction 3D
Page 35

35
PC
Réglage automatique - Vous permet de
con gurer automatiquement le téléviseur
pour l’utiliser en tant qu’écran d’ordinateur.
Décalage H - Modi e la position
horizontale de l‘image.
Décalage V- Modi e la position
verticale de l‘image.
Taille - augmentation de la taille de l'image.
Phase - Pour régler le temps de retard de la
phase a n de réduire le bruit des images
CONSEIL : Si l’ordinateur reste inactif
pendant un certain temps, le téléviseur
passe à l’état ‚sommeil‘ (l’écran s’éteint pour
économiser de l‘énergie). Pour le réactiver, appuyez sur la touche Veille.
Son
Mode audio - Choisissez entre
les pré-réglages suivants.
Standard - Paramètres par défaut
Musique - Met la musique en
évidence par rapport aux voix
Vidéo - Fournit un son complet
en direct pour les lms
Personnalisé - Sélectionne vos
paramètres de son personnel
Sport - Met le son en évidence
pour les sports
CONSEIL : Il n’est possible de
régler les niveaux de sons aigus
et que lorsque le mode Son ‚Personnel‘ est sélectionné.
Aigu - Pour régler la quantité de haute fréquence dans le son.
Bas - Pour régler la quantité de basse fréquence dans le son.
Équilibrage - Pour permuter le son entre les haut-
parleurs de gauche et de droite.
Volume auto (AVL) - Si ‘Activé’ est sélectionné, le volume reste
à un niveau constant quelle que soit l’entrée/la source.
Son surround - Vous permet d'activer le son surround ON ou OFF.
Sortie numérique - C’est la sortie audio COAX numérique.
Choisissez entre les options suivantes:
Désactivée - Désactivé
Auto - Sélectionne automatiquement les meilleurs paramètres
PCM - Sélectionnez cette option si vous raccordez le
téléviseur à une chaîne hi- stéréo via un câble coaxial
(la modulation à code d’impulsions (PCM) est une
représentation numérique d’un signal analogique)
Commutation AD - Augmente ou réduit le volume général.
Volume de AD - Volume pour malvoyants.
Canal
Antenne DVB - Régler le type de signal DTV
AIR - terrestre (DVB-T)
Câble - Câble (DVB-C)
Réglage auto - Vous permet de resyntoniser le téléviseur pour toutes les
chaînes numériques, les stations de radio
numériques et les chaînes analogiques.
Réglage manuel ATV - Vous permet
de syntoniser manuellement
votre signal analogique.
Réglage manuel DTV - Vous
permet de syntoniser manuellement
votre signal numérique.
Modi cation de programme - Vous permet de supprimer,
d’ignorer et d’ajouter des chaînes favorites.
Information sur le signal - Information sur la puissance du signal.
Informations CI - Les services de TV à la carte nécessitent d’insérer
une „carte intelligente“ dans le téléviseur. Si vous vous abonnez à
un service de TV à la carte, le fournisseur vous remettra une ‚CAM‘
et une „carte intelligente“. Il est alors possible d’insérer la CAM
dans le PORT D’INTERFACE COMMUNE (entrée de carte CI).
Liste enregistrées - Liste des émissions TV enregistrées.
Calendrier - Liste de vos rappels de programmes.
OAD - on / o de la mise a jour.’
OAD scan ‘ - Permet de numériser pour ‘les mises á jour ADO
Verrouillage
Le mot de passe par défaut est 0000.
Verrouiller systéme - Vous permet
de verrouiller ou de déverrouiller le
menu. Vous devrez saisir un mot de
passe à 4 chi res. Utilisez la touche ◄
pour quitter la saisie du mot de passe.
Utilisez la touche ► pour e acer.
Dé nir mot de passe - Remplace
le mot de passe par défaut.
Bloquer programme - Bloque
des chaînes spéci ques.
Accord parental - Bloque l'accès aux chaînes
en se basant sur les restrictions d'âge.
Blocage des touches - Bloque les touches du TV.
O - Tous les boutons du téléviseur sont déverrouillées
Partial - Seulement les boutons Standby est déverrouillé
Plein - Tous les boutons du téléviseur sont verrouillées
35
Page 36

FR
Heure
Horloge - Règle la date et l’heure.
Heure d’arret - Vous permet de
dé nir une heure spéci que pour
éteindre votre téléviseur.
Heure d’allumage - Vous permet de
dé nir une heure spéci que pour allumer
votre téléviseur, la chaîne qu’il a chera
alors, la source sur laquelle il sera et aussi
le volume. Il est ensuite possible de faire
basculer cette fonction pour qu’elle se
répète tous les jours ou un jour donné.
Fuseau horaire - Modi ez votre
fuseau horaire courant.
Minuterie veille - Vous permet de régler la minuterie de mise
en sommeil pour que le téléviseur s’éteigne automatiquement
après un délai dé ni. Désactivé -> 10min -> 20min -> 30min
-> 60min -> 90min -> 120min -> 180min -> 240min.
Veille automatique - Faites basculer la fonction
pour l’activer et la désactiver.
OSD Minuteur - Vous permet de régler le délai pendant lequel
le menu à l’écran reste a ché avant de disparaître.
Fuseau horaire - Changez votre fuseau horaire actuel.
Network
Pour connecter le téléviseur au réseau
via une connexion Wi-Fi gratuite, insérer
la clé USB Wi-Fi au port USB. La cled
USB Wi-Fi fait partie des accessoires.
Con guration du réseau - Sélectionnez
votre type de connexion. Vous pouvez choisir
entre une connexion Wi-Fi ou par câble.
IP Con guration - LAN paramètres
de connexion réseau
Auto - connectera le téléviseur
automatiquement à votre réseau
domestique (c'est le réglage par
défaut et fortement recommandé)
Manuel - Permet de modi er manuellement les informations
IP, Netmask , Gateway et les informations DNS.
Wi-Fi con guration - réglage des paramètres de
connexion au réseau sans l Wi-Fi auto search
Recherche automatique d'une connexion Wi-Fi - Recherche
automatique des réseaux sans l disponibles. Sélectionnez le
réseau Wi-Fi désiré et entrez le mot de passe si le réseau est protégé.
Une fois le mot de passe accepté, il ne sera plus demandé.
REMARQUE: le processus de connexion peut durer quelques minutes,
merci pour votre patience. La re-connexion automatique lors de la
mise sous tension de la TV peut ;egalement prendre du temps.
Network Info - Informations sur les paramètres réseaux
Network Test - test des connexions réseaux
Setting
Langue - Vous permet de modi er
la langue du menu.
Langues Audio - Vous permet de sélectionner
la langue audio en mode TV numérique.
Langues des sous-titres - Vous permet
de sélectionner la langue des soustitres en mode TV numérique.
Sous-titrage malentendants - Si le
signal prévoit une assistance pour les
malentendants, il est possible d’a cher les
sous-titres en appuyant sur “Subtitle”. Si vous
activez la fonction Malentendant et passez à
une chaîne prenant en charge les sous-titres
pour les malentendants, les sous-titres seront automatiquement activés.
Ecran Bleu - Modi e l’arrière-plan quand il n’y apas
d’entrée entre un arrière-plan transparent et bleu
(seulement disponible sur certaines sources).
Système des chiers PVR - options d'enregistrement PVR
Sélection du disque - Sélectionnez le por t USB et le disque
Importance du décalage de temps - Régler le format de l'heure.
Formatage Start - Vous pouvez formater le périphérique de stockage
USB connecté au format FAT 32 .
ATTENTION: toutes les données du
périphérique USB seront supprimées.
Vitesse Check - Tests de la vitesse d'écriture des
périphériques de stockage USB connectés.
Première installation Mise à jour logiciel (USB) - De temps en temps, nous pouvons publier
un nouveau progiciel pour améliorer le fonctionnement du téléviseur
(disponible en téléchargement). Ce menu vous permet d’installer le
nouveau logiciel/progiciel sur le téléviseur. Des détails supplémentaires sur
la façon de le faire seront publiés avec le progiciel. Contactez l’assistance
téléphonique ou référez-vous à la section ‚Assistance produit‘ du site Web.
REMARQUE: le téléviseur va automatiquement chercher les mises a jour
du logiciel à chaque fois qu'il sera activé. Si un nouveau logiciel est trouvé,
il vous demandera si vous souhaitez le télécharger et l'installer. Si vous
sélectionnez "Oui" la mise a jour de la dernière version du logiciel est lancée.
Restaurer les paramètres d'usine - Ceci réinitialise
les menus aux paramètres usine.
Set wallpaper- Régler la fond d’écran et a chage.
HDMI CEC* - Permet de faire fonctionner les appareils
connectés via HDMI avec la télécommande du téléviseur.
Arrêt automatique* - met automatiquement en marche
/ arrêt les appareils connectés via HDMI CEC.
Menu des périphériques* - Permet d'accéder au
menu des périphériques et d'exploiter leur menu
en utilisant la télécommande du téléviseur.
HDMI ARC* - Envoie le signal audio de la di usion terrestre / satellite
via HDMI au récepteur AV sans utiliser de câbles audio supplémentaires.
Cette fonction n'est disponible que sur la sortie HDMI 2.
* - La norme HDMI CEC doit être supportée par l'appareil connecté.
Commence la première installation.
Page 37

37
Application
ASTUCE: Pour accéder au menu SMART TV á tout instant,
appuyez sur la touche DVD de la télécommande ou
sélectionner á partir du menu du téléviseur.
NOTE: merci de patienter pendant que la télévision se connecte à une
connexion Wi-Fi gratuite. Cela peut prendre quelques minutes après
avoir allumé la télévision. A la premiére utilsation il est necessaire
de con gurer la connexion réseau comme décrit à la page xx.
AppStore
Vous pouvez naviguer dans le menu en utilisant les boutons ▲/▼/◄/►.
Pour con rmer votre séléction appuyer sur la touche [OK], pour
revenir en arriére appuyer sur la touches [Menu] et pour accéder
aux fonctions supplémentaires utliser les boutons de couleurs.
Pour quitter Appstore appuyez sur le bouton [EXIT].
Home - Écran d'accueil avec les lms recommandés
et les applications récemment ouvertes
Browser - Ouvre le navigateur Web par défaut.
Bouton rouge - Zoom avant
Bouton vert - Zoom arrière
Bouton jaune - Actualiser la page
Bouton bleu - Retour à l'écran d'accueil du navigateur.
Movies - Liste des lms disponibles
TV Shows - Liste des émissions de télévision disponibles
Music - Liste des musiques et clips disponibles.
Watchlist - Liste des lms à regarder plus tard.
Apps - Liste des applications disponibles
Login - Créer un compte ou login à un compte
existant pour personnaliser votre AppStore.
Settings - lter d’application en function de langue sélectionné
REMARQUE: Pour répondre aux attentes de nos clients, nous
travaillons a l’améliorons de nos produits. Pour cette raison et dans
le cadre de nos e orts continus, de nouvelles applications seront
ajoutées en permanence à AppStore. Les applications et de contenus
dans AppStore peuvent être modi és sans préavis. Certaines contenus
ou fonctions peuvent ne pas être disponibles dans votre pays.
Mode USB / Lecteur multimédia
Multimedia - Le mode USB permet de lire di érents types de contenus
que vous avez enregistrés sur votre clé USB.
Veuillez vous référer à la page des caractéristiques techniques pour
connaître les types de chiers compatibles
Lors d’une permutation à une source USB, l’écran de menu suivant s‘a che.
Le contenu sera divisé par Photo, Musique, Film et Texte en fonction du
type de chier.
1. Vous pouvez naviguer à travers les menus à l’aide des touches de déplacement ▲/▼/◄/►. Pour con rmer l’élément que vous souhaitez lire/
a cher, appuyez sur la touche [OK].
2. Sélectionnez le disque de votre choix. (Si votre disque ne possède
qu’une seule partition, vous ne verrez qu’un seul élément).
3. Vous pouvez alors accéder à l’élément. Appuyez sur [OK] pour l’a cher.
4. Pendant l’a chage, vous contrôlez l’élément en utilisant ou en appuyant
sur (i) et à l’aide des touches ▲/▼/◄/► et appuyez sur (OK)
Multimédia DLNA DMP ’’SAME DESCRIPTION IN THE FR MENU?
- Recherche automatique des serveurs de médias numériques
(DMS) connectés à votre réseau domestique et and provide
playback and rendering of content form media servers
REMARQUE: Médias serveur n'est pas fourni par le fabricant du téléviseur,
vous pouvez télécharger un logiciel tiers et l’installer votre ordinateur ou NAS.
Miracast’’SAME DESCRIPTION IN THE FR MENU? - Permet
d'a cher le contenu de votre smart phone sur l'écran TV.
REMARQUE: La fonction est disponible uniquement
sur le smart phone sélectionné.
REMARQUE: le téléviseur va automatiquement chercher les mises a jour
du logiciel à chaque fois qu'il sera activé. Si un nouveau logiciel est trouvé,
il vous demandera si vous souhaitez le télécharger et l'installer. Si vous
sélectionnez "Oui" la mise a jour de la dernière version du logiciel est lancée.
37
Page 38

FR
Guide TV sur 7 jours
Le Guide TV est disponible dans le mode TV numérique. Il fournit des
informations sur les programmes à venir (s’ils sont pris en charge par la
chaîne numérique). Vous pouvez a cher les dates/heures de début et de
n de tous les programmes et de toutes les chaînes pour les 7 prochains
jours et dé nir des rappels.
1. Appuyez sur [GUIDE TV]. Le Guide TV sur 7 jours suivant apparaît.
2. Naviguez à travers le menu à l’aide des touches ▲/▼/◄/►.
Vous pouvez alors:
Enregistrer le canal sélectionné et le programme en appuyant sur le
bouton rouge. * Cette opération n'est possible qu'avec les modèles
dotés de la fonction PVR
Dé nissez un rappel en appuyant sur VERT.
A chez un jour précédent en appuyant sur JAUNE.
A chez le jour suivant en appuyant sur BLEU.
3. Appuyez sur [EXIT] pour quitter le Guide TV sur 7 jours.
Enregistrement USB *
Un utilitaire d’enregistrement USB est incorporé dans ce téléviseur. Cette
fonction est disponible dans le mode numérique, lorsqu’elle est utilisée
en conjonction avec une clé USB ou un disque dur USB compatible. Les
avantages sont les suivants:
• Mise en pause du téléviseur en direct, puis lecture, avance rapide et
retour rapide (jusqu’au point de di usion en direct).
• Enregistrement par un seul bouton, si vous décidez d’enregistrer le
programme en cours.
• Enregistrement facilement programmable depuis le Guide TV sur 7 jours
• Enregistrez la télévision et regardez l’enregistrement sur votre ordinateur
de bureau/portable.
En raison de la nature du produit, il est nécessaire d’utiliser une clé USB
haute vitesse (du fait que le téléviseur lit depuis et écrit vers la clé USB en
même temps, il est possible que certaines clés USB ne soient pas adaptées).
Caractéristique minimale – Clé USB
Vitesse de lecture - 20 Mo/s(mégaoctets par seconde)
Vitesse d‘écriture - 6 Mo/s(mégaoctets par seconde)
Mise en pause de la télévision en direct (changement
d’heure) *
La mise en pause de la télévision en direct est très simple.
Appuyez sur la touche play/pause (lecture/pause) et le téléviseur se
mettra en pause et le contenu en direct sera enregistré. Pour reprendre la
lecture, appuyez à nouveau sur play/pause.
- Appuyez sur la touche d’avance rapide pour avancer dans
l’enregistrement (par ex. pour ignorer les publicités).
- Appuyez sur la touche de retour rapide pour retourner en arrière dans
l’enregistrement (par ex. si vous avez avancé trop loin).
CONSEIL : Lorsque vous mettez le téléviseur en veille ou quand vous changez
de chaîne, la mémoire de changement d’heure est e acée. Pour redémarrer
le changement d’heure, vous devez appuyer sur la touche play/pause.
Enregistrement en un seul appui de touche
Vous pouvez décider à tout moment d’enregistrer la chaîne en cours
de visionnage. Pour ce faire, vous devez appuyer sur la touche [REC]
(enregistrer).
CONSEIL : Ce téléviseur contient une antenne TV, donc il
ne peut enregistrer que la chaîne que vous regardez ou une
chaîne tandis que le téléviseur est en mode Veille.
REMARQUE : La fonction d’enregistrement USB n’est disponible que dans
le mode TV numérique. En raison des lois relatives aux droits d’auteur
et des copies/enregistrements illégaux, il n’est pas possible d’enregistrer
vers une autre source de sortie ou depuis une autre source d’entrée.
* - Uniquement pour les modèles avec PVR
Fiche produit
Fournisseur: Blaupunkt
Model: 40/148Z; 40/133Z
Classe énergétique: A+
Taille de l'écran visible (diagonale): 102 cm / 42"
Consommation d'énergie en mode
moyen:
Consommation d'énergie annuelle *: 59 kWh/year
Consommation en veille: <0,5 W
Consommation d'énergie en mode arrêt: 0 W
Résolution d'écran: 1920 (W) x 1080 ( H)
* - La consommation d'énergie XYZ kWh par an, basés sur la consommation d'énergie d'un téléviseur fonctionnant 4 heures par jour pendant
365 jours. La consommation d'énergie réelle dépendra de la façon dont
la television sera utilisée.
40W
Page 39

39
39
Page 40

IT
Istruzioni di sicurezza importanti
ATTENZIONE
PERICOLO DI SCOSSA ELETTRICA
NON APRIRE
Si prega di leggere le seguenti istruzioni di sicurezza
e di rispettare le avvertenze prima di utilizzare
l'apparecchio:
• La TV ha un peso superiore a20 kg e va sollevata e trasportata da
almeno due persone.
• Attenzione! La TV non contiene parti che possono essere riparate
dall’utente. In caso di guasti contattare la ditta costruttrice ol'assistenza
autorizzata. Il contatto con alcune parti all’interno dell’apparecchio può
mettere gravemente arepentaglio la vita. La garanzia non si estende
aguasti causati da interventi non professionali!
• Non rimuovere la parte posteriore dell’apparecchio
Al ne di evitare il propagarsi di
un eventuale incendio tenere
sempre candele oaltre amme
libere ben lontane dal prodotto.
• L’apparecchio è progettato per la ricezione e la riproduzione di segnali
video e audio. Qualsiasi altro tipo d'impiego è severamente vietato.
• Per evitare il pericolo, Il cavo di alimentazione danneggiato deve essere
sostituito dal produttore o dal centro di assistenza autorizzato.
• La distanza ideale per guardare la TV è pari acirca cinque volte la dia-
gonale dello schermo. Eventuali raggi di luce sullo schermo provenienti
da altre fonti luminose possono causare ri essi e ledere la qualità
dell’immagine.
• Si prega di garantire aerazione su ciente e adeguata distanza tra
l’apparecchio ed altri mobili oarredi.
• Il prodotto deve essere installato adistanza dal muro di almeno 5
centimentri per favorire la ventillazione.
• Si consiglia l’utilizzo del prodotto in condizioni di clima moderato.
• Il set TV è progettato esclusivamente per funzionare in spazi asciutti.
Se si utilizza l’apparecchio in ambienti esterni è necessario assicurarsi
che sia protetto contro l’umidità (pioggia, schizzi d’acqua). Mai esporre
l’apparecchio all’umidità.
• Non poggiare contenitori con acqua sull’apparecchio, come vasi ecc. Pot-
rebbero infatti accidentalmente cadere e mettere arischio la sicurezza
per via dei collegamenti elettrici. Poggiare l’apparecchio esclusivamente
su super ci piane e stabili. Non collocare oggetti come giornali ocoperte
ecc. né sopra né sotto l’apparecchio.
• Assicurarsi che l’apparecchio non poggi su cavi di alimentazione, poiché
potrebbero subire danni. Itelefonini cellulari ed altri dispositivi come
adattatori WLAN, telecamere di sorveglianza con segnale di trasmissione
senza lo ecc. possono causare interferenze elettromagnetiche e non
vanno pertanto collocati nelle vicinanze dell’apparecchio.
• Non collocare l’apparecchio vicino ad elementi di riscaldamento oin
zone con irradiazione solare diretta al ne di evitare e etti negativi sul
ra reddamento dell'apparecchio. L’accumulo di calore è pericoloso
e può ridurre di molto la vita utile dell’apparecchio. Per ragioni di
sicurezza chiedere alla persona quali cata di rimuovere le impurità
dall’apparecchio.
• Cercare di evitare danni al cavo di rete o(se parte della fornitura)
all’adattatore di rete. L’apparecchio può essere connesso soltanto con un
cavo di rete/adattatore ricevuto nella fornitura.
• Itemporali sono pericolosi per tutti gli apparecchi elettrici. Se icavi di
rete odell'antenna sono colpiti da un fulmine, l’apparecchio potrebbe risentirne e subire danni, anche se spento. Pertanto, prima del temporale,
sconnettere tutti icavi e connettori dell’apparecchio.
• Per pulire lo schermo dell’apparecchio utilizzare soltanto un panno umi-
do e morbido. Utilizzare soltanto acqua pulita, non prodotti detergenti e
in nessun caso solventi.
• Come descritto di seguito, qui vi è la descrizione della modalità di mon-
taggio sicuro del prodotto alla parete.
Se non è possibile avvitare la TV insieme al suo supporto incorporato e
montato alla parete, si consiglia di proteggere il prodotto con un laccio
di sicurezza e avvitarlo con una vite aocchiello.
Assicurarsi ogni volta che ibambini non possono inclinare, appendere
osalire sulla TV. Una TV non ssata bene può provocare gravi lesioni aLei
ed al Suo bambino.
Il cinturino di sicurezza non deve oltrepassare e non deve essere legato
orizzontalmente tra il televisore e la parete.
• Per utilizzare questo modello di televisore come monitor avrà bisogno
di essere collegato tramite l'ingresso VGA, ma non può essere utilizzato
come monitor del PC / laptop tramite l'ingresso HDMI. L'ingresso HDMI
è fornito per visualizzare icontenuti digitali con dispositivi esterni
compatibili.
• Il software del televisore e il menu visualizzato sullo schermo possono
essere modi cati dal produttore senza preavviso
Avvertenze:
• Mai connettere dispositivi esterni ad un apparecchio sotto tensione.
Spegnere non soltanto la TV ma anche idispositivi che si stanno connettendo! Inserire la spina dell’apparecchio nella presa amuro dopo aver
connesso idispositivi esterni e l’antenna!
• Assicurarsi sempre che vi sia spazio libero per accedere all’interruttore
principale dell'apparecchio e alla sua spina di rete.
• L'apparecchio non è stato progettato per essere impiegato in ambienti di
lavoro come monitor .
• L’uso sistematico di cu e ad alto volume può provocare danni irrever-
sibili all’udito.
• L’apparecchio e tutte le sue parti (comprese le batterie) vanno smaltiti
nel rispetto dell’ambiente. In caso di dubbi si prega di contattare la
locale autorità per informazioni sul riciclaggio.
• Durante la fase d’installazione dell’apparecchio si ricorda che le super ci
dei mobili sono trattate con varie vernici, materie plastiche ecc. oppure
possono essere lucidate. Le sostanze aggiunte ai suddetti prodotti
possono danneggiare odistruggere il materiale di base dell’appoggio
dell’apparecchio. Di conseguenza alcuni residui di materiale possono
rimanere incollati alla super cie del mobile ed è avolte di cile oquasi
impossibile eliminarli.
• Lo schermo TV soddisfa requisiti di massima qualità ed è stato diverse
volte sottoposto ad accurati controlli volti arilevare eventuali pixel
difettosi. Date le caratteristiche tecnologiche del processo di fabbricazione, non è possibile eliminare al 100% il problema dell’esistenza di un
numero esiguo di punti difettosi nello schermo (neanche con le più alte
precauzioni e cure in fase di produzione). Questi pixel difettosi non son
considerati errore oguasto alivello di condizioni di garanzia, purché il
loro numero non superi ilimiti de niti dalla norma DIN.
Informazioni importanti sull’uso di videogame,
computer, sottotitoli ed altre di immagini sse.
• L’uso intenso di programmi con immagini sse può causare un “immagi-
ne fantasma” permanente sullo schermo LCD (questo fenomeno è avolte
impropriamente descritto come “bruciatura dello schermo”). L’immagine
fantasma è in questo caso costantemente visibile sullo sfondo dello
schermo. Si tratta di un danno parzialmente irreversibile. Per evitare che
tale problema si veri chi seguire le seguenti istruzioni:
• Ridurre l’impostazione della luminosità/contrasto al livello minimo di
visualizzazione.
Page 41

41
• Non lasciare che il fermo immagine sia visualizzato alungo.
• Evitare:
» Orario e gra che teletext,
» Menu TV/DVD menu, per esempio contenuto del DVD,
» Nella modalità “Pausa”: Non utilizzare questa modalità alungo, per
esempio mentre si guarda un DVD ovideo.
» Se non lo state utilizzando, spegnete l’apparecchio.
Batterie
• Nell’inserire le batterie rispettare la giusta polarità.
• Non esporre le batterie ad alte temperature e non col-
locarle in spazi dove la temperatura è soggetta arapidi
aumenti, per esempio vicino al fuoco oin luoghi esposti
adiretta irradiazione solare.
• Non esporre le batterie acalore radiante eccessivo,
non gettarle nel fuoco, non smontarle e non provare
aricaricare batterie non ricaricabili. Si possono infatti veri care perdite di
liquido oesplosioni.
» Mai utilizzare insieme batterie diverse né mischiare nuove e vecchie
batterie.
» Le batterie vanno smaltite nel rispetto dell‘ambiente.
» Nella maggior parte dei Paesi UE lo smaltimento delle batterie è
regolato dalla legge.
Cd
Smaltimento
• Non smaltire questo apparecchio come ri uto urbano
ma conferiscilo alle piattaforme ecologiche della tua
città. In questo modo tu aiuterai ariciclare queste
risorse in maniera corretta contribuendo alla protezione
dell'ambiente. Per maggiori informazioni contatta il tuo
rivenditore ole autorità locali.
3D informazioni di sicurezza *
• Quando si guarda immagine 3D troppo da vicino oppure per un periodo
lungo, esso puó danneggiare la capacitá visiva. Guardare la TV oppure
giocare avideogiochi iquali contengono 3D imagini con i3D occhiali
per un periodo lungo puó provocare sonnolenza, mal di testa oppure
a aticamento mentale per te oa aticamento per ituoi occhi. Quando
hai mal di testa oppure ti senti a aticato osei insonnolito, smetti di
guardare la TV e riposati.
• Le donne incinte, le persone anziane, le persone ammalate di cuore, le
quali provano sonnolenze frequenti dovrebbero astenersi dal guardare
la TV 3D.
• Certi 3D immagini possono causare che tu chini al testa oppure che tu
schivi le immagini dimostrate in video. Quindi, la migliore cosa sarebbe
che tu non guardassi la TV 3D vicino agli oggetti fragili oppure vicino agli
oggetti che possono essere colpiti facilmente.
• Per cortesia, impedisci ai bambini sotto l’etá di 5 anni di guardare la T V
3D siccome il loro sviluppo della visione puó essere colpito.
Avvertimento per crisi di fotosensibilizzazione
• Alcuni spettatori possono so rire di convulsioni o epilessia se esposti
a determinati fattori tra cui luci lampeggianti o le immagini in TV
o videogiochi. Se Tu o qualcuno della Tua famiglia ha una storia di
epilessia o convulsione, si consiglia di consultare il proprio medico
prima di guardare il 3D. Alcuni sintomi possono veri carsi in condizioni
non speci cate, senza alcuna storia precedente. Se si veri ca uno dei
seguenti sintomi, immediatamente smettere di guadare le immagini 3D
e consultare un medico: vertigini e capogiri, transizione visiva o visione
alterata, instabilità visiva o del viso, spasmi muscolari, azioni inconsce,
convulsioni, perdita di coscienza, confusione o perdita del senso
direzionale, crampi, nausea. I genitori dovrebbero monitorare i bambini,
inclusi gli adolescenti, perché sono più sensibili agli e etti che potrebbe
provocare la visione del 3D.
*
Il rischio di fotosensibilizzazione può essere ridotto
con le seguenti azioni*
• e ettuare frequenti pause dal guardare 3D
• le persone che hanno una visione diversa in ogni occhio dovrebbero
guardare 3D dopo aver preso le misure di correzione di vista
• posizionarsi non troppo vicino e in modo che gli occhi siano sullo stesso
livello dell schermo 3D
• non quardare 3D quando si è stanchi o malati Evitare di guardare 3D per
il periodo troppo lungo
• usare gli occhiali 3D solo per visione delle immagini 3D
• alcuni spettatori possono sentirsi disorientati dopo aver guardato il TV
3D. Si consiglia di prendere un momento per ritrovare la consapevolezza
della situazione prima di moversi
* - solo per modelli con 3D
Note sulla funzione del TV Digitale
• Eventuali funzioni relative alla televisione digitale ( ) funzioneranno solo
nei paesi o nelle aree in cui i segnali digitali terrestri DVB - T / DVB - T2
( MPEG - 2 e H.264 / MPEG - 4 AVC ) vengono trasmessi o dove si ha
accesso a un compatibile DVB - C ( MPEG - 2 e H.264 / MPEG - 4 AVC )
servizio via cavo. Si prega di veri care se è possibile ricevere un segnale
/ DVB - T2 DVB - T nella Sua zona o chiedere al Suo provider via cavo se il
loro servizio via cavo DVB - C è compatibile al funzionamento integrato
con questo televisore.
• Il Suo provider via cavo potrebbe richiedere un pagamento o accettazio-
ne delle condizione di questo servizio.
• Questo televisore è conforme con le speci che di DVB - T / DVB - T2 e
DVB -C , ma la compatibilità con le future trasmissioni digitali terrestri
DVB - T / DVB - T2 e digitali via cavo DVB -C non è garantita.
• Alcune funzioni digitali del TV potrebbero non essere disponibili in
alcuni paesi/zone, e potrebbe non funzionare correttamente con alcuni
fornitori via cavo DVB - C .
Note per i genitori
• Questo televisore ha molte caratteristiche avanzate che consentono di
accedere a diverse applicazioni, tra cui alcuni siti web, chat room e le
reti sociali .
• Si raccomanda che, l’utilizzo da bambini di età inferiore ai 18 deve
essere sotto il controllo degli adulti.
• Per avitare che il Vostro glio usasse le funzioni di Internet, non bisogna
impostare le impostazioni di rete. In alternativa , è possibile scollegare
il cavo Ethernet o chiavetta Wi-Fi USB per non avere accesso a queste
funzionalità.
Page 42

IT
Contenuto della confezione
Il corredo della TV comprende iseguenti
componenti:
• 1x TV
• 1x Telecomando
• 1x chiavetta USB wireless
• 2x AAA bateries
• 1x guida utente
• 1x base d’appoggio
• 1x collo del supporto
• 1x cavo RF
• 1 x kit istallazione
• Occhiali 3D (solo per modelli con 3D)
Come agganciare la base d’appoggio
Si prega di seguire le istruzioni contenute nelle volantino di montaggio dello stand, che si trova nel sacchetto di accessori
Per iniziare – impostazione iniziale
1. Tramite il cavo RF incluso nel corredo,
connettere la TV alla presa dell’antenna
TV . Connettere il cavo di alimentazione
alla presa della corrente elettrica.
2. Inserite chiavetta USB wireless nell’
uscita USB.
3. Accendere il dispositivo con marcata
interruttore on / o
4. Inserire le batterie in dotazione nel
telecomando e premere il tasto Standby
per accendere la TV.
5. Ora La accoglierà la schermata della
Prima Installazione.
Se questa schermata non compare, premere il tasto [MENU] del
telecomando e in seguito 8-8-8-8. Per apportare modi che alle
impostazioni di default utilizzare itasti ▲/▼/◄/►. Per uscire dal menu
in qualsiasi momento premere il tasto [EXIT].
6. Si prega di con gurare le impostazioni desiderate nella schermata
PRIMA INSTALLAZIONE.
DVB Antenna - Selezionare il tipo di trasmissione digitale.
Potete scegliere tra terrestre (DVB-T ), cavo (DVB-C).
Lingua - Impostare la lingua del Menu.
Paese - Impostare il paese .
Tunning mode - Scegliere se si desidera sintonizzare solo Digitale
(DTV) Analogo (ATV) o sia Digitale che Analogo (DTV + ATV)
Operatore - Scegliere provider via cavo. Se il Suo operatore via cavo
non è elencato selezionare Altri. (Disponibile solo se il DVB Antenna è
impostata su CAVO)
Ambiente - Impostazione di risparmio energetico Per risparmiare
energia selezionare Home Mode.
LCN - Impostare LCN su ON se si desidera organizzare i canali per le
preferenze del provider (solo per i canali DVB-T e DVB-C).
7. Premere [Sintonizzazione automatica ] per avviare il processo di
sintonizzazione
8. Funzione DVB-C:
Mantenere tutte le impostazioni prede nite come consigliato.
Se non viene trovato nessun canale DVB-C, contattate il vostro fornitore
di servizi per un valido “ID di rete”. Poi avviate una nuova ricerca. Premere
[MENU], selezionate “Ricerca automatica” ed inserire l’ID di rete fornito
dall’operatore. Iniziate la ricerca premendo [OK].
TIP: Nel nostro desiderio di ridurre il consumo energetico, abbiamo
aggiunto una caratteristica in più di questo televisore chiamato ‘Ecohome’
(la funzione appare all'impostazione iniziale, all'installazione). Il consumo
energetico, nella modalità Ecohome, è circa il 15% inferiore aquella in
altri modi. La luminosità dell'immagine si riduce, utilizzando Ecohome
Se questa funzione non corrisponde al suo ambiente di visualizzazione,
è possibile selezionare altre modalità, se necessario. Vedi il manuale
d'uso, il capitolo ‘Impostazioni immagine’, per cambiare la modalità di
visualizzazione secondo il suo ambiente. Esiste anche un pulsante shortcut,
sul telecomando, chimato "P-Mode", se desiderate cambiare modalità
di visualizzazione. Vi preghiamo di notare che la modalità ‘Professional’
è le impostazioni prede nite ottimali dell'immagine, ma il consumo di
energia è di circa il 15% superiore aquello della modalità ‘Ecohome"
Telecomando
STANDBY – Accende la TV quando è in standby oviceversa.
MUTE – Annulla l’audio oviceversa.
DTV – con DTV selezioni icanali digitali
RADIO – vai su Digitale e scegli tra TV e radio con trasmissione digitale.
USB – Passa afonte USB.
ATV – Passa afonte T V analogica.
DVD – SMART TV Menu
0 – 9 – Per selezionare direttamente un canale TV.
TV GUIDE – Apre la guida TV 7 giorni (modalità digitale).
– Per tornare al canale precedente.
VOL ▲/▼ – Per alzare / abbassare il volume.
P. MODE
– Navigazione tra le diverse impostazioni immagine.
S. MODE
– Navigazione tra le diverse impostazioni suono.
FAV – Per visualizzare il menu Preferiti.
CH ▲/▼ – Per cambiare canale verso l’alto overso il basso.
(▲/▼/◄/►/ OK) – Permette di navigare nei menu sullo schermo e regola-
re le impostazioni di sistema avostro piacimento.
MENU – Per visualizzare il menu OSD.
EXIT – Per uscire da tutti imenu.
SOURCE – Per visualizzare il menu ingresso/fonte.
INFO – Premere una volta per informazioni su canale attuale/successivo.
Premere due volte per informazioni su programma attuale.
ASPECT – Per impostare idiversi formati immagine sullo schermo.
SLEEP – Premere ripetutamente per muoversi tra le opzioni sonno.
AUDIO – Per cambiare la lingua audio (se disponibile).
SUBTITLE – Per visualizzare isottotitoli nella parte bassa dello schermo
(on/o ).
TEXT – Modalità Teletext – Per accedere al Teletext.
TEXT HOLD - Modalità Teletext - Blocca la pagina attuale visualizzata.
TEXT DVD ZOOM - Modalità DVD - Modalità Teletext - Per aumentare lo
zoom
DISPLAY – Per disattivare lo schermo mentre ascoltate la radio.
DVD MENU1 – Modalità DVD - Per visualizzare il menu disco DVD,
Rec2 – Modalità PVR / Registra il programma in corso in TV.
DVD SETUP1 – Modalità DVD – Per visualizzare il menu impostazioni DVD
Rec List2 – Modalità PVR - Apre l’elenco di quello che è stato registrato in
precedenza.
– Per riavviare il capitolo attuale.
– Per passare al capitolo successivo.
/
– Per arrestare il playback. / Fuoriuscita disco in modalità DVD -
premere il pulsante per 4 secondi.
– Per l‘esecuzione in modalità fast rewind.
– Per l‘esecuzione in modalità fast forward.
– Per la funzione play/pausa
GOTO1 – Modalità DVD – Per passare ad un capitolo speci co.
A-B1 – Modalità DVD – Premere una volta per impostare un punto; premere
una seconda volta per ritornare al punto.
ANGLE1 – Modalità DVD – Seleziona diversi angoli DVD (se disponibile).
REPEAT – Modalità DVD1 – Modalità USB –Per ripetere il playback.
Page 43

43
REVEAL – Modalità Teletext – Per mostrare onascondere le parole
nascoste
SIZE – Modalità Teletext - Per cambiare le dimensioni di visualizzazione in
modalità Teletext
TITLE1 – Modalità DVD – Per visualizzare il menu titolo DVD
D. DIS1 – Modalità DVD – Per visualizzare le attuali informazioni disco
INDEX – Modalità Teletext – Per visualizzare la pagina indice
Tasti Rossi Verde Giallo Blu – con questi tasti si accede alle funzioni
addizionali che appaiono sullo schermo
3D giallo 3– provvede alla scelta delle funzioni 3D
1 - Le funzioni sono disponibili solo per TV con DVD player
2 - le funzioni sono disponibili solo sui telecomandi dei televisori con PVR
3 - Le funzioni sono disponibili solo per TV con 3D.
Pulsanti TV
Vol+ Alza volume e menu dx
Vol- Abbassa volume e menu sx
CH+ Cambia programma/canale verso l’alto e menu verso l’alto
CH- Cambia programma/canale verso il basso e menu verso
il basso
MENU Mostra menu/OSD
SOURCE Mostra menu fonte d’ingresso
STANDBY Standby Alimentazione On/O
Ingresso/fonte - modalità di selezione
Per cambiare tra idiversi ingressi/connessioni.
a) Tramite itasti del telecomando:
1. Premere [SOURCE/ AV] – Sarà visualizzato il
menu Source.
2. Premere [▼] o[▲] per selezionare
l’ingresso richiesto.
3. Premere [OK].
b) Tramite itasti del televisore:
1. Premere [SOURCE].
2. Scorrere verso l’alto overso il basso mediante itasti CH+/ CH- no all’ingresso/fonte
desiderato/a.
3. Premere Vol+ per cambiare l’ingresso/fonte
in quello/ache avete selezionato/a.
Connessioni
USB
Porta USB
HDMI 1, 2, 3
Ingresso HDMI 1, 2, 3
VGA(PC)
Ingresso VGA-PC
VGA (PC) Audio In
In 3.5mm – ingresso audio PC
Mini AV
Ingresso VIDEO + Componente / video ingresso
audio
Mini YPbPr
Componente ingresso HD
SCART
Ingresso SCART
CI Card IN
Ingresso modulo Common interface
RF In
Ingresso antenna RF / TV
RJ 45
Ethernet
Digital Audio Out
Uscita digitale coassiale
HEADPHONES
3.5mm - Uscita cu e
Page 44

IT
Impiego del menu TV
Per accedere al menu premere il tasto [MENU] del telecomando. Per
entrare nel menu premere [OK]. Per apportare modi che alle impostazioni
di default utilizzare itasti (▲/▼/◄/►). Per confermare le impostazioni
premere il tasto [OK]. Per uscire dal menu in qualsiasi momento premere
il tasto [EXIT].
Immagine
Modalità immagini - Selezionare
tra le seguenti preimpostazioni.
Standard - Impostazioni di default
Dinamico - Impostazioni consigliate
per immagini con movimenti rapidi
Mite - Impostazione con colori
più leggeri e meno luminosità
Personale - Consente di modi care
manualmente tutte le impostazioni
Ecohome - Ecohome consuma
il 15% di energia in meno.
Contrasto - Commuta l’equilibrio
tra bianco e nero.
Luminosità - Aumenta oriduce la luminosità dell’immagine.
Saturation - Aumenta il colore da bianco e nero.
Tono - Consente di aumentare oridurre il
livello di sfumatura nell’immagine.
Nitidezza - Aumenta oriduce la nitidezza dell’immagine.
Temperatura colore - Selezionare tre le seguenti preimpostazioni.
Normale - Impostazioni di default
Caldo - Aumenta il rosso nell’immagine
Freddo - Aumenta il blu nell’immagine
Rapporto del formato - Nell’ambito dell’UE il formato immagine
varia aseconda del canale/trasmissione. Vi sono molte opzioni
di diverso tipo per soddisfare al massimo le vostre esigenze.
Auto - Visualizzazione automatica del miglior formato immagine.
L’immagine è nella posizione corretta. Vi possono essere delle
linee nere nella parte alta/bassa dello schermo e/oai lati.
4:3 - Visualizza l'immagine 4:3 nelle sue dimensioni originali.
Vengono mostrate le barre laterali per riempire lo schermo 16:9.
16:9 - Riempie lo schermo con un segnale regolare 16:9.
Zoom 1/2 - L’immagine ha le proporzioni giuste
ma è ingrandita per riempire lo schermo.
Schremo intero - Stendi il segnale per riempire lo schermo.
Riduzione del disturbo - Selezionare tre le seguenti preimpostazioni.
Visione di programmi 3D*
Per una migliore visione di programmi in 3D,poniti di fronte
al tv con un angolo di visuale verticale di +/- 10 gradi.
TIP: A volte l’immagine dei programmi 3d può sembrare
distorta. Per poter coreggere questo problema utilizza
una delle seguenti opzioni premendo il tasto 3D
3D o - disabilita il 3D
3D spento (3D o ) - spegnere 3D
Side by side - funzione che lavora sulla frequenza orizzontale delle
immagini dimezzandola. Questo permette una migliore vista sia destra
che sinistra permettendo alle emittenti TV di ottenere buoni risultati
usando una larghezza di banda molto inferiore a quella dei BD disc.
Top Bottom 3D - questa funzione simile come lavoro
al side by side, lavora invece sulle frequenze verticali
dimezzando la risoluzione idi ogni immagine. E’
particolarmente adatto alle immagini di eventi sportivi.
Frame packing ( Compressione del frame) - Come suggerisce
lo stesso nome questo formato sovrappone le immagini colte
dall’occhio sinistro e destro in ogni riquadro sovrapponendoli
per ottenere un contenuto 3d il più reale possibile.. Molti
se non tutti 1080p lm in 3d BD e 720p cioè i giochi della
PS3 in 3D sono prodotti utilizzando questa tecnica.
Cambio 3D L/R - Cambia la frequenza delle
immagini per una visione di erente.
2D per 3D - Cambia le immagini da 2D a 3D. i contenuti
cambiati dalla tv avranno e etti limitati.
3D profondità - Profondità delle immagini convertite da 2D a 3D.
3D a 2D- E’ la profondità dell’immagine convertita da 3D a 2D.
* - solo per modelli con 3D
Page 45

45
PC
Regolazione automatica - Consente di
con gurare automaticamente la TV per
l’impiego come monitor del computer
H O set - Imposta la posizione
orizzontale dell‘immagine.
VO set - Imposta la posizione
verticale dell‘immagine.
Dimensioni - aumenta le
dimensioni dell'immagine.
Fase - Per regolare l’intervallo di tempo fase
al ne di ridurre idisturbi all'immagine.
CONSIGLIO: Se il computer non viene
utilizzato per un determinato periodo di tempo,
il televisore passerà allo status “standby” (lo schermo si spegne per non
consumare inutilmente energia). Per riaccendere premere il tasto standby.
Sonoro
Modalità Sonoro – Selezionare
tra le seguenti preimpostazioni.
Standard - Impostazioni di default
Musica - Mette in risalto
la musica sulle voci
Film - Fornisce suono dal vivo
e completo per i lm
Personale - Seleziona le impostazioni
suono personalizzate
Sport - Mette in risalto il suono per lo sport
CONSIGLIO: Il livello suoni acuti e bassi può
essere regolato soltanto quando si selezione
la modalità suono "Personalizzata".
Alti - Regola la
quantità di alta frequenza nel suono.
Bassi - Regola la quantità di bassa frequenza nel suono.
Bilanciamento - Commutazione del suono tra casse asinistra e destra.
Volume automatico - Quando è selezionato "on”, il volume rimane
ad un livello costante indipendentemente dall'ingresso/fonte.
Sonor Surround - Consente di attivare (ON) o
disattivare (OFF) il suono surround.
SPDIF Mode - Si tratta dell’uscita digitale coassiale
audio. Scegliere tra le seguenti opzioni:
O - O
Auto - Seleziona automaticamente le migliori impostazioni
PCM - Selezionare questa opzione se si è connessi ad un hi-
stereo via cavo coassiale (la modulazione acodici di impulsi
(PCM) è una rappresentazione del segnale digitale
AD Switch – Colonna sonora aggiuntiva per non vedenti.
Disponibile solo su alcuni programmi televisivi digitali.
Volume AD - Volume di pista audio supplementare
per le persone con problemi di vista.
Canale
DVB Antenna - impostare il
tipo del segnale DTV
Terrestre - Terrestre (DVB-T)
Cavo - Cavo (DVB-C)
Sintonizzazione automatica - Consente
di risintonizzare la televisione per tutti
icanali digitali, stazioni radiofoniche
digitali e canali analogici.
Sintonizzazione manuale
ATV - Consente di sintonizzare
manualmente il segnale analogico.
Sintonizzazione manuale DTV - Consente di
sintonizzare manualmente il segnale digitale.
Modi ca programma - Consente di eliminare,
tralasciare ed aggiungere canali preferiti.
Info segnale - Informazioni sul segnale satellitare.
Informazioni CI - Iservizi pay per view richiedono l’inserimento di una
“smartcard” nella T V. Se siete abbonati ad un servizio pay per view, il
fornitore vi fornirà una "CAM" e una "smartcard". La CAM può quindi
essere inserita nella PORTA COMMON INTERFACE (CI Card In).
Registro dei canali registrati - Elenco dei programmi TV registrati.
Lista programi - Elenca il promemoria programmi.
OAD - Accendere/spegnere aggiornamenti OAD
OAD Scan - Le permette di eseguire scansione per
aggiornamenti OAD (Over Air Download)
Blocca
La password di default è 0000.
Blocco sistema - Consente di bloccare e
sbloccare il menu. È necessario inserire
una password da 4 caratteri; premere
il tasto ◄ per uscire dall’inserimento
password. Premere il tasto ► per
cancellare. La password di default è 0000.
Imposta Password - Modi care
la password prede nita.
Blocca programma - Bloccare
canali televisivi speci ci.
Controlo gestione canal. - Bloccare
canali televisivi basato su limiti di età.
Blocco tastiera - Bloccare itasti del TV.
O - Tutti i tasti TV sono sbloccati
Partial - Solo il tasto Standby è sbloccato
Pieno - Tutti i tasti TV sono bloccati
Page 46

IT
Ora
Orologio - Imposta data e ora.
Orario spegnimento - Consente di impostare
un orario speci co in cui la TV si spegnerà.
Orario di accensione - Consente di impostare
un orario speci co in cui la TV si accenderà,
sarà attivato il canale display e la fonte
e il volume saranno in posizione "on". È
possibile commutare questa funzione per
la ripetizione giornaliera oin alcuni giorni.
Timer di spegnimento - Consente di
impostare il temporizzatore sonno in modo
che la televisione si spenga automaticamente
dopo un dato intervallo di tempo.
O -> 10min. -> 20min. -> 30min. -> 60min. ->
90min. -> 120min. -> 180min. -> 240min.
OSD Timer - Consente di regolare l’intervallo di tempo durante il
quale il menu resta attivo sullo schermo prima di scomparire.
Spegn. auto - Per attivare e disattivare la funzione.
Fuso orario - Cambiare il fuso orario corrente.
Network
Per collegare il televisore alla rete via
Wi-Fi , si prega di inserire la chiavetta USB
Wi-Fi nell ingresso USB . Chiavetta USB
Wi-Fi fa parte degli accessori standard.
Con gurazione di rete - Selezionare
il tipo di connessione . Si può
scegliere tra Wi-Fi e via cavo.
IP con g - impostazioni di
connessione di rete LAN
Auto - Il televisore si connetterà
automaticamente alla rete domestica
(questa è l'impostazione prede nita
ed è altamente raccomandata)
Manuale - Consente di modi care manualmente le
informazioni IP, Netmask , Gateway e DNS.
Wi-Fi con g - Impostazioni di connessione di rete senza li
Wi-Fi Auto Search - Cerca automaticamente le reti
wireless disponibili. Selezionare rete Wi-Fi desiderata e
inserire la password se la rete è protetta da password.La
password, una volta accettata, non sarà più richiesta.
NOTA : il processo di connessione può richiedere alcuni minuti
per essere stabilito. Anche per la riconnessione automatica
durante l'accensione del TV sarà necessario tempo.
Network info- informazioni sulle impostazioni di rete
Network Test - test di connessione di rete
Setting
Lingua - Consente di cambiare
la lingua del menu.
TT Lingua - Codi cazione delle
impostazioni per un’adeguata
visualizzazione dei caratteri teletext.
Lingue audio - Consente di
cambiare la lingua del audio.
Lingua sottotitoli - Consente di
cambiare la lingua del sottotitoli.
Cu e disaccoppiate - Se il segnale
consente il supporto per inon udenti,
isottotitoli potranno essere visualizzati
premendo "Subtitle". Se avete impostato
la funzione Non udenti e passate ad un canale che supporta
tale funzione, isottotitoli si attiveranno automaticamente.
Schremo Blu - Cambia lo sfondo quando non v’è alcun input
tra sfondo chiaro e blu (disponibile solo per alcune fonti).
File sistema PVR - Opzioni di registrazione PVR
Scelta del disco - Selezionare la porta USB e la partizione del disco
Tempo di TimeShift - Impostare il tempo di Shift Bu er.
Formato Start - È possibile formattare un dispositivo di memoria USB
collegato per system le FAT 32 .
ATTENZIONE : TUTTI I DATI SUL DISPOSITIVO
USB VERRÀNO CANCELLATI
Controllo di velocità - Veri ca velocità di scrittura
di dispositivi di memoria USB collegati .
Prima istallazione - Prima istallazione
Aggionamento software (USB) - Di tanto in tanto è possibile
che la nostra azienda rilasci un nuovo rmware per migliorare le
prestazioni del televisore (disponibili per il download). Il menu
consente di installare il nuovo software/ rmware nel televisore.
Insieme al rmware saranno fornite ulteriori informazioni
su come eseguire questa operazione. Contattare l’helpline
oconsultare la sezione “suppor to prodotto” sul sito web.
NOTA : TV cercherà nuove versioni del software ogni volta che si
accende automaticamente. Se viene rilevato un nuovo software, verrà
richiesta la Sua approvazione per scaricarlo e installarlo. Selezionando
"Sì" il software verrà aggiornato alla versione più recente.
Ripristina prede nito di fabbrica - Imenu vengono
resettati alle impostazioni di fabbrica.
Set wallpaper - sfondo del menu Applicazione.
HDMI CEC* - Permette gestire idispositivi collegati
tramite HDMI con telecomando della TV.
Auto power* - accendere / spegnere automaticamente
idispositivi collegati tramite HDMI CEC
Menu Dispositivo* - Permette accedere al menu dei dispositivi
e utilizzare il menu utilizzando il telecomando TV.
HDMI ARC* - Invia il segnale audio dalla trasmissione terrestre /
satellite tramite HDMI al ricevitore AV, senza l'impiego di cavi audio
aggiuntivi, questa funzione è disponibile solo su HDMI 2 uscite.
* - HDMI CEC deve essere supportato sui dispositivi collegati.
Page 47

47
Application
SUGGERIMENTO : Per accedere al Menu dello SMART TV premere in qualsiasi
momento pulsante DVD sul telecomando o selezionarlo dal menu TV .
NOTA : Attendere mentre il TV si connetta a Internet via Wi-Fi . Dopo
l’accensione potrebbero essere necessari alcuni minuti . La prima volta è
necessario impostare la connessione di rete come descritto sulla pagina xx .
AppStore
Per navigare nel Menu usare i tasti ▲/▼/◄/►. Per confermare la
Vostra scelta premere tasto [OK], per tornare indietro premere tasto
[Menu], per accedere alle altre funzionalità usare i tasti colorati.
Per uscire dall’Appstore premere (EXIT)
Home - la schermata principale con i lm consigliati
e le applicazioni utilizzate di recente
Browser - apre la pagine Web prede nita.
Pulsante Rosso - Zoom attivato
Pulsante Verde - Zoom disattivato
Pulsante Giallo – Aggiornamento pagina
Pulsante Blu – Ritorna alla schermata principale del browser.
Film - Lista dei lm disponibili
TV Show - Lista dei programmi TV disponibili
Musics - Lista della musica e dei lmati musicali disponibili
Watchlist - Lista dei lm che ha aggiunto e per guardarli più tardi.
Apps - Lista delle Applicazioni disponibili
Login - Crea un account o login per un account
personalizzato nel Suo AppStore.
Impostazioni - ltra le applicazioni in base alle lingue selezionate.
NOTA: Per andare incontro alle esigenze dei nostri clienti, noi stiamo
migliorando i nostri prodotti. In seguito al nostro continuo lavoro le nuove
applicazioni verranno sempre aggiunte all’AppStore. Le applicazioni e il
contenuto dell’AppStore possono essere cambiati senza avvertimenti. Alcune
delle funzioni e contenuti potrebbero essere non disponibili nel Tuo paese.
Modalità USB / Media player
USB media - La modalità USB o re il playback di diversi tipi di
contenuti salvati nella chiave USB. Si prega di consultare la pagina
con la speci ca tecnica per conoscere itipi di le compatibili.
Dopo essere passati alla fonte USB apparirà la schermata menu riportata
sopra. Icontenuti sono suddivisi in Foto, Musica, Film e Testo, aseconda
del tipo di le.
1. Per navigare nel menu servirsi dei tasti ▲/▼/◄/►. Per confermare
l'articolo da eseguire/visualizzare premere il tasto [OK[.
2. Selezionare il drive richiesto. (Se il vostro drive ha solo 1 ripartizione, sarà
visualizzato solo 1 articolo)
3. Aquesto punto è possibile accedere all’articolo. Premere OK per
visualizzare.
4. Mentre la visualizzazione è in corso è possibile gestire l’articolo premendo (i) ed utilizzando itasti ▲/▼/◄/► e(OK).
Media Server - Cerca automaticamente dei media server
digitali (DMS) collegati alla Tua rete di casa e provvede
alla riproduzione del contenuto dei media server.
NOTE: Media server non sono forniti dal produttore del TV, è possibile
scaricare e installare i software sul Suo computer o NAS.
Miracast - Permette di Vedere il contenuto del
Suo smart phone sullo schermo del TV.
NOTE: La funzione è utilizzabile solo sugli smart phone selezionati.
NOTA: TV cercherà nuove versioni del software ogni volta che si
accende automaticamente. Se viene rilevato un nuovo software, verrà
richiesta la Sua approvazione per scaricarlo e installarlo. Selezionando
"Sì" il software verrà aggiornato alla versione più recente.
Guida TV 7 giorni / Registrazione USB
La guida TV è disponibile in modalità TV digitale. Fornisce informazioni sui
programmi seguenti (dove esiste il supporto da canale digitale). È possibile
visualizzare l’orario di inizio e ne di tutti iprogrammi e su tutti icanali per
isuccessivi 7 giorni, impostando anche dei promemoria.
5. Premere [TV GUIDE]. Comparirà la guida TV per isuccessivi 7 giorni.
6. Navigare nel menu attraverso itasti ▲/▼/◄/►.
7. Aquesto punto è possibile:
É possibile registrare un canale TV selezionato e un programma TV
premendo il tasto ROSSO. * è possibile solo nei modelli con funzione di
registrazione.
Impostare un promemoria premendo il tasto VERDE.Visualizzare il giorno
precedente premendo il tasto GIALLO.
Visualizzare il giorno successivo premendo il tasto BLU.
8. Premere [EXIT] per uscire dalla guida TV 7 giorni.
* - Solo sui dispositivi dotati di PVR
Page 48

IT
Registrazione USB *
La TV contiene un meccanismo di registrazione USB integrato. Questa
funzione è disponibile in modalità digitale se utilizzata in associazione ad
una chiave USB ohard drive USB compatibile. Ne conseguono iseguenti
vantaggi:
• Possibilità di mettere in pausa la TV ed eseguire la riproduzione,
l'avanzamento rapido e l'avvolgimento rapido ( no adiretta TV).
• Registrazione con un singolo tasto; se si decide di registrare il program-
ma attuale.
• Registrazione facilmente programmabile tramite la guida Tv 7 giorni
• Registrazione da TV e possibilità di guardare di nuovo il contenuto su
PC/portatile.
Data la natura del prodotto, è necessario impiegare un supporto USB ad
alta velocità (la TV infatti legge dalla chiave USB e scrive nella chiave USB
allo stesso tempo; alcune chiavi potrebbero non essere idonee).
Speci ca minima – Chiave USB
Velocità di lettura - 20 MB/s(megabyte al secondo)
Velocità di scrittura - 6 MB/s(megabyte al secondo)
Pausa diretta TV (programmazione)
Mettere in pausa la TV in diretta è un operazione semplicissima.
Premere il pulsante play/pausa e la TV si mette in pausa, mentre
icontenuti in diretta vengono registrati. Per riprendere la visione premere
di nuovo il pulsante play/pausa.
- Premere il tasto fast forward per avanzare rapidamente nella
registrazione (per esempio per evitare le pubblicità).
- Premere il tasto fast rewind per tornare indietro nella registrazione (per
esempio se siete andati troppo oltre nell'avanzamento rapido).
CONSIGLIO: Quando si mette la TV in standby osi cambia
canale la memoria programmazione è azzerata. Per riprendere
la programmazione premere il tasto play/pausa.
Registrazione con un singolo tasto
È possibile registrare quello che state guardando in qualsiasi momento lo
desideriate. Per eseguire questa operazione premere il tasto [REC].
CONSIGLIO: La TV contiene un unico sintonizzatore TV; pertanto
riesce aregistrare soltanto dal canale che state guardando oppure
aregistrare da un unico canale mentre le TV è in standby.
NOTA: La funzione registrazione USB è disponibile soltanto
in modalità TV digitale. Per motivi legati alle leggi sui diritti
d'autore e sulla registrazione/copia illegale non è possibile
registrare verso/da nessuna altra fonte d’ingresso/uscita.
* - Solo sui dispositivi dotati di PVR
Fiche Prodotto
Fornitore: Blaupunkt
Model: 40/148Z; 40/133Z
Classe di E cienza Energetica: A+
Misura dello schermo visibile (in
diagonale):
Consumo medio in modalità “acceso”: 40W
Consumo di energia annuale*: 59 kWh/year
Consumo di energia in modalità
“stand-by”:
Consumo medio in modalità “spento”: 0 W
Risoluzione schermo: 1920 (W) x 1080 ( H)
* - Il consumo di energia XYZ kWh annuale è basato sul consumo del
TV acceso 4 ore al giorno per 365 giorno. L’attuale consumo dipende
dal’utilizzo del TV.
102 cm / 42"
<0,5 W
Page 49

49
Page 50

SP
Instalación y seguridad
PRECAUCIÓN
¡RIESGO DE CHOQUE ELÉCTRICO!
¡NO ABRIR!
Por favor, lea detenidamente estas instrucciones
de seguridad antes de poner en funcionamiento su
televisor y ala vez tenga en cuenta las siguientes
precauciones:
• Televisor de más de 20 kg debe ser levantado y transportado al menos
por 2 personas.
• ¡Atención! Este televisor no contiene componentes que podrían ser
reparados por el usuario. En caso de fallos pongáse en contacto con el
fabricante oservicio autorizado. El contacto con algunos componentes
en el interior del televisor puede ser mortal. La garantía no cubre daños
causados por interferencias indebidas!
• No retire el panel posterior del televisor.
Para prevenir que el fuego se
propague, mantenga velas
uotras llamas libres siempre
alejadas de este producto.
• Este televisor está diseñado para la recepción y reproducción de señales
de vídeo y audio. Cualquier otro uso está estrictamente prohibido.
• Si el cable de alimentación está dañado, éste debe ser solamente reemp-
lazado por el fabricante, centro de servicio o similar personal cuali cado,
a n de evitar potenciales riesgos.
• La distancia ideal para ver televisión es equivalente acerca de cinco
veces la diagonal de la pantalla. La luz de fuentes ajenas que cae en la
pantalla causa re exiones y puede perjudicar la calidad de visualización.
• Por favor, asegure una ventilación adecuada y observe la distancia apro-
priada de paredes de armarios uotras piezas de mobiliario.
• Instale el producto por lo menos a5 cm de la pared para permitir una
buena ventilación.
• El televisor está diseñado para ser utilizado en climas moderados.
• El televisor está diseñado exclusivamente para su uso en zonas secas. Si,
aun así quería usarlo en exterior, asegúrese de que está protegido contra
la humedad (lluvia, proyecciones de agua).En cualquier caso no exponga
el televisor ala humedad.
• No coloque vasos llenos de agua, tales como oreros, etc en el televisor.
Estos vasos pueden volcarse, lo que podría poner en peligro la seguridad
eléctrica. Ponga el televisor únicamente en super cies planas y estables.
En opor debajo del televisor no coloque ningún objeto, por ejemplo
periódicos, mantas, etc.
• Asegúrese de que el soporte de TV no está colocado en los cables
eléctricos lo que podría dañar los mismos. Teléfonos movíles uotros
dispositivos que emiten ondas de radio, tales como adaptadores WLAN,
cámaras de vigilancia con señal de transmisión inalámbrica y otros, pueden causar interferencias electromagnéticas y no deben ser colocados
cerca del televisor.
• No coloque el televisor cerca de fuentes de calor oen lugares con luz
solar directa por que tiene un impacto negativo en la refrigeración del
televisor. La acumulación de calor es peligrosa y puede reducir signi cativamente la vida de su televisor. Para garantizar su seguridad, pida aun
experto para eliminar las impurezas que se depositan en el televisor.
• Tenga cuidado de no dañar el cable de alimentación de CA o(si es
elemento de entrega) el adaptador de CA. El televisor debe estar alimentado solamente con el cable de alimentación de CA/adaptador.
• Tormentas son peligrosas para cualquier aparato eléctrico. Por un golpe
de rayo directo sobre la red eléctrica olínea de antena el televisor puede
dañarse incluso si está apagado. De tal modo, durante tormentas el
televisor debe ser desconectado de todos los conectores y cables.
• Para limpiar la pantalla use sólo un paño suave ligeramente humedeci-
do. Utilice sólo agua pura, nunca detergentes de limpieza y en ningún
caso disolventes.
• Acontinuación encontrará las instrucciones para la instalación correcta
del producto cerca de una pared. Si no puede atornillar el aparato al
apoyo/mesa donde está puesto, se recomienda utilizar un cordón entre
los tornillos de la placa VESA y una argolla sujeta ala pared.Asegúrese
de que los niños no puedan inclinar el dispositivo, no puedan colgarse
al TV osubir por encima de ella.Un aparato mal montado puede causar
lesiones graves austed osus hijos. El cordón de seguridad debe seguir
siendo tenso entre la unidad y la pared.
• Para utilizar este modelo de TV como un PC / ordenador portátil vigilar
que tendrá que ser conectado através de la entrada VGA, no se puede
utilizar como un PC / ordenador portátil monitor através de la entrada
HDMI. Se proporciona la entrada HDMI para ver contenidos digitales con
dispositivos externos compatibles.
• El software de la TV y el menú que aparece en la pantalla se pueden
cambiar por el fabricante sin previo aviso
Advertencia:
• No conecte los dispositivos externos cuando la TV está encendida. Antes
de conectar apague no sólo el televisor, sino también el dispositivo
conectado! ¡Conecte su televisor ala red eléctrica sólo después de
conectarlos dispositivos externos y la antena!
• Asegúrese de tener libre acceso al interruptor principal del TV y su
enchufe de la red.
• El televisor no está diseñado para uso en puestos de trabajo equipados
con monitores.
• El uso sistemático de los auriculares aun volumen elevado puede causar
daños irreversibles en el oído.
• Asegure la eliminación ecológica de este televisor, todos sus componen-
tes abaterías. En caso de dudas, póngase en contacto con la organización responsable de la eliminación de residuos en su área.
• Al instalar el televisor recuerde que las super cies de los muebles están
acabadas con diversas lacas, plásticos, etc., opueden ser tratados con
ceras para muebles. Las impurezas contenidas en estas composiciones
también pueden conducir ala destrucción de los materiales en el
soporte de TV. El resultado será restos de este material adheridos ala
super cie de mueble que sonmuy difíciles eliminar, sino imposibles.
• La pantalla de su LCD TV cumple con los más altos requisitos de calidad y
fue muy cuidadosamente revisada varias veces por píxeles defectuosos.
Debido alas características especí cas tecnológicas del proceso de
producción (incluso con el máximo cuidado en la fabricación de pantallas) no es posible a100% excluir la aparición de un pequeño número
de píxeles defectuosos en la pantalla. Estos píxeles defectuosos, bajo
condiciones de garantía, no son considerados como error de televisor, si
su cobertura no supera los límites establecidos por la norma DIN.
Información importante referente al uso de
videojuegos, ordenadores, subtítulos uotras
visualizaciones de imagen ja
• La utilización prolongada de material de programa de imagen ja puede
provocar una „imagen sombra“ permanente en el panel LCD.
• Esta imagen de fondo es visible en programas normales bajo la forma de
una imagen estacionaria ja. Este tipo de deterioración irreversible del
panel LCD/LED puede ser limitado al efectuar los siguientes pasos:
1. Reduzca la con guración de brillo/contraste hasta el nivel de
visualización mínimo.
2. No visualice una imagen ja durante largos períodos de tiempo.
3. Apague el televisor cuando no lo esté utilizando.
Page 51

51
• Presentamos acontinuación ejemplos de imágenes alas que debe
prestar atención (esta no es una lista exhaustiva):
» Logotipos de canales de televisor: ej.: logotipos de canales de tele-
ventas y visualizaciones de precios - principalmente si son brillantes
y estacionarios. Grá cos en movimiento ode bajo contraste tienen
menos probabilidad de causar el envejecimiento de la pantalla.
» Visualizaciones de Hora
» Teletexto: No visualice una página estacionaria durante un largo
período de tiempo.
» Menús de TV/DVD: ej.: lista de contenidos de un disco DVD.
» Modo Pausa: No deje el televisor en modo pausa durante largos
períodos de tiempo, ex.: Al visualizar DVD ovídeos.
Importante – Una vez aparezca una “imagen sombra/quema de la pantalla”, esta nunca más desaparecerá y no está cubierta por la garantía.
Baterías
• Al colocar las baterías, observe la polaridad correcta.
• No exponga las baterías aun calor excesivo y no las
coloque en lugares donde hay un fuerte aumento de la
temperatura, p.e. cerca del fuego oen la luz solar directa.
• No exponga las baterías aradiaciones de calor excesivo,
no las tire al fuego, no las desmonte y no intente recargar
las baterías no recargables. Las baterías podrían tener
fugas oexplotar.
» No utilice diferentes tipos de pilas en conjunto ni mezcle pilas
nuevas y usadas.
» Coloque las pilas para reciclaje respetando el medio ambiente.
» Ciertas regiones poseen reglamentos adecuados para el reciclaje
de pilas.
» Por favor contacte con la autoridad local de su área.
Cd
Tratamiento de los residuos de aparatos eléctricos y
electrónicos (RAEE)
• No se deshaga de este dispositivo con los residuos ur-
banos no seleccionados. Llévelo aun punto de recogida
designado para el reciclaje de los RAEE. De esta manera
ayudará aconservar los recursos y proteger el medio
ambiente. Póngase en contacto con su distribuidor ocon
las autoridades locales para obtener más información.
Información de seguridad sobre el 3D*
• Si nos jamos en la imagen 3D muy de cerca opor un largo período de
tiempo, esto puede interferir con la visión.
• Ver la televisión ojugando videojuegos que integran imágenes en 3D
con gafas 3D durante un largo período de tiempo puede causar somnolencia, dolor de cabeza ofatiga para usted y / osus ojos. Si sentir dolores
de cabeza, ose siente cansado ocon sueño, deje de ver televisión y
tomar su descanso.
• Las mujeres embarazadas, los ancianos, las personas con problemas
de corazón oaquellos que sienten sueño frecuentemente deberían
abstenerse de ver la televisión en 3D.
• Algunas de las imágenes en 3D le pueden llevar atratar de evadir oevi-
tar la imagen que aparece en el video. Por lo tanto, se recomienda no
ver la televisión en 3D cerca de objetos frágiles ocerca de objetos que
pueden ser fácilmente revertidos.
• Evitar que los niños menores de 5 años vean la televisión en 3D. Puede
afectar el desarrollo de su visión.
Advertencia sobre crisis de fotosensibilidad visual
crisis y epilepsia fotosensible:*
• Algunos espectadores pueden experimentar ataques epilépticos cuando
se exponen aciertos factores, incluyendo destellos de luces oimágenes
en los videojuegos ola televisión.
• Si usted oalguien en su familia tiene un historial de crisis de epilepsia
ofotosensibilidad visual, por favor consulte asu médico antes de ver la
televisión en 3D. Del mismo modo, algunos síntomas pueden ocurrir en
condiciones no especi cadas y sin precedentes de crisis de fotosensibi-
lidad. Si usted experimenta alguno de los siguientes síntomas, deje de
ver la imagen en 3D y consulte aun médico: mareos, transición visual
ovisión borrosa, inestabilidad visual ode la cara, tales como espasmos
de los ojos ocontracciones musculares, acción inconsciente, convulsiones, pérdida del conocimiento, confusión odesorientación, pérdida de
sentido de dirección, calambres onáuseas. Los padres deben controlar
estos síntomas en sus hijos, incluidos los adolescentes, ya que pueden
ser más sensibles alos efectos de ver la televisión en 3D.
Las crisis de fotosensibilidad ode epilepsia
fotosensible pueden reducirse através de las
siguientes acciones:*
• Tome descansos frecuentes mientras ve la televisión en 3D.
• Para aquellos que tienen una visión diferente en cada ojo, no ver la
televisión en 3D sin antes tomar medidas de corrección de la visión.
• Instálese frente ala televisión para que sus ojos estén al nivel de la pan-
talla 3D; absténgase de sentarse demasiado cerca del televisor.
• No vea TV en 3D cuando se está cansado oenfermo, y evite mirar ala
imagen en 3D durante un largo periodo de tiempo.
• No se ponga las gafas 3D para cualquier otro propósito que la visualiza-
ción de imágenes 3D en un televisor 3D.
• Algunos espectadores pueden sentirse desorientado después de ver la
televisión en 3D.
• Por lo tanto, después de ver la televisión en 3D, tome un momento para
recuperarse antes de pasar aotra actividad.
* - Sólo para los modelos con 3D)
Notas sobre la función Digital TV
• Cualquier función relacionada con Digital TV() solamente estará opera-
tiva en países o regiones donde exista emisión digital terrestre DVB-T/
DBV-T2 (MPEG-2 y H.264/MPEG-4 AVC), o allí donde usted tenga acceso
a servicios de cable compatibles con DVB-C (MPEG-2 y H.2654/MPEG-4
AVC). Por favor, consulte con su proveedor si usted puede recibir señal
DVB-T/DVB-T2 en su lugar de residencia, o consulte con su proveedor de
cable si su servicio de cable DVB-C es apropiado para operar con esta TV.
• Su proveedor de cable puede aplicar cargos por sus servicios, o requerir
aceptación de sus términos y condiciones de servicio.
• Este equipo de TV cumple con las especi caciones de DVB-T/DVB-T2 y
DVB-C, pero no se garantiza la compatibilidad con futuras versiones de
DVB-T/DVB-T2 y DVB-C.
• Algunas funciones de Digital TV pueden no estar disponibles en algunos
países o regiones, y DVB-C cable puede no funcionar correctamente con
algunos proveedores.
Aviso paterno
• Esta televisión incluye numerosas funciones avanzadas que le permiten
accede diferentes aplicaciones, incluyendo páginas de internet, chats y
redes sociales.
• Se recomienda que, si el producto va a ser usado por niños menores de
18 años, se haga bajo supervisón paterna.
• Si usted no desea que sus hijos puedan usar las funciones de internet,
se recomienda no con gurar los ajustes de red. Alternativamente, usted
puede desconectar el cable ethernet o el adaptador Wi-Fi USB.
Page 52

SP
Contenido de la caja
La entrega de este televisor contiene los siguientes
componentes
• 1x TV
• 1x Mando adistancia
• 1 x adaptador Wi-Fi USB
• 2x Baterías AAA
• 1x Manual de usuario
• 1x Soporte de posición
• 1x Cuello de soporte
• 1x Cable de antena RF
• 1x kit de instalación
• Gafas 3D (Sólo para los modelos con 3D)
Encajar el Soporte
Por favor, siga las instrucciones que aparecen en el folleto de instalación del stand, ubicado en la bolsa de accesorios.
Comenzar – Con guración inicial
1. Utilizando el cable RF suministrado,
conecte la TV ala clavija de la antena
(Fig.A). Conecte el cable de alimentación al
enchufe de la red eléctrica (Fig. B).
2. Introduzca el adaptador Wi-Fi USB en un
puerto USB.
3. Encienda el dispositivo con un marcado
de ON/OFF
4. Introduzca las pilas suministradas en
el mando adistancia y pulse el botón
Standby para encender aTV.
5. Esta usted a punto de acceder a la
pantalla de Instalación Por Primera Vez
En caso de que no aparezca, por favor pulse en el mando adistancia
[MENU] y acontinuación 8-8-8-8 para que el menú aparezca.
Si desea realizar cambios en los parámetros por defecto, utilice los botones
▲ ◄ ▼ ►. Para salir del menú, pulse [EXIT].
6. Por favor, introduzca los ajustes deseados en la pantalla de
Instalación Por Primera Vez.
Antena DVB - Seleccione el tipo de señal digital. Puede usted elegir
entre Aérea (DVB-T), Cable (DVB-C) o Satelital (SVB-S2)*.
Lengua - Seleccione el idioma de este equipo TV.
País - Seleccione el país deseado.
Tuning Mode - Seleccione si usted desea sintonización digital (DTV) o
analógica y digital (DTV + ATV)
Operador - Seleccione el proveedor de cable. Si su proveedor de cable
no se encuentra en la lista, seleccione Otros. (Disponible sólo si la
Antena DVB se encuentra en modo Cable)
Ajuste medioambiental - Opción de ahorro energético. Para ahorrar
energía, por favor seleccione Modo Hogar (Home Mode).
LCN - Active o desactive LCN para ordenar los canales de acuerdo a
las preferencias de su proveedor (sólo applicable en canales DVB-T y
DVB-C).
7. Pulse [Sintonización automática] para iniciar el proceso de
sintonización.
8.
Preajustes de canales DVB-C en opción:
Mantenga todos los ajustes por defecto como se recomienda.
Si los canales DVB-C no se encuentran, póngase en contacto con su
proveedor de red para el "Network ID" válido. Acontinuación, realice
una nueva búsqueda. Pulse el botón [MENU], seleccione "Automática de
Canales Buscar" y introduzca la ID de red.
TIP: Como parte de nuestros esfuerzos continuos para reducir el consumo
de energía, añadimos una nueva función aeste televisor llamada
Ecohome (aparecerá en la pantalla de primera instalación). Esta función
permite reducir más omenos en 15% el consumo de energía frente
aotros modos. La luminosidad de la imagen es reducida al utilizar
el modo Ecohome. Si esta función no conviene asu ambiente, puede
elegir otros modos (Nota: el modo profesional es el modo optimal por
defecto, sin embargo consume un 15% más que el modo Ecohome).
Mando adistancia
STANDBY – Encienda el televisor cuando esté en standby oviceversa.
MUTE – Silencie el volumen oviceversa.
DTV - Establece la fuente de la Televisión Digital Terrestre.
RADIO
- TV/RADIO –cambia entre TV y radio en modo digital.
USB – Pase ala fuente USB.
ATV – Pase ala fuente analógica de TV.
DVD – SMART TV Menu
0 – 9 – De 0 a9 para seleccionar directamente un canal de TV.
TV GUIDE – Abre al Guía de TV 7 Días (modo TDT).
– Para volver al último canal visualizado.
VOL ▲/▼ – Para disminuir/aumentar el nivel de sonido.
S.MODE - Navegue entre las diferentes con guraciones de sonido.
P.MODE - Navegue entre las diferentes con guraciones de imagen.
FAV – Para visualizar el menú de favoritos.
CH ▲/▼ – Para aumentar odisminuir el número del canal visualizado.
(▲/▼/◄/►/ OK) – Le permite navegar en los menús de pantalla y ajustar
las con guraciones de sistema de acuerdo con sus preferencias.
MENU – Para visualizar el menú OSD.
EXIT – Para salir de todos los menús.
SOURCE – Para visualizar el menú de entrada/raíz.
INFO – Pulse una vez para obtener información sobre el canal actual/
siguiente Pulse dos veces para obtener información de programa sobre el
programa actual.
ASPECT – TPara alterar la pantalla entre los diferentes
formatos de imagen.
SLEEP – Pulse repetidamente para navegar por entre
las opciones del temporizador.
AUDIO – Para alterar el idioma de audio
(si está disponible esta opción).
SUBTITLE – Para alterar el diálogo en el fondo de la pantalla (encendido/
apagado).
TEXT – En modo de teletexto - Para entrar en el teletexto
TEXT HOLD - HOLD - Modo de teletexto - Mantener la página actual
TEXT/DVD ZOOM - Modo DVD - Zoom para aumentar el tamaño de
imagen
- Modo de teletexto - Para cambiar el tamaño de la pantalla en el modo
de teletexto
DISPLAY – Para apagar la pantalla cuando se escucha la radio.
DVD MENU1 – Modo DVD - Para mostrar el menú del disco DVD
Rec2 – Modo PVR - Para grabar el programa que esté siendo emitido en el
televisor.
DVD SETUP1 – En modo DVD - Para mostrar el menú de configuración del
DVD - Modo
Rec List2 – PVR - Abre la lista de lo que haya grabado anteriormente.
– Para reiniciar el capítulo actual
– Para pasar al próximo capítulo
/
1– Para parar la reproducción / Expulsar disco en modo DVD - pulse
el botón para 4 segundos
– Para reproducir en modo de retroceso rápido.
– Para reproducir en modo de avance rápido.
– Para reproducir/parar.
GOTO1 – Modo DVD - Para ir aun capítulo específico
Page 53

53
A-B1 – Modo DVD - Pulse una vez para establecer el punto, pulse una
segunda vez para volver al punto de origen
ANGLE1 – Modo DVD - Repite la reproducción
REPEAT – Modo DVD1 - Modo USB - Repite la reproducción
REVEAL – Modo de teletexto - Para mostrar uocultar las palabras escon-
didas.
SIZE – Modo Teletexto - Para alterar el tamaño de visualización en modo
Teletexto.
1
TITLE
– modo DVD - Para mostrar el menú de títulos DVD
INDEX – En modo de teletexto - Para mostrar la página de inicio
Teclas Roja, Verde, Amarilla, Azul - Otras funciones de teletexto y de
menú OSD
3D Amarillo 3D
1 - funciones disponibles sólo para los televisores con reproductor de DVD
integrado
2 - funciones disponibles sólo para los televisores con PVR integrado
3 - funciones disponibles sólo para los televisores con 3D
3
- cambia entre diferentes con guraciones 3D.
Botónes de TV
Vol+ Volumen arriba y menú derecha
Vol- Volumen abajo y menú izquierda
CH+ Programa/Canal arriba y menú arriba
CH- Programa/Canal abajo y menú abajo
MENU Visualización Menú/OSD
SOURCE Visualización Menú/OSD
STANDBY Encender/Apagar
Selección de Entrada/Raíz de Modo
Para alternar entre las diferentes entradas/
conexiones.
a) Utilizando los botones del mando
adistancia:
1. Pulse [SOURCE/ AV] – El menú de raíz
aparecerá.
2. Pulse [▼] or [▲] para seleccionar la entrada
deseada.
3. Pulse [OK].
b) Utilizando los botones en el Televisor:
1. Pulse [SOURCE].
2. Navegue hacia arriba/hacia abajo utilizando
los botones CH+/CH- hasta la entrada/raíz
deseada.
3. Pulse Vol+ para alterar la entrada/raíz hasta aquella que desee selecci-
onar.
Conexiones
USB
Porta USB
HDMI 1, 2, 3
Entrada HDMI 1, 2, 3
VGA(PC)
Entrada VGA-PC
VGA (PC) Audio In
Entrada para audio de PC de 3,5mm
Mini AV
Video - Entrada + Entrada audio de Componente/
Vídeo
Mini YPbPr
Mini Component HD Input
SCART
Entrada SCART
CI Card IN
Entrada para tarjeta de Interfaz Común
RF In
Entrada de Antena RF/TV
RJ 45
Ethernet
Digital Audio Out
Salida Digital Coaxial
HEADPHONES
Salida de 3,5mm para auriculares
* - sólo para los modelos seleccionados
Page 54

SP
Navegación en el menú
Para acceder aeste menú, pulse el botón [MENU] en el mando adistancia.
Para entrar en el menú pulse [OK]. Si desea efectuar alteraciones en
alguna de las con guraciones de origen, utilice los botones de navegación
(▲/▼/◄/►).Para con rmar cualquier con guración pulse el botón [OK].
Para salir de este menú en cualquier momento, pulse el botón [EXIT].
Imagen
Modo de Imagen - Escoja entre las
siguientes pre-con guraciones.
Estándar - Con guraciones de origen
Dinámico - Con guraciones
recomendadas para imágenes
en movimiento rápido
Suave - Para colores más
claros y menos brillo
Personal - Le permite alterar
manualmente todas las con guraciones
Ecohome - Consuma un 15%
menos de energía.
Contraste - Altera
el equilibrio entre negros y blancos.
Brillo - Aumenta odisminuye el brillo de la imagen.
Saturation - Aumenta el color de negros y blancos.
Matriz - Le permite aumentar odisminuir el nivel de tintos en la imagen.
Nitidez - Aumenta odiminuye la nitidez de la imagen.
Temperatura del Color - Escoja entre las siguientes pre-con guraciones.
Normal - Con guraciones de origen
Cálida - Aumenta los tonos rojos de la imagen
Fría- Aumenta los tonos azules de la imagen
Relación de aspecto - El formato de la imagen puede
variar de acuerdo con el canal/emisión. Existen algunas
opciones diferentes para satisfacer sus necesidades.
Automática - Exhibe automáticamente el mejor formato de
imagen. La imagen está en la posición correcta. Podrá haber
líneas negras en el fondo/parte superior y/oen los lados.
Pantalla completa - Exhibirá la imagen de
la emisora sin ninguna alteración.
Zoom 1 / 2 - La imagen está en la proporción correcta
pero será aumentada para rellenar la pantalla.
4:3 - Exhibe la imagen 4:3 en tamaño original. Las barras
laterales aparecerán mostradas para rellenar la pantalla16:9.
16:9 - Llena la pantalla con una señal 16:9.
Reducción de Ruido - Escoja entre las siguientes pre-con guraciones.
CONSEJO: si no pulsa ningún botón durante 10 segundos, saldrá del menú
automáticamente. Puede alterar el límite de tiempo antes de que el menú
se desactive automáticamente – vea la sección Duración del Menú.
La con guración 3D*
Para un efecto óptimo de imágenes en 3D, ver la
televisión con ángulo vertical de + / - 10 °.
El tipo de conexión 3D - Aveces, la imagen en 3D de un dispositivo
3D se puede mostrar incorrectamente. Elija entre las siguientes
opciones para corregir esta situación. Puede cambiar esta
con guración pulsando el botón ’3D 'en el mando adistancia.
3D o - Desactiva el 3D
Side by Side 3D - Este formato se utiliza comúnmente en la
teledifusión 3D. Se reduce ala mitad la resolución horizontal
del video para almacenar las imágenes de los ojos izquierdo y
derecho en cada fotograma. Muestra imágenes de hasta 960 x
1080 píxeles para cada ojo, permitiendo que las estaciones de
televisión transmitan el contenido 3D en un ancho de banda
mucho menor que el Blu-ray 3D. Las resoluciones compatibles se
limitan a720p y 1080i para programas de TV en 3D. Los usuarios
tendrán que seleccionar manualmente el formato correcto para la
visualización 3D de contenidos 3D “side-by-side” en un televisor 3D.
Top Bottom 3D - Este formato es una alternativa para la
radiodifusión3D. Es bastante similar ala 3D side-by-side, excepto que
se reduce ala mitad la resolución vertical en lugar de la resolución
horizontal. Disponible primero en una resolución de 720p, el 3D Top
Bottom ofrece 1280 píxeles en dirección horizontal. Este formato
se considera más adecuado para los programas deportivos donde
existe mucho movimiento panorámico horizontal de la imagen.
Frame packing (compresión de frame) - Como su nombre lo
indica, este formato apila las imágenes del ojo izquierdo y ojo
derecho en cada marco para preservar la resolución original del
contenido a n de restablecer las mejores imágenes en 3D. La
mayoría, si no todos, de los videos Blu-Ray 1080p en 3D y de los
videojuegos 3D 720p de la PS3 son producidos mediante esta
técnica. Otra diferencia clave es que los televisores 3D son capaces
de detectar automáticamente las señales 3D "Frame Packing"
y de reproducir el contenido sin intervención del usuario.
Exchange 3D L/R (Cambio de 3D I/D) - Cambia la secuencia
de imágenes para una visualización diferente.
2D a3D - Cambia la imagen para transformar el 2D en 3D.
Tenga en cuenta que el contenido es transformado por la
televisión, por lo tanto los efectos son limitados.
Profundidad 3D - Profundidad de las imagenes convertidas de 2D a 3D.
3D a 2D - Cambia la imagen de 3D a 2D.
* - Sólo para los modelos con 3D
Page 55

55
PC
Ajuste automático - Le permite con gurar
automáticamente el televisor para que pueda
ser utilizado como un monitor de ordenador.
Disposición H - Altera la posición
horizontal de la imagen.
Disposición V- Altera la posición
vertical de la imagen.
Tamaño - aumenta el tamaño de la imagen.
Fase - Para ajustar el tiempo de atraso de
la fase para reducir el ruido de la imagen.
CONSEJO: si deja el ordenador
inactivo por un determinado período
de tiempo, el televisor pasará
aestado de hibernación (la pantalla se apagará para ahorrar
energía). Para encender nuevamente, pulse el botón Standby.
Sonido
Modo de sonido - Escoja entre las
siguientes pre-con guraciones.
Estándar - Con guraciones de origen
Música - Enfatiza la música sobre as voces
Película - Ofrece sonido en directo
y completo para películas
Personal - Selecciona sus
con guraciones de sonido personales
Deporte - Enfatiza el sonido para deportes
CONSEJO: los niveles de Agudo y Bajo
únicamente pueden ser ajustados cuando el
modo de sonido ‘Personal’ está seleccionado.
Agudos - Para ajustar la
intensidad de alta frecuencia en el sonido.
Bajos - Para ajustar la intensidad de baja frecuencia en el sonido.
Equilibrio - Para alternar el sonido entre los altavoces izquierdo y derecho.
Volumen Automático - Cuando estivé seleccionado la
opción “Encendido”, el volumen se mantendrá aun nivel
constante independientemente de la entrada/raíz.
Sonido Surround - Le permite activar o desactivar el modo Surround.
SPDIF Mode - Esta es la salida Audio COAXIAL
digital. Escoja entre las siguientes opciones:
Apagado - Apagado
Automática - Selecciona automáticamente las mejores con guraciones
PCM - Seleccione esta opción si está conectado aun sistema de
Hi-Fi Estéreo vía cable coaxial (OPCM (Pulse-code modulation)
es una representación digital de una señal analógica)
Conmutador AD - Aumente odisminuya el volumen general.
Volumen AD - Ajuste de volumen de la pista
adicional de audio para de cientes visuales.
Canal
Antena DVB - Seleccione el tipo
de señal de televisión digital.
Air/Aérea – Terrestre (DVB-T )
Cable – Cable (DVB-C)
Sintonización automática - le permite
volver asintonizar el televisor para
todos los canales digitales, estaciones de
radio digitales y canales analógicos.
TV analógica - Sintonización
manual - Le permite sintonizar
manualmente su señal analógico.
DTV Sintonización manual- Le permite
sintonizar manualmente su señal digital.
Editar programa - Le permite eliminar, saltar y añadir canales favoritos.
Inform. de señal - Información sobre la fuerza de señal.
Información CI - Los servicios “Pay per view” requieren la inserción de un
“smartcard” en la T V. Si subscribe un servicio “Pay per view” la operadora
le suministrará una “CAM” y un “smartcard”. La “CAM” podrá entonces ser
introducida en la Porta de Interfaz Común (Entrada para Tarjeta CI).
Registro de programas grabados - Lista de programas de TV grabados.
Lista prog - Lista sus llamadas de atención sobre programas.
OAD - Activa/desactiva la actualización OAD.
Búsqueda OAD - Le permite buscar actualizaciones automáticas.
Bloquear
La clave de origen es 0000.
Bloquear sistema - Le permite bloquear
odesbloquear el menú. Se le pedirá una
clave de 4 dígitos. Utilice el botón ◄ para
cancelar la inserción de la clave. Utilice el
botón ► para limpiar. Intr. Contraseña Cambio de la contraseña predeterminada.
Int. Contresanña - Cambiar
contraseña predeterminada
Bloquear programa - Bloqueo
de canales especí cos
Controlo paterno- Bloqueo de los canales de
televisión basado en la restricción de edad.
Bloqueo teclas - Bloqueo de los botones del televisor
O - Todos los botones están desbloqueados
Parcial - Únicamente el boton Standby está desbloquedado.
Total - Todos los botones están bloqueados.
Page 56

SP
Hora
Reloj - Con gure la hora y la fecha.
Hora de apagado - Le permite con gurar un
tiempo especí co para que su TV se apague.
Hora de encendido - Le permite con gurar
un tiempo especí co para que su TV se
encienda. El canal que será emitido será
el que estaba sintonizado anteriormente
y también el nivel del volumen. Puede
con gurar esta función para que se repita
todos los días oen un determinado día.
Temp. dormir - Le permite con gurar
el temporizador para que el televisor
se apague automáticamente tras un
determinado período de tiempo. Apagado -> 10min -> 20min ->
30min -> 60min -> 90min -> 120min -> 180min -> 240min.
Tiempo de OSD - Le permite ajustar la cantidad de tiempo de permanencia
del Menú On Screen en la pantalla antes de que este desaparezca.
Apagado autom. - Active y desactive la función.
Huso Horario - Altere el fuso horario actual.
Network
Para conectar esta TV a la red via Wi-Fi, por
favor introduzca el adaptador Wi-Fi USB
en un puerto USB. El adaptador Wi-Fi USB
forma parte de los accesorios estándar.
Con guración de red - Seleccione su modo
de conexión. Puede elegir entre Wi-Fi y Cable.
Con guración IP - Ajustes de conexión LAN.
Auto - La TV se conectará
automáticamente a su red doméstica
(este es el ajuste por defecto y
se recomienda mantenerlo).
Manual - Le permite cambiar
manualmente la dirección
IP, máscara de red, puerto e información DNS.
Wi-Fi - Ajustes de conexión inalámbrica.
Wi-Fi auto search - Búsqueda automática de redes Wi-Fi
disponibles. Seleccione la red Wi-Fi deseada, e introduzca
la contraseña si ésta es requerida. Una vez la contraseña
sea aceptada no se le volverá a pedir de nuevo.
ATENCIÓN : el proceso de conexión puede durar varios minutos, por
favor, sea paciente. La reconexión automática durante el proceso
de encendido de la TV también puede durar algo de tiempo.
Network info - Información sobre los ajustes de red.
Network test - Prueba de conexión a la red.
Setting
Lengua - Le permite alterar
el idioma del menú.
Idiomas del sonido - Le permite seleccionar
el idioma de audio en el modo de TV digital.
Idiomas para subtitulos - Le permite
seleccionar el idioma de los subtítulos
en el modo de TV digital.
Idioma para TT - con guración de
codi cación para la correcta visualización
de caracteres de teletexto.
Ayuda para sordos - si la señal
proporciona soporte para la personas
con problemas de audición, los subtítulos
pueden mostrarse pulsando “Subtítulo”. Al activar esta opción y
al cambiar aun canal con soporte para gente con problemas de
audición, los subtítulos auditivos se activan automáticamente.
Pantalla Azul - Altera el fondo cuando no hay entrada entre un
fondo claro y azul (Únicamente disponible en algunas fuentes).
Sistema de archivos PVR * - Controla el sistema de archivos del dispositivo
USB conectado y muestra información sobre el resultado de control.
Sistema de Archivos PVR - Ajustes de grabación PVR.
Selección de disco - Seleccione el puerto USBy partición de disco.
Volumen de adelantamiento temporal -
Seleccione el tamaño del bu er TimeShift.
Formatee start - Permite darle formato FAT32
a un dispositivo USB conectado.
AVISO: TODOS LOS DATOS EN EL DISPOSITIVO
USB SERÁN ELIMINADOSD
Velocidad check - Prueba la velocidad de escritura
en los dispositivos USB conectados.
Primera instalación - Inicia la instalación por primera vez.
Actualización el Software (USB) - De vez en cuando, podremos
lanzar un nuevo rmware para mejorar el funcionamiento del televisor
(disponible para descarga). Este menú le permite instalar el nuevo
software/ rmware en el televisor. Tendrá más detalles especí cos sobre
cómo efectuar este paso al abrir el rmware. Contacte con la línea de
apoyo oconsulte en la sección de ‘apoyo al producto’ en la página web.
ATENCIÓN : Esta TV buscará automáticamente nuevas versiones del
software cada vez que sea encendida. Si una nueva versión es encontrada,
se le preguntará si desea descargarla e instalarla. Si usted selecciona
SI, su televisión se actualizará con la última versión del software.
Restablecer predeterminados- Esta función recon gura
los menús para las con guraciones de origen.
Set wallpaper - Apariencia del menú de aplicaciones.
HDMI CEC* - Le permite controlar los dispositivos conectados
através de HDMI con el mando adistancia del televisor.
Apagado automático* - activa / desactiva automáticamente
los dispositivos conectados através de HDMI CEC.
Menú de dispositivo periférico* - Permite acceder
al menú del dispositivo periférico y operar su menú
con el mando adistancia del televisor.
HDMI ARC* - Envía la señal de audio de la recepción terrestre /
satélite al receptor AV através de HDMI sin necesidad de cables
adicionales de audio. Esta función sólo está disponible en HDMI 2.
* - HDMI CEC debe ser compatible con el dispositivo conectado.
Page 57

57
Application
CONSEJO : Para acceder al menu SMART TV, pulse el botón DVD en el control
remote en cualquier momento, o seleccione la opción desde el menú de su TV.
ATENCIÓN: Por favor, espere mientras su T V se conecta a la red Wi-Fi, ya
que puede tardar unos minutos desde que encienda su TV. La primera vez
necesitará con gurar los ajustes de red, según se describe en la página XX.
AppStore
Usted puede navegar por el menu usando los botones ▲/▼/◄/► de
navegación. Para con rmar el elemento que desea visualizar/reproducir,
pulse el botón OK. Para volver un nivel atrás, pulse el botón [Menu], y
para acceder las funciones adicionales, use los botones de colores.
Para abandonar la Appstore, pulse el botón [EXIT].
Home/Inicio - pantalla inicial con películas recomendadas
y aplicaciones abiertas recientemente.
Multimedia
USB Media - El modo USB permite la reproducción de varios tipos
diferentes de contenido que haya almacenado en su PenDrive USB. Al pasar
ala fuente USB aparecerá la pantalla de menú anterior. El contenido estará
dividido en Fotografía, Música, Película y Texto según el tipo de archivo.
1. Puede navegar por los menús utilizando los botones de navegación
▲/▼/◄/► Para con rmar el elemento que desea reproducir/visualizar
pulse el botón [OK].
2. Seleccione el drive deseado. (Si su drive sólo tiene una partición, únicamente podrá ver un elemento).
3. Puede ahora acceder al elemento. Pulse OK para visualizar.
4. Al visualizar controle el elemento utilizando oseleccionado (i) y utilizando ▲/▼/◄/► y pulse [OK].
Media Server - Búsqueda automática de servidores de
medios digitales (DMS) conectados a su red doméstica, y
reproducción de contenidos de servidores digitales.
AVISO : Los servidores digitales no son proporcionados por
el fabricante de este equipo TV, usted puede descargarse
software de terceros e instalar su ordenador o NAS.
Miracast - Le permite ver contenidos desde su smart phone en su TV.
AVISO : esta función sólo está disponible en el smart phone seleccionado.
Navegador - Abre el navegador predeterminado.
Botón rojo - Acercar zoom.
Botón Verde - Alejar zoom.
Botón Amarillo - Actualizar página.
Botón Azúl - Regresar a la pagina inicial del navegador.
Movies - Lista de películas disponibles.
TV Shows - Lista de programas de TV disponibles.
Música - Lista de música y videos musicales disponibles.
Watchlist - Lista de películas que usted añadió para ver posteriormente.
Apps - Lista de aplicaciones disponibles.
Login - Crear una cuenta, o entrar con una cuenta
existente para personalizar su AppStore.
Ajustes - Filtrar aplicaciones de acuerdo a los idiomas seleccionados.
AVISO : a n de satisfacer los deseos de nuestros clientes, estamos
continuamente mejorando nuestros productos. Como resultado de
ese esfuerzo continuado, nuevas aplicaciones serán regularmente
añadidas a la AppStore. Las aplicaciones y contenidos de la
AppStore pueden ser cambiados sin aviso. Algunas funciones
y contenidos pueden no estar disponibles en su país.
7 Días de TV Guía
La Guía de TV está disponible en el modo de TV Digital. Suministra
información sobre los programas que están siendo emitidos (cuando sea
compatible con el canal digital). Puede ver la hora de inicio y n de todos
los programas y en todos los canales para los 7 días siguientes y puede
con gurar llamadas de atención.
1. Pulse [TV Guide]. Los siguientes 7 días de la guía de TV aparecerán.
2. Navegue por el menú utilizando ▼▲►◄
Ahora puede:
Registre el canal seleccionado y el programa pulsando el botón ROJO. *
Esta operación sólo es posible con los modelos con la función PVR
Establecer un aviso pulsando VERDE.
Ver día anterior pulsando AMARILLO.
Ver el día siguiente pulsando AZUL.
3. Pulse [EXIT] para salir de la Guía de TV 7 días.
Page 58

SP
Grabación USB - modo digital/TDT*
Este televisor integra la posibilidad de instalar un dispositivo USB para
grabación de programas. Esta función está disponible en modo TDT /
digital cuando se utiliza junto con un Pen Drive USB odisco duro USB. Los
bene cios de esta función son los siguientes:
• Pausa del programa en vivo y reproducción, avance rápido y rebobinado
(de la televisión en directo).
• Un botón de grabación, si decide que desea grabar el programa actual
oprogramar una grabación desde la Guía de TV de 7 días.
Debido ala naturaleza del producto, es necesario utilizar una Pen Drive
USB de alta velocidad (como el televisor lee y escribe en la memoria al
mismo tiempo, algunas tarjetas de memoria pueden ser inadecuadas).
Especi cación mínima - Pen Drive USB
Velocidad de lectura - 20 MB/s(mega bytes por segundo)
Velocidad de escritura - 6 MB/s(mega bytes por segundo)
Si desea utilizar un disco duro portátil USB de capacidad superior a32
GB, por favor re érase ala sección de preguntas frecuentes en la parte
posterior de esta guía.
Pausa en directo (Time Shift) *
La pausa de la emisión en directo es muy simple.
- Pulse el botón de reproducción / pausa y pausa la televisión y el
contenido en directo se grabará. Para volver aver el contenido prensa la
reproducción / pausa de nuevo.
- Prensa rápida hacia adelante para avanzar en una grabación (es decir,
saltarse los anuncios).
- Pulse rebobinar para volver en una grabación (es decir, si usted
rápidamente transmitió demasiado lejos).
AVISO: Este televisor incluye un sintonizador de TV, por lo
que sólo se puede grabar el canal que está viendo ograbar
un canal mientras el televisor está en modo de espera.
Un Botón de grabación
En cualquier momento usted puede decidir para grabar el canal actual que
está viendo. Para ello es necesario pulsar el botón [REC].
AVISO: Este televisor incluye un sintonizador de TV, por lo
que sólo se puede grabar el canal que está viendo ograbar
un canal mientras el televisor está en modo de espera.
NOTA: La función de grabación USB sólo es disponible en modo de televisión
digital (TDT). Debido alas leyes sobre derechos de autor, copia ilegal y
grabación, no es posible grabar a/ de cualquier otra fuente de entrada / salida.
* - Disponible en los modelos con PVR integrado
Ficha de producto
Proveedor : Blaupunkt
Model: 40/148Z; 40/133Z
Clase de e ciencia energética: A+
Tamaño de pantalla visible (diagonal): 102 cm / 42"
Consumo promedio en modo encendido:
Consumo energético annual*: 59 kWh/year
Consumo energético en modo standby: <0,5 W
Consumo energético en modo apagado: 0 W
Resolución: 1920 (W) x 1080 ( H)
* - Energy consumption XYZ kWh per year, based on the power consumption of the television operating 4 hours per day for 365 days. The actual
energy consumption will depend on how the television is used.
40W
Page 59

59
Page 60

PT
Instalação e Segurança
ATENÇÃO
PERIGO DE ACIDENTE DA
ELECTRICIDADE! NÃO ABRIR!
Antes de pôr oseu aparelho televisivo em
funcionamento, leia, por favor, as instruções de
segurança e respeite as seguintes advertências:
• Este aparelho com peso maior de 20 kg têm de ser carregado e trans-
portado por mínimamente 2 pessoas.
• Atenção! Este aparelho não contêm nenhumas peças que possam ser
reparadas pelo utilizador. Em caso de avarias contacte ofabricante ou
oserviço autorizado. Ocontacto com algumas peças de dentro do aparelho pode ser um perigo mortal. Agarantia não é sujeita às dani cações
consequente de uma manipulação não autorizada!
• Não retire aparte traseira do aparelho.
Para eliminar operigo de
incêndio nunca deixe velas
ou outras fontes de fogo
aberto na proximidade do aparelho.
• Este aparelho televisivo é destinado para arecepção e reprodução de
sinais audio-visuais. Outro uso é proibido.
• Se o cabo de alimentação estiver dani cado, deve ser substituído pelo
fabricante, agente autorizado ou pessoal quali cado de modo a evitar
um acidente.
• Adistância ideal para ver atelevisão é igual a5 vezes adiagonal do ecrã
da televisão. Aluz provenida de outras fontes que faz re exo no ecrã,
pode piorar aqualidade de imagem.
• Assegure, por favor, aventilação su ciente e tenha cuidado com adis-
tância su ciente entre aparelho e amobília.
• Instalar oproduto, pelo menos, a5 cm da parede para permitir uma boa
ventilação.
• ATV foi projetada para ser utilizada em clima moderado.
• Oreceptor televisivo é destinado ao funcionamento em ambiente seco.
Apesar disso se desejar usa-lo em exterior, tenha cuidado em protegé-lo
contra ahumidade (chuva, fontes de água, salpicos). Não deixe em caso
nenhum oaparelho exposto à actuação de humidade.
• Não ponha recipientes enchidos de água (vaso e parecidos) em cima
da televisão. Estes recipientes podiam verter-se, oque põe em risco
asegurança de circuito eléctrico. Coloque oaparelho televisivo em bases
planas e estáveis. Não coloque nenhuns objectos como revistas, mantas
e parecidos em cima ou abaixo do aparelho.
• Preste atenção para que oseu aparelho televisivo não esteja colocado
em cima dos cabos conductores, que poderiam dani car-se. Os telemóveis ou outros aparelhos que emitem ondas de rádio como os adáptadores WLAN, câmaras monitoras com ligação sem os etc., podem provocar
interferência electromagnética por isso não devem estar colocados na
proximidade do aparelho televisivo.
• Não coloque oaparelho na proximidade de fontes de calor ou num sítio
com luz solar directa, porque tem uma consequência negativa para
oarrefecimento do aparelho. Aacumulação de calor é perigosa e pode
reduzir signi cativamente avida do seu aparelho televisivo. Para assegurar asegurança peça ocasionalmente aum especialista limpar asujidade
acumulada no aparelho.
• Tenha quidado para não dani car ocabo de alimentação de rede ou
(se faz parte do conteúdo) oadaptador de alimentação. Oaparelho
televisivo pode ser ligado só com ocabo de alimentação de rede/
adaptador anexo.
• As tempestades são perigosas para todo tipo de aparelho electrónico.
Oimpacto de um relâmpago com aantena pode dani car atelevisão,
mesmo estando desligada. Deve então desligar todos os conectores e
cabos do aparelho antes de uma tormenta.
• Para alimpeza do ecrã use só um pano suave e levemente húmido. Use
só água limpa, nunca detergentes e jamais solventes.
Aviso:
• Não conecte aparelhos externos com atelevisão acesa. Antes da
conexão desligue não só atelevisão mas também os aparelhos que
pretende ligar! Ligue a cha de televisão à tomada de rede eléctrica só
depois de ligar os aparelhos externos e aantena!
• Sempre tem em conta olivre acesso para odesconector principal e asua
tomada de rede.
• Oaparelho não é destinado ao uso em posto de trabalho equipado com
monitores.
• Ouso excessivo de auscultadores com som alto pode dani car oseu
ouvido.
• Assegure aeliminação ecológica deste producto e todos os seus
componentes e baterias. No caso de ter dúvidas, contacte, por favor,
aorganização de recliclagem de resíduos da sua área.
• Na instalação do aparelho não se esqueça de que as superfícies de
móveis são tratadas com diferentes lacas, plásticos etc., ou com graxa
para mobília. As misturas contidas nestes productos podem levar, entre
outras coisas, à destruição dos materiais do suporte de televisão. Como
consequência poderá encontrar restos deste material na superfície,
aqual será difícil de limpar, nalguns casos impossível.
• Oecrã do seu televisor LCD corresponde aos altos requerimentos de
qualidade e foi posto à prova várias vezes para detectar píxeis defectuosos. Devido atecnologia do processo de produção (mesmo com amaior
atenção na produção de ecrã) não se pode a100% excluir aaparição de
píxeis defeituosos no ecrã. Estes píxeis defeituosos não são considerados
como um defeito dentro de garantia do aparelho se asua extensão não
ultrapasse límites de nidas seguindo anorma DIN.
• Aseguir, poderá encontrar as instruções para amontagem correcta do
produto junto auma parede. Se não puder aparafusar oaparelho junto
ao suporte onde está colocado, recomendamos ouso de uma correia
entre os parafusos da placa VESA e um perno de olho xado na parede.
Tenha acerteza de que as crianças não podem inclinar oaparelho, não
podem pendurar-se ou subir acima dele. Um aparelho mal montado
pode causar feridas graves así ou às suas crianças. Acorreia de segurança deve car tensa entre oaparelho e aparede.
• Para utilizar este modelo de TV como um PC / computador portátil
monitorizar ele terá de ser ligado através da entrada VGA, ele não pode
ser usado como um monitor de PC / portátil através da entrada HDMI.
Aentrada HDMI é fornecida para visualizar oconteúdo digital com
dispositivos externos compatíveis.
• Osoftware da TV e do menu exibido no ecrã podem ser alterados pelo
fabricante sem aviso prévio
Informação Importante Relativa à Utilização de
Videojogos, Computadores, Legendas ou Outras
Visualizações de Imagem Fixa
• Autilização prolongada de material de programa de imagem xa pode
causar uma „imagem sombra“ permanente no painel LCD.
• Esta imagem de fundo é visível em programas normais sob aforma de
uma imagem estacionária xa. Este tipo de deterioração irreversível do
painel LCD/LED pode ser limitada ao efectuar os seguintes passos:
1. Reduza acon guração de brilho/contraste para um nível de
visualização mínimo.
2. Não visualize aimagem xa por longos períodos de tempo.
3. Desligue atelevisão quando não aestiver autilizar.
• Exemplos de imagens que precisa de ter em atenção são as seguintes
(esta não é uma lista exaustiva):
» Logótipos de canais de televisão: ex.: Logótipos de canais de tele-
vendas e visualizações de preços - principalmente se forem brilhan-
Page 61

61
tes e estacionários. Grá cos em movimento ou de baixo contraste
têm menos probabilidade de causar oenvelhecimento do ecrã.
» Visualizações de Hora.
» Teletexto: Não visualize uma página estacionária por um longo
período de tempo.
» Menus de TV/DVD: ex.: Listagem de conteúdos de um disco DVD.
» Modo Pausa: Não deixe atelevisão em modo pausa durante longos
períodos de tempo, ex.: Ao visualizar DVD ou vídeos.
Importante – Uma vez ocorrida a“imagem sombra/queima do ecrã”, esta
nunca mais irá desaparecer e não está coberta pela garantia.
Pilhas
• Respeite apolaridade correcta ao inserir as pilhas.
• Não utilize diferentes tipos de pilhas em conjunto nem
misture pilhas novas e usadas.
• Coloque as pilhas para reciclagem de uma forma amiga
do ambiente.
• Certas regiões possuem regulamentação adequada
para areciclagem de pilhas. Por favor contacte asua
autoridade local.
Cd
Tratamento de resíduos de equipamentos eléctricos
e electrónicos (REEE)*
• Não descarte este dispositivo com olixo comum. Traga-
opara um ponto de coleta designado para areciclagem
de REEE. Ao fazer isso, ajuda aconservar recursos e proteger omeio ambiente. Contacte oseu revendedor ou as
autoridades locais para obter mais informações.
Informações de segurança sobre o3D*
• Se olhar para imagens 3D de muito perto ou para um longo período de
tempo, pode interferir com avisão.
• Assistindo televisão ou jogando videojogos que integram imagens em
3D com óculos 3D para um longo período de tempo pode causar dor de
cabeça, sonolência ou cansaço para sí e / ou seus olhos. Se sentir dores
de cabeça, ou se sentir cansado ou com sono, pare de assistir TV e tomer
um descanso.
• As mulheres grávidas, os idosos, as pessoas com problemas cardíacos ou
aqueles que sofrem de sonolência frequentemente devem abster-se de
assistir TV em 3D.
• Algumas imagens 3D pode levá-lo atentar fugir ou evitar aimagem exi-
bida no vídeo. Portanto, é melhor não assistir TV em 3D perto de objetos
frágeis ou perto de objetos que podem ser facilmente revertidos.
• Evite que as crianças menores de 5 anos assistam televisão em 3D, um
vez que pode afetar odesenvolvimento da visão.
Aviso sobre as crises de fotossensibilidade e
aepilepsia fotossensível:*
• Alguns espectadores podem sofrer ataques epiléticos quando expostos
adeterminados factores, incluindo luzes ou imagens em vídeojogos ou
na televisão.
• Se você ou alguém da sua família tem um histórico de epilepsia ou de
crise de fotossensibilidade, consulte oseu médico antes de assistir TV em
3D. De modo semelhante, alguns sintomas podem ocorrer em condições
não especi cadas e sem precedente de crises anteriores. Se tiver algum
dos seguintes sintomas, pare de ver aimagem 3D e consulte um médico:
tontura, transição visual ou visão turva, instabilidade visual ou ou do
rosto, como espasmos ou contracções oculares, ação inconsciente,
convulsões, confusão, perda de consciência ou desorientação, perda de
senso de direção, cólicas ou náuseas. Os pais devem monitorar estes sintomas em seus lhos, inclusive adolescentes, um vez que esses podem
ser mais sensíveis aos efeitos de assistir TV em 3D.
As crises de fotossensibilidade ou epilepsia
fotossensível pode ser reduzida através das
seguintes acções:
• Faça pausas frequentes enquanto assiste TV em 3D.
• Para aqueles que têm uma visão diferente em cada olho, não assistir à TV
sem antes tomar medidas de correção da visão.
• Para assistir TV, escolha um posição confortável para que seus olhos
estejam ao nível da imagem 3D e abstenha-se de sentar-se muito perto
da televisão.
• Não veja imagens 3D quando estiver cansado ou doente, e evite olhar
para imagens 3D durante um longo período de tempo.
• Não use os óculos 3D para qualquer outra nalidade que não avisuali-
zação de imagens 3D em uma TV 3D.
• Alguns espectadores podem sentir-se desorientado depois de assistir
aTV 3D.
• Portanto, depois de assistir aTV 3D, tome um momento para recuperar
seus sentidos, antes de passar para outra atividade.
* - Apenas para os modelos com 3D\
Notas sobre a funcao TV digital
• Quaisquer funções relacionadas com a TV Digital ( ) só funcionarao
em países ou áreas onde os sinais digitais terrestres (MPEG -2 e H.264
/ MPEG-4 AVC) DVB -T / DVB -T2 são transmitidos ou onde você tem
acesso a um compatível DVB- C (MPEG-2 e H.264 / MPEG-4 AVC) serviço
de cabo. Por favor, con rme com o seu distribuidor local se você pode
receber um sinal / DVB -T2 DVB -T , onde você vive ou pergunte ao seu
fornecedor de cabo, se o seu serviço DVB- C é adequado para operação
integrada com esta TV .
• O seu fornecedor de cabo pode cobrar uma taxa por seus serviços, ou
exigir que você concorde com os termos e condições do negócio.
• Este televisor e compatível com DVB- T / DVB -T2 e especi cações DVB
-C , mas a compatibilidade com transmissões de cabo digital de futuros
DVB- T / DVB- T2 digital terrestre e DVB -C não são garantidos.
• Algumas funções de TV Digital podem não estar disponíveis em alguns
países/regiões e o cabo DVB- C pode não funcionar correctamente com
alguns fornecedores.
Nota Parental
• Este televisor inclui muitas características avançadas que lhe permitem
aceder a diferentes aplicações, incluindo alguns sites de internet, salas
de chat e redes sociais.
• Recomenda-se que, se o produto é para ser usado por crianças com
idade inferior a 18 anos, deve estar sob a supervisão dos pais ou tutores.
• Se você não deseja que o seu lho use os recursos de internet, você
não deve con gurar o ambiente de rede. Alternativamente, você pode
desconectar o cabo Ethernet ou Wi-Fi USB pen drive, se você não quiser
ter acesso a esses recursos.
Page 62

PT
Conteúdo de embalagem
Aembalagem deste televisor contem os seguintes
componentes.
• 1x TV
• 1x Comando
• 1x USB pen drive sem os
• 2x Baterias AAA
• 1x Manual de utilização
• 1 x Base de suporte
• 1 x Pescoço de suporte
• 1x Cabo de antena de alta frequência
• 1 x kit de instalação
• 1 x Óculos 3D (Apenas para os modelos com 3D)
Fixação da base
Por favor, siga as instruções do folheto de instalação da base, localizado no saco de acessórios
Começar – con guração inicial
1. Ligue aentrada de antena do receptor
de TV (RF IN) para atomada de antena.
Conecte ocabo de alimentação da TV
para sua tomada de parede.
2. Inserir USB pen drive sem os à entrada
USB .
3. Ligar oequipamento pelo interruptor
de corrente.
4. Coloque as pilhas fornecidas no comando
(respeite apolaridade) e ligue oaparelho
premindo obotão Standby.
5. Você será agora recebido com o ecra de
instalação pela primeira vez.
Caso não apareça, no coman-do remoto por favor prima [MENU] e de
seguida 8-8-8-8 e omenu aparecerá. Caso deseja efectuar alterações aos
parâmetros prede nidos, utilize os botões ▲ ◄ ▼ ►. Para sair do menu,
pressione [EXIT]
6. Por favor, de na as con gurações desejadas no ecra da primeira
instalação.
DVB Antena - Selecione o tipo de transmissão digital.
Você pode escolher entre a terrestre (DVB- T), cabo ( DVB- C).
Idioma - De na o idioma do menu TV.
País - De na o país desejado.
Tunning Mode - Escolha se você deseja sintonizar apenas Digital
(DTV) Analogue (ATV ) ou ambas analógica e digital (DTV + ATV).
Operator – Selecione operador de cabo. Se o seu operador de cabo
não estiver listado selecione Outros. (Disponível somente se a DVB
Antena está de nida para Cabo).
Environment - de nição de poupança de energia
Para economizar energia , por favor selecione o Modo Casa.
LCN - De nir LCN para ON se você quer organizar os canais por
preferências de um operador (só se aplica a DVB -T e canais DVB- C).
7. Pressione [Sintonização Automática] para iniciar o processo de
busca.
8. Prede nições de canais DVB-C em opção:
Mantenha todas as con gurações padrão, como recomendado.
Se alguns canais DVB-C não são encontrados, entre em contato com
seu provedor de rede para obter o"Network ID" válido. Em seguida,
realize uma nova pesquisa. Pressione atecla [MENU], selecione "busca
automática de canais" e digite oID da rede obtido.
TIP: Como parte de nosso esforços em curso para reduzir oconsumo de
energia, ac-rescentamos uma nova função aeste televisor chamada Ecohome
(aparecerá no ecrã de primeira instalação). Esta função permite reduzir
em aproximadamente 15% oconsumo energético face aoutros modos.
Aluminosidade da imagem é reduzida quando utilizar omodo Ecohome.
Se esta função não for adequada ao seu ambiente, pode escolher outros
modos (Nota: omodo Pro ssional é omodo ótimal por defeito, no entanto
ocon-sumo de energia é aproximadamente 15% superior ao modo Ecohome).
* - Somente para modelos com sintonizador DVB-S
Mando adistancia
STANDBY – Ligue atelevisão quando em standby ou vice-versa.
MUTE – Silencie ovolume ou vice-versa.
DTV - De ne afonte da Televisão Digital Terrestre.
RADIO – Alterna entre TV e Rádio no modo digital.
USB – Mude para afonte USB.
ATV – Mude para afonte analógica de TV.
DVD – menu Smart TV
0 – 9 –
De 0 a9 para seleccionar directamente um canal de TV.
TV GUIDE – Abre oGuia de TV 7 Dias (no modo TDT).
– Para retomar ao último canal visualizado.
VOL ▲/▼ – Para diminuir/aumentar onível de som.
S. MODE – Navegue por entre as diferentes con gurações de som
P. MODE – Navegue por entre as diferentes con gurações de imagem.
FAV – Para visualizar omenu de favoritos.
CH ▲/▼ – Para aumentar ou diminuir ocanal visualizado.
(▲/▼/◄/►/ OK) – Permite-lhe navegar nos menus de ecrã e ajustar as
con gurações de sistema de acordo com asua preferência.
MENU – Para visualizar omenu OSD.
EXIT – Para sair de todos os menus.
SOURCE – Para visualizar omenu de entrada/raiz.
INFO – Prima uma vez para informação sobre ocanal actual/seguinte
Prima duas vezes para informação de programa sobre oprograma actual.
ASPECT – Para alterar oecrã entre os diferentes formatos de imagem.
SLEEP – Prima repetidamente para navegar por entre as opções do
temporizador.
AUDIO – Para alterar oidioma de áudio (se disponível).
SUBTITLE – Para alterar odiálogo no fundo do ecrã (ligado/desligado).
TEXT – Modo Teletexto - Para entrar Teletexto
TEXT HOLD - Modo Teletexto - manter página atual, que é exibido
TEXT DVD ZOOM - Modo DVD1 - para alterar otamanho da imagem -
Modo de teletexto - para mudar otamanho do ecrã em modo teletexto
DISPLAY – Para apagar oecrã enquanto houve rádio.
DVD MENU1 Modo DVD - Para apresentar omenú de DVD
Rec2 – Modo PVR - Para gravar oque estiver aser emitido na televisão.
DVD SETUP1 – Modo DVD - Para exibir omenu de con guração do modo
DVD
Rec List2 – Modo PVR - Abre alista do que tiver gravado anteriormente.
– Para reiniciar ocapítulo actual.
– Para avançar para opróximo capítulo.
1
/
– Para parar areprodução / Ejectar disco em modo DVD - pressione
obotão para 4 segundo
– Para reproduzir em modo de retrocesso rápido.
– Para reproduzir em modo de avanço rápido.
– Para reproduzir/parar.
GOTO1 – Modo DVD - muda para DVD.
A-B1 – Modo DVD - Reprodução de AaB.
ANGLE1 – Modo DVD - opção de outro ângulo DVD.
REPEAT – Modo DVD1 - Modo USB -Repetição da reprodução.
REVEAL – Modo Teletexto - Para revelar ou esconder as palavras escon-
didas.
SIZE – Modo teletexto - para alterar otamanho em modo teletexto
TITLE1 – Modo DVD - Para exibir otítulo de DVD
D. DIS1 – Modo DVD - para mostrar informação do disco.
Page 63

63
INDEX – Modo Teletexto - Para exibir apágina do índice
Botões vermelho, verde, amarelo, azul – funções alternativas de teletex-
to e do OSD.
3D amarelo 3D
1
- funções disponíveis apenas com modelos com leitor DVD integrado
2
- funções disponíveis apenas com modelos com PVR integrado
3
- funções disponíveis apenas com modelos com 3D integrado
3
– alterna entre diferentes con gurações 3D
Botões de TV
Vol+ Volume cima e menu direita
Vol- Volume baixo e menu esquerda
CH+ Programa / Canal cima e menu cima
CH- Programa / Canal baixo e menu baixo
MENU Visualização Menu/OSD
SOURCE Visualização do menu raiz de entrada
STANDBY Ligar / Desligar
Selecção de Entrada/Raiz de Modo
Para alternar entre as diferentes entradas/
conexões.
a) Utilizando os botões do comando
remoto:
1. Prima [SOURCE/ AV] – Omenu de raiz irá
aparecer.
2. Prima [
▼] or [▲] para seleccionar aentrada
pretendida.
3. Prima [OK]
b) Utilizando os botões na Televisão:
1. Prima [SOURCE]
2. Ande para cima/baixo utilizando os botões
CH+/CH- para aentrada/raiz pretendida.
3. Prima Vol+ para alterar aentrada/raiz para aquela seleccionada.
Conexões
USB
Porta USB
HDMI 1, 2, 3
Entrada HDMI 1, 2, 3
VGA(PC)
Entrada VGA-PC
VGA (PC) Audio In *
Entrada para audio de PC de 3,5mm
Mini AV
Video - Entrada + audio de Componente/Vídeo
Mini YPbPr
Entrada HD para Mini Componente
SCART
Entrada SCART
CI Card IN
SCART input
RF In
Entrada de Antena RF/TV
RJ 45
Ethernet
Digital Audio Out
Digital Optical Coax output
HEADPHONES
Salida de 3,5mm para auriculares
Page 64

PT
Menu de navegação
Para aceder aeste menu, prima obotão [MENU] no comando remoto. Para
entrar num menu prima [OK].
Se pretender efectuar alterações aalguma das con gurações de origem,
utilize os botões de navegação (▲/▼/◄/►).Para con rmar qualquer
con guração prima obotão [OK]. Para sair deste menu em qualquer altura,
prima obotão [EXIT].
Imagem
Modo Imagem - Escolha entre as
seguintes pré-con gurações
Padrão - Con gurações de origem
Dinâmica - Con gurações recomendadas
para imagens em movimento rápido
Suave - Para cores mais
claras e menos brilho
Pessoal - Permite-lhe alterar
manualmente todas as con gurações
Ecohome - Ecohome consuma
15% de energia amenos.
Contraste - Altera oequilíbrio
entre preto e branco
Brilho - Aumenta ou diminui obrilho da imagem
Saturation - Aumenta acor de pretos e brancos
Matriz - Permite-lhe aumentar ou diminuir onível de tintos na imagem
Nitidez - Aumenta ou diminui anitidez da imagem
Temperatura da Cor - Escolha entre as seguintes pré-con gurações
Normal - Con gurações de origem
Quente - Aumenta os tons vermelhos na imagem
Frio - Aumenta os tons azuis na imagem
Dimesões da Imagen - Oformato da imagem pode variar
de acordo com ocanal/emissão. Existem algumas opções
diferentes para ir ao encontro das suas necessidades.
Automático - Exibe automaticamente omelhor formato
de imagem. Aimagem está na posição correcta. Poderá
ter linhas pretas no fundo/topo e/ou nos lados.
Em tela cheia - Irá exibir aimagem da emissora sem qualquer alteração.
Zoom 1 / 2 - Aimagem está na proporção correcta
mas é aumentada para preencher oecrã.
4:3 - Exibe aimagem 4:3 no tamanho original. As barras
laterais são mostradas para preencher oecrã16:9.
16:9 - Enche atela com um sinal 16:09/
Redução de Ruído - Escolha entre as seguintes pré-con gurações
De nições 3D*
Para um melhor efeito de imagem 3D, assista TV
com um ângulo vertical de + / - 10 °.
3D tipo de conexão - Às vezes, aimagem 3D de um dispositivo
3D pode ser exibida incorretamente. Escolha uma das seguintes
opções para corrigir isto. Pode alternar essas con gurações
pressionando obotão ’3D 'no controle remoto.
3D o - Desativa o3D
Side by Side 3D - Este formato é comumente usado em 3D
radiodifusão. Ele divide pela metade aresolução horizontal do uxo
vídeo para armazenar as imagens para os olhos esquerdo e direito em
cada imagem. Exibe imagens de até 960 x 1080 pixels para cada olho,
permitindo que as emissoras de TV transmitam conteúdo 3D numa
largura de banda muito menor do que o3D Blu-ray. As resoluções
suportadas são limitadas a720p e 1080i para programas de TV em 3D.
Os utilizadores precisarão selecionar manualmente oformato correto
para exibir oconteúdo 3D Side-by-side corretamente numa TV 3D.
Top Bottom 3D - Este formato é uma alternativa 3D para
aradiodifusão, bastante semelhante ao 3D side-by-side, excepto
que é reduzida pela metade aresolução vertical em vez da
resolução horizontal. Disponível na resolução de 720p, oTop
Bottom 3D oferece 1280 pixels na horizontal. Onúmero de
pixeis elevado é geralmente considerado mais apropriado para
omovimento panorámico horizontal em programas desportivos.
Frame Packing (compressão de frame) - Como opróprio nome indica,
este formato empilha as imagens do olho esquerdo e olho direito em
cada frame para preservar aresolução original do conteúdo a m de
restabelecer as melhores imagens 3D. Amaioria, se não todos, dos
lmes Blu-Ray 1080p 3D e dos jogos 3D 720p na PS3 é produzida
utilizando esta técnica. Outro importante diferencial é que as TVs 3D
são capazes de detectar automaticamente os sinais de "Frame Packing"
em 3D e reproduzir oconteúdo sem intervenção do utilizador.
Exchange 3D L / R (Troca 3D Esq / Dir) - Muda aseqüência
de imagens para uma visualização diferente.
2D a3D - para transformar imagens em 2D para visualização
3D. Por favor, note que oconteúdo é transformado
pela televisão, e os efeitos são limitados.
Profundidade 3D - Profundidade de imagens convertidas de 2D para 3D .
3D para 2D- Altera a imagem de 3D para duas dimensões (2D) regulares .
* - Apenas para os modelos com 3D
PC
Ajustar Automaticamente - Permite-
lhe con gurar automaticamente
atelevisão para ser utilizada como
um monitor de computador.
O set horizontal - Altera aposição
horizontal da imagem.
O set Vertical - Altera aposição
vertical da imagem.
Tamanho - Aumenta otamanho da imagem.
Fase - Para ajustar otempo de atraso da
fase de forma areduzir oruído da imagem.
DICA: Se ocomputador for deixado inactivo
por um determinado período de tempo,
atelevisão irá mudar para oestado de hibernação (oecrã irá desligar-se
para poupar energia). Para ligar novamente prima obotão Standby.
Page 65

65
Som
Modo de Som - Escolha entre as
seguintes pré-con gurações.
Padrão - Con gurações de origem
Música - Enfatiza amúsica sobre as vozes
Filme - Oferece som ao vivo
e completo para lmes
Pessoal - Selecciona as suas
con gurações de som pessoais
Desporto - Enfatiza osom para desportos
DICA: Os níveis de Agudos e Graves apenas
podem ser ajustados quando omodo
de som ‘Pessoal’ é seleccionado.
Agudos - Para ajustar
aquantidade de alta frequência no som.
Graves - Para ajustar aquantidade de baixa frequência no som.
Balanço - Para alternar osom entre as colunas esquerda e direita.
Volume automático - Quando ‘ligado’ estiver seleccionado, ovolume irá
manter-se aum nível constante independentemente da entrada/raiz.
Surround Sound - Permite ligar o som surround ON ou OFF.
SPDIF Mode - Esta é asaída Áudio COAXIAL digital.
Escolha entre as seguintes opções:
Desligado - Desligado
Automático - Selecciona automaticamente as melhores con gurações
PCM - Seleccione esta opção se estiver aefectuar uma conexão
aum sistema de Hi-Fi Estéreo via cabo coaxial (OPCM (Pulse-code
modulation) é uma representação digital de um sinal analógico)
Comutador AD- Aumente ou diminua ovolume geral.
Volume de AD - Volume de faixa adicional para de cientes visuais .
Canal
DVB Antena - De na o tipo
de sinal de TV digital
Air - Terrestre (DVB- T)
Cabo - Cabo (DVB- C)
Sintonização Automática - lhe voltar
asintonizar atelevisão para todos
os canais digitais, estações de rádio
digitais e canais analógicos.
Sintonização manual da ATV- Permite-lhe
sintonizar manualmente oseu sinal analógico.
Sintonização manual DVB-T - Permite-lhe
sintonizar manualmente oseu sinal digital.
Editar Programa - Permite
- lhe eliminar, saltar e adicionais canais favoritos.
Informação do sinal - Informações sobre aforça do sinal.
Informação de CI - Serviços “Pay per view” requerem ainserção de um
“smartcard” na T V. Se subscrever um serviço “Pay per view” aoperadora
irá fornecer-lhe uma “CAM” e um “smartcard”. A“CAM” poderá então
ser inserida na Porta de Interface Comum (Entrada para Cartão CI).
Registro de programas gravados - Lista dos programas de TV gravados.
Lista programas - Lista os seus lembretes de programa.
OAD - Ligar/desligar atualizações OAD
Busca OAD - Permite buscar atualizações para OAD (Over Air Download).
Bloquear
Apalavra-passe de origem é 0000.
Bloquear Sistema - Permite-lhe bloquear
ou desbloquear omenu. Irá ser-lhe pedida
uma palavra-passe de dígitos. Utilize
obotão◄para cancelar ainserção da
palavra-passe. Utilize obotão►para limpar.
Apalavra-passe de origem é 0000.
De nir senha - Muda asenha padrão.
Bloquera Programa - Bloqueia
canais de televisão especí cos.
Instrução parental - Bloqueia canais de
televisão com base na restrição de idade.
Bloquiero teclas - Bloqueia os botões da TV.
Desligado - Todos os botões de TV são desbloqueados
Parcial - Apenas botão Standby é desbloqueado
Cheio - Todos os botões de TV são bloqueados
Hora
Relógio - Con gure ahora e adata.
Tempo para Desligar - Permite -lhe
con gurar um tempo especí co
para que asua TV se desligue.
Tempo para Ligar - Permite -lhe con gurar
um tempo especí co para que asua TV se
ligue, ocanal que será emitido, araiz que
estará ligada e também ovolume. Pode
con gurar esta função para que se repita
todos os dias ou num determinado dia.
Temp. Dormir - Permite-lhe con gurar
otemporizador para que atelevisão
se desligue automaticamente após
um determinado período de tempo. Desligado -> 10min -> 20min
-> 30min -> 60min -> 90min -> 120min -> 180min -> 240min.
Tempo OSD - Permite-lhe ajustar aquantidade de tempo
da permanência do Menu On Screen no ecrã antes de.
Temp. automático - Ligue e desligue afunção.
Fuso Horário - Altere oseu fuso horário actual.
Page 66

PT
Network
Para conectar a TV à rede via Wi-Fi,
por favor, insira a drive USB Wi- Fi
na entrada USB. A drive USB Wi-Fi é
uma parte dos acessórios padrão.
Con guração da rede - Selecione
o tipo de conexão. Você pode
escolher entre Wi- Fi e cabo.
Con guração IP - con gurações
de conexão de rede LAN
Auto - conectará automaticamente a TV à
sua rede doméstica (esta é a con guração
padrão e é altamente recomendada)
Manual - Permite alterar manualmente
as informações de IP, máscara de rede, gateway e DNS.
Wi-Fi - con gurações de conexão de rede sem o.
Wi-Fi auto search- Automaticamente procura redes
sem os disponíveis. Seleccione a rede Wi- Fi desejada e
digite a senha se a rede está protegida por uma. Uma vez
aceite a senha, você não tera de voltar a faze-lo.
NOTA : O processo de conexão pode demorar alguns minutos,
por favor, seja paciente. Re -conexão automática durante o
processo de ligar a TV também pode demorar algum tempo.
Network Info - Informações sobre as con gurações de rede
Network Test - teste de conexão de rede
.
Setting
Idioma - Permite-lhe alterar oidioma do menu.
Idioma TT - de nições de codi cação para
aexibição de caracteres no teletexto.
Idiomas do áudio - Permite que selecionar
oidioma de áudio no modo TV Digital.
Idiomas das Legendas - Permite
que selecionar oidioma dos
subtítulos no modo TV Digital.
Ajuda para surdos - se osinal fornece
suporte para os de cientes auditivos, as
legendas de apoio podem ser exibidas,
pressionando obotão “subtítulo”. Se
activar aopção de subtítulos opcionais
para de cientes auditivos, e mudar para um canal que soporta esta
funcionalidade, as legendas são ativadas automaticamente.
Ecrã Azul - Altera ofundo quando não há entrada entre um
fundo claro e azul (Apenas disponível em algumas fontes).
PVR do sistema de arquivos - opções de gravação PVR
Seleção do disco - Selecione a porta USB e partição de disco.
Volume de andamento temporal - De na o tamanho
Formato Start - Você pode formatar dispositivo de armazenamento
USB conectado ao sistema de arquivos FAT 32.
Aviso: todos os dados no dispositivo USB SERÃO ELIMINADOS.
Celocidade check - Testes de velocidade de gravação de
dispositivos de armazenamento USB conectados.
Primeira instalação - Inicia ainstalação pela primeira vez.
Actualizar Software (USB) - Actualização de Software (USB) – De vez em
quando poderemos lançar novo rmware para melhorar ofuncionamento
da televisão (disponível para download). Este menu permite-lhe instalar
onovo software/ rmware na televisão. Detalhes mais aprofundados sobre
como efectuar este passo serão lançados com o rmware. Contacte alinha
de apoio ou consulte asecção de ‘apoio ao produto’ da página web.
NOTA: a TV irá procurar uma nova versão do software automaticamente
de cada vez que é ligado. Se o novo software for encontrado, ele vai
???
perguntar se você gostaria de fazer download e instalá-lo. Se você
selecionar " Sim " a TV irá atualizar a versão mais recente do software.
Restabelecer prede nições - Esta função recon gura
os menus para as con gurações de origem.
Set Wallpaper - Fundo do menu de aplicativos.
HDMI CEC* - Permite-lhe operar os dispositivos
conectados via HDMI com ocontrole remoto da TV.
Auto O * - liga / desliga automaticamente os
dispositivos conectados via HDMI CEC.
Menu de dispositivo* - Permite aceder ao menu de dispositivos
periféricos e operar os seus menu usando ocontrole remoto da TV.
HDMI ARC* - Envia osinal de áudio terrestre / satélite via
HDMI receptor AV sem ouso de cabos de áudio adicionais.
Esta função só está disponível na porta HDMI 2.
* - HDMI CEC deve ser suportado pelo dispositivo conectado.
Page 67

67
Application
DICA: Para aceder ao menu Smart TV pressione o botão DVD no controle
remoto a qualquer momento ou selecione a partir do menu TV.
NOTA: Por favor, aguarde enquanto a TV liga ao Wi-Fi. Pode demorar
alguns minutos depois de ligar TV. A primeira vez que você necessita
con gurar a conexão de rede como está descrito na página xx.
AppStore
Você pode navegar pelo menu usando as teclas ▲/▼/◄/►.
Para con rmar o item que deseja reproduzir/exibir prima o
botão [OK]. Para voltar atrás pressione o botão [Menu] e para
acessar as funções adicionais use os botões coloridos .
Para deixar Appstore pressione o botão [EXIT].
Home - Ecra inicial com lmes recomendados
e aplicativos abertos recentemente.
Modo USB / Reprodutor multimédia
USB media - Omodo USB permite areprodução de vários tipos diferentes
de conteúdo que tiver armazenado na sua PenDrive USB. Ao mudar para
afonte USB irá aparecer oecrã de menu acima. Oconteúdo estará dividido
em Fotogra a, Música, Filme e Texto com base no tipo de cheiro.
1. Pode navegar pelos menus utilizando os botões de navegação
▲/▼/◄/► Para con rmar oitem que pretende reproduzir/visualizar
prima obotão [OK].
2. Seleccione adrive pretendida. (Se asua drive só tem uma partição
apenas irá ver um item).
3. Pode agora aceder ao item. Prima OK para visualizar.
4. Ao visualizar controle oitem utilizando ou premindo (i) e utilizando
▲/▼/◄/► e [OK].
Media Server - Automaticamente procurar servidores de media digital
(DMS) conectados à sua rede doméstica e oferecer uma reprodução
e prestação de servidores de mídia de formulário conteúdo
NOTA: Media Server não é fornecido pelo fabricante TV, você pode baixar
o software de terceiros e instalá-lo atreves do seu computador ou NAS.
Miracast - Permite visualizar o conteúdo de seu
telefone inteligente na tela da TV.
NOTA: A função está disponível apenas nos
selecionados telefones inteligentes.
Browser - Abre o navegador web padrão.
Botão Vermelho – Ampliar.
Botão Verde – Reduzir.
Botão Amarelo - Atualizar página.
Botão Azul - Voltar ao ecra inicial do navegador.
Movies - lista de lmes disponíveis.
TV shows - Lista de programas de TV disponíveis.
Music - lista disponível de música e vídeos musicais.
Watchlist - Lista de lmes que você adicionou para assistir mais tarde.
Apps - Lista de aplicativos disponíveis.
Login - Crie uma conta ou faça login numa conta
existente para personalizar sua AppStore.
Settings - Filtra as aplicacoes com base nos idiomas selecionados.
NOTA: Para atender as exigencias dos nossos clientes , estamos a
melhorar nossos produtos. Como resultado do nosso esforço, novas
aplicações serão adicionadas contínuamente para a AppStore. Aplicações
e conteúdos em AppStore podem ser alterados sem aviso prévio. Algumas
das funções e conteúdo pode não estar disponível no seu país.
Guia TV de 7 dias / USB Record
OGuia de TV está disponível no modo de TV Digital. Fornece informação
sobre os programas aserem emitidos (onde suportado pelo canal TDT).
Pode ver ahora de início e de m de todos os programas e em todos os
canais para os 7 dias seguintes e con gurar lembretes.
1. Prima [TV GUIDE]. Oseguinte Guia de TV 7 Dias irá aparecer.
2. Navegue pelo menu utilizando ◄►▼▲.
Poderá agora:
Gravar ocanal selecionado e oprograma premindo obotão vermelho.*
Esta operação apenas é possível com os modelos dispondo da função
PVR
Con gurar um lembrete ao premir VERDE.
Visualizar um dia anterior premindo AMARELO.
Visualizar odia seguinte premindo AZUL.
3. Prima [SAIR] para sair do Guia de TV 7 Dias.
Page 68

PT
Gravação USB - USB Record - Modo TDT *
Esta TV permite aconexão de um dispositivo USB para efectuar agravação
de programas. Este recurso está disponível no modo digital (TDT), quando
usado com uma Pen Drive ou disco rígido USB. Os benefícios são:
• Pausa da emissão em directo, reprodução, avanço e recuo rápido.
• Um botão de gravação, se decidir gravar oprograma que está aser
emitido ou agendar uma gravação apartir do Guia TV de 7 dias.
Devido à natureza do produto, deve usar um dispositivo USB de alta
velocidade (como aTV lê e grava no dispostivo ao mesmo tempo, alguns
modelos podem ser inadequados).
Especi cação mínima - Pen Drive USB
Velocidade de leitura de - 20 MB / s(mega bytes por segundo)
Escreva avelocidade de - 6 MB / s(mega bytes por segundo)
Pause Live TV (Time Shift) *
Pause Live TV é muito simples.
- Aperte oplay / pause e pausa de conteúdos de televisão ao vivo
e gravados. Para revisar oconteúdo pressionar obotão Play / Pause
novamente.
- Pressione avançar para avançar em uma gravação (ou seja, pular os
comerciais).
- Pressione retroceder para voltar em uma gravação (ou seja, se você
acelerei demais).
DICA: Este televisor só possui um sintonizador de TV,
permitindo gravar apenas ocanal que está aassistir ou gravar
um canal enquanto aTV está no modo de espera.
Um botão de gravação
Aqualquer momento pode optar por gravar ocana que estiver aassistir,
pressionando obotão [REC].
DICA: Este televisor só possui um sintonizador de TV,
permitindo gravar apenas ocanal que está aassistir ou gravar
um canal enquanto aTV está no modo de espera.
NOTA: afunção de gravação USB é apenas disponível no modo digital
/ TDT. Devido às leis sobre direitos autorais, cópia ilegal e gravação,
não é possível gravar para / desde qualquer outra entrada / saída.
* - Somente para modelos com PVR
Ficha do produto
Fornecedor: Blaupunkt
Model: 40/148Z; 40/133Z
Classe de e ciência energética: A+
Tamanho do ecra visível (diagonal): 102 cm / 42"
Consumo de energia em modo average: 40W
Consumo anual de energia*: 59 kWh/year
Consumo de energia em Standby: <0,5 W
Consumo de energia em modo O : 0 W
Resolução do ecra: 1920 (W) x 1080 ( H)
* - Consumo de energia XYZ kWh por ano, com base no consumo de energia do televisor a funcionar 4 horas por dia durante 365 dias. O consumo
real de energia vai depender de como a televisão é utilizada.
Page 69

69PT71
Page 70

Page 71

Page 72

Universal Media Corporation /Slovakia/ s.r.o.
Mickiewiczova 7104/14,
81107 Bratislava 1, Slovakia
Assembled in Europe
BLA/MAN/0237
 Loading...