

Page 1

Instruction Manual for
Induction Cooktops
BIC78F
Page 2

Dear Customer,
Thank you for buying a BLANCO Induction Cooktop.
Before we continue telling you about this cooktop, we cordially invite you to become part of the Blanco family by
subscribing online. Please visit our website where you can easily register for product/cooking demonstrations,
and request Blanco’s gourmet recipes. Go to www.blanco-australia.com and fill in the subscription details in the
contact us/showrooms section.
You will find that the clean lines and modern look of your Blanco Induction cooktop blends in perfectly with your
kitchen décor. It is easy to use and performs to a high standard.
Blanco also makes a range of products that will enhance your kitchen such as ovens, rangehoods, dishwashers,
microwaves, sinks and taps. There are models to complement your new Blanco Induction cooktop.
Of course, we make every effort to ensure that our products meet all your requirements, and our Customer Relations
department is at your disposal, to answer all your questions and to listen to all your suggestions.
Please complete the warranty card and keep your receipt as proof of purchase. Retain all documents relating to
the purchase of this product.
Blanco is committed to providing increasingly efficient products that are easy to use.
Page 3

Read these instructions carefully before using your cooktop and keep them in
a safe place.
If you follow the instructions, your cooktop will provide you with many years of good
service.
Page 4
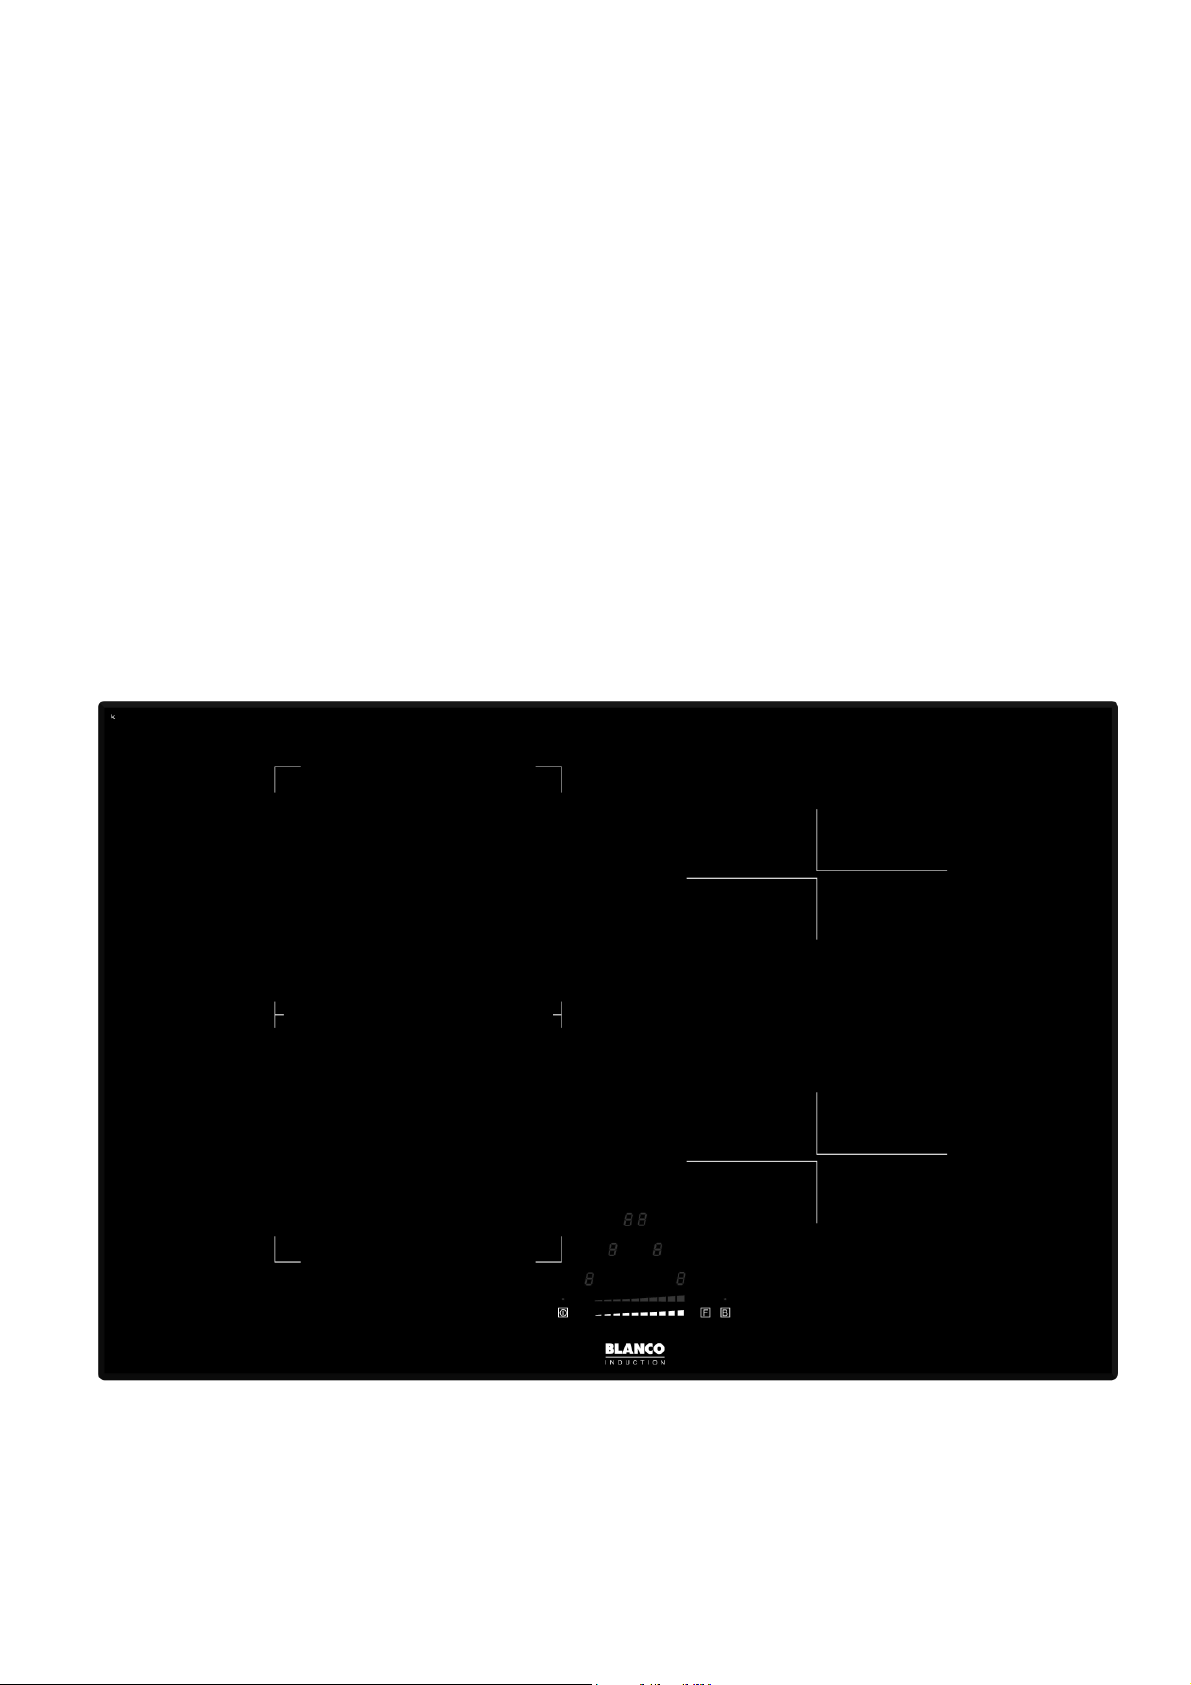
TABLE OF CONTENTS
SECTION PAGE NO.
Important Safety Instructions ………….. 1-2
Appliance Details ………………………… 2
Operating Instructions …………………… 3-8
Cleaning ………………………………….. 9
Electrical Connections …………………... 10
Installation ………………………………… 11-12
Trouble Shooting and Error Codes ……. 13-14
Warranty ………………………………….. 16
Page 5

IMPORTANT SAFETY INSTRUCTIONS
IMPORTANT: Read the assembly instruction section and safety precautions of this
booklet carefully before removing the contents of this carton.
1. This appliance is not intended for use by persons (including children) with reduced physical, sensory or
mental capabilities, or lack of experience or knowledge, unless they have been given supervision or
instruction concerning the use of the appliance by a person responsible for their safety. Children
should be supervised to insure that they do not play with the appliance.
2. After removing the packaging, make sure to check if there is any damage to the appliance. If there is
any damage, never attempt to use the appliance and immediately contact your Authorised Service
Centre. As packaging materials can be dangerous to children, they need to be collected immediately
and put out of reach.
3. In certain circumstances electrical appliances may be a danger hazard. Check the conformity of
voltage and power settings, which are specified on the information plate attached to the appliance
and/or packaging, with the usage conditions available.
4. Do not place heavy objects in or on these appliances, use for storage or as a cutting surface as sharp
edges can damage the surface. This appliance is designed for cooking food only. Use flat based, stable,
inductive cooking rated cooking vessels only.
5. This appliance is designed for domestic household use only and for the cooking of domestic food
products. Use as a commercial appliance will void the warranty. It should not to be used in a marine
environment or outdoors and must be fully built in. Do not use the appliances until fully installed.
6. A means for disconnection must be incorporated in the fixed wiring in accordance with the wiring rules.
7. The electrical connection must be accessible after installation. The appliance must be electrically isolated
before any maintenance can be performed.
8. The appliance is not intended to be operated by means of an external timer or separate remote control
system.
9. Electrical connection must be made as per local wiring rules and regulations. Do not disconnect the
appliance with wet hands or bare feet, and do not disconnect the power cord with extreme force.
10. Ensure that the kitchen is well ventilated or mechanical ventilation is in use while cooking on this
appliance.
11. Do not store or use flammable materials or aerosols near the cooktop. Items made from aluminium,
plastic, plastic film & sugar based foods should also be kept away from the appliance, as they may fuse
to the surface.
12. Heat from the underside of the unit will be expelled by inbuilt fans – do not block. It is essential that the
installation instructions relating to ventilation are followed, otherwise the appliance can fail.
13. WARNING - The cooktop will become hot during and directly after use. Do not touch the surface during
this time, as it may be hot and can cause burns. To avoid burns, children should be kept away.
14. Cleaning may only be commenced on the appliance once it has cooled down and is turned off. Failure to
clean properly can damage the unit. Do not use a steam jet or any other high pressure cleaning
equipment to clean the appliance.
15. When the appliance is not being used, turn the appliance off. Do not cover with any type of protection
sheet or cloth, as these may ignite and burn.
16. Where this appliance is installed in a caravan, it shall NOT be used as a space heater.
17. Do not modify this appliance. Remove all labels from the glass cooktop before operating.
18. Do not use harsh abrasive cleaners or sharp metal scrapers to clean the glass surface as they can
scratch the surface, which may result in the glass shattering. Clean the glass using a warm damp cloth
(e.g. dishcloth) and dry it with a soft dry tea towel.
19. Do not install this appliance above a dishwasher or clothes dryer, as the steam may damage the internal
circuitry.
20. If any cracking or chipping is noticed on the cooktop, turn the appliance off immediately and call your
Authorised Service Centre.
1
Page 6

21. All cabinetry and materials used in the installation must be able to withstand a minimum temperature of
80°C whilst in use. Certain types of vinyl or laminate kitchen furniture are particularly prone to heat
damage or discolouration at temperatures below the guidelines given above. Any damage caused by the
appliance being installed without adhering to the temperature limits set out above will be the liability of the
owner. To avoid any hazards, limit access to the under-bench section of the cooktop.
22. The appliance must be installed and put into operation by an authorised person under the conditions
provided by the manufacturer in this manual. The manufacturer cannot be held responsible for any
damage that might occur due to faulty installation.
23. Damage can occur to bench tops if pots and pans are allowed to overlap the bench top. This can result
in heat being transferred to the bench top. Ensure that correct sized pots & pans are used. Pans should
be lifted on and off the cooktop surface and not dragged. Cooking zones should not be switched on
without cookware placed on it. Do not place empty cookware onto the cooking zones when in use.
24. Do not leave the cooktop unattended while cooking with solid or liquid oils. There may be flaming up in
conditions of extreme heating. Never pour water onto the flames occurring from oil. Immediately turn the
cooktop off and cover the pan with a lid or fire blanket in order to smother the flame.
25. Users with pacemakers should keep their upper body at least 30cm away from any operational inductive
cooking zone. If in doubt, please consult your doctor before use.
26. Do not place metal objects such as spoons or pan lids onto the cooktop as they may become hot or
cause damage to the surface.
27. A small amount of noise will sometimes be heard as elements turn on & off during operation. This is
normal & not a fault. The sound of the fans will vary depending on cooking zone usage.
DO NOT PLACE ARTICLES ON OR AGAINST THIS APPLIANCE
DO NOT STORE CHEMICALS OR FLAMMABLE MATERIALS OR
DO NOT OPERATE THIS APPLIANCE BEFORE READING THE
INSTRUCTION BOOKLET
SPRAY AEROSOLS NEAR THIS APPLIANCE
APPLIANCE DETAILS
ELECTRICAL DETAILS:
COOKTOPS:
Rated Voltage: Single phase 220-240Vac 50Hz, 2-phase 380-415Vac 50Hz: 7400W.
This information can be found on the rating plate (identification plate) affixed to the underside of the
appliance.
Position of
the heating
zone
Front left
Rear left
Front right
Rear right
Nominal
Power*
2100 W
2100 W
1850 W
1850 W
Booster
Power*
2600 W
2600 W
2300 W
2300 W
Type
Induction
Total
Power
7400 W
* The given power may change according to the dimensions and material of the pan. Nominal power on
cooking zones may adjust lower when the boost function is being used on other cooking zones, to keep the
appliance from exceeding the rated total power.
COOKTOP – Directly wired to mains supply.
SIZES:
Relevant Sizes: LENGTH (mm) WIDTH (mm) HEIGHT (mm)
Cooktop Size (BIC78F) 780 520 50
Cut-out Size (BIC78F) 560 490 -
Super
Boost
Power
3700 W
3700 W
3000 W
3000 W
Diameter
190x220 mm
190x220 mm
200 mm
200 mm
Minimum
diameter
detection
90 mm
90 mm
90 mm
90 mm
2
Page 7

OPERATING INSTRUCTIONS
The basic layout of the induction cooktop is shown in the diagrams below.
10
11
11
06
08
07
09
01
04
05
02
03
DESCRIPTION DESCRIPTION
01 On/off Power touch control 06 Cooking Zone Select touch control & Power LED display (LHR)
02 Melting and Keep Warm Functions touch control 07 Cooking Zone Select touch control & Power LED display (LHF)
03 Boost Power touch control 08 Cooking Zone Select touch control & Power LED display (RHR)
04 Power/Timer Slide touch control 09 Cooking Zone Select touch control & Power LED display (RHF)
05 Power/Timer Slide LED Indicator 10 Timer Touch Control & LED display
11 Cooking Zone Timer Select Indicator
The induction cooktop appliance is operated by touching the control buttons, with the functions confirmed by
LED displays and acoustic signals. Clean glass surface with a damp cloth and dry before use.
Note: All cooking zones have a pre-set limit on the length of time they will run without any setting changes
(table further in the manual).
3
Page 8

Turning On and Turning Off the Cooktop Appliance
NOTE: Do not operate the cooktop without first placing a suitably sized cooking vessel on the appropriate
cooking zone. If the correct sized cooking vessel is not placed on the cooking zone, the Cooking Zone Select
touch control & Power LED display will indicate pan not detected. Settings can be changed, but the zone will
not work until the pot is replaced.
If the appliance is in Stand-By-Mode, it is put into Operating-Mode by pressing the On/Off Power touch control
for at least 1 second. A beep signal indicates the successful operation acoustically, with a small indicator
above the touch control being lit.
Each Cooking Zone Select touch control & Power LED display will display a ´0`. The decimal points on the
Cooking Zone Power Displays will flash until a cooking zone is selected.
If there is no operation within 20 seconds, all the Cooking Zone Select touch control & Power LED
displays will automatically turn off and the appliance will be re-set into Stand-By-Mode.
If the On/Off Power touch control is pressed for more than 1 second (in Operating-Mode), the appliance is
switched off and is set into the Stand-By-Mode again. The appliance can be turned off by pressing On/Off
at any time. The small indicator above the touch control will also turn off.
If there is any residual heat remaining in a cooking zone, this will be indicated in the corresponding
Cooking Zone Select touch control & Power LED display as a red “H”.
Note: All cooking zones have a pre-set limit on the length of time they will run without any setting changes
(table further in the manual).
Selecting A Cooking Zone
1. Select a single cooking zone by pressing the corresponding Cooking Zone Select touch control & Power
LED display (06, 07, 08 or 09), and the decimal point of the chosen cooking zone stays bright while the
others turn off.
2. For the selected cooking zone, you can set or adjust the power level between 1-9 by touching the
Power/Timer Slide touch control (04). All of the other cooking zone displays will have a visible ‘O’, value
(if in use) or ‘H’ (if recently used). The Power/Timer Slide touch control can be operated by either
touching the sensor at some point (lower values to the left), or placing a finger on the sensor and sliding it
left and right. The position will be displayed on the Power/Timer Slide LED Indicator above, as well as on
the Cooking Zone Select touch control & Power LED display.
3. If left idle for more than 10 seconds, the LED for the chosen cooking zone display will turn off (the
cooking zone is no longer selected). Press the Cooking Zone Select touch control & Power LED display
again to select the cooking zone again. Other cooking zones can be selected without waiting for the
previous one to become inactive.
The Cooking Zone Select touch control & Power LED display works on a thermostat system. This means
that the cooking zone will switch on and off in order to remain at the chosen Power Level.
NOTE the cooking zone will remain on for longer periods if a higher Power Level is chosen, alternatively
the cooking zone will be on less regularly on lower Power Level Settings.
Turning Off Individual Cooking Zones
A cooking zone can be turned off by selecting the specific cooking zone touching the Cooking Zone Select
touch control & Power LED display and then using the Power/Timer Slide touch control to set the power to 0.
4
Page 9

The Boost and Super Boost Functions
The Boost and Super Boost functions are available on all of the cooking zones. They are used to speed up
the initial heat up time (say boil a pot of water) and only runs for a short time (10 minutes).
1. Select a cooking zone and press the Boost Power touch control (03) once, so the Cooking Zone Select
touch control & Power LED display changes from the current value to “P”. The power boost function is
now active (indicator above the sensor is lit).
2. The Super Boost Function uses even more power than the Boost Function. Once the Boost Function has
been activated, press the Boost Power touch control again. The Cooking Zone Power LED display will
start to flash ii, ll, P, indicating the function is now active.
3. Once the 10 minutes has passed, the power level of the cooking zone will drop back down to 9 (and the
Cooking Zone Power LED display will change to 9).
Note: The Boost and Super Boost functions use significantly more power than the nominal power (see
appliance details). If used in conjunction with other cooking zones, the max power available on the other
cooking zones may be reduced to keep power usage within the total allowed.
4. To disable the Super Boost function, select the cooking zone and press the Boost Power touch control
(the cooking zone returns to the Boost Function). To disable the Boost function, select the cooking zone
again (so the decimal point is on) and adjust the power level with the Power/Timer Slide touch control
(04). The indicator above the Boost Power touch control will turn off (unless other cooking zones are
using the boost function).
Activating The Key Lock
The key lock is used to set the appliance up so that it cannot be operated without disabling the lock. This is a
useful feature when cleaning down the glass, or to stop children playing with the controls.
1. The appliance must be in Operating-Mode.
2. Place one finger on any point on the Power/Timer Slide touch control (04) and with another finger press
the Boost Power touch control (03) three times (“L” will be created in 3 parts on each of the Cooking Zone
Power LED displays). After the “L” is completely formed, the Timer Touch Control & LED display (10) will
start to count down from 10 to 0. Once finished, the Key Lock Function will run, and the appliance will
change to Stand-By-Mode.
3. To disable the Key Lock Function, press the On/Off Power touch control to put the appliance back into
Operating-Mode. The Cooking Zone Power LED displays will all show “L”, and the 10 second countdown
will start again. Place one finger on any point on the Power/Timer Slide touch control (04) and with
another finger press the Boost Power touch control (03) three times (the “L” will deconstruct). If done
before the 10 second countdown has finished, the appliance will return to normal.
The Key Lock will stay active even if the power is disconnected for a short period of time.
Minute Minder Function
The Minute Minder function is a timer that does not affect any operation on the appliance, but can be used as
a reminder to take action (add a spice, turn meat etc).
1. The appliance must be in set to Operating-Mode, so that the Timer Touch Control & LED display shows
“CL”.
2. Press the Timer Touch Control & LED display (10) and the LED will show “0-“. Within 10 seconds, adjust
the minutes value (0-9) using the Power/Timer Slide touch control (04). The value will flash for 3 seconds
and then the first digit will change to “-“.
3. Adjust this (10 minute value) in the same way. The value will flash for 3 seconds and then the Cooking
Zone Select touch control & Power LED displays will turn off, leaving the minute minder value and the
indicator above the On/Off Power touch control on.
4. When the set time has passed, the appliance starts to beep, and the LED displays at the top of the
control panel (10) will flash “00”. Press any button to turn the sound off and return the appliance to display
its operations as before.
The Minute Minder time can be adjusted at any point by activating the function and adjusting as above.
To disable the function, adjust the time to “00”. Alternatively, if no cooking zone is being used, press the
On/Off Power touch control twice.
The appliance can be used as normal during the Minute Minder operation, but no cooking zone Timer
functions will run.
5
Page 10

Timer Function
The timer function differs from the Minute Minder function in that it will turn off a cooking zone at the end of the
time. It can be set for one or more cooking zones (each working independently). The Cooking Zone Select
touch control & Power LED display always shows the shortest timer when in operation.
1. First set up the appliance with cookware placed on cooking zones and set all power levels.
2. Activate a cooking zone pressing its Cooking Zone Select touch control & Power LED display and within
10 seconds press the Timer Touch Control & LED display (10). The LED shows the current timer value
(00 if new).
3. Set the time in the same manner as for the Minute Minder (the difference to setting the Minute Minder
function time is that the decimal point of the display (11) for the selected cooking zone is also flashing).
The timer starts as the last button is pressed. 3-10 seconds after the last button is pressed, the decimal
point on the Cooking Zone Timer Select Indicator (11) will stop flashing and stay on as long as the timer
is working.
4. Another timer function can now be set on a different cooking zone, or power levels can be adjusted. If a
change needs to be made to a timer, the above can be repeated. Changing the value to “00” will disable
the timer on the selected cooking zone (but not the power level).
5. When a timer function finishes, the appliance will start to beep indicating the cooking zone has finished.
The Cooking Zone Timer Select Indicator (11) for the cooking zone will flash and the Timer Touch Control
& LED display (10) LED will flash “00” for 2 minutes (unless a button is pressed) and then the displays will
return to normal. Any other timer functions that are running will continue (Cooking Zone Timer Select
Indicator decimal points on) until the next timer is finished. If all timer functions finish and there are no
other cooking zones active, the appliance will return to the Stand-By-Mode after the alarm finishes.
Auto Cooking Function
The Auto Cooking Function allows you to set any or all cooking zones up so that they run at a high power
level for a period of time, and then drop the power down to a lower level.
1. The appliance must be in set to Operating-Mode and the cooking zone selected.
2. Use the Power/Timer Slide touch control (04) to set the power to “9”. Let go of the sensor and then press
9 again (the Cooking Zone Select touch control & Power LED display changes to “A”). Holding down the
sensor, slid the sensor back to the left to set a low power setting. After 3 seconds, the Select touch
control & Power LED display will alternate between “A” and the low power setting. At this point, the
cooking zone will run for a set time at high, and then drop down to the low power setting (at which point
the Cooking Zone Select touch control & Power LED display changes to the low power setting). See table
for times on next page.
3. To disable the Auto Cooking Function, select the cooking zone and pick a new power setting with the
Power/Timer Slide touch control (lower than 9). Hold the sensor down and slide up to “9”, then back to a
new setting.
Vertical Bridge Zones Function
The Vertical Bridge Zones Function allows you to control the front and rear cooking zones on the left hand
side from a single touch control (making it easier to cook something in a long pan, like fish, that covers both
cooking zones on the left of the appliance). When in operation the Cooking Zone Select touch control &
Power LED display (LHF) (07) controls both cooking zones, while Cooking Zone Select touch control & Power
LED display (LHR) (06) is disabled.
1. The appliance must be in set to Operating-Mode.
2. Press both Cooking Zone Select touch control & Power LED displays (06 & 07) simultaneously. The
Cooking Zone Select touch control & Power LED displays (06) to the rear will show “n”, the Cooking Zone
Select touch control & Power LED displays (07) to the front will be selected (decimal point lit). Set power
settings as normal (only the front cooking zone will be adjusted).
3. To disable the function press both Cooking Zone Select touch control & Power LED displays (06 & 07)
simultaneously again (power settings both return to 0) or press the On/Off Power touch control to set the
appliance back to Stand-By-Mode.
This function will work with the Timer and Auto Cook Functions, but not with the Boost Function.
Note: For efficient cooking, both cooking zones must be covered by suitable cookware (small pots can be
used between the 2 cooking zones, but this function is best used with long trays or larger pots)
6
Page 11

Melting and Keep Warm Functions
The Melting and Keep Warm Functions can be used to keep food at a certain temperature for long periods of
time (up to 2 hours). The cookware can be removed from the element for up to 10 minutes without disabling
the function.
1. The appliance must be set to Operating-Mode.
2. Select one of the cooking zones. Press the Melting and Keep Warm Function Touch Control (02) to
select the Melting Function (temperature set at approximately 42⁰C) and the Cooking Zone Select touch
control & Power LED display of the selected cooking zone will change to “u”.
3. Press a second time to select the Keep Warm Function (temperature set at approximately 70⁰C) and the
Cooking Zone Select touch control & Power LED display of the selected cooking zone will change to “U”.
Pressing again will cycle the function back to the first setting.
4. The function can be disabled by adjusting the cooking zone power level.
Stop N Go Function
The Stop N Go Function allows you to stop all activity on the appliance (cooking, timers) and restart for where
you left off at a later time.
1. While the appliance is in Operating-Mode, press the Cooking Zone Select touch control & Power LED
displays (06 & 08) for the rear cooking zones simultaneously. A pause symbol “ll” will appear in the two
Cooking Zone Select touch control & Power LED display, indicating that operation has been put on hold.
All functions will pause, and all touch sensors disabled (except for On/Off Power touch control).
2. Once ready to restart, press the Cooking Zone Select touch control & Power LED displays (06 & 08)
again. The LED displays will flash for 2 seconds. Press the Power/Timer Slide touch control (04) within
that time and the pause symbols will disappear. The appliance will then continue to work as it was before.
Recall Function
There may be times when you are cooking and press the On/Off Power touch control by mistake, deleting all
functions and timers. If the On/Off Power touch control is pressed again (within 6 seconds of the appliance
being set to Stand-By-Mode), the Cooking Zone Select touch control & Power LED displays (06 & 08) for the
rear cooking zones a pause symbol “ll” will flash, and the Timer Touch Control & LED display (10) will count
down for 6 seconds. Press the Cooking Zone Select touch control & Power LED displays simultaneously
within the 6 seconds, and the previous settings for the appliance will be recalled.
TOUCH CONTROL SAFETY FUNCTIONS
The following safety functions are available to avoid unintended operations of the cooktop control:
Overflow Cut-off Function
The cooktop has a sensor that detects if liquids are spilled on the control panel. When this happens, an error
function (Er03) will flash and the control panel will cease to operate. The easiest remedy is to clean/dry the
control panel with a moistened cloth and leave for a minute to dry. Once dry, the control panel will be usable
again.
Pan Detection Failure
If a cooking zone is activated and undersized cookware, incorrect material cookware or no cookware is
detected, the symbol U will be displayed on the cooking zone LED display and the cooking zone will be
disabled. Place or replace cookware on the cooking zone.
Residual Heat Functions
After all cooking processes there is some heat stored in the glass top called residual heat. The control can
calculate roughly how hot the glass is in the worst case. If the calculated temperature is higher than + 60 ° C,
then this will be indicated in the corresponding Cooking Zone Select touch control & Power LED display with
a red “H” after the cooktop has turned off. The residual heat display is shown as long as the calculated
cooking zone temperature is > + 60 ° C.
7
Page 12

EXAMPLES OF COOKING ZONE POWER SETTINGS
)
(The values below are indicative)
1 to 2 Melting
Reheating
2 to 3 Simmering
Defrosting
Sauces, butter, chocolate, gelatine.
Dishes prepared beforehand.
Rice, pudding, sugar syrup.
Dried vegetables, fish, frozen products.
3 to 4 Steam Vegetables, fish, meat.
4 to 5 Water Steamed potatoes, soups, pasta, fresh vegetables.
6 to 7 Medium cooking
Simmering
Meat, eggs, sausages.
Goulash, roulade, tripe.
7 to 8 Cooking Potatoes, fritters, wafers.
9 Frying, roosting
Boiling water
P Frying, roasting
Boiling water
Steaks, omelettes, fried dishes.
Water.
Scallops, steaks.
Boiling large quantities of water.
AUTO COOKING FUNCTION TIMES COOKING ZONE TIME LIMITS
SELECTED POWER TIME AT HIGH (MM:SS
1 00:40
2 01:12
3 02:00
4 02:56
5 04:16
6 07:12
7 02:00
8 03:12
9 - : -
POWER LEVEL OPERATING TIME (HRS:MM)
1 8:36
2 6:42
3 5:18
4 4:18
5 3:30
6 2:18
7 2:18
8 1:48
9 1:30
The minimum pot size that can be placed in the centre section (between front left and rear left zones) for the
cooktop to work when on the left vertical flexi zone is Ø185mm.
8
Page 13

CLEANING
NOTE: Cleaning and maintenance operations must only be carried out when the
cooktop is cool (all residual heat indicators are off).
The appliance should be disconnected from the power outlet or turned off at your
isolation switch before commencing any cleaning process.
Do not use plastic, plastic coated or aluminium cooking equipment on this appliance.
CLEANING THE COOKTOP
All cookware used on this appliance should be rated for induction cooking by the manufacturer. Cookware
with rough bases should not be used as they can scratch the glass ceramic surface. The base of the good
cookware should be as thick and flat as possible. Before use, make sure that cookware bases are clean
and dry.
Always place the cookware on the cooking zone before it is switched on. If possible, always place the lids
on the cookware. The base of any cookware used must not be smaller or larger than the cooking zones;
they should be the proper size as indicated below, so as not to waste energy.
Before cleaning the cooktop, first isolate the cooktop from the power. Once done, ensure that there is no
residual heat stored in the appliance. The glass is very resistant to high temperature and overheating. If
there is residual heat stored in the appliance, the related residual heat indicator lamp will be on. In order to
avoid burns, let the appliance cool down.
Remove all spilt food and fat with a clean damp, warm, slightly soapy, dishcloth. Rinse cloth and wipe
cooktop again until clean, then wipe the cooktop dry with a clean tea towel or dry soft cloth.
If aluminium foil or plastic items are accidentally melted on the glass surface, they should be immediately
removed from the hot cooking area with a scraper specifically for glass. This will avoid any possible
damage to the surface. This also applies to sugar or food containing sugar that may be spilled on the
cooktop. Enamelled steel, aluminium & copper will leave a residue on the surface that should be removed
immediately or permanent damage may occur.
In the event of other food melted on the cooktop surface, remove the dirt when the appliance has cooled
down. Use cleaner for glass ceramic or stainless steel when cleaning the surface.
Do not use abrasive sponges to clean the glass surface. These materials may damage the surface.
Do not use chemical detergents, sprays or spot removers on the glass surface. These materials may cause
fire or the glass colour to fade. Clean with a damp, warm, slightly soapy, dishcloth.
WARNING: Using cookware that is too large can cause discolouration or damage to the cooktop surface
around the cooking zones, which is NOT covered under warranty.
9
Page 14

ELECTRICAL CONNECTIONS
LOCAL AUTHORITY REQUIREMENTS
Installation is only permitted by a licensed electrician, and carried out according to instructions
provided by the manufacturer. Incorrect installation might cause harm and damage, for which the
manufacturer accepts no responsibility.
ELECTRICAL INSTALLATION
Before carrying out the connection to the power supply, the voltage rating of the appliance (stamped on the
appliance identification plate) must be checked for correspondence to the available mains supply voltage, and
the mains electric wiring should be capable of handling the oven’s power rating (also indicated on the
identification plate). If you have any doubts, call in a qualified technician.
NOTE: For connections to the mains power supply, never use adapters, reductions or multiple power points
as these may overheat and catch fire. Do not install separate timers.
After having installed the appliance, the switched outlet must always be in an accessible position.
The electrical safety of this appliance can only be guaranteed if the cooktop is correctly and efficiently
earthed, always ensure that the earthing is efficient; if you have any doubts call in a licensed electrician to
check the system. The manufacturer declines all responsibility for damage resulting from an installation which
has not been correctly earthed.
WARNING: If any damage occurs to the power cable during or after installation, it must be replaced
immediately by a licensed electrician with a replacement cable from your Service Centre.
The cooktops can be connected to either a single phase 220-240Vac 50 Hz supply, or 2 phase 380-415Vac
50Hz.
SINGLE PHASE CONNECTION
First, a bridge connection must be made between terminals 1 and 2 (live) and between 4 and 5 (neutral).
Connect the pairs to the live and neutral power supply cables. Connect the ground terminal to the ground
supply cable.
TWO PHASE CONNECTION
First remove any bridge connection between terminals 1 and 2 (live). Place a bridge connection between 4
and 5 (neutral). Connect terminals 1 and 2 to the live power supply cables. Connect either terminal 4 or 5 to
the neutral power supply cable. Connect the ground terminal to the ground supply cable.
The mains terminal block is located on the underside of the cooktop and the terminals are accessible by
removing the terminal block cover using a small flat screwdriver.
The appliance is designed for fixed connection to the mains. During installation, an all pole disconnector
should be included inside the supply circuit with a contact opening of at least 3mm (rated 32A, delay
functioning type). The power supply cord must not touch against any hot surfaces and must be placed so that
its temperature does not exceed 75 °C at any point along its length.
IMPORTANT: The appliance must NOT be connected to the mains supply by means of a 10A, 15A or 20A
plug and socket.
The maximum current drawn in a single phase installation is 32A, and 2x16A for a two phase installation. Only
use cables Tmax 90C types H05RN-F, H07RN-F, H05RR-F, H07RR-F etc.
10
Page 15

INSTALLATION
The adjacent furniture must be able to withstand a minimum temperature rise of 100°C above the
ambient temperature of the room it is located in, during periods of use. The power supply to the
appliance must be cut off before any adjustments or maintenance work is done on it. The
appliance must be well ventilated (as per this manual) otherwise the appliance will overheat.
PREPARATION FOR INSTALLATION AND USE
Manufactured with best quality parts and materials, this modern, functional and practical cooktop will meet
your needs in all respects. Make sure to read the manual to obtain successful results so as not to
experience any problems in the future. The information given below contains rules that are necessary for
correct positioning and service operations. They should be read without fail, especially by the technician
who will position the appliance.
CHOOSING A LOCATION FOR THE APPLIANCE
There are several points to pay attention to when choosing a location for your cooktop. Make sure to take
into account our recommendations below in order to prevent any problems and dangerous situations, which
might occur later!
When choosing a location for the cooktop, attention should be paid that there are no flammable or
combustible materials in the close vicinity, such as curtains, oil, cloth etc. which quickly catch fire.
Ensure a distance between the cooktop edge and rear or side walls of at least 50mm.
Furniture surrounding the cooktop must be made of materials resistant to temperatures above 100 C°.
Required changes to wall cabinets and exhaust fans above a built-in cooktop as well as minimum heights
from the oven board are shown in Figure 1. Accordingly, the exhaust fan should be at a minimum height of
65 cm from the cooktop. If there is no exhaust fan the height should not be less than 70 cm.
11
Page 16

INSTALLATION OF BUILT IN COOKTOP
In order to prevent leakage of any liquids on the work bench and fix the appliance to the bench, a special
sealing tape is supplied together with your oven. Place the cooktop glass down on a clean cloth on a stable
flat surface & apply this seal around the bottom edge of the cooktop (see below). Remove the backing from
the sealing tape and then place the appliance in position. If the sealing tape is not enough to fully seal the
appliance to the bench, use a small bead of clear high temperature resistant silicone sealant.
This appliance can be installed into a workbench 30-40mm thick. When cutting the hole in the work bench,
keep in mind the correct space and ventilation which are shown in the diagrams below.
A board must be placed a minimum of 20mm
below the cooktop that prevents anyone from
touching the underside of the cooktop. Take
care that there is adequate ventilation for air
exchange to the inductive elements (at least
20mm).
NOTE: INDUCTIVE COOKTOPS GENERATE A
LOT OF HEAT INTERNALLY WHEN IN
OPERATION. THE BOTTOM OF THE
APPLIANCE MUST HAVE A CLEAR PATHWAY
TO VENT THIS HEAT OUT VIA THE BOTTOM
FANS TO THE OPEN AIR IN ORDER TO
KEEP ITSELF COOL. FAILING TO PROVIDE
ADIQUATE VENTILLATION WILL DAMAGE
THE APPLIANCE AND VOID YOUR
WARRANTY. THE ABOVE DIMENSIONS
SHOULD BE CONSIDERED THE MINIMUM
VENTILLATION REQUIRED.
12
Page 17

TROUBLESHOOTING AND ERROR CODES
The appliance or a cooking zone doesn’t start:
The electrical connection to the power is faulty – Call an electrician.
A fuse has blown – Check fuse box.
The Key Lock function is active – reset as per the manual.
The control panel buttons are coated in grease or water – clean as per the manual.
An object is covering a control button – in general only one button can be pressed at a time, so
remove object to free-up buttons.
The control panel displays a “U” in one of the Cooking Zone Power LED displays:
There is no cookware on the cooking zone – replace cookware on cooking zone.
Cookware cannot be used with induction cooktops - replace cookware.
The size of the base of the cookware is too small - replace cookware.
The appliance or a cooking zone cuts out:
A fuse has blown – Check fuse box.
A cooking zone has run unattended for a long period of time so has turned off – reset.
A control panel button has been pressed or covered – remove object and reset.
Cookware is empty and base has overheated – turn off appliance, let cool then restart with
cookware refilled.
The control panel LED displays show “
An object or liquid is covering some or all of the buttons – remove object or carefully clean the liquid
away from the control panel.
The control panel LED displays show “E”:
There is an internal software fault in the appliance – disconnect the appliance from the power
source for a few minutes, and then reconnect to reset the software.
If the problem persists, please contact Blanco using the contact details at the end of the manual.
” or “Er03”:
13
Page 18

14
7
Page 19

We appreciate your feedback.
Please review our products on www. blanco-australia.com
15
Page 20

16
 Loading...