

Page 1
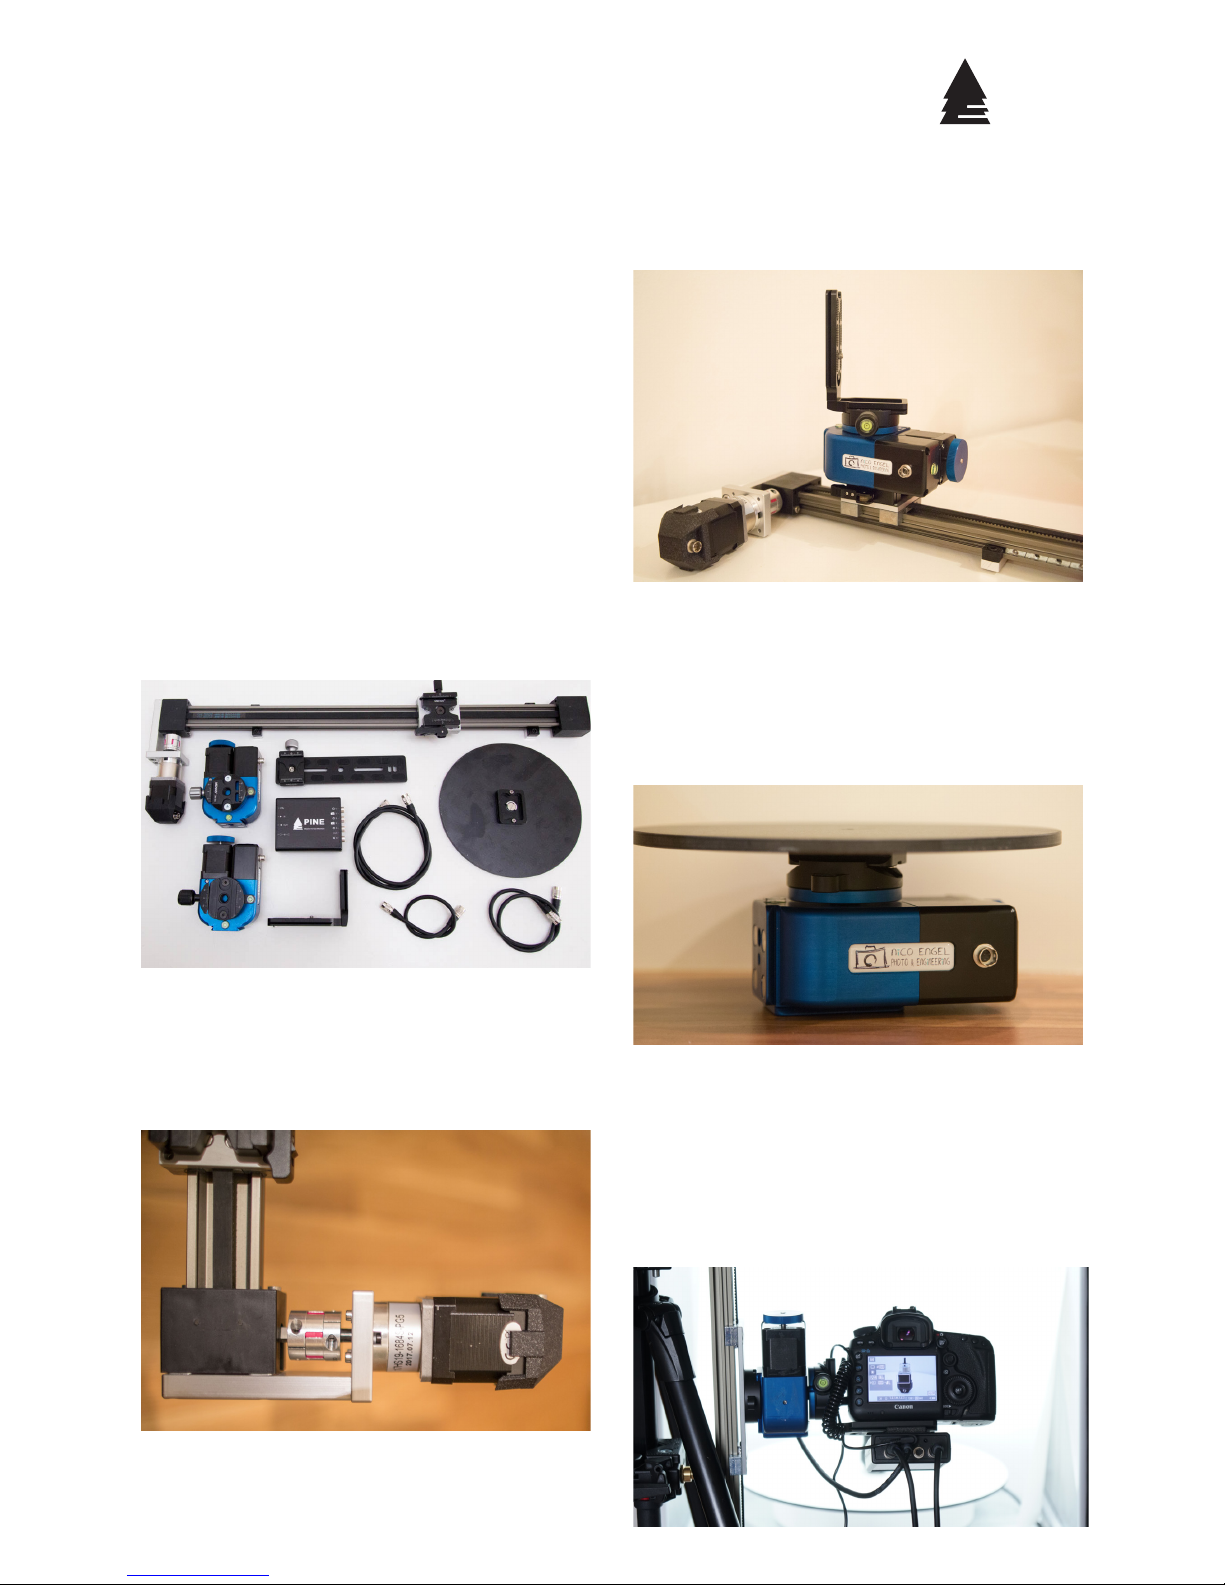
Tilt axis assembly
Use one of the Nic-O-Tilt motor units and mount
it to the slider as shown in the picture below.
Turntable assembly
Use one of the Nic-O-Tilt motor units and mount
the turntable disk to it as shown below. The additional arca rail that is included with the Nic-OTilt is not needed if the bundle is used for the 3D
scan application.
Camera assembly
Mount your camera to the additional arca L-bracket and mount everything to the tilt axis as
shown below. Connect an appropriate camera
release cable to your camera and the camera 1
port of the PINE Controller (both camera ports
on the controller can be used).
Black Forest Motion
3D Bundle – Quick Start Guide
Thank you and congratulations for purchasing
the Black Forest Motion 3D photogrammetry
bundle. This guide will help you with the first
steps to set-up the system. For a quick start
guide focusing on the PINE Motion Controller,
see our separate guide which is included with
each controller.
Bundle Parts
• PINE Motion Controller
• Power supply
• Nic-O-Tilt Head
• Motor Cable 2.0m
• Motor Cable 1.5m
• Motor Cable 0.5m
• Turntable disk
• Slider Rail
• Motor attachment
Motor assembly (120cm only)
Mount the motor attachment to the slider rail as
shown in the picture below. You need an appropriate Allen Key tool.
Black Forest Motion
Page 2
Recommended Setup
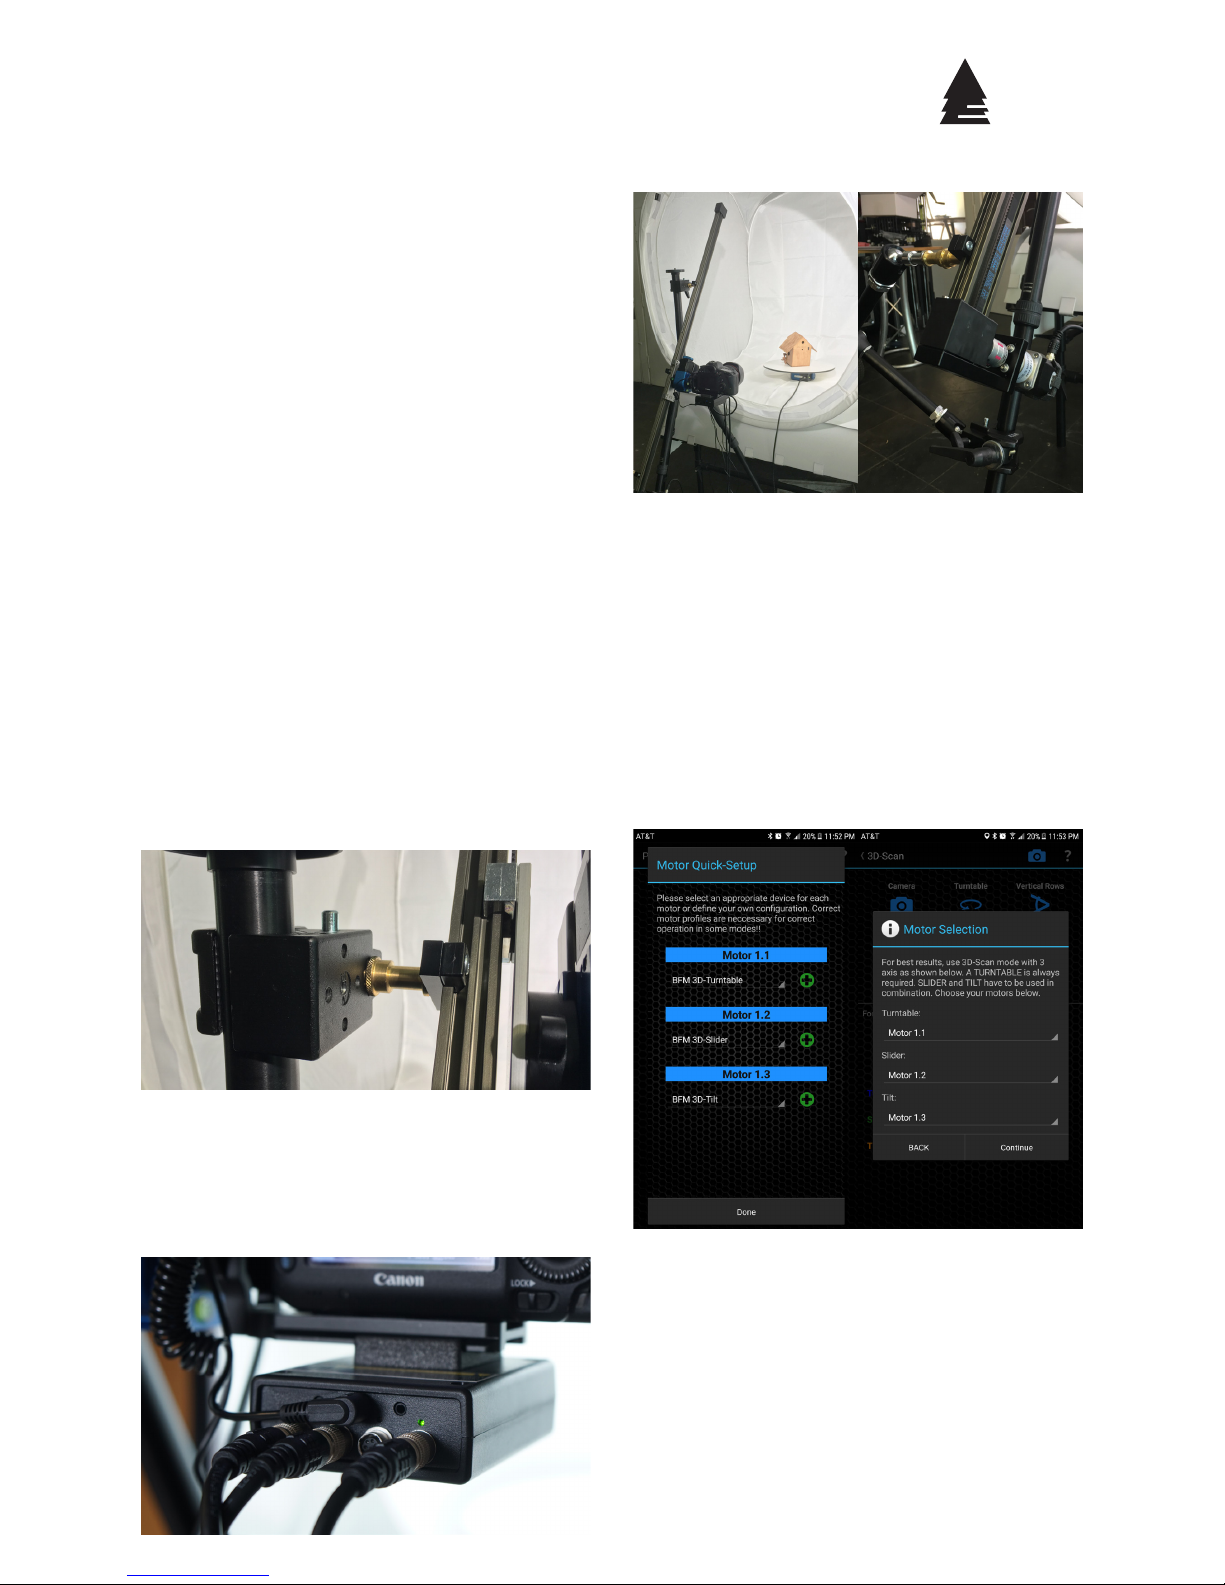
The following pictures show our recommended
constellation for the 3D scan application. Use
the longest 2m cable to connect the turntable
to the PINE Controller. Use the 1.5m cable for
the slider motor and the 0.5m cable for the tilt
axis. Connect motors to the PINE Controller as
follows:
1 – Turntable
2 – Slider
3 – Tilt
You are free to choose the motor ports, but we
recommend to use the above sequence. Mount
the turntable unit to a tripod. Mount the slider rail vertically to a tripod (using additional
clamps – not included) or mount the slider to
a table. Please make sure to not twist the slider
rail in any way with mounting brackets. This can
result in the slider plate getting stuck during movement. If the slider gets still stuck during movement, try to mount the slider with a slight angle.
This also gives better results in terms of distance
and focus.
Mount the PINE Motion Controller directly under the camera to the L-bracket using the small
arca plate which is included with the Nic-O-Tilt.
Mount the plate directly to the bottom of the
controller and slide it to the L-bracket.
Black Forest Motion
Power up the controller
Once the entire system is assembled and all motor units are connected to the PINE Controller,
power on the controller by connecting the included power supply. Please refer to the included
quick start guide for the controller.
Once the controller has booted up and the status
led is blinking green, open the PINE Motion App
on your phone and connect to the controller.
Once the motor quick setup screen appears, select motor profiles as follows:
It is very important and crucial that all motor
profiles are set correctly to guarantee proper
operation of the 3D scan mode. You are now ready to start the 3D Scan mode in the app. On the
right picture you can see the assignment of the
motors in 3D-mode.
 Loading...