

Page 1
INSTRUCTION MANUAL
Catalog No. VEC1086BBD-CA
SAVE THIS MANUAL FOR FUTURE REFERENCE.
Page 2

6. Be extra cautious to reduce the risk of dropping a metal tool onto battery. This might
cause sparks or short-circuit the battery or other electrical part, which can cause an
explosion.
7. Remove personal metal items such as rings, bracelets, necklaces and watches when
working with a lead-acid battery. A lead-acid battery can produce a short-circuit current
high enough to cause a severe burn.
8. Use charger for charging a LEAD-ACID battery only. It is not intended to supply power
to a low-voltage electrical system other than in a starter-motor application. Do not use
the battery charger for charging dry-cell batteries that are commonly used with home
appliances. These batteries may burst and cause injury to persons and damage
property.
9. NEVER ATTEMPT TO CHARGE A FROZEN BATTERY.
Power Cord Safety
This appliance has a polarized plug (one blade is wider than the other) as a safety feature.
This plug will fit into a polarized outlet only one way. If the plug does not fit fully into the outlet,
reverse the plug. If it still does not fit, contact a qualified electrician. Do not attempt to defeat
this safety feature.
Preparing to Charge
1. Determine voltage of battery to be charged by referring to the vehicle manual.
2. If it is necessary to remove battery from vehicle to charge, or to clean terminals, always
remove grounded terminal from battery first. Make sure all accessories in the vehicle
are off, so as not to cause an arc.
3. Clean battery terminals. Do not allow corrosion to come in contact with eyes.
4. Add distilled water in each cell until battery acid reaches level specified by battery
manufacturer. This helps purge excessive gas from cells. Do not overfill. For a battery
without cell caps (maintenance free), carefully follow manufa
cturer's charging
instructions.
5. Study all battery manufacturer’s specific precautions, such as removing or not
removing cell caps while charging, and recommended rates of charge.
6. Area around battery should be well ventilated while battery is being charged. Gas can
be forcefully blown away by using a piece of cardboard or other nonmetallic material
as a fan.
7. Make sure the initial charging rate does not exceed battery manufacturer ’s
requirement.
Charger Location
1. Locate charger as far away from battery as cables permit.
2. NEVER place charger directly above battery being charged; gases from battery will
corrode and damage charger.
3. NEVER allow battery acid to drip on charger when reading gravity or filling battery.
4. NEVER operate charger in a closed-in area or restrict ventilation in any way.
5. Marine batteries must be removed and charged on shore.
6. Do not set a battery on top of charger.
DC Connection Precautions
1. Connect and disconnect DC output clamps only after removing AC cord from electric
outlet.
2. Never allow clamps to touch each other.
3. Attach clamps to battery chassis as indicated in “Battery Installed in Vehicle” steps 5
and 6, and in “Battery Outside of Vehicle” steps 2, 4 and 5.
Follow these steps when the battery is installed in a vehicle. A spark near the battery
may cause an explosion. To reduce risk of a spark near the battery:
1. Position AC and DC cords to reduce risk of damage by hood, door, or moving engine
part.
2. Stay clear of fan blades, belts, pulleys, and other parts that can cause injury to
persons.
3. Check polarity of battery posts. POSITIVE (POS, P, +) battery post usually has larger
diameter than NEGATIVE (NEG, N, –) post.
I M P O R TANT SAFETY INSTRUCTIONS
WARNINGS
1. RISK OF EXPLOSIVE GAS MIXTURES — WORKING IN VICINITY OF A LEADACID BATTERY IS DANGEROUS. BATTERIES GENERATE EXPLOSIVE GASES
DURING NORMAL BATTERY OPERATION. FOR THIS REASON, IT IS OF UTMOST
IMPORTANCE THAT EACH TIME BEFORE USING YOUR CHARGER, YOU READ
THIS MANUAL AND FOLLOW THE INSTRUCTIONS EXACTLY.
2 . To reduce risk of battery explosion, follow these instructions and those published
by the battery manufacturer and manufacturer of any equipment you intend to use
in vicinity of battery. Review cautionary markings on these products and on
e n g i n e .
3 . This equipment employs parts (switches, relays, etc.) that produce arcs or sparks.
Therefore, if used in a garage or enclosed area, the unit MUST be placed not less
than 18 inches above the floor.
Battery Safety
1. Use of an attachment not recommended or sold by the battery charger manufacturer
may result in a risk of fire, electric shock, or injury to persons.
2. To reduce risk of damage to electric plug and cord, pull by plug rather than cord when
disconnecting charger.
3. An extension cord should not be used unless absolutely necessary. Use of an improper
extension cord could result in a risk of fire and electric shock, and will void warranty.
If an extension cord must be used, make sure:
a. that pins on plug of extension cord are the same number, size, and shape as those
of plug on charger;
b. that extension cord is properly wired and in good electrical condition; and
c. that wire size
is AWG#16 (16 gauge) for 100 feet and AWG#14 for distances over
100 feet.
4. Do not operate charger with damaged cord or plug — take to a qualified technician for
replacement of the plug or cord immediately.
5. Do not operate charger if it has received a sharp blow, been dropped, or otherwise
damaged in any way; take it to a qualified service technician.
6. Do not disassemble charger; take it to a qualified service technician when service or
repair is required. Incorrect re-assembly may result in a risk of electric shock or fire,
and will void warranty.
7. To reduce risk of electric shock, unplug charger from outlet before attempting any
maintenance or cleaning. Turning off controls without unplugging will not reduce this
risk.
8. Do not expose charger to rain, snow or use when wet.
Personal Safety
1. Another person should be within range of your voice or close enough to come to your
aid when you work near a lead-acid battery.
2. Fresh water and soap should be nearby in case battery acid contacts skin, clothing, or
eyes.
3. Wear complete eye protection and clothing protection. Avoid touching eyes while
working with a battery. Acid, acid particles or corrosion may get into eyes. Immediately
flood eye with cold water (Eye Wash Station) for at least 15 minutes and seek medical
attention immediately.
4. If battery acid contacts skin or clothing, wash immediately with soap and water. If
redness, pain or irritation occurs, seek immediate medical attention.
NEVER smoke or allow a spark or flame in vicinity of battery or engine.
IMPORTANT SAFETY INFORMATION, SAVE THESE
INSTRUCTIONS
TO REDUCE THE RISK OF INJURY, USER MUST READ AND UNDERSTAND
THIS INSTRUCTIONAL MANUAL. THIS MANUAL CONTAINS IMPORTANT
INFORMATION REGARDING THE OPERATION AND WARRANTY OF THIS
PRODUCT. PLEASE RETAIN FOR FUTURE REFERENCE.
Page 3
I N T R O D U C T I O N
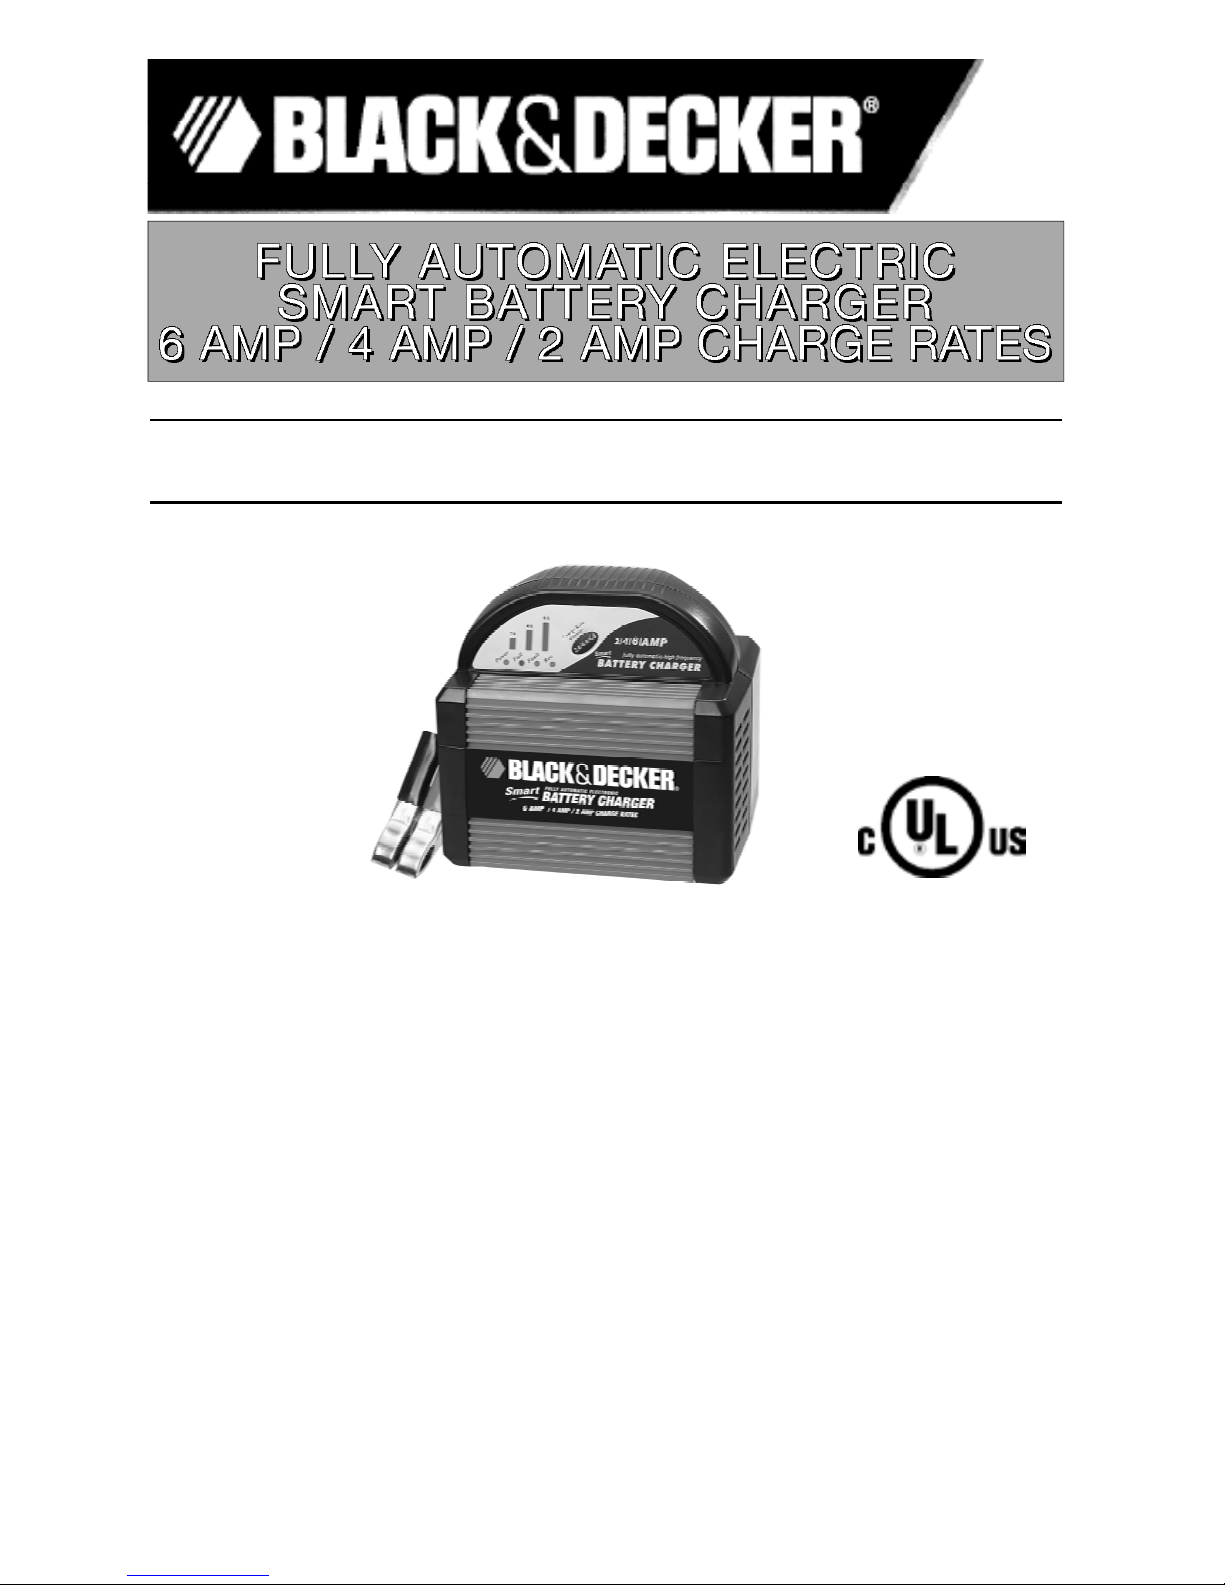
Thank you for selecting the Black & Decker 6 Amp / 4 Amp / 2 Amp Smart Battery Charger.
With proper care and use, it will give you years of dependable service. This battery charger
has a high charge rate of up to 6 amps, and low charge rate of 2 amps. It is designed for
charging only 12-volt lead-acid batteries — conventional automotive, maintenance-free,
marine deep cycle and gel — used in cars, farm equipment, boats, RVs and SUVs, lawn
mowers/garden tractors, motorcycles, personal watercraft, snowmobiles, ATVs and various
a p p l i c a t i o n s .
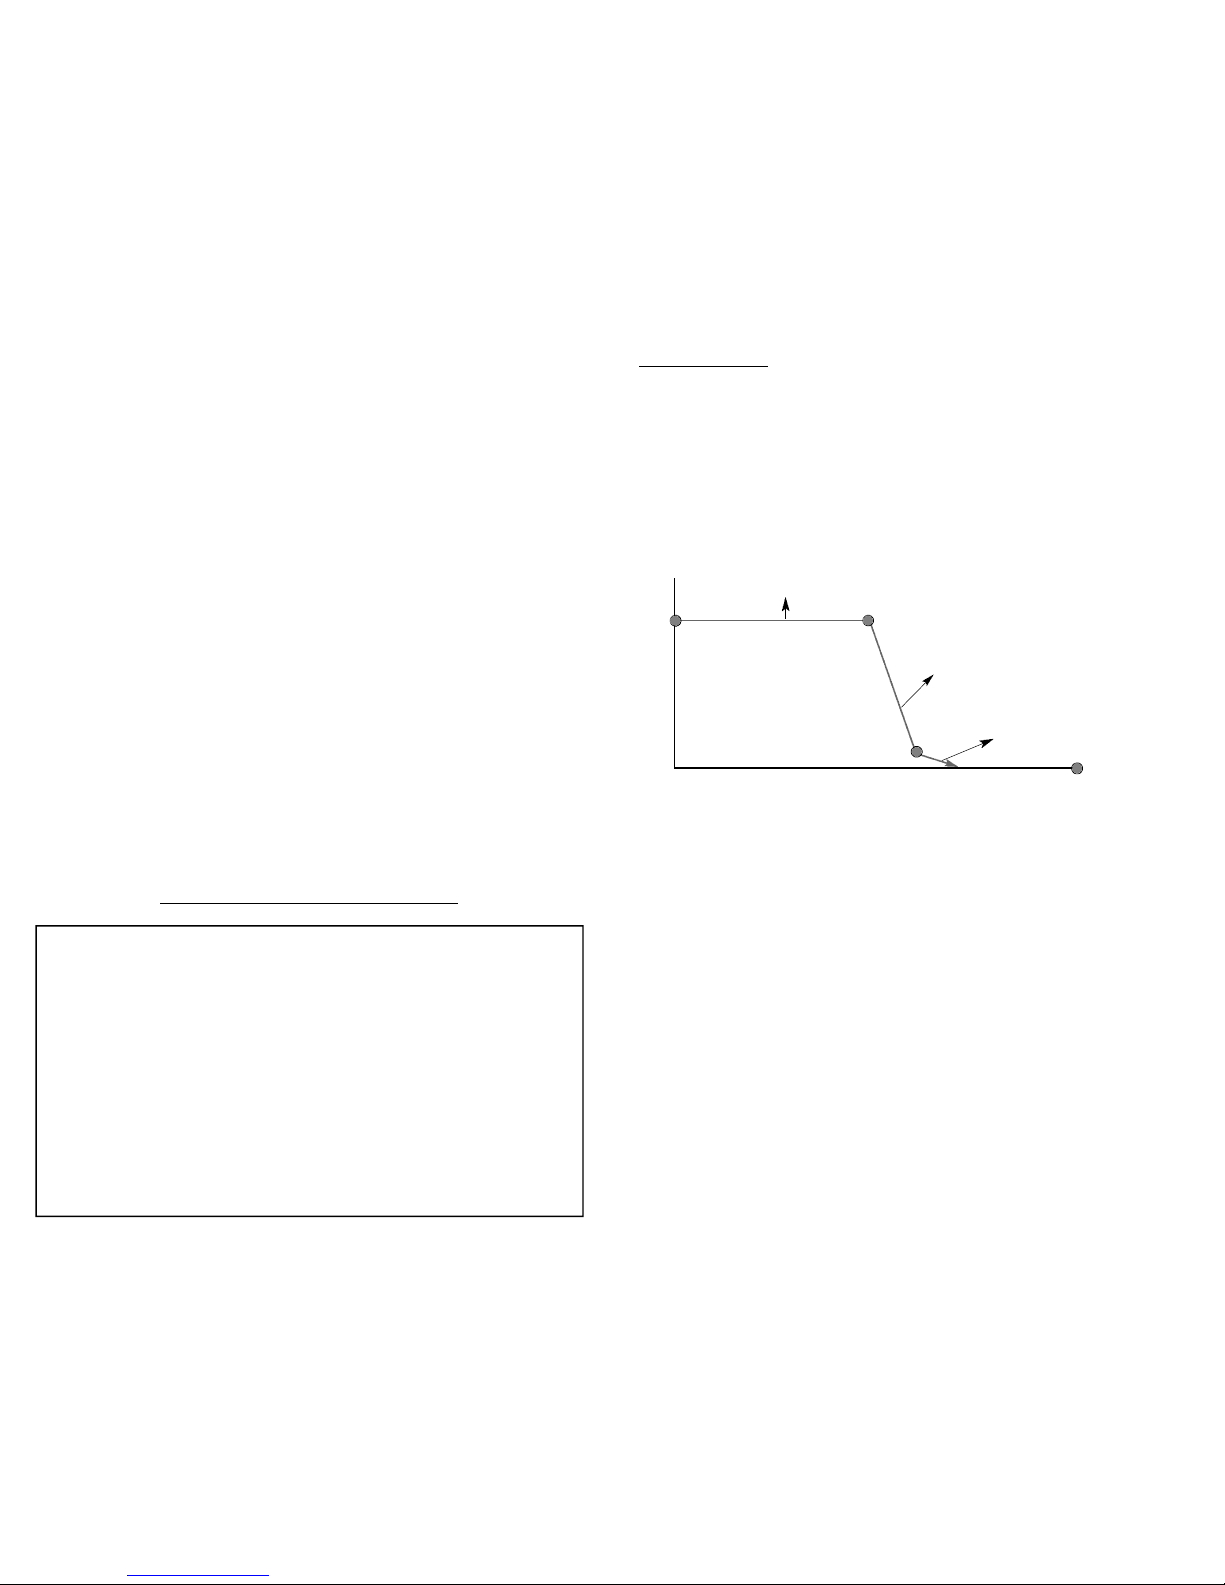
Smart Battery Chargers feature 3-stage, high-efficiency charging technology, built-in
microprocessor control that ensures fast, safe and complete charging of serviceable
b a t t e r i e s .
C h a rge Curv e
Stage One — Rapid Start Charge at 6 amps delivers maximum charging amperage
to “wake up” any serviceable 12 volt battery and allows for quick engine starting in
just 8 minutes (based on a midsize vehicle batt
ery at 50% charge level). When
battery reaches a maximum safe predetermined voltage, the charger will
automatically signal a "beep" and move into Stage 2 of the charging process.
Stage Two — Absorption Charge maintains the maximum possible charge at a
constant, safe, predetermined voltage. During the phase, voltage absorption
regulation charge, the charging voltage remains constant, while the actual charging
BEEP
BEEP
OFF BEEP
STAGE THREE
CHARGING
COMPLETE
STAGE ONE
STAGE TWO
4 . Determine which post of battery is grounded (connected) to the chassis. If negative post
is grounded to chassis (as in most vehicles), see 5. If positive post is grounded to the
chassis, see 6.
5. For negative-grounded vehicle, connect POSITIVE (RED) clamp from battery charger
to POSITIVE (POS, P, +) ungrounded post of battery. Connect NEGATIVE (BLACK)
clamp to vehicle chassis or engine block away from battery. Do not connect clip to
carburetor, fuel lines, or sheet-metal body parts. Connect to heavy gauge metal part of
the frame or engine block.
6. For positive-grounded vehicle, connect NEGATIVE (BLACK) clamp from battery
charger to NEGATIVE (NEG, N, –) ungrounded post of battery. Connect POSITIVE
(RED) clamp to vehicle chassis or engine block away from battery. Do not connect clip
to carburetor, fuel lines or sheet-metal body parts. Connect to a heavy gauge metal
part of the frame or engine block.
7. When disconnecting charger, disconnect AC cord, remove clamp from vehicle chassis,
and then remove clamp from battery terminal.
8. Do not charge the battery while the engine is operating.
9. See operating instructions for length of charge information.
Follow these steps when the battery has been removed from a vehicle. A spark near
the battery may cause an explosion. To reduce risk of a spark near the battery:
1. Check polarity of battery posts. POSITIVE post (marked POS,P, +) usually has a larger
diameter than the NEGATIVE battery post (marked NEG, N, –).
2. Attach a 24-inch (minimum length) 6 AWG insulated battery cable to the NEGATIVE
battery post (marked NEG, N, –).
3. Connect the POSITIVE (RED) battery clamp to the POSITIVE battery post (marked
POS, P, + or red).
4. Stand as far back from the battery as possible, and do not face battery when making
final connection.
5. Carefully connect the NEGATIVE (BLACK) charger clamp to the free end of the battery
cable connected to the NEGATIVE terminal.
6. Set the charge rate to appropriate setting according to battery size.
7. When disconnecting charger, always do so in reverse sequence of connecting
procedure and break first connection while as far away from battery as practical.
Note: A marine (boat) battery must be removed and charged on shore. To charge it
on board requires equipment specially designed for marine
use. This unit is
NOT designed for such use.
SAVE THESE INSTRUCTIONS
This device complies with part 15 of the FCC rules. Operation is subject to the following two conditions:
(1) this device may not cause harmful interference, and (2) this device must accept any interference
received, including interference that may cause undesired operation.
This equipment has been tested and found to comply with the limits for a Class B digital device, pursuant
to part 15 of the FCC Rules. These limits are designed to provide reasonable protection against harmful
interference in a residential installation. This equipment generates, uses and can radiate radio frequency
energy and, if not installed and used in accordance with the instructions, may cause harmful interference
to radio commu
nications. However, there is no guarantee that interference will not occur in a particular
installation. If equipment does cause harmful interference to radio or television reception, which can be
determined by turning the equipment off and on, the user is encouraged to try to correct the interference
by one or more of the following measures:
• Reorient or relocate the receiving antenna.
• Increase the separation between equipment and receiver.
• Connect the equipment into an outlet on a circuit different from that to which the receiver is
connected.
• Consult the dealer or an experienced radio/TV technician for help.
Modifications not authorized by the manufacturer void user’s authority to operate this device.
Page 4

Fault — Lights when the battery is not connected properly or not chargeable.
R e v. (Reverse Polarity) — Lights when clamps are incorrectly connected to battery
terminals.
O P E R ATING INSTRUCTIONS
Ensure that all installation and operating instructions and safety
precautions are understood and carefully followed by anyone installing or
using the charger. Follow the steps outlined in the “Important Safety
Instructions” at the front of this manual.
Charge Rate Selection
After charger clamps are correctly connected, plug the charger into a 120 volt A C
outlet. The power indicator light will light. Select the proper charge current rate
based on battery size.
WA R N I N G
If FA U L T indicator lights, the connection to the battery terminals is bad.
Follow the steps outlined in “Important Safety Instructions” at the front of this
m a n u a l .
If Rev. Polarity indicator also lights, the RED (POSITIVE) and B L A C K
( N E G AT I V E ) clamps are incorrectly connected to battery terminals. Follow the
steps outlined in “Important Safety Instructions” at the front of this manual.
Charging the Battery
1 . Press Charge Rate Selector 2A/4A/6A button once to begin charging at the
2 amp rate; the unit sounds a beep and the charging current LED lights.
2 . Pressing the Charge Rate Selector 2A/4A/6A button again advances charging
rate to 4 amps, and pressing once more advances charging rate to 6 amps.
(Pressing the button again will turn OFF the charger output.) This selection
a n d actual battery charge rate are monitored by the microprocessor and the
u n i t will stop charging if the selected rate is too fast or too slow for battery size
or condition.
As the battery nears full charge capacity, the unit’s output will automatically drop
to a lower charge rate.
3 . The FUL LED lights when the battery is fully charged.
4 . Disconnect the AC power cord first, then the N E G AT I V E clamp, and finally the
POSITIVE clamp.
Automatic Float Charging
Automatic Float Charging is ideal for maintaining a fully charged battery.
1 . Keep the 120 volt AC power and battery connected after battery is fully charged.
2 . The charger monitors the battery and tops it of
f as needed.
WA R N I N G
If battery size is not known, charge at the 2 Amp rate. DO NOT overcharge
batteries.
current is reduced to allow for the maximum proper internal chemical energy transfer.
At the end of Stage 2, the charger will automatically move into Stage 3 charge mode.
Stage Three — To p - O f f Charge voltage is automatically maintained and reduced to
a predetermined level while current is adjusted for a safe, effective battery charge.
At the conclusion of Stage 3, the unit will BEEP signaling the completion of the
charging cycle.
The Automatic Float Charge feature is ideal for maintaining a battery. It
automatically “tops off” a battery as needed, to keep it fully charged all the time.
F E AT U R E S
• This unit has three charge rate settings, accessed by the Charge Rate Selector
2 A / 4 A / 6 A b u t t o n :
a ) 2 amps: smaller batteries, as in lawn mowers, snowmobiles, motorcycles, etc.
b ) 4 amps: mid-sized batteries, as in small cars
c ) 6 amps: automobile batteries and light trucks
• Automatic float charge monitoring
• Microprocessor-controlled for proper operation and for fault detection
• Charge rate LEDs
• H i g h - f r e q u e n c y, switch-mode operation for pure DC output
• Rapid charging three-stage output
• Heavy-duty cables and clamps are corrosion-resistant
• Connect to side or top-mount battery terminals
• Rugged case, plus sturdy carry handle
• Self-storage of cables and clamps
• Ideal during winter season when vehicle's starting performance is reduced by cold
or extreme weather conditions
• Single beep tone indicates a button is pressed or a mode change occurs
C o n t r ols and Indicators
The Charge Rate Selector 2A/4A/6A button allows the user to select the charger
rate based on battery size. This selection and actual battery charge rate are
monitored by the microprocessor and the unit will stop
charging if the rate is too fast
or too slow for battery size or condition.
Below the Charge Rate LEDs are a series of four LEDs that light on the following
c o n d i t i o n s :
P o w e r — Lights when unit is connected to a 120 volt AC electric outlet.
Full — Lights when charging is complete.
CHARGE RATE
SELECTOR
BUTTON
Page 5

T R O U B L E S H O O T I N G
Fault LED Lit
The following conditions may light the FA U LT L E D :
• Poor connection to battery (or frame).
• Charging too fast — decrease charge rate by pressing the Charge Rate Selector
2 A / 4 A / 6 A button to select a lower rate.
• Charging too slowly - battery is large and did not complete charging in 24 hours.
Press the Charge Rate Selector 2A/4A/6A button to select a faster rate.
• Shorted battery cell — check battery.
• Open battery cell — check battery.
• Internal shorted battery cell — take your battery to a certified automotive service
center for evaluation.
• Internal overheat in charger — make sure fan is not blocked.
Reverse Polarity LED Lit
• Incorrect polarity — follow the steps outlined in “Important Safety
Instructions” at
the front of this manual.
Battery Not Accepting a Charge
• Make sure that the charger is plugged into a “live” 110/120 volt AC outlet and
Power LED is lit.
• Unplug the charger and check battery connections - ensure that there is a good
connection at the battery terminal and/or vehicle chassis.
• Check that the correct charge rate was selected for the battery being charged.
• Ensure enough charging time was allowed to charge battery.
Charging a Very Cold Battery
If the battery to be charged is extremely cold (in temperatures below freezing —
0ºC/32ºF), it cannot accept a high rate of charge, so the initial charge rate will be
s l o w. The rate of charge will increase as the battery warms. N E V E R attempt to
charge a frozen battery.
S P E C I F I C AT I O N S
Input: 120 volts AC, 110 watts
Output: 12 volts DC, 2/4/6 amps
A P P R O X I M ATE CHARGING TIMES
The 2/4/6 Amp 12 Volt Smart Battery Charger will automatically adjust the charge
rate as the battery becomes charged and stop when the battery is fully charged.
Deep cycle batteries may require longer charging time.
For estimates of the time it takes to charge a battery, refer to the following table.
Percent of charge
in battery 7 5 % 5 0 % 2 5 % 0 %
at 2 amp rate 7 HRS 14 HRS NR* N R *
at 4 amp rate 3.5 HRS 7 HRS 10.5 HRS 14 HRS
at 6 amp rate 2.5 HRS 4.7 HRS 7 HRS 9.2 HRS
*NR = Not recommended at 2 amps — use a higher charge rate.
The times shown in the table above are approximate and refer to a 50 A h
automotive battery. For example, a 50 Ah (12 volt) battery is discharged (50%). How
long should it be charged at the 6 amp rate? See the chart above under “50%” and
“at 6 amp rate.”
In most cases, battery charging times will vary depending on the size, age and
condition of the battery. Smaller batteries should be charged at a lower rate
( 2 amps) and an extra hour added to charge tim
e.
CARE AND MAINTENANCE
With proper care and minimal maintenance, the
6 Amp / 4 Amp / 2 Amp Smart
Battery Charger
will provide years of dependable service. For maximum
performance, manufacturer recommends:
• After each use, clean the battery charger clamps — be sure to remove any battery
fluid that will cause corrosion of the copper clamps.
• Clean the outside case of the charger with a soft cloth and, if necessary, mild soap
s o l u t i o n .
• Do not allow liquid to enter the charger. Do not operate when charger is wet.
• Keep the charger cords loosely coiled during storage to prevent damage to the
c o r d s .
WA R N I N G S
• There are no user-serviceable parts in this unit.
• Do not open the unit. In the event of malfunction, it must be returned to
manufacturer for professional testing and repair. OPENING THE UNIT WILL
VOID THE MANUFACTURER’S WA R R A N T Y.
BLACK DECKER ACCESSORIES
GARAGE ACCESSORIES
 Loading...