

Black+Decker TO1380SS, TO1380SSD User Manual
8. Desenchufe el aparato cuando no esté en uso.
Nota: Para cancelar la función de to stado antes que termine el ciclo de tostatdo, presione el bot ón
de iniciar/parar (Start/ Stop ) para apagar el aparato y retirar la s tostadas. Para obtener
mejores resultados, coloque el pan en la s áreas ilustradas.
FUNCIÓN PARA HOR NEAR 150° F - 450° F
1. Presione el botón de la función para hornear ( Bake).
2. Presione los botones de temperatura . Presione la flecha apuntando hacia arr iba s para una
temperatura más alta, flecha apun tando hacia abajo t para una temperatura más fría.
3. La temperatura parpadeará hasta que el hor no alcance la temperatura seleccionada. El reloj
automático no comenzará a marcar el tiemp o hasta que el horno esté precalentado.
4. Presione los botones de tiempo para seleccionar el tiempo de cocción deseado. Presione la
flecha apuntando hacia arriba s para un período de t iempo más largo, flecha apuntando hacia abajo
t para un período de tiempo más corto. Seleccione la función de funcionamiento continuo (S tay
On ), presionando la flecha de tiempo apunt ando hacia abajo t pasada la posición cero (zero) .
5. Presione el botón de iniciar/parar (S tart/Stop ) ( ) para comenzar a cocinar.
6. Los elementos de calor se encenderán y apag arán para mantener una distribución uniforme de calor.
7. Una vez que la pantalla pare de parpadear, el horno está precalentad o. Abra la puerta del horno
y coloque los alimentos en el horno. Cierre la puer ta.
Nota: Utilice un recipiente para horn ear de metal, vidrio o cerámica, colocado sobre la parrilla
deslizante.
8. Si utiliza el reloj automático, el horno emitirá un bip después que el ciclo de cocción h aya
terminado. El horno se apaga. Si no utiliza el reloj au tomático, presione el botón de iniciar/parar
(Start /Stop) ( ) des pués que el ciclo de cocción haya terminado.
9. Abra la puerta del horno. Utilizando guante s de cocina o agarraderas de olla, deslice la parrilla
hacia afuera para retirar los alimento s cocinados.
10. Desenchufe el aparato cuando no esté en uso.
FUNCIÓN PARA AS AR 350° F - 450° F
Nota: Para obtener mejores result ados, siempre precaliente el horno por lo menos 10 minutos.
1. Presione el botón de la función para asar ( Broil).
2. Presione los botones de temperatura . Presione la flecha apuntando hacia arr iba s para una
temperatura más alta, flecha apun tando hacia abajo t para una temperatura más fría.
3. La temperatura parpadeará hasta que el hor no alcance la temperatura seleccionada. El reloj
automático no comenzará a marcar el tiemp o hasta que el horno esté precalentado.
4. Presione los botones de tiempo para seleccionar el tiempo de cocción deseado. Presion e la flecha
apuntando hacia arriba s para un período de tiempo más la rgo, flecha apuntando hacia abajo t para
un período de tiempo más corto. Selec cione la función de funcionamiento continuo (St ay On ),
presionando la flecha de tiempo apunt ando hacia abajo t pasada la posición cero (zero) .
5. Abra la puerta del hor no y utilizando la bandeja para hornear como bandeja de goteo, ins tálela debajo de
la parrilla deslizante y coloque los alimentos direc tamente sobre la parilla deslizante/ parrilla para asar.
Cierre la puerta.
6. Presione el botón de iniciar/parar (S tart/Stop ) ( ) para comenzar el ciclo de cocción.
Nota: Usted puede co cinar sus alimentos en 2 maneras:
• Utilice la bandeja para hornear/bandeja de goteo coloc ada sobre la parrilla deslizante.
• Coloque la bandeja para hornear/bandeja de goteo debajo de la p arrilla deslizante/parrilla para asa r.
7. Cuando el ciclo de cocción termine, el horno emitirá un bip y los elementos de calor se
apagarán. Si no utiliza el reloj automático, pr esione el botón de iniciar/parar (St art/Stop) ( )
después que el ciclo de cocción haya terminado.
8. Utilizando guantes de cocina o agarraderas de olla, deslice la pa rrilla para asar hacia afuera
para retirar los alimentos cocinado s.
9. Desenchufe el aparato cuando no esté en uso.
FUNCIÓN PARA MANTENER CALIENTE LOS ALIMENTOS 150° F - 200° F
1. Presione el botón de la función para mantener caliente lo s alimentos (Keep Warm).
2. Presione los botones de temperatura . Presione la flecha apuntando hacia arr iba s para una
temperatura más alta, flecha apun tando hacia abajo t para una temperatura más fría.
3. Presione los botones de tiempo para seleccio nar el tiempo de calentamiento deseado. Presione la
flecha apuntando hacia arriba s para un período de t iempo más largo, flecha apuntando hacia abajo
t para un período de tiempo más corto. Selecci one la función de funcionamiento continuo (St ay On
), presionando la flecha de tiempo apuntando hacia abajo pasada la posición cero (zero ).
Nota: Esta f unción está diseñada para mantener caliente los alimentos que ya est án cocinados
después que se hayan cocinado. Esta función s e debe utilizar por cortos períodos de tiempo.
Para evitar que los alimentos se sequen, cúb ralos con papel de aluminio.
4. Cuando el ciclo de calentamiento termine, el horno emitirá un bip y los elementos de c alor se
apagarán. Si no utiliza el reloj automático, pr esione el botón de iniciar/parar (St art/Stop) ( )
después que el ciclo de calentamiento haya terminado.
5. Desenchufe el aparato cuando no esté en uso.
CÓMO CAMBIAR LA TEMPERATURA DE CELSIUS A FAHRENHEIT
1. Presione y sostenga los botones de las flecha s apuntando hacia arriba y hacia abajo s t
simultanemente hasta que escuche un bip. La p antalla mostrará una ° C para Celsius o
una °F para Fahrenheit.
CUIDADO Y LIMPIEZ A
Este producto no contiene pieza s que puedan ser reparadas por el usuario. Para servicio, c onsulte
a personal de servicio calific ado.
LIMPIEZA
Importante : Antes de limpiar cualqui er parte del hono, asegúr ese de que esté apagado, dese nchufado y que se haya enfriado.
1. Limpie la puerta de vidrio con una esponja, paño suave o almohadilla de nailon y agua jabo nosa.
No utilice un limpiador para vidrios en aerosol.
2. Para retirar la parrilla deslizante, abra la puert a, tire de ésta hacia el frente y hacia afuera. Lave
la parrilla deslizante con agua jabonosa o en la máquina lavapl atos. Para remover las manchas
persistentes, utilice una almohadilla de poliéster o nailon.
3. Lave la bandeja para hornear con agua jabonosa. Pa ra reducir los rayones, utilice una
almohadilla de poliéster o nailon.
BANDEJA DE RESIDUOS
1. Sujete la bandeja por el asa y tire hacia afuera.
2. Deseche las migas y limpie la bandeja con un paño húmedo; seque por completo an tes de
colocarla de nuevo en el horno.
SUPERFICIES EXTERIORES
Limpie la superficies superior y de los lado s con un paño o esponja húmeda. Seque por completo.
RECIPIENTES DE COCCIÓN
Se deben utilizar recipientes de metal, de vidrio r esistente al calor o de cerámica sin tapas de vidrio.
Siga las indicaciones del fabricante. A segúrese de que los alimentos o la bandeja para hornear se
encuentre a una distancia no menos de 1 ½ pulgadas ( 3.81 cm) de los elementos de calor superiores.
¿NECESITA AYUDA?
Para servicio, reparaciones o p reguntas relacionadas al producto, por favor llame al número del
centro de servicio que se indica para el p aís donde usted compró su producto. NO devuélva el
producto al fabricante. Llame o lleve el pro ducto a un centro de servicio autorizado.
DOS AÑOS DE GAR ANTÍA LIMITADA
(No aplica en México, Estado s Unidos y Canada)
¿Qué cubre la garantía?
• La garantía cubre cualquier defecto d e materiales o de mano de obra que no haya sido
generado por el uso incorrecto del pro ducto.
¿Por cuánto tiempo es vá lida la garantía?
• Por dos años a partir de la fecha or iginal de compra mientras que tenga una prueba de la
compra.
¿Cómo se obtiene el servicio necesario?
• Conserve el recibo original como compr obante de la fecha de compra, comuníquese con el
centro de servicio de su país y haga efec tiva su garantía si cumple lo indicado en el manual
de instrucciones.
¿Cómo se puede obtener servicio?
• Conserve el recibo original de compra.
• Por favor llame al número del centro de servicio a utorizado.
¿Qué aspectos no cubr e esta garantía?
• Los productos que han sido utilizado s en condiciones distintas a las normales.
• Los daños ocasionados por el mal u so, el abuso o negligencia.
• Los productos que han sido alter ados de alguna manera.
• Los daños ocasionados por el us o comercial del producto.
• Los productos utilizados o repa rados fuera del país original de compra.
• Las piezas de vidrio y demás accesori os empacados con el aparato.
• Los gastos de tramitación y emb arque asociados al reemplazo del producto.
• Los daños y perjuicios indirectos o inciden tales.
¿Qué relación tiene la ley e statal con esta garantía?
• Esta garantía le otorga der echos legales específicos y el consumidor podría tener otros
derechos que varían de una región a otra.
Póliza de Garantía
(Válida sólo para México)
Duración
Rayovac de México SA de CV garant iza este producto por 2 años a partir de la fecha original de
compra.
¿Qué cubre esta gara ntía?
Esta Garantía cubre cualquier de fecto que presenten las piezas, componentes y la mano de obra
contenidas en este producto.
7. Open the oven door. Using oven mitts or pot holders, slide the rack out to remove the to ast.
8. Unplug appliance when not in use.
Note: To cancel toasting before cycle complete, pres s the Start/St op button ( ) to turn off the
unit, and remove toast
For best results, place the bread in t he locations shown.
BAKING 150° F - 450° F
1. Press the Bake function butto n.
2. Press the temperature but tons to select the desired temperature. Up s arrow for higher
temperature and Down t arrow for cooler t emperature.
3. Temperature will blink until oven reaches set temperature. Timer will not begin until oven is
preheated.
4. Press the time buttons to select the desired time. Up s arrow for longer time and Dow n t
arrow for shorter time. Select S TAY ON to bake longer than 60 minutes or to control cooking
time yourself. Select STAY ON by pressing the t ime Down arrow t past zero.
5. Press the Star t/Stop Button ( ) to begin baking.
6. The heating elements will cycle on and off t o maintain even heat distribution.
7. Once the display stops flashing, the oven is preheated. Open the oven door and inse rt food.
Close oven door.
Note: Use a metal, glas s or ceramic baking dish placed on the slide rack.
8. If using the oven timer, there will be an audible beep once the baking cycle is complete. T he oven will
turn off. If not using the oven timer, press the St art/Stop Bu tton ( ) once cooking cycle is complete.
9. Open the oven door. Using oven mitts or pot holders, s lide the rack out to remove the cooked food.
10. Unplug the appliance when not in use.
BROILING 350° F - 450° F
Note: For best results, wh en broiling, always preheat the oven for at least 10 minutes.
1. Press the Broil function butto n.
2. Press the temperature but tons to select the desired temperature. Up s arrow for higher
temperature and Down t arrow for cooler t emperature.
3. Temperature will blink until oven reaches set temperature. Timer will not begin until oven is
preheated.
4. Press the time buttons to select the desired time. Up s arrow for longer time and Dow n t
arrow for shorter time. Select S TAY ON to control cooking time yourself. Select STAY ON
by pressing the time Down ar row t past zero.
5. Open oven door and using the bake pan as a drip tray, inser t it under the slide rack and place
food directly on slide rack /broil rack. Close oven door.
6. Press the Star t/Stop Button ( ) to begin broiling.
Note: You can cook your food in 2 ways :
• Use the bake pan/drip tray placed on the slide rack.
• Place the bake pan/drip tray under the slide rack /broil rack.
7. When finished broiling, there will be an audible beep and the heating element will turn off. If n ot
using the oven timer, press the Start /Stop Button ( ) o nce cooking cycle is complete.
8. Using an oven mitt or pot holder, slide out broiling rack togeth er with bake pan to remove food.
9. Unplug appliance when not in use.
KEEP WARM 150° F - 200° F
1. Press the Keep Warm function butt on.
2. Press the temperature but tons to select the desired temperature. Up s arrow for higher
temperature and Down t arrow for cooler t emperature.
3. Press the time buttons to select the desired time. Up s arrow for longer time and Dow n t
arrow for shorter time. Select S TAY ON to keep warm longer than 60 minutes or to control
warming time yourself. Select STAY ON by pressing t he time Down arrow t past zero.
Note: This feature is designed to keep already c ooked foods warm after they have been cooked.
This function should be used for shor t periods of time. To keep food from drying out, cover with
foil.
4. When finished, there will be an audible beep and the heating elemen ts will turn off. If not using
the oven timer, press the Start /Stop Button ( ) once finished.
5. Unplug appliance when not in use.
CHANGING TO AND FROM CELSIUS AND FAHRENHEIT
1. Press and hold the Up and Down temperature ar rows s t simultaneously until an audible
beep. The display will display either a for Celsius or f or Fahrenheit.
CARE AND CLEANING
This product contains no user ser viceable parts. Refer service to qua lified service personnel.
CLEANING
Important : Before cleaning any par t, be sure the oven is off, un plugged, and cool.
1. Clean the glass door with a sponge, soft clot h or nylon pad and sudsy water. Do not use a spray
glass cleaner.
2. To remove the slide rack, open the door, pull the rack forward and out. Wash the slide rack in
soapy water or in a dishwasher. To remove stubborn spots, use a polyest er or nylon pad.
3. Wash the bake pan in sudsy water. To minimize scratching, use a polyester or nylon pad.
CRU MB TRAY
1. Grasp handle and pull out tray.
2. Dispose of crumbs and wipe tray with a damp clo th; dry thoroughly before placing back in the oven.
EXTERIOR SURFACES
Wipe the top and exterior walls with a da mp cloth or sponge. Dry thoroughly.
COOKING CONTAINERS
Metal, ovenproof glass or ceramic bakewa re without glass lids can be used in your oven. Follow
manufacturer’s instructions. B e sure the top edge of the container is at least 1½” (3.81 cm) away
from the upper heating elements.
NEED HELP?
For service, repair or any questio ns regarding your appliance, call the appropriate 800 number
on cover of this book. Please DO NOT r eturn the product to the place of purchase. Also, please
DO NOT mail product back to manufact urer, nor bring it to a service center. You may also want to
consult the website listed on the cover of this manu al.
Two-Year Limited Warranty
(Applies only in the U nited States and Canada)
What does it cover?
• Any defect in material or workmanship provided; however, Spectrum Br ands, Inc’s liability will not
exceed the purchase price of product.
For how long?
• Two years from the date of original purchase with proof of such purchase.
What will we do to help you?
• Provide you with a reasonably similar replacement product that is eithe r new or factory refurbished.
How do you get servic e?
• Save your receipt as proof of date of sale.
• Visit the online service website at www.prodprotec t.com/applica, or call toll-free 1-800 -231-9786,
for general warranty service.
• If you need parts or accessories, please call 1-80 0-738-0245.
What does your warran ty not cover?
• Damage from commercial use.
• Damage from misuse, abuse or neglect.
• Products that have been modified in any way.
• Products used or serviced outside the count ry of purchase.
• Glass parts and other accessory i tems that are packed with the unit.
• Shipping and handling costs associated with the replacement of t he unit.
• Consequential or incidental damages (Please n ote, however, that some states do not allow the
exclusion or limitation of consequential or incident al damages, so this limitation may not apply to
you.)
How does state law re late to this warranty?
• This warranty gives you specific legal rights. You may also have other r ights that vary from state to
state or province to province.
Por favor lea este inst ructivo antes de usar el producto
INSTRUCCIONES IMPORTANTES
DE SEGURIDAD.
Cuando se utilizan aparatos eléctricos, siempre se debe respetar ciertas medidas
de seguridad a fin de reducir el riesgo de incendio, descarga eléctrica y/o lesiones
a las personas, incluyendo las siguientes:
• Lea todas las instrucciones antes de utilizar el aparato.
• No toque las superficies calientes. Utilice las asas o perillas.
• A fin de protegerse contra una descarga eléctrica, no sumerja el cable, los
enchufes ni el aparato en agua ni en ningún otro líquido.
• Todo aparato eléctrico utilizado en la presencia de los niños o por ellos mismos
requiere la supervisión de un adulto.
Please Read and Save this Use and C are Book.
IMPORTANT SAFEGUARDS.
When using electrical appliances, basic safety precautions should always be followed, including the follo wing:
• Read all instructions before using.
• Do not touch hot surfaces. Use handles or knobs.
• To protect against electrical shock do not immerse cord, plugs or appliance in
water or other liquid.
• Close supervision is necessary when any appliance is used by or near children.
• Unplug from outlet when not in use and before cleaning. Allow to cool before
putting on or taking off parts.
• Do not operate any appliance with a damaged cord or plug, or after the appliance
malfunctions or has been damaged in any manner. Contact Consumer Support at
the toll-free number listed in this manual.
• The use of accessory attachments not recommended by the appliance
manufacturer may cause injuries.
• Do not use outdoors.
• Do not let cord hang over edge of table or counter, or touch hot surfaces.
• Do not place on or near a hot gas or electric burner, or in a heated oven.
• Extreme caution must be used when moving an appliance containing hot oil or
other hot liquids.
• To disconnect, press start/stop button ( ) to cancel the operation if necessary,
then remove plug from wall outlet.
• Do not use appliance for other than intended use.
• Use extreme caution when removing tray or disposing of hot grease.
• Do not clean with metal scouring pads. Pieces can break off the pad and touch
electrical parts, creating a risk of electric shock.
• Oversized foods or metal utensils must not be inserted in a toaster oven, as they
may create a fire or risk of electric shock.
• A fire may occur if the toaster oven is covered or touching flammable material
including curtains, draperies, walls and the like, when in operation. Do not store
any item on top of unit when in operation.
• Extreme caution should be exercised when using containers constructed of other
than metal or glass.
• Do not store any material, other than manufacturer’s recommended accessories, in
this oven when not in use.
• Do not place any of the following materials in the oven: paper, cardboard, plastic,
and the like.
• Do not cover crumb tray or any part of this oven with metal foil. This will cause
overheating of the oven.
SAVE THESE INSTRUCTIONS.
This product is for household use only.
GROUNDED PLUG
As a safety feature, this product is equipped with a grounded plug, which will only fit into
a three-prong outlet. Do not attempt to defeat this safet y feature. Improper connection
of the grounding conductor may result in the risk of electric shock. Consult a qualified
electrician if you are in doubt as to whether the outlet is properly grounded.
TAMPER-RESISTANT SCREW
Warning: This appli ance is equipped with a tamper-r esistant screw to prevent re moval of
the outer cover. To reduce the risk o f fire or electric shock, do not a ttempt to remove the
outer cover. There are no us er-serviceable parts in side. Repair should be done only by
authorized service personnel.
ELECTRICAL CORD
a) A short power-supply cord ( or detachable power-supply cord) is provided to reduce t he risk resulting from
becoming entangled in or tripping over a longer cord.
b) Longer detachable power-supply cords o r extension cords are available and may be used if care is
exercised in their use.
c) If a long det achable power-supply cord or extension cord is used,
1) The marked electr ical rating of the detachable power-supply cord or extension cord should
be at least as great as the electr ical rating of the appliance,
2) The applian ce is of the grounded type, the extension cord should be a grounding-t ype 3-wire
cord, and
3) The lo nger cord should be arranged so that it will not drape over the counter top or tabletop
where it can be pulled on by children or tripped over unintentionally.
Note: If the power supply c ord is damaged, it should be replaced by qualified personnel; in La tin
America, by an authorized ser vice center.
HOW TO USE
This product is for household use only.
Caution: Do not l eave oven unattended when in ope ration. Food ignition may occur. If
this happens, unplug u nit but DO NOT open door. To reduce the risk of fire, ke ep oven
interior complet ely clean and free of food residu es, oil, grease and any other combu stible
materials.
Caution: A fire m ay occur if the toaster oven is cover ed or touching flammable material s
including curtain s, draperies, walls and the like whe n in operation or after, when still ho t.
Do not place paper, cardboard , plastic or similar materials in the ov en, on top of the oven,
or in contact with t he sides or bottom surface s of the oven.”
GETTING STARTED
• Remove all packing material and any stickers from oven and remove the plastic r ing from the power plug.
• Please go to www.prodprotect.com/ applica to register your warranty.
• Wash all removable parts as instructed in CA RE AND CLEA NING.
• Select a location where this unit is to be used, allowing enough space from b ack of the unit and
the wall to allow heat to flow without damage to ca binets and walls.
• Plug unit into electrical outlet.
IMPORTANT INFORM ATION ABOUT YOUR OVEN
• This oven gets hot. When in use, always use oven mitts or pothold ers when touching any outer or
inner surface of the oven.
• When using the oven for the first time, you may notice smoke or a slight odor during the firs t few
minutes.
• You must set the timer, toast shade or select STAY ON and press the Start /Stop Button ( ) for
the oven to function.
IMPO RTANT: Be sure food or baking dish does not come within 1½ inches of the top heating
elements.
IMPO RTANT: Food should not extend beyond the edges of the bake pan /drip tray to avoid drippings from falling onto the heating elements.
Note: The display will turn off af ter 120 seconds of inactivity.
TOASTING (SETTINGS 1-7)
It is not necessary to preh eat the oven for toasting.
1. Open oven door and insert slide rack.
2. Place items to be toasted directly o n slide rack and close the door.
3. Press the Toast function but ton.
4. Press the time buttons to select the desired shade. Up s arrow for darker shade and D own
t arrow for lighter shade.
5. Press the Star t/Stop Button ( ) to begin toasting.
6. When toast cycle is complete, there will be an audible beep a nd the word “END” will flash in the
display. The oven will turn off.
• Desenchufe el aparato del tomacorriente cuando no esté en uso y antes de limpiarlo.
Espere que el aparato se enfríe antes de instalarle o retirarle piezas y antes de limpiarlo.
• No utilice ningún aparato eléctrico que tenga el cable o el enchufe averiado, que
presente un problema de funcionamiento o que esté dañado de alguna manera. Acuda
al centro de servicio autorizado más cercano para que lo examinen, reparen o ajusten.
• El uso de accesorios no recomendados por el fabricante del aparato puede
ocasionar lesiones personales.
• No utilice el aparato a la intemperie.
• No permita que el cable cuelgue del borde de la mesa o del mostrador ni que entre
en contacto con superficies calientes.
• No coloque el aparato sobre ni cerca de una hornilla de gas o eléctrica ni adentro
de un horno caliente.
• Tome mucha precaución al mover de un lugar a otro un aparato que contenga
aceite u otros líquidos calientes.
• Para desconectar el aparato, presione el botón de iniciar/parar (Start/S top ( ) para
cancelar el funcionamiento si es necesario, luego desenchúfelo del tomacorriente.
• Este aparato se debe utilizar solamente para el fin previsto.
• Tenga muchísimo cuidado al retirar la bandeja o al desechar la grasa caliente.
• No utilice almohadillas de fibras metálicas para limpiar el aparato. Las fibras
metálicas podrían partirse y entrar en contacto con las piezas eléctricas del
aparato, resultando en el riesgo de una descarga eléctrica.
• A fin de evitar el riesgo de incendio o descarga eléctrica, jamás introduzca
alimentos demasiado grandes ni utensilios de metal adentro del aparato.
• Existe el riesgo de incendio si el horno tostador permanece cubierto mientras se
encuentra en funcionamiento o si éste llegase a entrar en contacto con cualquier
material inflamable, incluyendo las cortinas y las paredes u otros materiales similares.
Asegúrese de no colocar nada encima del aparato mientras éste se encuentre en uso.
• Tenga mucho cuidado al utilizar recipientes que no sean de metal ni de vidrio.
• Cuando este aparato no se encuentre en funcionamiento no se debe almacenar
nada aparte de los accesorios recomendados por el fabricante.
• No introduzca los siguientes materiales en el aparato: papel, cartón, envolturas
plásticas ni materiales semejantes.
• No cubra la bandeja de residuos ni ninguna otra parte de este horno con papel de
aluminio. Esto puede causar que el horno se sobrecaliente.
CONSERVE ESTAS INSTRUCCIONES.
Este aparato electrico es para uso
domestico unicamente.
ENCHUFE POLARIZADO
Como medida de seguridad, este producto cuenta con un enchufe de tierra que tiene tres
contactos. no trate de alterar esta medida de seguridad. la conexión inapropiada del conductor
de tierra puede resultar en un riesgo de choque eléctrico. Si tiene alguna duda, consulte con un
eléctricista calicado para asegurarse de que el tomacorriente sea uno de tierr a.
TORNILLO DE SEGURIDAD
Advertencia: Es te aparato cuenta con un torni llo de seguridad para evitar la remo ción de
la cubierta ext erior del mismo. A fin de reducir el rie sgo de incendio o de choque eléct rico,
por favor no trate de re mover la cubierta exterior. Est e producto no contiene pieza s
reparables por el consumidor. Toda reparación se debe llevar a cabo únicamente por
personal de servicio autorizado.
CABLE ELÉCTRICO
1. El producto se debe de propo rcionar con un cable eléctrico corto (o uno sepa rable), a n de reducir el
riesgo de tropezar o de enredarse en un ca ble más largo.
2. Existen cables eléctricos más largos y s eparables o cables de extensión que uno puede utilizar
si toma el cuidado debido.
3. Si se utiliza un cable separable o de extensión,
a) El régimen nominal del cable separ able o del cable de extensión debe ser, como mínimo,
igual al del régimen nominal del aparato.
b) Si el aparato es de conexió n a tierra, el cable de extensión debe ser un cable de tres
alambres de conexión a tierra.
c) Uno debe de acomodar el cable má s largo de manera que no cuelgue del mostrador o de la
mesa, para evitar que un niño tire del mismo o que alguien se t ropiece.
Nota: Si el cordón de alimentación es dañad o, en América Latina debe sustituirse por pers onal
calicado o por el centro de ser vicio autorizado.
COMO USAR
Este producto es para uso d oméstico solamente.
PRECAUCIÓN: Nunca deje el horno desatendido mientra esté funcionando. Podria ocurrir
un incendio mientras se cocinan los alimentos. Si esto ocurriera, desenchufe el horno
pero NO abra la puer ta. Para reducir el riesgo de ince ndio, mantenga el interior del ho rno
completament e limpio y libre de residuos de aliment os, aceite, grasa, y de cualquier o tro
material combustible.
PRECAUCIÓN: Existe el riesgo de incendio si el horno tostador permanence cubierto
mientras está fu ncionando o si éste llegase a entr ar en contacto con cualquier mat erial
inflamable, incluyend o las cortinas, las paredes y cual quier otro material similar mien tras
funciona o si aún está caliente. No coloque o introduzca los siguientes materiales adentro
del horno, sobre la superficie superior o que entren en contacto con las superficies de los
costados o la inferior: papel, cartón, envolturas plásticas y materiales similares.
PRIMEROS PASOS
• Retire todo material de empaque y cualquier etiqueta del horno.
• Por favor visite www.prodprotect.com/ applica para registrar su garantía.
• Lave todas las piezas removibles según las instrucciones en la secció n de, CUIDADO Y LIMPI EZA.
• Escoja un lugar apropiado para utilizar el aparato. A segúrese de que haya suficiente espacio entre la par te
posterior del horno y la pared, par a permitir que el aire circule sin dañar los gabinetes y las paredes.
• Enchufe el aparato a un tomacorriente.
INFORMACIÓN IMPO RTANTE ACERCA DE SU HORNO
• Este horno se calienta. Siempre que lo utilice, use guantes de cocina o aga rraderas de olla al tocar
cualquier superficie externa o inter na.
• Cuando utilice el horno por primera vez, quizas note humo o un ligero olor durante los p rimeros minutos.
• Para activar el horno, se requiere ajustar el reloj automátic o, el nivel de tostado o presionar el botón
de iniciar/parar (Start/ Stop) ( ) .
IMPORTANTE: Asegúrese de que los alimentos o la bandeja de hornear se encuen tre a una
distancia no menos de 1 ½ pulgadas (3. 81 cm) de los elementos de calor superiores.
IMPORTANTE: Los alimentos no deben extenderse de los bordes de la ba ndeja para hornear/
bandeja de goteo a fin de evitar que el exceso de goteo c aiga sobre los elementos de calor.
Nota: La pantalla digital s e apagará después de 120 minutos de inactividad.
FUNCIÓN PARA TOS TAR ( AJUS TES 1-7 )
No es necesario precalenta r el horno para utilizar la función de tostado.
1. Abra la puerta del horno e insert e la parrilla deslizante.
2. Coloque los alimentos a tostar directamente s obre la parrilla deslizante y cierre la puerta.
3. Presione el botón de la función para tostar ( Toast).
4. Presione los botones de tiempo para s eleccionar la intensidad de tostado deseado. Presione
la flecha apuntando hacia arriba s para una inten sidad de tostado más oscura y la flecha
apuntando hacia abajo t para una intensidad de to stado más claro.
5. Presione el botón de iniciar/parar (S tart/Stop ) ( ) para comenzar el ciclo de tostado.
6. Cuando el ciclo de tostado termine, escuchará un bip y la palabra “E ND” (fin) parpadeará en la
pantalla. El horno se apagará.
7. Abra la puerta del horno. Utilizando guante s de cocina o agarraderas de olla, deslice la parrilla
hacia afuera para retirar las tostadas.
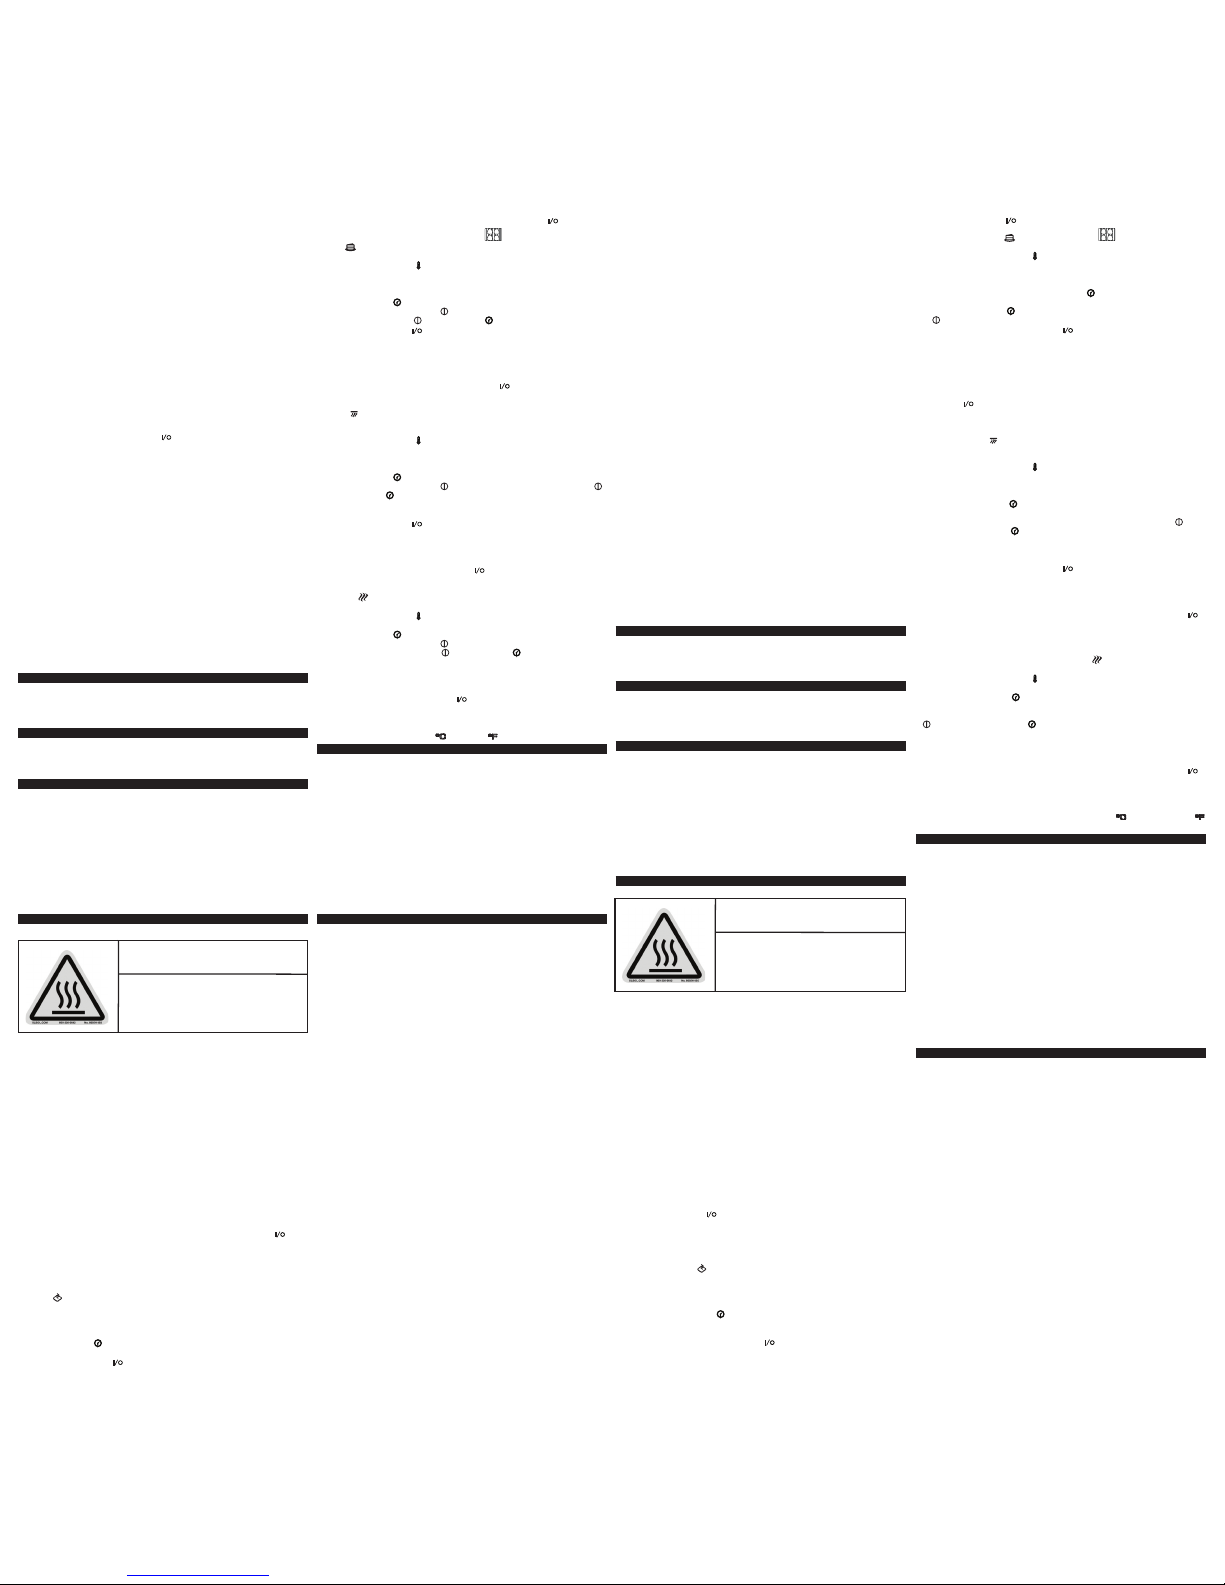
CAUTION
THIS OVEN GETS HOT.
WHEN IN USE, ALWAYS USE OVEN MITTS OR
POT HOLDERS WHEN TOUCHING ANY OUTER
OR INNER SURFACE OF THE OVEN.
PRECAUCIÓN
ESTE HORNO SE CALIENTA CUANDO ESTÁ
EN USO. SIEMPRE USE AGARRADERAS O
GUANTES DE COCINA CUANDO TOQUE TODA
SUPERFICIE INTERNA O EXTERNA DEL HORNO.
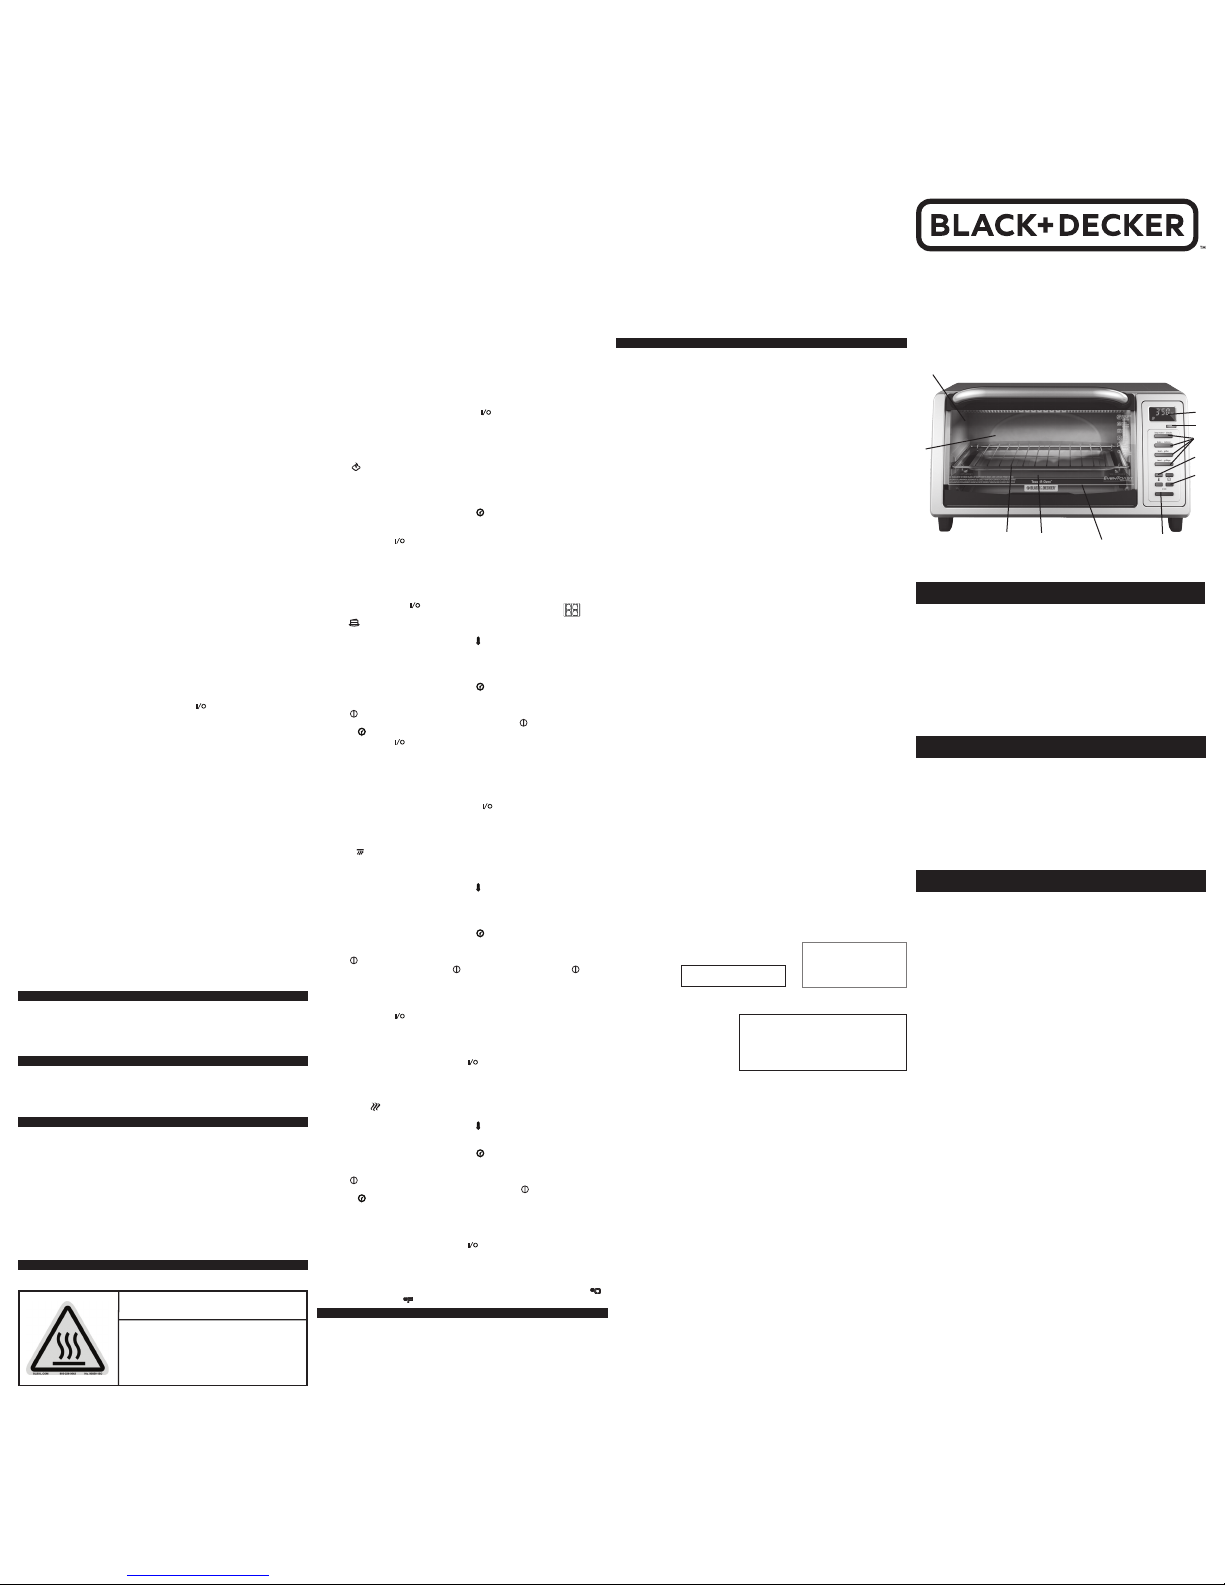
1. Easy-view glass door
2. Temperature selector controls
3. Cooking function selector con trols
4. Timer/Toast shade selector contr ols
5. Power indicator light
† 6. Crumb tray
(Part # TO1300-04 )
† 7. Bake pan/drip tray
(P art# TO130 0-05 )
† 8. Slide rack/ broil rack
(Part# TO1300-06)
9. Extra deep curved interior
10. Digital display
11. Start /stop button
Note: † indicates consumer r eplaceable/
removable parts
DIGITAL OVEN
Product may vary slig htly from what is illustrated.
1. Puer ta de vidrio transparente
2. C ontrol de temperatura
3. S elector de función de cocción
4. S elector de tostado/reloj automátic o
5. Luz indicad ora de funcionamiento
† 6. Bandeja para migas removible ( Pieza no.
TO1300-04)
† 7. Bandeja para horne ar/de goteo
(Pieza no. TO1300-0 5)
† 8. Par rilla corrediza/para asar
(Pieza no. TO1300-0 6)
9. Inter ior extra profundor
10. Pantalla digital
11. Botón de iniciar/parar ( Start/Stop )
Note: † indica piezas reemplazables /
removibles por el consumidor
1. Por te transparente en verre
2. S électeurs de température
3. S électeurs de fonction de cuisson
4. S électeur de réglage de la minuterie/du
degré de grillage
5. Témoin de fonctionnement
† 6. Plateau à miettes ( pièce n° TO1300-04)
† 7. Plaque de cuisson /plateau d’égouttage
(pièce n° TO1300-05 )
† 8 . Grille coulissante/grille de lèchefrite
(pièce n° TO1300-06 )
9. Intér ieur courbé très profond
10. Afficheur numérique
11. Bouton Start /Stop (Démarrage /Arrêt)
Note: Le symbole † indique une piè ce
amovible/remplaçable par l’utilisateur
Le produit peut dif férer légèrement de celui qui est illust ré.
HORNO TOSTADOR DIG ITAL
FOUR NUMÉRIQUE
Requisitos para hacer váli da la garantía
Para reclamar su Garantía deber á presentar al Centro de Servicio Aut orizado la póliza sellada por
el establecimiento en donde adquirió el product o. Si no la tiene, podrá presentar el comprobante
de compra original.
¿Donde hago válida la garantía ?
Llame sin costo al teléfono 01 80 0 714 2503, para ubicar el Centro de Servicio Aut orizado más
cercano a su domicilio en donde usted podrá enco ntrar partes, componentes, consumibles y
accesorios.
Procedimiento para ha cer válida la garantía
Acuda al Centro de Servici o Autorizado con el producto con la póliza de Garant ía sellada o el
comprobante de compra original, ahí se reemplaz ará cualquier pieza o componente defectuoso
sin cargo alguno para el usuario final. Es ta Garantía incluye los gastos de transpor tación que se
deriven de su cumplimiento.
Excepciones
Esta Garantía no ser á válida cuando el producto:
A) Se hubiese utilizado en condiciones distintas a las normales.
B) No hubiese sido operado de acuerdo con el instructivo de uso que le acompaña .
C) Cuando el producto hubiese sido alterado o reparado por perso nas no autorizadas por Rayovac
de México SA de CV.
Nota: Usted podr a encontrar partes, componentes, consumibles y ac cesorios en los centros de
servicios autorizados. E sta garantía incluyen los gastos de transpor tación que se deriven de sus
cumplimiento dentro de sus red de servicio.
Veuillez lire et conser ver ce guide d’entretien et d’utilisa tion.
IMPORTANTES CONSIGNES DE
SÉCURITÉ.
Lorsqu’on utilise des appareils électriques, il faut toujours respecter certaines
règles de sécurité fondamentales, notamment les suivantes
• Lire toutes les directives.
• Ne pas toucher aux surfaces chaudes; utiliser les poignées et les boutons.
• Afin d’éviter les risques de choc électrique, ne pas immerger le cordon, la fiche ou
l’appareil dans l’eau ou tout autre liquide.
• Exercer une étroite surveillance lorsque l’appareil est utilisé par un enfant ou près
d’un enfant.
• Débrancher l’appareil lorsqu’il ne sert pas ou avant de le nettoyer. Laisser l’appareil
refroidir avant d’y placer ou d’en retirer des composantes.
• Ne pas utiliser un appareil dont la fiche ou le cordon est abîmé, qui fonctionne
mal ou qui a été endommagé de quelque façon que ce soit. Pour un examen, une
réparation ou un réglage, rapporter l’appareil à un centre de service autorisé. Ou
composer le numéro sans frais inscrit sur la page couverture du présent guide.
• L’utilisation d’accessoires non recommandés par le fabricant de l’appareil peut
occasionner des blessures.
• Ne pas utiliser l’appareil à l’extérieur.
• Ne pas laisser pendre le cordon sur le bord d’une table ou d’un comptoir ni le
laisser entrer en contact avec une sur face chaude.
• Ne pas placer l’appareil sur le dessus ou près d’un élément chauffant électrique ou
à gaz ni dans un four chaud.
• Faire preuve de grande prudence pour déplacer un appareil co ntenant de l’huile
brûlante ou autre liquide chaud.
• Pour vous déconnecter, appuyez sur Start / Stop ( ) pour annuler l’opération si
nécessaire, puis retirez la fiche de la prise murale.
• Utiliser l’appareil uniquement aux fins pour lesquelles il a été conçu.
• Soyez extrêmement prudent lorsque vous retirez le plateau ou de l’élimination de la
graisse chaude
• Ne pas introduire dans le grille-pain four des aliments trop volumineux ni des
ustensiles, car ils pourraient provoquer un incendie ou un choc électrique.
• Il y a risque d’incendie lorsque le grille-pain four est recouvert de matériaux
inflammables, comme des rideaux, des draperies ou des revêtements muraux, ou
lorsqu’il entre en contact avec ceux-ci pendant qu’il fonctionne. Ne rien déposer
sur l’appareil pendant qu’il fonctionne.
• Ne pas nettoyer avec un tampon à récurer. Des morceaux pourraient se détacher
du tampon et toucher les parties électriques, entraînant un risque de choc
électrique.
• Faire preuve d’une grande prudence lors de l’utilisation de contenants autres qu’en
métal ou en verre.
• Ne pas ranger d’articles, autres que les accessoires recommandés par le fabricant,
dans le four lorsqu’il n’est pas en fonction.
• Ne pas mettre dans le four : papier, carton, plastique et autres matériaux de même
type.
• Ne pas recouvrir de papier d’aluminium le plateau à miettes ou une quelconque
autre partie du four. Cela causerait une surchauffe du four.
CONSERVER CES MESURES
.
Cet appareil est conçu pour un usage
domestique seulement.
FICHE MISE À LA TER RE
Par mesure de sécurité, le produit comporte une fiche mise à la terre qui n’entre
que dans une prise à trois trous. Il ne faut pas neutraliser ce dispositif de sécurité.
La mauvaise connexion du conducteur de terre présente des risques de secousses
électriques. Communiquer avec un électricien certifié lorsqu’on se demande si la prise
est bien mise à la terre.
VIS INDESSERRABLE
Avertissement : L’appareil est doté d’une vis indesserrable empêchant l’enlèvement du
couvercle extérieur. Pour réduire les risques d’incendie ou de secousses électriques, ne
pas tenter de retirer le couvercle extérieur. L’utilisateur ne peut pas remplacer les pièces
de l’appareil. En confier la r éparation seulement au pers onnel des centres de serv ice
autorisés.
CORDON
a) Le cordon d’alimentation d e l’appareil est court (ou amovible) afin de minimiser les r isques
d’enchevêtrement ou de trébuchement.
b) Il existe des cordons d’alimentati on amovibles ou de rallonge plus longs et il faut s’en servir avec
prudence.
c) Lorsqu’on utilise un cor don d’alimentation amovible ou de rallonge plus long, il faut s’assurer que :
1) la tension nominale du cordon d’alimentat ion amovible ou de rallonge soit au moins égale à
celle de l’appareil, et que;
2) lorsque l’appareil es t de type mis à la terre, il faut utiliser un cordon de rallonge mis à la
terre à trois broches, et;
3) le cord on plus long soit placé de sorte qu’il ne soit pas étalé sur le comptoir ou la ta ble d’où
des enfants pourraient le tirer, ni placé de manière à provoquer un t rébuchement.
Note: Lorsque le co rdon d’alimentation est endommagé, il faut le faire remplacer par du personnel qualifié ou, en Amérique latine, par le personnel d’un cent re de service autorisé.
UTILISATION
Cet appareil est conçu pour un usage dome stique seulement.
Mise en garde : Ne pas laiss er le four sans surveillance pen dant qu’il fonctionne. Il
b
i
a
j
f
k
d
h
e
c
est possible que les aliments s’enflamment. Si cette situation se produit, débrancher
l’appareil, mais NE PAS ouvrir la po rte. Pour réduire les risqu es d’incendie, veiller à conserver l’intérieu r du four propre et exempt de résidus d’alime nts, d’huile, de graisse et de
toute autre matière combustible.
Mise en garde : Un incend ie pourrait se déclencher si le gr ille-pain four est couvert ou s’il
touche une matièr e inflammable comme des rideaux , draperies, murs, etc. pend ant qu’il
fonctionne et lor squ’il est encore chaud. Ne placez auc une des matières suivantes dan s le
four ni sur le dessus du f our et ne les mettez pas en cont act avec les côtés ou le dessous
du four : papier, carton, em ballage plastique et autre maté riau semblable.
POUR COMMENCER
• Retirer tous les matériaux d’emballage et les autocollants se trouvant sur le pr oduit.
• Visiter le www.prodprotect.com/a pplica pour enregistrer la garantie.
• Laver toutes les pièces amovibles en suivant les directives de la section E NTRETIEN E T NETTOYAGE
du présent guide.
• Choisir un endroit où placer l’appareil en laissant suffisamment d’espace entre l’arrièr e de l’appareil
et le mur pour favoriser la circulation de la chaleur, sans endommager les armoires e t les murs.
• Brancher l’appareil dans une prise de courant.
RENSEIGNEMENTS IMPORTANTS SUR LE FOUR
• Le four devient chaud. Lorsque l’appareil est en marche, toujours utiliser des gant s de cuisine ou
des poignées pour toucher les surface s extérieures et intérieures du four.
• Lorsque vous utilisez le four pour le temps Thefirst, vous remar querez peut-être de la fumée ou une
légère odorduring les premières minutes.
• Vous devez régler la minuterie ou sélectionner l’option STAY ON (FONCT IONNEMENT CON TINU) et
appuyez sur le bouton Start /Stop (Démarrage /Arrêt) ( ) p our que le four fonctionne.
IMPO RTANT: Assurez-vous que la nourriture ou un plat de cuisson ne relève pas de 1 ½ pouces
des éléments chauffants sup érieurs.
IMPO RTANT: Alimentaire ne devrait pas s’étendre au-delà des bords de la plaque de cuisson /
plateau d’égouttement pour éviter de tomber jus de cuiss on sur les éléments chauffants.
Remarque: L’afficheur s’éteint après 120 secondes d’inactivité.
GRILLAGE ( RÉGLAGES 1 À 7)
Il n’est pas nécessaire de préchauffer le fo ur pour faire griller des aliments.
1. Ouvrir la porte du four et insérer la grille coulissant e.
2. Déposer les aliments à griller directement sur la grille coulis sante et fermer la porte.
3. Appuyer sur le bouton de fonction de gr illage.
4. Appuyer sur les boutons de réglage de la minuterie pour sélectionner le degré de grillage
désiré. Utiliser la flèche vers le haut s pour un degré de grillage plus élevé et la f lèche vers le
bas t pour un degré de grillage moins élevé.
5. Appuyer sur le bouton ( ) p our commencer le grillage.
6. À la fin du cycle de grillage, l’appareil émet un bip et le mot « END » (Terminé) clignote sur
l’afficheur. Le four s’éteint.
7. Ouvrir la porte du four. À l’aide de gants de cuisine/poignées pour le four, retirer la grille pour
sortir les aliments.
8. Débrancher l’appareil quand il ne sert pas.
Remarque: Pour annuler le cycle de grillage avant qu’il ne soit terminé, appuyer sur le bouton
Start/ Stop (Démarrage/ Arrêt) ( ) pour éteindre l’appareil et ret irer la rôtie.
Pour obtenir les meilleurs résultats pos sible, déposer le pain aux endroits indiqués.
CUISSON 150° F - 450° F
1. Appuyer sur le bouton de fonction de cuisson.
2. Appuyer sur les boutons de réglage de la minuterie pour sélectionner la températ ure désirée.
Utiliser la flèche vers le haut s pour une températur e plus élevée et la flèche vers le bas s
pour une température moins élevée.
3. Température clignote jusqu’à ce que le four atteigne la température réglée. Pr ogrammateur ne
peut pas commencer tant que le four est préch auffé.
4. Appuyer sur les boutons de réglage de la minuterie pour sélectionner le temps de cuisson
désiré. Utiliser la flèche vers le haut s pour un temps de cuiss on plus long et la flèche vers
le bas t pour un temps de cuisson plus court. S électionner l’option STAY ON (Fonctionnement
continu) pour faire cuire plus de 60 minutes ou pour déte rminer manuellement le temps de
cuisson.) Sélectionner l’option STAY ON ( Fonctionnement continu) en appuya nt sur la flèche
vers le bas t jusqu’à ce que vous dépassiez le zéro.
5. Appuyer sur le bouton ( ) p our commencer la cuisson.
6. Les éléments chauffant s s’allument et s’éteignent pour maintenir la température voulue.
7. Lorsque l’afficheur cesse de clignoter, le four est préchauffé. Ouvr ir la porte du four et placer les
aliments à l’intérieur du four. Fermer la porte du four.
Remarque : Sur la grille coulissante, dépo ser un plat de cuisson en métal, en verre ou en
céramique.
8. Si la minuterie est utilisée, un bip se fera entendre à la f in du cycle de cuisson. Le four s’éteint.
Si la minuterie n’est pas utilisée, tourner le bouton à ( ) pour éteindre le four à la fin du cycle
de cuisson.
9. Ouvrir la porte du four. À l’aide de gants de cuisine/ poignées pour le four, retirer la grille pour
sortir les aliments.
10. Débrancher l’appareil lorsqu’il ne sert pas.
RÔTISSAGE 350° F - 450° F
Remarque : Pour obtenir de meilleurs résult ats lors du rôtissage, toujours préchauf fer le four
pendant au moins 10 minutes.
1. Appuyer sur le bouton de fonction de rôtiss age.
2. Appuyer sur les boutons de réglage de la minuterie pour sélectionner la températ ure désirée.
Utiliser la flèche vers le haut s pour une températur e plus élevée et la flèche vers le bas t
pour une température moins élevée.
3. Température clignote jusqu’à ce que le four atteigne la température réglée. Pr ogrammateur ne
peut pas commencer tant que le four est préch auffé.
4. Appuyer sur les boutons de réglage de la minuterie pour sélectionner le temps de cuisson
désiré. Utiliser la flèche vers le haut s pour un temps de rôt issage plus long et la flèche vers
le bas t pour un temps de rôtissage plus cour t. Sélectionner l’option STAY ON (Fonctionnement
continu) pour faire cuire pour déterminer manuellement le temps de cuiss on.) Sélectionner
l’option STAY ON (Fonctionnement cont inu) en appuyant sur la flèche vers le bas t
jusqu’à ce que vous dépassiez le zéro.
5. Ouvrir la porte du four et, en ut ilisant la plaque de cuisson comme un plateau d’égouttage,
insérer la plaque sous la grille coulissante et dépos er les aliments directement sur la grille/
lèchefrite. Fermer la porte du fou r.
6. Appuyer sur le bouton ( ) p our commencer le rôtissage.
Remarque : Il y a 2 façons de faire cuire les a liments :
• Placer la plaque de cuisson/plateau d’égouttage sur la grille co ulissante.
• Glisser la plaque de cuisson/plateau d’égouttage s ous la grille coulissante/lèchefrite.
7. Lorsque le rôtissage est terminé, un bip se fait entendre et l’élément chauf fant s’éteint. Si la
minuterie n’est pas utilisée, tourner le bouton à ( ) pour éteindre le four à la fin du cycle de
cuisson.
8. À l’aide d’un gant de cuisine ou d’une poignée pour le four, retirer la grille de lèchefrite et la
plaque de cuisson pour retirer les aliments.
9.. Débrancher l’appareil quand il ne sert pas.
MODE RÉCHAUD 150° F - 200° F
1. Appuyer sur le bouton de fonction du mode réchaud.
2. Appuyer sur les boutons de réglage de la minuterie pour sélectionner la températ ure désirée.
Utiliser la flèche vers le haut s pour une températur e plus élevée et la flèche vers le bas t
pour une température moins élevée.
3. Appuyer sur les boutons de réglage de la minuterie pour sélectionner le temps de cuisson
désiré. Utiliser la flèche vers le haut s pour un temps de récha ud plus long et la flèche vers le
bas t pour un temps de réchaud plus court. S électionner l’option STAY ON (Fonctionnement
continu) pour réchauffer plus de 60 minut es ou pour déterminer au besoin le temps de
réchaud.) Sélectionner l’option STAY ON ( Fonctionnement continu) en appuyan t sur la flèche
vers le bas t jusqu’à ce que vous dépassiez le zéro.
Remarque : Cette fonctio n sert à garder des aliments au chaud immédiatement après la cuisson.
Elle doit être utilisée pour des durées as sez brèves. Pour empêcher les aliments de sécher, les
couvrir de papier d’aluminium.
4. Lorsque le temps est écoulé, un bip se fait ent endre et l’élément chauffant s’éteint. Si la
minuterie n’est pas utilisée, tourner le bouton à ( ) pour éteindre le four à la fin du cycle de
cuisson.
5. Débrancher l’appareil quand il ne sert pas.
BASCULER ENTRE LES DEGRÉS CELSIUS ET FAHRENHEIT
1. Appuyer simultanément et maintenir enfoncées les flèches de ré glage de la température vers le
haut et vers le bas s et t , jusqu’à ce que vous entendiez un bip. L’afficheur affiche soit
pour les degrés Celsius ou pour les degrés Fahr enheit.
ENTRETIEN ET NETTOYAGE
L’utilisateur ne peut effectuer lui-même l’entretien d’aucune pièce de cet appareil. En confier
l’entretien à du personnel qualifié.
NET TOYAG E
Important : Avant de nettoyer une pièce quelconque, s’assurer que le four est éteint, débranché et
froid.
1. Nettoyer la porte en verre avec une éponge, un linge doux ou un tampo n en nylon et de l’eau
savonneuse. Ne pas utiliser de nettoya nt à vitres en vaporisateur.
ATTENTION
LE FOUR DEVIENT CHAUD LORSQU’IL EST EN
MARCHE. TOUJOURS UTILISER DES MITAINES
DE CUISINE OU DES POIGNÉES POUR
TOUCHER LES SURFACES EXTÉRIEURES OU
INTÉRIEURES DU FOUR.
Model/Modelo/ Mod èle: TO1380 SSD , TO13 80S S
Customer Care Lin e: 1-800 -231-97 86
For online customer service: ww w.prodprotect.com/applica
Línea de Atención del Cliente: 1-800 -231-97 86
Para servicio al cliente en línea: w ww.prodprotect.com/applica
Ligne Service à la Clientèle: 1-80 0-231- 9786
Pour le service à la clientèle en ligne: www.prodpr otect.com/applica
10796-00 E/S/F
T22-5001231
Made and Printed in People’s Republic of China
Fabricado e Impreso en la República Popular de C hina
Fabriqué et Imprimé en République populaire de Chine.
Sello del Distribuidor:
Fecha de compra:
Modelo:
Código de fecha / Date C ode / Le code de date:
1150 W 120V~ 60 Hz
BLACK+DEC KER and the BLACK+DEC KER logo are trademarks of The Black & Decker
Corporation and are used und er license. All rights reserved
BLACK+DEC KER y el logo tipo BLACK+DEC KER son marcas registradas de The Black & Decker
Corporation y son utilizados bajo licencia. Todos los derechos reservados.
BLACK + DEC KER et le logo BLACK &+ DECKER sont des marques de commerce de The Black &
Decker Corporation, et son t utilisés sous licence. Tous droits réservés.
Importado por / Imported by:
RAYOVAC ARGENTINA S.R.L.
Humboldt 2495 Piso #3
(C1425FUG) C.A.B.A. Argentina.
C.U.I.T NO. 30-70706168-1
Importado por / Imported by:
Rayovac de México S.A de C.V
Autopista México Querétaro No 3069-C Ocina 004
Colonia San Andrés Atenco, Tlalnepantla
Estado de México, C.P. 54040
Mexico.
Telefono: (55) 5831 – 7070
Para atención de garantía marque: 01 800 714 2503
Comercializado por:
Rayovac de México S.A de C.V
Autopista México Querétaro No 3069-C Ocina 004
Colonia San Andrés Atenco, Tlalnepantla
Estado de México, C.P. 54040
Mexico.
Telefono: (55) 5831 – 7070
Para atención de garantía marque: 01 800 714 2503
Servicio y Reparación
Art. 123 No. 95
Col. Centro, C.P. 06050
Deleg. Cuauhtemoc
Servicio al Consumidor,
Venta de Refacciones y Accesorios
01 800 714 2503
Argentina
Servicio Técnico
Monroe 33 51
CABA Argentina
Tel: 0800 – 444 - 729 6
servicios@rayovac.com.ar
Argentina
SERVICI O DE MAQUINA S Y
HERRAMIENTAS LTDA.
Portugal Nº 6 44
Santiago – Chile
Fonos: 02-63 55208 / 02-6341169
Email: servicio@spectrumbrands.cl
Call center: 800 -171-051
Colombia
Rayovac Varta S. A
Carrera 17 Número 89- 40
Línea gratuita nacional
Tel. 018000510012
Costa Rica
Aplicaciones Electromecanicas, S.A.
Calle 26 Bis y Ave. 3
San Jose, Cost a Rica
Tel. (506) 257-5716 / 223-0136
administracion@masterecuador.com
Ecuador
SERVICIO MASTER ECUADOR
ALMERI A N50-71 Y DE LOS AL AMOS
Tel. (593) 2281-3882 / 2240 -9870
El Salvador
Calle San Antonio A bad 2936
San Salvador, El Salvador
Tel. (503) 2284-8374
Guatemala
MacPartes SA
3ª Calle 414 Zona 9
Frente a Tecun
Tel. (502) 2331-5020 / 23 32-2101
Honduras
Ser viTot al
Contigua a Telecentro
Tegucigalpa, Honduras,
Tel. (504) 235-62 71
México
Articulo 123 # 95 Loca l 109 y 112
Col. Centro, Cuauht emoc,
México, D.F.
Tel. 01 800 714 2503
Nicaragua
Ser viTot al
De semáforo de portez uelo
500 metros al sur.
Managua, Nicaragua,
Tel. (505) 248-7001
Panamá
Servicios Técnicos CAPRI
Tumbamuerto Boulevard
El Dorado Panamá
500 metros al sur.
Tel. 3020-480 -800 sin costo
(507) 2360 -236 / 159
Panamá
Servicio Central Fast Service
Av. Angamos Este 2431
San Borja, Lima Per ú
Tel. (511) 2251 388
Puerto Rico
Buckeye Service
Jesús P. Piñero #1013
Puerto Nuevo, SJ P R 00920
Tel.: (787) 782-6175
Republica Dominicana
Prolongación Av. Rómulo Betancourt
Zona Industrial de Herrera
Santo Domingo, República
Dominicana
Tel.: (809) 530-54 09
Venezuela
Inversiones BDR CA
Av. Casanova C.C.
City Market Nivel Pl aza Local 153
Diagonal Hotel Melia,
Caracas.
Tel. (582) 324-0969
www.applicaservice.com
servicio@applicamail.com
© 2014 The Black & Decker Corporation and Sp ectrum Brands, Inc.
2. Pour enlever le grille coulissantes, ouvrir la porte, puis tirer le grille et les s ortir. Les laver dans
de l’eau tiède savonneuse ou au lave-vaisselle. Pour venir à bout des taches tenac es, utiliser un
tampon en nylon ou en polyester.
3. Laver le plat de cuisson/bac récupérateur e t la grille de lèchefrite dans de l’eau tiède
savonneuse ou au lave-vaisselle. Utiliser un tampon en nyl on ou en polyester pour réduire au
minimum les égratignures.
Plateau à miettes
1. Saisir la poignée et tirer le plateau.
2. Jeter les miettes et essuyer le plateau avec un linge humide.
Surfaces extérieures
Essuyer le dessus et les surf aces extérieures avec un linge humide ou une éponge. Bien assécher.
Récipients de cuiss on
Dans le four, on peut utiliser des plats en métal, des plats en ver re allant au four ou des plats en
céramique, sans couvercle de verre. Suivre les inst ructions du fabricant. S’assurer que le dessus
du récipient se trouve à au moins 3,81 cm (1½ po) des éléments chau ffants supérieurs.
BESOIN D’AIDE?
Pour communiquer avec les services d’entretien ou de répar ation, ou pour adresser toute question
relative au produit, composer le numéro sans f rais approprié indiqué sur la page couverture. Ne
pas retourner le produit où il a été acheté. Ne pa s poster le produit au fabricant ni le porter dans
un centre de service. On peut également c onsulter le site web indiqué sur la page couverture.
Garantie limitée de d eux ans
(Valable seulemen t aux États-Unis et au Canada )
Quelle est la couver ture?
• Tout défaut de main-d’oeuvre ou de matériau; toutefois, la responsabilité de l a société Applica se
limite au prix d’achat du produit.
Quelle est la durée ?
• Deux année(s) à compter de la date d’achat initiale, avec une preuve d’achat.
Quelle aide offrons nous?
• Remplacement par un produit raisonnablement semblable nouveau ou réusiné.
Comment se prévaut-on du service?
• Conserver son reçu de caisse comme preuve de la date d’achat.
• Visiter notre site web au www.prodprotect.com /applica, ou composer sans frais le 1 80 0 2319786, pour obtenir des renseignements génér aux relatifs à la garantie.
• On peut également communiquer avec le service des pièces et des accessoires au 1 8 00 738-
0245.
Qu’est-ce que la garantie n e couvre pas?
• Des dommages dus à une utilisation commerciale.
• Des dommages causés par une mauvaise utilisation ou de la négligence.
• Des produits qui ont été modifiés.
• Des produits utilisés ou entretenus hors du pays où ils ont été achet és.
• Des pièces en verre et tout autre accessoire emballés avec le produit.
• Les frais de transport et de manutention reliés au r emplacement du produit.
• Des dommages indirects (il faut toutefois prendre note que cer tains états ne permettent pas
l’exclusion ni la limitation des dommages indirects).
Quelles lois régiss ent la garantie?
• Les modalités de la présente garantie donnent des droits lé gaux spécifiques. L’utilisateur peut
également se prévaloir d’autres droits selon l’état ou la prov ince qu’il habite.
El producto puede var iar ligeramente del que aparece ilust rado.
 Loading...