

Page 1
Please Read and Save this Use and Care Book
Por favor lea este instructivo antes de usar el producto
Veuillez lire et conserver ce guide d’entretien et d’utilisation
Accessories/Parts (USA/Canada)
Accesorios/Partes
(EE.UU/Canadá)
Accessoires/Pièces (É.-U./Canada)
1-800-738-0245
Model
Modelo
Modèle
❑
SKG110
USA/Canada 1-800-231-9786
Mexico 01-800-714-2503
www.applicaconsumerproductsinc.com
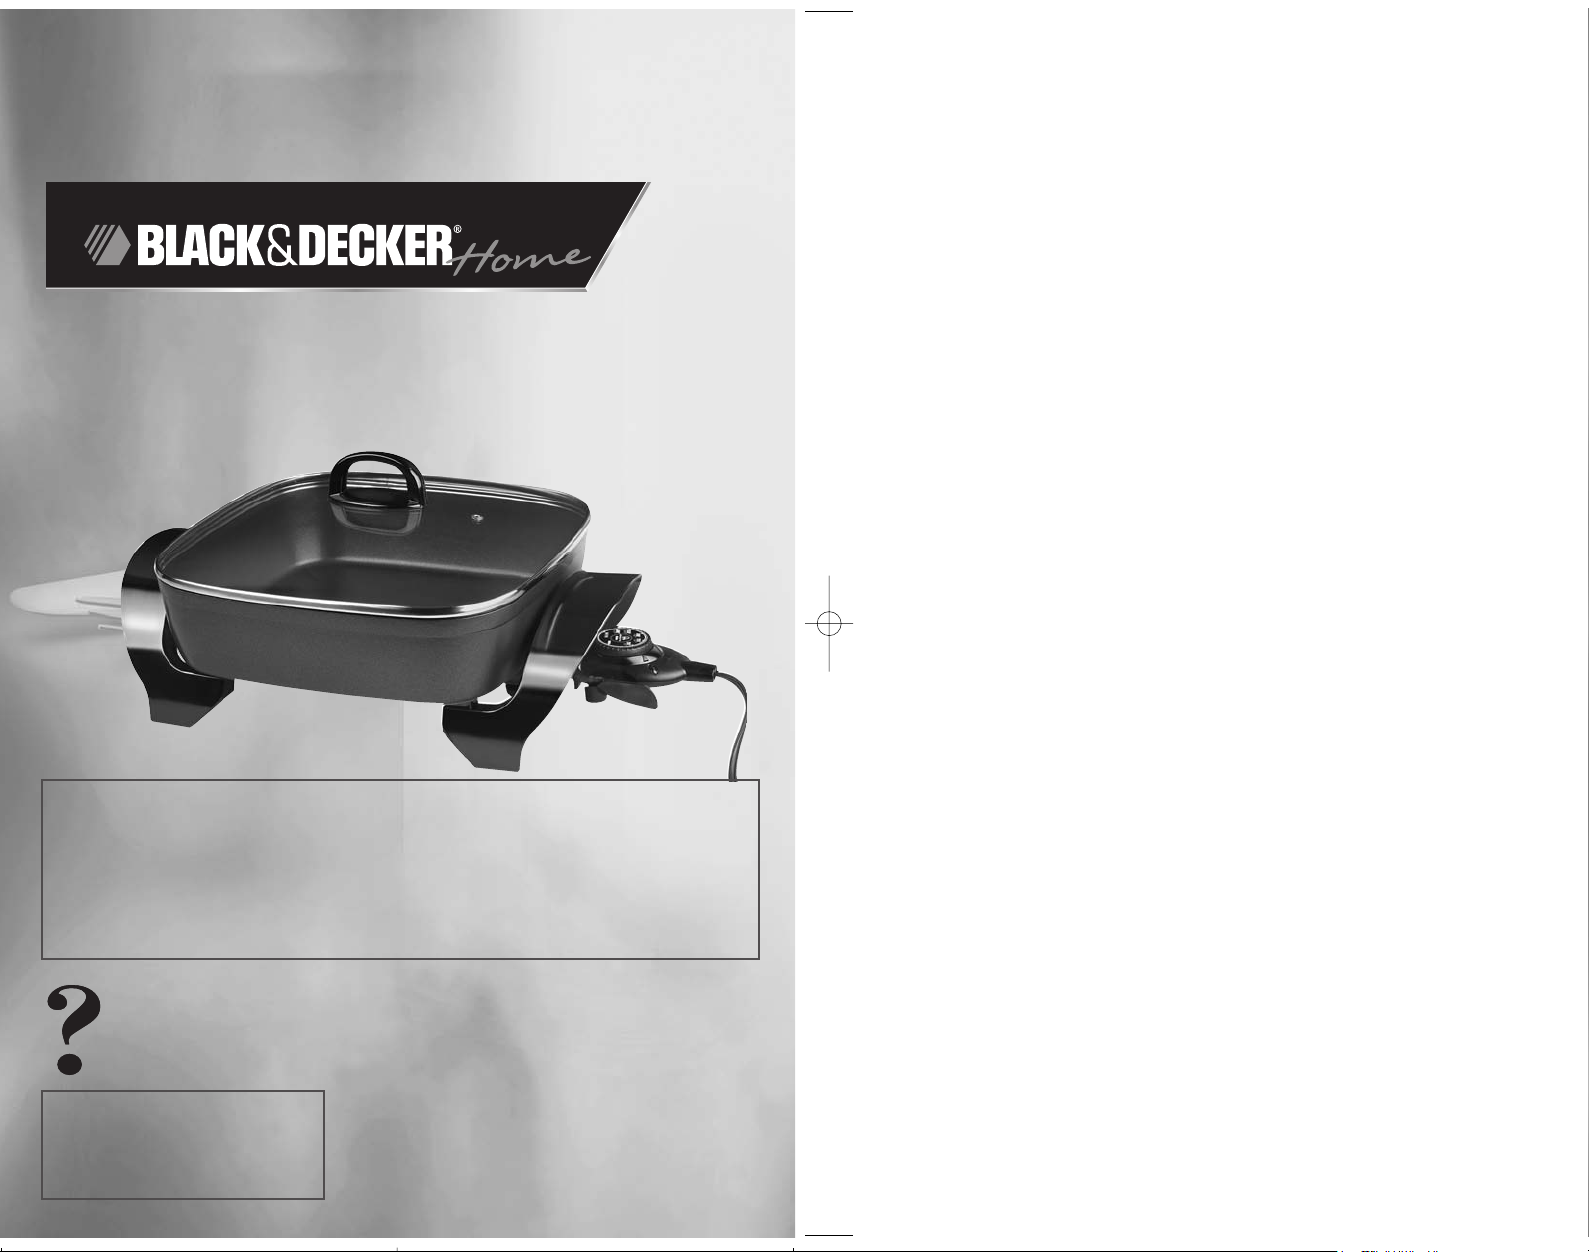
12" Electric Skillet
Sartén eléctrico de 30,5 cm
Poêle à frire électrique 30,5 cm
Register your product online at www.prodprotect.com/applica,
for a chance to WIN $100,000!
Registre su producto en la Internet en el sitio Web www.prodprotect.com/applica
y tendrá la oportunidad de GANAR $100,000!
Inscrivez votre produit en ligne à l'adresse www.prodprotect.com/applica
et courez la chance de GAGNER 100 000 $!
Page 2

1
2
IMPORTANT SAFEGUARDS
When using electrical appliances, basic safety precautions should always
be followed including the following:
❑
Read all instructions.
❑
Do not touch hot surfaces. Use handles or knobs.
❑
To protect against electric shock, do not spill on or immerse cord, plug,
or temperature control in water or other liquids.
❑
Close supervision is necessary when any appliance is used by or near
children.
❑
Unplug from outlet when not in use and before cleaning. Allow to cool
before putting on or taking off parts and before cleaning the appliance.
❑
Do not operate any appliance with a damaged cord or plug or after the
appliance malfunctions or has been dropped or damaged in any
manner. Return the appliance to the nearest authorized service facility
for examination, repair, or electrical or mechanical adjustment.
❑
The use of attachments not recommended by the appliance
manufacturer may cause fire, electric shock or injuries.
❑
Do not use outdoors.
❑
Do not let cord hang over edge of table or counter, it can be
accidentally pulled or touch hot surfaces.
❑
Do not place on or near a hot gas or electric burner, or in a heated
oven.
❑
Extreme caution must be used when moving an appliance containing
hot oil or other hot liquids.
❑
Always attach temperature control to the skillet first, then plug cord in
the wall outlet. To disconnect, remove the plug from the wall outlet.
❑
Do not use the appliance for other than intended use.
SAVE THESE INSTRUCTIONS
GROUNDED PLUG (Canada Models Only)
This product is equipped with a grounded plug, which will only fit into a three-prong outlet.
Do not attempt to defeat this feature. Improper connection of the grounding conductor may
result in the risk of electric shock. Consult a qualified electrician if you are in doubt as to
whether the outlet is properly grounded.
POLARIZED PLUG (Non Canada models)
This appliance has a polarized plug (one blade is wider than the other). To reduce the risk of
electric shock, this plug will fit in a polarized outlet only one way. If the plug does not fit fully
in the outlet, reverse the plug. If it still does not fit, contact a qualified electrician. Do not
modify the plug in any way.
ELECTRICAL CORD
a) A short power-supply cord (or detachable power-supply cord) is to be provided
to reduce the risk resulting from becoming entangled in or tripping over
a longer cord.
b) Longer detachable power-supply cords or extension cords are available and
may be used if care is exercised in their use.
c) If a long detachable power-supply cord or extension cord is used,
1) The marked electrical rating of the detachable power-supply cord
or extension cord should be at least as great as the electrical rating
of the appliance,
2) If the appliance is of the grounded type, the extension cord should
be a grounding-type 3-wire cord, and
3) The longer cord should be arranged so that it will not drape over
the countertop or tabletop where it can be pulled on by children
or tripped over.
TAMPER-RESISTANT SCREW
Warning : This appliance is equipped with a tamper-resistant screw to prevent
removal of the outer cover. To reduce the risk of fire or electric shock, do not
attempt to remove the outer cover. There are no user-serviceable parts inside.
Repair should be done only
by authorized service personnel.
Note: If the power supply cord is damaged, it should be replaced by qualified
personnel or in Latin America by an authorized service center.
Page 3
4
3
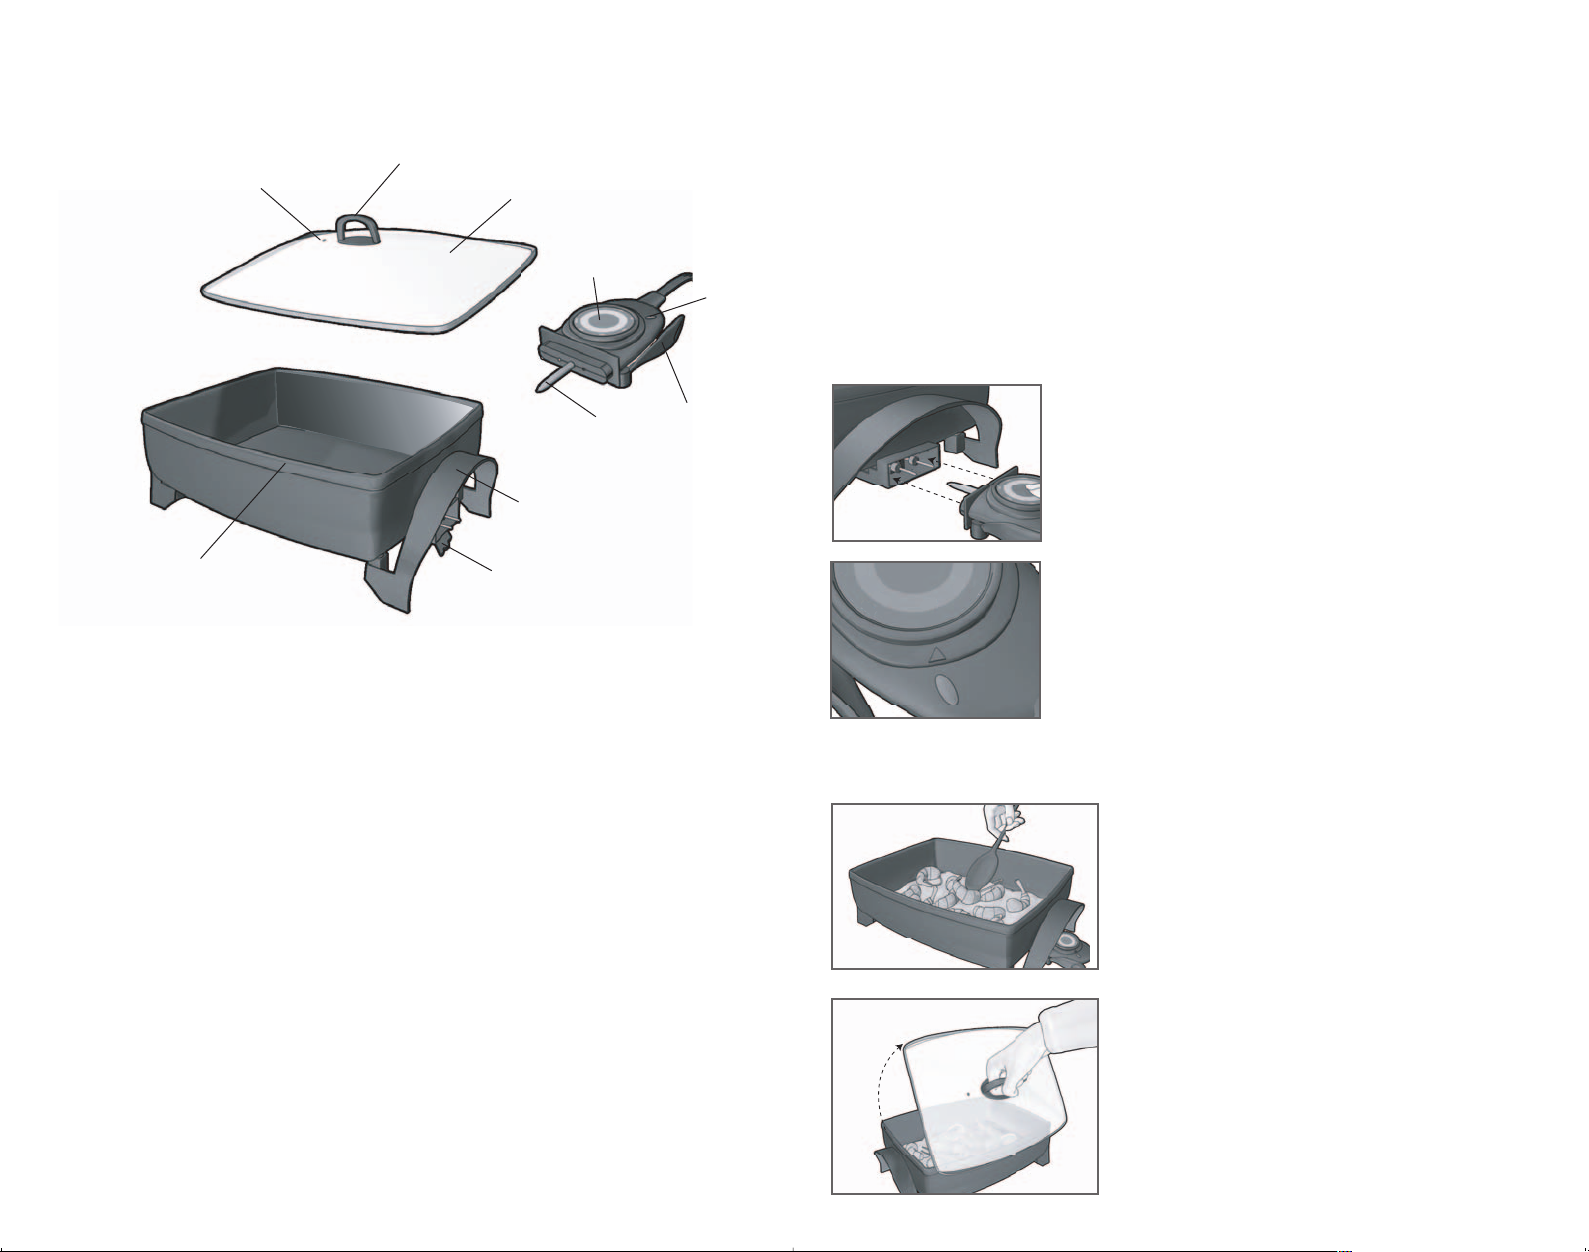
1. Lid handle
†2. Tempered glass lid (Part # SKG110-01 )
3. Steam vent
4. Probe
†5. Variable temperature control (Part # SKG110-02 )
6. On indicator light
7. Quick-release lever
8. Cool-touch handles
9. Pan-tilt leg
10. Extra deep, nonstick interior
† Consumer replaceable/removable
Product may vary slightly from what is illustrated.
How To Use
This appliance is for household use only.
GETTING STARTED
• Remove all packing material and stickers from the product.
• Remove and save literature.
• Wash and dry all parts as instructed in CARE AND CLEANING section of this
manual.
Note: Unplug the cord and remove variable temperature control before cleaning.
• Place appliance on a flat, stable surface.
Note: Use only the temperature control provided with this skillet.
• The cooking capacity of this appliance is 20 cups (5 quarts/4.7 liters).
READY TO COOK
1. Make sure the variable temperature control is set to
“Min”. Insert the probe firmly into the socket found
at the side of the appliance (A). Be sure the control
is securely inserted.
Note: Always attach the control to the pan before
plugging into an outlet.
2. Uncoil cord and plug into standard electrical outlet.
Turn the variable temperature control to the desired
setting. Three things should align on the probe (B):
• The indicator light
• The arrow below the dial
• The selected temperature setting on the dial
3. When the selected temperature is reached, the light goes off. The light will
cycle on and off during cooking, indicating the selected cooking temperature is
being maintained.
4. To simmer foods, bring the mixture to a boil;
then reduce heat to 250°F.
5. Use wooden, nylon or plastic utensils that are
suitable for use on hot surfaces (C ).
Note: Do not use metal utensils. Do not cut
foods in the skillet; it will damage the nonstick
surface.
6. Always use hot pads or oven mitts when
handling hot skillet. Remember skillet takes
several minutes to cool down after use.
7. When removing lid from skillet, always tilt the
lid away when lifting (D).
8. When food is fully cooked, set temperature
to WARM setting to keep food at serving
temperature.
A
1
M
B
D
C
50
21
F
c
150
c
300
F
c
F
205
400
c
177
F
350F
350
Page 4

6
5
9. To use skillet for table service, unplug appliance.
To remove the variable temperature control probe,
hold the cool-touch handle on to the side of the
skillet. Press the quick-release lever and pull out
the control (E).
USING THE ADJUSTABLE PAN-TILT LEG
This skillet is designed for:
• healthy cooking
• easy cleanup
To set the pan-tilt leg in position, tilt the skillet before
preheating by putting the leg straight down under the
cool-touch handle (F). The drippings and oil will flow
to the tilted side of the skillet and away from the food.
Whenever the pan is hot be sure to protect hands
by using a hot pad or glove when aligning or releasing
the lift (G).
GETTING THE MOST FROM YOUR SKILLET
A few guidelines to give great cooking results and prolong the life of your skillet:
• It is not necessary to use high heat when browning or frying foods. The heat
distribution is so efficient medium heat is sufficient.
• Use only wood, plastic or nylon utensils that are suitable for hot surfaces.
Do not use metal utensils.
• Do not use aerosol nonstick cooking spray on the cooking surface of the skillet.
• Use olive oil or butter, if desired. Neither is necessary; the foods will cook on
the nonstick surface without sticking.
• Do not cut foods in the skillet; it will damage the nonstick surface.
• Allow pan to return to room temperature before cleaning.
• When storing the skillet, line the cooking surface with paper towels to preserve
the nonstick finish.
RECIPES
SAUTÉED TILAPIA WITH GINGERED PINEAPPLE SAUCE
1 cup thinly sliced purple onion
2 tbsp. butter or margarine
11⁄2 cup pineapple juice
2 tbsp. lime juice
1/2 cup halved seedless green grapes
1 orange, peeled, cut in half and sliced
1 cup cubed mango
2 tbsp. slivered orange peel
1 tbsp. grated fresh ginger
1/2 tsp. salt
1/4 tsp. pepper
6 tilapia fillets (about 11⁄2
lbs.)
1 tbsp. cornstarch
Hot cooked rice
Heat Black & Decker
®
electric skillet to 350°F. Cook onion in 1tbsp. butter for
3 minutes, stirring occasionally. Add 11⁄4 cups pineapple juice and lime juice.
Stir in grapes, orange pieces, mango, orange peel, ginger salt and pepper.
Cook 3 minutes longer, stirring occasionally.
Blend remaining 1/4 cup pineapple juice with cornstarch. Stir into pineapple juice
mixture and cook, stirring, until thickened and smooth. Remove to bowl and keep
warm.
Raise temperature to 375°F. Add remaining tablespoon butter to skillet and cook
fish until golden on both sides and fully cooked.
Return sauce to skillet and heat through.
Serve over rice and garnish with sliced toasted almonds, if desired.
Makes 6 servings.
CARNE CON PAPAS
BEEF WITH POTATOES
2 lb. beef, cubed
2 tbsp. olive oil
1 can ( 141⁄2 oz.) tomato sauce
1 cup dry white wine or cooking wine
3/4 cup water
1 large onion, chopped
3 large cloves garlic, minced
1 bay leaf
1 tsp. paprika
1 tsp. salt
E
F
G
Page 5

8
7
1/2 tsp. coarse ground pepper
2 lbs. potatoes, cubed
1 large green pepper, coarsely chopped
1 jar (2oz.) capers, drained
Hot cooked rice
Chopped parsley
Heat Black & Decker
®
electric skillet to 350°F. Brown beef on both sides in oil.
Stir in next 9 ingredients. Bring to a boil. Reduce heat to 250°F. Cover and let
simmer for 1 hour. Add potatoes, peppers and capers. Cook 30 minutes longer
or until beef is tender and cooked through; stir occasionally.
Serve with salad and warm crusty bread.
Makes 8 servings
QUICK AND EASY CUBED STEAK
11⁄2 lbs. cubed beef
1 tbsp. olive oil
1 large onion, chopped
1 large green pepper, seeded and cut into strips
2 large cloves garlic, minced
1 tsp. Adobo seasoning
1 tsp. salt
1/2 tsp. coarse ground pepper
2 large tomatoes, cut into wedges
1 can (8 oz.) tomato sauce
Hot cooked rice
Chopped parsley
Heat Black & Decker®electric skillet to 350°F. Brown beef on both sides
in oil. Allow to cook several minutes until tender. Remove to platter and keep
warm.
Add onion, green pepper and garlic to skillet. Season all with seasoning, salt and
pepper. Cook until vegetables are tender. Stir in tomatoes and cook several
minutes. Add tomato sauce and return meat to skillet. Bring to a boil. Reduce
heat to 250°F. Cover and let simmer for 5 minutes; stir occasionally.
Serve over hot cooked rice and garnish with parsley.
Makes 4 servings.
SAUTÉED SHRIMP WITH PESTO
2
1
⁄2 lbs. shrimp
1 large Vidalia onion, halved and thinly sliced
2 tbsp. butter or margarine
1 large red pepper, seeded and cut into 2-inch strips
3 large cloves garlic, minced
1 bottle (8 oz.) clam juice
1/2 cup fresh lemon juice
2 tbsp. jarred traditional basil pesto
2 tbsp. grated lemon peel
1 bay leaf
1 tsp. salt
1/2 tsp. coarse ground pepper
Hot cooked rice
Chopped parsley
Shell shrimp, leaving tail on and devein. Refrigerate until ready to use.
Heat Black & Decker®electric skillet to 350°F. Cook onion in butter for 3 minutes,
stirring occasionally. Add red pepper and garlic. Cook 3 minutes longer, stirring
occasionally. Add next 7 ingredients. Stir in shrimp. Bring to a boil. Reduce heat
to 250°F. Cover and let simmer for 5 minutes or until shrimp are fully cooked; stir
occasionally.
Serve over rice and garnish with parsley, if desired.
Makes about 8 servings.
TEX-MEX PICADILLO
2 lb. ground round
1 large green pepper, chopped
1 large onion, chopped
3 large cloves garlic, minced
1 can (15 oz.) tomato sauce
1 can (141⁄
2 oz.) petit diced tomatoes
1 cup salsa
1 cup water
2 tbsp. taco seasoning mix
1/2 tsp coarse ground pepper
Hot cooked rice
Shredded Jack cheese
Sour cream
Coarsely crumbled tortilla chips
Page 6

10
9
Heat Black & Decker®electric skillet to 350°F. Add ground beef and brown well;
stir to break into bits. Add green pepper, onion and garlic. Stir in next
6 ingredients. Bring to a boil. Reduce heat to 250°F. Cover and let simmer
for 15 minutes; stir occasionally.
To serve, spoon over rice and garnish with cheese, sour cream and tortilla chips.
Makes 8 servings.
PORK 'n SALSA STEW
21⁄2 lbs. boneless pork loin, cut in 3/4-inch cubes
21⁄2 cups chicken broth
1 cup salsa
2 tbsp. tomato paste
2 large cloves garlic, minced
1/2 tsp. ground cumin
1/2 tsp coarse ground pepper
1 bag (16 oz.) frozen shelled edamame
1 bunch green onions, cut in 11⁄2-inch pieces
2 tbsp. cornstarch
Hot cooked rice
Coarsely chopped cashews
Heat Black & Decker®electric skillet to 350°F. Add pork and brown well on all
sides. Stir in 2 cups chicken broth and next 5 ingredients. Bring to a boil. Reduce
heat to 250°F. Cover and let simmer for 45 minutes; stir occasionally. Add
edamame and green onions and cook 10 minutes longer or until meat and
vegetables are tender.
Blend remaining 1/2 cup chicken broth with cornstarch. Increase heat in skillet
to 350°F. Stir cornstarch mixture into skillet and cook, stirring until thickened and
smooth.
To serve, spoon over rice and garnish with cashews.
Makes 6 to 8 servings.
SUGGESTED COOKING CHART
FOOD TEMPERATURE APPROXIMATE
COOKING TIME
Eggs (fried) 300°F 3 to 5 minutes
Eggs (scrambled) 325°F 3 to 5 minutes
Pancakes 375°F 2 to 3 minutes per side
French Toast 325°F 2 to 4 minutes per side
Grilled cheese sandwiches 325°F 7 to 9 minutes
Hamburgers (5 to 6 oz.) 375°F 4 to 8 minutes for rare
9 to 11 minutes for medium
Sausage 350°F 12 to 14 minutes
Cubed steak 375°F 3 to 5 minutes
Pork chops 350°F 15 to 20 minutes
Potatoes (country fried) 325°F 12 to15 minutes
Fish fillets 350°F 5 to 7 minutes
(breaded and shallow fried)
Page 7

12
11
INSTRUCCIONES IMPORTANTES
DE SEGURIDAD
Cuando se utilizan aparatos eléctricos, siempre se debe respetar ciertas
medidas de seguridad incluyendo las siguientes:
❑
Llea todas las instrucciones antes de utilizar el producto.
❑
No toque las superficies calientes. Utilice las asas o las perillas.
❑
A fin de disminuir el riesgo de un choque eléctrico, no sumerja el cable,
el enchufe ni la base del aparato en agua ni en ningún otro líquido.
❑
Todo aparato eléctrico utilizado cerca de los niños o por ellos mismos
requiere la supervisión de un adulto.
❑
Desconecte el aparato de la toma de corriente cuando éste no se
encuentre en funcionamiento y antes de limpiarlo. Espere que el
aparato se enfríe antes de instalar o retirar los accesorios y antes de
limpiarlo.
❑
No utilice ningún aparato que tenga dañado el cable o el enchufe o que
no funcione debido a una caída o daño en general. Devuelva el aparato
a un centro de servicio autorizado para que lo examinen, reparen o
ajusten.
❑
El uso de accesorios no recomendaados por el fabricante del producto
presenta el riesgo de lesiones personales.
❑
No utilice este aparato a la intemperie.
❑
No permita que el cable del aparato cuelgue del borde de la mesa o del
mostrador ni que entre en contacto con las superficies calientes.
❑
No coloque el aparato sobre ni cerca de una hornilla de gas o eléctrica
ni cerca de un horno caliente.
❑
Todo aparato que contenga aceite o líquido caliente se debe transportar
de un lugar a otro con mucho cuidado.
❑
Siempre conecte el control de temperature a la sartén antes de enchufar
el cable en la toma de corriente. Para desonectar el aparato, sujete y
retire el enchufe de la toma de corriente.
❑
Este aparato se debe utilizar únicamente con el fin previsto.
CONSERVE ESTAS INSTRUCCIONES
Care and Cleaning
This product contains no user serviceable parts. Refer service to qualified service
personnel.
To Clean:
1. Unplug the cord, remove the variable temperature control by pulling it straight out.
Wait for appliance to cool completely before cleaning.
Caution: Be careful when removing the variable temperature control; it may be hot
after use.
2. Wash the pan and lid with hot sudsy water. The lid can be washed on both the
upper and lower racks of the dishwasher.
3. If washing by hand, use a sponge or nylon scouring pad with liquid detergent.
Do not use any abrasive cleaners or metal pads as they can damage the nonstick
coating.
4. Rinse and dry.
To Store:
1. Store the unit in a dry place and wind electric cord into a coil securing it with
a twist fastener.
2. To preserve the nonstick finish on the skillet, line the cooking surface with paper
towels before placing any other item in the skillet.
Page 8

13 14
El producto puede variar ligeramente del ilustrado.
1. Asa de la tapa
†2. Tapa de vidrio templado (Pieza Nº SKG110-01 )
3. Escape de vapor
4. Contacto del control de temperatura
†5. Control de temperatura variable (Pieza Nº SKG110-02 )
6. Luz indicadora de funcionamiento
7. Palanca de rápido desenganche
8. Asas frescas al tacto
9. Soporte de inclinación
10. Interior antiadherente, extra hondo
† Reemplazable/removible por el consumidor
ENCHUFE DE TIERRA (Sólo en los modelos de Canada)
Este producto cuenta con un enchufe de tierra que tiene tres contactos. No trate de
alterar esta medida. La conexión inapropiada del conductor de tierra puede resultar en
un riesgo de choque eléctrico. Si tiene alguna duda, consulte con un eléctricista
calificado para asegurarse de que la toma de corriente sea una de tierra.
ENCHUFE POLARIZADO (Modelos no canadienses)
Este artefacto posee un enchufe polarizado (un contacto es más ancho que el otro).
Para reducir los riesgos de choque eléctrico, este enchufe entra en un contacto
polarizado de una sola manera. Si el enchufe no entra en su contacto, inviértalo.
Si aun así no entra, busque la ayuda de un electricista calificado. No intente hacerle
ninguna modificación al enchufe.
CABLE ÉLECTRICO
a) El producto debe proporcionarse con un cable corto (o uno desmontable) para
reducir el riesgo de enredarse o de tropezar con un cable largo.
b) Se encuentran disponibles cables desmontables o de extensión más largos, que
es posible utilizar si se emplea el cuidado debido.
c) Si se utiliza un cable desmontable o de extensión,
1) El voltaje eléctrico del cable desmontable o del cable de extensión debe ser,
como mínimo, igual al del voltaje del aparato,
2) Si el aparato es del tipo que va connectado a tierra, el cable de extensión
deberá ser un cable de tres alambres connnectado a tierra.
3) El cable más largo debe acomodarse de modo que no cuelgue del mostrador
o de la mesa, para evitar que un niño tire del mismo o que alguien se tropiece.
TORNILLO DE SEGURIDAD
Advertencia: Este aparato cuenta con un tornillo de seguridad para evitar la
remoción de la cubierta exterior del mismo. A fin de reducir el riesgo de incendio
o de choque eléctrico, por favor no trate de remover la cubierta exterior. Este
producto no contiene piezas reparables por el consumidor. Toda reparación se
debe llevar a cabo únicamente por personal de servicio autorizado.
Nota: Si el cordón de alimentación es dañado, en América Latina debe sustituirse
por personal calificado o por el centro de servicio autorizado.
Page 9

15 16
7. Cuando retire la tapa de la sartén, siempre
incline y aleje la tapa al levantarla (D).
8. Si desea mantener tibios los alimentos después
de cocinarlos, gire el control de temperatura a
la posición (WARM).
9. Para llevar la sartén y servir directamente a la mesa,
desconecte el aparato y retire el control de
temperatura. Para retirar el control de temperatura,
sujete el asa frescas al tacto en el costado de la
sartén, presione la palanca de rápido desenganche y
tire del control hacia afuera (E).
USO DEL SOPORTE DE INCLINACIÓN AJUSTABLE
La sartén ha sido diseñada para:
• preparar alimentos saludables y
• ser limpiada fácilmente
Para colocar el soporte en posición, tire del soporte
directamente para abajo de manera que éste
permanezca en posición vertical debajo del asa (F).
Los jugos y la grasa corren hacia el lado inclinado de la
sartén, alejándoos de los alimentos.
Siempre que la sartén esté caliente, asegúrese de
protegerse las manos con guantes o agarraderas de
cocina al alinear o desprender el soporte de inclinación
(G).
COMO APROVECHAR AL MÁXIMO SU NUEVA SARTÉN
Consejos para mejores resultados al cocinar y aumentar la vida útil de su sartén:
• No se requiere usar temperaturas elevadas para dorar o freír los alimentos. La
distribución de calos es tan eficiente que el nivel medio es suficiente.
• Use utensilios de madera, nailon o de plástico aptos para las superficies
calientes. No use utensilios de metal.
• No use rociadores de cocinar tipo aerosol en la superficie de cocinar de la
sartén.
• Si desea, use aceite de oliva o mantequilla. Ninguno es necesario ya que los
alimentos se cocinan en la superficie antiadherente sin pegarse.
• Para no dañar la superficie antiadherente, no corte los alimentos adentro de la
sartén.
• Espere que la sartén se enfríe bien antes de limpiarla.
• Cuando guarde la sartén, cubra la superficie con papel toalla para proteger el
acabado antiadherente.
D
E
F
G
Como usar
Este aparato es para uso doméstico solamente.
PASOS PRELIMINARES
• Retire el material de empaque y toda calcomanía adherida al producto.
• Retire y conserve toda literatura incluida con el producto.
• Lave y seque todas las piezas removibles, según las instrucciones de
CUIDADO Y LIMPIEZA de este manual.
Nota: Desconecte el cable y retire el control de temperatura variable antes de
limpiar el aparato.
• Coloque el aparato sobre una superficie plana y estable.
Nota: Use solamente el control de temperatura provisto con esta sartén.
• La capacidad de cocción de este aparato es de 20 tazas (5 cuartos de galón /
4,7 litros).
PREPARACIÓN DE ALIMENTOS
1. Asegúrese que el control de temperatura variable esté
en la posición de temperatura mínima (MIN). Inserte
el control de temperatura en el enchufe situado en el
costado del aparato (A). Verifique que el control
quede bien seguro.
Nota: Siempre inserte el control de temperatura en la
sartén antes de enchufar el aparato a una toma de
corriente.
2. Desenrolle el cable y enchúfelo a una toma de
corriente normal. Gire el control al nivel de
temperatura deseado. Los siguientes deben quedar
alineados en el control (B):
• La luz indicadora
• La flecha debajo del selector
• La temperatura programada
3. Cuando el aparato alcanza la temperatura programada, la luz indicadora se
apaga. Esta luz brilla intermitentemente durante el ciclo de cocción para
indicar que la temperatura programada permanece constante.
4. Para cocinar los alimentos a fuego lento,
llévelos a un hervor y baje la temperatura a
250° F.
5. Use utensilios de madera, nailon o de plástico
aptos para las superficies calientes (C).
Nota: No use utensilios de metal, y para no
dañar la superficie antiadherente, nunca corte
los alimentos adentro de la sartén.
6. Siempre utilice agarraderas o guantes de cocina para manejar la sartén caliente.
Recuerde que la sartén toma varios minutos para enfriarse después de usarla.
A
1
M
B
C
50
21
F
c
1
50
c
300
F
c
F
205
400
c
177
F
350F
350
Page 10

17
18
2 lb papas cortadas en cubos
1 pimiento verde grande en pedazos
1 tarro (2oz) alcaparras, escurridas
Arroz cocido, caliente
Perejil picado
Caliente la sartén eléctrica Black & Decker®a 350° F. Dore la carne por ambos
lados en el aceite. Revuelva los siguientes nueve ingredientes. Reduzca la
temperatura a 250° F. Cubra la olla y cocine a fuego lento por una hora.
Agregue las papas, pimientos y alcaparras. Cocine 30 minutos más o hasta que la
carne este blanda y bien cocida; revuelva de vez en cuando.
Sirva con ensalada y pan caliente crujiente.
Rinde 8 porciones.
RÁPIDO Y FÁCIL BISTEC EN CUBOS
11⁄2 lb bistec en cubos
1 cda aceite de oliva
1 cebolla grande, picada
1 pimiento verde grande, sin semilla, cortado en tiras
2 dientes de ajos grandes, cortados
1 cdta sazón tipo “Adobo”
1 cdta sal
1/2 cdta pimiento gorda molida
2 tomates grandes cortados en pedazos
1 lata (8 oz) salsa de tomate
Arroz cocido, caliente
Perejil picado
Caliente la sartén eléctrica Black & Decaer®a 350° F. Dore la carne en el aceite
y cocine hasta ablandar. Retire la carne a una bandeja manténgala tibia.
Agregue a la sartén las papas, pimientos verdes y el ajo. Mezcle los tomates
y cocine durante varios minutos. Añada la salsa de tomate y pase la carne
nuevamente a la sartén. Lleve a un hervor. Reduzca la temperatura a 250° F.
Cubra la olla y cocine 5 minutos a fuego lento, revolviendo de vez en cuando.
Sirva sobre arroz caliente ya cocido y adorne con el perejil.
Rinde 4 porciones.
CAMARONES SALTEADOS CON PESTO
21⁄2 lb camarones
1 cebolla Vidalia grande cortada en rebanadas finas
2 cdas mantequilla o margarina
1 pimiento rojo grande, sin semilla, cortado en tiras de dos pulgadas
3 dientes de ajos grandes, cortados
1 botella (8 oz) jugo de calamares
1/2 taza jugo fresco de limón
RECETAS
TILAPIA SALTEADA CON SALSA DE PIÑA Y JENGIBRE
1 taza cebolla morada en rebanadas finas
2 cdas mantequilla o margarina
11⁄2 taza jugo de piña
2 cdtas jugo de lima
1/2 taza rebanadas de uvas verdes sin semilla
1 naranja pelada, cortada por mitad y rebanada
1 taza cubos de mango
2 cda rajas de piel de naranja
1 cda ralladura de jengibre fresco
1/2 cdta sal
1/4 cdta pimienta
6 filetes de tilapia (11⁄2 lb aprox)
1 cdta maicena
Arroz cocido, caliente
Caliente la sartén eléctrica Black & Decker®a 350° F. Cocine la cebolla en una
cucharada de mantequilla por 3 minutos, revolviendo de vez en cuando.
Agregue las uvas, los pedazos de naranja, el mango, la piel de naranja, sal de
jengibre, y pimienta. Cocine tres minutos más, siempre revolviéndola
ocasionalmente.
Mezcle el cuarto de taza de jugo de piña restante con la maicena. Revuelva con
la mezcla de piña y cocine, hasta espesar. Pase a un tazón y conserve caliente.
Aumente la temperatura de la sartén a 375° F. Con la cucharada de mantequilla
sobrante, cocine bien el pescado hasta dorarlo por ambos lados.
Caliente la salsa en la sartén.
Sirva sobre arroz y si desea, corone con rebanadas de almendras tostadas.
Rinde 6 porciones.
CARNE CON PAPAS
2 lb cubos de carne de res
2 cdas aceite de oliva
1 lata (141⁄2 oz) salsa de tomate
1 taza vino blanco de cocinar o vino blanco seco
3/4 taza agua
1 cebolla grande, picada
3 dientes de ajos grandes, picados
1 hoja de laurel
1 cdta páprika
1 cdta sal
1/2 cdta pimienta gorda, molida
Page 11

19 20
ESTOFADO DE CERDO EN SALSA
21⁄
2 lb lomo de cerdo sin hueso, cortado en cubos de 3/4 pulg
2
1
⁄2 tazas caldo de pollo
1 taza salsa
2 cdta pasta de tomate
2 dientes de ajos grandes, cortados
1/2 cdta comino en polvo
1/2 cdta pimienta gorda, molida
1 bolsa (16 oz) frijoles de soya en su vaina
1 racimo cebollinos verdes, cortados en pedazos de 11⁄2 pulg
2 cdtas maicena
Arroz cocido, caliente
Semilla de marañón picada en pedazos gruesos
Caliente la sartén eléctrica Black & Decker®a 350° F. Agregue el cerdo y dórelo
bien por todos lados. Agregue dos tazas del caldo de pollo al igual que los demás
5 ingredientes. Lleve a un hervor. Reduzca la temperatura a 250° F. Cubra la olla
y cocine a fuego lento por 45 minutos, revolviendo de vez en cuando. Agregue
los frijoles de soya y los cebollinos y cocine 10 minutos más o hasta que los
vegetales y la carne estén blandos. Mezcle la 1/2 taza de caldo de pollo restante
con la maicena. Aumente la temperatura de la sartén a 350° F. Agregue la mezcla
de la maicena y cocine hasta espesar.
Sirva sobre arroz y corone con semillas de marañón.
Rinde 8 porciones.
2 cdas pesto tradicional en tarro
2 cdas ralladura de piel de limón
1 hoja de laurel
1 cdta sal
1/2 cdta pimienta gorda molida
Arroz cocido, caliente
Perejil picado
Pele los camarones, quíteles la vena y déjeles la cola. Refrigere los camarones.
Caliente la sartén eléctrica Black & Decker®a 350° F. Cocine la cebolla en la
mantequilla por tres minutos. Agregue el pimiento rojo y el ajo. Cocine otros tres
minutos, revolviendo de vez en cuando. Agregue los siete ingredientes restantes,
al igual que los camarones. Lleve a un hervor. Reduzca la temperatura a 250° F.
Cubra la olla y cocine a fuego lento por cinco minutos o hasta que los camarones
estén bien cocidos; revuelva ocasionalmente.
Sirva sobre arroz caliente ya cocido y adorne con el perejil.
Rinde 8 porciones.
PICADILLO TEX-MEX
2 lb carne molida
1 pimienta verde grande, picado
1 cebolla grande, picada
3 dientes de ajo grandes, cortados
1 lata (15 oz) salsa de tomate
1 lata (141⁄2
oz) cubitos de tomate
1 taza salsa
1 taza agua
2 cdas sazón para tacos
1/2 cdta pimiento gorda molida
Arroz cocido, caliente
Queso “Jack” desmenuzado
Crema agria
Tortillas fritas desmoronadas
Caliente la sartén eléctrica Black & Decker
®
a 350° F. Agregue la carne molida y
dórela bien; revuélvala para desmoronarla. Agregue el pimiento verde, la cebolla
y el ajo. Añada los seis ingredientes restantes. Lleve a un hervor. Reduzca la
temperatura a 250° F. Cubra la olla y cocine a fuego lento por quince minutos,
revolviendo de vez en cuando.
Sirva sobre arroz caliente y corone con el queso, la crema agria y las tortillas
fritas desmoronadas.
Rinde 8 porciones.
Page 12

21 22
Cuidado y limpieza
Este producto no contiene piezas reparables por el consumidor. Para servicio, por
favor acuda a personal calificado.
Limpieza
1. Desconecte el cable y retire el control de temperatura variable, simplemente
halándolo hacia afuera. Espere que el aparato se enfríe por completo antes de
limpiarlo.
Advertencia: Tenga cuidado al retirar el control de temperatura variable; puede
estar caliente después de usar el aparato.
2. Lave la sartén y la tapa con agua caliente jabonada. La tapa puede ser introducida
en la bandeja superior o inferior de la máquina lavaplatos.
3. Si lava estas piezas a mano, use una esponja o una almohadilla de nailon con
detergente líquido. No use limpiadores abrasivos ni almohadillas de fibra metálica
que pudieran dañar el recubrimiento antiadherente de la sartén.
4. Enjuague y seque bien.
Almacenamiento
1. Guarde el aparato en un lugar seco y enrolle el cable eléctrico en espiral y
asegúrelo con una atadura.
2. Para preservar el acabado antiadherente de la sartén, proteja la superficie de
cocinar con papel toalla antes de colocar cualquier otro artículo en la sartén.
GUIÁ DE COCCIÓN RECOMENDADA
ALIMENTO TEMPERATURA TIEMPO DE COCCIÓN
APROX.
Huevos (fritos) 300° F De 3 a 5 minutos
Huevos (revueltos) 325° F De 3 a 5 minutos
Panqueques 375° F De 2 a 3 minutos cada lado
Tostadas francesas 325° F De 2 a 4 minutos cada lado
Sándwiches de
queso derretido 325° F De 7 a 9 minutos
Hamburguesas 375° F De 4 a 8 minutos para
(de 5 a 6 oz) término casi crudo
De 9 a 11 minutos para
término medio
Salchichas 350° F De 12 a 14 minutos
Bistec en cubos 375° F De 12 a 14 minutos
Chuletas de cerdo 350° F De 15 a 20 minutos
Papas (fritas tipo campestre) 325° F De 12 a 15 minutos
Filetes de pescado 350° F De 5 a 7 minutos
(empanizados y fritos
en poca grasa)
Page 13

23 24
FICHE MISE À LA TERRE (Modèles du Canada seulement)
Le produit comporte une fiche mise à la terre qui n’entre que dans une prise à trois trous.
Il ne faut pas neutraliser ce dispositif. La mauvaise connexion du conducteur de terre
présente des risques de secousses électriques. Communiquer avec un électricien certifié
lorsqu’on se demande si la prise est bien mise à la terre.
FICHE POLARISÉE (Modèles non offerts au Canada)
Le produit est muni d’une fiche polarisée (une lame plus large que l’autre). Ce genre de
fiche n’entre que d’une façon dans une prise polarisée, afin de minimiser les risques de
secousses électriques. Lorsqu’on ne peut insérer la fiche à fond dans la prise, il faut tenter
de le faire après avoir inversé les lames de côté. Si la fiche n’entre toujours pas dans la
prise, il faut communiquer avec un électricien certifié. Il ne faut pas modifier la fiche.
CORDON
a) Le cordon d’alimentation de l’appareil est court (ou amovible) afin de minimiser
les risques d’enchevêtrement ou de trébuchement.
b) Il existe des cordons d’alimentation amovibles ou de rallonge plus longs et il faut
s’en servir avec prudence.
c) Lorsqu’on utilise un cordon d’alimentation amovible ou de rallonge plus long,
il faut s’assurer que :
1) la tension nominale du cordon d’alimentation amovible ou de rallonge soit
au moins égale à celle de l’appareil, et que;
2) lorsque l’appareil est de type mis à la terre, il faut utiliser un cordon de rallonge
mis à la terre à trois broches, et;
3) le cordon plus long soit placé de sorte qu’il ne soit pas étalé sur le comptoir
ou la table d’où des enfants pourraient le tirer, ni placé de manière à provoquer
un trébuchement.
VIS INDESSERRABLE
Avertissement : L’appareil est doté d’une vis indesserrable empêchant l’enlèvement
du couvercle extérieur. Pour réduire les risques d’incendie ou de secousses
électriques, ne pas tenter de retirer le couvercle extérieur. L’utilisateur ne peut pas
remplacer les pièces de l’appareil. En confier la réparation seulement au personnel
des centres de service autorisés.
Note : Lorsque le cordon d’alimentation est endommagé, il faut le faire remplacer
par du personnel qualifié ou, en Amérique latine, par le personnel d’un centre de
sevice autorisé.
IMPORTANTES MISES EN GARDE
Lorsqu’on utilise un appareil électrique, il faut toujours respecter certaines
règles de sécurité fondamentales, notamment les suivantes.
❑
Lire toutes les directives.
❑
Ne pas toucher aux surfaces chaudes. Utiliser les poignées ou les
boutons.
❑
Afin d’éviter les risques de secousses électriques, ne pas immerger le
cordon, la fiche, ni le sélecteur de température de l’appareil et ne pas
renverser de l’eau ni tout autre liquide sur ces derniers.
❑
Exercer une étroite surveillance lorsqu’on utilise l’appareil près d’un
enfant ou lorsque ce dernier s’en sert.
❑
Débrancher l’appareil avant de le nettoyer et lorsqu’on ne s’en sert pas.
Le laisser refroidir avant d’y ajouter ou d’en retirer un accessoire.
❑
Ne pas utiliser un appareil dont la fiche ou le cordon est abîmé, qui
présente un problème de fonctionnement, qui est tombé par terre ou qui
est endommagé. Le rapporter au centre de service autorisé de la région
pour le faire examiner, réparer ou régler.
❑
L’utilisation d’accessoires non recommandés par le fabricant présente
des risques d’incendies, de décharges électriques ou de blessures.
❑
Ne pas utiliser l’appareil à l’extérieur.
❑
Ne pas laisser pendre le cordon d’une table ou d’un comptoir, ni le
laisser à un endroit
où on peut le tirer par inadvertance ou à un endroit où il peut entrer en
contact avec une surface chaude.
❑
Ne pas placer près ou sur une cuisinière au gaz ou à l’électricité
chaude, ni dans un four réchauffé.
❑
Déplacer avec une extrême prudence un appareil renfermant de l’huile
chaude ou tout autre liquide chaud.
❑
Toujours brancher le sélecteur de température dans la poêle avant de
brancher le cordon dans la prise murale. Pour débrancher l’appareil,
débrancher le cordon de la prise murale.
❑
Utiliser l’appareil seulement aux fins qu’il est prévu.
CONSERVER CES MESURES.
Page 14

25 26
Utilisation
L'appareil est conçu pour une utilisation domestique uniquement.
POUR COMMENCER
• Retirer le matériau d'emballage et les autocollants posés sur l'appareil.
• Retirer et mettre de côté les instructions.
• Laver toutes les pièces amovibles en suivant les recommandations de la section
Entretien et nettoyage du présent guide.
Remarque : Débrancher le cordon d'alimentation, retirer la commande de
température réglable avant de le nettoyer.
• Déposer le récipient sur une surface plane et stable.
Remarque : Utiliser seulement la commande de température fournie avec cette
poêle.
• La capacité de cuisson de cet appareil est de 20 tasses, 5 pintes ou 4,7 litres.
PRÉPARATION À LA CUISSON
1. S'assurer que la commande de température réglable
est réglée à réglage MIN. Insérer solidement la sonde
dans la douille sur le côté de l'appareil (A). S'assurer
que la sonde est bien insérée.
Remarque : Toujours fixer la commande de température
à la poêle avant de brancher l'appareil dans une prise.
2. Dérouler le cordon d'alimentation et brancher la fiche
dans une prise de courant standard. Régler la
commande de température à la température voulue.
Les trois composants suivants devraient être alignés
avec la sonde (B) :
• le témoin lumineux;
• la flèche sous le cadran;
• la température sélectionnée sur le cadran.
3. Lorsque la température sélectionnée est atteinte,
le témoin lumineux s'éteint. Le témoin
lumineux s'allumera et s'éteindra au cours de la
cuisson, indiquant ainsi que la température de
cuisson sélectionnée est maintenue.
4. Pour faire mijoter les aliments, porter à
ébullition et réduire la température à 121 °C
(250° F).
5. Utiliser des ustensiles de bois, de nylon ou de
plastique qui résistent à la chaleur (C).
Remarque : Ne pas utiliser des ustensiles de métal. Ne pas couper les aliments
dans la poêle, car cela endommagera le revêtement antiadhésif de la poêle.
6. Toujours utiliser des poignées ou des mitaines isolantes lors de la manipulation
de la poêle chaude. Après avoir servi, la poêle prendra quelques minutes à
refroidir.
A
B
C
Le produit peut différer légèrement de celui illustré.
1. Poignée du couvercle
†2. Couvercle en verre trempé (no de pièce SKG110-01)
3. Évent
4. Sonde
†5. Commande de température réglable (no de pièce SKG110-02)
6. Témoin lumineux de fonctionnement
7. Levier à dégagement rapide
8. Poignées froides au toucher
9. Patte d'inclinaison de la poêle
10. Intérieur antiadhésif très profond
† Pièce amovible e remplaçable par le consommateur
c
F
150
c
300
F
205
400
c
177
F
350F
350
Page 15

27 28
RECETTES
TILAPIA SAUTÉ À LA SAUCE À L'ANANAS ET AU GINGEMBRE
250 ml (1 tasse) d'oignon rouge tranché finement
30 ml (2 c. à table) de beurre ou de margarine
375 ml (11⁄2 tasse) de jus d'ananas
30 ml (2 c. à table) de jus de lime
125 ml (1/2 tasse) de raisins verts sans pépins coupés en deux
1 orange pelée, coupée en deux et tranchée
250 ml (1 tasse) de mangue en cubes
30 ml (2 c. à table) de zeste d'orange
15 ml (1 c. à table) de gingembre frais râpé
2,5 ml (1/2 c. à thé) de sel
1,25 ml (1/4 c. à thé) de poivre
6 filets de tilapia (environ 700 g [11⁄2 lb])
15 ml (1 c. à table) d'amidon de maïs
Riz cuit chaud
Chauffer la poêle électrique Black & DeckerMDà 175° C (350° F). Faire revenir
l'oignon dans 15 ml (1 c. à table) de beurre pendant 3 minutes en remuant de
temps à autre. Ajouter 325 ml (11⁄4 tasse) de jus d'ananas et le jus de lime. Ajouter
les raisins, les morceaux d'orange, la mangue, le zeste d'orange, le gingembre, le
sel et le poivre. Cuire 3 minutes de plus en remuant de temps à autre.
Mélanger les 60 ml (1/4 tasse) de jus d'ananas restant avec l'amidon de maïs.
Incorporer au mélange de jus d'ananas puis cuire en remuant jusqu'à l'obtention
d'une consistance lisse et épaisse. Verser dans un bol et garder au chaud.
Augmenter la température à 190° C (375° F). Ajouter les 15 ml (1 c. à table) de
beurre restant dans la poêle et cuire les filets de poisson jusqu'à ce qu'ils soient
dorés des deux côtés et bien cuits.
Chauffer la sauce dans la poêle.
Servir sur un lit de riz et garnir de tranches d'amandes rôties si désiré.
Donne 6 portions.
CARNE CON PAPAS
Bœuf avec pommes de terre
900 g (2 lb) de bœuf en cubes
30 ml (2 c. à table) d'huile d'olive
1 boîte de 425 ml (14
1
⁄2 oz) de sauce tomate
250 ml (1 tasse) de vin blanc sec ou de vin de cuisson
175 ml (3/4 tasse) d'eau
1 gros oignon haché
3 grosses gousses d'ail émincées
1 feuille de laurier
5 ml (1 c. à thé) de paprika
7. Lorsqu'on soulève le couvercle de la poêle,
il faut toujours l'incliner vers l'extérieur (D).
8. Lorsque les aliments sont cuits, on peut régler la
température à réchaud (WARM) pour conserver
la chaleur des aliments.
9. Débrancher l'appareil pour faire le service à la table.
Pour retirer la sonde de commande de la température,
tenir la poignée froide au toucher sur le côté de la
poêle. Appuyer sur le levier à dégagement rapide
et retirer la commande (E).
UTILISER LA PATTE D'INCLINAISON AMOVIBLE
Cette poêle est conçue pour :
• une cuisson santé;
• un nettoyage facile.
Pour mettre en place la patte d'inclinaison de la poêle,
relever la patte à la verticale située sous la poignée froide
au toucher, avant de préchauffer la poêle (F).
Les graisses et l'huile se retrouveront du côté incliné de la
poêle, donc à l'écart des aliments.
Quand la poêle est chaude, utiliser des poignées ou des
mitaines isolantes pour se protéger les mains lors du
réglage ou du dégagement de la patte d'inclinaison (G).
OBTENIR LE RENDEMENT OPTIMAL DE LA POÊLE
Quelques conseils pour obtenir de bons résultats de cuisson et pour prolonger
la durée de vie de la poêle :
• Il n'est pas nécessaire d'utiliser une température très élevée pour dorer ou frire
les aliments. La distribution de la chaleur est assez efficace; une température
moyenne sera donc suffisante.
• Utiliser seulement des ustensiles de bois, de plastique ou de nylon résistants à la
chaleur. Ne pas utiliser d'ustensiles en métal.
• Ne pas utiliser d'antiadhésif en vaporisateur sur la surface de cuisson de la poêle.
• Utiliser de l'huile d'olive ou du beurre au goût. Ni l'un ni l'autre n'est nécessaire,
car les aliments cuiront sans coller à la surface.
• Ne pas couper les aliments dans la poêle, car cela endommagera le revêtement
antiadhésif.
• Laisser la poêle refroidir jusqu'à la température de la pièce avant de la nettoyer.
• Ranger la poêle avec un papier essuie-tout sur la surface de cuisson pour
protéger son revêtement antiadhésif.
D
E
F
G
Page 16

29 30
CREVETTES SAUTÉES AU PESTO
1,1 kg (21⁄2 lb) de crevettes
1 gros oignon Vidalia coupé en deux et tranché finement
30 ml (2 c. à table) de beurre ou de margarine
1 gros poivron rouge épépiné et coupé en lanières de 5 cm (2 po)
3 grosses gousses d'ail émincées
1 bouteille de 250 ml (8 oz) de jus de palourdes
125 ml (1/2 tasse) de jus de citron frais
30 ml (2 c. à table) de pesto traditionnel au basilic en pot
30 ml (2 c. à table) de zeste de citron râpé
1 feuille de laurier
5 ml (1 c. à thé) de sel
2,5 ml (1/2 c. à thé) de poivre grossièrement moulu
Riz cuit chaud
Persil haché
Décortiquer les crevettes en laissant la queue et les déveiner. Réfrigérer jusqu'à
l'utilisation.
Chauffer la poêle à frire électrique Black & DeckerMDà 175° C (350° F). Faire
cuire l'oignon dans le beurre pendant 3 minutes en remuant de temps à autre.
Ajouter le poivron rouge et l'ail. Cuire 3 minutes de plus en remuant de temps à
autre. Ajouter les 7 ingrédients suivants. Ajouter les crevettes. Porter à ébullition,
puis réduire le feu à 120° C (250° F). Couvrir et laisser mijoter pendant 5 minutes
ou jusqu'à ce que les crevettes soient bien cuites. Remuer de temps à autre.
Servir sur un lit de riz et garnir de persil si désiré.
Donne environ 8 portions.
PICADILLO TEX-MEX
900 g (2 lb) de ronde hachée
1 gros poivron vert épépiné et haché
1 gros oignon haché
3 grosses gousses d'ail émincées
1 boîte de 450 ml (15 oz) de sauce tomate
1 boîte de 425 ml (14,5 oz) de petites tomates en dés
250 ml (1 tasse) de salsa
250 ml (1 tasse) d'eau
15 ml (2 c. à table) d'assaisonnement à taco
2,5 ml (1/2 c. à thé) de poivre grossièrement moulu
Riz cuit chaud
Fromage jack râpé
Crème sûre
Chips tortillas grossièrement émiettées
5 ml (1 c. à thé) de sel
2,5 ml (1/2 c. à thé) de poivre grossièrement moulu
900 g (2 lb) de pommes de terre en cubes
1 gros poivron vert haché grossièrement
1 pot de 60 ml ([2 oz) de câpres égouttées
Riz cuit chaud
Persil haché
Chauffer la poêle à frire électrique Black & DeckerMDà 175° C (350° F). Faire
dorer le bœuf des deux côtés dans l'huile. Ajouter les 9 ingrédients suivants.
Porter à ébullition, puis réduire le feu à 120° C (250° F).Couvrir et laisser mijoter
pendant une heure. Ajouter les pommes de terre, les poivrons et les câpres. Cuire
30 minutes de plus ou jusqu'à ce que le bœuf soit tendre et bien cuit en remuant
de temps à autre.
Servir avec de la salade et du pain crouté chaud
Donne 8 portions
BIFTECK EN CUBES RAPIDE ET FACILE
700 g (11⁄2 lb) de bœuf en cubes
15 ml (1 c. à table) d'huile d'olive
1 gros oignon haché
1 gros poivron vert épépiné et coupé en lanières
2 grosses gousses d'ail émincées
5 ml (1 c. à thé) d'assaisonnement Adobo
5 ml (1 c. à thé) de sel
2,5 ml (1/2 c. à thé) de poivre grossièrement moulu
2 grosses tomates coupées en quartiers
1 boîte de 250 ml (8 oz) de sauce tomate
Riz cuit chaud
Persil haché
Chauffer la poêle à frire électrique Black & DeckerMDà 175° C (350° F). Faire
dorer le bœuf des deux côtés dans l'huile. Laisser cuire plusieurs minutes jusqu'à
ce qu'il soit tendre. Déposer dans un plat et garder au chaud. Ajouter l'oignon, le
poivron vert et l'ail dans la poêle. Ajouter tous les assaisonnements, le sel et le
poivre. Cuire jusqu'à ce que les légumes soient tendres. Ajouter les tomates et
cuire plusieurs minutes. Ajouter la sauce tomate et remettre le bœuf dans la
poêle. Porter à ébullition, puis réduire le feu à 120° C (250° F). Couvrir et laisser
mijoter pendant 5 minutes en remuant de temps à autre.
Servir sur un lit de riz chaud et garnir de persil.
Donne 4 portions.
Page 17

31 32
TABLEAU DE CUISSON SUGGÉRÉ
ALIMENT TEMPÉRATURE TEMPS APPROXIMATIF
DE CUISSON
Œufs (poêlés) 149° C (300° F) 3 à 5 minutes
Œufs (brouillés) 163° C (325° F) 3 à 5 minutes
Crêpes 190° C (375° F) 2 à 3 minutes per side
Pains dorés 163° C (325° F) 2 à 4 minutes per side
Sandwich au fromage grillé 163° C (325° F) 7 à 9 minutes
Hamburgers 190° C (375° F) 4 à 8 minutes for rare
(142 g à 170 g [5 à 6 oz]) 9 à 11 minutes for medium
Saucisses 177° C (350° F) 12 à 14 minutes
Cubes de steak 190° C (375° F) 3 à 5 minutes
Côtelettes de porc 177° C (350° F) 15 à 20 minutes
Pommes de terre (rissolées) 163° C (325° F) 12 à 15 minutes
Filets de poisson 177° C (350° F) 5 à 7 minutes
(panés et frits)
Chauffer la poêle à frire électrique Black & Decker à 175° C (350° F). Ajouter la
ronde hachée et bien faire dorer. Remuer pour défaire en morceaux. Ajouter le
poivron vert, l'oignon et l'ail. Ajouter les 6 ingrédients suivants. Porter à
ébullition, puis réduire le feu à 120° C (250° F). Couvrir et laisser mijoter pendant
15 minutes en remuant de temps à autre.
Servir sur un lit de riz et garnir de fromage, de crème sûre et de chips tortillas.
Donne 8 portions
RAGOÛT DE PORC À LA SALSA
1,1 kg (21⁄2 lb) de longe de porc désossée en cubes de 2 cm (3/4 po)
625 ml (21⁄2 tasses) de bouillon de poulet
250 ml (1 tasse) de salsa
30 ml (2 c. à table) de pâte de tomate
2 grosses gousses d'ail émincées
2,5 ml (1/2 c. à thé) de cumin moulu
2,5 ml (1/2 c. à thé) de poivre grossièrement moulu
1 sac de 450 g (16 oz) de fèves de soya edamame congelées et décortiquées
1 botte (environ 250 ml [1 tasse]) d'oignon vert tranché en morceaux
de 4 cm (11⁄2 po)
30 ml (2 c. à table) d'amidon de maïs
Riz cuit chaud
Noix de cajou grossièrement hachées
Chauffer la poêle à frire électrique Black & DeckerMDà 175° C (350° F). Ajouter le
porc et bien dorer sur tous les côtés. Ajouter 500 ml (2 tasses) de bouillon de
poulet et les 5 ingrédients suivants. Porter à ébullition, puis réduire le feu à
120° C (250° F). Couvrir et laisser mijoter pendant 45 minutes en remuant de
temps à autre. Ajouter les fèves de soja edamame et les oignons verts et cuire 10
minutes de plus ou jusqu'à ce que la viande et les légumes soient tendres.
Mélanger les 125 ml (1/2 tasse) de bouillon de poulet restant avec l'amidon de
maïs. Augmenter la température de la poêle à 175° C (350° F). Verser le mélange
dans la poêle et cuire en remuant jusqu'à consistance lisse et épaisse.
Servir sur un lit de riz et garnir de noix de cajou.
Donne de 6 à 8 portions.
Page 18

33 34
NEED HELP?
For service, repair or any questions regarding your appliance, call the appropriate
"800" number on the cover of this book. Do not return the product to the place of
purchase. Do not mail the product back to the manufacturer nor bring it to a service
center. You may also want to consult the website listed on the cover of this manual.
One-Year Limited Warranty (Applies only in the United States and Canada)
What does it cover?
• Any defect in material or workmanship; provided; however, Applica’s liability will
not exceed the purchase price of the product
For how long?
• One year after the date of original purchase
What will we do to help you?
• Provide you with a reasonably similar replacement product that is either new
or factory refurbished
How do you get service?
• Save your receipt as proof of the date of sale.
• Check our on-line service site at www.prodprotect.com/applica, or call our
toll-free number, 1-800-231-9786, for general warranty service
• If you need parts or accessories, please call 1-800-738-0245.
What does your warranty not cover?
• Damage from commercial use
• Damage from misuse, abuse or neglect
• Products that have been modified in any way
• Products used or serviced outside the country of purchase
• Glass parts and other accessory items that are packed with the unit
• Shipping and handling costs associated with the replacement of the unit
• Consequential or incidental damages (Please note, however, that some states
do not allow the exclusion or limitation of consequential or incidental damages,
so this limitation may not apply to you.)
How does state law relate to this warranty?
• This warranty gives you specific legal rights, and you may also have other rights
that vary from state to state or province to province.
Entretien et nettoyage
L'utilisateur ne peut effectuer lui-même l'entretien d'aucune pièce de cet appareil.
Confier l'entretien à un technicien qualifié.
Pour nettoyer :
1. Débrancher le cordon d'alimentation, retirer la commande de température réglable
en tirant. Attendre que l'appareil refroidisse complètement avant de le nettoyer.
Mise en garde : Porter une attention particulière à la commande de température
réglable, car elle peut encore être chaude.
2. Laver la poêle et le couvercle avec de l'eau chaude savonneuse. Le couvercle peut
être lavé au lave-vaisselle soit dans le panier du haut, soit dans celui du bas.
3. Si l'appareil est lavé à la main, utiliser une éponge ou un tampon à récurer en
nylon avec du détergent liquide. N'utiliser aucun produit nettoyant abrasif ou
tampon à récurer en métal, car ils pourraient endommager le revêtement
antiadhésif.
4. Rincer et sécher.
Pour ranger :
1. Ranger l'appareil dans un endroit sec. Enrouler le cordon d'alimentation
et l'attacher avec une attache en spirale.
2. Pour conserver le revêtement antiadhésif de la poêle, ranger la poêle avec un
papier essuie-tout sur la surface de cuisson avant d'y mettre d'autres objets.
Page 19

35 36
BESOIN D’AIDE?
Pour communiquer avec les services d’entretien ou de réparation, ou pour adresser
toute question relative au produit, composer le numéro sans frais approprié indiqué
sur la page couverture. Ne pas retourner le produit où il a été acheté. Ne pas poster
le produit au fabricant ni le porter dans un centre de service. On peut également
consulter le site web indiqué sur la page couverture.
Garantie limitée de un an (Valable seulement aux États-Unis et au Canada)
Quelle est la couverture?
• Tout défaut de main-d’oeuvre ou de matériau; toutefois, la responsabilité de la
société Applica se limite au prix d’achat du produit.
Quelle est la durée?
• Un an après l’achat original.
Quelle aide offrons nous?
• Remplacement par un produit raisonnablement semblable nouveau ou réusiné.
Comment se prévaut-on du service?
• Conserver son reçu de caisse comme preuve de la date d’achat.
• Visiter notre site web au www.prodprotect.com/applica, ou composer sans frais le
1 800 231-9786, pour obtenir des renseignements généraux relatifs à la garantie.
• On peut également communiquer avec le service des pièces et des accessoires
au 1 800 738-0245.
Qu’est-ce que la garantie ne couvre pas?
• Des dommages dus à une utilisation commerciale.
• Des dommages causés par une mauvaise utilisation ou de la négligence.
• Des produits qui ont été modifiés.
• Des produits utilisés ou entretenus hors du pays où ils ont été achetés.
• Des pièces en verre et tout autre accessoire emballés avec le produit.
• Les frais de transport et de manutention reliés au remplacement du produit.
• Des dommages indirects (il faut toutefois prendre note que certains états ne
permettent pas l’exclusion ni la limitation des dommages indirects).
Quelles lois régissent la garantie?
• Les modalités de la présente garantie donnent des droits légaux spécifiques.
L’utilisateur peut également se prévaloir d’autres droits selon l’état ou la province
qu’il habite.
¿NECESITA AYUDA?
Para servicio, reparaciones o preguntas relacionadas al producto, por favor llame al
número del centro de servicio en el país donde usted compró su producto. NO
devuelva el producto al fabricante. Llame o lleve el producto a un centro de
servicio autorizado.
DOS AÑOS DE GARANTÍA LIMITADA
(No aplica en México, Estados Unidos o Canadá)
¿Qué cubre la garantía?
• La garantía cubre cualquier defecto de materiales o de mano de obra. Applica no
se responsabiliza por ningún costo que exceda el valor de compra del producto.
¿Por cuánto tiempo es válida la garantía?
• Por dos años a partir de la fecha original de compra.
¿Cómo se puede obtener servicio?
• Conserve el recibo original de compra.
• Por favor llame al número del centro de servicio autorizado.
Esta garantía no cubre:
• Los productos que han sido utilizados en condiciones distintas a las normales
• Los daños ocasionados por el mal uso, el abuso o negligencia.
• Los productos que han sido alterados de alguna manera
• Los daños ocasionados por el uso comercial del producto
• Los productos utilizados o reparados fuera del país original de compra
• Las piezas de vidrio y demás accesorios empacados con el aparato
• Los gastos de tramitación y embarque asociados al reemplazo del producto
• Los daños y perjuicios indirectos o incidentales
Page 20

37 38
Argentina
Servicio Técnico Central
Attendance
Atención al Cliente
Av. Monroe 3351
Buenos Aires, Argentina
Tel.: 0810-999-8999
Chile
Servicio Máquinas y
Herramientas Ltda.
Av. Apoquindo No. 4867 Las Condes
Santiago, Chile
Tel.: (562) 263-2490
Colombia
PLINARES
Avenida Quito # 88A-09
Bogotá, Colombia
Tel. sin costo 01 800 7001870
Costa Rica
Aplicaciones
Electromecanicas, S.A.
Calle 26 Bis y Ave. 3
San Jose, Costa Rica
Tel.: (506) 257-5716
223-0136
Ecuador
Servicio Master Ecuador
Av. 6 de Diciembre 9276
y Los Alamos
Tel. ( 593 ) 2281-3882
El Salvador
Sedeblack
Calle San Antonio Abad 2936
San Salvador, El Salvador
Tel. (503) 2284-8374
Guatemala
MacPartes SA
3ª Calle 414 Zona 9
Frente a Tecun
Tel. (502) 2331-5020
2332-2101
Honduras
ServiTotal
Contigua a Telecentro
Tegucigalpa, Honduras,
Tel. (504) 235-6271
México
Art. 123 No. 95
Col. Centro, C.P. 06050
Deleg. Cuauhtemoc
Tel: 01 800 714-2503
Nicaragua
ServiTotal
De semáforo de portezuelo
500 metros al sur.
Managua, Nicaragua,
Tel. (505) 248-7001
Panamá
Servicios Técnicos CAPRI
Tumbamuerto Boulevard El
Dorado
Panamá.
Tel. (507) 2360 236
(507) 2360 159
Perú
Servicio Técnico Central
Fast Service
Calle Jorge Muelle 121
San Borja
Lima Perú
Tel.( 0511) 2257391-2230221
Puerto Rico
Buckeye Service
Jesús P. Piñero #1013
Puerto Nuevo, SJ PR 00920
Tel.: (787) 782-6175
Republica Dominicana
Plaza Lama, S.A.
Av, Duarte #94
Santo Domingo,
República Dominicana
Tel.: (809) 687-9171
Trinidad and Tobago
A.S. Bryden & Sons (Trinidad)
Limited
33 Independence Square,
Port of Spain
Trinidad, W.I.
Tel.: (868) 623-4696
Venezuela
Inversiones BDR CA
Av. Casanova C.C. City Market
Nivel Plaza Local 153,
Diagonal Hotel Melia.
Caracas
Tel. (582) 324 0969
Por favor llame al número correspondiente que aparece en la lista a continuación para
solicitar que se haga efectiva la garantía y donde Ud. puede solicitar servicio,
reparaciones o partes en el país donde el producto fué comprado. También puede
consultarnos en el e-mail. “servicio@applicamail.com.mx
Comercializado por:
Applica de México, S. de R. L. de C.V.
Presidente Mazaryk No111, 1er Piso
Col. Chapultepec Morales, Mexico D.F
Deleg. Miguel Hidalgo
CP 11570
MEXICO
Servicio y Reparación
Art. 123 No. 95
Col. Centro, C.P. 06050
Deleg. Cuauhtemoc
Servicio al Consumidor,
Venta de Refacciones y Accesorios
01 800 714 2503
Sello del Distribuidor:
Fecha de compra:
Modelo:
Póliza de Garantía
(Válida sólo para México)
Duración
Applica de México S. de R. L. de C.V. garantiza este producto por dos años a partir
de la fecha original de compra.
¿Qué cubre esta garantía?
Esta garantía cubre cualquier defecto que presenten las piezas, componentes y la
mano de obra contenidas en este producto.
Requisitos para hacer válida la garantía
Esta póliza deberá ser sellada por el establecimiento en donde adquirió el producto.
Para reclamar su garantía, deberá presentar al Centro de Servicio Autorizado dicha
póliza sellada. Si no la tiene, podrá presentar el comprobante de compra original.
¿Donde hago válida la garantía?
En el centro de servicio indicado en el directorio anexo.
Si lo desea, puede llamar sin costo al teléfono 01 (800) 714-2503, para ubicar el
Centro de Servicio más cercano a su domicilio.
Procedimiento para hacer válida la garantía
Acudir al Centro de Servicio con el producto y la póliza sellada. Ahí se reemplazará
cualquier pieza o componente defectuoso sin cargo alguno para el usuario final.
Excepciones
Esta garantía no será valida bajo las siguientes circunstancias:
a) Cuando el producto se hubiese utilizado en condiciones distintas a las normales.
b) Cuando el producto no hubiese sido operado de acuerdo con el instructivo de
uso que le acompaña.
c) Cuando el producto hubiese sido alterado o reparado por personas no
autorizadas por Applica de México S. de R.L. de C.V.
Page 21

2007/6-4-1E/S/F
1250 W 120 V 60 Hz
is a trademark of The Black & Decker Corporation, Towson, Maryland, USA
Marca registrada de The Black & Decker Corporation, Towson, Maryland, E.U.
Marque de commerce déposée de la société The Black & Decker Corporation, Towson, Maryland, É.-U.
Copyright © 2007 Applica Consumer Products, Inc.
Made in People’s Republic of China
Printed in People’s Republic of China
Importado por:
APPLICA DE MEXICO, S. DE R. L. DE C. V.
Presidente Mazaryk No111, 1er Piso
Col. Chapultepec Morales, Mexico D.F
Deleg. Miguel Hidalgo
CP 11570
MEXICO
Teléfono: (55) 1106-1400
Del interior marque sin costo
01 (800) 714 2503
Fabricado en la República Popular de China
Impreso en la República Popular de China
Fabriqué en République populaire de Chine
|Imprimé en République populaire de Chine
 Loading...