

Page 1
INSTRUCTION MANUAL
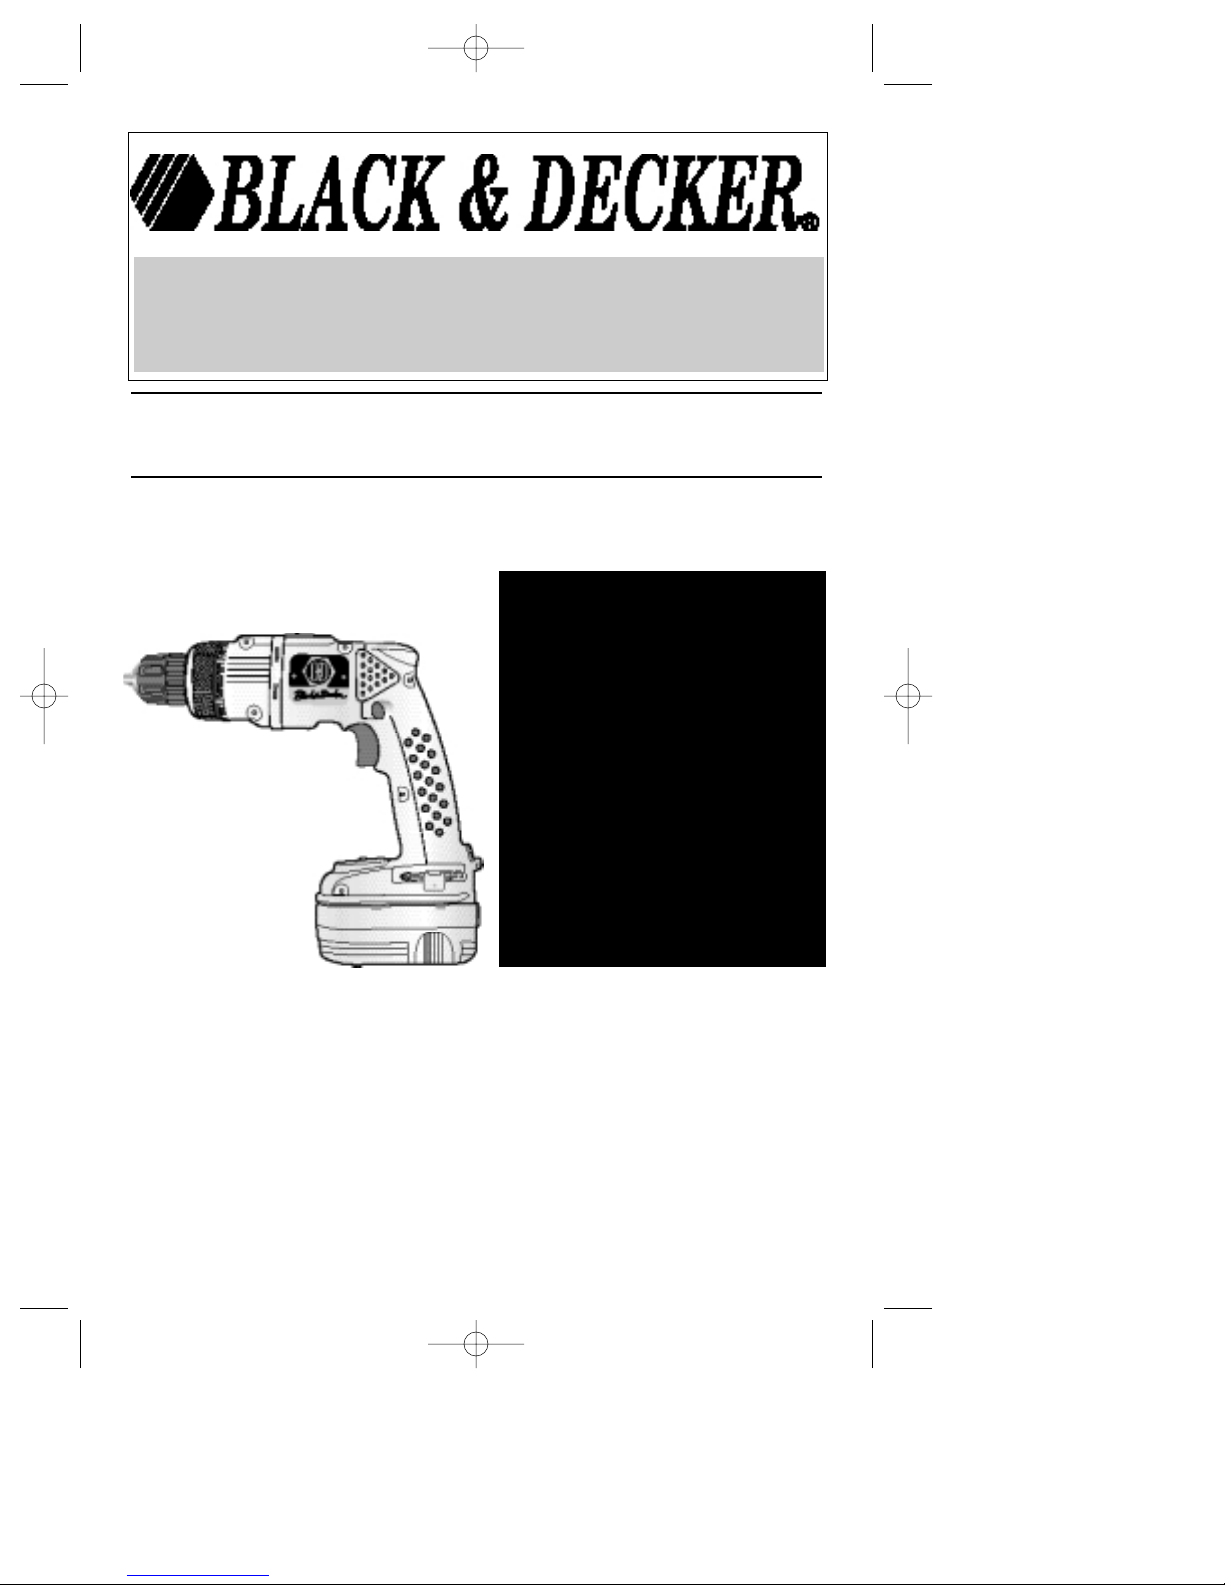
1144..44 VVOOLLTT CCOORRDDLLEESSSS DDRRIILLL
L
Catalog No. RD1440
VEA EL ESPAÑOL EN LA CONTRAPORTADA.
SAVE THIS MANUAL FOR FUTURE REFERENCE.
INSTRUCTIVO DE OPERACIÓN, CENTROS DE SERVICIO Y PÓLIZADE
GARANTÍA. ADVERTENCIA: LÉASE ESTE INSTRUCTIVO ANTES DE USAR
EL PRODUCTO.
KKKKEEEEYYYYIIIINNNNFFFFOOOORRRRMMMMAAAATTTTIIIIOOOONN
NN
YYYYOOOOUUUUSSSSHHHHOOOOUUUULLLLDD
DD
KKKKNNNNOOOOWWWW::
::
•Charge battery for 9 hours
before first use. For more
information see “CHARGING
THE POWER P ACK”.
611193-00 Rd1440 drill manual 7/16/02 3:54 PM Page 1
Page 2

GENERAL SAFETY RULES
FOR ALL BATTERY
OPERATED TOOLS
W ARNING! READ AND
UNDERSTAND ALL
INSTRUCTIONS.
Failure to follow all instructions listed
below, may result in electric shock,
fire and/or serious personal injury.
SAVE THESE INSTRUCTIONS
WORK AREA
• Keep your work area clean
and well lit.Cluttered benches and
dark areas invite accidents.
• Do not operate power tools in
explosive atmospheres, such
as in the presence of
flammable liquids, gases, or
dust. Power tools create sparks
which may ignite the dust or fumes.
• Keep bystanders, children,
and visitors away while
operating a power tool.
Distractions can cause you to lose
control.
ELECTRICAL SAFETY
• Do not abuse the cord. Never
use the cord to carry the tool.
Keep cord away from heat,
oil, sharp edges or moving
parts. Replace damaged cords
immediately. Damaged cords may
create a fire.
• A battery operated tool with
integral batteries or a
separate battery pack must
be recharged only with the
specified charger for the
battery. A charger that may be
suitable for one type of battery may
create a risk of fire when used with
another battery.
• Use battery operated tool
only with specifically
designated battery pack.Use of
any other batteries may create a risk
of fire.
PERSONAL SAFETY
• Stay alert, watch what you
are doing and use common
sense when operating a
power tool. Do not use tool
while tired or under the
influence of drugs, alcohol, or
medication. Amoment of
inattention while operating power
tools may result in serious personal
injury,
• Dress properly. Do not wear
loose clothing or jewelry.
Contain long hair. Keep your
hair, clothing, and gloves
away from moving parts.Loose
clothes, jewelry, or long hair can be
caught in moving parts. Air vents
cover moving parts and should be
avoided.
• Avoid accidental starting. Be
sure switch is in the locked
or off position before
inserting battery pack.
Carrying tools with your finger on the
switch or inserting the battery pack
into a tool with the switch on invites
accidents.
• Remove adjusting keys or
wrenches before turning the
tool on. A wrench or a key that is left
attached to a rotating part of the tool
may result in personal injury.
• Do not overreach. Keep
proper footing and balance at
all times.Proper footing and
balance enable better control of the
tool in unexpected situations.
• Use safety equipment. Always
wear eye protection.Dust mask,
non-skid safety shoes, hard hat, or
hearing protection must be used for
appropriate conditions.
TOOL USE AND CARE
• Use clamps or other practical
way to secure and support
the workpiece to a stable
platform. Holding the work by hand
or against your body is unstable and
may lead to loss of control.
• Do not force tool. Use the
correct tool for your
application. The correct tool will do
the job better and safer at the rate for
which it is designed.
• Do not use tool if switch does
not turn it on or off. A tool that
cannot be controlled with the switch is
dangerous and must be repaired.
• Disconnect battery pack from
tool or place the switch in the
locked or off position before
2
611193-00 Rd1440 drill manual 7/16/02 3:54 PM Page 2
Page 3

3
making any adjustments,
changing accessories, or
storing the tool.Such preventive
safety measures reduce the risk of
starting the tool accidentally.
• Store idle tools out of reach of
children and other untrained
persons. Tools are dangerous in the
hands of untrained users.
• When battery pack is not in
use, keep it away from other
metal objects like: paper
clips, coins, keys, nails,
screws or other small metal
objects that can make a
connection from one terminal
to another.Shorting the battery
terminals together may cause sparks,
burns, or a fire.
• Maintain tools with care.
Keep cutting tools sharp and
clean. Properly maintained tools,
with sharp cutting edge are less likely
to bind and are easier to control.
• Check for misalignment or
binding of moving parts,
breakage of parts, and any
other condition that may
affect the tool’s operation. If
damaged, have the tool
serviced before using. Many
accidents are caused by poorly
maintained tools.
• Use only accessories that are
recommended by the
manufacturer for your model.
Accessories that may be suitable for
one tool may create a risk of injury
when used on another tool.
SERVICE
• Tool service must be
performed only by qualified
repair personnel. Service or
maintenance performed by unqualified
personnel may result in a risk of injury.
• When servicing a tool, use
only identical replacement
parts. Follow instructions in
the Maintenance section of
this manual.Use of unauthorized
parts or failure to follow Maintenance
Instructions may create a risk of shock
or injury.
SPECIFIC SAFETY RULES
• Hold tool by insulated
gripping surfaces when
performing an operation
where the cutting tool may
contact hidden wiring or its
own cord. Contact with a "live" wire
will make exposed metal parts of the
tool "live" and shock the operator.
• When working on a ladder or
on scaffolding be sure to lay
the tool down on its side when
not in use.Some tools with large
battery packs will stand upright but
may be easily knocked over .
WARNING:Some dust created by
power sanding, sawing, grinding,
drilling, and other construction
activities contains chemicals known to
cause cancer , birth defects or other
reproductive harm. Some examples of
these chemicals are:
• lead from lead-based paints,
• crystalline silica from bricks and
cement and other masonry products,
and
• arsenic and chromium from
chemically-treated lumber . (CCA)
Your risk from these exposures varies,
depending on how often you do this
type of work. T o reduce your exposure
to these chemicals: work in a well
ventilated area, and work with
approved safety equipment, such as
those dust masks that are specially
designed to filter out microscopic
particles.
• Avoid prolonged contact with
dust from power sanding,
sawing, grinding, drilling,
and other construction
activities. Wear protective
clothing and wash exposed
areas with soap and water.
Allowing dust to get into your mouth,
eyes, or lay on the skin may promote
absorption of harmful chemicals.
611193-00 Rd1440 drill manual 7/16/02 3:54 PM Page 3
Page 4

4
• The label on your tool may include
the following symbols.
V..............volts
A..............amperes
Hz ..........hertz
W ............watts
min..........minutes
............alternating current
........direct current
no............no load speed
............Class II Construction
…/min ....revolutions or
reciprocation per minute
............earthing terminal
............safety alert symbol
BATTERY CAP INFORMATION
Battery storage and carrying caps are
provided for use whenever the battery
is out of the tool or charger . Remove
cap before placing battery in charger or
tool.
W ARNING: Do not store or carry
battery so that metal objects can
contact exposed battery terminals. For
example, do not place battery in
aprons, pockets, tool boxes, product kit
boxes, drawers, etc. with loose nails,
screws, keys, etc. without battery cap.
Without cap in place, battery could
short circuit causing fire or burns or
damage to battery.
Battery Cap
Figure A
1
2
3
Trigger Switch
Interrupteur à gâchette
Interruptor
Depress for reverse (this side)
Enfoncer pour la marche arrière (ce côté)
Presionar para reverso (de este lado)
Depress for forward (other side)
Enfoncer pour la marche avant (l’autre côté)
Presionar para marcha (del otro lado)
611193-00 Rd1440 drill manual 7/16/02 3:54 PM Page 4
Page 5
5
4
Screw Icon
Symbole d’une vis
Símbolo de tornillo
Torque Adjust Collar
Collier de réglage de couple
Anillo de ajuste de cabezal
5
6
Charge Indicator
Indicateur de charge
Indicador de carga
Gear Shifter
Bouton à deux vitesses d’engrenage
Engranaje para Cambios
7
8
Level
Niveau
Nivel
611193-00 Rd1440 drill manual 7/16/02 3:54 PM Page 5
Page 6

6
Charging the Power Pack
THE BATTERIES IN YOUR POWER
P ACK ARE NOT FULLY CHARGED
AT THE FACTORY. BEFORE
ATTEMPTING TO CHARGE THEM,
THOROUGHL Y READ ALL OF THE
SAFETY INSTRUCTIONS.
The charger is designed to use standard
household 120 volt 60 Hz power.
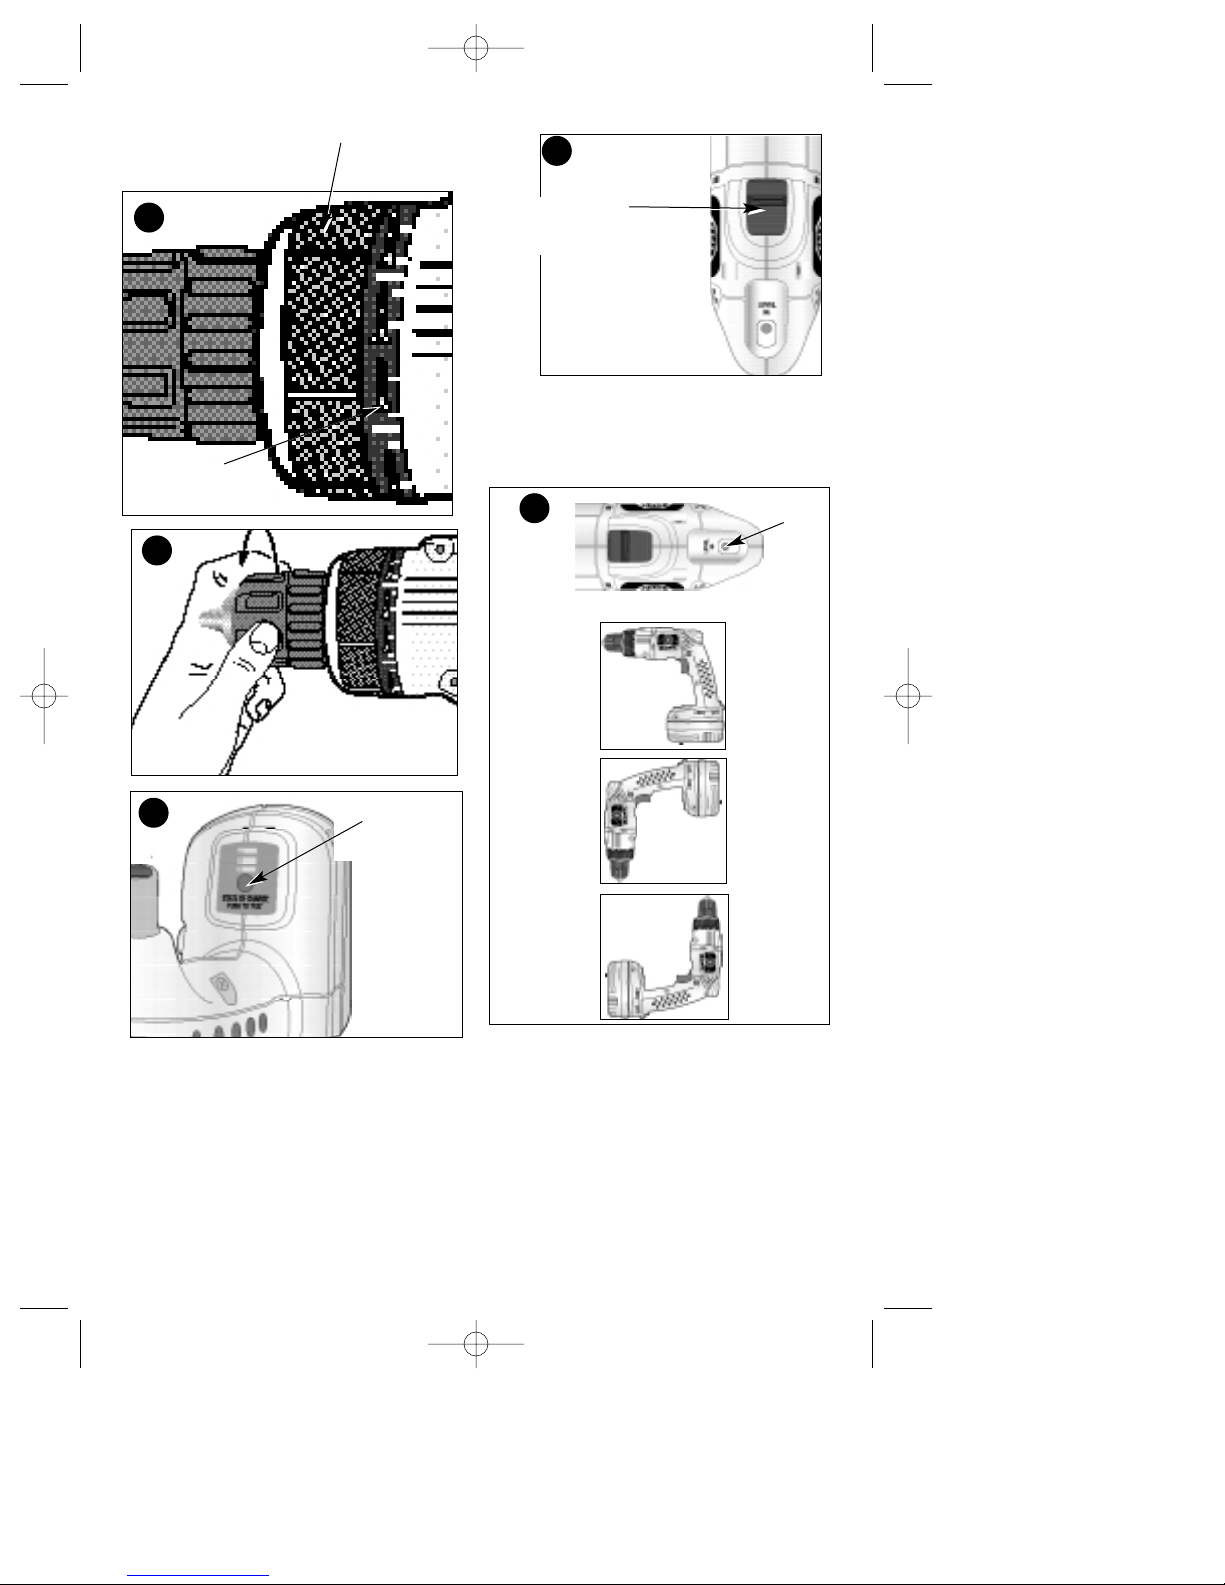
1. Plug the charger into any standard
120 Volt 60 Hz electrical outlet.
2. Slide the charger onto the battery
pack as shown in Figure 1 and let it
charge initially for 9 hours. After
the initial charge, under normal
usage, your power pack should be
fully charged in 3 to 6 hours.
3. Remove pack from the charger and
place in product. NOTE: To remove
the battery from the product, press
down on the release button on the
back of the battery (Figure 2) and
pull out.
IMPORTANT CHARGING
NOTES
1. After normal usage, your power
pack should be fully charged in 3 to
6 hours. If the power pack is rundown completely, it may take up to 6
hours to become fully charged. Your
power pack was sent from the
factory in an uncharged condition.
Before attempting to use it, it must
be charged for at least 9 hours.
2. DO NOT charge the power pack in
an air temperature below 40°F or
above 105°F. This is important and
will prevent serious damage to the
power pack. Longest life and best
performance can be obtained if
power pack is charged when air
temperature is about 75°F.
3. While charging, the charger may
hum and become warm to touch.
This is a normal condition and does
not indicate a problem.
4. If the power pack does not charge
properly—(1) Check current at
receptacle by plugging in a lamp or
other appliance. (2) Check to see if
receptacle is connected to a light
switch which turns power off when
you turn out the lights. (3) Move
charger and power pack to a
surrounding air temperature of 40°F
to 105°F. (4) If the receptacle and
temperature are ok, and you do not
get proper charging, take or send
the power pack and charger to your
local Black & Decker service center.
See Tools Electric in yellow pages.
5. The power pack should be recharged
when it fails to produce sufficient
power on jobs which were easily
done previously. DO NOT
CONTINUE using product with its
power pack in a depleted condition.
6. To prolong power pack life, avoid
leaving the power pack on charge
for extended periods of time (over 30
days without use). Although
overcharging is not a safety concern,
it can significantly reduce overall
power pack life.
7. When the battery is inserted into
the charger, the red “Charging
Indicator” light will come on
indicating that there is contact
between the battery and charger.
The light will stay on as long as the
battery is in the charger and the
charger is plugged into a working
outlet. It WILL NOT flash, go out or
change to a different color when the
charging cycle is complete.
8. The power pack will reach optimum
performance after being cycled 5
times during normal usage. There is
no need to run the batteries down
completely before recharging.
Normal usage is the best method of
discharging and recharging the
batteries.
SAFETY WARNINGS AND
INSTRUCTIONS: CHARGING
THE BATTERY
1. This manual contains important
safety and operating instructions.
2. Before using battery charger, read
all instructions and cautionary
markings on (1) battery charger, (2)
battery, and (3) product using
battery.
3. CAUTION: To reduce the risk of
injury, charge only Black & Decker
Power Packs. Other types of
batteries may burst causing
personal injury and damage.
4. Do not expose charger to rain or
snow.
5. Use of an attachment not
recommended or sold by Black &
Decker may result in a risk of fire,
electric shock, or injury to persons.
6. To reduce risk of damage to electric
plug and cord, pull by plug rather
than cord when disconnecting
charger.
7. Make sure cord is located so that it
will not be stepped on, tripped over,
or otherwise subjected to damage or
stress.
8. An extension cord should not be
used unless absolutely necessary.
Use of improper extension cord
could result in a risk of fire, electric
shock or electrocution.
611193-00 Rd1440 drill manual 7/16/02 3:54 PM Page 6
Page 7

7
a. Two-wire cords can be used with 2-
wire or 3-wire extension cords. Only
round jacketed extension cords
should be used, and we recommend
that they be listed by Underwriters
Laboratories (U.L.). If the extension
is to be used outside, the cord must
be suitable for outdoor use. Any cord
marked for outdoor use can also be
used for indoor work. The letters
"W" or "WA" on the cord jacket
indicate that the cord is suitable for
outdoor use.
b. An extension cord must have
adequate wire size (AWG or
American Wire Gauge) for safety,
and to prevent loss of power and
overheating. The smaller the gauge
number of the wire, the greater the
capacity of the cable; that is, 16
gauge has more capacity than 18
gauge. When using more than one
extension to make up the total
length, be sure each extension
contains at least the minimum wire
size.
9. Use only the supplied charger when
charging your tool. The use of any
other charger could damage the
battery or create a hazardous
condition.
10.Use only one charger when
charging.
11.Do not attempt to open the charger.
There are no customer serviceable
parts inside. Return to any
authorized Black & Decker service
center.
12.DO NOT incinerate the battery
packs even if they are severely
damaged or completely worn out.
The batteries can explode in a fire.
13. A small leakage of liquid from the
battery cells may occur under
extreme usage, charging or
temperature conditions. This does
not indicate a failure. However, if
the outer seal is broken and this
leakage gets on your skin:
a.) W ash quickly with soap and water.
b.) Neutralize with a mild acid such as
lemon juice or vinegar .
c.) If the battery liquid gets in your
eyes, flush them with clean water for a
minimum of 10 minutes and seek
immediate medical attention.
MEDICAL NOTE: The liquid is a 2535% solution of potassium hydroxide.
Operating Instructions
TRIGGER SWITCH &
REVERSING BUTTON FIGURE 3
The drill is turned ON and OFF by
pulling and releasing the trigger
switch shown in Figure 3. The farther
the trigger is depressed, the higher
the speed of the drill. A
forward/reverse control button
determines the direction of the tool
and also serves as a lock off button. To
select forward rotation, release the
trigger switch and depress the
forward/reverse control button. To
select reverse, depress the
forward/reverse control button the
opposite direction. The center position
of the control button locks the tool in
the off position. When changing the
position of the control button, be sure
the trigger is released.
TORQUE CONTROL - FIGURE 4
T o set the tool’ s torque, rotate the
adjustable torque collar as required.
There are 24 clutch settings in all.
These are indicated by screw icons
depicted on the torque collar . For light
duty work when using small screws,
set the collar to the smallest screw
icon. Each click in a clockwise direction
means an increase in the torque
produced. The highest position is the
drill mode and is indicated by a drill bit
icon. In this position the clutch will not
operate.
KEYLESS CHUCK - FIGURE 5
Single Sleeve Chuck with Automatic
Spindle Lock -This tool is equipped
with a feature that automatically locks
the spindle when the tool is not
running. This feature is a normal
condition which allows for tightening
or loosening of the chuck with one hand
while holding the drill with the other .
Loosen the chuck by rotating the sleeve
counterclockwise (Fig. 5). Insert the bit
or other accessory fully into the chuck,
Minimum Gage for Extension Cords (AWG)
120 VAC Tools
Total Cord Length 0-25 26-50 51-100 105-150
Amp Rating AWG AWG AWG AWG
More than 0 18 16 16 14
Not More than 6
More than 6 18 16 14 12
Not More than 10
More than 10 16 16 14 12
Not more than 12
More than 10 14 12 Not
Not more than 12 Recomended
611193-00 Rd1440 drill manual 7/16/02 3:54 PM Page 7
Page 8

8
and tighten securely by rotating the
sleeve in the clockwise direction as
viewed from the chuck end.
WARNING: Do not attempt to
tighten drill bits (or any other
accessory) by gripping the front part of
the chuck and turning the tool on.
Damage to the chuck and personal
injury may occur when changing
accessories.
BATTERY LEVEL INDICATOR
FIGURE 6
Figure 6 illustrates the location of the
charge indicator . To display the charge
status, press the black button at the
top of the indicator .
When fully charged batteries are
installed, all three lights will be
illuminated. As the charge is depleted,
there will be less lights illuminated.
DUAL RANGE GEARING FIGURE 7
The dual range feature of your drill
allows you to shift gears for greater
versatility. T o select low speed, high
torque setting (position 1), turn tool off
and permit to stop. Push button
forward towards the chuck. T o select
the high speed, low torque setting
(position 2), turn tool off and permit to
stop. Slide gear shifter back (away from
chuck). NOTE: Do not change gears
when tool is running. If you are having
trouble changing gears, make sure that
the dual range gear button is either
completely pushed forward or
completely pushed back.
LEVEL - FIGURE 8
Aunique leveling feature is built-in to
your drill. T o activate the level, depress
the switch button slightly. NOTE: It is
not necessary to turn the tool on to
activate the level light. The light will
illuminate when the drill is held
LEVEL in the up, down and straight
positions shown in Figure 8.
SCREW DRIVING
For driving fasteners, the reversing
button should be pushed to the left.
Use reverse (button pushed to the
right) for removing fasteners. When
moving from forward to reverse, or vice
versa, always release the trigger switch
first.
ON BOARD BIT STORAGE
Ascrewdriver bit storage slot is built-in
to the area just above the battery.
DRILLING
• Use sharp drill bits only.
• Support and secure work properly,
as instructed in the Safety
Instructions.
• Use appropriate and required safety
equipment, as instructed in the
Safety Instructions.
• Secure and maintain work area, as
instructed in the Safety
Instructions.
• Run the drill very slowly, using light
pressure, until the hole is started
enough to keep the drill bit from
slipping out of it.
• Apply pressure in a straight line
with the bit. Use enough pressure to
keep the bit biting but not so much
as to stall the motor or deflect the
bit.
• Hold the drill firmly with two hands
to control its twisting action.
• DO NOT CLICK THE TRIGGER OF
A STALLED DRILL OFF AND ON
IN AN ATTEMPT TO START IT.
DAMAGE TO THE DRILL CAN
RESULT.
• Minimize stalling on breakthrough
by reducing pressure and slowly
drilling through the last part of the
hole.
• Keep the motor running while
pulling the bit out of a drilled hole.
This will help reduce jamming.
• When using twist drill bits to drill
holes in wood, it will be necessary to
pull the bits out frequently to clear
chips from the flutes.
• Make sure switch turns drill on and
off.
WARNING: It is important to
support the work properly and to
hold the drill firmly to prevent loss
of control which could cause
personal injury. If you have any
questions on how to properly
operate tool, call: 1-800-54-HOW-TO
(544-6986).
DRILLING IN WOOD
Holes in wood can be made with the
same twist drill bits used for metal or
with spade bits. These bits should be
sharp and should be pulled out
frequently when drilling to clear chips
from the flutes.
DRILLING IN METAL
Use a cutting lubricant when drilling
metals. The exceptions are cast iron
and brass which should be drilled dry.
611193-00 Rd1440 drill manual 7/16/02 3:54 PM Page 8
Page 9
9
The cutting lubricants that work best
are sulfurized cutting oil or lard oil.
DRILLING IN MASONRY
Use carbide tipped masonry bits. Refer
to Drilling section. Keep even force on
the drill but not so much that you crack
the brittle material. Asmooth, even
flow of dust indicates the proper
drilling rate.
Maintenance
Use only mild soap and damp cloth to
clean the tool. Never let any liquid get
inside the tool; never immerse any part
of the tool into a liquid.
IMPORTANT: T o assure product
SAFETY and RELIABILITY, repairs,
maintenance and adjustment (other
than those listed in this manual)
should be performed by authorized
service centers or other qualified
service organizations, always using
identical replacement parts.
The RBRC™ Seal
The RBRC™ (Rechargeable
Battery Recycling
Corporation)
Seal on the nickel-cadmium
battery (or battery pack) indicates that
the costs to recycle the battery (or
battery pack) at the end of its useful
life have already been paid by Black &
Decker . In some areas, it is illegal to
place spent nickel-cadmium batteries
in the trash or municipal solid waste
stream and the RBRC program
provides an environmentally conscious
alternative.
RBRC in cooperation with Black &
Decker and other battery users, has
established programs in the United
States and Canada to facilitate the
collection of spent nickel-cadmium
batteries. Help protect our
environment and conserve natural
resources by returning the spent
nickel-cadmium battery to an
authorized Black & Decker service
center or to your local retailer for
recycling. You may also contact your
local recycling center for information
on where to drop off the spent battery,
or call 1-800-8-BATTERY.
Accessories
Recommended accessories for use with
your tool are available from your local
dealer or authorized service center . If
you need assistance regarding
accessories, please call:
1-800-544-6986.
W ARNING:The use of any
accessory not recommended for use
with this tool could be hazardous.
The following accessories should be
used only in the sizes specified below:
BITS, METALDRILLING – Up to 3/8"
(9.5mm); BITS, MASONRY DRILLING
– Up to 3/8" (9.5mm); WOOD
DRILLING – Up to 1/2" (12.7mm).
Service Information
All Black & Decker Service Centers are
staffed with trained personnel to
provide customers with efficient and
reliable power tool service. Whether
you need technical advice, repair , or
genuine factory replacement parts,
contact the Black & Decker location
nearest you. T o find your local service
location, refer to the yellow page
directory under "T ools—Electric" or
call: 1-800-54-HOW TO. (544-6986)
Full Two-Year Home Use
Warranty
Black & Decker (U.S.) Inc. warrants
this product for two years against any
defects in material or workmanship.
The defective product will be replaced
or repaired at no charge in either of two
ways.
The first, which will result in
exchanges only, is to return the product
to the retailer from whom it was
purchased (provided that the store is a
participating retailer). Returns should
be made within the time period of the
retailer’s policy for exchanges (usually
30 to 90 days after the sale). Proof of
purchase may be required. Please
check with the retailer for their specific
return policy regarding returns that
are beyond the time set for exchanges.
The second option is to take or send the
product (prepaid) to a Black & Decker
owned or authorized Service Center for
repair or replacement at our option.
Proof of purchase may be required.
Black & Decker owned and authorized
Service Centers are listed under "T oolsElectric" in the yellow pages of the
phone directory.
This warranty does not apply to
accessories. This warranty gives you
specific legal rights and you may have
other rights which vary from state to
state. Should you have any questions,
contact the manager of your nearest
Black & Decker Service Center .
Imported by
Black & Decker (U.S.) Inc.,
701 E. Joppa Rd.
Towson, MD 21286 U.S.A.
611193-00 Rd1440 drill manual 7/16/02 3:54 PM Page 9
Page 10

10
RD1440
IIIIMMMMPPPPOOOORRRRTTTTAAAANNNNTTTTSS
SS
RRRREEEENNNNSSSSEEEEIIIIGGGGNNNNEEEEMMMMEEEENNNNTTTTSSSS::
::
Charger la pile pendant 9
heures avant de l’utiliser pour la
première fois. Pour de plus
amples renseignements, voir la
section intitulée «
CHARGEMENT DU BLOCPILE ».
GUIDE D’UTILISATION
611193-00 Rd1440 drill manual 7/16/02 3:54 PM Page 10
Page 11

11
RÈGLES DE SÉCURITÉ
CONCERNANT LES
OUTILS À PILE GÉNÉRALITÉS
AVERTISSEMENT! LIRE,
COMPRENDRE ET SUIVRE
TOUTES LES DIRECTIVES
précisées ci-dessous, y compris les
consignes de sécurité, afin d’éviter les
risques de choc électrique, d’incendie ou
de blessure grave.
CONSERVER CES
DIRECTIVES
ZONE DE TRAVAIL
•Garder la zone de travail
propre et bien éclairée;les
établis encombrés et les endroits
sombres sont propices aux accidents.
•Ne pas utiliser les outils
électriques dans une
atmosphère explosive, comme
à proximité de liquides, de
gaz ou de poussières
inflammables;le moteur peut
créer des étincelles et enflammer les
vapeurs ou les poussières
environnantes.
•Tenir les enfants, les
visiteurs ou toute autre
personne éloignés lorsqu’on
utilise un outil électrique; les
distractions peuvent faire perdre la
maîtrise de ce dernier .
MESURES DE SÉCURITÉ ÉLECTRICITÉ
•Ne pas utiliser le cordon de
manière abusive, ni
transporter l’outil en le
tenant par le cordon. On doit
tenir le cordon éloigné des
sources de chaleur, de
l’huile, des bords tranchants
ou des pièces mobiles.
Remplacer immédiatement les
cordons endommagés, car ces derniers
augmentent les risques d’incendie.
•Un outil à piles intégrées ou
à bloc-pile externe doit être
rechargé seulement au moyen
du chargeur approprié,car un
chargeur destiné à une pile
particulière peut entraîner un risque
d’incendie lorsqu’il est utilisé avec une
autre.
•N’utiliser l’outil à piles
qu’avec le bloc-pile désigné,
car l’utilisation d’un autre type de
piles peut entraîner un risque
d’incendie.
SÉCURITÉ PERSONNELLE
•Rester vigilant en tout temps
et faire preuve de jugement
lorsqu’on utilise un outil
électrique; ne pas utiliser
l’outil lorsqu’on est fatigué
ou sous l’influence de
drogues, d’alcool ou de
médicaments, car un moment
d’inattention peut entraîner des
blessures graves.
•Porter des vêtements
appropriés; ne pas porter de
vêtements amples ni de
bijoux. Couvrir ou attacher les
cheveux longs. Garder les cheveux, les
vêtements, les bijoux et les gants
éloignés des pièces mobiles, car ceux-ci
peuvent s’y coincer . Se tenir éloigné
des évents puisque ces derniers
pourraient camoufler des pièces
mobiles
•Éviter les démarrages
accidentels; s’assurer que
l’interrupteur est en position
de verrouillage ou d’arrêt
avant d’insérer un bloc-pile
dans l’outil.Ne pas transporter
l’outil en laissant le doigt sur
l’interrupteur ni y insérer un bloc-pile
lorsque l’interrupteur est en position
de marche, car cela pourrait causer un
accident.
•Retirer les clés de réglage
avant de démarrer l’outil;une
clé laissée sur une pièce rotative peut
entraîner des blessures.
•Ne pas trop étendre les bras;
les pieds doivent rester
ancrés fermement au sol afin
de maintenir son équilibre en
tout temps et de mieux
maîtriser l’outil dans des
situations imprévues.
• Utiliser le matériel de sécurité
approprié; toujours porter des
lunettes de protection. Porter un
masque anti-poussières, des
chaussures antidérapantes, un casque
de sécurité ou des protecteurs auditifs
lorsque la situation le requiert.
UTILISATION ET ENTRETIEN
DE L’OUTIL
•Fixer et soutenir la pièce sur
une plate-forme stable au
moyen d’une butée fixe ou de
tout autre dispositif
semblable;la pièce est instable
lorsqu’on la retient manuellement ou
611193-00 Rd1440 drill manual 7/16/02 3:54 PM Page 11
Page 12

12
qu’on l’appuie contre le corps, ce qui
peut faire perdre la maîtrise de l’outil.
•Ne pas forcer l’outil ni
l’utiliser pour des travaux
autres que ceux pour lesquels
il a été conçu.Pour obtenir de
meilleurs résultats et prévenir les
risques de blessure, laisser l’outil
couper à la vitesse pour laquelle il a
été conçu.
•Ne pas utiliser l’outil lorsque
l’interrupteur marche-arrêt
ne fonctionne pas; tout outil qui
ne peut être commandé au moyen de
l’interrupteur est dangereux et doit
être réparé.
•Débrancher le bloc-pile de
l’outil ou mettre
l’interrupteur en position de
verrouillage ou d’arrêt avant
d’effectuer un réglage, de
changer les accessoires ou de
ranger l’outil;ces mesures de
sécurité préventives réduisent les
risques de démarrage accidentel.
•Lorsqu’on n’utilise pas
l’outil, le ranger hors de la
portée des enfants ou des
personnes non qualifiées;les
outils sont dangereux entre les mains
de personnes inexpérimentées.
•Lorsqu’on n’utilise pas le
bloc-pile, le ranger à l’écart
des objets métalliques tels
que les trombones, les pièces
de monnaie, les clés, les
clous, les vis ou autres petits
objets susceptibles de
conduire l’électricité entre
les bornes et d’occasionner
ainsi un court-circuit
pouvant provoquer des
étincelles, des brûlures ou un
incendie.
• Bien entretenir l’outil et s’assurer
qu’il est toujours bien propre et
aiguisé; les outils bien entretenus et
dont les bords sont bien tranchants
sont moins susceptibles de rester
coincés et sont plus faciles à maîtriser .
• Vérifier les pièces mobiles afin de
s’assurer qu’elles sont bien alignées et
qu’elles ne restent pas coincées;
vérifier également les pièces afin de
s’assurer qu’il n’y a ni bris ni aucune
autre condition susceptible de nuire
au bon fonctionnement de l’outil; faire
réparer l’outil si ce dernier est
endommagé avant de s’en servir à
nouveau, car les accidents sont
souvent causés par des outils mal
entretenus.
•N’utiliser que les accessoires
recommandés par le
fabricant pour le modèle en
question; un accessoire destiné à un
outil particulier peut devenir
dangereux lorsqu’il est utilisé avec un
autre.
ENTRETIEN
•L’outil doit être entretenu ou
réparé par le personnel
qualifié seulement;toute
maintenance effectuée par une
personne non qualifiée peut entraîner
des risques de blessure.
• Lors de l’entretien, n’utiliser que des
pièces de rechange identiques et
suivre les directives de la section
«Entretien» du présent guide afin de
prévenir les risques de choc électrique
ou de blessure.
RÈGLES DE SÉCURITÉ
PARTICULIÈRES
•Tenir l’outil par les surfaces
isolées prévues à cette fin
lorsque l’outil risque d’entrer
en contact avec des fils
cachés ou le cordon,car de tels
contacts peuvent mettre les pièces
métalliques de l’outil sous tension,
engendrant des risques de choc
électrique.
•Lorsqu’on est installé sur une
échelle ou un échafaudage
pour travailler, on doit
déposer l’outil sur le côté
lorsqu’on ne s’en sert plus.
Bien que certains outils munis d’un
gros bloc-pile puissent être placés à la
verticale, dans cette position, ils
peuvent facilement être renversés.
AVERTISSEMENT :certains
outils électriques, tels que les
sableuses, les scies, les meules, les
perceuses ou certains autres outils de
construction, peuvent produire de la
poussière contenant des produits
chimiques susceptibles d’entraîner le
cancer , des malformations congénitales
ou pouvant être nocifs pour le système
reproductif. Parmi ces produits
chimiques, on retrouve :
• le plomb dans les peintures à base
de plomb,
• la silice cristalline dans les briques
et le ciment et autres produits de
maçonnerie,
• l’arsenic et le chrome dans le bois de
sciage ayant subi un traitement
chimique (comme l’arséniate de cuivre
et de chrome).
Le risque associé à de telles
expositions varie selon la fréquence
avec laquelle on effectue ces travaux.
611193-00 Rd1440 drill manual 7/16/02 3:54 PM Page 12
Page 13

13
Pour réduire l’exposition à de tels
produits, il faut travailler dans un
endroit bien aéré et utiliser le
matériel de sécurité approprié, tel un
masque anti-poussières spécialement
conçu pour filtrer les particules
microscopiques.
• Il faut éviter d’entrer en contact
avec la poussière que produisent
les sableuses, les scies, les meules,
les perceuses ou certains d’autres
outils de construction. Porter des
vêtements de protection et laver
la peau touchée avec du savon et
de l’eau. Ne pas permettre à la
poussière d’entrer dans la bouche ou
les yeux ou d’entrer en contact avec la
peau pour éviter l’absorption de
produits chimiques nocifs.
L’étiquette de l’outil peut comporter les
symboles suivants.
V ....................................volts
A ....................................ampères
Hz ..................................hertz
W ....................................watts
min ................................minutes
..................................courant
........................................alternatif
................................courant continu
n
o....................................sous vide
....................................
Construction de
........................................classe II
....................................borne de mise à
la ................................minute
..................................symbole
........................................d´avertissement
.../min ............................tours ou c
........................................ourses
à la minute
INFORMATION CONCERNANT
LE CAPUCHON DU BLOC-PILE
Un capuchon est fourni avec le blocpile en vue d’être utilisé chaque fois
qu’on retire ce dernier de l’outil ou du
chargeur en vue de le ranger ou de le
transporter; enlever le capuchon
avant de remettre le bloc-pile dans le
chargeur ou dans l’outil.
AVERTISSEMENT : s’assurer, au
moment de ranger ou de transporter
le bloc-pile, qu’aucun objet métallique
n’entre en contact avec les bornes à
découvert du bloc-pile. Par exemple, il
faut éviter de placer un bloc-pile sans
capuchon dans un tablier, une poche,
une boîte à outils ou un tiroir (etc.)
contenant des objets tels que des
clous, des vis ou des clés, car le blocpile pourrait causer un court-circuit et
s’endommager, ou risquer de
provoquer des brûlures ou un
incendie.
CHARGEMENT DU BLOCPILE
LE BLOC-PILE N’EST PAS
COMPLÈTEMENT CHARGÉ EN
USINE. IL IMPORTE DONC DE LIRE
ATTENTIVEMENT TOUTES LES
CONSIGNES DE SÉCURITÉ AVANT
DE LE CHARGER.
Le chargeur est conçu pour être
branché dans une prise résidentielle
standard de 120 volts c.a. (courant
alternatif) et de 60 Hz.
1. Enficher le chargeur dans une prise
standard.
2. Insérer le chargeur dans le bloc-pile
tel qu’illustré dans la figure 1 et le
Capuchon de pile
Figure A
611193-00 Rd1440 drill manual 7/16/02 3:54 PM Page 13
Page 14

14
laisser charger la première fois
pendant 9 heures. Après ce
chargement initial, au cours d’une
utilisation normale, le bloc-pile
devrait être complètement chargé
dans 3 à 6 heures.
3. Enlever le bloc-pile du chargeur et
l’installer dans l’outil. REMARQUE
: Pour enlever la pile de l’outil,
enfoncer le bouton de dégagement à
l’arrière de la pile (figure 2) et la
retirer.
CONSEILS IMPORTANTS
CONCERNANT LE
CHARGEMENT
1. Après une utilisation normale, le
bloc-pile devrait être complètement
chargé dans 3 à 6 heures. Si le blocpile est complètement déchargé, son
chargement complet peut durer
jusqu’à 6 heures. Le bloc-pile n’est
pas chargé en usine. Avant de
l’utiliser, il faut le laisser charger
pendant au moins 9 heures.
2. Afin d’éviter d’endommager le blocpile, il est important de NE PAS le
charger à des températures
inférieures à +4,5 °C (+40 °F) ou
supérieures à +40,5 °C (105 °F). Afin
de maximiser la durée de vie du
bloc-pile et d’assurer son rendement
optimal, le charger à la température
ambiante, environ 24 °C (75 °F).
3. Lors du chargement, le chargeur
peut émettre un bourdonnement ou
devenir chaud au toucher. Ceci est
normal et n’indique pas la présence
d’un problème.
4. Si le bloc-pile ne se charge pas
normalement, il faut : (1) vérifier
l’alimentation de la prise en y
enfichant une lampe ou un appareil,
(2) s’assurer que la prise n’est pas
raccordée à un interrupteur qui
coupe le courant lorsqu’on éteint les
lumières, (3) placer le chargeur et le
bloc-pile dans un endroit où la
température ambiante est environ
4,5 à 40,5 °C (40 à 105 °F). Si le
problème persiste, retourner le blocpile et le chargeur au centre de
service local Black & Decker. Se
reporter aux pages jaunes sous la
rubrique « Outils – électriques ».
5. Le bloc-pile doit être rechargé
lorsqu’il ne produit pas
suffisamment de courant pour
permettre à l’utilisateur de travailler
normalement. On doit CESSER de
l’utiliser dans de telles conditions.
6. Pour prolonger la durée de vie du
bloc-pile, éviter de laisser ce dernier
dans le chargeur pour de longues
périodes (plus de 30 jours sans
utiliser l’outil). Bien que le fait de
surcharger le bloc-pile ne soit pas un
problème au niveau de la sécurité,
cela peut réduire de façon
importante la durée de vie du blocpile.
7. Une fois que le bloc-pile est inséré
dans le chargeur, le voyant rouge de
charge s’allume pour indiquer le
contact entre la pile et le chargeur.
Le voyant reste allumé tant que le
chargeur est enfiché dans une prise
sous tension. Lorsque le cycle de
charge est terminé, le voyant NE
CLIGNOTERA PAS, ni s’éteindra
ni changera de couleur.
8. Le bloc-pile est à son rendement
optimal après 5 cycles de charge et
de décharge lors d’une utilisation
normale. Il n’est pas nécessaire de
laisser la pile complètement
déchargé avant de la recharger.
L’utilisation normale est la meilleure
méthode de décharge et de charge de
la pile.
IMPORTANTES CONSIGNES
DE SÉCURITÉ CONCERNANT
LE CHARGEMENT DES PILES
1. Le présent guide comprend
d’importantes directives, dont un
mode d’emploi et des consignes de
sécurité.
2. Avant d’utiliser le chargeur, lire
toutes les directives et les étiquettes
de mise en garde apposées sur (1) le
chargeur, (2) la pile et (3) le produit
utilisant la pile.
3. MISE EN GARDE : afin de
réduire les risques de blessure, ne
charger que des blocs-piles Black &
Decker, car les autres peuvent
éclater et entraîner des blessures ou
des dommages matériels.
4. Ne pas exposer le chargeur à la pluie
ou à la neige.
611193-00 Rd1440 drill manual 7/16/02 3:54 PM Page 14
Page 15

15
5. L’utilisation d’un accessoire n’étant
ni recommandé ni vendu par Black
& Decker peut entraîner des risques
d’incendie, de choc électrique ou de
blessure.
6. Afin de réduire les risques de
dommage à la fiche ou au cordon
électrique, débrancher le chargeur
en saisissant la fiche, non le cordon.
7. S’assurer que le cordon est placé de
manière à éviter qu’il ne subisse des
dommages ou des contraintes ou que
les personnes s’y prennent les pieds
et trébuchent.
8. Ne pas utiliser de rallonge à moins
que cela ne soit absolument
nécessaire, car l’usage d’une rallonge
ayant une puissance inadéquate
pourrait causer des risques
d’incendie, de choc électrique ou
d’électrocution.
a. Bien qu’on puisse utiliser un cordon
bifilaire avec une rallonge bifilaire
ou trifilaire, on ne doit utiliser
qu’une rallonge à cordon; on
recommande que celle-ci soit
approuvée par l’organisme américain
Underwriters Laboratories (UL).
Lorsqu’on utilise un outil électrique
à l’extérieur, on ne doit utiliser que
des rallonges conçues pour cet usage,
comme celles de type W-A ou W.
Toute rallonge conçue pour un usage
extérieur peut aussi être employée à
l’intérieur.
b. Afin d’éviter une perte de puissance
ou une surchauffe et d’assurer la
sécurité de l’utilisateur, la rallonge
doit être de calibre AWG approprié.
Plus le calibre est petit, plus la
capacité est grande; autrement dit,
une rallonge de calibre 16 est plus
puissante qu’une rallonge de calibre
18. Lorsqu’on utilise plusieurs
rallonges pour obtenir la longueur
voulue, s’assurer que chacune d’elles
présente les valeurs minimales
requises.
9. Ne charger l’outil qu’au moyen du
chargeur fourni, car l’usage de tout
autre dispositif pourrait
endommager l’outil ou engendrer
une situation dangereuse.
10.N’utiliser qu’un seul chargeur
durant le chargement.
11. Ne pas ouvrir le chargeur; ce
dernier ne contient aucune pièce
pouvant être réparée par le client et
doit être retourné à un centre de
service Black & Decker, le cas
échéant.
12.NE PAS incinérer les piles, y
compris les piles gravement
endommagées ou complètement
déchargées, car elles peuvent
exploser en présence de flammes.
13.Les cellules peuvent subir une fuite
légère par suite d’un usage extrême,
du chargement ou d’une exposition à
certaines températures; ceci
n’indique pas un problème.
Cependant, si le scellant externe est
percé et le liquide entre en contact
avec la peau, on doit :
a. se laver rapidement la partie du
corps touchée avec de l’eau
savonneuse;
b. neutraliser l’effet au moyen d’un
acide doux tel que du jus de citron
ou du vinaigre;
c. si les yeux sont touchés, les rincer à
fond avec de l’eau propre pendant au
moins 10 minutes et consulter
immédiatement un médecin.
REMARQUE AUX FINS
MÉDICALES : ce liquide contient
une solution composée de 25 à 35 %
d’hydroxyde de potassium.
Mode d’emploi
INTERRUPTEUR À GÂCHETTE
ET BOUTON DE COMMANDE
DE MARCHE ARRIÈRE FIGURE 3
Enfoncer l’interrupteur à gâchette
pour mettre l’outil en marche; le
relâcher pour arrêter l’outil. Voir la
figure 3. Plus l’interrupteur est
enfoncé, plus la perceuse est rapide.
Le bouton de commande de marche
arrière et avant permet de
sélectionner la direction de rotation de
l’outil et sert aussi de bouton de
verrouillage en position d’arrêt de
l’interrupteur. Pour sélectionner la
marche arrière, enfoncer le bouton de
commande de marche arrière et avant
sur l’autre côté. La position centrale
du bouton de commande permet de
verrouiller l’outil en position d’arrêt.
611193-00 Rd1440 drill manual 7/16/02 3:54 PM Page 15
Page 16

16
Lorsqu’on charge de direction,
s’assurer que l’interrupteur à gâchette
est relâché.
COMMANDE DU COUPLE FIGURE 4
Pour régler le couple de l’outil,
tourner le collier de réglage de couple
selon les besoins. L’outil comprend 24
positions d’embrayage qui sont
indiquées par les symboles de vis
imprimés sur le collier de réglage de
couple. Pour effectuer des légers
travaux utilisant de petites vis, régler
le collier au symbole de vis le plus
petit. Chaque déclic vers la droite
indique une augmentation du couple.
La position la plus élevée est le mode
perçage et elle est indiquée par le
symbole d’une mèche. Dans cette
position, l’embrayage ne fonctionne
pas.
MANDRIN SANS CLÈ - FIGURE 5
Mandrin à manchon unique avec
mécanisme de verrouillage
automatique de la broche – Cet outil
est équipé d’une fonction de
verrouillage automatique de la broche
lorsque l’outil n’est pas en marche. Il
s’agit d’une fonction normale qui
permet de serrer ou de desserrer le
mandrin avec la main tout en tenant
la perceuse avec l’autre main.
Desserrer le mandrin en tournant le
manchon vers la gauche (figure 5).
Insérer la mèche ou tout autre
accessoire complètement dans le
mandrin et bien serrer en tournant le
mandrin vers la droite.
AVERTISSEMENT : Pour éviter
d’endommager le mandrin ou
d’engendrer des blessures, ne pas
tenter de serrer les mèches (ou tout
autre accessoire) en tenant la partie
avant du mandrin et en mettant
l’outil en marche.
INDICATEUR DE CHARGE FIGURE 6
L’emplacement de l’indicateur de
charge est indiqué à la figure 6. Pour
afficher l’état de la charge, enfoncer le
bouton noir sur la partie supérieure
de l’indicateur. Lorsque des piles
complètement chargées sont
installées, les trois voyants sont
allumés. À mesure que la pile se
décharge, les voyants s’éteignent, un à
la fois.
BOUTON À DEUX VITESSES
D’ENGRENAGE - FIGURE 7
Le bouton à deux vitesses d’engrenage
permet à l’outil d’effectuer le perçage
à des vitesses variées. Pour
sélectionner la première vitesse (basse
vitesse) à couple élevé (position 1),
mettre l’outil hors tension et le laisser
s’arrêter complètement. Glisser le
bouton vers l’avant, en direction du
mandrin. Pour sélectionner la
deuxième vitesse (vitesse élevée) à
faible couple (position 2), mettre l’outil
hors tension et le laisser s’arrêter
complètement. Glisser le bouton vers
l’arrière. REMARQUE : Ne pas
changer de vitesse lorsque l’outil est
en marche. S’il est difficile de changer
de vitesses, s’assurer que le bouton à
deux vitesses d’engrenage est enfoncé
soit complètement vers l’avant, soit
complètement vers l’arrière.
NIVEAU - FIGURE 8
L’outil est équipé d’un niveau unique.
Pour activer le niveau, enfoncer
légèrement l’interrupteur à gâchette.
REMAQUE : Il n’est pas nécessaire de
mettre l’outil sous tension pour
allumer le voyant du niveau. Le
voyant s’allume lorsque l’outil est mis
de niveau dans les positions indiquées
à la figure 8 : vertical, orienté vers le
bas et orienté vers le haut.
MODE TOURNEVIS
Pour fixer les attaches, enfoncer le
bouton de commande de marche
arrière vers la gauche. Pour enlever
les attaches, enfoncer le bouton de
commande de marche arrière vers la
droite. Pour passer de la marche
avant à la marche arrière, toujours
relâcher d’abord l’interrupteur à
gâchette.
RANGEMENT INTÉGRÉ DE
MÈCHES
Un compartiment intégré pour ranger
les mèches de tournevis se trouve en
dessus de la pile.
PERÇAGE
• N’utiliser que des mèches aiguisées.
• Bien immobiliser le matériau,
conformément aux consignes de
sécurité.
• Utiliser le matériel de sécurité
approprié, conformément aux
consignes de sécurité.
• Maintenir propre la zone de travail,
conformément aux consignes de
611193-00 Rd1440 drill manual 7/16/02 3:54 PM Page 16
Page 17

17
sécurité.
• Effectuer le perçage lentement en
appuyant légèrement sur l’outil,
jusqu’à ce que le trou soit commencé
pour empêcher la mèche de sortir de ce
dernier .
• Maintenir l’outil bien droit lorsqu’on
exerce de la pression sur la mèche.
Exercer la pression de manière à
garder la mèche engagée et éviter de
décrocher le moteur ou faire dévier la
mèche.
• Tenir fermement la perceuse avec
deux mains pour commander la
torsion.
• NE PAS ENFONCER PLUSIEURS
FOIS L’INTERRUPTEUR À
GÂCHETTE D’UNE PERÇEUSE
DÉCROCHÉE POUR LA
REDÉMARRER. L’OUTILPEUT
ÊTRE ENDOMMAGÉ.
• Éviter le décrochage ou la percée en
réduisant la pression et en perçant
lentement la dernière partie du trou.
• Laisser le moteur en marche pour
retirer la mèche d’un trou percé pour
réduire le blocage.
• Utiliser de l’huile de coupe lors du
perçage du métal, sauf dans le cas de
la fonte et du laiton qui doivent être
percés sans huile. Les meilleurs
lubrifiants sont l’huile de coupe
sulfurée ou l’huile de lard.
• Lorsqu’on utilise des mèches
hélicoïdales pour percer le bois, il est
nécessaire de retirer fréquemment les
mèches pour pouvoir enlever les
frisures de bois des cannelures.
• S’assurer que l’interrupteur à
gâchette permet de démarrer et
d’arrêter l’outil.
A VERTISSEMENT :Il est
important de bien immobiliser le
matériau et de tenir fermement l’outil
pour éviter de perdre la maîtrise de ce
dernier , ce qui peut entraîner des
blessures. Pour toute question sur la
bonne façon d’utiliser l’outil, composer
le 1-800-544-6986.
PERÇAGE DU BOIS
Il est possible de percer le bois à l’aide
des mèches hélicoïdales utilisées pour
le métal ou de mèches à vrille. Ces
mèches doivent être aiguisées et
retirées fréquemment pour pouvoir
enlever les frisures de bois des
cannelures.
PERÇAGE DU MÉTAL
Utiliser de l’huile de coupe lors du
perçage du métal, sauf dans le cas de
la fonte et du laiton qui doivent être
percés sans huile. Les meilleurs
lubrifiants sont l’huile de coupe
sulfurée ou l’huile de lard.
PERÇAGE DE LA MAÇONNERIE
Utiliser les mèches à pointe carburée.
Voir la partie intitulée « Perçage ».
Exercer une pression constante sur la
perceuse, mais éviter de briser le
matériau cassant. La vitesse choisie
est appropriée lorsque la poussière est
projetée uniformément et
régulièrement.
ACCESSOIRES
Les accessoires recommandés pour
chaque outil sont vendus séparément
chez les dépositaires locaux ou dans
les centres de service autorisés. Pour
obtenir plus d’information sur les
accessoires, composer le 1 800 544-
6986.
AVERTISSEMENT : l’usage d’un
accessoire non recommandé peut
présenter un danger.
IMPORTANT : pour assurer la
SÉCURITÉ et la FIABILITÉ de ce
produit, toutes les opérations de
réparation, d’entretien et de réglage
doivent être effectuées dans un centre
de service autorisé ou par du
personnel qualifié; on ne doit utiliser
que des pièces de rechange identiques.
SCEAU RBRC
MC
Le sceau RBRCMC de la
Rechargeable Battery
Recycling Corporation apposé
sur la pile au nickelcadmium (ou le bloc-pile)
indique que les coûts de recyclage de
ce dernier à la fin de sa vie utile ont
déjà été payés par Black & Decker. En
certains endroits, la mise au rebut ou
aux ordures municipales des piles au
nickel-cadmium est illégale; le
programme de «RBRC» constitue donc
une solution des plus pratiques et
écologiques.
La «RBRC», en collaboration avec
Black & Decker et d’autres
utilisateurs de piles, a mis sur pied
des programmes aux États-Unis et au
Canada dans le but de faciliter la
collecte des piles déchargées. Black &
Decker encourage ses utilisateurs à
participer à son programme de
protection de l'environnement et de
611193-00 Rd1440 drill manual 7/16/02 3:54 PM Page 17
Page 18

18
conservation des ressources naturelles
en retournant les piles usagées à un
centre de service Black & Decker ou
chez un dépositaire local afin qu’elles
puissent être recyclées. On peut en
outre se renseigner auprès d’un centre
de recyclage local pour connaître
d'autres sites les acceptant, ou
composer le 1 800 8-228-8379 pour
obtenir de l'information sur le
recyclage de ces piles dans sa région.
INFORMATION SUR LES
SERVICES
Black & Decker dispose d’un réseau
complet composé de centres de service
et de centres autorisés situés partout
en Amérique du Nord. Tous les centres
de service Black & Decker sont dotés
de personnel qualifié en matière
d’outillage électrique; ils sont donc en
mesure d’offrir à leur clientèle un
service efficace et fiable. Pour obtenir
un conseil technique ou une pièce
d’origine ou pour faire réparer un
outil, on peut communiquer avec le
centre Black & Decker le plus près.
Pour obtenir le numéro de téléphone,
consulter les pages jaunes sous la
rubrique «Outils - électriques» ou
composer le 1 800 544-6986.
GARANTIE COMPLÈTE DE
DEUX ANS POUR USAGE
RÉSIDENTIEL
Black & Decker (U.S.) Inc. garantit ce
produit pour une période de deux ans
contre tout défaut de matériel ou de
fabrication. Le produit défectueux
sera réparé ou remplacé sans frais,
suivant l’une des deux méthodes
suivantes.
La première méthode consiste en un
échange seulement. On doit retourner
le produit au détaillant qui l’a vendu
(pourvu qu’il s’agisse d’un détaillant
participant), en respectant les délais
stipulés dans sa politique relative aux
échanges (normalement de 30 à 90
jours après la vente). Une preuve
d’achat peut être requise. On doit
vérifier la politique de retour du
détaillant pour tout produit retourné
après le délai prescrit pour les
échanges.
La deuxième méthode consiste à
apporter ou à envoyer le produit
(prépayé) à un centre Black & Decker
ou à un centre de service autorisé aux
fins de réparation ou de
remplacement, selon notre choix. Une
preuve d’achat peut être requise. Les
centres Black & Decker et les centres
de service autorisés sont répertoriés
dans les pages jaunes sous la rubrique
«Outils - électriques».
Cette garantie ne s’applique pas aux
accessoires. Elle confère des droits
légaux particuliers à l’acheteur, mais
celui-ci pourrait aussi bénéficier
d’autres droits variant d’un territoire
à l’autre.
Toute question doit être adressée au
gérant du centre Black & Decker le
plus près.
Imported by / Importé par
Black & Decker Canada Inc.
100 Central Ave.
Brockville (Ontario) K6V 5W6
Voir la rubrique “Outils
électriques”
des Pages Jaunes
pour le service et les ventes.
611193-00 Rd1440 drill manual 7/16/02 3:54 PM Page 18
Page 19

19
MANUAL DE INSTRUCCIONES
RD1440
IIIINNNNFFFFOOOORRRRMMMMAAAACCCCIIIIOOOONN
NN
IIIIMMMMPPPPOOOORRRRTTTTAAAANNNNTTTTEEEE QQQQUUUUEE
EE
UUUUSSSSTTTTEEEEDDDD DDDDEEEEBBBBEE
EE
SSSSAAAABBBBEEEERRRR:::: ::
::
CARGA: Cargue la batería 9
horas antes de utilizarla por
primera vez. Para mayor
información, vea “Para cargar la
fuente de energía”.
611193-00 Rd1440 drill manual 7/16/02 3:54 PM Page 19
Page 20

20
REGLAS GENERALES DE
SEGURIDAD – PARA
TODAS LAS
HERRAMIENTAS QUE
FUNCIONAN CON
BATERIAS
¡ADVERTENCIA! LEA Y
ASEGÚRESE DE
ENTENDER TODAS LAS
INSTRUCCIONES.
La no-observación de la totalidad de
las instrucciones dadas en este
manual puede provocar riesgos de
choque eléctrico, incendio y/o lesiones
personales de gravedad.
CONSERVE ESTAS
INSTRUCCIONES
ÁREA DE TRABAJO
• Conserve su área de trabajo
limpia y bien iluminada.Las
bancas amontonadas y las zonas
oscuras propician los accidentes.
• No haga funcionar las
herramientas eléctricas en
ambientes explosivos, tales
como en presencia de
líquidos, gases o polvos
inflamables. Las herramientas
eléctricas producen chispas que
pueden provocar la ignición de polvos o
vapores explosivos.
• No permita a ningún
observador, niño o visitante
acercarse mientras pone en
funcionamiento una
herramienta eléctrica.Las
distracciones pueden hacerle perder a
usted el control.
SEGURIDAD ELÉCTRICA
• No maltrate el cable. Nunca
tome el cable para
transportar una herramienta.
Consérvelo alejado de calor,
del aceite, de bordes afilados
o de piezas móviles.Cambie
inmediatamente los cables dañados,
dado que éstos pueden provocar un
incendio.
• Una herramienta que
funciona con baterías
integradas o por separado
debe recargarse solamente
con el cargador especificado
para esa batería.Un cargador
adecuado para un tipo de batería
puede originar riesgos de incendio
cuando se utiliza con otro tipo de
batería.
• Utilice su herramienta
solamente con las baterías
específicamente diseñadas
para ella.El uso de otro tipo de
baterías puede originar riesgos de
incendio.
SEGURIDAD PERSONAL
• Esté siempre alerta,
concéntrese en lo que está
haciendo y recurra al sentido
común cuando utilice una
herramienta eléctrica. No
utilice ninguna herramienta
si se encuentra fatigado o
bajo la influencia de drogas,
alcohol o medicamentos.Un
descuido de su parte mientras utiliza
una herramienta eléctrica puede
ocasionarle lesiones graves.
• Vístase adecuadamente. No
utilice ropa floja ni joyas.
Cubra su cabello si lo tiene
largo. Conserve su cabello,
ropas y guantes alejados de
las piezas móviles.Las piezas de
vestir flojas, las joyas y el cabello largo
pueden resultar atrapados por las
piezas móviles. Las rejillas de
ventilación que cubren las partes
móviles deben ser evitadas.
• Evite el encendido
accidental. Asegúrese de que
el interruptor esté apagado
antes de colocar la batería.
Sostener una herramienta con su dedo
colocado en el interruptor o colocar la
batería sin fijarse si el interruptor está
encendido, puede provocar accidentes.
· Retire las llaves de ajuste o
presión antes de encender la
herramienta. El dejar una llave en
una pieza giratoria puede ocasionar
lesiones personales.
• No se incline demasiado.
Conserve siempre los pies
bien apoyados, al igual que su
equilibrio.La posición correcta de
los pies y el equilibrio permiten
controlar mejor la herramienta en
situaciones inesperadas.
• Utilice equipo de seguridad.
Utilice siempre un protector
para sus ojos.Las mascarillas
contra el polvo, los zapatos de
611193-00 Rd1440 drill manual 7/16/02 3:54 PM Page 20
Page 21

21
seguridad antideslizantes, el casco o
los protectores auditivos deben ser
utilizados con el fin de trabajar en
condiciones apropiadas.
USO Y CUIDADOS DE LA
HERRAMIENTA
• Utilice prensas u otros
medios prácticos para
asegurar y apoyar la pieza de
trabajo a una plataforma
estable. La sujeción de piezas con la
mano o contra su cuerpo resulta
inestable y puede originar la pérdida
de control.
• No fuerce la herramienta.
Utilice la herramienta
adecuada según la situación.
Esto le permitirá ejecutar mejor el
trabajo, de manera más segura y al
ritmo para el cual ésta ha sido
diseñada.
• No utilice la herramienta si el
interruptor no enciende y
apaga. Cualquier herramienta que
no pueda controlarse por medio del
interruptor es peligrosa y debe ser
reparada.
• Antes de realizar cualquier
ajuste, cambiar accesorios o
guardar la herramienta,
desconecte la batería de la
herramienta o coloque el
interruptor en la posición de
seguro o apagado.Esta medida
preventiva reduce el riesgo de
encendido accidental de la
herramienta.
• Guarde las herramientas que
no utilice fuera del alcance
de los niños y de cualquier
otra persona no entrenada.
Las herramientas son peligrosas en
manos de personas sin entrenamiento.
• Cuando no utilice la batería,
consérvela alejada de otros
objetos metálicos tales como
clips, monedas, clavos,
tornillos y otros pequeños
objetos metálicos que puedan
hacer contacto entre una
terminal y la otra.Un corto
circuito entre las terminales de la
batería puede originar chispas,
quemaduras o incendios.
• Mantenga adecuadamente sus
herramientas. Conserve las
herramientas de corte
afiladas y limpias. Aquellas
herramientas con piezas de corte
afiladas que reciben un
mantenimiento adecuado, difícilmente
se atascan y son más fáciles de
controlar .
• Verifique la correcta
alineación de las piezas
móviles, la presencia de
roturas en las piezas y
cualquier otra anomalía que
pueda afectar el
funcionamiento adecuado de
las herramientas. Si su
herramienta se encuentra
dañada, llévela al servicio de
mantenimiento antes de
utilizarla.La falta de un
mantenimiento adecuado puede ser la
causa de muchos accidentes.
• Utilice solamente aquellos
accesorios recomendados por
el fabricante para el modelo
de la herramienta que usted
posee. Los accesorios diseñados para
una herramienta pueden resultar
peligrosos el emplearse en otra para la
cual no han sido diseñados.
SERVICIO DE
MANTENIMIENTO Y
REPARACIÓN
• El servicio de mantenimiento
y reparación de las
herramientas debe ser
efectuado únicamente por
personal calificad.El
mantenimiento realizado por personal
no calificado puede provocar riesgos de
lesiones.
• Cuando efectúe el
mantenimiento de una
herramienta utilice
únicamente accesorios
originales. Siga las
instrucciones presentadas en
la sección Mantenimiento, de
este manual.El empleo de piezas
no autorizadas o no seguir las
instrucciones de mantenimiento,
puede originar riegos de choque
eléctrico o lesiones.
REGLAS DE SEGURIDAD
ESPECÍFICAS
• Cuando realice un trabajo en
el cual la herramienta pueda
tener contacto con cables
ocultos, tome la herramienta
por las superficies aislantes
de sujeción.El contacto con un
cable “vivo” hará que las partes
metálicas de la herramienta puedan
transmitir una descarga eléctrica al
operario.
611193-00 Rd1440 drill manual 7/16/02 3:54 PM Page 21
Page 22

• Cuando trabaje en una
escalera o en un andamio,
asegúrese de colocar la
herramienta de costado
mientras ésta no se encuentre
en uso. Algunas herramientas con
grandes cargadores para batería
pueden sostenerse en posición vertical
pero pueden caer muy fácilmente.
ADVERTENCIA: El polvo
generado por algunas actividades como
lijar , pulir, taladrar y otras actividades
de construcción, contiene químicos que
pueden producir cáncer , defectos de
nacimiento u otros defectos en el
sistema reproductor . Algunos ejemplos
de estos químicos son:
· plomo proveniente de pinturas a base
de plomo;
· sílice cristalino proveniente de
ladrillos, cemento y otros productos de
mampostería, y
· arsénico y cromo provenientes de la
madera tratada químicamente (CCA).
Su riesgo a estas exposiciones varía,
dependiendo de la frecuencia con la
cual usted ejecute este tipo de trabajo.
Para reducir su exposición a estos
químicos trabaje en un área bien
ventilada y con un equipo de seguridad
aprobado, tal como las máscaras
especialmente diseñadas para filtrar
partículas microscópicas.
La etiqueta de su herramienta puede
incluir los siguientes símbolos.
V ..................volts
A ..................amperes
Hz ................hertz
W..................watts
min ..............minutos
................corriente alterna
..............corriente directa
n
o ................velocidad sin carga
................construcción clase II
..................terminales de conexión
..................a tierre
................símbolo de alerta
.../min ..........revoluciones o minuto
....................seguridad
INFORMACIÓN SOBRE LA
TAPA DE LA BATERÍA
Las tapas para el almacenamiento y
transporte de las baterías son
suministradas para ser utilizadas
mientras la batería se encuentre fuera
de la herramienta o del cargador.
Retire la tapa antes de colocar la
batería en el cargador o en la
herramienta.
¡ADVERTENCIA!No guarde o
transporte la batería de manera que los
objetos metálicos puedan entrar en
contacto con los bornes de la batería.
Por ejemplo, no coloque la batería sin
su tapa en delantales, bolsillos, cajas de
herramientas, cajas de conjuntos de
productos, cajones, etc., junto con
puntillas sueltas, tornillos, llaves, etc.
Sin la tapa en su lugar , la batería
podría hacer un corto circuito causando
fuego o quemaduras, o causando la
avería de la misma.
CARGA DE LA BATERÍA
LA BATERÍANO SE ENCUENTRA
CARGADA COMPLETAMENTE.
ANTES DE INTENTAR SU CARGA,
LEAATENTAMENTE TODAS LAS
INSTRUCCIONES DE SEGURIDAD.
El cargador está diseñado para
utilizar la energía eléctrica residencial
estándar de 120 voltios y 60 Hz.
22
Tapa de la batería
611193-00 Rd1440 drill manual 7/16/02 3:54 PM Page 22
Page 23

1.Conecte el cargador en una toma de
corriente estándar de 120 voltios y 60
Hz.
2.Deslice el cargador en la batería como
se muestra en la Figura 1 y déjelo
cargando inicialmente durante 9
horas. Después de la carga inicial, su
batería deberá quedar completamente
cargada en un periodo de 3 a 6
horas.
3.Retire la batería del cargador y
colóquela en la herramienta (Figura 2).
NOTA: Para retirar la batería de la
sierra presione hacia abajo el botón de
seguro de la parte posterior de la
batería (Figura 3) y deslícela.
NOTAS IMPORTANTES ACERCA
DE LOS CARGADORES
1.Después de una utilización normal, su
batería deberá quedar completamente
cargada en un periodo de 3 a 6 horas.
Si la batería está completamente
descargada, puede tomar hasta 6 horas
para cargarse completamente. Su
batería fue enviada de fábrica
descargada. Antes de su utilización,
ésta debe ser cargada durante al
menos 9 horas.
2.NO CARGUE la batería a una
temperatura inferior a 40° F ó superior
a 105° F. Esto es muy importante y le
evitará serios daños a la batería. Si
desea obtener de su batería un mejor
funcionamiento y una más larga vida,
cárguela a una temperatura de cerca
de 75° F.
3.El cargador puede zumbar y calentarse
durante la carga. Esto es una
condición normal y no indica ningún
problema.
4.Si la batería no carga apropiadamente
- (1) V erifique la corriente en la toma
conectando una lámpara u otro
aparato eléctrico. (2) V erifique si la
toma de corriente está conectada a un
interruptor que corte la corriente
cuando usted apaga las luces. (3) Lleve
el cargador y la batería a un lugar en
donde la temperatura del aire esté
entre 40° F y 105° F. (4) Si la toma de
corriente y la temperatura están bien y
la carga no funciona correctamente,
lleve o envíe la herramienta, la batería
y el cargador a su centro de servicio
local Black & Decker . Consulte la
sección “Herramientas eléctricas”
(T ools Electric) de las páginas
amarillas.
5.La batería debe recargarse cuando
deja de producir suficiente potencia en
trabajos que anteriormente se hicieron
con facilidad. NO CONTINÚE a
utilizar la sierra con su batería
agotada.
6.Para prolongar la vida útil de la
batería evite dejarla cargando durante
largos periodos de tiempo (más de 30
días sin uso). Aunque la sobrecarga no
implica un problema de seguridad,
ésta puede disminuir
significativamente la vida útil total de
la batería.
7.Cuando la batería se inserta en el
cargador , la luz roja del “Indicador de
carga” se enciende indicando que la
batería y el cargador se encuentran en
contacto. La luz permanecerá
encendida en la medida que la batería
se encuentre en el cargador y que el
cargador se encuentre conectado a una
toma de corriente que funcione
correctamente. La luz NO parpadeará,
no se apagará ni cambiará de color una
vez que el ciclo de carga se termine.
8.La batería alcanzará su máximo
rendimiento después de 5 ciclos de
carga bajo condiciones normales de
utilización. No es necesario agotar las
baterías completamente antes de
recargarlas. La utilización normal es el
mejor método de descarga y recarga de
la batería.
INSTRUCCIONES Y
ADVERTENCIAS DE SEGURIDAD:
CARGA DE LA BATERÍA
1. Este manual contiene importantes
instrucciones de seguridad y
funcionamiento.
2. Antes de utilizar el cargador, lea
todas las instrucciones y
advertencias que se encuentran en
(1) el cargador de baterías, (2) la
batería, y (3) los productos que
utilizan las baterías.
3. ADVERTENCIA: Para reducir
el riesgo de lesiones, cargue tan sólo
baterías Black & Decker. Otros tipos
de baterías pueden estallar causando
lesiones y daños personales.
4. No deje expuesto el cargador a la
lluvia o la nieve.
5. La utilización de un accesorio no
recomendado ni vendido por Black &
Decker puede provocar riesgo de
incendio, choque eléctrico o lesiones
personales.
6. Con el fin de reducir el riesgo de
daño del enchufe y el cable, cuando
desconecte el cargador tire del
23
611193-00 Rd1440 drill manual 7/16/02 3:54 PM Page 23
Page 24

enchufe en lugar de hacerlo del
cable.
7. Asegúrese que el cable se encuentre
en una posición tal que evite pisarlo,
tropezar con él o que implique su
deterioración o tensión.
8. Trate de no utilizar extensiones a
menos que sea absolutamente
necesario. El uso de una extensión
inadecuada puede ocasionar
incendios, descargas eléctricas o
electrocución.
a. Los cables de dos polos pueden ser
conectados con extensiones de 2 ó 3
polos. Tan sólo deben utilizarse
extensiones envueltas con un forro
redondo y recomendamos que estén
catalogadas por Underwriters
Laboratories (U.L.). Si la extensión
va a ser utilizada al exterior, ésta
debe estar especificada para tal uso.
Cualquier extensión especificada
para uso al exterior puede también
ser utilizada para trabajar al
interior. Las letras “W” o “WA” que
aparecen sobre el forro indican que
la extensión es adecuada para ser
utilizada al exterior.
b. Por seguridad y para evitar la
pérdida de tensión y el
recalentamiento, el cable de una
extensión debe tener una dimensión
adecuada (AWG o American Wire
Gauge). En la medida que el calibre
de un cable es menor, mayor es su
capacidad; el cable calibre 16 tiene
una mayor capacidad que el cable
calibre 18. Cuando esté utilizando
más de una extensión para lograr la
longitud deseada, asegúrese que
cada extensión cumpla con las
normas mínimas en cuanto al calibre
del cable.
9. Utilice tan sólo el cargador
suministrado para cargar su
herramienta. La utilización de
cualquier otros cargador puede
averiar la batería o presentar
peligro.
10.Cuando cargue, utilice tan sólo un
cargador.
11.No intente abrir el cargador. Asu
interior no existen partes
reutilizables. Llévelo a cualquier
centro de servicio Black & Decker
autorizado.
12.NO INCINERE la batería aún si
ésta se encuentra muy averiada o si
está completamente descargada. La
batería puede explotar en el fuego.
13.En condiciones de temperatura o de
uso extremos, puede presentarse un
ligero goteo de líquido de la batería.
Esto no indica que haya una falla.
Sin embargo, si el sello externo está
roto y si su piel llegase a tener
contacto con este líquido, siga las
siguientes instrucciones:
a. Lave rápidamente la zona afectada
con agua y jabón.
b. Neutralice con un ácido suave como
jugo de limón o vinagre.
c. Si el líquido de la batería toca sus
ojos, enjuáguelos con agua limpia
por un tiempo mínimo de 10 minutos
y busque atención médica inmediata.
(NOTAMÉDICA: el líquido es una
solución de hidróxido de potasio en
una concentración de 25 a 35%).
Instrucciones de
operación
INTERRUPTOR DE ENCENDIDO /
APAGADO – FIGURA 3
El taladro se ENCIENDE y APAGA al
jalar y soltar el interruptor como
muestra la Figura 3.
Cuanto más lejos se jale del
interruptor, será mayor la velocidad
del taladro. El botón de control de
marcha / reverso, determina la
dirección en que funciona el producto
y sirve además de botón de seguridad
fijo. Para seleccionar el sentido de la
rotación, suelte el interruptor y
presione el botón de control de marcha
/ reverso. Para seleccionar el reverso,
presione el botón en la dirección
opuesta.
La posición de centro del botón de
control, fija el producto en posición de
apagado. Cuando cambie la posición
del botón de control, asegúrese de
soltar el interruptor.
24
611193-00 Rd1440 drill manual 7/16/02 3:54 PM Page 24
Page 25

CONTROL DEL CABEZAL –
FIGURA 4
Para ajustar el cabezal del producto
debe dar vuelta el anillo de acuerdo a
lo requerido para realizar el trabajo.
Existen 24 posiciones diferentes del
engranaje las cuales están indicadas
por medio de símbolos de tornillos en
el anillo. Para labores livianas cuando
se utilizan tornillos pequeños, coloque
la posición del anillo indicada con el
símbolo de tornillo más pequeño. Cada
tictac en el sentido de las agujas del
reloj, indica un aumento en el ajuste
del cabezal. La posición más alta es
para taladrar y está indicada con el
símbolo de una agujeta de taladro. En
esta posición, el engranaje no está en
marcha.
TORNO SIN LLAVE- FIGURA 5
Plato de Torno simple de ajuste
automático - Este producto consta de
una característica que permite que la
agujeta quede bloqueada en su lugar
cuando el producto no está en marcha.
Esta es una característica común que
permite el ajuste y desajuste del torno
utilizando una sola mano, mientras se
sostiene el taladro con la otra.
Desajuste el torno girando el plato en
el sentido opuesto a las agujas del
reloj (Figura 5). Coloque la agujeta o
accesorio completamente en el torno y
ajústelo en su lugar girando el plato
en el sentido de las agujas del reloj,
viendo desde la parte posterior del
torno.
ADVERTENCIA: No trate de
ajustar agujetas u otro accesorio
sosteniendo el torno por su parte
anterior y encendiendo el producto,
esto puede ocasionar daños al torno o
lesiones personales.
INDICADOR DEL NIVEL DE
CARGA DE LA BATERIA – FIGURA
6
La Figura 6 muestra donde se
encuentra el indicador de carga. Para
ver el nivel de carga, presione el botón
de color negro que se encuentra en la
parte superior del indicador.
Cuando se instalan baterías
totalmente cargadas, las tres luces se
encenderán. Amedida que la batería
se descarga, habrán menos luces que
se enciendan.
ENGRANAJE DE DOBLE
ALCANCE – FIGURA 7
La característica de doble alcance del
taladro le permite efectuar cambios de
velocidad para mayor versatilidad.
Para seleccionar baja velocidad,
posición alta del torno, (posición 1),
apague y espere que se detenga
totalmente el producto. Presione el
botón para adelante y hacia el torno.
Para seleccionar una velocidad más
alta, baje la posición del torno
(posición 2), apague y espere a que se
detenga totalmente el producto.
Deslice el engranaje de cambio de
velocidad en sentido opuesto al torno.
NOTA: No cambie velocidades
mientras el producto esté en marcha.
Si tiene inconvenientes al cambiar de
velocidad, asegúrese que el botón de
engranaje de doble alcance esté
completamente presionado hacia
adelante o hacia atrás.
NIVELADOR – FIGURA 8
El taladro tiene una característica
única para nivelarlo. Para activar el
nivelador, presione el botón
suavemente. NOTA: No es necesario
poner en marcha el producto para
activar la luz indicadora de nivelado.
La luz se prenderá sola cuando el
taladro se encuentre ANIVEL en
posición derecha, para arriba o para
abajo, según lo muestra la Figura 8.
DESTORNILLADOR
Para atornillar, debe presionarse el
botón de reverso hacia la izquierda.
Para destornillar, utilice el reverso con
el botón hacia la derecha. Cuando
cambie de marcha a reverso o
viceversa, siempre suelte primero el
interruptor.
ESPACIO PARA GUARDAR LAS
AGUJETAS
Un lugar para guardar las agujetas
del destornillador se encuentra
diseñado en la parte justo arriba de la
batería.
PERFORADO
• Utilice sólo agujetas bien afiladas.
• Soporte y mantenga el trabajo
25
611193-00 Rd1440 drill manual 7/16/02 3:54 PM Page 25
Page 26

adecuadamente como indicado en las
Instrucciones de Seguridad.
• Utilice el equipo requerido de
seguridad y apropiado, como indicado
en las Instrucciones de Seguridad.
• Asegure y mantenga el área de trabajo
como indicado en las Instrucciones de
Seguridad.
• Utilice el taladro despacio y ejerciendo
poca presión hasta que la agujeta
comience a quedarse suficientemente
dentro del agujero como para no
deslizarse fuera del mismo.
• Ejerza presión en forma alineada con
la agujeta. Ejerza presión suficiente
para mantener la agujeta en su
taladrando, pero no demasiado,
causando que el motor se detenga que
se desvíe la agujeta.
• Sostenga el taladro firmemente con
ambas manos para controlar su
movimiento de serpenteo.
• NO PRESIONE EL INTERRUPTOR
DE ENCENDIDO/ APAGADO P ARA
TRATAR DE PONERLO EN
MARCHA. ESTO PUEDE RESULTAR
EN Daños ALTALADRO.
• Evite que el producto se detenga al
perforar reduciendo la presión ejercida
y perforando despacio la última parte
del agujero.
• Mantenga el motor andando mientras
saca la agujeta del agujero perforado.
Esto evita que se trabe.
• Utilice un lubricante especial para
cortes cuando taladre metales, excepto
cuando taladre en hierro forjado y
latón, los que deben taladrarse en
seco. Los lubricantes que funcionan
mejor son el aceite de sulfuro para
cortes o el lardo.
• Cuando utilice agujetas serpenteadas
para perforar madera, las mismas
deben retirarse frecuentemente para
quitarles las pequeñas partículas de
material.
• Asegúrese que el interruptor prende y
apaga el taladro.
ADVERTENCIA Es importante
sostener el trabajo y mantener el
taladro firme para prevenir la
pérdida de control que puede causar
lesiones personales. Si tiene alguna
consulta de cómo utilizar el producto
correctamente, llame al:1-800-544-
6986.
PERFORANDO EN MADERA
Las perforaciones en madera pueden
efectuarse con las mismas agujetas
serpenteadas que se utilizan para
metal o con agujetas en forma de pala.
Estas agujetas deben estar bien
afiladas y deben retirarse
frecuentemente para quitar las
partículas de material.
PERFORANDO EN METAL
Utilice un lubricante especial para
cortes cuando taladre metales, excepto
cuando taladre en hierro forjado y
latón, los que deben taladrarse en
seco. Los lubricantes que funcionan
mejor son el aceite de sulfuro para
cortes o el lardo.
PERFORANDO EN MAMPOSTERIA
Utilice agujetas con punta de carburo
para mampostería. Refiérase a la
sección “Perforado”. Mantenga una
fuerza uniforme en el taladro, pero no
tanta que pueda causar daño al
material. La indicación del uso
correcto de fuerza ejercida con el
taladro es la emisión uniforme de
polvo al perforar.
ACCESORIOS
Usted puede adquirir los accesorios
recomendados para su herramienta en
su centro local de servicio. En caso de
requerir asistencia para localizar
cualquier accesorio para su
herramienta, comuníquese con
nosotros al: 1(800-544-6986)
PRECAUSIÓN: La utilización de
cualquier accesorio no recomendado
para esta herramienta puede ser
peligrosa.
IMPORTANTE: Para garantizar la
SEGURIDAD y la FIABILIDAD del
producto, las reparaciones, el
mantenimiento y los ajustes deberán
ser realizados en los centros
autorizados de servicio u otras
organizaciones de servicio calificadas
que utilicen siempre accesorios
originales.
26
611193-00 Rd1440 drill manual 7/16/02 3:54 PM Page 26
Page 27

EL SELLO RBRC™
El sello RBRC™ (Rechargable Battery Recycling Corporation) en las
baterías de niquelcadmio, indica que el costo del reciclaje de la batería (o
del paquete de baterías), al final de su vida útil, ya ha sido pagado por
Black & Decker. En algunas áreas es ilegal colocar las baterías de
niquelcadmio desgastadas en la basura doméstica o en los basureros
municipales. El programa RBRC™ proporciona una alternativa ambiental
conciente.
La RBCR, en cooperación con Black & Decker y otros usuarios de baterías, han
establecido programas en los Estados Unidos y Canadá para facilitar la
recolección de baterías desgastadas de niquelcadmio. Al llevar sus baterías
desgastadas de niquelcadmio a un Centro de servicio autorizado Black & Decker,
o a su minorista local para el reciclaje de su batería, usted ayuda a proteger el
medio ambiente y a conservar nuestros recursos naturales. Usted puede además
comunicarse con el centro de reciclaje de su localidad para que le informen acerca
de los lugares donde usted puede llevar las baterías desgastadas, o llame al 1800-8-BATTERY.
PARA REPARACION Y SERVICIO DE SUS HERRAMIENTAS
ELECTRICAS FAVOR DE DIRIGIRSE AL CENTRO DE SERVICIO
MAS CERCANO
CULIACAN A v. Nicolas Bravo #1063 Sur (56 77) 12 42 10
GAUDALAJARA A v. La Paz #1770 (33 38) 26 69 78
LEON Polara #32 (47 77) 13 14 56
MEXICO Sonora #134 Hiprodromo Condesa (55 55) 53 99 79
MERIDA Calle 63 #459 (99 99) 23 54 90
MONTERREY Av. Francisco I. Madero Pte. 1820-A (81 83) 72 1 1 25
PUEBLA 17 Norte #2057 (22 22) 46 90 20
QUERETARO Av. Madero 139 Pte. (44 22) 14 60 60
SAN LOUIS POTOSI Pedro Moreno #408 Fracc. la Victoria (44 48) 14 25 67
TORREON Blvd. Independencia, 96 pte. (87 17) 16 52 65
VERACRUZ Prolongación Diaz Miron #4280 (29 99) 21 70 18
VILLAHERMOSA Zaragoza #105 (99 33) 12 53 17
P ARAOTRAS LOCALIDADES LLAME AL: (55) 5326-7100
27
611193-00 Rd1440 drill manual 7/16/02 3:54 PM Page 27
Page 28

MANTENIMIENTO
Black & Decker le ofrece una red
completa de compañías propias y
centros de servicio autorizados en
Norteamérica. Todos los centros de
servicio Black & Decker cuentan
personal calificado para suministrar a
los clientes un servicio de
mantenimiento de herramientas
eléctricas eficiente y confiable.
Ya sea que necesite asesoría técnica,
reparaciones o repuestos genuinos,
llame a su centro Black & Decker más
cercano. Para encontrar su centro
local de servicios, consulte la sección
"Tools—Electric" de las páginas
amarillas o llame al 1-800 -544-6986
GARANTÍA COMPLETA
Black & Decker (U.S.) Inc. garantiza
este producto por un periodo de dos
años contra cualquier defecto debido
al material o a una mano de obra
defectuosa. Cualquier producto
defectuoso será reemplazado o
reparado sin costo alguno.
En cuanto a la primera opción, la cual
implica el reemplazo solamente, usted
debe enviar el producto al vendedor
donde usted adquirió el producto (a
condición que el almacén sea un
minorista participante). Las
devoluciones deben hacerse al interior
del periodo establecido por la política
de cambio del minorista (usualmente
de 30 a 90 días después de la compra).
La prueba de compra podrá ser
requerida. Para devoluciones
posteriores al tiempo establecido, por
favor verifique con su vendedor la
política específica respecto a las
devoluciones.
La segunda opción es llevar o enviar
el producto (porte prepagado) a un
centro de servicio Black & Decker o a
un centro de servicio autorizado para
su reparación o reemplazo, según
nuestro criterio. La prueba de compra
podrá ser requerida. Los centros de
servicio Black & Decker se encuentran
en la sección "Tools-Electric" de las
páginas amarillas de su directorio
telefónico.
Esta garantía no es aplicable a los
accesorios. Esta garantía le otorga a
usted derechos legales específicos y
otros derechos que pueden variar de
un Estado a otro. Si usted requiere de
mayor información, llame al gerente
de su centro de servicio Black &
Decker más cercano.
28
BLACK & DECKER S.A. DE C.V.
BOSQUES DE CIDROS ACCESO RADIATAS NO.
42
COL. BOSQUES DE LAS LOMAS.
05120 MÉXICO, D.F
TEL. 3-26-71-00
Para servicio y ventas consulte
“HERRAMIENTAS
ELECTRICAS”
en la sección amarilla.
ESPECIFICACIONES
Cargador:
Input 120V AC, 60 Hz, 12W
Output 14.5 V DC 200mA
CAT. NO. RD1440 FORM NO. 611193-00 Copyright © 2002 Black & Decker (MAY-02) Printed in China
611193-00 Rd1440 drill manual 7/16/02 3:54 PM Page 28
 Loading...