

Page 1
6-IN-1 STIRRING RICE AND RISOTTO COOKER
Use and care manual
6-EN-1 RIZ ET RICOTTO
CUISSEUR COOKER
Manuel d’Utilisation et de Soin
OLLA REVOLVEDORA
PARA COCINAR ARROZ
Y RISOTTO 6 EN 1
Manual de uso y cuidado
RCR520SD
TM
Page 2

Thank you for your purchase!
Should you have any questions or concerns with your new product,
please call our Customer Service Line at 1-800-231-9786 (US and
Canada). Please do not return to the store.
2
Page 3

Please Read and Save this Use and Care Book.
IMPORTANT SAFEGUARDS.
When using electrical appliances, basic safety precautions should always be
followed to reduce the risk of fire, electric shock, and/or injury, including the following:
• Read all instructions.
• Do not touch hot surfaces. Use hot
pads when removing the cooking bowl
or pasta/steaming basket as they will
be hot.
• To protect against electrical shock, do
not immerse cord, plug or base unit in
water or other liquid.
• Close supervision is necessary when
any appliance is used by or near
children.
• Unplug from outlet when not in use
and before cleaning. Allow to cool
before putting on or taking off parts.
• Do not operate appliance with a
damaged cord or plug, or after the
appliance malfunctions or has been
damaged in any manner. Contact
Consumer Support at the toll-free
number listed in the warranty section.
• The use of accessory attachments
not recommended by this appliance
manufacturer may cause injuries.
• Do not use outdoors.
• Do not let cord hang over edge of
table or counter, or touch hot surfaces.
• Do not place on or near a hot gas or
electric burner, or in a heated oven.
• Extreme caution must be used when
moving an appliance containing hot
food, water or other hot liquids.
• To disconnect; press the warm/cancel
button and then remove the plug from
the outlet.
• Do not use appliance for other than
intended use.
• To prevent the risk of electric shock,
do not cook directly in the cooking
base. Cook only in the cooking bowl
provided.
• This appliance is not intended for use
by persons (including children) with
reduced physical, sensory or mental
capabilities, or lack of experience
and knowledge, unless they have
been given supervision or instruction
concerning use of the appliance by a
person responsible for their safety.
• When using the appliance, provide
adequate air space above and on all
sides for circulation.
• The appliance is not intended to be
operated by means of an external timer
or separate remote control system.
• Do not use this appliance on an unstable
surface.
• Do not attempt to heat or cook nonfood items in this appliance.
• Children should be supervised to
ensure that they do not play with the
appliance.
• This appliance is not intended for deep
frying foods.
Additional Safeguards:
• This appliance generates heat and
escaping steam during use. Lift off glass
lid carefully to avoid scalding, and allow
water to drip into cooking bowl.
• Never use the cooking bowl on a gas or
electric cooktop or on an open flame.
• Do not cut foods directly in the
cooking bowl to avoid scratching.
3
Page 4

SAVE THESE INSTRUCTIONS.
This product is for household use only.
POLARIZED PLUG (120V models only)
This appliance has a polarized plug (one blade is wider than the other). To reduce
the risk of electric shock, this plug is intended to fit into a polarized outlet only one
way. If the plug does not fit fully into the outlet, reverse the plug. If it still does not fit,
contact a qualified electrician. Do not attempt to modify the plug in any way.
TAMPER-RESISTANT SCREW
Warning: This appliance is equipped with a tamper-resistant screw to prevent
removal of the outer cover. To reduce the risk of fire or electric shock, do not attempt
to remove the outer cover. There are no user-serviceable parts inside. Repair should
be done only by authorized service personnel. For service, repair or any questions
regarding your appliance, please call our Customer Service Line at 1-800-231-9786
(US and Canada).
ELECTRICAL CORD
1. A short power-supply cord is provided to reduce the risk resulting from becoming
entangled in or tripping over a longer cord.
2. Longer detachable power-supply cords or extension cords are available and may be
used if care is exercised in their use.
3. If a long detachable power-supply cord or extension cord is used:
a) The marked electrical rating of the power cord or extension cord should be at least
as great as the electrical rating of the appliance.
b) The longer cord should be arranged so that it will not drape over the countertop or
tabletop where it can be pulled on by children or tripped over unintentionally.
Note: If the power cord is damaged, please contact the warranty department listed
in these instructions.
4
Page 5
GETTING TO KNOW YOUR
6-IN-1 STIRRING RICE AND RISOTTO COOKER
1
2
3
4
5
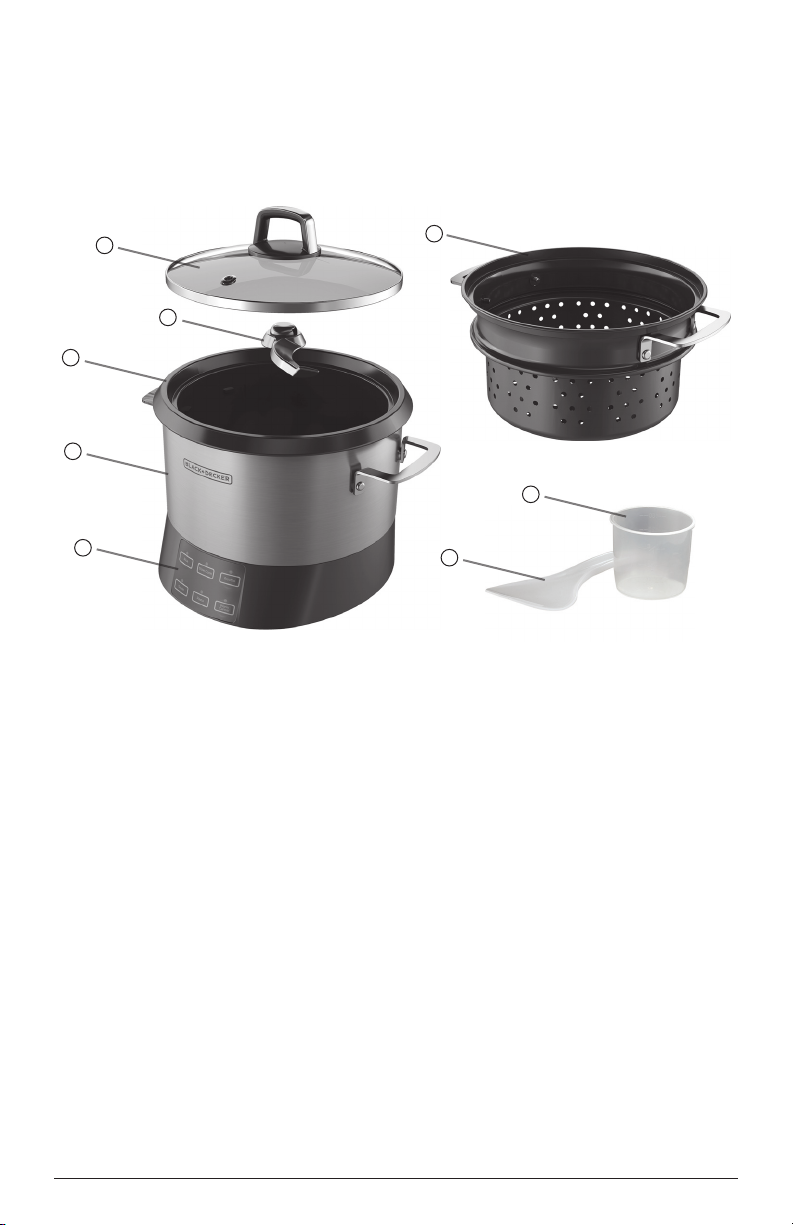
1. Tempered Glass Lid
(Part# RCR520-01)
2. Stirring Arm (Part# RCR520-04)
3. Cooking Bowl
(Part# RCR520-03)
4. Base Unit
5. Control Panel
6
7
8
6. Pasta/Steaming Basket
(Part# RCR520-02)
7. Rice measure
(Part# RC514-04)
8. Serving spoon
(Part# RC514-05)
9. Power Cord Socket
(on back of Base Unit,
not shown)
Product may vary slightly from what is illustrated.
5
Page 6

GETTING STARTED
This appliance is intended for household use only.
• Remove all packing material, any stickers, and the plastic band around the
power plug.
• Please go to www.prodprotect.com/applica to register your warranty.
• Wash all removable parts as instructed in CARE AND CLEANING.
Place the clean, dry cooking bowl in the cooking base.
• Select a location where this unit is to be used. Place the unit on a stable, heat
resistant surface, free from cloth, liquids and any other flammable materials.
Ensure that the unit has enough space all the way around and above it to
allow heat to flow without damage to cabinets or walls.
IMPORTANT INFORMATION ABOUT YOUR APPLIANCE
This cooker gets hot. When in use, always use hot pads when touching any
part of the appliance.
• During the first few minutes of use you may notice smoke and a slight
odor. This is caused by oil that may have been used during manufacturing
of the unit and will not impact the performance.
• To switch to different functions on the appliance, you must be in the
cancel mode. The blue indicator light will be flashing above the warm/
cancel function. The unit is then in cancel mode and you will be able to
switch to another function.
• As most meals cook, steam will escape through the vent in the lid. Place
glass lid on the rice and risotto cooker so the steam vent is facing away
from cabinets and walls. Do not place hand over steam vent while rice is
cooking; the hot steam may burn.
• Use the provided plastic serving spoon to remove food and a wooden
spoon to stir. Do not use metal utensils that can scratch the nonstick
cooking bowl.
• Do not fill the cooking bowl higher than highest water marking measurement.
OPERATING YOUR 6-IN-1 RICE AND RISOTTO COOKER
There are six ways to use your rice and risotto cooker; Cooking directly in the
cooking bowl (for rice, oatmeal and more), making pasta or steaming with the
provided pasta/steaming basket, sautéing in the cooking bowl, making risotto
utilizing the stirring arm, or slow cooking (high setting). Directions for each
are outlined below:
COOKING RICE
1. Plug in the appliance. The blue indicator light will start flashing above
the warm/cancel button ( ). The appliance will remain in the cancel
function until the rice button ( ) is pressed.
2. Place cooking bowl into the cooking base. Use the rice measure provided
with the appliance to measure the desired amount of rice (no more than 10
6
Page 7
rice measures). Fill the cooking bowl with water to the corresponding water
marking, i.e. for 1 rice cup measure, fill to the 1 cup water marking, etc.
Note: Do not use a standard measuring cup. One rice measure holds
approximately 2/3 cup, which yields approximately 1 cup of cooked rice.
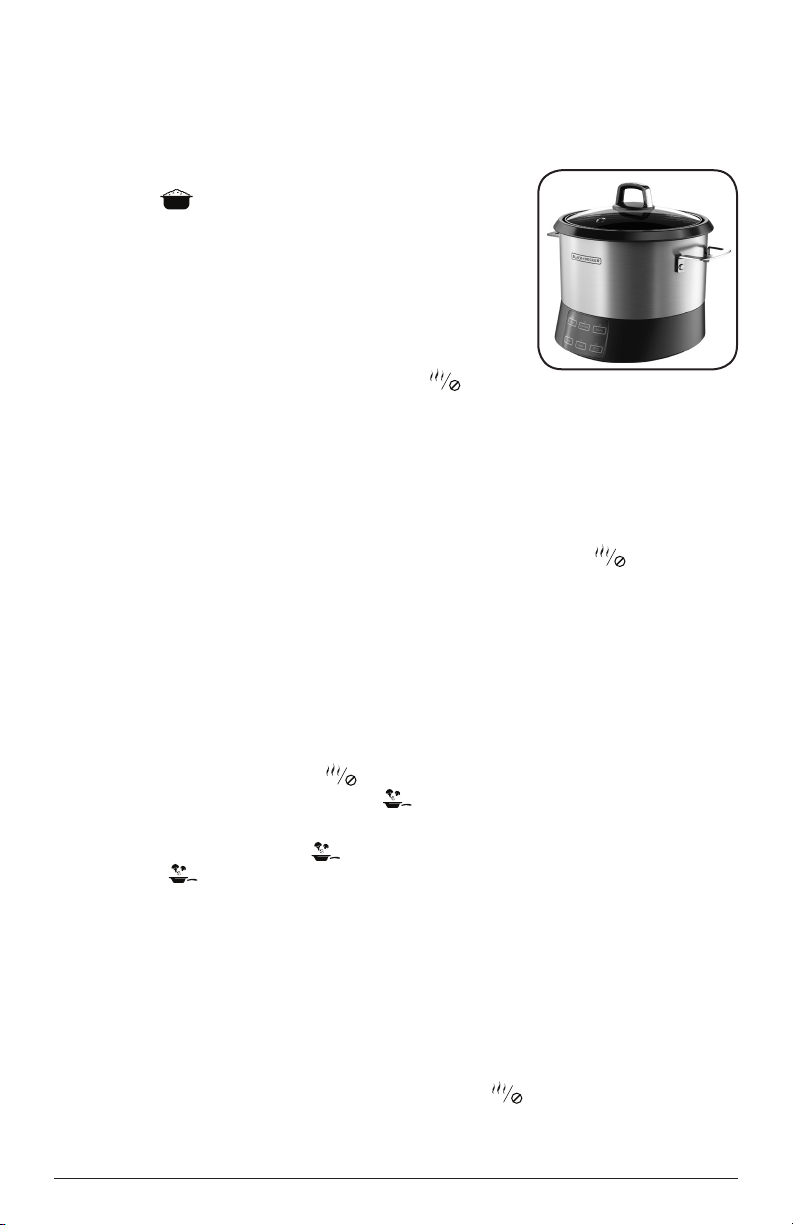
3. Place the lid on the cooking bowl and press the Rice
button ( ). The cook indicator light above the
rice button will illuminate blue and cooking will
begin.
4. When cooking rice: Once the rice is done, the
rice will rest for 8–10 minutes before switching
to keep warm for the optimal flavor and texture.
After 8–10 minutes, the blue cook indicator light
will shut off and the blue light will illuminate
above the keep warm/cancel button ( );
indicating the appliance has switched to the warm function. The warm
indicator light will stay on until the appliance is unplugged. The cooking
bowl may be hot. Always use hot pads when removing bowl.
When cooking soups, stews, etc: Use a kitchen timer to determine the
cook time, as the appliance will not switch to warm when the cooking
cycle is complete for these types of foods. You can manually switch the
appliance to warm by pushing the warm/cancel button ( ) twice.
When the blue light is solid blue, the unit is in the keep warm setting. The
cooking bowl may be hot. Always use hot pads when removing bowl.
5. Unplug the appliance when not in use. Always allow it to completely cool
before cleaning.
SAUTÉING
1. Plug in the appliance; the blue indicator light will start flashing above
the warm/cancel button ( ). The appliance will remain in the cancel
function until the sauté button ( ) is pressed. Place cooking bowl
into the cooking base.
2. Press the sauté button ( ). The cook indicator light above the sauté
button ( ) will illuminate blue and cooking will begin.
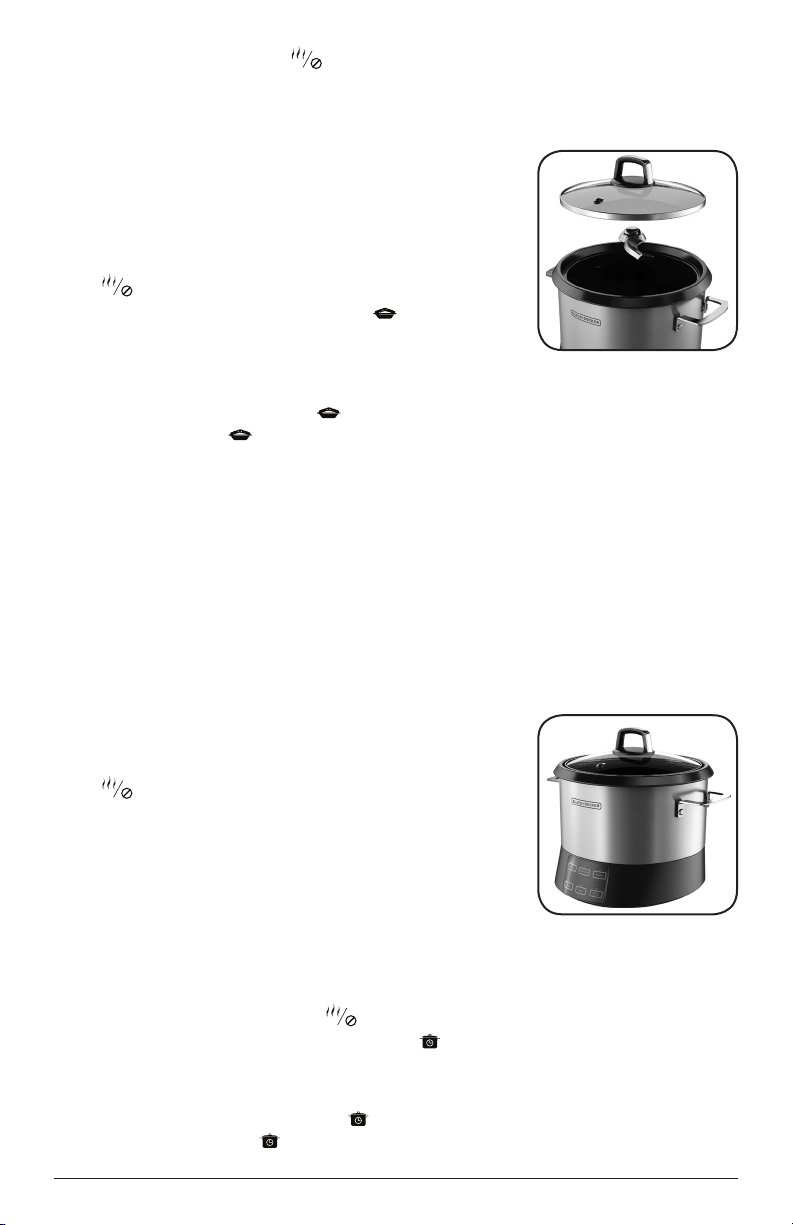
3. Place the lid on the cooking bowl and preheat for approximately 3–6
minutes. (A)
4. Once preheated, add the food and any needed liquids into the cooking
bowl to sauté. Manually stir as needed to ensure desired results.
Note: Do not use metal utensils as it could scratch the nonstick finish.
A
5. When the sautéing is done, either continue cooking with the
instructions listed in the “Helpful Hints” section or turn the appliance to
warm by pressing the warm/cancel button ( ) twice. When the blue
light is solid the unit is in the keep warm setting. The cooking bowl may
be hot. Always use hot pads when removing bowl
7
Page 8
6. Unplug the appliance when not in use. Always allow it to completely cool
before cleaning.
PASTA
1. Plug in the appliance; the blue indicator light
will start flashing above the warm/cancel
button ( ). The appliance will remain in the
cancel function until the pasta button ( ) is
pressed.
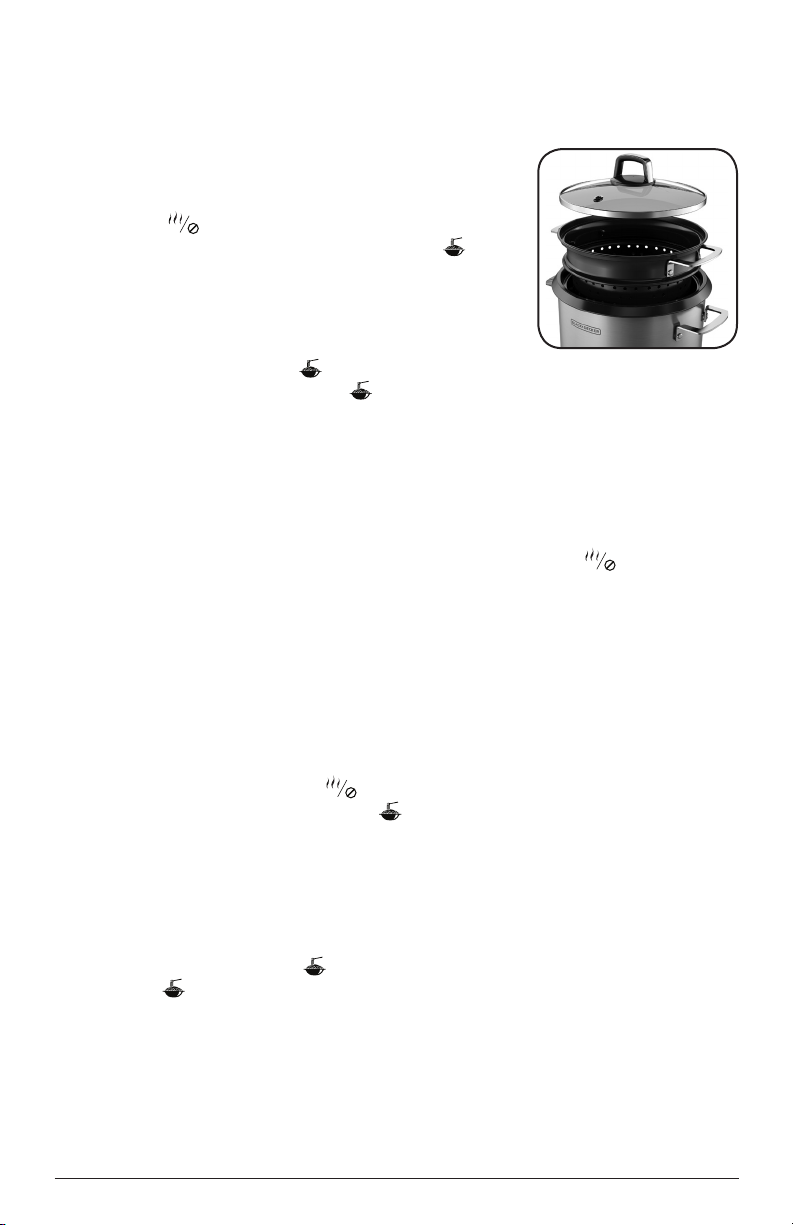
2. Fill the cooking bowl with water, up to the 9 cup
marking and place into the cooking base. Then
place the pasta basket in the cooking bowl. (B)
3. Press the pasta button ( ). The cook indicator
light above the pasta button ( ) will illuminate blue and heating will
begin.
4. With the lid on, allow the water to come to a boil. Add up to 8 ounces of
pasta to the pasta basket.
5. Cook pasta, uncovered, according to package directions. Once pasta is
cooked to desired consistency, use hot pads to remove the pasta basket
to drain the pasta water into the cooking bowl.
6. When the pasta is done, press the warm/cancel button ( ) once. When
the blue light is flashing, the unit will stop cooking. The pasta/steaming
basket handles may be hot. Always use hot pads when removing
basket.
7. Unplug the appliance when not in use. Always allow it to completely cool
before cleaning.
B
STEAMING (PASTA FUNCTION)
1. Plug in the appliance; the blue indicator light will start flashing above
the warm/cancel button ( ). The appliance will remain in the cancel
function until the pasta button ( ) is pressed.
2. Fill the cooking bowl with 1 / cups of water and place in the cooking base.
3. Place the foods to be steamed inside of the pasta/steaming basket and
set the basket inside of the cooking bowl. (B) The water level in the
cooking bowl should not be touching the basket. Cover with lid.
Note: Always keep lid on while steaming.
4. Press the pasta button ( ). The cook indicator light above the pasta
button ( ) will illuminate and heating will begin.
5. Steaming times vary between vegetables and food types; begin
checking for doneness after initial 5 minutes. Refer to the Steaming
Chart in this instruction booklet for additional steam times.
Note: When steaming vegetables or other foods without rice in the cooking
bowl, the unit will not automatically switch to warm.
6. When steaming is done (if not also cooking rice) press the
8
Page 9
warm/cancel button ( ) once. When the blue light is flashing, the
unit will stop cooking. The pasta/steaming basket handles may be hot.
Always use hot pads when removing basket.
7. Unplug the appliance when not in use. Always
allow it to completely cool before cleaning.
RISOTTO
1. Plug in the appliance: the blue indicator light will
start flashing above the warm/cancel button
( ). The appliance will remain in the cancel
function until the risotto button ( ) is pressed.
2. Place cooking bowl into cooking base. Fit the
stirring arm over the prongs on the drive shaft
in the base of the cooking bowl. (C)
3. Press the risotto button ( ). The cook indicator light above the
risotto button ( ) will illuminate blue and the unit will begin heating.
The stirring arm will start rotating after approximately 5 seconds.
The stirring arm will continue to rotate throughout the entire cooking
process. The stirring arm will cycle off and on during cooking to create
the best consistency.
4. Place the lid on the cooking bowl, and let the rice cooker preheat for
approximately 3–6 minutes.
5. Once preheated, add ingredients (Arborio, onion, garlic, etc.) and any
necessary liquid. Cook according to recipe or package directions.
Note: A risotto recipe is provided in the RECIPE section of this booklet.
6. Place the lid back on the cooking base and allow the stirring arm to cook
the risotto.
7. Once the risotto is done, the blue cook
indicator light will shut off and the blue light will
illuminate above the warm/cancel button
( ). The warm indicator light will stay on until
the unit is unplugged. The cooking bowl may be
hot. Always use hot pads when removing bowl.
8. Unplug the appliance when not in use. Always
allow it to completely cool before cleaning it
and the stirring arm.
C
D
SLOW COOK
1. Plug in the appliance; the blue indicator light will start flashing above
the warm/cancel button ( ). The appliance will remain in the cancel
function until the slow cook button ( ) is pressed.
2. Place the cooking bowl into the cooking base and fill with desired
ingredients. (D) Do not fill above the 9 cup marking inside the cooking bowl.
3. Press the slow cook button ( ). The cook indicator light above the
slow cook button ( ) will illuminate blue and the unit will begin
9
Page 10

cooking.
NOTE: The slow cook function is a high setting and will cook foods faster
than a normal low setting.
4. The slow cook function will cook foods up to 8 hours before the unit will
switch to keep warm. If your recipe calls for less time, manually switch
the unit to keep warm by pressing the warm/cancel button ( ) twice.
When the blue light is solid, the unit is in the keep warm setting. The
cooking bowl may be hot. Always use hot pads when removing bowl.
5. Unplug the appliance when not in use. Always allow it to completely cool
before cleaning.
CLEANING AND CARE
This product contains no user serviceable parts. Refer service to qualified
service personnel.
CLEANING
Important: Never immerse cooking base in water or other liquids.
1. Always unplug the rice and risotto cooker and allow to cool completely
before cleaning.
2. Wash cooking bowl and glass lid in warm, soapy water. If food sticks to
the cooking bowl or stirring arm, fill the bowl with warm, soapy water
and allow it to soak before cleaning with plastic scouring pad.
Note: The cooking bowl, glass lid, pasta/steaming basket, and stirring arm
are dishwasher safe.
3. Wipe interior and exterior of the cooking base with a soft, slightly damp
cloth or sponge. Never use abrasive cleaners or scouring pads to clean
the cooking base, as they may damage the surfaces.
4. Allow to dry thoroughly before storing.
STORING
Make sure that the appliance is thoroughly cool and dry. Never wrap the cord
tightly around the appliance; keep it loosely coiled. Placing the lid on upsidedown for storage can help save space.
HELPFUL HINTS AND TIPS
RICE TIPS
• When measuring uncooked rice; do not use a standard 1 cup (8 fluid oz.)
measuring cup. A standard rice cup is / cup (5 fluid oz.); the same size as
the provided rice measuring cup. One / cup (5 fluid oz.) of dry rice will
yield approximately 1 cup (8 fluid oz.) of cooked rice.
• Rinse the rice with water to remove any excess starch and then drain.
• How to use the water markings
- Scoop in the desired amount of rice into the cooking bowl using the
10
Page 11

provided rice measuring cup.
- Fill the cooking bowl with water to the corresponding water marking, i.e.
for 1 rice cup, fill to the 1 cup water marking, etc.
• To reduce foaming, add a small amount of butter or oil to the water
before cooking.
• Kosher salt has no impurities and dissolves faster than table salt. If using
kosher salt, you may find you want to add a little more than if using table
salt. About ¾ tsp. of kosher salt is recommended for each rice cup (5 fluid
oz.) of uncooked rice.
• White rice can be stored in an airtight container in a cool dark place for
up to one year.
• Brown rice can be stored in an airtight container in a cool dark place for
up to six months. Refrigeration or freezing extends its shelf life.
• Try using broth, stock or reconstituted bouillon in place of water for
additional flavor. If you do, no additional salt may be necessary.
• Do not keep small amounts of rice in the warm cycle for extended periods
of time because it can dry out the rice.
• During cooking, a thin crust may develop on the rice at the bottom of the bowl.
If you do not like rice with a crust, you can easily peel it off and discard it.
• Taste/firmness will vary depending on the quality/type of rice used and
length of time it is cooked. For softer, fluffier rice, add a little more water.
For firmer rice, use less water.
• For other types of grains not listed in the cooking chart, follow package
directions.
CHART FOR RICE COOKING
If desired, add seasonings and oil or butter with rice before adding water.
AMOUNT OF RICE AMOUNT OF
WATER
APPROX.
COOKING TIME
YIELD
(standard
8 oz. cups)
FOR WHITE LONG GRAIN, JASMINE, BASMATI, YELLOW, OR MEDIUM GRAIN RICE
2 rice measures to 2 mark 21 to 26 minutes 3.5 cups
3 rice measures to 3 mark 23 to 28 minutes 5.3 cups
4 rice measures to 4 mark 25 to 30 minutes 7 cups
5 rice measures to 5 mark 27 to 32 minutes 8.8 cups
6 rice measures to 6 mark 29 to 34 minutes 10.5 cups
7 rice measures to 7 mark 31 to 36 minutes 12.3 cups
8 rice measures to 8 mark 33 to 38 minutes 14 cups
9 rice measures to 9 mark 35 to 40 minutes 15.8 cups
10 rice measures to 10 mark 37 to 42 minutes 17.5 cups
FOR BROWN RICE
11
Page 12

AMOUNT OF RICE AMOUNT OF
WATER
APPROX.
COOKING TIME
YIELD
(standard
8 oz. cups)
2 rice measures 3 cups 28 to 33 minutes 4.5 cups
3 rice measures 4 ½ cups 30 to 35 minutes 6.8 cups
4 rice measures 6 cups 32 to 37 minutes 9 cups
5 rice measures 7 ½ cups 34 to 39 minutes 11.3 cups
6 rice measures 9 cups 36 to 41 minutes 13.5 cups
7 rice measures 10 ½ cups 38 to 43 minutes 15.8 cups
8 rice measures 12 cups 40 to 45 minutes 18 cups
Note: As you experiment with different brands and types of rice, make note of
needed changes to directions and adjust accordingly in subsequent cooking
sessions.
ADDITIONAL USES FOR YOUR 6-IN-1 RICE AND RISOTTO COOKER
Packaged foods: condensed and ready to serve soups, pastas, and stews
• Do not fill the cooking bowl above the highest water marking cup level
on the cooking bowl.
• For even heating, stir occasionally.
• Always use a kitchen timer. Do not rely on the control switch on the cooker
since it is not intended to be an indicator of cooking time for soups and stews.
• Use only boneless meats and poultry that are cut into cubes no larger than 1 ½
inches. It is not necessary to brown the meats before cooking.
• When cooking rice or pasta in the soup, add additional liquid in the recipe.
• Since most frozen vegetables cook very quickly, it is best to add them at the
end of the cooking time. Stir them into the soup or stew and allow the mixture
to cook an additional 5 to 10 minutes.
• Choose recipes that will cook in 1 hour or less.
Oatmeal or Hot Cereals
• Steel Cut Oats work best.
• Do not fill bowl more than half way with liquids, as the oatmeal will
expand during the cooking process.
• For even heating, stir occasionally.
• When the oatmeal is done, the rice cooker will switch to warm.
Please note that this is for well-done oatmeal. If you prefer a different
consistency, monitor the cooking process to manually switch to warm for
desired results.
12
Page 13

• Choose recipes that will cook in 1 hour or less.
CHART FOR STEAMED VEGETABLES
Steam using 1 ½ to 2 cups of water, stock, or vegetable broth (cold or room
temperature).
VEGETABLE AMOUNT PREPARATION TIME SUGGESTIONS
Fresh
Asparagus
Fresh Green
Beans
Fresh Beets
(quartered)
Fresh Broccoli 1 lb. Cut into florets. 15 to 18
Brussels
Sprouts
Cabbage 1 lb. Cut in wedges. 24 to 26
Carrots 12 oz. Slice. 18 to 20
Cauliflower 12 oz. Cut into florets. 22 to 25
Corn 1 ½ lb. 2–4 ears. 20 to 22
Snow peas or
Sugar Snap
Peas
New potatoes
(red)
Fresh leaf
spinach
Butternut
squash
Summer
Squash
(yellow squash
or zucchini)
½ lb. Wash; break off
½ lb. Leave whole, trim
1 lb. (about
5 medium)
4 cups Cut a cross in the
8 oz. Trim and leave whole. 12 to 14
6 medium
(about 1 lb.)
4 cups
firmly
packed
1 lb. Peel and cut into
1 lb. Slice. 16 to 18
woody base where
spears snap easily.
end or cut into 2-inch
pieces.
Remove stem and
root ends. Peel and
cut into wedges.
base of each sprout.
Cut in half. 24 to 26
Use whole leaves. 10 to 15
1-inch cubes.
15 to 18
minutes
15 to 18
minutes
26 to 28
minutes
minutes
24 to 26
minutes
minutes
minutes
minutes
minutes
minutes
minutes
minutes
24 to 26
minutes
minutes
Season with
salt, pepper, and
grated lemon peel.
Season with salt,
pepper, and freshly
snipped dill.
Serve with butter.
Season with
salt, pepper, and
grated lemon peel.
Garnish with
chopped, toasted
hazelnuts.
Garnish with
crumbled, cooked
bacon.
Season with salt,
pepper, and grated
orange peel.
Garnish with
buttered, toasted
bread crumbs.
Serve with butter
and spices.
Serve with minced
green onions and
drizzled with soy
sauce.
Toss with butter
and parsley.
Garnish with
roasted garlic and
toasted pine nuts
Serve with butter
and spices.
Season with salt
and garlic pepper
13
Page 14

VEGETABLE AMOUNT PREPARATION TIME SUGGESTIONS
Frozen
Vegetables,
including
mixed
vegetables
such as
broccoli
medley,
broccoli
stir fry, and
pepper stir fry
Frozen peas 1 lb. Remove from bag. 14 to 16
10 oz. to 1 lb. Remove from bag
and season.
16 to 18
minutes
minutes
Stir in chopped,
fresh mint.
CHART FOR STEAMED FISH
Add 1 ½ cups water to rice cooking bowl. Add 1 lemon, thickly sliced, to water.
Season fish with lemon juice and Seafood Seasoning.
FISH AMOUNT PREPARATION TIME SUGGESTIONS
Salmon 1 ½ lbs. Fillets 20 to 22
Scallops 1 lb. Medium size 14 to 16
Snapper 1 lb. Whole, remove head
and tail
Shrimp 1 lb.
(20 to 24)
Swordfish 1 lb. 2 medium steaks 15 to 17
minutes
minutes
20 to 22
minutes
15 to 18
minutes
or until
shrimp
turn pink
minutes
Top with lemon
slices and snipped,
fresh dill.
Very tender;
serve with tartar
sauce and lemon
wedges.
Drizzle with garlic,
soy vinaigrette
Season with
Seafood
Seasoning and
lemon.
Very tender;
serve with tartar
sauce and lemon
wedges.
TROUBLESHOOTING
14
Page 15

PROBLEM POSSIBLE CAUSE SOLUTION
Some kernels of rice do
not seem fully cooked
Cooking bowl is not as
clean as I would like.
Rice boils over.
Rice is too dry.
Rice is gummy.
Risotto burns.
Risotto is gummy.
• The rice was not allowed
to finish cooking
• There was not enough
water in the cooking
bowl.
• Starch built up on sides
and bottom of the bowl.
• Too much rice is being
cooked.
• There is too much water
for the amount of rice.
• There is too much rice or
not enough water.
• There is too much water
or not enough rice.
• There’s not enough
liquid in the cooking
bowl.
• Too much liquid was
added all at once.
• Add a few more
tablespoons of water
and cook a little longer.
Press the Rice button
( ) again. Recheck
the rice when the
appliance switches back
to warm.
• Fill the bowl with
hot soapy water and
let stand for several
minutes; then use a
nylon scrubber along
sides and bottom.
Rinse well.
• Make sure to cook no
more than maximum
amount suggested in
this manual. The amount
of rice to be cooked
should match the water
markings on the bowl.
• Add a small amount
(1 Tbs.) of butter or oil to
water before cooking.
• Use the rice measuring
cup that comes with
the appliance. The rice
measure provided holds
/ cup (5 fluid oz.) of
uncooked rice.
• Add water to match
water markings on the
rice bowl. Make sure you
have the correct ratio of
/ cup (5 fluid oz) rice to
1 cup water marking.
• Add additional liquid
to the cooking bowl
and switch back to the
risotto cooking function.
• Follow the recipe
directions in the
Instruction Booklet for
adding liquid one cup
at a time. This will allow
the risotto to cook to the
perfect consistency.
15
Page 16

RECIPES
TASTY TUSCAN SOUP WITH KALE
Prep Time: 15 min.
Cook Time: 6 hours
Makes: 8 (1cup) servings
Ingredients
1 lb. Italian sausage
1 medium onion, chopped
2 cans (15 oz. each) cannellini
beans, drained and rinsed
2 cans (14 oz. each) diced
tomatoes
Directions
Place Italian sausage and onion into the cooking bowl. Press the SAUTE
button. Cook and stir 8 to 10 minutes or until meat is cooked and onion is
tender. Remove bowl from base; discard drippings from pan.
Add remaining ingredients to cooking bowl; stir to combine.
Cook, covered on SLOW COOK setting 5 to 6 hours.
TIP: Serve with a crisp side salad and Italian bread.
2 cans (14 oz. each) chicken broth
1/4 cup Parmesan cheese
6 cups loosely packed chopped
fresh kale
UDON NOODLE SALAD
Prep Time: 15 min., plus refrigeration
Cook Time: 10 min.
Makes: 8 (1 cup) servings
Ingredients
1 pkg. (11 oz.) dry Udon noodles
1/4 cup sesame oil
1/3 cup honey
1/3 cup soy sauce
Directions
Fill cooking pot with water. Press PASTA button ( ) and bring water to a boil.
Place noodles in pasta basket; cook 10 minutes or until tender. Drain and rinse
with cold water.
Combine cooked noodles, pea pods and shrimp in medium bowl; set aside.
Mix oil, honey, soy sauce and Sriracha sauce in small bowl. Pour over noodle
mixture; toss to coat.
Cover; refrigerate at least 2 hours to allow flavors to blend.
1 Tbsp. Sirracha sauce
6 oz. peapods
6 oz. small cooked salad shrimp
(51–70 ct.)
16
Page 17

MUSHROOM RISOTTO
Prep Time: 15
Cook Time: 30
Makes: 8 (1/2 cup) servings
Ingredients
2 Tbsp. olive oil
1 (8 oz.) pkg. sliced Portobello
mushrooms
1/2 cup diced shallots
2 Tbsp. butter, divided
3/4 cups Arborio rice
1/4 cup dry white wine
Directions
Press the sauté button ( ) and add olive oil; heat 2 to 3 min with the lid on.
Add mushrooms and shallots; cook and manually stir 3 min. or until softened.
Remove from cooking bowl; set aside.
Attach the stirring arm over the prongs on the drive shaft in the base of the
cooking bowl. Switch to the risotto button ( ) and melt 1 Tbsp. butter in the
cooking bowl. Add rice. Cook with stirring arm in place 5 min. or until rice
is light, golden brown in color. Add wine and continue cooking until wine is
absorbed.
Add 1 cup chicken broth; cook until absorbed. Continue adding broth 1 cup at
a time, until liquid is absorbed and the rice is al dente, about 30 min.
Add mushrooms, remaining butter and Parmesan cheese. Cook and stir 1 to 2
minutes to combine.
3 cups chicken broth
1/4 cup fresh grated Parmesan
cheese
Fresh ground sea salt and
black pepper to taste
17
Page 18

WARRANTY INFORMATION
For service, repair or any questions regarding your appliance, call the
appropriate 800 number listed within this section. Please DO NOT return
the product to the place of purchase. Also, please DO NOT mail product
back to manufacturer, nor bring it to a service center. You may also want to
consult the website listed on the cover of this manual.
Two-Year Limited Warranty
(Applies only in the United States and Canada)
What does it cover?
• Any defect in material or workmanship provided; however, Spectrum Brands,
Inc.’s liability will not exceed the purchase price of product.
For how long?
• Two years from the date of original purchase with proof of purchase.
What will we do to help you?
• Provide you with a reasonably similar replacement product that is either new or
factory refurbished.
How do you get service?
• Save your receipt as proof of date of sale.
• Visit the online service website at www.prodprotect.com/applica, or call toll-free
1-800-231-9786, for general warranty service.
• If you need parts or accessories, please call 1-800 -738-0245.
What does your warranty not cover?
• Damage from commercial use
• Damage from misuse, abuse or neglect
• Products that have been modified in any way
• Products used or serviced outside the country of purchase
• Glass parts and other accessory items that are packed with the unit
• Shipping and handling costs associated with the replacement of the unit
• Consequential or incidental damages (Please note, however, that some states do
not allow the exclusion or limitation of consequential or incidental damages, so
this limitation may not apply to you.)
How does state law relate to this warranty?
• This warranty gives you specific legal rights. You may also have other rights that
vary from state to state or province to province.
18
Page 19

Merci Pour votre Achat!
Inscription en ligne a
www.prodproduct.com/applica
Évaluez et Examiner vos produits
Partagez vos photos et histoires avec nous en ligne
Si vous avez des questions ou des préoccupations avec votre
nouveau produit , s’il vous plaît communiquer avec notre service
à la clientèle au 1-800-231-9786 ( États-Unis et Canada). S’il vous
plaît ne pas retourner au magasin
19
Page 20

S’IL VOUS PLAIT LIRE ET CONSERVER
CE LIVRE D’UTILISATION ET DE
Lorsque vous utilisez des appareils électriques, des précautions de base devraient
toujours être suivie pour réduire le risque d’incendie, de choc électrique et / ou des
blessures, y compris les suivantes:
• Lisez toutes les instructions
• Ne pas toucher les surfaces chaudes.
Utilisez des maniques lorsque vous
retirez le bol ou le panier de cuisson à
vapeur des pâtes car ils seront chauds
• Pour protéger contre les chocs
électriques, ne pas immerger le
cordon, la fiche ou unité de base
dans l’eau ou tout autre liquide
• Une surveillance étroite est nécessaire
lorsque tout appareil est utilisé par ou
à proximité d’enfants
• Débrancher L’appareil lorsqu’elle n’est
pas en usage et avant le nettoyage,
Laisser refroidir avant d’enlever les
pièces
• Ne pas faire fonctionner l’appareil avec
un cordon ou une fiche endommagé,
ou lorsque l’appareil fonctionne mal ou
été endommagé. Contactez le support
à la clientèle au numéro sans frais
figurant dans la section de garantie
• L’utilisation d’accessoires non
recommandé par le fabricant de
l’appareil peut causer des blessures
• Ne pas utiliser à l’extérieur
• Ne pas laisser le cordon pendre de la
table ou du comptoir, ni toucher des
surfaces chaudes
• Ne pas placer sur ou près d’un brûleur
à gaz ou électrique, ou dans un four
chauffé
• Une extrême prudence doit être
utilisée pour déplacer un appareil
contenant de la nourriture chaude,
d’eau ou d’autres liquides chauds
• Pour déconnecter ; appuyez sur le
bouton d’annulation, puis retirez la
fiche de la prise
• Ne pas utiliser l’appareil à d’autres fins
que celles prévues
• Pour éviter le risque de choc
électrique, ne pas cuire directement
dans la base de cuisson. Cuire
seulement dans le bol de cuisson
fourni.
• Cet appareil n’a pas destiné à être
utilisé par des personnes (y compris
les enfants) ayant un handicap
physique réduit, sensorielles
ou mentales, ayant un manque
d’expérience et de connaissances, à
moins qu’ils seront sous surveillance ou
apprennent les instructions concernant
l’utilisation de l’appareil par une
personne responsable de leur sécurité
• Lorsque vous utilisez l’appareil, fournir
un espace de circulation d’air adéquate
ci-dessus et sur tous les côtés
• L’appareil ne doit pas être fonctionné
au moyen d’une horloge externe ou
un système de commande à distance
séparé.
• Ne pas utiliser cet appareil sur un
Surface instable
• Ne pas tenter de réchauffer ou cuire
des articles non alimentaires dans cet
appareil
• Les enfants doivent être surveillés pour
• Veuiller à ce qu’ils ne jouent pas avec
l’appareil
• Garanties supplémentaires :
• Cet appareil génère de la chaleur et de
la vapeur pendant l’utilisation. Soulevez
le couvercle en verre avec soin pour
éviter les brûlures, et permettre à l’eau
de dégoutter dans le bol de cuisson.
• Ne jamais utiliser le bol de cuisson
sur une plaque de cuisson gaz ou
électrique ou sur une flamme nue.
• Ne pas couper les aliments
directement dans le bol de cuisson
pour éviter les rayures
• Cet appareil n’est pas destiné à la
friture des aliments.
20
Page 21

CONSERVER SES INSTRUCTIONS
Ce produit est destiné uniquement à un usage domestique
FICHE POLARISÉE (Modèles de 120 V seulement)
Cet appareil possède une fiche polarisée (une lame est plus large que l’autre). Pour
réduire le risque de choc électrique, cette fiche est conçue pour entrer dans une prise
polarisée que dans un sens. Si la fiche ne rentre pas complètement dans la prise,
inverser la fiche. Si elle ne rentre toujours pas, contactez un électricien qualifié. Ne pas
tenter de modifier la fiche en aucune façon.
VIS INDESSERRABLE
Attention: Cet appareil est équipé d’une vis inviolable pour empêcher le retrait de la
couverture extérieure. Pour réduire le risque d’incendie ou de choc électrique, ne pas
tenter de retirer le couvercle extérieur. Il n’y a aucune pièce réparable par l’utilisateur.
La réparation doit être effectuée uniquement par le personnel de service autorisé.
Pour le service, la réparation ou des questions au sujet de votre appareil, s’il vous
plaît communiquer avec notre service à la clientèle au 1-800-231-9786 (États-Unis et
Canada)
CORDON ÉLECTRIQUE
1. Un cordon d’alimentation court est fourni pour réduire le risque de l’enchevêtrement
ou de trébuchement sur un long cordon
2. les cordons d’alimentation amovible ou des rallonges sont disponibles et peuvent être
utilisés avec précaution
3. Si un long cordon ou de l’extension d’alimentation cordon détachable est utilisé :
a) La puissance électrique indiquée sur le cordon d’alimentation ou la rallonge devrait
être au moins aussi grande que la puissance électrique de l’appareil.
b) Le cordon plus long devra être placé de sorte qu’il ne soit pas étalé sur le comptoir
ou la table où il pourrait être tiré par des enfants ou faire trébucher
Remarque: Si le cordon d’alimentation est endommagé, s’il vous plaît contacter le
service de garantie inclus dans ces instructions.
as great as the electrical rating of the appliance.
21
Page 22

CONNAÎTRE VOTRE
6-en - 1 RIZ ET RICOTTO CUISSEUR
1
2
3
4
5
1. Couvercle en verre trempé
(Part# RCR520-01)
2. Bras de brassage
(Part# RCR520-04)
3. Bol the cuisson
(Part # RCR520-03 )
4. Unité de base
5. Panneau de contrôle
6
7
8
6. Panier de Cuisson
à la vapeur pour les Pâtes
(Part # RCR520-02)
7. Tasse de mesurer
le riz (Part # RC514-04
8. Cuillère de service
(Part # RC514-05)
9. Range-Cordon
(en bas de l’unité de base)
Le produit peut différer légèrement de ce qui est illustré.
22
Page 23

EN COMMENCE
Cet appareil est destiné uniquement à un usage domestique
• Retirez tous les matériaux d’emballage, des autocollants, et la bande de
plastique autour de la prise d’alimentation
• S’il vous plaît enregistrer votre garantie r à www.prodprotect.com/applica
• Laver toutes les pièces amovibles en suivant les SOINS DE NETTOYAGE.
• Placer le bol de cuisson propre et sec dans la base de cuisson
• Choisissez un endroit où cet appareil doit être utilisé. Placez l’appareil sur
une surface stable, résistant à la chaleur, loin de tissus, de liquides et d’autres
matériaux inflammables. Veuiller à ce que l’unité a suffisamment d’espace tout
autour et au-dessus pour permettre à la chaleur de circuler sans endommager
les armoires ou les murs
RENSEIGNEMENTS IMPORTANTS SUR VOTRE APPAREIL
• Cette cuisinière devient chaud. Lors de l’utilisation, utilisez toujours des
maniques pour toucher les pièces de l’appareil
• Durant les premières minutes d’utilisation, vous remarquerez peut-être de la
fumée et une légère odeur. Cela est causé par l’huile qui peut avoir été utilisée
lors de la fabrication de l’unité et ne sera pas influencer la performance.
• Pour passer aux différentes fonctions de l’appareil, vous devez être dans le
mode annulé. Le voyant lumineux bleu clignote au-dessus de la fonction
chaud / annuler. L’appareil est alors en mode annuler et vous serez en mesur
de passer à une autre fonction
• Comme la plupart des repas cuire, la vapeur s’échappe par l’évent du couve-
cle. Placer le couvercle de verre sur le bol de cuisson pour que l’évacuation de
vapeur n’endommage pas les armoires et les murs. Ne placez pas la main sur
l’évent de vapeur pendant la cuisson du riz, la vapeur chaude peut vous brûle
• Utilisez la cuillère en plastique fourni pour enlever et servir la nourriture et
une cuillère en bois pour remuer. Ne pas utiliser des ustensiles en métal qui
peuvent rayer le bol de cuisson antiadhésive
• Ne pas remplir le bol de cuisson plus élevé que le niveau maximum du ma
quage de l’eau
UTILISER VOTRE 6-en-1 RIZ ET RISOTTO COCOTTE
Il ya six façons d’utiliser votre Riz et Risotto Cocotte; Cuisson directement
dans le bol de cuisson ( le riz, la farine d’avoine et plus ) , Préparer de pâtes
à la vapeur avec le panier à vapeur disponible, sautés dans le bol de cuisson,
faire le Risotto en utilisant le bras de brassage , ou une cuisson lente (réglage
haute). Indications pour chaque recette sont décrites ci-dessous:
CUIRE LE RIZ
1. Branchez l’appareil. Le voyant lumineux bleu clignote au-dessus du bouton
chaud / annuler ( ). L’appareil restera dans la fonction annuler jusqu’à le
bouton de Riz ( ) est pressé
2.Placer le bol de cuisson dans la base de cuisson. Utiliser la mesure de riz
fourni avec l’appareil pour mesurer la quantité souhaitée du riz (pas plus
de 10 mesures de riz). Remplissez le bol de cuisson avec de l’eau, pour
le marquage d’eau adéquate, 1 tasse de riz correspond à 1 tasse d’eau de
23
Page 24

marquage.
Remarque: N’utiliser pas une tasse de mesure standard. Une mesure
de riz détient environ 2/3 tasse, ce qui donne environ 1 tasse de riz cuit
3.Placez le couvercle sur le bol de cuisson et
appuyez sur le bouton de riz ( ). (A) Le voyant
lumineux de cuisson au-dessus du bouton de riz
( ) sera allumé en bleu et la cuisson commence.
4. PENDANT LA CUISSON DU RIZ, dès qu’il est
prêt, le riz se repose pour 8-10 minutes avant
de passer à garder au chaud afin de garder la
texture et la saveur optimale. Après 8-10 minutes,
l’indicateur Lumineux bleu sera éteint e et la
lumière bleu au-dessus du bouton de garder au
chaud / annulation s’allume, indiquant que l’appareil
est passé à la fonction chaud. Le voyant lumineux
chaud restera allumé jusqu’à ce que l’appareil soit débranché. Le bol
de cuisson peut être chaud. Toujours utiliser des maniques lorsque vous
retirez bol.
LORS DE LA CUISSON DES SOUPES ET RAGOÛTS:
Utilisez une minuterie de cuisine pour déterminer le temps de cuisson, pour
ce type d’aliments, l’appareil ne passera pas au mode garder au chaud
lorsque le cycle de cuisson est terminé. Vous pouvez basculer manuellement
l’appareil au mode chaud en poussant le bouton chaud / annuler ( ) deux
fois. Lorsque la lumière bleu est allumée, l’unité est donc au mode garder
au chaud. Le bol de cuisson peut être chaud. Toujours utiliser des maniques
lorsque vous retirez bol.
A
5. Débranchez l’appareil à la fin de l’utilisation. Toujours laisser refroidir
complètement avant de le nettoyer
SAUTER
1. Branchez l’appareil ; le voyant lumineux bleu clignote au-dessus du
bouton chaud / annuler ( ). L’appareil restera dans la fonction annuler
jusqu’à ce que le bouton sauter ( ) soit pressé. Placer le bol de cuisson
dans la base de cuisson
2. Appuyez sur le bouton de sauter ( ). Le voyant de cuisson au-dessus
du bouton de sauter ( ) s’allumera en bleu et la cuisson commence.
3. Placez le couvercle sur le bol de cuisson et préchauffer pendant environ
3-6 minutes (A)
4. Une fois préchauffé, ajoutez la nourriture et les liquides nécessaires dans
le bol de cuisson pour faire sauter. Remuer manuellement si nécessaire pour
assurer les résultats souhaités
Remarque: Ne pas utiliser des ustensiles en métal car il pourrait rayer la
finition antiadhésive
5. Lorsque vous terminez de sauter les aliments, soit poursuivre la cuisson
avec les Instructions inclus dans la section “ Conseils” ou mets l’appareil au
mode garder au chaud en appuyant sur le bouton chaude / annuler deux
fois. Lorsque la lumière est bleu, l’unité est dans le mode garder au chaud.
24
Page 25

Le bol de cuisson peut être chaud. Toujours utiliser des maniques lorsque
vous retirez bol
6. Débranchez l’appareil à la fin de l’utilisation. Toujours laisser refroidir
complètement avant de le nettoyer
PÂTES
1. Branchez l’appareil ; le voyant lumineux bleu
clignote au-dessus du bouton chaud / annuler
( ). L’appareil restera dans la fonction
annuler jusqu’à ce que le bouton pâtes ( )
soit pressé.
2. Remplissez le bol de cuisson avec de l’eau,
jusqu’à la marque 9 tasse et le placer dans la
base de cuisson. Ensuite, placer le panier de
pâtes dans le bol de cuisson. (B)
3. Appuyez sur le bouton de pâtes ( ). Le voyant de
cuisson au-dessus du bouton de pâtes ( ) s’allumera en bleu et le
réchauffage commencera.
4. En Gardant le couvercle, attend que l’eau sera en ébullition. Ajouter
jusqu’à 8 onces de pâtes dans le panier
5. Cuire les pâtes sans couvercle, selon les instructions du paquet.
Une fois les pâtes soient cuites à la consistance désirée, utiliser des
serviettes pour retirer le panier de pâtes et éliminer l’eau
6. Quand la cuisson des pâtes est fait, appuyez sur le bouton chaude
/ annuler ( ) une fois. Lorsque la lumière bleu clignote, l’unité
va arrêter la cuisson. Les poignées du panier peuvent être chaud.
Toujours utiliser des maniques lorsque vous retirez le panier.
7. Débranchez l’appareil à la fin de l’utilisation. Toujours laisser refroidir
complètement avant de le nettoyer
LA FONCTION DES PÂTES AU VAPEUR
1. Branchez l’appareil ; le voyant lumineux bleu clignote au-dessus du
bouton chaud / annuler ( ). L’appareil restera dans la fonction
annuler jusqu’à ce que le bouton pâtes ( ) soit pressé
2. Remplissez le bol de cuisson avec 1 1/2 tasses d’eau et le placer dans
la base de la cuisson.
3. Placez les aliments que vous voulez cuire à la vapeur dans le panier
à pâte et mettre le panier à l’intérieur du bol de cuisson. (B) Le niveau
de l’eau dans le bol de cuisson ne doit pas toucher le panier. Couvrir
avec le couvercle
Remarque: Toujours garder le couvercle sur le panier
4. Appuyez sur le bouton de pâtes ( ). Le voyant de cuisson au-dessus
du bouton de pâtes ( ) s’allumera et le chauffage commencera
5. Le temps de cuisson au vapeur varient entre les légumes et les autres
types d’aliments, vérifier la cuisson après 5 minutes. Utiliser le graphique du
temps pour la cuisson à vapeur dans le livre d’instruction supplémentaire
Remarque: Lors de cuisson à vapeur des légumes ou d’autres aliments autre
que le riz dans le bol de cuisson, l’appareil ne passe pas automatiquement à
mode garder au chaud
B
25
Page 26

6. Lorsque la cuisson à vapeur est fait (s’il n’ya pas le riz) appuyez sur le
bouton chaude / Annuler ( ) une fois. Lorsque la lumière bleu
clignote,
l’unité va arrêter la cuisson. Les poignées de
panier à pâtes peuvent être chauds. Toujours
utiliser des maniques lorsque vous retirez
le panier
7. Débranchez l’appareil à la fin de l’utilisation.
Toujours laisser refroidir complètement avant
de le nettoyer
RISOTTO
1. Branchez l’appareil, le voyant lumineux bleu
clignote au-dessus du bouton chaud / annuler
( ). L’appareil restera dans la fonction annuler
jusqu’à ce que le bouton Risottos ( ) soit pressé
2. Placer le bol de cuisson dans la base de cuisson.
Monter le bras d’agitation sur les tiges dans le fond de bol de cuisson. (C)
3. Appuyez sur le bouton de risotto ( ). Le voyant de cuisson au-dessus du
bouton de risotto ( ) s’allumera en bleu et l’appareil commence à se
réchauffer. Le bras d’agitation commence à tourner après environ 5
secondes. Le bras d’agitation continue à se tourner pendant tout le
processus de cuisson. Le cycle d’agitation créer une meilleure cohérence
de Risotto.
4. Placez le couvercle sur le bol de cuisson, et laisser le cuiseur à riz se
réchauffe pendant environ 3-6 minutes
5. Une fois préchauffé, ajouter des ingrédients (Arborio, l’oignon, l’ail,
etc.) et tout liquide nécessaire. Cuire selon les recettes ou les instructions
sur l’emballage
Remarque: Une recette de Risotto est fournie dans la
section des recettes
de ce livret.
6. Placez le couvercle sur la base de cuisson
et laisser le bras d’agitation faire cuire le risotto.
7. Une fois le risotto est cuit, l’indicateur bleu
s’éteint et la lumière bleue s’allume audessus
du bouton chaud / annuler ( ).
L’indicateur chaud restera allumer jusqu’à
ce que l’appareil soit débranché. Le bol
de cuisson peut être chaud. Toujours utiliser
des maniques lorsque vous retirez bol.
8. Débranchez l’appareil à la fin de l’utilisation.
Toujours laisser refroidir complètement avant
de le nettoyer
C
D
CUISSON LENTE
1. Branchez l’appareil, le voyant lumineux bleu clignote au-dessus du
bouton chaud / annuler ( ). L’appareil restera dans la fonction annuler
jusqu’à ce que le bouton cuisson lente ( ) soit pressé
26
Page 27

2. Placez le bol de cuisson dans la base de cuisson et de remplir avec les
ingrédients désiré (D) Ne pas remplir au-dessus du marquage de 9
tasses
3. Appuyez sur le bouton de cuisson lente ( ). Le voyant de cuisson
au-dessus du bouton de cuisson lente ( ) sera allumé en bleu et l’unité
va commencer la cuisson.
Remarque: La fonction de cuisson lente est un réglage élevé et cuire les
aliments plus vite Qu’’un réglage normal
4. La fonction de cuisson lente va cuire les aliments jusqu’à 8 heures avant
que l’appareil passe à garder au chaud. Si votre recette demande
moins de temps, basculer manuellement l’appareil pour garder au chaud
en appuyant sur le bouton chaude / annuler ( ) deux fois.
Quand la lumière bleue est allumée, l’unité est donc dans le mode
garder au chaud. Le bol de cuisson peut être chaud. Toujours
utiliser des maniques lorsque vous retirez bol
5. Débranchez l’appareil à la fin de l’utilisation. Toujours laisser refroidir
complètement avant de le nettoyer
NETTOYAGE ET ENTRETIEN
Ce produit ne contient aucune pièce réparable par l’utilisateur.
Reportez-vous au personnel de maintenance qualifié.
NETTOYAGE
Important: Ne jamais immerger la base de cuisson dans de l’eau ou d’autres
liquides.
1. Toujours débrancher l’appareil et laisser refroidir complètement avant
de le nettoyer.
2. Laver bol de cuisson et le couvercle de verre dans l’eau chaude
savonneuse. Si des ingrédients restent dans le bol de cuisson ou le bras
d’agitation, remplir le bol avec de l’eau chaude savonneuse et laisser
tremper avant de le nettoyer avec un tampon à récurer en plastique
Remarque: Le bol de cuisson, couvercle en verre, panier à vapeur des
pâtes, et le bras d’agitation vont au lave-vaisselle.
3. Essuyez l’intérieur et l’extérieur de la base de cuisson avec un chiffon
doux, légèrement humide ou une éponge. Ne jamais utiliser de
nettoyants abrasifs ou de tampons à récurer pour nettoyer la base de
cuisson, car ils peuvent endommager les surfaces.
4. Laisser sécher complètement avant de le ranger
STOCKAGE
Assurez-vous que l’appareil est bien froid et sec. Ne jamais enrouler le cordon
serré autour de l’appareil; garder enroulé de façon libre. Placer le couvercle
sur l’envers pour aider à économiser de l’espace.
CONSEILS UTILES
CONSEILS DE RIZ
• Lors de la mesure du riz non cuit ; ne pas utiliser 1 tasse de mesure
normale ( 8 fluide once ) . Une tasse de riz est la norme 2/3 tasse ( 5
27
Page 28

fluide once ) ; la même taille que la tasse de mesure de riz inclue dans
l’appareil . Un 2/3 tasse ( 5 fluide oz ) de riz sec donnera environ 1 tasse
( 8 fluide oz ) de riz cuit
• Rincer le riz avec de l’eau pour enlever tout l’amidon en excès et puis les
égoutter
• Comment utiliser les marques d’eau
• Mets la quantité désirée de riz dans le bol de cuisson en utilisant le
gobelet de mesure de riz fourni avec l’appareil
• Remplissez le bol de cuisson avec de l’eau jusqu’à le marquage d’eau
correspondant, pour 1 tasse de riz, remplir jusqu’à le marquage d’une
tasse d’eau, etc.
• Pour réduire le mousse, ajouter une petite quantité de beurre ou de l’huile
à l’eau avant la cuisson
• Le sel Kosher n’a pas d’impuretés et se dissolve plus rapidement que le
sel de table. Si vous utilisez du sel Kosher , vous devrez ajouter un peu
plus . environ ¾ cuillère de sel Kosher est recommandé pour chaque
tasse de riz non cuit (5 fluide oz )
• Le riz blanc peut être conserver dans un récipient hermétique dans un
endroit frais et sombre pour un maximum d’une année
• Le riz brun peut être conserver dans un récipient hermétique dans un
endroit frais et sombre pour un maximum de six mois. Le réfrigérateur ou
le congélateur prolonge sa durée de vie
• Essayez d’utiliser le bouillon à la place de l’eau pour une saveur
supplémentaire. Si vous le faites, n’ajouter pas de sel supplémentaire
• Ne pas garder une petite quantité de riz dans le cycle chaud pendant des
périodes prolongées, car il peut sécher le riz
• Pendant la cuisson, une mince croûte peut se développer sur le fond
de la cuvette. Si vous n ‘aimez pas le riz avec une croûte, vous pouvez
facilement la retirer et la jeter.
• Le goût / fermeté varie en fonction de la qualité / le type de riz utilisé et
la durée de la cuisson. Pour un riz doux et velouté, ajouter un peu plus
d’eau .Pour un riz plus ferme, utiliser moins d’eau
• Pour les autres types de grains de riz qui ne figurent pas dans le tableau
de cuisson, suivre les indications de l’emballage.
GRAPHIQUE POUR LA CUISSON DU RIZ
Si désiré, ajouter des assaisonnements et huile ou de beurre avec du riz avant
d’ajouter l’eau.
QUANTITÉ
DU RIZ
POUR LE RIZ BLANC LONG GRAIN, JASMINE, BASMATI, JAUNE OU GRAIN MEDIUM
2 mesures de riz 2 marque 21 à 26 minutes 3.5 tasses
3 mesures de riz 3 marque 23 à 28 minutes 5.3 tasses
NIVEAU
D’EAU
TEMPS
DE CUISSON
APPROX.
28
RENDEMENT
(standard
8 oz.
tasses)
Page 29

QUANTITÉ
DU RIZ
4 mesures de riz 4 marque 25 à 30 minutes 7 tasses
5 mesures de riz 5 marque 27 à 32 minutes 8.8 tasses
6 mesures de riz 6 marque 29 à 34 minutes 10.5 tasses
7 mesures de riz 7 marque 31 à 36 minutes 12.3 tasses
8 mesures de riz 8 marque 33 à 38 minutes 14 tasses
9 mesures de riz 9 marque 35 à 40 minutes 15.8 tasses
10 mesures de riz 10 marque 37 à 42 minutes 17.5 tasses
POUR LE RIZ BRUN
2 mesures de riz 3 tasses 28 à 33 minutes 4.5 tasses
3 mesures de riz 4 ½ tasses 30 à 35 minutes 6.8 tasses
4 mesures de riz 6 tasses 32 à 37 minutes 9 tasses
5 mesures de riz 7 ½ tasses 34 à 39 minutes 11.3 tasses
6 mesures de riz 9 tasses 36 à 41 minutes 13.5 tasses
NIVEAU
D’EAU
TEMPS
DE CUISSON
APPROX.
RENDEMENT
(standard
8 oz.
tasses)
7 mesures de riz 10 ½ tasses 38 à 43 minutes 15.8 tasses
8 mesures de riz 12 tasses 40 à 45 minutes 18 tasses
Remarque: Comme vous vous expérimentez avec différentes marques
et types de riz, prenez note des changements nécessaires pour les directions
et ajuster en conséquence à des séances de cuisine ultérieures.
UTILISATIONS SUPPLEMENTAIRES POUR VOTRE 6-EN - 1 RIZ
ET RISOTTO COCOTTE
Les aliments emballés: Les Soupes, les pâtes et les ragoûts condensés et
prêts à servir
• Ne pas remplir le bol de cuisson au-dessus du plus haut niveau de marquage
d’eau
• Pour un chauffage complet, remuer de temps en temps
• Toujours utiliser une minuterie de cuisine. Ne comptez pas sur le
commutateur de commande sur l’appareil, car il ne vise pas à être un
indicateur de temps pour les soupes et les ragoûts.
• Utilisez uniquement des viandes désossées et des volailles qui sont coupés
29
Page 30

en cubes de 1 ½ pouces. Il n’est pas nécessaire de faire dorer les viandes
avant de les cuire
• Lors de la cuisson du riz ou des pâtes dans la soupe, ajouter du liquide
supplémentaire dans la recette
• Comme la plupart des légumes surgelés se cuisent très rapidement, il
est préférable de les ajouter à la fin du temps de cuisson. Remuez après
la soupe ou le ragoût et laisser le mélange se faire cuire 5 à 10 minutes
supplémentaires
• Choisissez des recettes qui prennent au maximum 1 heure de cuisso
Avoine ou céréales chaudes
• L’Avoine couper fonctionnent le mieux
• Ne pas remplir le bol plus que la moitié avec des liquides, la farine
d’avoine va étendre au cours du processus de cuisson
• Pour un chauffage complet, remuer de temps en temps.
• Lorsque la farine d’avoine est cuite, l ;appareil passe au fonction garder au
chaud.
• Cela pour une farine d’avoine bien fait. Si vous préférez une consistance
différente, surveiller le processus de cuisson pour passer manuellement à
la fonction de garder au chaud
• Choisissez des recettes qui prennent au maximum 1 heure de cuisson
GRAPHIQUE POUR LÉGUMES À LA VAPEUR
Steam using 1 ½ to 2 cups of water, stock, or vegetable broth (cold or room
temperature).
VEGETABLE AMOUNT PREPARATION TIME SUGGESTIONS
Asperges
Frais
Haricots Vert
Frais
Betteraves
fraîches
(quartiers)
Brocoli frais 1 lb. Couper en petits
Choux de
Bruxelles
½ lb. Laver Bien, découper
½ lb. Laisser entier,
1 lb. (about
5 medium)
4 tasses Cut a cross in the
la partie dure qui est
en bas
éliminer les 2
boues ou coupé en
morceaux
de 2 pouces
Retirer la tige et
extrémités. peler et
coupé en quartiers
bouquets
base of each sprout.
30
15 to 18
minutes
15 to 18
minutes
26 to 28
minutes
15 to 18
minutes
24 to 26
minutes
Assaisonner
avec sel, poivre,
et zeste de citron
râpé
Assaisonner avec
le sel, poivre, Anise
ciselée fraîche
Servir avec
du beurre
Assaisonner avec
sel, poivre, et
zeste de citron
râpé.
Garnir avec des
noisettes grillé
et haché
Page 31

VEGETABLE AMOUNT PREPARATION TIME SUGGESTIONS
Chou 1 lb. Tranche 24 to 26
Carottes 12 oz. Tranche 18 a 20
Chou-fleur 12 oz. Couper en bouquets 22 a 25
Maïs 1 ½ Lb 2-4 épis 20 a 22
Petit pois 8 oz Couper les extrémités
pommes de
terre fraiches
(rouge)
feuilles
fraîches des
épinards
Courge Jaune
ou courgette
Le légume
congelé
comprenant
les légumes
mixtes comme
brocoli sautés,
et les poivres
sautés
Petits pois
surgelés
6 moyens
(environ 1
lb)
1 lb. Peler et coupée
1 lb. Coupée en Tranche 16 to 18
10 oz. to 1 lb. Retirer du sac
1 lb. Retirer du sac 14 to 16
et laisse entière
Coupé en deux 24 a 26
en cube
et la saisonner
minutes
minutes
minutes
minutes
12 a 14
minutes
minutes
24 to 26
minutes
minutes
16 to 18
minutes
minutes
Assaisonner avec
le sel, poivre, et
le zeste d’orange
râpée
Season with salt,
pepper, and grated
orange peel.
Garnish with
buttered, toasted
bread crumbs.
Serve with butter
and spices.
Servir avec des
oignons verts
émincé et arrosé
avec la sauce du
soja
Mélanger avec du
beurre et du persil
Servir avec du
beurre et d'épices
Assaisonner avec
le sel, le poivre
et l’ail
Incorporer dans
la menthe fraîche
haché
GRAPHIQUE POUR POISSON À LA VAPEUR
POISSON QUAN-
TITÉ
Saumon 1 ½ lbs. Filets 20 to 22
PRÉPARATION
TEMPS DE
CONSEILS
CUISSON
minutes
31
Assaisonner avec
du citron Tranches
et Anise ciselée
fraîche.
Page 32

POISSON QUAN-
TITÉ
Escalope 1 lb. Taille moyenne 14 to 16
Snapper 1 lb. Entière, retirer
Crevette 1 lb.
(20 to 24)
PRÉPARATION
la tête et la
queue
TEMPS DE
CUISSON
minutes
20 to 22
minutes
15 à 18
Minutes, ou
jusqu’à ce que
les crevettes
Deviennent
roses
CONSEILS
Très tendre; servir
avec la sauce
du tartre et des
tranches de citron
Arroser avec de
l’ail et vinaigrette
au soya
Ajouter un
assaisonnement
de Fruit de mer
et le citron.
Espadon 1 lb. 2 steaks
moyens
15 to 17
minutes
Très tendre; servir
avec la sauce
du tartre et des
tranches de citron
RESOLUTION DU PROBLÈME
PROBLÈME LA CAUSE LA SOLUTION
Quelques grains de riz
ne sont pas entièrement cuit
Bol de cuisson n’est
pas aussi propre
qu’il le faut
Riz surcuit
•Le riz n’a pas terminé
la cuisson.
• Il n’y avait pas assez
d’eau Dans le bol de
cuisson
• Une couche d’Amidon
construit sur les côtés
et le fond du bol
• Trop de riz est utiliser
• Il ya trop d’eau pour la
quantité de riz utiliser
• Ajouter quelques
cuillères à soupe d’eau
et appuyez sur le bouton
marche de nouveau.
Vérifiez le riz lorsque
l’appareil repasse au
mode garder au chaud
•Remplissez le bol avec
l’eau chaude savonneuse
et laisser reposer pendant
plusieurs minutes; puis
utiliser un laveur de nylon
long et frotter les côtés
et le fond. Bien rincer à
la fin
• Assurez-vous de ne pas
dépasser la quantité
maximale suggérée dans
ce manuel.
• La quantité de riz à cuire
doit correspondre aux
marques d’eau sur le bol.
32
Page 33

PROBLÈME LA CAUSE LA SOLUTION
Le riz est trop sec
• l ya trop de riz ou pas
assez d’eau
• Utilisez la tasse à mesurer
de riz qui vient avec
l’appareil. Cette tasse
correspond à 2/3 tasse
régulière (5 oz fluide) de riz
non cuit.
Le riz est collé.
Risotto Brûlé
• Il ya trop d’eau ou pas
assez de riz.
•Il n’y a pas assez des
liquides dans le bol de
cuisson
• Ajouter de l’eau qui
correspond aux marques
d’eau sur le bol de riz.
Assurez-vous que vous
que pour 2/3 tasse (5
fluide oz) de riz
correspond à 1 tasse
d’eau de marquage.
•Ajouter des liquides
supplémentaires dans le bol
de cuisson et appuyer sur la
Botton Risotto cuisson
DES RECETTES
SAVOUREUX TOSCANE SOUPE AVEC CHOU FRISÉ
Temps de préparation : 15 min
Temps de cuisson: 6 heures
Donne: 8 portions (1 tasse)
Ingédients
1 lb Saucisse italienne
1 Oignon moyen haché
2 Boîtes (15 oz. Chacun) cannelloni
haricots, égouttés et rincés
2 Boîtes (14 oz. Chacun) tomates
2 boîtes (14 oz. chacun) De bouillon
de poulet
1/4 tasse de parmesan
6 tasses de chou frisé frais
hachées
en dés
Instructions
Placez les saucisses italiennes et l’oignon dans le bol de cuisson. Appuyez sur
le bouton SAUTE. Cuire en remuant 8 à 10 minutes ou jusqu’à ce que la viande
est cuite et l’oignon soit tendre. Retirer le bol de la base ; Jeter le jus de la
poêle. Ajouter les ingrédients restant dans le bol de cuisson ; remuer pour
33
Page 34

mélanger le tout. Couvrir et cuire en mode lente pour 5 à 6 heures
CONSEIL: Servir avec une salade croquante et pain italien.
SALADE DE NOUILLES UDON
Temps de préparation : 15 min. Plus la réfrigération
Temps de cuisson: 10 min.
Donne: 8 portions (1 tasse)
Ingrédients
1 paquet. (11 oz) sécher
Les nouilles udon
1/4 tasse d’huile de sésame
1/3 tasse de miel
1/3 tasse de sauce de soja
Instructions
Remplissez le bol avec de l’eau. Appuyez sur le bouton de pâtes ( ) et
porter l’eau à l’ébullition. Placez les nouilles dans le panier à pâtes ; cuire 10
minutes. Égoutter et rincer à l’eau froide. Combinez nouilles cuites, cosses
de petits pois et les crevettes dans un bol moyen ; mettre de côté. Mélanger
l’huile, le miel, la sauce soja et la sauce Sriracha dans un petit bol. Verser sur
les nouilles, mélanger bien et remuer. Couvrir et réfrigérer au moins 2 heures
pour permettre aux saveurs de se mélanger.
1 c. sauce Sirracha
6 oz. Cosses de petits pois
6 oz. Petits crevettes cuites (51-70
ct.)
RISOTTO AUX CHAMPIGNONS
Temps de préparation : 15 min
Temps de cuisson: 30 min
Donne: 8 (1/2 tasse) portions
Ingredients
2 c. huile d’olive
1 (8 onces) paquet. Portobello
champignons tranchés
1/2 tasse des échalotes en dés
2 c. beurre
3/4 tasses de riz Arborio
1/4 tasse de vin blanc sec
Instructions
Appuyez sur le bouton de sauter ( ) et ajouter l’huile d’olive, chauffer 2 à 3
min avec le couvercle. Ajouter les
champignons et les échalotes, cuire en remuant manuellement 3 min.
Ou jusqu’à ce qu’ils seront tendres.
Retirer le tout du bol de cuisson, mettre de côté.
Fixez le bras de brassage sur les tiges dans l’arbre d’entraînement. Appuyer
sur le bouton de Risotto ( ) et faire fondre 1 c. beurre dans le bol de cuisson.
Ajouter le riz. Cuire en utilisant le bras de brassage en place pour 5 min.
3 tasses de bouillon de poulet
1/4 tasse du fromage parmesan
frais râpé
Frais sel de la mer et poivre
noir au goût
34
Page 35

ou jusqu’à ce que le riz est léger et de couleur brun doré. Ajouter le vin et
continuer la cuisson jusqu’à ce que le vin soit absorbé. Ajouter le bouillon de
poulet 1 tasse, cuire jusqu’à l’absorption. Continuez à ajouter le bouillon 1 tasse
à la fois jusqu’à ce que le liquide soit absorbé et que le riz soit denté, environ
30 min. Ajouter les champignons, le reste du beurre et le parmesan. Cuire en
remuant de 1 à 2 minutes pour une combinaison parfaite.
INFORMATIONS DE GARANTIE
Pour le service, la réparation ou toute question concernant votre produit,
composer le numéro 800 indiqué dans cette section. S’il vous plaît NE PAS
retourner le produit au lieu d’achat. Aussi, s’il vous plaît NE PAS envoyer
le produit par poste, ne pas retour au fabricant ni centre de service. Vous
pouvez également consulter le site web indiqué sur la couverture de ce
manuel.
Deux ans de garantie limitée
(Valable seulement aux États-Unis et Canada)
• Quelle est la couverture de la garantie ?
• Tout défaut de matériau ou de fabrication fourni ; Toutefois,
La responsabilité de Spectrum Brands Inc. ne dépassera pas
le prix d’achat du produit
• Pour combien de temps?
• Deux ans après la date d’achat original avec une preuve d’achat
• Que ferons-nous pour vous aider ?
• Vous fournir un produit de remplacement raisonnablement semblable
nouveau ou rénové
• Comment obtenir le service?
• Conservez votre reçu comme preuve de la date de la vente.
• Visitez le site du service en ligne à www.prodprotect.com/applica, ou
appelez sans frais 1-800-231-9786, pour le service général de garantie.
• Si vous avez besoin de pièces ou accessoires, s’il vous plaît appeler
1-800-738-0245.
• Ce que votre garantie ne couvre pas?
• Les dommages causés par un usage commercial
• Les dommages causés par une mauvaise utilisation, abus ou de négligence
• Les produits qui ont été modifiés en une manière ou autre
• Produits utilisés ou réparés à l’extérieur du pays d’achat
• Pièces de verre et d’autres accessoires qui sont emballés à l’unité
• Frais d’expédition associés au remplacement de l’unité
• Dommages indirects ou accessoires (S’il vous plaît noter, cependant, que
certains états ne permettent pas l’exclusion ou la limitation des dommages
indirects ou accidentels, la présente restriction peut ne pas vous concerner)
•
• Comment le droit de l’État se rapporte à cette garantie ?
• Cette garantie vous confère des droits légaux spécifiques. Vous pouvez
également avoir d’autres droits qui varient d’un état ou province à province.
35
Page 36

¡ Gracias por su compra!
regístrese en línea en
www.prodproduct.com/applica
Evalue y opine sobre sus productos en
www.blackanddeckerhome.com
Comparta con nostotros sus fotografías e historias en línea
Si tiene cualquier pregunta o preocupación acerca de su nuevo
producto, por favor llame a nuestra línea de Servico al Cliente
al número gratis 1-800-231-9786 (EE. UU. y Canadá).
Por favor no lo devuelva a la tienda.
36
Page 37

Por favor lea este instructivo antes de usar el producto.
.
MEDIDAS IMPORTANTES DE SEGURIDAD
Cuando se utilizan aparatos eléctricos, se deben respetar precauciones básicas
de seguridad para reducir el riesgo de incendio, descarga eléctrica y/o una lesión,
incluyendo las siguientes:
• Lea todas las instrucciones.
• No toque las superficies calientes.
Utilice agarraderas de olla resistentes
al calor cuando retire la olla de cocción
o la cesta para cocinar pasta/al vapor,
ya que éstas estarán calientes.
• A fin de protegerse contra descarga
eléctrica, no sumerja el cable, enchufe
o la unidad en agua ni en otro líquido.
• Se requiere supervisión constante
cuando el aparato sea utilizado por o
cerca de la presencia de los niños.
• Desenchufe el aparato del
tomacorriente cuando no esté en uso
y antes de limpiarlo. Permita que se
enfríe antes de colocar o retirarle las
piezas.
• No opere ningún aparato eléctrico si
el cable o el enchufe están dañado,
o si el aparato presenta un problema
de funcionamiento o se ha dañado
de alguna manera. Comuníquese
con el departamento de Servicio al
Consumidor al número gratis que
aparece en la seccién de garantía.
• El uso de accesorios no recomendados
por el fabricante del aparato puede
ocasionar lesiones personales.
• No utilice el aparato a la intemperie.
• No permita que el cable cuelgue del
borde de la mesa o del mostrador ni
que entre en contacto con superficies
calientes.
• No coloque sobre o cerca de una
hornilla de gas o eléctrica, ni dentro
de un horno caliente.
• Se debe ejercer extrema precaución al
transportar un aparato que contenga
alimentos calientes, agua u otros
líquidos calientes.
• Para desenchufar el aparato, presione
el botón de mantener caliente/cancelar
y retire el enchufe del tomacorriente.
• No utilice el aparato para otro fin que
no sea para el que ha sido diseñado.
• Para prevenir daños o riesgos
de descarga eléctrica, no cocine
directamente en la base de cocción.
Cocine solamente en la olla de cocción
incluída.
• Este aparato no está diseñado para ser
utilizado por personas (incluyendo los
niños) con su capacidad física, psíquica
o sensorial reducida, o con falta de
experiencia o sabiduria, a menos que
sean supervisadas o instruidas acerca
del uso del aparato por una persona
responsable de su seguridad.
• Cuando use este aparato, deje un
espacio adecuado para que circule
aire encima de éste y en todos los
costados.
• Este aparato no está diseñado
para funcionar a través de un reloj
automático externo o con un sistema
de control remoto adicional.
• No utilice el aparato sobre una
superficie inestable.
• No trate de calentar o cocinar artículos
que no sean alimentos en este aparato.
• Los niños deben ser supervisados
para asegurar que no jueguen con
el aparato.
• Este aparato no está diseñado para
freír alimentos profundo.
MEDIDAS DE SEGURIDAD
ADICIONALES
• Este aparato genera calor y vapor
mientras está en uso. Levante la tapa
de vidrio cuidadosamente para evitar
quemaduras y deje escurrir el agua
dentro de la olla de cocción.
• Nunca use la olla de cocción en una
estufa de gas o eléctrica, o sobre una
llama expuesta.
• Para evitar rayones, no corte los
alimentos directo en la olla de cocción.
37
Page 38

CONSERVE ESTAS INSTRUCCIONES.
Este producto es para uso doméstico solamente.
ENCHUFE POLARIZADO (Solamente en los modelos de 120V)This appliance has a
Este aparato cuenta con un enchufe polarizado (un contacto es más ancho
que el otro). A fin de reducir el riesgo de un choque eléctrico, este enchufe encaja
en un tomacorriente polarizado en un solo sentido. Si el enchufe no entra
en el tomacorriente, inviértalo y si aun así no encaja, consulte con un electricista.
Por favor no trate de alterar esta medida de seguridad.
CABLE ELÉCTRICO
El cable de este aparato fue escogido a fin de evitar el riesgo de enredarse o de
tropezar con un cable de mayor longitud. Cualquier cable de extensión que se deba
emplear, deberá estar calificado para nada menor de este electrodoméstico. Cuando
utilice un cable de extensión, asegúrese que no interfiera con la superficie de trabajo
ni que cuelgue de manera que alguien se pueda tropezar. A fin de aumentar la vida
útil del cable, no tire de él ni maltrate las uniones del cable con el enchufe ni con el
aparato.
TORNILLO DE SEGURIDAD
Advertencia: Este aparato cuenta con un tornillo de seguridad para evitar la remoción
de la cubierta exterior del mismo. A fin de reducir el riesgo de incendio o de choque
eléctrico, por favor no trate de remover la cubierta exterior. Este producto no contiene
piezas reparables por el consumidor. Toda reparación se debe llevar a cabo únicamente
por personal de servicio autorizado.
Nota: Si el cordón de alimentación esta dañado, en América Latina debe sustituirse
por personal calificado o por el centro de servicio autorizado.
38
Page 39

CONOZCA SU OLLA REVOLVEDORA
PARA COCINAR ARROZ Y RISOTTO 6 EN 1
1
2
3
4
5
1. Tapa de vidrio resistente
(pieza no. RCR520-01)
2. Brazo para revolver
(pieza no. RCR520-04)
3. Olla de cocción
(pieza no. RCR520-03)
4. Base de la unidad
5. Panel de control
6
7
8
6. Cesta para cocinar
pasta/al vapor
(pieza no. RCR520-02)
7. Medidor de arroz
(pieza no. RCR514-04)
8. Cuchara de servir
(pieza no. RCR514-05)
9. Enchufe del cable
de alimentación (en la parte
posterior de la base de la unidad,
no mostrado)
El producto puede variar ligeramente del que aparece ilustrado.
39
Page 40

PREPARACIÓN PARA USO
Este aparato está diseñado para uso doméstico solamente.
• Retire todo el material de empaque, cualquier etiqueta adherida a la
unidad y la banda plástica alrededor del enchufe.
• Por favor, vaya a www.prodprotect/applica para registrar su garantía.
• Lave todas las piezas removibles según las instrucciones indicadas
en la sección de CUIDADO Y LIMPIEZA. Coloque la olla de cocción limpia
y seca en la base de la unidad.
• Escoja un lugar para utilizar la unidad. Coloque la unidad sobre una
superficie estable, resistente al calor, libre de paños, líquidos y otros
materiales flamables. Asegúrese de que la unidad tenga suficiente espacio
alrededor y en la parte superior para permitir que el aire caliente fluya sin
dañar los gabinetes y las paredes.
INFORMACIÓN IMPORTANTE SOBRE SU APARATO
Este aparato se calienta. Cuando el aparato esté funcionando, asegúrese
de siempre usar guantes o agarraderas de olla al tocar cualquier parte del
aparato.
• Durante los primeros minutos de funcionamiento, pudiera notar un lígero
olor. Esto es causado por el aceite utilizado durante el proceso de
fabricación del producto y no afectará su desempeño.
• Para cambiar a las diferentes funciones, el aparato debe estar en el modo
de cancelación. La luz indicadora azul parapadeará arriba de la función de
mantener caliente/cancelar. Esto indica que la unidad está en el modo de
cancelación y podrá cambiar a otra función.
• Mientras que la mayoría de los alimentos se cocinan, el vapor saldrá a
través del escape de vapor en la tapa. Coloque la tapa de vidrio de
manera que el escape de vapor quede mirando lejos de los gabinetes y las
paredes. No coloque la mano sobre el escape de vapor mientras el arroz se
está cocinando; el vapor caliente puede quemar.
• Utilice la cuchara de servir incluída para retirar los alimentos y una cuchara
de madera para revolver. No utilice utensilos de metal que puedan rayar la
superficie antiadherente de la olla de cocción.
• No llene la olla de cocción a un nivel más alto que el nivel más alto de agua
marcado.
USO DE SU OLLA PARA COCINAR ARROZ Y RISOTTO
6 EN 1
Su olla para cocinar arroz y risotto puede ser utilizada de seis maneras: Para
cocinar directamente en la olla de cocción (arroz, avena y más), cocinar pasta
o cocinar al vapor en la cesta incluída para cocinar pasta/al vapor, sofreír en
la olla de cocción, cocinar risotto con el brazo para revolver o para cocinar
lento (en el ajuste de temperatura alta). Instrucciones para cada manera de
cocinar aparecen a continuación:
COCCIÓN DE ARROZ
1. Enchufe el aparato. La luz indicadora azul arriba del botón de mantener
40
Page 41

caliente/cancelar ( ) comenzará a parpadear. El aparato se mantendrá
en la función de cancelar hasta que el botón de la función de arroz ( )
se presione.
2. Coloque la olla de cocción en la base de la unidad. Utilice el medidor
de arroz incluído para medir la cantidad deseada de arroz (no use más de 10
medidas de arroz). Llene la olla de cocción con agua hasta la marca de agua
correspondiente; por ejemplo, para 1 medida de una taza de arroz, llene la
olla hasta la marca de agua de una taza, etc.
Nota: : No use una taza de medir estándar.
El medidor de arroz mide aproximadamente 2 /3 de taza, lo cual rinde
aproximadamente 1 taza
de arroz cocinado
3. Coloque la tapa sobre la olla de cocción y presione el botón de la función de
arroz ( ). (A) La luz indicadora de cocción arriba
del botón de arroz se iluminará azul y el ciclo de cocción comenzará.
Cuando cocine arroz: Una vez que el arroz esté cocinado, el arroz
reposará por 8 a 10 minutos antes de cambiar a la función de mantener
caliente/cancelar ( ) para obtener óptimo sabor y textura. Después
de 8 a 10 minutos, la luz indicadora de cocción azul se aparagará y la
luz azul se iluminará arriba del botón de mantener caliente/cancelar,
indicando que el aparato ha cambiado a la función de mantener caliente.
La luz =/ indicadora de mantener caliente se mantendrá encendida hasta
que el aparato sea desenchufado. La olla de cocción puede estar caliente.
Siempre utilice agarraderas de olla para retirar la olla de cocción.
Para cocinar sopas, guisados y similares: Utilice un reloj contador
de tiempo de cocina para determinar el tiempo de cocción, ya que el
aparato no cambiará a la función de mantener caliente para estos tipos
de alimentos cuando el ciclo de cocción termina. Usted puede cambiar
manualmente el aparato a la función de mantener caliente, presionando
el botón de mantener caliente/cancelar ( ) dos veces. Cuando
la luz azul se convierte a sólida, la unidad está en el ajuste de mantener
caliente. La olla de cocción puede estar caliente. Siempre utilice
agarraderas de olla para retirar la olla de cocción..
4. Desenchufe el aparato cuando no esté en uso. Siempre deje que se enfríe
completamente antes de limpiarlo.
SOFREÍR
1. Enchufe el aparato; la luz indicadora azul arriba del botón de mantener
caliente/cancelar ( ) comenzará
a parpadear. El aparato se mantendrá
en la función de cancelar hasta que el botón
de sofrito sea presionado. Coloque la olla
de cocción dentro de la base.
2. Presione el botón de sofrito ( ). La luz
indicadora de cocción arriba del botón
de sofreír se iluminará azul y la cocción
comenzará.
3. Coloque la tapa sobre la olla de cocción
41
A
Page 42

y precaliente por aproximadamente 3 a 6
minutos. (A)
4. Una vez que se haya precalentado, añada los alimentos y el líquido
necesario a la olla de cocción para sofreirlos. Revuelva a mano según sea
necesario para asegurar los resultados deseados.
Nota: No utilice utensilios de metal que puedan rayar la superficie de cocción
antiadherente.
5. Cuando el sofrito esté listo, continue cocinando siguiendo las
instrucciones en la sección de Consejos Útiles o escoja la función de
mantener caliente, presionando el botón de mantener caliente/cancelar
( ) dos veces. Cuando la luz azul esté sólida, la unidad está en el ajuste
de mantener caliente. La olla de cocción puede estar caliente. Siempre
utilice agarraderas de olla para remover la olla.
6. Desenchufe ell aparato cuando no esté en uso. Siempre permita que se
enfríe completamente antes de limpiarlo.
PASTA
1. Enchufe el aparato; la luz indicadora azul arriba del botón de mantener
caliente/cancelar ( ) comenzará a parpadear. El aparato se mantendrá
en la función de cancelar hasta que el botón de pasta ( ) sea
presionado.
2. Llene la olla de cocción con agua, hasta el nivel que marca 9 tazas y
coloque la olla en la base. Luego coloque la cesta para cocinar pasta
en la olla de cocción. (B)
3. Presione el botón de pasta ( ). La luz
indicadora de cocción arriba del botón
de pasta se iluminará azul y el proceso de
calentamiento comenzará.
4. Con la tapa sobre la olla, deje que el agua se
hierva. Añada hasta 8 onzas de pasta en la cesta.
5. Cocine la pasta sin tapar, de acuerdo a las
instrucciones del paquete. Una vez que la pasta
esté cocinada a la consistencia deseada, use
agarraderas de olla para retirar la cesta y escurrir
el agua de la pasta en la olla de cocción.
6. Cuando la pasta esté cocinada, presione el botón de
mantener caliente cancelar una vez. Cuando la luz azul esté
parpadeando, la unidad parará
de cocinar. Las asas de la cesta para cocinar pasta/al vapor pueden
estar calientes. Siempre utilice agarraderas de olla para retirar la cesta.
7. Desenchufe el aparato cuando no esté en uso. Simpre permita que se
enfríe completamente antes de limpiarlo
B
COCCIÓN AL VAPOR (FUNCIÓN PARA PASTA)
1. Enchufe el aparato; la luz indicadora azul arriba del botón de mantener
caliente/cancelar ( ) comenzará a parpadear. El aparato se
mantendrá en la función de cancelar hasta que el botón de pasta ( )
sea presionado.
2. Llene la olla de cocción con 1 1/2 tazas de agua y coloque en la base.
3. Coloque los alimentos para cocinar al vapor dentro de la cesta para
42
Page 43

cocinar pasta/al vapor e inserte la cesta adentro de la olla de cocción.
(B) El nivel de agua en la olla de cocción no debe tocar la cesta.
Cubra la olla con la tapa.
Nota: Siempre mantenga la tapa sobre la olla
cuando cocine al vapor.
4. Presione el botón de pasta ( ). La luz
indicadora de cocción arriba del botón
de pasta se iluminará y el ciclo de
calentamiento comenzará
5. Los tiempos de cocción al vapor pueden variar
de acuerdo a los vegetales y los tipos de
alimentos; comience a verificar el punto de
cocción después de 5 minutos de inicio.
Consulte la tabla de cocción al vapor en este
manual para ver los tiempos de cocción al
vapor adicionales.
Nota: Cuando cocine vegetales al vapor u otros alimentos sin arroz añadido
en la olla de cocción, la unidad no cambiará automáticamente a la función
de mantener caliente.
6. Cuando la cocción al vapor esté terminada
(si no está cocinando arroz), presione el botón de mantener caliente
cancelar una vez. Cuando la luz azul esté parpadeando, la unidad parará
de cocinar. Las asas de la cesta para cocinar pasta/al vapor pueden
estar calientes. Siempre utilice agarraderas de olla para retirar la cesta.
7. Desenchufe el aparato cuando no esté en uso. Siempre deje que se
enfríe completamente antes de limpiarlo.
C
RISOTTO
1. Enchufe el aparato; la luz indicadora azul arriba del botón de mantener
caliente/cancelar ( ) comenzará a parpadear. El aparato se mantendrá
en la función de cancelar hasta que el botón de risotto ( ) sea
presionado.
2. Coloque la olla de cocción en la base. Acomode el brazo para revolver
sobre las espigas en el eje de transmisión en la base de la olla cocción. (C)
3. Presione el botón de risotto ( ). La luz indicadora de cocción arriba del
botón de risotto ( ) se iluminará azul y la unidad comenzará a calentar.
El brazo para revolver comenzará a girar después de 5 segundos. El brazo
pare revolver continuara a girar a lo largo de todo el proceso de cocción.
El brazo para revolver rotará y se detendrá durante el ciclo de cocción
para crear la mejor consistencia.
4. Coloque la tapa sobre la olla de cocción y deje que la olla se precaliente
por aproximadamente 3 a 6 minutos.
5. Una vez que la olla esté precalentada, añada los ingredientes (Arborio,
cebolla, ajo y otros) y cualquier líquido que sea necesario. Cocine de
acuerdo a las instrucciones del paquete.
Nota: Una receta de risotto está incluída en la sección de Recetas de este
manual.
6. Coloque la tapa de nuevo en la olla de cocción y permita que el brazo
para revolver cocine el risotto.
7. Una vez que el risotto esté cocinado, la luz indicadora de cocción azul
se apagará y la luz azul arriba del botón de mantener caliente/cancelar
43
Page 44

se iluminará. La luz indicadora de mantener caliente se mantendrá
iluminada hasta que la unidad se desenchufe. La olla de cocción puede
estar caliente. Siempre utilice agarraderas de olla para retirar la olla de
cocción.
8. Desenchufe el aparato cuando no esté en uso.
Siempre deje que se enfríe
completamente antes de limpiarlo al igual que el
brazo para revolver.
COCCIÓN LENTA
1. Enchufe el aparato; la luz indicador azul arriba
del botón de mantener caliente/cancelar
( ) comenzará a parpadear. El aparato
se mantendrá en la función de cancelar
hasta que el botón de cocción lenta ( ) sea
presionado.
2. Coloque la olla de cocción dentro de la base
y añada los ingredientes deseados. (D) No llene
por encima del nivel que marca 9 tazas adentro
de la olla.
3. Presione el botón de cocción lenta ( ). La luz
indicadora de cocción arriba del botón
de cocción lenta se iluminará azul y la unidad
comenzará a cocinar.
Nota: La función de cocción lenta es un ajuste de temperatura alta y cocinará
los alimentos más rápido que un ajuste de temperatura normal.
4. La función de cocción lenta cocinará los alimentos hasta 8 horas antes
de que la unidad cambie a la función de mantener caliente. Si su receta
requiere menos tiempo de cocción, cambie manualmente la unidad a la
función de mantener caliente, presionando el botón de mantener
caliente dos veces. Cuando la luz azul se convierta a sólida, la unidad
está en el ajuste de mantener caliente. La olla de cocción puede estar
caliente. Simpre utilice agarraderas de olla para retirar la olla.
5. Desenchufe el aparato cuando no esté en uso. Siempre deje que se
enfríe completamente antes de limpiarlo.
D
LIMPIEZA Y CUIDADO
Este producto no contiene piezas que deban ser reparadas por el usuario.
Para servicio, acuda a personal de servicio calificado.
LIMPIEZA
Importante: Nunca sumerja la base en agua ni en otros líquidos.
1. Siempre desenchufe la olla para cocinar arroz y risotto y deje que se enfríe
completamente antes de limpiarla.
2. Lave la olla de cocción y la tapa de vidrio en agua caliente jabonosa. Si los
alimentos se pegan a la olla de cocción o en el brazo para revolver, llene
la olla con agua caliente jabonosa y deje remojada antes de limpiar con una
almohadilla de fregar de plástico.
Nota: La olla de cocción, la tapa de vidrio, la cesta para cocinar pasta/al vapor
44
Page 45

y el brazo para revolver son aptos para la máquina lavaplatos.
3. Limpie el interior y el exterior de la base con un paño o esponja suave,
humedecido ligeramente. Nunca utilice limpiadores abrasivos ni almohadillas
de fregar duras para limpiar la base, ya que puden dañar las superficies.
4. Deje secar completamente antes de almacenar
ALMACENAMIENTO
Asegúrese de que el aparato esté completamente frío y seco. Nunca enrolle
el cable apretado alrededor del aparato; manténgalo enrollado holgadamente.
Coloque la tapa invertida para ahorrar espacio.
CONSEJOS Y PIS TAS ÚTILES
CONSEJOS ÚTILES
• Cuando mida arroz crudo, no utilice una taza de medir estándar (8
onzas fluidas). Una taza estándar para medir arroz es 2/3 de taza (5
onzas fluidas); el mismo tamaño que el medidor de arroz incluído. 2/3
de taza (5 onzas fluidas) de arroz crudo rendirá aproximadamente 1 taza
(8 onzas fluidas) de arroz cocinado.
• Enjuague el arroz con agua para remover cualquier exceso
de almidón y escurra.
Cómo utilizar las marcars de agua:
- Utilizando el medidor de arroz incluído, vierta la cantidad de arroz
deseada en la olla de cocción.
- Llene la olla de cocción con agua hasta la marca de agua
correspondiente; ejemplo, por 1 taza de arroz, llene hasta el nivel que
marca 1 taza de agua, etc.
• Para reducir la espuma, añada un poco de mantequilla o aceite al agua
antes de cocinar.
• La sal “Kosher” no contiene impurezas y se disuelve más rápido. Si usa
este tipo de sal, agregue un poco más que de costumbre con sal de
mesa. Agregue 3/4 cucharadita de sal “Kosher” por cada taza de arroz
crudo.
• El arroz blanco puede ser almacenado en un recipiente hermético en un
lugar oscuro y fresco por hasta 1 año.
• El arroz integral puede ser almacenado en un recipiente hermético
en un lugar oscuro y fresco por hasta 6 meses. La refrigeración o el
congelamiento extienden su duración.
• Para más sabor, use caldos en lugar de agua. El hacerlo podría eliminar
el uso de sal adicional.
• Procure no mantener pocas cantidades de arroz durante mucho tiempo,
en la función de mantener caliente ya que esto puede secar el arroz.
• Durante el proceso de cocción del arroz, se puede formar una raspa
fina en el fondo del recipiente. Si dicha raspa no es de su agrado, la
puede desprender y desechar fácilmente.
• El sabor y la firmeza variarán dependiendo de la calidad/tipo de arroz
utilizado y el largo de tiempo que esté cocinado. Para arroz más suave y
esponjoso, añada un poco más de agua. Para arroz más firme, use menos
agua.
• Para otros tipos de granos que no aparecen en la tabla de cocción, siga
45
Page 46

las instrucciones del paquete
TABLA PARA COCINAR ARROZ
Si lo desea, añada los condimentos y aceite o mantequilla con el arroz antes
de agregar agua.
CANTIDAD
DE ARROZ
PARA ARROZ BLANCO DE GRANO ALARGADO, JAZMÍN, BASMATI, AMARILLO,
O DE GRANO MEDIO
2 medidas de arroz hasta la marca 2 de 21 a 26 minutos 3.5 tazas
3 medidas de arroz hasta la marca 3 de 23 a 28 minutos 5.3 tazas
4 medidas de arroz hasta la marca 4 de 25 a 30 minutos 7 tazas
5 medidas de arroz hasta la marca 5 de 27 a 32 minutos 8.8 tazas
6 medidas de arroz hasta la marca 6 de 29 a 34 minutos 10.5 tazas
7 medidas de arroz hasta la marca 7 de 31 a 36 minutos 12.3 tazas
8 medidas de arroz hasta la marca 8 de 33 a 38 minutos 14 tazas
9 medidas de arroz hasta la marca 9 de 35 a 40 minutos 15.8 tazas
10 medidas de arroz hasta la marca 10 de 37 a 42 minutos 17.5 tazas
PARA ARROZ INTEGRAL
CANTIDAD
DE AGUA
TIEMPO
DE COCCIÓN
APROX.
RINDE
(tazas
de 8 onzas
estándar)
2 medidas de arroz 3 tazas de 28 a 33 minutos 4.5 tazas
3 medidas de arroz 4 ½ tazas de 30 a 35 minutos 6.8 tazas
4 medidas de arroz 6 tazas de 32 a 37 minutos 9 tazas
5 medidas de arroz 7 ½ tazas de 34 a 39 minutos 11.3 tazas
6 medidas de arroz 9 tazas de 36 a 41 minutos 13.5 tazas
7 medidas de arroz 10 ½ tazas de a 43 minutos 15.8 tazas
8 medidas de arroz 12 tazas de 40 a 45 minutos 18 tazas
Nota: Mientras experimenta con las diferentes marcas y tipos de arroz, anote
los cambios necesarios en las instrucciones a seguir y haga
los ajustes apropiados para la próxima vez.
USOS ADICIONALES PARA SU OLLA PARA COCINAR
ARROZ Y RISOTTO 6 EN 1
Packaged foods: condensed and ready to serve soups, pastas, and stews
• Alimentos empaquetados: sopas listas para servir y condensadas,
pastas y guisados
46
Page 47

• No llene el recipiente de cocción pasada la marca más alta de agua del
nivel de tazas.
• Para calentamiento uniforme, revuelva de vez en cuando.
• Siempre utilice un reloj contador de tiempo de cocina. No confíe en el
interruptor de control en la olla ya que no está diseñado para indicar el
tiempo de cocción para sopas y guisados.
• Utilice solamente carnes deshuesadas y aves cortadas en trozos de no
más de 1 ½ pulgadas.
• Cuando cocine arroz o pasta en la sopa, añada líquido adicional en la
receta.
• Ya que la mayoría de los vegetales congelados se cocinan muy rápido,
es mejor añadirlos al final del tiempo de cocción. Revuélvalos para
incorporarlos en la sopa o guisado y permita que la mezcla se concine
unos 5 a 10 minutos más. No es necesario dorar las carnes antes de
cocinarlas.
• Escoja recetas que se cocinan en 1 hora o menos.
Avena o Cereales Calientes
• Avena corte acero es la que mejor trabaja.
• No llene la olla de cocción más de la mitad con líquidos, ya que la avena se
expanderá durante el proceso de cocción.
• Para calentamiento uniforme, revuelva de vez en cuando.
• Cuando la avena esté cocinada, la olla cambiará a la función de mantener
caliente. Por favor tome nota de que este proceso es para avena bien
cocinada. Si prefiere una consistencia diferente, supervise el proceso
de cocción para cambiar el interruptor manualmente a la función de
mantener caliente y así obtener los resultados deseados.
• Escoja recetas que se cocinan en 1 hora o menos.
TABLA PARA VEGETALES COCINADOS
AL VAPOR
Cocine al vapor utilizando 1 ½ a 2 tazas de agua, o caldo (a temperatura fría
o ambiente)
VEGETABLES CANTIDAD PREPARACIÓN TIEMPO SUGEREN-
CIAS
Espárragos
frescos
Habichuelas
verdes, frescas
Remolachas
frescas
(cortadas
en cuartos)
½ libra
½ libra
1 libra (aprox.
5 de tamaño
mediano)
Lave; parta la
base dura donde
los espárragos
se parten con
facilidad
Deje entera,
recorte la punta
o corte en trozos
de 2 pulgadas.
Remueva el tallo
y los extremos
con raíces. Pele
y corte en forma
de cuñas.
47
15 to 18
minutos
15 to 18
minutos
26 to 28
minutos
Sazone con
sal, pimienta
y cáscara de
limón rallada.
Sazone con
sal, pimienta
y eneldo fresco
Sirva con
mantequilla.
Page 48

VEGETABLES CANTIDAD PREPARACIÓN TIEMPO SUGEREN-
CIAS
Brócoli fresco 1 libra Corte en
Coles o repollos
de Bruselas
Col 1 libra Cortada en
Zanahorias 12 onzas Rebane. 18 to 20
Coliflor 12 onzas Cortada en
Maíz 1 ½ libras de 2 a 4
Guisantes de
vaina plana o
guisantes de
vaina redonda
Papas nuevas
(de piel roja)
Espinaca de
hoja, fresca
Calabaza
moscada
Calabacín
de verano
(calabacín
amarillo o verde)
4 tazas Corte a tráves
8 onzas. Recórtelos y
6 de tamaño
mediano
(aprox. 1 libra)
4 tazas,
empacadas
de forma
compacta
1 libra Pele y corte
1 libra Rebane. 16 to 18
ramilletes.
de la base
de cada col.
forma de cuñas.
ramilletes.
mazorcas
déjelos enteros.
Corte a la mitad. 24 to 26
Utilice hojas
enteras.
en cubitos
de 1 pulgada.
15 to 18
minutos
24 to 26
minutos
24 to 26
minutos
minutos
22 to 25
minutos
20 to 22
minutos
12 to 14
minutos
minutos
10 to 15
minutos
24 to 26
minutos
minutos
Sazone con
sal, pimienta
y cáscara de
limón rallada.
Adorne
con avellanas
tostadas,
picadas.
Adorne
con tocino
cocinado,
desmoronado.
Sazone con
sal, pimienta
y cáscara de
naranja rallada.
Adorne con
migas de pan
tostadas y
mantequilla.
Adorne con
tomates
picados finitos
y perejil.
Sirva con
cebolletas
picaditas y
rociadas con
salsa de soya.
Mezcle con
mantequilla
y perejil.
Adorne con ajo
asado y piñones
tostados.
Sirva con
mantequilla y
condimentos.
Sazone con sal
y pimienta de
ajo.
48
Page 49

VEGETABLES CANTIDAD PREPARACIÓN TIEMPO SUGEREN-
CIAS
Vegetales
congelados,
incluyendo
vegetales
mixtos, tales
como una
mezcla de
brócoli, salteado
de brócoli y
salteado de
pimientos
Guisantes
congelados
10 onzas
a 1 libra
1 libra Retire
Retire de la bolsa
y sazone.
de la bolsa.
16 to 18
minutos
14 to 16
minutos
Incorpore
menta fresca,
picada.
TABLA PARA PESCADO COCINADO AL VAPOR
Añada 1 ¾ tazas de agua a la olla de cocción. Añada 1 limón, cortado
en rebanadas gruesas, al agua. Sazone el pescado con jugo de limón
y sazón para mariscos.
PESCADO CANTI-
DAD
PREPARACIÓN TIEM-
PO DE
COCCIÓN
Salmón 1 ½ libras Filetes 20 to 22
Vieiras 1 libra Tamaño mediano 14 to 16
Pargo 1 libra Entero, remueva
la cabeza y la cola.
Camarones 1 lb.
(20 a 24)
Pez espada 1 libra 2 bistecs medianos 15 to 17
49
minutos
minutos
20 to 22
minutos
15 to 18
minutos
or until
shrimp
turn pink
minutos
SUGERENCIAS
Cubra con
rebanadas de
limón y eneldo
fresco, recortado.
Bien tiernos; sirva
con salsa tártara
y cuñas de limón.
Rocíe con ajo y
vinagreta de soya.
Sazone con sazón
para mariscos y
limón.
Bien tiernos; sirva
con salsa tártara y
cuñas de limón.
Page 50

RESOLUCIÓN DE PROBLEMAS
PROBLEMA CAUSA POSIBLE SOLUCIÓN
Algunos granos de
arroz parecen no estar
bien cocinados.
• El arroz no se pudo
terminar de cocinar.
• La olla de cocción no
tenia suficiente cantidad
de agua
• Añada unas cuantas
cucharadas más de agua
y cocine por un poco
más de tiempo. Presione
el botón de la suficiente
cantidad de agua.
La olla de cocción no
está lo limpia que yo
quisiera.
El arroz se desborda
al hervir.
El arroz
está demasiado seco.
• El almidón se ha
acumulado en los lados
y en el fondo de la olla
de cocción.
• Se está cocinando
demasiada cantidad de
arroz.
• Se está usando
demasiada cantidad de
agua para la cantidad de
arroz.
• Se ha utilizado
demasiado arroz o poca
cantidad de agua.
• Llene la olla de cocción
con agua caliente
jabonosa y deje reposar
por varios minutos,
luego utilice un estropajo
de nailon para frotar
los lados y el fondo.
Enjuague bien.
• Asegúrese de no
cocinar más cantidad
de arroz de la máxima
recomendada en este
manual. La cantidad
de arroz a preparar debe
corresponder con la
marca de agua en la olla
de cocción.
• Añada una pequeña
cantidad (1 cucharada)
de mantequilla o aceite
al agua antes de cocinar.
• Utilice el medidor de
arroz que incluído. El
medidor de arroz tiene
una capacidad de 2/3
taza (5 onzas fluidas) de
arroz crudo.
El arroz está pegajoso.
El risotto se quema.
• Se ha utilizado
demasiada cantidad de
agua y poca cantidad de
arroz.
• No hay suficiente
cantidad de líquido
en la olla de cocción.
50
• Añada una cantidad de
agua que corresponda
con las marcas indicadas
en la olla de cocción.
Asegúrese de tener la
proporción correcta
de 2/3 taza (5 onzas
fluidas) de arroz por 1
taza de agua marcada.
• Añada más líquido a la
olla de cocción y cambie
de nuevo a la función de
risotto.
Page 51

RECETAS
SABROSA SOPA TOSCANA CON COL RIZADA
Tiempo de preparación: 15 minutos
Tiempo de cocción: 6 horas
Rinde: 8 porciones (1 taza)
Ingredientes:
1 libra de salchicha italiana
2 cebollas medianas, picadas
2 latas (15 oz cada una) de frijoles
cannellini (frijoles blancos),
escurridos y enjuagados
2 latas (14 oz cada una) de tomates
cortados en cubos
Preparación:
Coloque la salchicha italiana y la cebolla en la olla de cocción. Presione el
botón de sofrito ( ). Cocine y revuelva de 8 a 10 minutos o hasta que la
salchicha esté cocinada y la cebolla esté blanda. Retire la olla de la base;
deseche los jugos de cocción de la olla.
Añada los demás ingredientes a la olla de cocción; revuelva para mezclarlos.
2 latas (14 oz cada una) de caldo
de pollo
¾ taza de queso parmesano
6 tazas de col rizada fresca picada,
empacada suelta
Cocine con la tapa sobre la olla en el ajuste de cocción lenta ( )
de 5 a 6 horas.
Consejo: Sirva con una ensalada pequeña fresca y pan italiano.
ENSALADA CON FIDEOS JAPONESES (UDON)
Tiempo de preparación: 15 minutos, más el tiempo de refrigeración
Tiempo de cocción: 10 minutos
Rinde: 8 porciones (1 taza)
Ingredientes
1 paquete (11 onzas) de fideos
secos Udon
1/4 taza de aceite de sésamo
1/3 taza de miel
1/3 taza de salsa de soya
1 cucharada de salsa sriracha
6 onzas de guisantes
6 onzas de ensalada de camarones
cocinados pequeña (51 a 70 ct.)
51
Page 52

Preparación:
Llene la olla de cocción con agua. Presione el botón de pasta ( ) y deje que
el agua hierva.
Coloque los fideos en la cesta para cocinar pasta; cocine 10 minutos o hasta
que estén blandos. Escurra y enjuague con agua fría.
Combine los fideos cocinados, los guisantes y los camarones en un recipiente
mediano; deje a un lado.
Mezcle el aceite, la miel, la salsa de soya y la salsa sriracha en un recipiente
pequeño. Vierta encima de la mezcla de fideos y revuelva hasta cubrir bien.
Cubra y refrigere por lo menos 2 horas para que los sabores se mezclen.
RISOTTO DE CHAMPIÑONES
Tiempo de preparación: 15 minutos
Tiempo de cocción: 30 minutos
Rinde: 8 porciones (1/2 taza)
Ingredientes
2 cucharadas de aceite de oliva
1 paquete (8 onzas) de champiñones portobello, rebanados
½ taza de chalotes, cortados en cubos
2 cucharadas de mantequilla, dividida
¾ tazas de arroz Arborio
¼ taza de vino blanco seco
3 tazas de caldo de pollo
¼ taza de queso parmesano fresco rallado
Sal de mar molida, fresca y pimienta negra al sabor
Preparación:
Presione el botón de sofrito ( ) y añada el aceite de oliva; caliente 2 a 3
minutos con la olla tapada. Añada los champiñones y los chalotes; cocine y
revuelva 3 minutos o hasta que estén blandos. Retire de la olla de cocción;
deje hacia un lado.
Instale el brazo para revolver sobre las espigas en el eje de transmisión en
la base de la olla de cocción. Cambie al botón de risotto ( ) y derrita 1
cucharada de mantequilla en la olla de cocción. Añada el arroz. Cocine con
el brazo para revolver en su lugar por 5 minutos o hasta que el arroz tome un
tono dorado claro. Añada el vino y continue cocinando hasta que el vino esté
absorbido.
Añada 1 taza de caldo de pollo; cocine hasta que esté absorbido. Continue
añadiendo el caldo 1 taza a la vez, hasta que el líquido esté absorbido y el
arroz esté “al dente”, aproximadamente 30 minutos.
Añada los champiñones, el resto de la mantequilla y el queso parmesano.
Cocine y revuelva 1 a 2 minutos para mezclar.
52
Page 53

¿NECESITA AYUDA?
Para servicio, reparaciones o preguntas relacionadas al producto, por favor
llame al número del centro de servicio que se indica para el país donde
usted compró su producto. NO devuélva el producto al fabricante. Llame o
lleve el producto a un centro de servicio autorizado.
Dos Años de Garantía Limitada
(No aplica en México, Estados Unidos y Canada)
¿Qué cubre la garantía?
• La garantía cubre cualquier defecto de materiales o de mano de obra que no haya
sido generado por el uso incorrecto del producto.
¿Por cuánto tiempo es válida la garantía?
• Por dos años a partir de la fecha original de compra mientras que tenga una
prueba de la compra.
¿Cómo se obtiene el servicio necesario?
• Conserve el recibo original como comprobante de la fecha de compra,
comuníquese con el centro de servicio de su país y haga efectiva su garantía si
cumple lo indicado en el manual de instrucciones.
¿Cómo se puede obtener servicio?
• Conserve el recibo original de compra.
• Por favor llame al número del centro de servicio autorizado.
¿Qué aspectos no cubre esta garantía?
• Los productos que han sido utilizados en condiciones distintas a las normales.
• Los daños ocasionados por el mal uso, el abuso o negligencia.
• Los productos que han sido alterados de alguna manera.
• Los daños ocasionados por el uso comercial del producto.
• Los productos utilizados o reparados fuera del país original de compra.
• Las piezas de vidrio y demás accesorios empacados con el aparato.
• Los gastos de tramitación y embarque asociados al reemplazo del producto.
• Los daños y perjuicios indirectos o incidentales.
¿Qué relación tiene la ley estatal con esta garantía?
• Esta garantía le otorga derechos legales específicos y el consumidor podría
tener otros derechos que varían de una región a otra.
53
Page 54

PÓLIZA DE GARANTÍA
(Válida sólo para México)
DURACIÓN
Spectrum Brands de México, SA de CV. garantiza este producto
por 2 años a partir dela fecha original de compra.
¿Qué cubre esta garantía?
• Esta Garantía cubre cualquier defecto que presenten las piezas,
componentes y la mano de obra contenidas en este producto.
• Requisitos para hacer válida la garantía
• Para reclamar su Garantía deberá presentar al Centro de Servicio Autorizado
la póliza sellada por el establecimiento en donde adquirió el producto. Si no
la tiene, podrá presentar el comprobante de compra original.
¿Donde hago válida la garantía?
• Llame sin costo al teléfono 01 800 714 2503, para ubicar el Centro de
Servicio Autorizado más cercano a su domicilio en donde usted podrá
encontrar partes, componentes, consumibles y accesorios.
Procedimiento para hacer válida la garantía
Acuda al Centro de Servicio Autorizado con el producto con la póliza de
Garantía sellada o el comprobante de compra original, ahí se reemplazará
cualquier pieza o componente defectuoso sin cargo alguno para el usuario
final. Esta Garantía incluye los gastos de transportación que se deriven de su
cumplimiento.
Excepciones
Esta Garantía no será válida cuando el producto:
A) Se hubiese utilizado en condiciones distintas a las normales.
B) No hubiese sido operado de acuerdo con el instructivo de uso
que le acompaña.
C) Cuando el producto hubiese sido alterado o reparado por personas
no autorizadas por Spectrum Brands de México, SA de CV..
Nota: Usted podra encontrar partes, componentes, consumibles y
accesorios en los centros de servicios autorizados. Esta garantía incluyen los
gastos de transportación que se deriven de sus cumplimiento dentro de sus
red de servicio.
54
Page 55

Por favor llame al número correspondiente que aparece en la lista a continuación para solicitar
que se haga efectiva la garantía y donde Ud. puede solicitar servicio, reparaciones o partes en
el país donde el producto fué comprado.
Argentina
Servicio Técnico
Monroe 3351 CABA Argentina
Tel: 0800 – 444 - 7296
servicios@rayovac.com.ar
Chile
SERVICIO DE MAQUINAS Y
HERRAMIENTAS LTDA.
Portugal Nº 644
Santiago – Chile
Fonos: 02- 6355208 / 02-6341169
Email: servicio@spectrumbrands.cl
Call center: 800-17 1-051
Colombia
Rayovac Varta S.A
Carrera 17 Número 89-40
Línea gratuita nacional
018000510012
Costa Rica
Aplicaciones Electromecanicas
Calle 22 y 24 en Avenida 3 BLV de
la torre Mercedes Benz
200 mts norte y 50 mts este
San José, Costa Rica
Tel. (506) 2257-5716
Ecuador
Servicio Master
Dirección: Capitán Rafael
Ramos OE 1-85 y Galo plaza
lasso. Tel (593) 2281-3882 /
2240-9870
El Salvador
Sedeblack
Calle San Antonio Abad,
Colonia Lisboa No 2936
San Salvador, Depto.
de San Salvador
Tel. (503) 2284-8374
Guatemala
Kinal
17 avenida 26 -75, zona 11
Centro comercial Novicentro,
Local 37 - Ciudad Guatemala
Tel. (502)-2476-7367
Honduras
Serviteca
San Pedro Sula, B Los Andes,
2 calle -entre 11-12 Avenida
Honduras
Tel. (504) 2550-1074
México
Articulo 123 # 95 Local 109 y 112
Col. Centro, Cuauhtemoc,
México, D. F.
Tel. 01 800 714 2503
Nicaragua
LRM ELECTRONICA
Managua - Sinsa Altamira
1.5 kilómetros al norte
Nicaragua
Tel. (505) 2270-268 4
Panamá
Supermarcas
Centro comercial El dorado,
Plaza Dorado, Local 2.
Panama
Tel. (507) 392-6231
Perú
Servicio Central Fast Service
Av. Angamos Este 2431
San Borja, Lima Perú
Tel. (511) 2251-388
Puerto Rico
Buckeye Service
Jesús P. Piñero #1013
Puerto Nuevo, SJ PR 00920
Tel.: (787) 782-6175
Republica Dominicana
Prolongación Av. Rómulo
Betancourt
Zona Industrial de Herrera
Santo Domingo, República
Dominicana
Tel.: (809) 530-5409
Venezuela
Inversiones BDR CA
Av. Casanova C .C.
City Market Nivel Plaza
Local 153 Diagonal Hotel
Melia, Caracas.
Tel. (582) 324-0969
Sello del Distribuidor:
Fecha de compra:
Modelo:
IMPORTADO POR / IMPORTED BY:
RAYOVAC ARGENTINA S.R.L.
Humboldt 2495 Piso# 3
C1425FUG) C.A.B.A. Argentina
C.U.I.T No. 30-70706168-1
IMPORTADO POR / IMPORTED BY:
SPECTRUM BRANDS DE MÉXICO, SA DE CV.
Autopista México Querétaro
No 3069-C Oficina 004
Colonia San Andrés Atenco, Tlalnepantla
Estado de México, C.P. 54040
México. Telefono: (55) 5831 – 7070
Para atención de garantía marque:
01 (800) 714 2503
IMPORTADO POR / IMPORTED BY:
SPECTRUM BRANDS EN CHILE,
Household Products Chile Ltda
Av. Del Valle 570, Ofic. 704
Ciudad Empresarial, Huechuraba
Santiago - Chile
Fono: (562) 2571 3700
Código de fecha / Date Code
IMPORTADO POR / IMPORTED BY:
SPECTRUM BRANDS S. A.
Carrera 17 No.89-40
Bogotá, Colombia
Línea de atención al cliente: 018000510012
COMERCIALIZADO POR:
SPECTRUM BRANDS DE MÉXICO SA DE C.V
Autopista México Querétaro No 3069-C Oficina 004
Colonia San Andrés Atenco, Tlalnepantla
Estado de México, C.P. 54040
MÉXICO.
Teléfono: (55) 5831-7070
Servicio y Reparación
Art. 123 No. 95
Col. Centro, C.P. 06050
Deleg. Cuauhtemoc
Servicio al Consumidor,
Venta de Refacciones y Accesorios
01 800 714 2503
55
Page 56

www.BlackAndDeckerAppliances.com
RCR520SD
1000W 120V~ 60Hz
© 2016 The Black + Decker Corporation
and Spectrum Brands, Inc.,
Middleton, WI 53562
Made in People’s Republic of China
Fabricado en la República Popular de China
Fabriqué en République populaire de Chine
BLACK+DECKER and the BL ACK+DECKER logo are trademarks of The Black +
Decker Corporation and are used under license. All rights reserved.
BLACK+DECKER y el logo tipo BLACK+DECKER son marcas registradas de The
Black + Decker Corporation y son utilizados bajo licencia. Todos los derechos
reservados.
BLACK + DECKER et le logo BL ACK &+DECKER sont des marques de commerce
de The Black + Decker Corporation, et sont utilisés sous licence. Tous droits
réservés.
56
T22-5002787
 Loading...