

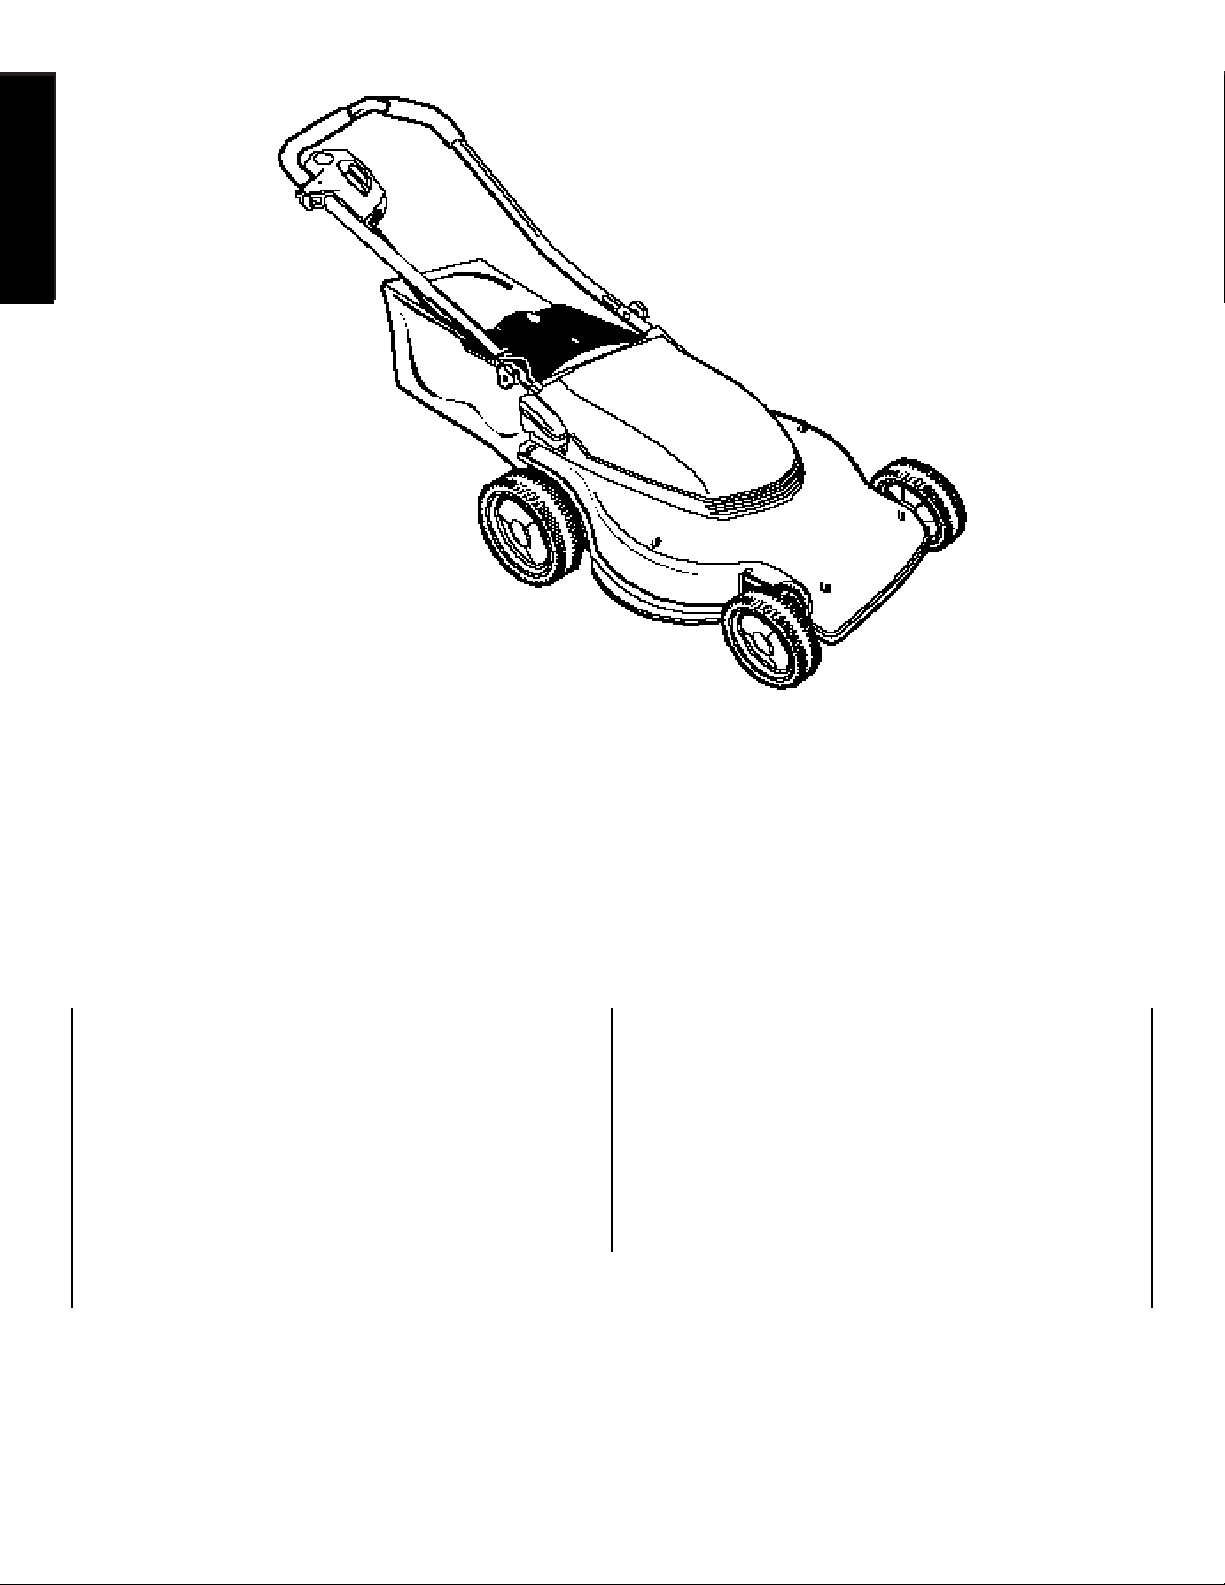
Black & Decker MM850 Instruction Manual

MM850
19” (483 mm) Convertible Mulching•Rear Bag Mower
Déchiqueteuse convertible • Tondeuse à sac arrière de
483 mm (19 po)
Podadora convertible de 483 mm (19”) con bolsa trasera
Instruction Manual
Guide d’utilisation
Manual de instrucciones
ENGLISH
2
Your new MM850 lawnmower has been built to
those same tough standards that have made Black
& Decker the world’s most trusted name in power
tools for over seventy-five years.
Extremely lightweight to reduce fatigue and one of
the quietiest lawnmowers you can buy anywhere,
your new mower has a list of features, extra large
wheels for easy going over rough ground, and a
One Touch wheel height adjustment system that
allows you to adjust all four wheels simultaneously
at the touch of a lever.
Please take the time to read this informative
instruction manual. Only with a thorough
understanding of your mower and its features will
you get the most from it.
Don’t forget to send in your owner’s registration
card.
Thanks for buying Black & Decker.
Welcome to
Black & Decker’s World
of Outdoor Products
ENGLISH

ENGLISH
3
READ ALL INSTRUCTIONS
WARNING: WHEN USING ELECTRIC LAWNMOWERS, BASIC SAFETY PRECAUTIONS SHOULD ALWAYS BE
FOLLOWED TO REDUCE THE RISK OF FIRE, ELECTRIC SHOCK AND PERSONAL INJURY, INCLUDING THE
FOLLOWING.
1. KNOW YOUR MOWER - Read the Manual carefully. Be thoroughly familiar with the controls and the
proper use of your mower.
2. AVOID DANGEROUS ENVIRONMENT - Don’t use your mower in the rain or in damp or wet
locations. Don’t operate it in gaseous or explosive atmospheres. Motors normally spark and the
sparks might ignite fumes.
3. USE PROTECTIVE EQUIPMENT - Wear safety spectacles or goggles while mowing (regular
eyeglasses are not safety glasses). Use face or dusk mask if operation is dusty. Safety spectacles are
available at your Black & Decker dealer.
4. KEEP GUARDS AND SHIELDS IN PLACE - and keep in working order.
5. GUARD AGAINST ELECTRIC SHOCK - Repair or replace damaged mower cord or extension cords
immediately. To prevent disconnection of mower cord from the extension cord during use, knot the
cords exactly as shown in Figure 1.
6. DANGER: KEEP AWAY FROM BLADE AREA - Risk of cut - Keep hands and feet away from blade.
Don’t attempt to remove cut material or unclog chute when blade is moving.
7. DISCONNECT LAWNMOWER - Release switch lever to turn off mower and after blade has stopped,
unplug cord from receptacle or extension cord when tool is not in use, before making adjustments,
before servicing, cleaning and when changing accessories such as blades, and the likes.
8. KEEP CHILDREN AWAY - All visitors should be kept a safe distance from work area.
9. STORE IDLE LAWNMOWER INDOORS - When not in use, lawnmower should be stored indoors in a
dry place, locked up - out of reach of children.
10. DON’T FORCE THE MOWER - It will do the job better and safer at the rate for which it was
designed.
11. USE RIGHT TOOL - Do not use tool for any job except that for which it was intended.
12. DRESS PROPERLY - Do not wear loose clothing or jewelry. They can be caught in moving parts.
Use of rubber gloves and footwear is recommended when working outdoors.
13. DON’T ABUSE CORD - Never pull lawnmower by cord or yank it to disconnect from receptacle. Keep
cord from heat, oil and sharp edges.
14. WARNING - To reduce the risk of electric shock hazard use only with an extension cord suitable for
outdoor use. Always connect extension cords to a fused line or one protected by a circuit breaker.
15. DON’T OVERREACH - Keep proper footing and balance at all times.
16. MAINTAIN LAWNMOWER WITH CARE - Keep blade sharp and clean for best and safest
performance. Follow instructions for lubricating and changing accessories. Inspect lawnmower cord
periodically and if damaged, have it repaired by an authorized service facility. Inspect extension cords
periodically and replace if damaged. Keep handles dry, clean, and free from oil and grease.
17. AVOID ACCIDENTAL STARTING - Be sure switch is off when plugging in.
18. OBJECTS STRUCK BY THE LAWNMOWER BLADE can cause severe injuries to persons. The
lawn should always be carefully examined and cleared of all objects prior to each mowing.
19. IF MOWER STRIKES A FOREIGN OBJECT follow these steps: (a) Release switch lever to turn off
mower and wait for blade to stop, (b) Unplug power cord, (c) Inspect for damage, (d) Repair any
damage before restarting and operating the mower.
20. USE IDENTICAL REPLACEMENT BLADES ONLY.
21. WHEN SERVICING – Use only identical replacement parts.
22. Ground Fault Circuit Interrupter (GFCI) protection should be provided on the circuit(s) or outlet(s) to
be used for the lawnmower. Receptacles are available having built-in GFCI protection and may be
used for this measure of safety.
SAVE THESE INSTRUCTIONS FOR FUTURE USE
Important Safety Instructions
Additional Safety
Instructions
1. Read this instruction manual
carefully. Be thoroughly familiar with
the controls and the proper use of
the equipment.
2. Never allow children to operate a
power mower.
3. Keep the area of operation clear of
all persons, particularly small
children, and pets.
4. Thoroughly inspect the area where
the equipment is to be used and
remove all stones, sticks, wires,
bones, and other foreign objects that
could be thrown by the blade.
5. Do not operate the equipment when
barefoot or wearing open sandals.
Always wear substantial footwear.
6. Never attempt to make a wheel
height adjustment while the motor is
running or while the mower is
plugged in.
7. Mow only in daylight or in good
artificial light.
8. Never operate the equipment in wet
grass. Always be sure of your
footing; keep a firm hold on the
handle and walk; never run. When
backing up use extreme caution.
Look where you are walking.
9. Do not put hands or feet near or
under rotating parts. Keep clear of
the discharge opening at all times.
10. Release switch lever to turn mower
off when crossing gravel drives,
walks, or roads.
11. If the mower stalls, be sure to
release switch lever to turn mower
off, wait for the blade to stop and
unplug the cord before attempting to
unclog the chute or remove anything
from under the deck.
12. After striking a foreign object, release
switch lever to turn mower off, wait
for the blade to stop and unplug the
mower, thoroughly inspect the mower
for any damage, and repair the
damage before restarting and
operating the mower.
13. If the equipment should start to
vibrate abnormally release switch
lever and unplug the mower and
check immediately for the cause.
Vibration is generally a warning of
trouble.
14. Release switch lever to turn mower
off, wait for the blade to stop and
unplug the mower whenever you
leave the equipment, before
unclogging the deck or chute, or
cleaning the mower housing, and
when making any repairs or
inspections.
15. When cleaning, repairing, or
inspecting, make certain the blade
and all moving parts have stopped.
16. Shut the motor off and wait until the
blade comes to a complete stop,
then disconnect the power cord
before removing the grass catcher or
unclogging the chute.
17. Mow across the face of slopes; never
up and down. Exercise extreme
caution when changing direction on
slopes. Do not mow excessively
steep slopes.
18. Never operate the mower without
proper guards, plates, or other safety
protective devices in place.
Maintenance
1. Be sure the switch lever is released
and the blade has stopped and the
cord unplugged before doing any
maintenance.
2. Check the blade at frequent intervals
for proper tightness.
3. Keep all nuts, bolts, and screws tight
to be sure the equipment is in safe
working condition.
4. If you are using a Grass Catcher,
check it frequently for wear or
deterioration. If excessively worn,
replace with new bag for safety
protection.
Double Insulation
Your Mower is DOUBLE INSULATED to
give you added safety. This means that it
is constructed throughout with TWO
separate “layers” of electrical insulation or
one DOUBLE thickness of insulation
between you and the tool’s electrical
system.
Tools built with this insulation system are
not intended to be grounded. As a result,
your mower is equipped with a two-prong
plug which permits you to use extension
cords without concern for maintaining a
ground connection.
NOTE: DOUBLE INSULATION does not
take the place of normal safety
precautions when operating this mower.
The insulation system is for added
protection against injury resulting from a
possible electrical insulation failure within
the tool.
CAUTION: When servicing all tools, USE
ONLY IDENTICAL REPLACEMENT
PARTS. Repair or replace damaged
cords.
Polarized Plug
To reduce the risk of electric shock, this
equipment has a polarized plug (one
blade is wider than the other). This
equipment must be used with a suitable
polarized 2 wire or 3 wire extension
cord. Polarized connections will fit
together only one way. Make sure that
the receptacle end of the extension
cord has large and small blade slot
widths. If the plug does not fit fully into
the extension cord, reverse the plug. If
it still does not fit, obtain a suitable
extension cord. If the extension cord
does not fit fully into the outlet, contact
a qualified electrician to install the
proper outlet. Do not change the tool
plug or extension cord in any way.
Extension Cords
Double-insulated tools have 2 wire cords,
and can be used with 2 wire or 3 wire
extension cords. Only round jacketed
extension cords should be used, and we
recommend that they be listed by
Underwriters Laboratories (U.L.) or
Canadian Standards Association (CSA).
WARNING – TO PREVENT ELECTRIC
SHOCK USE ONLY WITH AN
EXTENSION CORD SUITABLE FOR
OUTDOOR USE, SUCH AS SW-A,
SJOW-A, SOW-A, STW-A, STOW-A,
SJW-A, SJTW-A OR SJTOW-A.
An extension cord must have adequate
wire size (AWG or American Wire Gauge)
for safety, and to prevent loss of power
and overheating. The smaller the gauge
number of the wire, the greater the
capacity of the cable, that is 16 gauge
has more capacity than 18 gauge. When
using more than one extension to make
up the total length, be sure each
individual extension contains at least the
minimum wire size.
To determine the minimum wire size
required, refer to the chart below:
(Refer to your mower’s nameplate to find
the Ampere Rating)
4
ENGLISH
NOTICE
Using any other length or rating
of cord will diminish the
performance and possibly the
life of the electric motor.
Attaching
Extension Cord
To Mower
DO NOT connect the extension cord to
power source until you have finished
reading this manual and you are ready to
start mowing.
STEP 1-Read the
Polarized plug section on page 4
before plugging the extension cord into
the switch housing as shown in figure
1. The extension cord must be
polarized and will only plug in one way,
orient the wide slot with the wide blade
in the switch housing.
STEP 2-Loop the extension cord and
push the loop up through the hole in
the switch housing.
STEP 3-Pull the extension cord on the
side of the loop that is plugged into the
switch housing and remove all the
slack in this section of the extension
cord.
STEP 4-Place the loop over the strain
relief tab on the switch housing and pull
the extension cord so the loop draws
down around the strain relief tab as
shown in the detail. Double check to
see that you did not loosen the
extension cord in step 3.
Unpacking
Your mulching mower has been
completely assembled at the factory
except for the Grassbag.
CAUTION: Do not lift the lawnmower off
the ground by holding the
finger grip. See Figure 4.
To remove mulching mower from
carton
1. Remove the Grassbag frame,
Grassbag assembly instructions, and
cardboard fillers.
2. Remove the mower from the carton
and place all four wheels on the
ground or floor. See Figure 2.
3. Check the carton thoroughly and make
sure there are no loose parts.
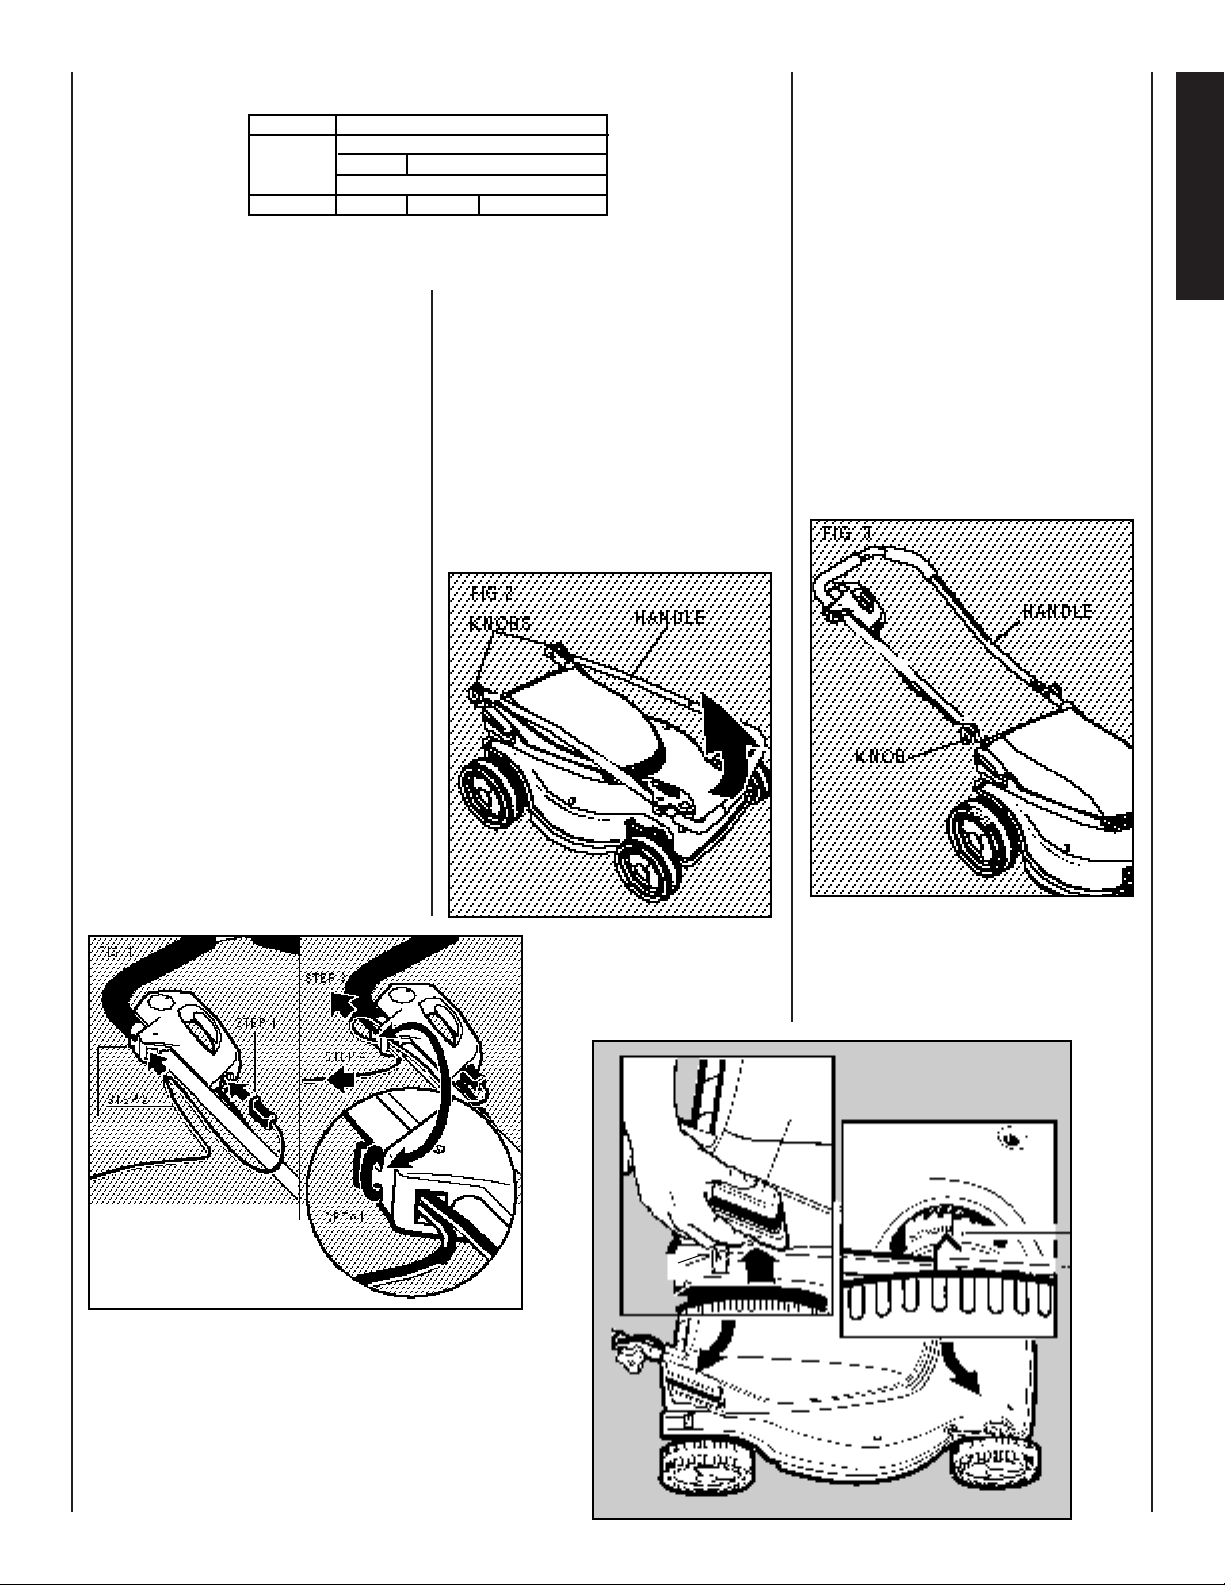
To Unfold Handle
Raise the handle section into place and
secure by tightening the two knobs. See
Figure 2 and 3.
WARNING: For your own safety DO NOT
use this mower without either
the Grasscatcher or Mulch
Insert in operating position.
To Assemble
Grassbag
To assemble the Grassbag to the
Grassbag frame, read the instructions
supplied with the Lawnmower.
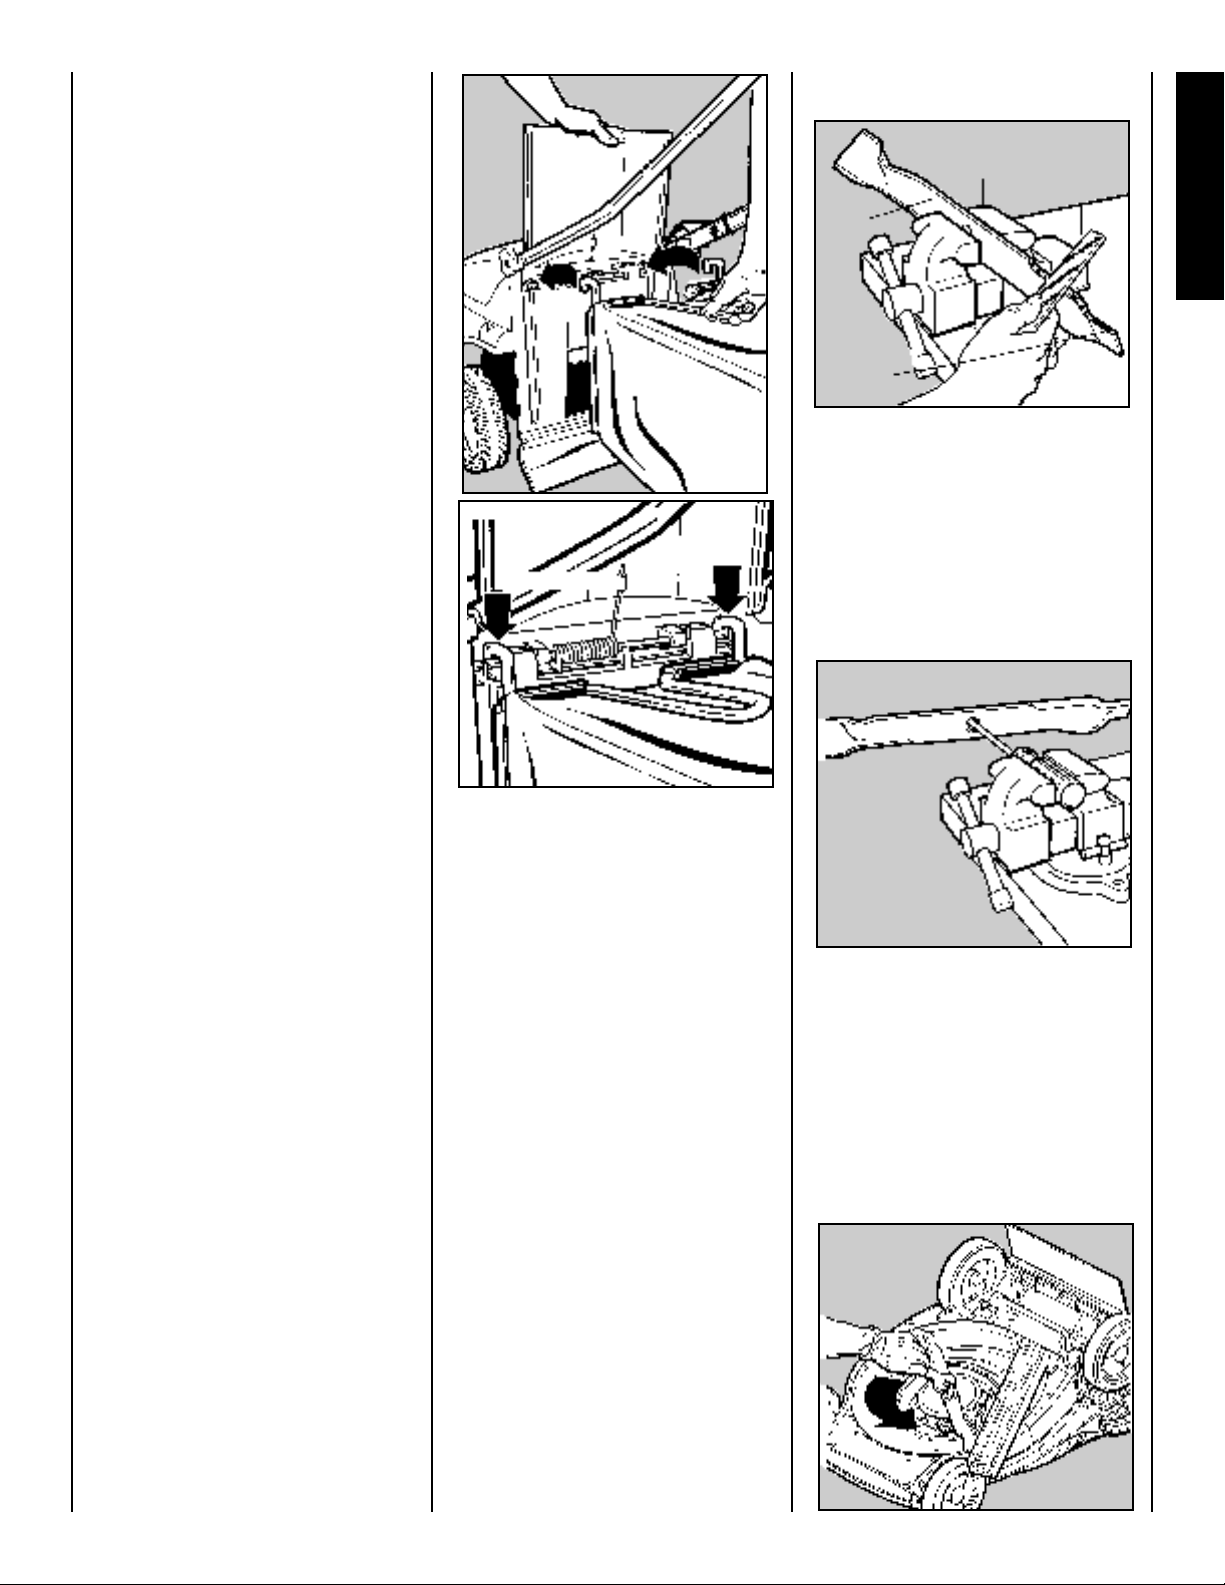
Wheel Height Adjustment
(from 1-14” to 3-1/2”)
1. Before making any adjustments, turn
off, unplug mower and wait for blade to
stop.
2. Your mulcher features the Black &
Decker one touch wheel height
adjustment system. This system will
adjust all four wheels at the same
time.
3. To raise or lower the cutting height.
See Figure 4. Rest the palm of your
hand on the palm rest and with your
5
ENGLISH
MINIMUM GAUGE FOR CORD SETS
120 VOLTS Required Cord Length
Cord Length in Feet
25 50 100 150
Wire Gauge
12-16 14 12
If you have any questions call the Consumer 1-800 Help Line as listed in this instruction manual.
MOTOR
AMP
RATING
NOT RECOMMENDED
FINGER
GRIP
PALM
REST
FIG. 4
POINTER
SCALE
STRAIN
RELIEF
TAB
fingers, squeeze upward on the finger
grip and hold.
4. While holding the finger grip up you
can raise or lower the cutting height.
The mulcher has eight blade height
adjustment positions. Refer to the
scale and pointer (see Figure 4) at the
front of the mower. The pointer will
give you the height setting for cutting
your lawn. This setting can be a
reference for the next time you want to
cut your lawn at the same height.
When you have the mulcher at the
height you would like, simply release
the finger grip to lock the height adjust.
Note: To ensure that the deck is securely
locked in one of the eight positions,
press down on the palm rest after
releasing the finger grip.
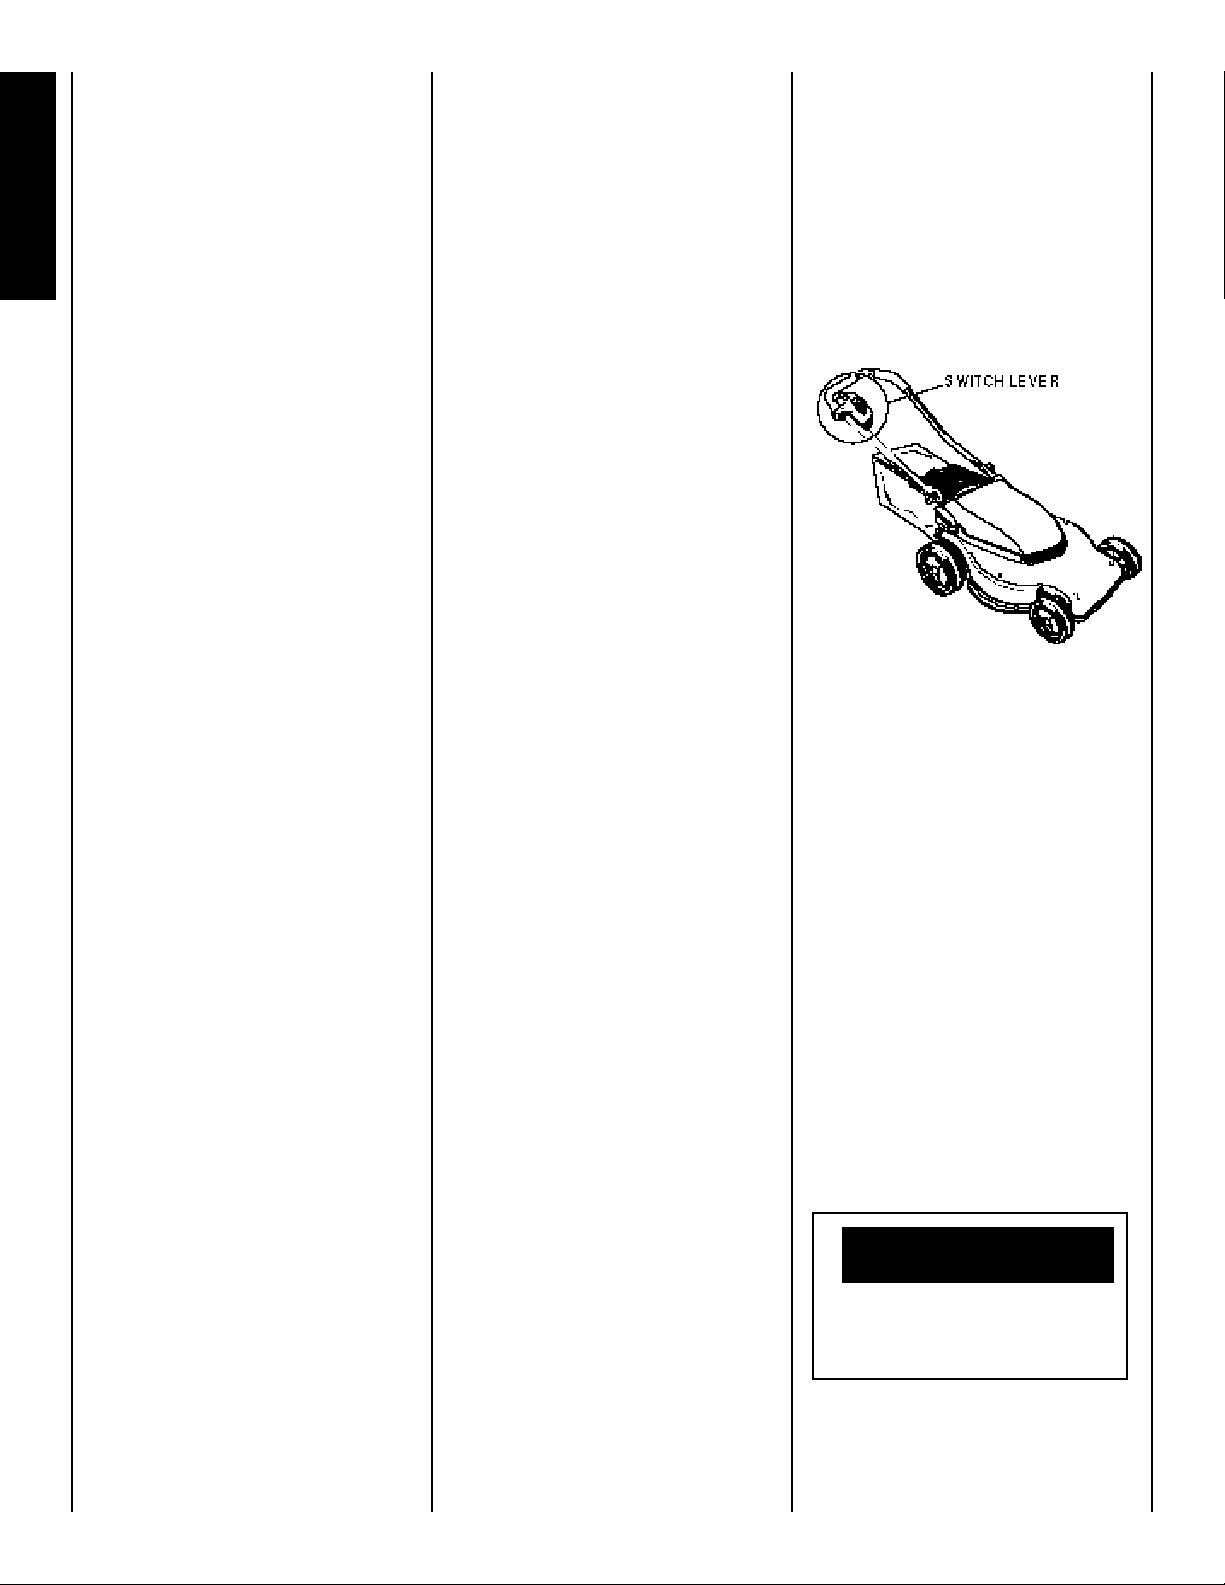
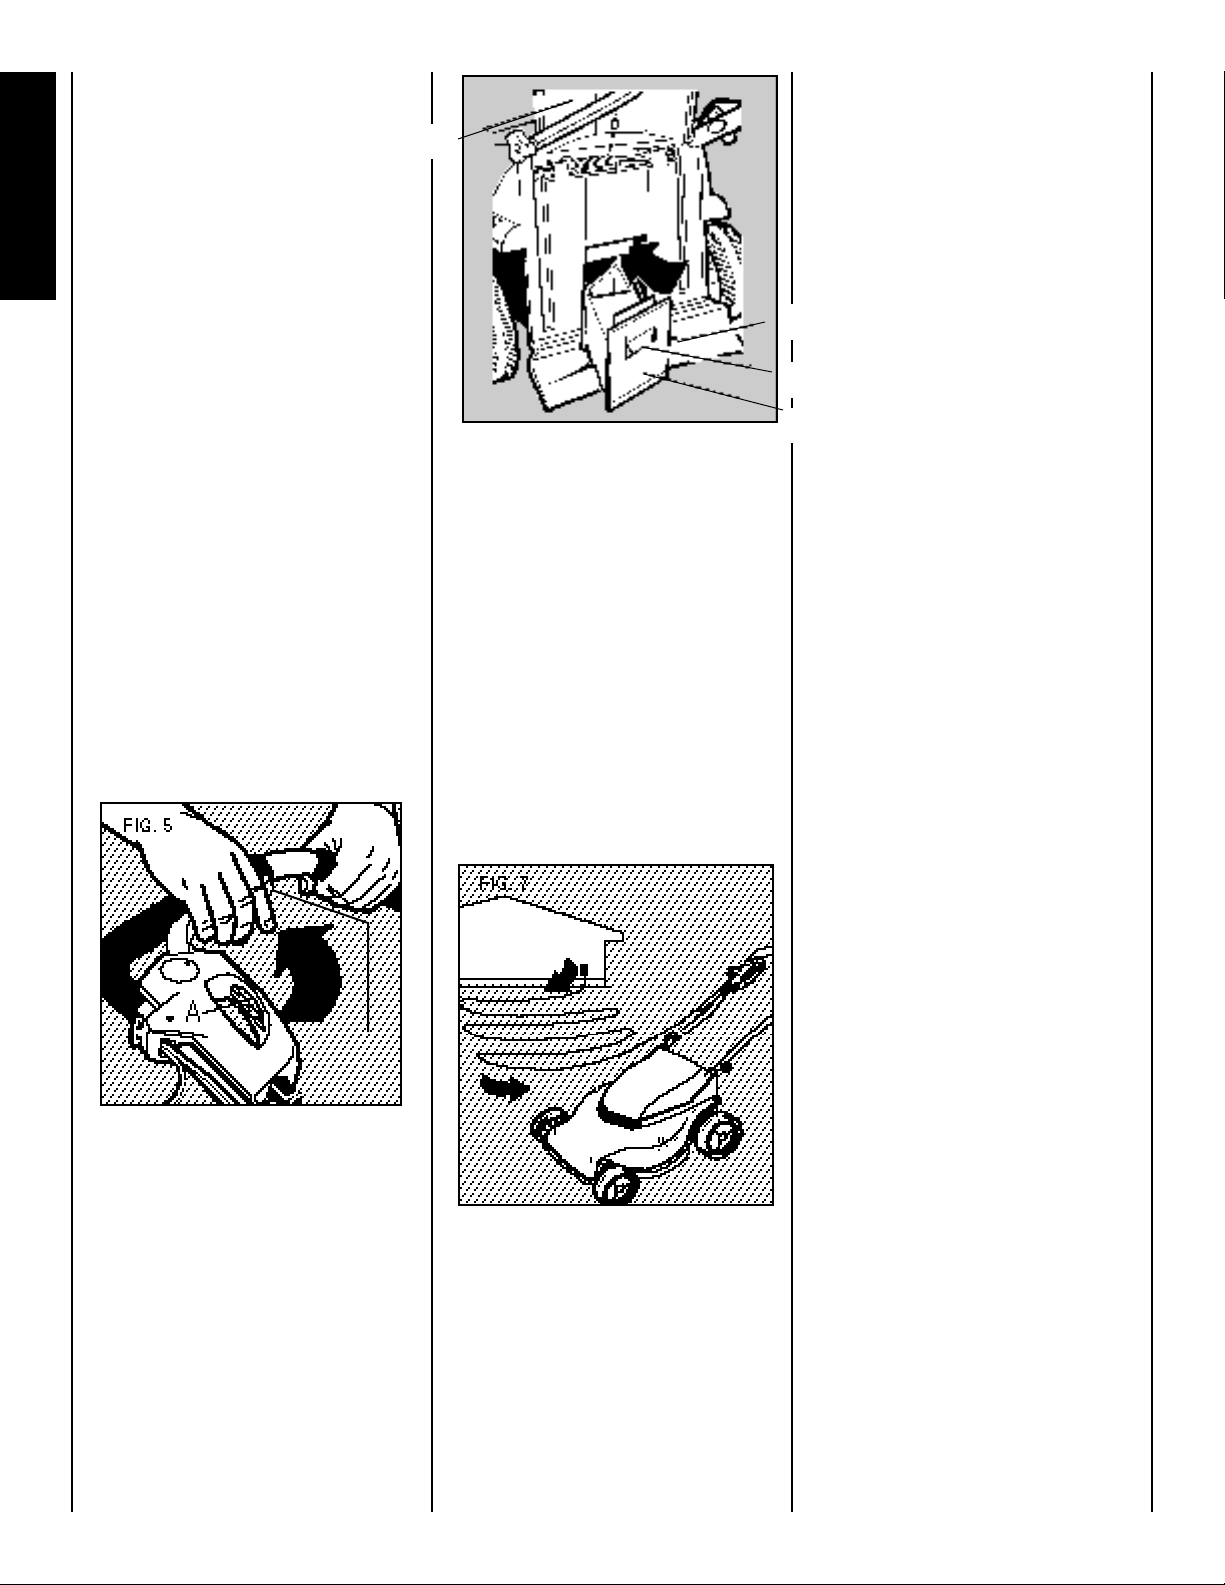
Switch
Your mower is equipped with a special
switch. To operate the switch, insert your
finger into the opening (A) in figure 5 and
push the lever out so that you can grab it
with your other hand. Pull the lever back
to turn the unit on and hold it against the
mower handle to keep it running. To turn
the mower off, just release the lever. The
spring loaded “SNAP ACTION” lever will
quickly turn the mower off.
CAUTION: NEVER ATTEMPT TO
OVERRIDE THE OPERATION OF THIS
SWITCH.
Safety Shield
& Rear Door
This safety shield (Figure 6) is designed
to minimize the throwing of stones or
other objects by the mower blade
backward from under the mower deck.
The shield, along with the rear door
minimize the possibility of accidental foot
contact with the blade. DO NOT operate
mower without the safety shield and rear
door in place.
WARNING: For your own safety DO NOT
use this mower without either the
grasscatcher or mulch insert in operating
position.
WARNING: Do not operate the
lawnmower if the rear door is not under
spring tension. Take your lawnmower to
the nearest service center or depot for
repair.
MOWING PROCEDURE
1. Inspect area where mower is to be
used and remove all stones, sticks,
wire, bones, and other debris which
might be thrown by the rotating blades.
2. Place most of the extension cord close
to the electrical outlet, out of the path
of the mower (Figure 7). CAUTION:
Do not plug extension cord into
receptacle outlet while standing in
water or when hands are wet.
3. Begin mowing in the area closest to
the outlet and mow in a back and forth
manner (Figure 7). Note that cord is
kept on cut portion of lawn.
Other Mowing Tips
1. Mow across the face of slopes, never
up-and-down. Exercise extreme
caution when changing direction on
slopes. Do not mow excessively steep
slopes. Always maintain good footing.
2. Release switch to turn mower “OFF”
when crossing any graveled area
(stones can be thrown by the blade).
3. Set mower at highest cutting height
when mowing in rough ground or in tall
weed.
4. From time to time turn off mower and
wait for the blade to come to a
complete stop. Then unplug the power
cord and turn mower on its side. Using
an object such as a stick, wipe out any
accumulation of grass in the blade
area. Be careful of the sharp edges of
the blade. If a grass catcher is used
during the fast growing season, the
grass may tend to clog up at the
discharge opening. Turn the switch
“OFF” and disconnect the power cord
plug. Remove the catcher and shake
the grass down to the back end of the
bag. Also clean out any grass or
debris which may be packed around
the discharge opening. Replace the
grass catcher. Clean often in wet,
spring grass.
5. If mower should start to vibrate
abnormally, turn mower “OFF” and
unplug power cord. Check immediately
for cause. Vibration is a warning of
trouble. Do not operate mower until a
service check has been made.
6. ALWAYS TURN THE SWITCH OFF
AND UNPLUG THE MOWER WHEN
LEAVING IT UNATTENDED EVEN
FOR A SHORT PERIOD OF TIME.
Mulching
Your new mower is designed to re-cut the
grass clippings many times and reduce
them in size so that, as they fall into the
lawn, they will disperse into the grass and
not be noticed. Also, the mulched grass
will biodegrade quickly to provide
nutrients to the lawn.
Your mower was shipped with the Mulch
Insert installed from Black & Decker.
See section of manual for removing
mulch insert.
Mulching Mowing Tips
For best performance, keep the mower
housing free of built-up grass and trash.
Clean after each use. See CLEANING in
the maintenance section of this manual.
Avoid cutting the lawn when it is wet. Wet
grass tends to form clumps and they
interfere with the mulching action. The
best time to mow your lawn is in the early
afternoon. At this time the grass is dried
and the newly cut area will not be
exposed to the direct sun. For best
results, adjust the lawnmower cutting
height so that the lawnmower cuts off only
the top one third of the grass blades. If
the lawn is overgrown it will be necessary
to increase the cutting height to reduce
the pushing effect and reduce overloading
the motor. For extremely heavy mulching
make narrower cuts and mow slowly.
Certain types of grass and grass
conditions may require that an area be
6
ENGLISH
FIG. 6
SWITCH
LEVER
HANDLE
POCKET
SAFETY
SHIELD
MULCH
INSERT
REAR
DOOR
mulched a second time to completely hide
the clippings. When doing a second cut,
mow across or perpendicular to the first
cut path. DO NOT MOW
PERPENDICULAR TO THE FIRST PATH
IF IT WOULD CAUSE MOWING
ACROSS A HILL.
Change your cutting pattern from week to
week. Mow north to south one week and
east to west the next week. This will help
prevent matting and graining of the lawn.
Removing Mulch
Insert
To remove the Mulch Insert so that you
can bag the grass, follow the steps listed
below.
1. Shut the mower off, wait until the blade
stops and unplug the mower.
2. Raise the rear discharge door and
hold it up as shown in Figure 6.
3. Locate your hand in the handle pocket
as shown in Figure 6, lift and pull out
the mulch insert completely.
4. The rear discharge door is spring
loaded. When you release it the door
will return to the closed position.
Installing Mulch
Insert
1. Repeat steps 1 and 2 for removing
mulch insert.
2. Slide the mulch insert into the
discharge opening until it is firmly in
contact with the deck.
Installing Grass
Catcher
1. Reaching down between the
lawnmower handles, raise the rear
discharge door to a vertical position
and hold the door up as shown in
Figure 8.
2. Pick up the grass catcher by the
handle and lower the grass catcher
between the lawnmower handles as
shown in Figure 8. Position the grass
catcher hanger hooks on the
lawnmower as shown in Figure 9.
Release the rear discharge door.
Warning: Never operate the mower
unless the hanger hooks on the grass
catcher are seated properly on the
lawnmower and the rear discharge door
rests firmly against the top of the grass
catcher.
Blade Sharpening
KEEP BLADE SHARP FOR BEST
MOWER PERFORMANCE. A DULL
BLADE DOES NOT CUT GRASS
EVENLY
WEAR PROPER EYE PROTECTION
BLADE SHARPENING
Sharpening the blade twice during a
mowing season is usually sufficient under
normal circumstances. Sand causes the
blade to dull fast. If your lawn has sandy
soil, more frequent sharpenings are
required.
REPLACE BENT OR DAMAGED BLADE
IMMEDIATELY.
WHEN SHARPENING THE BLADE:
1. Make sure blade remains balanced.
2. Sharpen blade at the original cutting
angle.
3. Sharpen cutting edges on both ends of
blade, removing equal amounts of
material from both ends.
TO SHARPEN BLADE IN A VISE:
See Figure 10
1. Be sure the switch lever is released
and the blade has stopped and the
cord unplugged before removing the
blade.
2. Remove blade from mower. See
instructions for removing and attaching
blade.
3. Secure blade in a vise as shown in
figure 10.
4. Wear safety glasses and be careful
not to cut yourself.
5. Carefully file the cutting edges of the
blade with a fine tooth file or
sharpening stone.
6. Check balance of blade. See
instructions for blade balancing.
7. Replace blade on mower and tighten
securely.
BLADE BALANCING
Check balance of blade by placing centre
hole in blade over a nail or screwdriver
shank, clamped horizontally in a vise.
If either end of the blade rotates
downward, file that end. Blade is
properly balanced when neither end
drops. (Fig. 11)
Removing and
Attaching Blades
1. RELEASE SWITCH LEVER TO TURN
MOWER OFF, WAIT FOR THE
BLADE TO STOP, AND UNPLUG
MOWER!
2. Cut a piece of 2x4 wood (about 2 feet
long) to keep blade from turning while
removing blade nut.
3. Wear gloves. Position wood and
remove nut as shown in Figure 12.
7
ENGLISH
FIG. 8
FIG. 9
FIG. 10
FIG. 11
FIG. 12
HANGER HOOK
BLADE
VISE
SHARPEN THIS
EDGE ON
BOTH ENDS
OF BLADE
FINE
TOOTH
FILE
4. Remove lower blade spacer, lower
insulator washer and blade (Figure 14)
5. When replacing sharpened or new
blade on shoulder of fan, make sure
cutting edges of the blade are closest
to the ground. Place lower insulator
washer over shoulder of the fan. Now
place lower blade spacer and the
blade nut on the shaft.
NOTE: Align flats of shaft with flats in
lower insulator washer and lower the
blade spacer.
Position wood to keep shaft from
turning (Figure 13) and then securely
tighten blade nut.
Lubrication
No lubrication is necessary. Do not oil the
wheels. They have plastic bearing
surfaces which require no lubrication.
Cleaning
TURN OFF, LET THE BLADE COME TO
A STOP AND THEN UNPLUG MOWER!
Use only mild soap and a damp cloth to
clean the mower. Clean out any clippings
which may have accumulated on the
underside of the deck. After several uses,
check all exposed fasteners for tightness.
PREVENTING CORROSION
Fertilizers and other garden chemicals
contain agents which greatly accelerate
the corrosion of metals. If you mow in
areas where fertilizers or chemicals have
been used, the mower should be cleaned
immediately afterward as follows: (1) Be
sure the tool is turned off and unplugged.
(2) Wipe all exposed parts with a damp
cloth.
CAUTION: DO NOT POUR OR SPRAY
WATER ON THE MOWER IN AN
ATTEMPT TO CLEAN IT.
do not store the tool on or adjacent to
fertilizers or chemicals. Such storage can
cause rapid corrosion.
Storage
Your mower should be stored in a dry
place.
8
ENGLISH
Fig. 13
Fig. 14
LOWER
BLADE
SPACER
LOWER
INSULATOR
WASHER
LOWER
INSULATOR
WASHER
ARMATURE
SHAFT
BLADE NUT
BLADE

ENGLISH
9
Important
To assure product SAFETY and RELIABILITY, repairs, maintenance and adjustment (including brush inspection and
replacement) should be performed by BLACK & DECKER Service Centers or other qualified service organizations, always
using Black & Decker replacement parts. When servicing use ONLY IDENTICAL REPLACEMENT PARTS.
HOME USE WARRANTY
FULL TWO-YEAR WARRANTY ON MOWER AND
FULL FIVE-YEAR WARRANTY ON PLASTIC DECK
Black & Decker warrants (in non-commercial use) this entire mower for two years and the plastic deck (only) of the mower
for five years against defects that are due to faulty materials or workmanship. Please return the mower to Black & Decker
Service Center or Authorized Service Depot for free replacement or repair at our option (proof of purchase may be
required). This warranty gives you specific legal rights and you may have other rights which vary from state to state or
province to province. Should you have any questions, contact your nearest Black & Decker Service Center.
30-Day No-Risk Try Out
If you are not completely satisfied with this product’s performance, simply return to your place of purchase within 30 days
for a full refund.
THE CONSUMER 1-800 HELP LINE
For your assistance, Black & Decker has installed a toll-free number. Should you have any questions that are not
explained in the Instruction Manual or experience any difficulties with your Black & Decker Lawnmower, please phone
1-800-762-6672 U.S. AND CANADA
An operator is available to answer your call between 8:00 and 5:00 p.m. (EST) Monday through Friday (excluding holidays)
Accessories
CAUTION: Accessories are recommended for use with your mower. The use of any other accessory or attachment might
be hazardous.
The accessories listed in this manual are available at extra cost from your local dealer or Black & Decker Service Center.
MC-1000.....................................................................................................REPLACEMENT GRASSBAG
MB-850 ...............................................................................................................REPLACEMENT BLADE
A complete listing of service centers is included in the Instruction Manual packed with your Lawnmower.
If you need assistance in locating any accessory please contact:
Black & Decker (U.S.) Inc. Black & Decker Canada Inc.
Consumer Service Department 100 Central Avenue,
626 Hanover Pike Brockville, Ontario,
P.O. Box 618 K6V 5W6
Hampstead, MD 21074-0618
SAVE THESE INSTRUCTIONS FOR FUTURE USE

10
NOTES
11
Guide d’utilisation
Déchiqueteuse convertible • Tondeuse à sac
arrière de 483 mm (19 po)
Modèle n
0
MM850
 Loading...