

Page 1

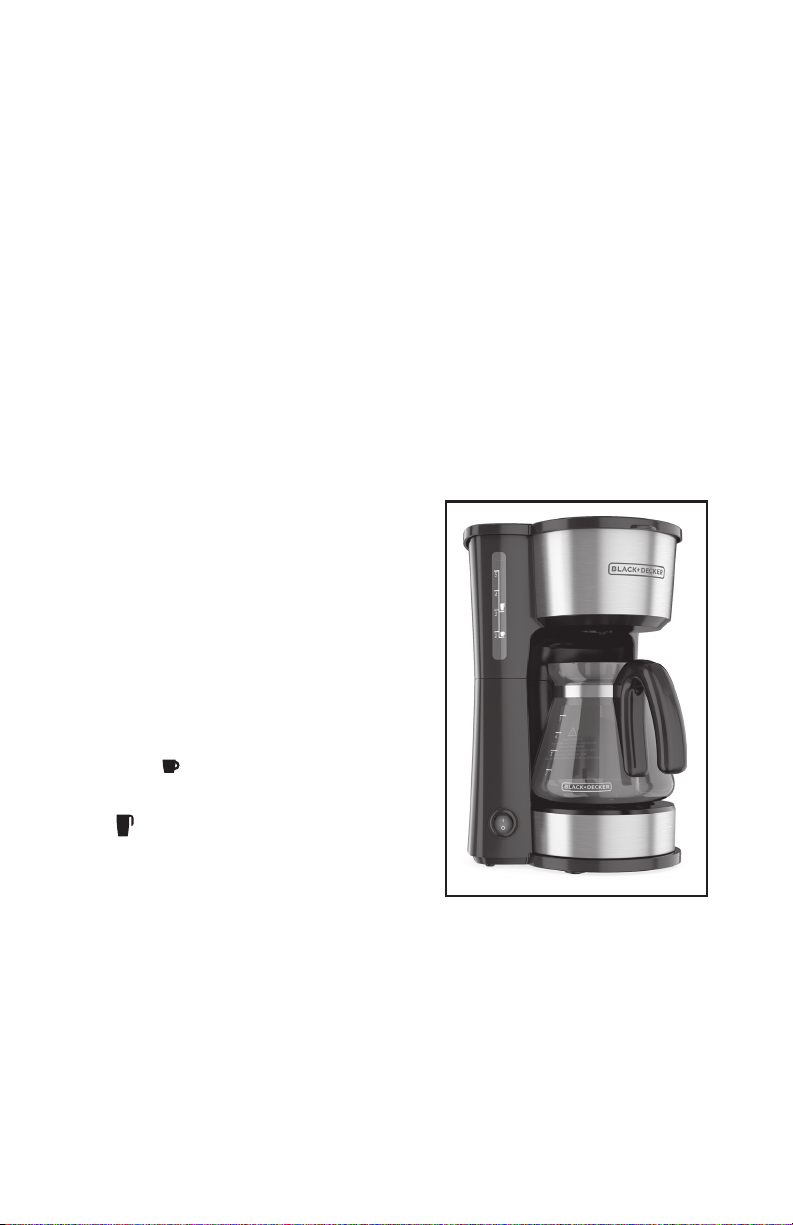
4-IN-1 COFFEE STATION
ESTACIÓN DE CAFÉ 4-EN-1
use and care manual
manual de uso y cuidado
CM0755S-LA
CM0755S-CL
CM0755S-MX
CM0755WG
CM0755G
Page 2

WELCOME!
Congratulations on your purchase of the
BLACK+DECKER® 4-in-1 Coffee Station!
We have developed this guide to ensure
optimal product performance for your
complete satisfaction.
Please Read and Save this Use and Care Book.
IMPORTANT
SAFEGUARDS
When using electrical appliances, basic safety
precautions should always be followed to
reduce the risk of fire, electric shock, and/or
injury, including the following:
CONTENTS
Important Safeguards.............. 2
Getting to Know Your Coffeemaker .....4
Getting Started ...................5
General Brewing Instructions .........5
Brewing Coffee Into Carafe ...........5
Brewing Coffee Into a Mug ...........6
Brewing Coffee Into Travel Mug .......6
Pour Over Brewing .................6
Care and Cleaning .................7
Warranty and Customer Service
Information ......................8
• READ ALL INSTRUCTIONS.
• Do not touch hot surfaces. Use
handle or knobs.
• To protect against electrical shock,
do not immerse cord, plug, or base
unit in water or other liquid.
• Close supervision is necessary when
any appliance is used by or near
children.
• Unplug from outlet when not in use
and before cleaning. Allow to cool
before putting on or taking o parts
and before cleaning the appliance.
• Do not operate any appliance with
a damaged cord or plug or after the
appliance malfunctions, or has been
damaged in any manner. Contact
Consumer Support at the toll-free
number listed in the warranty section.
• The use of accessory attachments
not recommended by the appliance
manufacturer may result in re,
electric shock or injury.
• Do not use outdoors.
• Do not let cord hang over the edge
of table or counter, or touch hot
surfaces.
• Do not place on or near a hot gas or
electric burner or in a heated oven.
• To disconnect, turn any control to OFF
(O), then remove plug from wall outlet.
WARNING
The lightning symbol refers to “dangerous voltage”; the exclamation symbol refers
to maintenance instructions. See below.
Warning: To reduce the risk of fire or electric shock, do not remove the cover of the
coffeemaker. There are no user-serviceable parts inside. Repair should be done by
authorized service personnel only.
RISK OF FIRE OR ELECTRIC SHOCK. DO NOT OPEN.
2
Page 3

• Do not use this appliance for other
than intended use.
• Keep lid on the carafe when in use.
• Scalding may occur if the lid is
removed during the brewing cycles.
• The carafe is designed for use with
this appliance. It must never be
used on a range top.
• Do not set a hot carafe on a wet or
cold surface.
• Do not use a cracked carafe or a carafe
having a loose or weakened handle.
• Do not clean carafe with cleansers, steel
wool pads or other abrasive material.
• This appliance is not intended for
use by persons (including children)
with reduced physical, sensory
or mental capabilities, or lack of
experience and knowledge, unless
they have been given supervision
or instruction concerning use of the
appliance by a person responsible
for their safety.
• Children should be supervised to
ensure that they do not play with
the appliance.
• This appliance is intended to be
used for domestic use and similar
applications such as:
• Kitchen areas of stores, oces and
other work environments
• Rural houses
• For customers in hotels, motels and
other types of residences.
SAVE THESE
INSTRUCTIONS.
This product is for household use only.
the plug. If it still does not t, contact a
qualied electrician. Do not attempt to
modify the plug in any way.
TAMPE R-R ESISTANT S CREW
Warning: This appliance is equipped
with a tamper-resistant screw to
prevent removal of the outer cover. To
reduce the risk of re or electric shock,
do not attempt to remove the outer
cover. There are no user-serviceable
parts inside. Repair should be done
only by authorized service personnel.
ELECTRICAL CORD
a) A short power-supply cord is
provided to reduce the risks
resulting from becoming entangled
in or tripping over a longer cord.
b) Extension cords are available and
may be used if care is exercised in
their use.
c) If an extension cord is used:
1) The marked electrical rating of
the extension cord should be at
least as great as the electrical rating
of the appliance;
2) If the appliance is of the
grounded type, the extension cord
should be a grounding-type 3-wire
cord; and
3) The cord should be arranged
so that it will not drape over the
counter top or tabletop where it
can be pulled on by children or
tripped over.
Note: If the power cord is damaged,
please contact the warranty
department listed in these instructions.
POLARIZED PLUG
(120V model only)
This appliance has a polarized plug
(one blade is wider than the other). To
reduce the risk of electric shock, this
plug is intended to t into a polarized
outlet only one way. If the plug does
not t fully into the outlet, reverse
3
Page 4

GETTING TO KNOW YOUR 4-in-1 COFFEE STATION
4
5
6
1
12
*
2
3
13
1. Water reservoir
2. Water level window
3. Lighted On/Off (I/O) switch
4. Lid
5. Shower head
6. Permanent filter
7. Brew basket, pour over compatible
8. Spout
9. Duralife™ 5 cup Carafe with lid
10. Adjustable stand
11. Base
12. Travel Mug (hand-wash only)
13. Personal Tritan
(model CM0755S-LA)
(model CM0755WG)
TM
Mug
7
8
9
10
11
The parts supplied with the coffeemaker depend on which model was purchased.
Product may vary slightly from what is illustrated.
4
Page 5
GETTING STARTED
This appliance is intended for household
use only.
• Remove all packing material, any stickers,
and the plastic band around the power plug.
• Remove all accessories and components.
• Open lid
• Pour fresh cold water into water reservoir
up to 5-cup mark.
• Place empty basket-style paper lter into
removable brew basket.
• Place basket into lter basket holder
• Place empty basket-style lter into
removable brew basket.
• Uncoil power cord and plug into
standard electrical outlet.
• Brew water through appliance without
adding coee grounds. This removes any
dust or residue that may remain in the
system during the manufacturing process.
• Discard the water from the carafe and
paper lter from brew basket.
• Turn o the appliance; unplug and allow
appliance to cool down.
GENERAL BREWING INSTRUCTIONS
1. Open one-piece cover.
2. Pour fresh cold water up to desired
level mark into water reservoir.
-If brewing a single cup into a mug,
fill to the
8 oz of coffee.
-If brewing into a travel mug, fill to
the
of coffee.
3. Place permanent filter or paper
filter into the brew basket.
4. Insert brew basket into top of
coffeemaker.
5. Add desired amount of ground
coffee.
Not sure how much coee to use?
Begin by using 1 level tablespoon of
medium grind coee for each 5 oz. of
coee to be brewed. A full carafe holds
25 oz. of coee.
icon. This will produce
icon. This will produce 12 oz.
6. Close lid securely.
7. By using or taking away the
adjustable stand, arrange the
receptacle of your choice so that its
top is close to the spout.
8. Plug cord into standard electrical
outlet.
9. Press on/off (I/O) switch button;
blue light comes on and brewing
begins.
10. Turn off coffeemaker when done
brewing.
11. Unplug appliance when not in use.
BREWING COFFEE INTO THE CARAFE
1. Place adjustable stand on the base.
2. Place empty carafe on the
adjustable stand.
3. Brew coffee following the general
brewing instructions.
NOTE:
This product does not
the keep hot carafe feature.
contain
5
Page 6
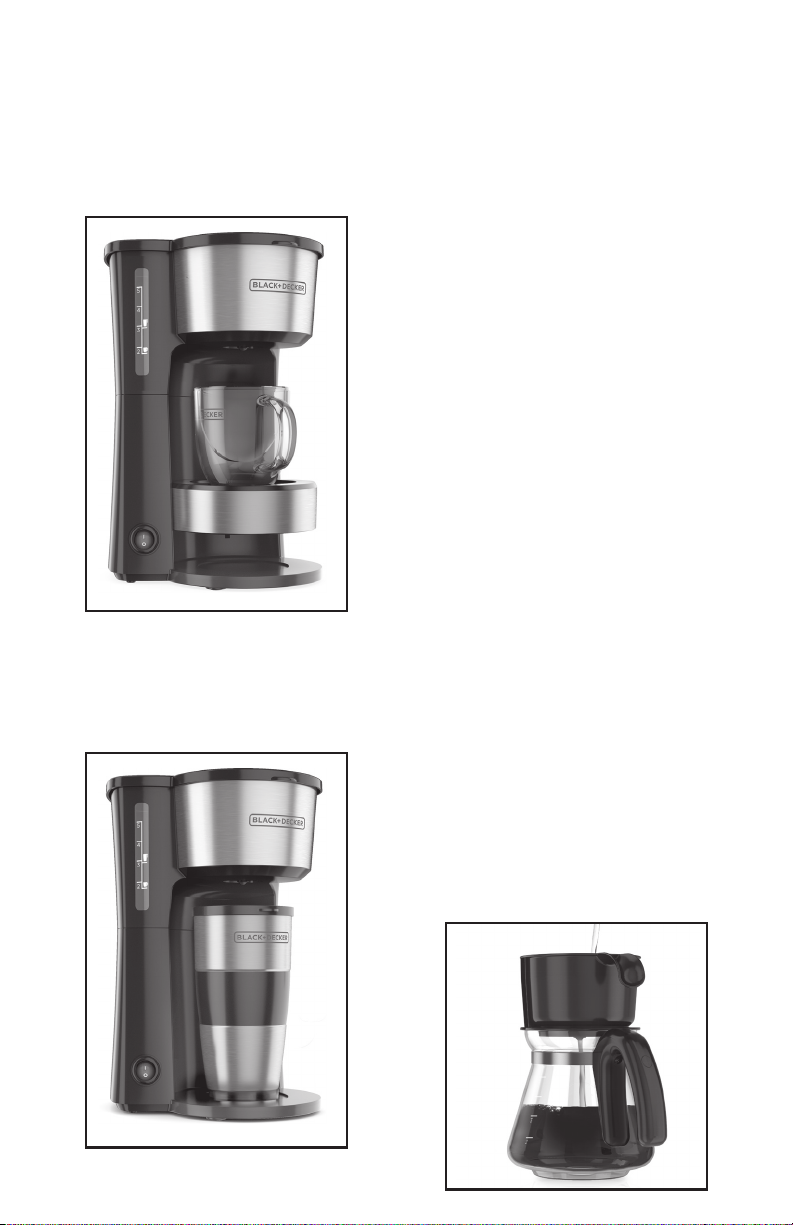
BREWING COFFEE INTO A MUG
1. By inserting the hooks on the stand
into the concave wall above the
base, adjust it so that it holds your
coffee mug close to the spout.
2. Brew coffee following the general
brewing instructions.
BREWING COFFEE INTO A TRAVEL MUG
1. Remove the stand and put travel
mug on the base.
2. Brew coffee following the general
brewing instructions.
POUR OVER BREWING
Why Pour Over?
Take more control over your coffee
brewing – you control the amount of
coffee and rate of brewing. The slower the
pour, the richer the flavor.
1. Pour cold water into a kettle or other
container [not included] and bring to
a boil. Once water reaches a boil, turn
off and let sit for 30 seconds.
2. Place the pour over compatible brew
basket on top of a mug of your choice
or the carafe with its lid removed.
3. Place the permanent filter or a #2
paper filter inside brew basket
Note: for best results, we recommend
using this brew method with paper filters.
4. Rinse the filter and carafe by pouring
your boiled water over the filter. This
helps preheat the brew basket and
carafe. Pour out the water from your
carafe or mug.
5. Add desired amount of freshly
ground coffee to the filter. About
2 tablespoons per serving is
recommended for this brew method.
6. Starting at the center of your grounds,
gently pour your boiled water onto
your grounds (just enough to wet all
of the coffee). Let rest for 30 seconds.
This allows the coffee to Bloom before
continuing.
7. Continue pouring slowly and gently
over the grounds then resting for 30
seconds after each pour. Continue
until you have your desired amount of
coffee. The process should take about
2–3 minutes.
Experiment! Find the method that brews
your perfect cup.
6
Page 7

CARE AND CLEANING
This product contains no user serviceable
parts. Refer service to qualied service
personnel.
CLEANING
1. Be sure the unit is unplugged
and cooled.
2. Open the one-piece cover, remove the
brew basket (lift straight up).
3. Empty the permanent filter or discard
the paper filter from the brew basket
(if using).
4. Wash the permanent filter, brew
basket, carafe, and carafe lid in the
dishwasher, top-rack only, or handwash with warm water and dish soap,
for travel mug hand wash only.
5. To clean inside one-piece cover, open
the cover and allow it to rest in the
open position.
6. Wipe surfaces with a damp cloth, and
close the cover.
CLEANING WITH VINEGAR (Descaling)
Mineral deposits left by hard water can
clog your coffeemaker. Cleaning with
vinegar is recommended once a month.
Your coffeemaker will not work
properly if it is not descaled regularly.
1. Pour white vinegar into water
reservoir up to 2-cup level on
water window.
2. Add cold water up to 5-cup line.
3. Place a paper filter in the brew
basket and close the cover.
4. Set empty carafe on adjustable
stand.
5. Turn on coffeemaker and let half the
cleaning solution brew into carafe
(until water level goes down to
around 3). Turn off coffeemaker and
let it soak for at least 15 minutes to
soften the deposits.
6. Turn on coffeemaker and brew
remaining cleaning solution
into carafe.
7. Turn off coffeemaker, empty carafe
and discard soiled filter.
8. Fill reservoir with cold water to
5-cup line, replace empty carafe,
then turn on coffeemaker for a
complete brew cycle to flush out
remaining cleaning solution. You
may wish to repeat this step to
eliminate any remaining vinegar
smell/taste.
9. Wash the brew basket and carafe as
instructed in CLEANING.
STORING
Make sure that the appliance is thoroughly
dry. Never wrap the cord tightly around the
appliance; keep it loosely coiled.
7
Page 8

WARRANTY INFORMATION
Two-Year Limited Warranty
(Applies only in the United States and Canada)
For service, repair or any questions regarding your appliance, call the appropriate 800
number listed within this section. Please DO NOT return the product to the place of
purchase. Also, please DO NOT mail product back to manufacturer, nor bring it to a service
center. You may also want to consult the website listed on the cover of this manual.
What does it cover?
• Any defect in material or workmanship provided; however,
Spectrum Brands, Inc.’s liability will not exceed the purchase price of product.
For how long?
• Two years from the date of original purchase with proof of purchase.
What will we do to help you?
• Provide you with a reasonably similar replacement product that is either new or factory refurbished.
How do you get service?
• Save your receipt as proof of date of sale.
• Visit the online service website at www.prodprotect.com/applica, or call toll-free
1-800-231-9786, for general warranty service.
• If you need parts or accessories, please call 1-800-738-0245.
What does your warranty not cover?
• Damage from commercial use
• Damage from misuse, abuse or neglect
• Products that have been modied in any way
• Products used or serviced outside the country of purchase
• Glass parts and other accessory items that are packed with the unit
• Shipping and handling costs associated with the replacement of the unit
• Consequential or incidental damages (Please note, however, that some states do not allow the
exclusion or limitation of consequential or incidental damages, so this limitation may not apply to you.)
How does state law relate to this warranty?
• This warranty gives you specic legal rights. You may also have other rights that vary from state to
state or province to province.
8
Page 9

¡BIENVENIDO!
PRECAUCIÓN
RIESGO DE INCENDIO O DE CHOQUE ELÉCTRICO. NO ABRA.
El símbolo de un rayo indica voltaje peligroso. El signo de exclamación
indica importantes instrucciones de mantenimiento. Consulte a
continuación:
Precaución: Para reducir el riesgo de incendio o de choque eléctrico,
no retire la cubierta de la cafetera. No contiene por dentro partes
reparables por el consumidor. Cualquier reparación deberá ser
efectuada únicamente por personal autorizado.
¡Felicitaciones por su compra
de la Estación de Café 4-en-1
BLACK+DECKER®! Hemos desarrollado
este manual para asegurar rendimiento
óptimo y su satisfacción total..
INFORMACIÓN
CONTENIDA
Instrucciones Importantes de Seguridad ......... 9
Conozca su Cafetera.......................... 11
Antes del Primer Uso .........................12
Instrucciones Generales de Prepraración ........12
Preparación de Café dentro de la Jarra ..........12
Preparación de Café dentro de la Taza ..........13
Preparación de Café dentro de la Taza Portátil .....13
Preparación de Café Filtrado a Mano............ 13
Cuidado y Limpieza ..........................14
Información de Garantía y Servicio al Cliente..... 16
Por favor lea este instructivo antes de usar el producto.
INSTRUCCIONES
IMPORTANTES
DE SEGURIDAD
Cuando se utilizan aparatos eléctricos, siempre
se debe respetar ciertas medidas de seguridad
a fin de reducir el riesgo de un incendio, un
choque eléctrico y (o) lesiones a las personas,
incluyendo las siguientes:
• POR FAVOR LEA TODAS LAS
INSTRUCCIONES.
• No toque las supercies calientes.
Use las asas o las perillas.
• A n de protegerse contra un
choque eléctrico y lesiones a las
personas, no sumerja el cable, los
enchufes ni el aparato en agua ni en
ningún otro líquido.
• Todo aparato eléctrico usado en la
presencia de los niños o por ellos
mismos requiere la supervisión de
un adulto.
• Desconecte el aparato del
tomacorriente cuando no esté en uso
y antes de limpiarlo. Espere que el
aparato se enfríe antes de instalarle o
retirarle piezas y antes de limpiarlo.
• No use ningún aparato eléctrico que
tenga el cable o el enchufe averiado,
que presente un problema de
funcionamiento o que esté dañado.
Acuda a un centro de servicio
autorizado para que lo examinen,
reparen o ajusten o llame gratis
al número correspondiente en la
cubierta de este manual.
• El uso de accesorios no recomendados
por el fabricante del aparato puede
ocasionar incendio, choque eléctrico o
lesiones a las personas.
• No use este aparato a la intemperie.
• No permita que el cable cuelgue del
borde de la mesa o del mostrador
ni que entre en contacto con las
supercies calientes.
• No coloque el aparato sobre ni cerca
de las hornillas de gas o eléctricas ni
adentro de un horno caliente.
9
Page 10

• Para desconectar, ajuste todo control
a la posición de apagado (OFF) O
y después, retire el enchufe del
tomacorriente.
• Este aparato se debe usar
únicamente con el n previsto.
• La tapa debe permanecer sobre la
jarra cuando el aparato está en uso.
• El retirar la tapa durante los
ciclos de colado puede ocasionar
quemaduras.
• La jarra está diseñada para ser
utilizada con este aparato. Jamás se
deberá utilizar sobre la estufa.
• Nunca coloque una jarra caliente
sobre una supercie fría ni húmeda.
• No utilice la jarra si el vidrio se
encuentra rajado o si el asa está
débil.
• No limpie la jarra con limpiadores
abrasivos, con almohadillas de bra
de metal ni demás limpiadores
abrasivos.
• Este aparato no está diseñado para
ser usado por personas (incluído
niños) con capacidad limitada física,
mental o sensoriales disminuidas y
falta de experiencia o conocimiento
que les impida utilizar el aparato con
toda seguridad sin supervisión o
instrucción.
• Se debe asegurar la supervisión de
los niños para evitar que usen el
aparato como juguete.
• Este ar tefacto está destinado a ser usado para uso
doméstico y similares aplicaciones tales como:
• Áreas de cocina de tiendas, ocinas
y otros entornos laborales
• Casas rurales
• Por clientes en hoteles, moteles y
otros tipos de residencias.
CONSERVE ESTAS
INSTRUCCIONES.
Este aparato electrico es para uso
domestico unicamente.
ENCHUFE POLARIZADO
(Solamente para modelos de
120V)
Este aparato cuenta con un enchufe
polarizado (un contacto es más ancho
que el otro). A n de reducir el riesgo
de un choque eléctrico, este enchufe
encaja en un tomacorriente polarizada
en un solo sentido. Si el enchufe no
entra en le tomacorriente, inviértalo
y si aun así no encaja, consulte con
un electricista. Por favor no trate de
alterar esta medida de seguridad.
TORNILLO DE SEGURIDAD
Advertencia: Este aparato cuenta con
un tornillo de seguridad para evitar la
remoción de la cubierta exterior del
mismo. A n de reducir el riesgo de
incendio o de choque eléctrico, por
favor no trate de remover la cubierta
exterior. Este producto no contiene
piezas reparables por el consumidor.
Toda reparación se debe llevar a cabo
únicamente por personal de servicio
autorizado.
CABLE ELÉCTRICO
a) Un cable de alimentación corto es
provisto para reducir los riesgos de
enredarse o tropezar con un cable
más largo.
b) Existen cables de extensión
disponibles y estos pueden ser
utilizados si se toma el cuidado
debido en su uso.
c) Si se utiliza un cable de extensión:
1) La clasificación eléctrica
marcada del cable de extensión
debe ser, como mínimo, igual a la
clasificación eléctrica del aparato;
2) Si el aparato es del tipo de
conexión a tierra, el cable de
extensión debe ser un cable de tres
alambres de conexión a tierra; y
3) El cable debe ser acomodado
de manera que no cuelgue del
mostrador o de la mesa para evitar
que un niño tire del mismo o que
alguien se tropiece sin darse cuenta.
Nota: Si el cable de alimentación está
dañado, por favor llame al número
del departamento de garantía que
aparece en estar instrucciones.
10
Page 11

CONOZCA SU ESTACIÓN DE CAFÉ 4-en-1
4
5
6
1
2
*
12
13
1. Tanque de agua
2. Ventana para ver el nivel de agua
3. Interruptor de encendido/apagado (I/O)
4. Tap a
5. Distribuidor de agua
6. Filtro permanente
7. Cesta de preparación, compatible
con un goteador para filtrado a mano
8. Boquilla
Las piezas suministradas con la cafetera dependen del modelo ordenado.
El producto puede variar ligeramente del que aparece ilustrado.
3
9. Jarra con tapa
de 5 tazas Duralife™
10. Soporte ajustable
11. Base
12. Taza portátil,
lavar a mano unicamente
13. Taza personal de Tritan
(modelo CM0755S-LA)
(modelo CM0755WG)
7
8
9
10
11
TM
11
Page 12

ANTES DEL PRIMER USO
Este aparato está diseñado solamente para
uso doméstico.
• Retire todo material de empaque,
etiquetas adheridas y la banda plástica
alrededor del enchufe.
• Retire todos los accesorios y
componentes.
• Abra la tapa.
• Vierta agua fresca fría en el tanque de
agua hasta la marca de 5 tazas.
• Coloque un ltro de papel vacío, estilo
cesta adentro de la cesta de preparación
removible.
• Coloque la cesta en el compartimiento
de la cesta del ltro.
• Desenrolle el cable de alimentación y
enchúfelo a un tomacorriente estándar.
• Cuele agua a través del aparato sin
agregar granos de café. Esto remueve
cualquier polvo o residuo que pueda
haber quedado durante el proceso de
fabricación.
• Deseche el agua de la jarra y el ltro de
papel de la cesta.
• Apague el aparato, descenchúfelo y deje
que se enfríe.
INSTRUCCIONES GENERALES DE
PREPARACIÓN
1. Abra la tapa enteriza.
2. Vierta agua fresca fría hasta la
marca del nivel deseado en el
tanque de agua.
- Si va a preparar una sola taza
dentro de una taza, llene hasta el
icono
de café de 8 onzas.
- Si va a preparar dentro de una taza
portátil, llene hasta el icon
Esto producirá una taza de café
de 12 onzas.
3. Coloque el filtro permanente o
un filtro de papel en la cesta de
preparación.
4. Inserte la cesta de preparación en
la parte superior de la cafetera.
5. Añada la cantidad de café molido
deseada.
. Esto producirá una taza
.
¿No está seguro que cantidad de café debe
usar? Comience usando 1 cucharada de
café de molido mediano al ras, por cada
5 onzas de café a preparar. Una jarra llena
contiene 25 onzas de café.
6. Cierre la tapa de forma segura.
7. Utilice o retire el soporte ajustable y
acomode su taza favorita de manera
que la parte superior quede cerca
de la boquilla.
8. Enchufe el cable a un tomacorriente
estándar.
9. Presione el interruptor de
encendido/apagado (I/O), la luz azul
se ilumina y la preparación de café
comienza.
10. Apague la cafetera cuando la
preparación termine.
11. Desenchufe el aparato cuando no
esté en uso.
PREPARACIÓN DE CAFÉ DENTRO
DE LA JARRA
1. Coloque el soporte ajustable
en la base.
2. Coloque la jarra vacía sobre el
soporte ajustable.
3. Prepare el café siguiendo las
instrucciones generales de
preparación.
NOTA:
Este producto no contiene la función
de mantener caliente la jarra.
12
Page 13

PREPARACIÓN DE CAFÉ DENTRO
DE UNA TAZA
1. Insertando los ganchos en el
soporte dentro de la pared cóncava
arriba de la base, ajústelo de
manera que sostenga su taza de
café cerca de la boquilla.
2. Prepare el café siguiendo las
instrucciones generales de
preparación.
PEPARACIÓN DE CAFÉ DENTRO DE
UNA TAZA PORTÁTIL
1. Retire el soporte y coloque la taza
portátil sobre la base.
2. Prepare el café siguiendo las
instrucciones generales de
preparación.
PREPARACIÓN DE CAFÉ FILTRADO A MANO
¿Por qué café filtrado a mano?
Adquiera más control sobre la preparación
de su café—usted controla la cantidad
de café y la velocidad de la preparación.
Mientras más lento sea el vertido, más
fuerte será el sabor.
1. Vierta agua fría en un hervidor u otro
recipiente (no incluido) y póngala
a hervir. Una vez que el agua haya
hervido, apague y deje reposar por 30
segundos.
2. Coloque la cesta de preparación
compatible con un goteador encima
de una taza de su preferencia o de la
jarra con su tapa.
3. Coloque el filtro permanente o un
filtro de papel #2 dentro de la cesta de
preparación.
Nota: Para mejores resultados,
recomendamos utilizar este método de
preparación con filtros de papel.
4. Enjuague el filtro y la jarra vertiendo el
13
Page 14

agua hervida sobre el filtro. Esto ayuda a
precalentar la cesta de preparación y la
jarra. Deseche el agua de su jarra o taza.
5. Añada la cantidad deseada de
café recién molido al filtro. Es
recomendado usar aproximadamente
2 cucharadas por taza para este
método de preparación.
6. Comenzando en el centro de sus
granos, suavemente vierta su agua
hervida sobre los granos (justo la
cantidad suficiente para mojar todo el
café). Deje reposar por 30 segundos.
Esto permite que el café se expanda
antes de continuar.
7. Continue vertiendo lentamente y
suavemente sobre los granos, luego
deje reposar por 30 segundos después
de cada vertido. Continue hasta que
tenga la cantidad deseada de café. El
proceso debe tomar 2 a 3 minutos.
¡Experimente! Encuentre el método de
preparación ideal para lograr su perfecta
taza de café.
CUIDADO Y LIMPIEZA
Este producto no contiene piezas que
deban ser reparadas por el usuario. Para
servicio, consulte con personal de servicio
calicado.
LIMPIEZA
1. Asegúrese de que su cafetera esté
desenchufada y enfriada.
2. Abra la tapa enteriza, retire la cesta
de preparación (álzela directo hacia
arriba).
3. Vacíe el filtro permanente o deseche
el filtro de papel de la cesta de
preparación (si se ha utilizado).
4. Lave el filtro permanente, la cesta
de preparación, la jarra y la tapa de
la jarra en la máquina lavadora de
platos, rejilla superior solamente,
o lave a mano con agua caliente y
líquido de fregar, la taza portátil se
lava a mano unicamente.
5. Para limpiar el interior de la tapa
enteriza, abra la tapa y déjela reposar
en la posición abierta.
6. Limpie las superferficies con un paño
húmedo y cierre la tapa.
14
Page 15

LIMPIEZA CON VINAGRE
(DESCALCIFICACIÓN)
Los depósitos minerales acumulados
por el agua dura pueden tupir su
cafetera. La limpieza con vinagre es
recomendada una vez al mes.
Su cafetera no funcionará
adecuadamente si no es descalcificada
regularmente.
1. Llene el tangue de agua con vinagre
blanco hasta el nivel de 2 tazas en
la ventana de agua.
2. Añada agua fría hasta el nivel de
5 tazas.
3. Coloque un filtro de papel en la cesta
de preparación y cierre la tapa.
4. Coloque la jarra vacía en el soporte
ajustable.
5. Encienda la cafetera y deje que la
mitad de la solución cuele en la
jarra (hasta que el nivel de agua
baje hasta aproximadamente 3).
Apague la cafetera y deje remojar
por 15 minutos como mínimo para
suavizar los depósitos.
6. Encienda la cafetera y cuele el resto
de la solución en la jarra.
7. Apague la cafetera, vacíe la jarra y
deseche el filtro sucio.
8. Llene el tanque de agua con agua
fría hasta el nivel de 5 tazas,
coloque la jarra vacía, luego
encienda la cafetera para iniciar
un ciclo de colado completo y dejar
salir el resto de la solución. Tal vez
deba repetir este paso para eliminar
cualquier olor/sabor a vinagre que
haya quedado.
9. Lave la cesta de preparación y
la jarra según las instrucciones
indicadas en la sección de
LIMPIEZA.
ALMACENAMIENTO
Asegúrese de que el aparato esté
completamente seco. Nunca enrolle el
cable de forma ajustada alrededor del
aparato, manténgalo enrollado de forma
holgada.
15
Page 16

¿NECESITA AYUDA?
Para servicio, reparaciones o preguntas relacionadas al producto,
por favor llame al número del centro de servicio que se indica para
el país donde usted compró su producto. NO devuélva el producto
al fabricante. Llame o lleve el producto a un centro de servicio
autorizado.
DOS AÑOS DE GARANTÍA LIMITADA
(No aplica en México, Estados Unidos y Canada)
¿Qué cubre la garantía?
• La garantía cubre cualquier defecto de materiales o de mano de obra que no
haya sido generado por el uso incorrecto del producto.
¿Por cuánto tiempo es válida la garantía?
• Por dos años a partir de la fecha original de compra mientras que tenga una
prueba de la compra.
¿Cómo se obtiene el servicio necesario?
• Conserve el recibo original como comprobante de la fecha de compra,
comuníquese con el centro de servicio de su país y haga efectiva su garantía
si cumple lo indicado en el manual de instrucciones.
¿Cómo se puede obtener servicio?
• Conserve el recibo original de compra.
• Por favor llame al número del centro de servicio autorizado.
¿Qué relación tiene la ley estatal con esta garantía?
• Esta garantía le otorga derechos legales especícos y el consumidor podría
tener otros derechos que varían de una región a otra.
¿Qué aspectos no cubre esta garantía?
• Los productos que han sido utilizados en condiciones distintas a las
normales.
• Los daños ocasionados por el mal uso, el abuso o negligencia.
• Los productos que han sido alterados de alguna manera.
• Los daños ocasionados por el uso comercial del producto.
• Los productos utilizados o reparados fuera del país original de compra.
• Las piezas de vidrio y demás accesorios empacados con el aparato.
• Los gastos de tramitación y embarque asociados al reemplazo del producto.
• Los daños y perjuicios indirectos o incidentales.
¿Existen exclusiones de garantía adicionales?
• Esta garantía no será válida donde exista oposición a EE.UU. y otras leyes
aplicables, o donde la garantía sería prohibida bajo cualquier sanción
económica, ley de control de exportación, embargo u otra medida comercial
impuesta por los Estados Unidos u otras jurisdicciones aplicables. Esto incluye,
sin limitación, cualquier reclamo de garantía que implique partes de, u de otro
modo localizadas en, Cuba, Irán, Corea del Norte, Siria y la región disputada
de Crimea.
16
Page 17

PÓLIZA DE GARANTÍA
(Válida sólo para México)
Duración
Spectrum Brands de México, SA de CV garantiza este producto por 2 años a partir
de la fecha original de compra.
¿Qué cubre esta garantía?
• Esta Garantía cubre cualquier defecto que presenten las piezas, componentes y la
mano de obra contenidas en este producto.
• Requisitos para hacer válida la garantía
• Para reclamar su Garantía deberá presentar al Centro de Servicio Autorizado
la póliza sellada por el establecimiento en donde adquirió el producto. Si no la
tiene, podrá presentar el comprobante de compra original.
¿Donde hago válida la garantía?
• Llame sin costo al teléfono 01 800 714 2503, para ubicar el Centro de Servicio
Autorizado más cercano a su domicilio en donde usted podrá encontrar partes,
componentes, consumibles y accesorios.
Procedimiento para hacer válida la garantía
Acuda al Centro de Servicio Autorizado con el producto con la póliza de Garantía
sellada o el comprobante de compra original, ahí se reemplazará cualquier pieza
o componente defectuoso sin cargo alguno para el usuario nal. Esta Garantía
incluye los gastos de transportación que se deriven de su cumplimiento.
Excepciones
Esta Garantía no será válida cuando el producto:
A) Se hubiese utilizado en condiciones distintas a las normales.
B) No hubiese sido operado de acuerdo con el instructivo de uso
que le acompaña.
C) Cuando el producto hubiese sido alterado o reparado por personas
no autorizadas por Spectrum Brands de México, SA de CV.
Nota:
Usted podra encontrar partes, componentes, consumibles y accesorios
en los centros de servicios autorizados. Esta garantía incluyen los gastos de
transportación que se deriven de sus cumplimiento dentro de sus red de servicio.
¿Existen exclusiones de garantía adicionales?
• Esta garantía no será válida donde exista oposición a EE.UU. y otras leyes
aplicables, o donde la garantía sería prohibida bajo cualquier sanción
económica, ley de control de exportación, embargo u otra medida comercial
impuesta por los Estados Unidos u otras jurisdicciones aplicables. Esto incluye,
sin limitación, cualquier reclamo de garantía que implique partes de, u de otro
modo localizadas en, Cuba, Irán, Corea del Norte, Siria y la región disputada
de Crimea.
17
Page 18

¿NECESITA AYUDA?
Para servicio, reparaciones o preguntas relacionadas al producto, por favor llame al
número del centro de servicio que se indica para el país donde usted compró su producto.
NO devuélva el producto al fabricante. Llame o lleve el producto a un centro de servicio
autorizado.
DOS AÑOS DE GARANTÍA LIMITADA
(No aplica en México, Estados Unidos y Canada)
¿Qué cubre la garantía?
• La garantía cubre cualquier defecto de materiales o de mano de obra que no haya sido generado por
el uso incorrecto del producto.
¿Por cuánto tiempo es válida la garantía?
• Por dos años a partir de la fecha original de compra mientras que tenga una prueba de la compra.
¿Cómo se obtiene el servicio necesario?
• Conserve el recibo original como comprobante de la fecha de compra, comuníquese con el
centro de servicio de su país y haga efectiva su garantía si cumple lo indicado en el manual de
instrucciones.
¿Cómo se puede obtener servicio?
• Conserve el recibo original de compra.
• Por favor llame al número del centro de servicio autorizado.
¿Qué aspectos no cubre esta garantía?
• Los productos que han sido utilizados en condiciones distintas a las normales.
• Los daños ocasionados por el mal uso, el abuso o negligencia.
• Los productos que han sido alterados de alguna manera.
• Los daños ocasionados por el uso comercial del producto.
• Los productos utilizados o reparados fuera del país original de compra.
• Las piezas de vidrio y demás accesorios empacados con el aparato.
• Los gastos de tramitación y embarque asociados al reemplazo del producto.
• Los daños y perjuicios indirectos o incidentales.
¿Qué relación tiene la ley estatal con esta garantía?
• Esta garantía le otorga derechos legales especícos y el consumidor podría tener otros
derechos que varían de una región a otra.
18
Page 19

Por favor llame al número correspondiente que aparece en la lista a continuación
para solicitar que se haga efectiva la garantía y donde Ud. puede solicitar servicio,
reparaciones o partes en el país donde el producto fué comprado.
Argentina
Atención al consumidor
0800 444 7296
Horario de atención:
Lunes a viernes de 9 a 13 hs
y de 14. 30 a 17 hs .
Mail: postventa@spectrumbrands.com
Bolivia
Atención al consumidor
La Paz: c. Villalobos N °100 esq.
Busch. Miraflores . Tel. (02) 2224924
Santa Cruz: Av. Paraguá C.
Socoris N°2415 (03) 3602002
Cochabamba: c. Uruguay N°211 esq.
Nataniel Aguirre (04) 4501894
Chile
Atención al consumidor
Inversiones la Mundial Ltda.
Dirección: Libertad 790,
Santiago de Chile.
Teléfonos: +56 226820217 – 226810032
Colombia
Spectrum Brands Corp, S.A.S.
Transversal 23 #97-73
Oficinas 403-404-405, Bogotá, Colombia
Línea Servicio al Cliente: 018000510012
Tel. (506) 2233-1361
ryasasanjose1@gmail.com
Costa Rica
RYA S A
San Jose centro -
El Parque La Merced: San José,
calle 10 avenidas 2 y 4
San José, Costa Rica
Tel. (506) 2257-5716
Ecuador
Servicio Master
Dirección: Capitán Rafael
Ramos OE 1-85 y Galo plaza lasso.
Tel (593) 2281-3882 / 2240-9870
El Salvador
Sedeblack
Calle San Antonio Abad,
Colonia Lisboa
No 2936
San Salvador,
Depto. de San Salvador
Tel. (503) 2284- 8374
Guatemala
Kinal
17 avenida 26-75, zona 11
Centro comercial Novicentro,
Local 37 - Ciudad
Guatemala
Tel. (502)-2476-7367
Honduras
Serviteca
San Pedro Sula,
B Los Andes,
2 calle-entre 11-12 Avenida
Honduras
Tel. (504) 2550-1074
México
Articulo 123 # 95 Local 109 y 112
Col. Centro, Cuauhtemoc,
Mé xi co, D. F.
Tel. 01 800 7 14 2503
Nicaragua
LRM ELECTRONICA
Managua - Sinsa Altamira 1.5
kilómetros al norte
Nicaragua
Tel. (505) 2270-268 4
Panamá
Supermarcas
Centro comercial El dorado,
Plaza Dorado, Local 2.
Panama
Tel. (507) 392- 6231
Perú
Servicio Central Fast Service
Av. Angamos Este 2431
San Borja, Lima Perú
Tel. (511) 2251 388
Puerto Rico
Buckeye Service
Jesús P. Piñero #1013
Puerto Nuevo, SJ PR 00920
Tel.: (787) 782-6175
Republica Dominicana
Prolongación Av. Rómulo
Betancourt
Zona Industrial de Herrera
Santo Domingo, República
Dominicana
Tel.: (809) 530-5409
Venezuela
Inversiones BDR CA
Av. Casanova C .C.
City Market Nivel Plaza
Local 153
Diagonal Hotel Melia,
Caracas.
Tel. (582) 324-09 69
19
Page 20

www.BlackAndDeckerHogar.com
Sello del Distribuidor:
Fecha de compra:
Modelo:
COMERCIALIZADO POR:
SPECTRUM BRANDS DE MEXICO, S.A. DE C.V.
Avenida 1° de Mayo No. 120 Piso 7, Oficina 702.
Colonia San Andres Atoto, C.P.53500 Naucalpan
de Juárez, Estado de México, México
Tel. 01-800-714-2503
650W 120 V~ 6 0Hz
650W 220V~ 50Hz
SERVICIO Y REPARACIÓN
Art. 123 No. 95 Col. Centro, C.P. 06050 Deleg.
Cuauhtemoc SERVICIO AL CONSUMIDOR,
VENTA DE REFACCIONES Y ACCESORIOS
Código de fecha / Date Code / Le code de date:
SERVICIO Y REPARACIÓN
Art. 123 No. 95 Col. Centro, C.P.
06050 Deleg. Cuauhtemoc Servicio
al Consumidor, Venta de Refacciones
y Accesorios 01 800 714 2503
Importado y Distribuido por:
RAYOVAC ARGENTINA S.R.L
Av. Del Libertador 6810,
piso 2 dpto. A 1429, CABA,
Argentina
+ 54 11 5353-9500
CUIT: 30-70706168-1
Importador N° # 76983
IMPORTADO POR / IMPORTED BY:
AIDISA BOLIVIA S.A.
Av. Chacaltaya No. 2141- Zona
Achachicala La Paz, Bolivia.
Teléfono (591)2- 2305353
NIT 1020647023,
Resolución Ministerial 0661-12.
IMPORTADO POR / IMPORTED BY:
Inversiones la Mundial Ltda.
Rut: 78.146.900-9
Libertad 790, Santiago – Chile
Fono: (562) 26810217 info@ilm.cl
IMPORTADO POR / IMPORTED BY:
Spectrum Brands
de México, SA de C.V
01 800 714 2503
Avenida 1° de Mayo No. 120
Piso 7, Oficina 702. C
olonia San Andres Atoto,
C.P. 53500 Naucalpan de Juárez,
Estado de México, México
Para atención de garantía marque:
01 (800) 714 2503
IMPORTADO POR / IMPORTED BY:
Spectrum Brands Corp, S.A.S.
Transversal 23 #97-73
Oficinas 403-404-405,
Bogotá, Colombia
Línea Servicio al Cliente:
018000510012
BLACK+DECKER® y los logotipos BLACK+DECKER® son marcas registradas de Black & Decker®
Corporation, utilizados por Empower Brands, LLC, una subsidiaria de Spectrum Brands, Inc. bajo su licencia
para su fabricación y venta de este producto.
Todos los derechos reservados. Todas la Demas marcas son Marcas Registrades de Empower Brands, LLC.
®
BLACK+DECKER
and the BLACK+DECKER® logos are trademarks of The Black & Decker® Corporation,
used under license by Empower Brands, LLC, a subsidiary of Spectrum Brands, Inc. for its manufacturing
and sale of this product. All rights reserved.
All other marks are trademarks of Spectrum Brands, Inc.
Todas la demás marcas son marcas registradas de Spectrum Brands, Inc.
© 2022 Empower Brands, LLC All Rights Reserved. Derechos Reservados. Middleton, WI 53562
Made in China. Fabricado en China.
Made in China.
Fabricado en China.
20
T22-5003988
2022/07
 Loading...