

Page 1
18
2 AMP CHARGE RATE AUTOMATIC BATTERY MAINTAINER
INSTRUCTION MANUAL
Catalog Number BM2B
TO REDUCE THE RISK OF INJURY, THE USER MUST READ AND
UNDERSTAND THE INSTRUCTION MANUAL
SAVE THIS MANUAL FOR FUTURE REFERENCE.
Cat. # BM2B Form # 90556303
October 2009 Copyright © 2009 Black & Decker Printed in China
Thank you for choosing Black & Decker!
Go to www.BlackandDecker.com/NewOwner
to register your new product.
PLEASE READ BEFORE RETURNING THIS
PRODUCT FOR ANY REASON:
If you have a question or experience a problem with your Black & Decker purchase, go to
HTTP://WWW.BLACKANDDECKER.COM/INSTANTANSWERS
If you canʼt find the answer or do not have access to the internet,
call 1-800-544-6986 from 8 a.m. to 5 p.m. EST Mon. -- Fri. to speak with an agent.
Please have the catalog number available when you call.
for instant answers 24 hours a day.
BLACK & DECKER S.A. DE C.V.
BOSQUES DE CIDROS ACCESO RADIATAS NO. 42
COL. BOSQUES DE LAS LOMAS.
05120 MÉXICO, D.F
TEL. (01 55) 5326 7100
01 800 847 2309/01 800 847 2312
SECCI N
AMARILLA
Si funciona…
y funciona muy bien.
Vea “Herramientas
eléctricas (Tools-Electric)”
– Páginas amarillas –
para Servicio y ventas
Grupo Realsa en herramientas,
S.A. de C.V.
Súper Manzana 69 MZ.01 Lote 30
(Av. Torcasita)
Col. Puerto Juárez
Cancún, Quintana Roo
Tel. 01 998 884 72 27
Ferre Pat de Puebla, S.A. de C.V.
16 de Septiembre No. 6149
Col. El Cerrito
Puebla, Puebla
Tel. 01 222 264 12 12
Ferre Pat de Puebla, S.A. de C.V.
Ejército Mexicano No. 15
Col. Ejido 1ro. de Mayo
Boca del Rio, Veracruz
Tel. 01 229 167 89 89
Servicio de Fabrica Black & Decker,
S.A. de C.V.
Lázaro Cardenas No. 18
Col. Obrera
Distrito Federal
Tel. 55 88 95 02
Representaciones Industriales Robles,
S.A. de C.V.
Tezozomoc No. 89
Col. La Preciosa
Distrito Federal
Tel. 55 61 86 82
Gpo. Comercial de Htas. y Refacciones
de Occidente, S.A. de C.V.
Av. La Paz No. 1779
Col. Americana, S. Juaréz
Guadalajara, Jalisco
Tel. 01 33 38 25 69 78
Herramientas y Equipos Profesionales
Av. Colón 2915 Ote.
Col. Francisco I. Madero
Monterrey, Nvo. León
Tel. 01 81 83 54 60 06
Htas. Portátiles de Chihuahua,
S.A. de C.V.
Av. Universidad No. 2903
Col. Fracc. Universidad
Chihuahua, Chihuahua
Tel. 01 614 413 64 04
Fernando González Armenta
Bolivia No. 605
Col. Felipe Carrillo Puerto
Cd. Madero, Tampico
Tel. 01 833 221 34 50
Perfiles y Herramientas de Morelia
Gertrudis Bocanegra No. 898
Col. Ventura Puente
Morelia, Michoacán
Tel. 01 443 313 85 50
Enrique Robles
Av. de la Solidaridad No. 12713
Col. La Pradera
Irapuato, Guanajuato
Tel. 01 462 626 67 39
Hernández Martinez Jeanette
Prolongación Corregidora Nte. No. 1104
Col. Arboledas
Queretaro, Qro.
Tel. 01 442 245 25 80
SOLAMENTE PARA PROPOSITOS DE MEXICO
PARA OTRAS LOCALIDADES LLAME AL 01 800 847 2309 o 01 800 847 2312.
90556303 BM2B.qxp:BM2B ManualEN 061708 10/26/09 10:35 AM Page 16
Page 2

3
in line voltage resulting in loss of power and overheating. The following table shows the correct size to use
depending on cord length and nameplate ampere rating. If in doubt, use the next heavier gage. The smaller the
gage number, the heavier the cord.
• OUTDOOR USE EXTENSION CORDS. When tool is used outdoors, use only extension cords intended for use
outdoors and so marked.
WARNING: BURST HAZARD: Do not use the unit for charging dry-cell batteries that are commonly used with
home appliances. These batteries may burst and cause injury to persons and damage property. Use the unit for
charging/boosting a LEAD-ACID battery only. It is not intended to supply power to a low-voltage electrical system
other than in a starter-motor application.
WARNING: SHOCK HAZARD:
• If an extension cord is used, make sure that:
a) the pins of extension cord are the same number, size and shape as those in the battery maintainer,
b) the extension cord is properly wired and in good electrical condition,
c) the wire size is large enough for the AC rating of the charger as indicated in the table on page 2.
• Do not operate unit with damaged cord or plug; or if the unit has received a sharp blow, been dropped, or
otherwise damaged in any way. Do not disassemble the unit; take it to a qualified service technician when
service or repair is required. Incorrect reassembly may result in a risk of electric shock or fire, and will void
warranty.
• Use of an attachment not supplied, recommended or sold by manufacturer specifically for use with this unit may
result in a risk of electrical shock and injury to persons.
• NEVER submerge this unit in water; do not expose it to rain, snow or use when wet.
• To reduce risk of electric shock, disconnect the unit from any power source before attempting maintenance or
cleaning. Turning off controls without disconnecting will not reduce this risk.
WARNING: RISK OF EXPLOSIVE GASES:
• Working in the vicinity of a lead acid battery is dangerous. Batteries generate explosive gases during normal
battery operation. For this reason, it is of the utmost importance that each time before using the battery maintainer
you read this manual and follow instructions exactly.
• To reduce the risk of battery explosion, follow these instructions and those published by the battery
manufacturer and manufacturer of any equipment you intend to use in the vicinity of the battery. Review
cautionary markings on these products and on the engine.
• This equipment employs parts (switches, relays, etc.) that produce arcs or sparks. Therefore, if used in a garage
or enclosed area, the unit MUST be placed not less than 18 inches above the floor.
• THIS UNIT IS NOT FOR USE BY CHILDREN AND SHOULD ONLY BE OPERATED BY ADULTS.
CAUTION: TO REDUCE THE RISK OF INJURY OR PROPERTY DAMAGE:
• Pull cord by plug rather than cord when disconnecting the 120V AC Charging Adapter from the unit.
• NEVER ATTEMPT TO JUMP-START OR CHARGE A FROZEN BATTERY.
• To recharge this unit, use only the supplied AC Charging Adapter.
• Vehicles that have on-board computerized systems may be damaged if vehicle battery is jump-started. Before
jump-starting, read the vehicle’s owner’s manual to confirm that external-starting assistance is suitable.
• When working with lead acid batteries, always make sure immediate assistance is available in case of accident
or emergency.
• Always have protective eyewear when using this product: contact with battery acid may cause blindness and/or
severe burns. Be aware of first aid procedures in case of accidental contact with battery acid.
• Have plenty of fresh water and soap nearby in case battery acid contacts skin.
• If battery acid contacts skin or clothing, wash immediately with soap and water for at least 10 minutes and get
medical attention immediately.
• Never smoke or allow a spark or flame in vicinity of vehicle battery, engine or battery maintainer.
Minimum Gauge for Cord Sets
Volts Total Length of Cord in Feet
120V 0-25 26-50 51-100 101-150
(0-7,6m) (7,6-15,2m) (15,2-30,4m) (30,4-45,7m)
240V 0-50 51-100 101-200 201-300
(0-15,2m) (15,2-30,4m) (30,4-60,9m) (60,9-91,4m)
Ampere Rating
More Not more American Wire Gauge
Than Than
0 - 6 18 16 16 14
6 -101816 14 12
10 -121616 14 12
12 - 16 14 12 Not Recommended
2
SAFETY GUIDELINES / DEFINITIONS
DANGER: Indicates an imminently hazardous situation which, if not avoided, will result in death or serious
injury.
WARNING: Indicates a potentially hazardous situation which, if not avoided, could result in death or serious
injury.
CAUTION: Indicates a potentially hazardous situation which, if not avoided, may result in minor or moderate
injury.
CAUTION: Used without the safety alert symbol indicates potentially hazardous situation which, if not avoided,
may result in property damage.
RISK OF UNSAFE OPERATION. When using tools or equipment, basic safety precautions should always be
followed to reduce the risk of personal injury. Improper operation, maintenance or modification of tools or
equipment could result in serious injury and property damage. There are certain applications for which tools and
equipment are designed. Black & Decker strongly recommends that this product NOT be modified and/or used for
any application other than for which it was designed. Read and understand all warnings and operating
instructions before using any tool or equipment.
IMPORTANT SAFETY INSTRUCTIONS
GENERAL SAFETY WARNINGS AND INSTRUCTIONS FOR ALL APPLIANCES
READ ALL INSTRUCTIONS
WARNING: Read all instructions before operating product. Failure to follow all instructions listed below may
result in electric shock, fire and/or serious injury.
• AVOID DANGEROUS ENVIRONMENTS Don’t use appliances in damp or wet locations. Don’t use appliances in the
rain.
• KEEP CHILDREN AWAY. All visitors should be kept at a distance from work area.
• STORE IDLE APPLIANCES INDOORS. When not in use, appliances should be stored indoors in dry, and high or
locked-up place – out of reach of children.
• DON’T FORCE APPLIANCE. It will do the job better and with less likelihood of a risk of injury at the rate for which
it was designed.
• USE RIGHT APPLIANCE. Do not use the appliance for any job except that for which it is intended.
• DRESS PROPERLY. Do not wear loose clothing or jewelry. They can be caught in moving parts. Rubber gloves and
substantial, non-skid footwear are recommended when working outdoors. Wear protective hair covering to contain
long hair.
• USE SAFETY GLASSES AND OTHER SAFETY EQUIPMENT. Use safety goggles or safety glasses with side shields,
complying with applicable safety standards and, when needed, a face shield. Also use face or dust mask if
operation is dusty. This applies to all persons in the work area. Also use a hard hat, hearing protection, gloves,
safety shoes and dust collection systems when specified or required. Safety glasses or the like are available at
extra cost at your local dealer or Black & Decker Service Center.
• DON’T ABUSE CORD. Never carry appliance by cord or yank it to disconnect from receptacle. Keep cord from
heat, oil, and sharp edges.
• DON’T OVERREACH. Keep proper footing and balance at all times.
• DISCONNECT APPLIANCES. Disconnect the appliance from the power supply when not in use, before servicing,
and when changing accessories such as blades and the like.
• AVOID UNINTENTIONAL STARTING. Don’t carry plugged-in appliance with finger on switch. Be sure switch is off
when plugging in.
• GROUND FAULT CIRCUIT INTERRUPTER (GFCI) protection should be provided on the circuits or outlets to be
used. Receptacles are available having built in GFCI protection and may be used for this measure of safety.
• USE OF ACCESSORIES AND ATTACHMENTS. The use of any accessory or attachment not recommended for use
with this appliance could be hazardous. Note: Refer to the accessory section of this manual for further details.
• STAY ALERT. Watch what you are doing. Use common sense. Do not operate tool when you are tired.
• CHECK DAMAGED PARTS. Before further use of the tool, a guard or other part that is damaged should be
carefully checked to determine that it will operate properly and perform its intended function. Check for alignment
of moving parts, binding of moving parts, breakage of parts, mounting, and any other conditions that may affect
its operation. A guard or other part that is damaged should be properly repaired or replaced by an authorized
service center unless otherwise indicated elsewhere in this instruction manual. Have defective switches replaced by
authorized service center. Do not use tool if switch does not turn it on and off.
• DO NOT OPERATE portable electric tools near flammable liquids or in gaseous or explosive atmospheres. Motors
in these tools normally spark, and the sparks might ignite fumes.
• EXTENSION CORDS. Make sure your extension cord is in good condition. When using an extension cord, be
sure to use one heavy enough to carry the current your product will draw. An undersized cord will cause a drop
90556303 BM2B.qxp:BM2B ManualEN 061708 10/26/09 10:35 AM Page 2
Page 3

5
Follow these steps when the battery has been removed from a vehicle. A spark near the battery may cause
an explosion.
WARNING: TO REDUCE RISK OF A SPARK NEAR THE BATTERY:
1. Check polarity of battery posts. Positive post (marked POS,P, +) usually has a larger diameter than the
Negative battery post (marked NEG, N, –).
2. Attach a 24-inch (minimum length) 6 AWG insulated battery cable to the Negative battery post (marked NEG,
N, –).
3. Connect the Positive (RED) battery clamp to the Positive battery post (marked POS, P, + or red).
4. Stand as far back from the battery as possible, and do not face battery when making final connection.
5. Carefully connect the NEGATIVE (BLACK) charger clamp to the free end of the battery cable connected to the
negative terminal.
6. Set the charge rate to appropriate setting according to battery size.
7. When disconnecting charger, always do so in reverse sequence of connecting procedure and break first
connection while as far away from battery as practical.
Note: A marine (boat) battery must be removed and charged on shore. To charge it on board requires equipment
specially designed for marine use. This unit is NOT designed for such use.
• Check unit periodically for wear and tear. Take to a qualified technician for replacement of worn or defective
parts immediately.
• Read This Instruction Manual Before Using This Unit.
SAVE THESE INSTRUCTIONS
WARNING: TO REDUCE THE RISK OF INJURY:
Follow these instructions and those published by the battery manufacturer and manufacturer of any equipment you
intend to use with this unit. Review cautionary markings on these products and on engine.
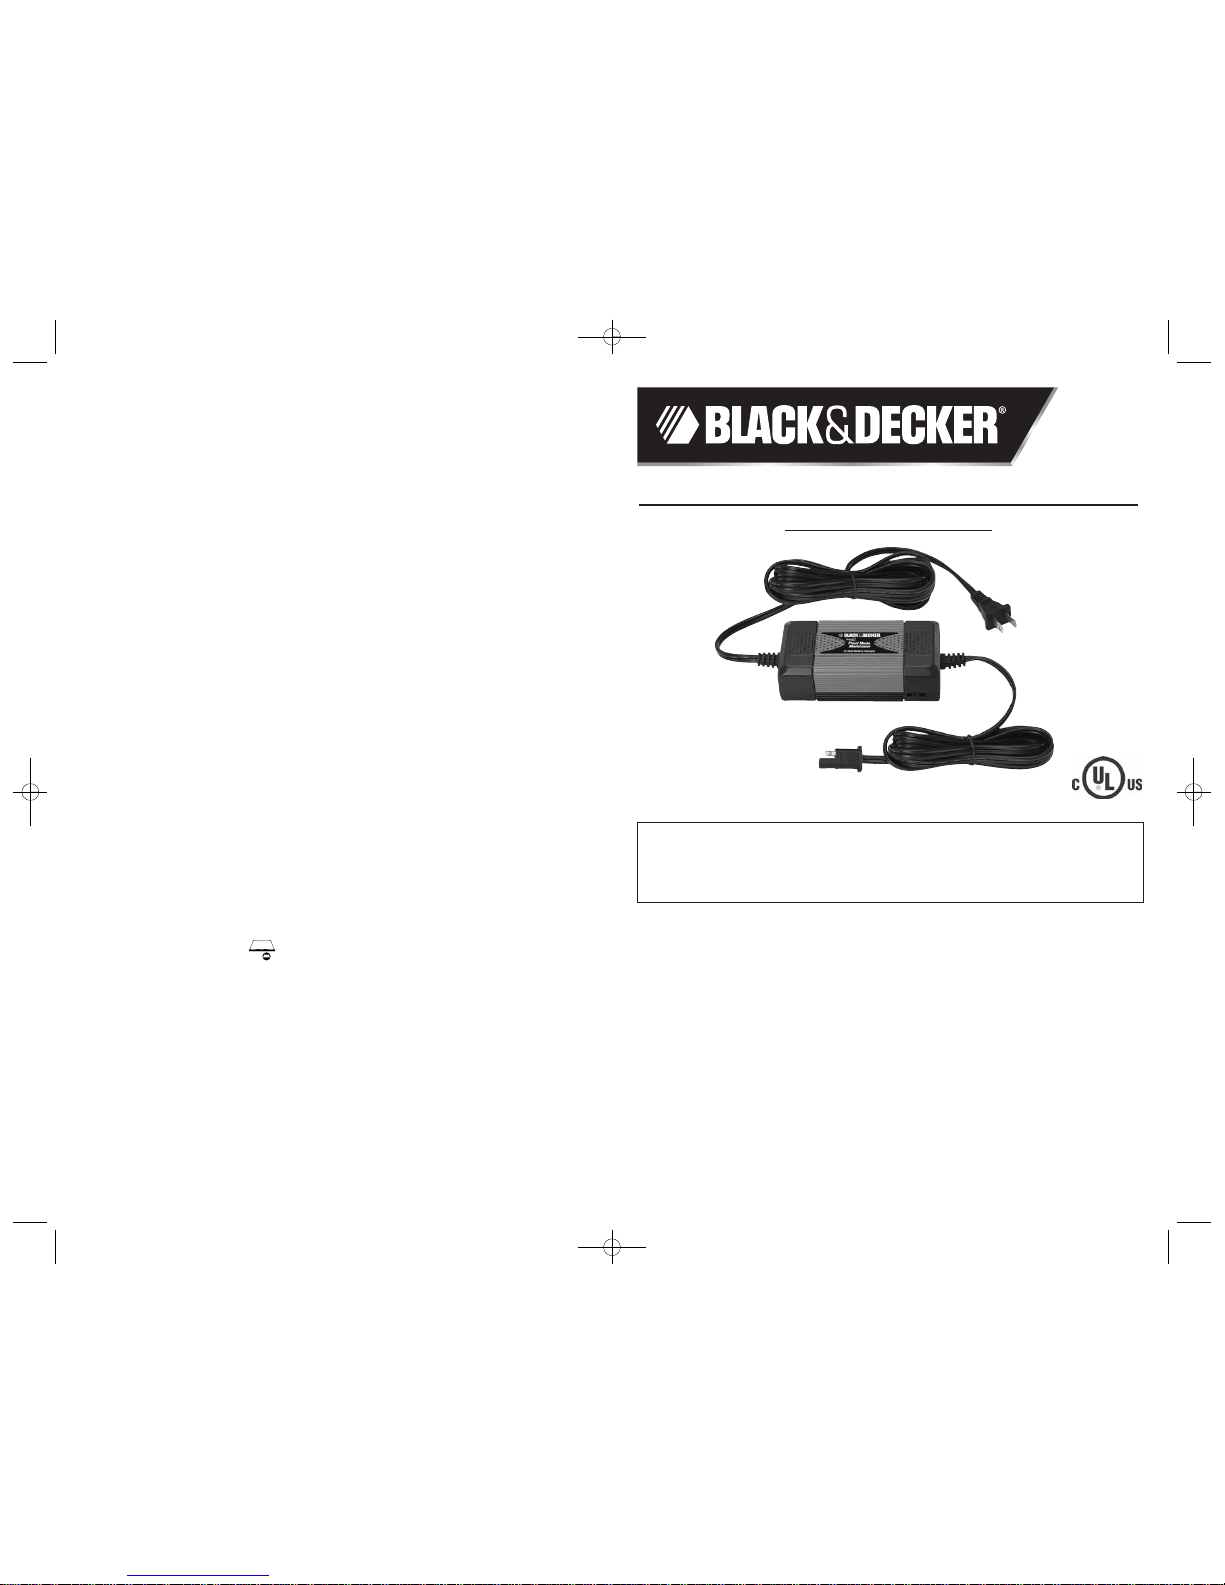
INTRODUCTION
Thank you for selecting the
Black & Decker®2 Amp Charge Rate Automatic Battery Maintainer.
With proper care
and use, it will give you years of dependable service. Please read and observe all safety warnings and cautions and
this entire user’s manual, before installing or using this device. The manual should then be retained for quick
reference whenever the unit is used. Figure 1 shows the battery charger and its components.
This device complies with part 15 of the FCC rules. Operation is subject to the following two conditions: (1) this device
may not cause harmful interference, and (2) this device must accept any interference received, including interference that
may cause undesired operation.
This equipment has been tested and found to comply with the limits for a Class B digital device, pursuant to part 15 of the
FCC Rules. This limits are designed to provide reasonable protection against harmful interference in a residential
installation. This equipment generates, uses and can radiate radio frequency energy and, if not installed and used in
accordance with the instructions, may cause harmful interference to radio communications. However, there is no
guarantee that interference will not occur in a particular installation. If equipment does cause harmful interference to radio
or television reception, which can be determined by turning the equipment off and on, the user is encouraged to try to
correct the interference by one or more of the following measures:
• Reorient or relocate the receiving antenna.
• Increase the separation between equipment and receiver.
• Connect the equipment into an outlet on a circuit different from that to which the receiver is connected.
• Consult the dealer or an experienced radio/TV technician for help.
4
• Remove personal metal items such as rings, bracelets, necklaces and watches when working with a lead acid
battery. A lead acid battery can produce a short circuit current high enough to weld a ring, or the like of a metal,
causing a severe burn.
• Never allow battery acid to come in contact with this unit.
• Do not operate this unit in a closed area or restrict ventilation in any way.
• FIRST AID – SKIN: If battery acid comes in contact with skin, rinse immediately with water, then wash thoroughly
with soap and water. If redness, pain, or irritation occurs, seek immediate medical attention.
EYES: If battery acid comes in contact with eyes, flush eyes immediately, for a minimum of 15 minutes and seek
immediate medical attention.
Power Cord Safety:
This appliance has a polarized plug (one blade is wider than the other) as a safety feature. This plug will fit into a
polarized outlet only one way. If the plug does not fit fully into the outlet, reverse the plug. If it still does not fit,
contact a qualified electrician. Do not attempt to defeat this safety feature.
Preparing to Charge
1. Determine voltage of battery to be charged by referring to the vehicle manual.
2. it is necessary to remove battery from vehicle to charge, or to clean terminals, always remove grounded
terminal from battery first. Make sure all accessories in the vehicle are off, so as not to cause an arc.
3. Clean battery terminals. Do not allow corrosion to come in contact with eyes.
4. Add distilled water in each cell until battery acid reaches level specified by battery manufacturer. This helps
purge excessive gas from cells. Do not overfill. For a battery without cell caps (maintenance free), carefully
follow manufacturer's charging instructions.
5. Study all battery manufacturer’s specific precautions, such as removing or not removing cell caps while
charging, and recommended rates of charge.
6. Area around battery should be well ventilated while battery is being charged. Gas can be forcefully blown
away by using a piece of cardboard or other nonmetallic material as a fan.
7. Make sure the initial charging rate does not exceed battery manufacturer’s requirement.
Charger Location
1. Locate charger as far away from battery as cables permit.
2. NEVER place charger directly above battery being charged; gases from battery will corrode and damage
charger.
3. NEVER allow battery acid to drip on charger when reading gravity or filling battery.
4. NEVER operate charger in a closed-in area or restrict ventilation in any way.
5. Marine batteries must be removed and charged on shore.
6. Do not set a battery on top of charger.
DC Connection Precautions
1. Connect and disconnect DC output clamps only after removing AC cord from electric outlet.
2. Never allow clamps to touch each other.
3. Attach clamps to battery chassis as indicated in “Battery Installed in Vehicle” steps 5 and 6, and in “Battery
Outside of Vehicle” steps 2, 4 and 5.
Follow these steps when the battery is installed in a vehicle. A spark near the battery may cause an explosion.
WARNING: TO REDUCE RISK OF A SPARK NEAR THE BATTERY:
1. Position AC and DC cords away from hood, door, or moving engine parts.
2. Stay clear of fan blades, belts, pulleys, and other parts that can cause injury to persons.
3. Check polarity of battery posts. POSITIVE (POS, P, +) battery post usually has larger diameter than NEGATIVE
(NEG, N, –) post.
4. Determine which post of battery is grounded (connected) to the chassis. If negative post is grounded to
chassis (as in most vehicles), see 5. If positive post is grounded to the chassis, see 6.
5. For negative-grounded vehicle, connect POSITIVE (RED) clamp from battery charger to POSITIVE (POS, P, +)
ungrounded post of battery. Connect NEGATIVE (BLACK) clamp to vehicle chassis or engine block away from
battery. Do not connect clip to carburetor, fuel lines, or sheet-metal body parts. Connect to heavy gauge metal
part of the frame or engine block.
6. For positive-grounded vehicle, connect NEGATIVE (BLACK) clamp from battery charger to NEGATIVE (NEG, N,
–) ungrounded post of battery. Connect POSITIVE (RED) clamp to vehicle chassis or engine block away from
battery. Do not connect clip to carburetor, fuel lines or sheet-metal body parts. Connect to a heavy gauge metal
part of the frame or engine block.
7. When disconnecting charger, disconnect AC cord, remove clamp from vehicle chassis, and then remove
clamp from battery terminal.
8. Do not charge the battery while the engine is operating.
9. See operating instructions for length of charge information.
90556303 BM2B.qxp:BM2B ManualEN 061708 10/26/09 10:35 AM Page 4
Page 4

7
Connecting the Charger with Terminal Rings
The charger’s output leads have crimped, color-coded ring terminals (Figure 4) (RED-POSITIVE and BLACKNEGATIVE). These rings connect directly to the corresponding connectors on the battery posts.
1. Remove the nuts from the bolts of the battery post’s connectors.
2. Position the RED terminal on the bolt of the POSITIVE battery post connector.
3. Position the BLACK terminal on the NEGATIVE post connector; then replace the nuts.
4. If there is any problem connecting the output leads, check with a reputable auto supply store or contact the
Customer Service Department toll-free at (800) 544-6986 for assistance in finding an appropriate connection
device for your particular application.
Note: ALWAYS disconnect the AC power cord from the AC power outlet before connecting (or disconnecting) the
charger to (or from) the battery.
Connecting the Charger with the DC Accessory Plug
The charger’s output leads also contain a DC accessory plug (Figure 5).
1. Insert the DC plug into the vehicle’s DC accessory outlet.
2. Insert the AC plug of the charger into any standard 110/120 volt
AC wall outlet.
Note: Some vehicles require that the ignition be turned to the ACC
(accessory) position to acitvate the DC accessory outlet.
Charging the Battery
1. Slide the Charge Rate Selector switch to 1 amp or 2 amps.
2. Leave the charger on.
3. Monitor the battery from time to time.
Note: A clicking sound may occur during this process. This is normal.
Fuse Replacement (DC Accessory Adapter)
1. Remove plug from accessory outlet. Remove the gold cap by turning counter clockwise and lifting off.
2. Remove center pin and spring. Remove fuse.
3. Replace fuse with same type and size fuse (5 amp).
4. Replace center pin and spring inside plug.
5. Replace gold cap by turning clockwise.
TROUBLESHOOTING
Unit Not Charging
• Check that the charger is properly connected to a live 120 volt AC outlet (the LED will illuminate).
• Check that the correct charge rate has been selected for the battery being charged.
• If the battery to be charged has fallen below 2 volts, the battery cannot be recharged with this unit.
CARE AND MAINTENANCE
With proper care and minimal maintenance, the 2 Amp Charge Rate Automatic Battery Maintainer will provide
years of dependable service. For maximum performance, manufacturer recommends:
1. Storing the unit in a clean, dry, cool place when not in use.
2. Cleaning the unit casing and cords (as necessary) with a dry (or slightly damp) cloth. Ensure that unit is
completely disconnected from battery and power source, before cleaning.
3. To maintain the operating condition and maximize the life of the charger cords, always coil them loosely for
storage. Do not wrap them around the unit or crimp them with a tight band.
Figure 5. DC Accessory Plug
RED
BLACK
Figure 4. Terminal Rings
CONNECTOR
NUT
BOLT
TERMINAL RINGS
Figure 3. Ring Terminal Connection Diagram
6
FEATURES
• The unit has two charge rate settings, controlled by one switch:
a) 2 amp: for recharging motorcycles, lawn mowers, tractors, ATVs, snowmobiles and personal watercraft
b) 1 amp: for maintenance charging RVs, speciality vehicles, antique and classic cars, marine deep cycle
batteries and more
• Maintains battery charge in stored vehicles
• Excellent for winter pre-start battery warm-up
• Includes three connector sets:
a) DC accessory plug
b) Battery harness clips
c) Battery ring terminal harness
• Charging indicators:
a) Red – bad connection, battery not able to accept charge, reverse polarity hook-up
b) Yellow – connection correct and charging
c) Green – fully charged
• UL-Listed for safety
• Fully automatic; powers on when needed, powers off when battery is fully-charged or topped-off
• Built-in circuit protection guards against overcharging or short circuit
• Automatically checks for correct polarity (requires a minimum of 2.0 volts battery voltage)
• Convenient, color-coded ring terminals/clamps for easy, correct installation
• Charges with high frequency, pure, DC current
OPERATING INSTRUCTIONS
Ensure that all installation and operating instructions and safety precautions are understood and carefully followed
by anyone installing or using the charger. Follow the steps outlined in “Important Safety Instructions” at the front
of this manual.
Charging Indicators
Red LED – Bad connection, battery not able to accept charge, reverse polarity connection
Yellow LED – Connection correct and charging
Green LED – Battery fully charged
When the charger is properly connected, the LED will illuminate, indicating the inside smart
circuit is functioning to judge the battery status. This procedure may take up to 2 minutes
if the battery voltage is lower than 12.8 volts.
Connecting the Charger with the Terminal Clips
The charger’s output leads have color-coded battery clips (Figure 2) (RED-POSITIVE and
BLACK-NEGATIVE). These connect directly to the corresponding connectors on the battery
posts.
Follow the steps outlined in “Important Safety Instructions” at the front of this manual.
BLACK
Figure 2. Battery Clips
RED
BATTERY TERMINAL RINGS
DC ACCESSORY PLUG
ACCESSORY OUTLET
BATTERY
BATTERY
CABLES
Figure 1. 2 Amp Battery Maintainer Connection Diagram
110/120 VOLT AC PLUG END
CHASSIS
2 AMP BATTERY MAINTAINER
BATTERY HARNESS
CLIPS
90556303 BM2B.qxp:BM2B ManualEN 061708 10/26/09 10:35 AM Page 6
Page 5

98
WARNINGS:
• Do not use charger if cords have been damaged in any way — call Technical Support toll-free at (800) 544-
6986.
• There are no user-serviceable parts in this unit.
• Do not open the unit. In the event of malfunction, it must be returned to manufacturer for professional testing
and repair. Opening the unit will void the manufacturer’s warranty.
ACCESSORIES
Recommended accessories for use with your tool are available from your local dealer or authorized service center.
If you need assistance regarding accessories, please call: 1-800-544-6986.
WARNING: The use of any accessory not recommended for use with this tool could be hazardous.
SERVICE INFORMATION
All Black & Decker Service Centers are staffed with trained personnel to provide customers
with efficient and reliable power tool service. Whether you need technical advice, repair, or
genuine factory replacement parts, contact the Black & Decker location nearest you. To find
your local service location, refer to the yellow page directory under "Tools—Electric" or call:
1-800-544-6986 or visit www.blackanddecker.com
FULL TWO-YEAR HOME USE WARRANTY
Black & Decker (U.S.) Inc. warrants this product for two years against any defects in
material or workmanship. The defective product will be replaced or repaired at no charge in
either of two ways.
The first, which will result in exchanges only, is to return the product to the retailer from
whom it was purchased (provided that the store is a participating retailer). Returns should
be made within the time period of the retailerʼs policy for exchanges (usually 30 to 90 days
after the sale). Proof of purchase may be required. Please check with the retailer for their
specific return policy regarding returns that are beyond the time set for exchanges.
The second option is to take or send the product (prepaid) to a Black & Decker owned or
authorized Service Center for repair or replacement at our option. Proof of purchase may
be required.Black & Decker owned and authorized Service Centers are listed under
"Tools-Electric" in the yellow pages of the phone directory.
This warranty does not apply to accessories. This warranty gives you specific legal rights
and you may have other rights which vary from state to state or province to province.
Should you have any questions, contact the manager of your nearest Black & Decker
Service Center. This product is not intended for commercial use.
FREE WARNING LABEL REPLACEMENT: If your warning labels become illegible or are
missing, call 1-800-544-6986 for a free replacement.
LATIN AMERICA: This warranty does not apply to products sold in Latin America. For
products sold in Latin America, check country specific warranty information contained in the
packaging, call the local company or see the website for warranty information.
SPECIFICATIONS
Input: 120 volts AC, 60 Hz, .50 amps
Output: 12 volts DC, 2 Amps
CONSERVADOR AUTOMÁTICO DE BATERÍA DE 2 AMPERIOS
MANUAL DE INSTRUCCIONES
Número de catálogo BM2B
PARA REDUCIR EL RIESGO DE LESIONES, EL USUARIO DEBE LEER Y
ENTENDER EL MANUAL DE INSTRUCCIONES
CONSERVE ESTE MANUAL PARA FUTURAS CONSULTAS.
Nº de Catálogo: BM2B Form # 90556303
Octubre 2009 Copyright © 2009 Black & Decker Impreso en China
LEA EL MANUAL ANTES DE DEVOLVER
ESTE PRODUCTO POR CUALQUIER MOTIVO:
Si tiene una consulta o algún inconveniente con su producto Black & Decker, visite
HTTP://WWW.BLACKANDDECKER.COM/INSTANTANSWERS
Si no encuentra la respuesta o no tiene acceso a Internet, llame al 1-800-544-6986 de
lunes a viernes de 8 a.m. a 5 p.m. hora del Este para hablar con un agente.
Cuando llame, tenga a mano el número de catálogo.
para obtener respuestas instantáneas las 24 horas del día.
Gracias por elegir Black & Decker!
Visite www.BlackandDecker.com/NewOwner
para registrar su nuevo producto.
See ‘Tools-
Electric’
– Yellow Pages –
for Service &
Sales
Imported by
Black & Decker (U.S.) Inc.,
701 E. Joppa Rd.
Towson, MD 21286 U.S.A.
90556303 BM2B.qxp:BM2B ManualEN 061708 10/26/09 10:35 AM Page 8
Page 6

11
• NO OPERE herramientas eléctricas portátiles cerca de líquidos inflamables o en atmósferas gaseosas o
explosivas. Ciertos componentes en estas herramientas normalmente chispean, y las chispas pueden encender
los vapores.
• CABLES PROLONGADORES. Asegúrese de que el cable prolongador esté en buenas condiciones. Cuando utilice
un cable prolongador, asegúrese de que tenga la capacidad para conducir la corriente que su producto exige. Un
cable de menor capacidad provocará una disminución en el voltaje de la línea, lo cual producirá una pérdida de
potencia y sobrecalentamiento. La siguiente tabla muestra la medida correcta que debe utilizar según la longitud
del cable y la capacidad nominal en amperios indicada en la placa. En caso de duda, utilice el calibre
inmediatamente superior. Cuanto menor es el número de calibre, más grueso es el cable.
• USO DE CABLES PROLONGADORES EN ESPACIOS ABIERTOS. Cuando utilice la herramienta al aire libre, utilice
solamente cables prolongadores diseñados para su uso al aire libre o marcados como tales.
ADVERTENCIA, PELIGRO DE ESTALLIDO: No utilice la unidad para cargar las baterías secas que se usan
normalmente con los aparatos domésticos Estas baterías pueden estallar y provocar lesiones a las personas y
daños a la propiedad. Use la unidad para carga/ refuerzo solamente de una batería de PLOMO-ÁCIDO. No está
diseñada para proveer energía a un sistema eléctrico de bajo voltaje que no sea para arrancar un motor.
RIESGO DE DESCARGA ELÉCTRICA:
• No se debe utilizar un cable prolongador a menos que sea absolutamente necesario. Si es necesario utilizar un
cable prolongador, asegúrese de que:
a) las patas del cable prolongador sean de la misma cantidad, tamaño y forma que las de la batería de refuerzo,
b) que el cable prolongador posea los conductores correctos y esté en buenas condiciones eléctricas,
c) la medida del conductor es suficientemente grande para la capacidad nominal en amperios como se indicó en
la tabla anterior.
• No opere la unidad con un cable o enchufe dañados, o si ésta ha recibido un golpe fuerte, se cayó o presenta
algún daño. No desarme la unidad; llévela a un técnico de servicio calificado cuando se requiera mantenimiento
o una reparación. Volver a armarlo de manera incorrecta podría provocar riesgo de descarga eléctrica o
incendio, y anulará la garantía.
• El uso de un dispositivo no suministrado, recomendado o vendido por el fabricante específicamente para el uso
con esta unidad puede provocar riego de descarga eléctrica y lesiones a las personas.
• NUNCA sumerja esta unidad en agua, no la exponga a la lluvia, la nieve ni la use cuando esté mojada.
• Para reducir el riesgo de descarga eléctrica, desconecte la unidad de cualquier fuente de alimentación antes de
intentar realizarle mantenimiento o limpieza. Apagar los controles sin desenchufar la unidad no reducirá este
riesgo.
ADVERTENCIA: RIESGO DE GASES EXPLOSIVOS:
• Trabajar cerca de una batería de plomo ácido es peligroso. Las baterías generan gases explosivos durante su
funcionamiento normal. Por esta razón, es muy importante que lea este manual siempre antes de utilizar la
batería de urgencia y que siga las instrucciones con exactitud.
• Para reducir el riesgo de explosión de la batería, siga estas instrucciones y las publicadas por el fabricante de la
batería y el fabricante de cualquier equipo que tenga la intención de utilizar cerca de la batería. Revise las
indicaciones sobre precauciones en estos productos y en el motor.
• Este equipo emplea piezas (interruptores y relés) que producen arcos o chispas. Por lo tanto, si utiliza la unidad
en una cochera o un área cerrada, DEBE colocarla a no menos de 46 cm (18 pulgadas) por encima del piso.
• PARA REDUCIR EL RIESGO DE LESIONES, ESTA UNIDAD SÓLO DEBE SER OPERADA POR ADULTOS, NO FUE
DISEÑADA PARA QUE LA UTILICEN LOS NIÑOS. CAUTION: TO REDUCE THE
PRECAUCIÓN: PARA REDUCIR EL RIESGO DE LESIONES O DAÑO A LA PROPIEDAD:
• Tire del enchufe y no del cable al desconectar el adaptador de carga de CA de 120 voltios de la unidad.
• NUNCA INTENTE ARRANCAR MEDIANTE PUENTE UNA BATERÍA CONGELADA.
• Para recargar esta unidad, utilice sólo el adaptador de carga CA o el enchufe del adaptador de CC de 12 voltios
incorporado.
Calibre mínimo para los juegos de cables
Voltios Largo total del cable en pies
120V 0-25 26-50 51-100 101-150
(0-7,6 m) (7,6-15,2 m) (15,2-30,4 m) (30,4-45,7m)
240V 0-50 51-100 101-200 201-300
(0-15,2m) (15,2-30,4m) (30,4-60,9m) (60,9-91,4m)
Capacidad nominal en amperios
Más No más Medida de conductor estadounidense
que que
0 - 6 18 16 16 14
6 -1018161412
10 -1216161412
12 - 16 14 12 No recomendado
10
NORMAS DE SEGURIDAD / DEFINICIONES
PELIGRO: Indica una situación de peligro inminente que, si no se evita, provocará la muerte o lesiones graves.
ADVERTENCIA: Indica una situación de peligro inminente que, si no se evita, provocará la muerte o lesiones graves.
PRECAUCIÓN: Indica una situación de peligro potencial que, si no se evita, puede provocar lesiones leves o
moderadas.
PRECAUCIÓN: Utilizado sin el símbolo de alerta de seguridad indica una situación de peligro potencial que, si
no se evita, puede provocar daños en la propiedad.
RIESGO DE OPERACIÓN INSEGURA. Cuando se utilizan herramientas o equipos, siempre se deben respetar las
precauciones de seguridad para reducir el riesgo de lesiones personales. La operación, el mantenimiento o la
modificación incorrectos de herramientas o equipos pueden provocar lesiones graves y daños a la propiedad. Las
herramientas y los equipos están diseñados para determinados usos. Black & Decker recomienda enfáticamente que
NO se modifique este producto y que NO se utilice para ningún otro uso que aquél para el que fue diseñado. Lea y
comprenda todas las instrucciones operativas y las advertencias antes de utilizar cualquier herramienta o equipo.
INSTRUCCIONES IMPORTANTES SOBRE SEGURIDAD
ADVERTENCIAS E INSTRUCCIONES DE SEGURIDAD GENERALES PARA TODOS LOS ARTEFACTOS
LEA LAS INSTRUCCIONES
ADVERTENCIA: Lea todas las instrucciones antes de operar el producto. El incumplimiento de todas las
instrucciones enumeradas a continuación puede provocar una descarga eléctrica, un incendio o lesiones graves.
• EVITE LAS CONDICIONES AMBIENTALES PELIGROSAS. NO utilice artefactos en zonas húmedas o mojadas. No
utilice artefactos bajo la lluvia.
• MANTENGA A LOS NIÑOS ALEJADOS. Los visitantes deben mantenerse a distancia del área de trabajo.
• GUARDE LOS ARTEFACTOS QUE NO UTILICE EN EL INTERIOR. Cuando no los utilice, los artefactos deben
guardarse en el interior en un lugar seco, alto o bajo llave, lejos del alcance de los niños.
• UTILICE EL APARATO ADECUADO. Nunca utilice el aparato para otra tarea que no sea aquella para la que fue
creada.
• USE LA VESTIMENTA ADECUADA. No use ropas holgadas o joyas. Pueden atascarse en las piezas en
movimiento. Se recomienda utilizar guantes de goma y calzado antideslizante considerable al trabajar al aire
libre. Recójase y cubra el cabello largo.
• USE ANTEOJOS DE SEGURIDAD Y CUALQUIER OTRO EQUIPO DE SEGURIDAD. Use anteojos protectores o
lentes de seguridad con protección lateral que cumplan con las normas de seguridad aplicables y, de ser
necesario, un protector facial. Utilice también máscaras faciales o para polvo si la operación produce polvillo. Esto
se aplica a todas las personas que se encuentren en el área de trabajo. Utilice también un casco, protección
auditiva, guantes, calzado de seguridad y sistemas de recolección de polvo cuando así se especifique o requiera.
Puede conseguir anteojos de seguridad o similares a un costo adicional en su distribuidor local o en el Centro de
mantenimiento de Black & Decker.
• NO TIRE DEL CABLE. Nunca transporte el aparato por el cable ni lo jale para desconectarlo del tomacorriente.
Mantenga el cable alejado del calor, el aceite y los bordes afilados.
• NO SE ESTIRE. Conserve el equilibrio y párese adecuadamente en todo momento.
• DESCONECTE LOS APARATOS. Desconecte el aparato de la fuente de energía cuando no lo utiliza, antes de
realizar un mantenimiento y al cambiar accesorios como hojas y elementos semejantes.
• EVITE EL ENCENDIDO POR ACCIDENTE. No transporte el aparato enchufado con el dedo en el interruptor.
Asegúrese de que el interruptor esté apagado cuando lo enchufe.
• La protección del INTERRUPTOR DE CORTE POR FALLA A TIERRA (GFCI) debe aplicarse a los circuitos o los
tomacorrientes que se utilizarán. Hay tomacorrientes con protección GFCI incorporada que pueden utilizarse
para tomar esta medida de seguridad.
• USO DE SUPLEMENTOS Y ACCESORIOS. El uso de accesorios o dispositivos no recomendados para utilizar
con este aparato puede resultar peligroso. Nota: Consulte la sección "Accesorios" de este manual para obtener
detalles adicionales.
• MANTÉNGASE ALERTA. Fíjese en lo que está haciendo. Use el sentido común. No opere la herramienta si está
cansado.
• VERIFIQUE QUE NO HAYA PIEZAS DAÑADAS. Antes de volver a utilizar la herramienta, se debe controlar
cualquier protección u otra pieza que esté averiada para determinar si funcionará correctamente y realizará la
función para la que fue diseñada. Verifique la alineación de las piezas móviles, la rotura de piezas, el montaje y
cualquier otra condición que pueda afectar su operación. Cualquier protección u otra pieza que esté dañada debe
ser reparada correctamente o reemplazada por un centro de mantenimiento autorizado, a menos que este
manual de instrucciones indique otra cosa. Reemplace los interruptores defectuosos en un centro de
mantenimiento autorizado. No utilice la herramienta si no puede encenderla o apagarla con el interruptor.
90556303 BM2B.qxp:BM2B ManualEN 061708 10/26/09 10:35 AM Page 10
Page 7

13
2. Manténgase alejado de las paletas de ventilador, correas, poleas y otras partes que pueden provocar lesiones
a las personas.
3. Controle la polaridad de los bornes de la batería. El borne POSITIVO (POS, P, +) de la batería generalmente
tiene mayor diámetro que el borne NEGATIVO (NEG, N, –).
4. Determine qué borne de la batería está puesto a tierra (conectado) al bastidor. Si el borne negativo está puesto
a tierra en el bastidor (como en la mayoría de los vehículos), vea 5. Si el borne positivo está puesto a tierra en
el bastidor, vea 6.
5. Para un vehículo puesto a tierra con el negativo, conecte la pinza del POSITIVO (ROJA) del cargador de batería
al borne sin conexión a tierra POSITIVO (POS, P, +) de la batería. Conecte la pinza del NEGATIVO (NEGRA) al
bastidor del vehículo o al bloque del motor, lejos de la batería. No conecte la pinza al carburador, las cañerías
de combustible o a las partes de chapa de la carrocería. Conecte a una pieza de metal sólida del bastidor o del
bloque del motor.
6. Para un vehículo puesto a tierra con el positivo, conecte la pinza del NEGATIVO (NEGRA) del cargador de
batería al borne sin conexión a tierra NEGATIVO (NEG, N, –) de la batería. Conecte la pinza del POSITIVO
(ROJA) al bastidor del vehículo o al bloque del motor, lejos de la batería. No conecte la pinza al carburador, las
cañerías de combustible o a las partes de chapa de la carrocería. Conecte a una pieza de metal sólida del
bastidor o del bloque del motor.
7. Cuando desconecta el cargador, coloque todos los interruptores en apagado (Off), desconecte el cable de CA,
retire la pinza del bastidor del vehículo, y luego retire la pinza del terminal de la batería.
8. No cargue la batería mientras el motor está en marcha.
9. Vea las instrucciones de operación para obtener información sobre la duración de la carga.
Cuando la batería ha sido retirada del vehículo, siga estos pasos. Una chispa cerca de la batería puede
provocar una explosión.
ADVERTENCIA: PARA REDUCIR EL RIESGO DE CHISPA CERCA DE LA BATERÍA:
1. Controle la polaridad de los bornes de la batería. El borne positivo (marcado POS, P, +) generalmente tiene
mayor diámetro que el borne negativo de la batería (marcado NEG, N, –).
2. Conecte un cable de 60 cm (24 pulgadas)(longitud mínima) Nº 6 AWG aislado, para batería al borne negativo
de la batería (marcado NEG, N, –).
3. Conecte la pinza positiva (ROJA) de la batería al borne positivo de la batería (marcado POS, P, + o rojo).
4. Párese tan lejos de la batería como sea posible, y no esté de cara a la batería hasta que haya hecho la
conexión final.
5. Conecte cuidadosamente la pinza NEGATIVA (NEGRA) del cargador al extremo libre del cable de la batería
conectado al terminal negativo.
6. Ubique el nivel de carga en la posición apropiada de acuerdo con la medida de la batería.
7. Cuando desconecta el cargador, hágalo siempre en la secuencia inversa del procedimiento de conexión y
corte la primera conexión estando tan lejos de la batería como resulte posible.
Nota: Una batería marina (de bote) se debe retirar y cargar en tierra. Cargarla a bordo exige equipos\ diseñados
especialmente para uso marino. Esta unidad NO está diseñada para tal uso.
• Controle el desgaste de la unidad periódicamente. Lleve la unidad a un técnico calificado para reemplazar las
piezas desgastadas o defectuosas de inmediato.
• Lea este manual de instrucciones antes de utilizar esta unidad.
CONSERVE ESTAS INSTRUCCIONES
ADVERTENCIA: PARA REDUCIR EL RIESGO DE LESIONES:
Siga estas instrucciones y las publicadas por el fabricante de la batería y el fabricante de cualquier equipo que tenga
la intención de utilizar con esta unidad. Revise las indicaciones sobre precauciones en estos productos y en el motor.
Este dispositivo cumple con la parte 15 de las normas de la Comisión Federal de Comunicaciones de Estados Unidos (FCC). La
operación está sujeta a las dos condiciones siguientes: (1) este dispositivo no puede causar interferencia perjudicial y (2) este
mecanismo debe aceptar cualquier interferencia recibida, incluida la interferencia que puede provocar una operación no deseada.
Este equipo ha sido probado y se encontró que cumple con los límites para dispositivo digital Clase B, según la parte 15 de las
normas de la FCC. Estos límites están diseñados para brindar protección razonable contra interferencia perjudicial en una
instalación residencial. Este equipo genera, usa y puede irradiar energía en frecuencia de radio y, si no se instala y se usa de
acuerdo con las instrucciones, puede provocar interferencia perjudicial en las comunicaciones de radio. Sin embargo, no hay
garantía de que la interferencia no ocurra en una instalación en particular. Si el equipo provoca interferencia perjudicial en la
recepción de radio o televisión, lo que se puede determinar al apagar y encender el equipo, el usuario debe tratar de corregir la
interferencia mediante una o más de las siguientes medidas:
• Cambiar la orientación o la ubicación de la antena de recepción.
• Aumentar la separación entre el equipo y el receptor.
• Conectar el equipo a un tomacorriente sobre un circuito diferente de aquel al que está conectado el receptor.
• Consultar al vendedor o pedir la ayuda de un técnico en radio y televisión con experiencia.
12
• Los vehículos que tienen sistemas computarizados incorporados pueden resultar dañados si la batería del
vehículo se arranca mediante puente. Antes de arrancar mediante puente, lea el manual del cliente del vehículo
para confirmar que la ayuda externa para arrancar es adecuada.
• Cuando trabaje con baterías de plomo-ácido, asegúrese de que siempre haya ayuda inmediata disponible en
caso de accidente o emergencia.
• Utilice siempre protección para los ojos al emplear este producto; el contacto con el ácido de la batería puede
producir ceguera o quemaduras graves. Conozca los procedimientos de primeros auxilios para el caso de
contacto accidental con el ácido de la batería.
• Mantenga cerca suficiente agua fresca y jabón en caso que el ácido de la batería entre en contacto con la piel.
• Si el ácido de la batería entra en contacto con la piel o la ropa, enjuáguese inmediatamente con agua y jabón
durante por lo menos 10 minutos. Busque asistencia médica de inmediato.
• Nunca fume, ni permita que hayan chispas o llamas cerca de la batería del vehículo, del motor o del
conservador de energía.
• Quítese todos los artículos personales que sean de metal, como anillos, pulseras y relojes cuando trabaje con
una batería de ácido de plomo. Una batería de ácido de plomo puede producir una corriente de cortocircuito lo
suficientemente alta como para soldar un anillo, o algo parecido al metal, causando así una quemadura severa.
• Nunca permita que el ácido de la batería entre en contacto con esta unidad.
• No opere esta unidad en un área cerrada ni restrinja la ventilación de alguna forma.
• PRIMEROS AUXILIOS – PIEL: Si el ácido de la batería entra en contacto con la piel, enjuáguese inmediatamente
con agua, luego lávese con agua y jabón. Si se presenta enrojecimiento, dolor o irritación, busque asistencia
médica de inmediato.
OJOS: Si el ácido de la batería entra en contacto con los ojos, lávese los ojos inmediatamente durante 15
minutos como mínimo y busque asistencia médica de inmediato. .
Seguridad del cable eléctrico
Este aparato tiene un enchufe polarizado (una pata es más ancha que la otra) como característica de seguridad.
Este enchufe se ajustará en un tomacorriente polarizado de una sola manera. Si el enchufe no se ajusta
totalmente en el tomacorriente, invierta el enchufe. Si aún así no se ajusta, comuníquese con un electricista
calificado. No intente anular esta característica de seguridad.
Preparación para la carga
1. Determine el voltaje de la batería que se va a cargar consultando el manual del vehículo.
2. Si es necesario retirar la batería del vehículo para cargarla, o para limpiar los terminales, retire siempre
primero de la batería el terminal puesto a tierra. Asegúrese de que todos los accesorios del vehículo estén
apagados, para no causar un arco eléctrico.
3. Limpie los terminales de la batería. No permita que la corrosión entre en contacto con sus ojos.
4. Agregue agua destilada en cada celda hasta que el ácido de la batería alcance el nivel especificado en el manual
del fabricante. Esto ayuda a purgar el exceso de gas de las celdas. No llene de más. Para una batería sin tapas
de celda (que no requiere mantenimiento), siga cuidadosamente las instrucciones de carga del fabricante.
5. Estudie todas las precauciones específicas del fabricante de la batería, tales como si retirar o no las tapas de
las celdas mientras se carga, y la velocidad de carga recomendada.
6. El área alrededor de la batería debe estar bien ventilada mientras se carga una batería. Se puede ayudar a disipar el
gas mediante el uso de un trozo de cartón u otro material no metálico, como un abanico.
7. Asegúrese de que la carga inicial no exceda los requisitos del fabricante de la batería.
Ubicación del cargador
1. Ubique el cargador tan lejos de la batería como lo permitan los cables.
2. NUNCA ubique el cargador directamente sobre la batería que se está cargando; los gases de la batería
producirán corrosión y daños al cargador.
3. NUNCA permita que el ácido de la batería gotee sobre el cargador cuando lee la gravedad o llena la batería.
4. NUNCA opere el cargador en un área cerrada ni restrinja la ventilación de manera alguna.
5. Las baterías marinas se pueden retirar y cargar en tierra.
6. No coloque una batería sobre el cargador.
Precauciones para la conexión de CC
1. Conecte y desconecte las pinzas de salida de CC sólo después de retirar el cable de CA del tomacorriente eléctrico.
2. Nunca permita que las pinzas se toquen entre sí.
3. Fije las pinzas al bastidor de la batería según se indica en “Batería instalada en el vehículo”, pasos 5 y 6, y en
“Batería fuera del vehículo”, pasos 2, 4 y 5.
Cuando la batería está instalada en un vehículo, siga estos pasos. Una chispa cerca de la batería puede
provocar una explosión.
ADVERTENCIA: PARA REDUCIR EL RIESGO DE CHISPA CERCA DE LA BATERÍA:
1. Mantenga los cables de CA y CC alejados del capó, la puerta las partes moviles del motor.
90556303 BM2B.qxp:BM2B ManualEN 061708 10/26/09 10:35 AM Page 12
Page 8

15
Conexión del cargador con las pinzas terminales
Los conductores de salida del cargador tienen pinzas de batería codificadas por color
(Figura 2) (Rojo: positivo y Negro: negativo). Las mismas se conectan directamente con
los conectores correspondientes en los bornes de la batería.
Siga los pasos detallados en “Instrucciones de seguridad importantes” en el
comienzo de este manual.
Conexión del cargador con los anillos terminales
Los conductores de salida del cargador tienen anillos terminales engarzados, codificados por color (Figura 4) (Rojo:
positivo y Negro: negativo). Estos anillos se conectan directamente con los conectores correspondientes en los
bornes de la batería.
1. Retire las tuercas de los pernos de los conectores de los bornes de la batería.
2. Ubique el terminal ROJO sobre el perno del conector del borne POSITIVO de la batería.
3. Ubique el terminal NEGRO sobre el conector del borne NEGATIVO; luego vuelva a colocar las tuercas.
4. Si hay algún problema al conectar los conductores de salida, verifique con un proveedor de repuestos
automotores o comuníquese con el Departamento de Servicio al Cliente, a la línea gratuita (800) 544-6986
para obtener ayuda para encontrar el dispositivo de conexión apropiado para su aplicación particular.
Nota: Desconecte SIEMPRE el cable de energía CA de la salida de energía CA antes de conectar el cargador a la
batería (o desconectarlo de la misma).
Conexión del cargador con el enchufe para accesorios CC
Los conductores de salida del cargador también tienen un enchufe para accesorios
CC (Figura 5).
1. Conecte el enchufe CC en el tomacorriente para accesorios CC del vehículo.
2. Conecte el enchufe CA del cargador en cualquier tomacorriente
de pared estándar de 110/120 voltios CA.
Nota: Algunos vehículos requieren que la ignición esté en la posición
de ACC (Accesorios) para activar la salida de accesorios de CC.
Carga de la batería
1. Deslice el interruptor selector de nivel de carga a 1 A o a 2 A.
2. Deje el cargador encendido.
3. Controle la batería de vez en cuando.
Nota: Durante este proceso puede oírse un sonido seco. Esto es normal.
Reemplazo del fusible (Adaptador para accesorios de CC)
1. Extraiga el enchufe de la salida de accesorios. Dele vueltas al casquillo dorado hacia la izquierda y levántelo
para extraerlo.
2. Extraiga el pin central y el muelle. Extraiga el fusible.
3. Reemplace el fusible por otro del mismo tipo y clasificación (5 amperios).
4. Coloque el pin central y el muelle nuevamente dentro del enchufe.
5. Coloque el casquillo dorado nuevamente girando hacia la derecha
DETECCIÓN DE PROBLEMAS
La unidad no carga
• Controle que el cargador esté conectado correctamente a un tomacorriente de 120 voltios CA que funcione (se
encenderá la luz LED).
• Controle que se haya seleccionado el nivel de carga correcto para la batería que se está cargando.
• Si la batería que se debe cargar ha caído debajo de los 2 voltios, no se puede recargar con esta unidad.
Figura 5. Enchufe
para accesorios CC
CONECTOR
TUERCA
PERNO
ANILLOS TERMINALES
Figura 3. Diagrama de la conexión con anillos terminales
ROJO
NEGRO
Figura 4. Anillos terminales
NEGRO
Figura 2. Pinzas de batería
ROJO
14
INTRODUCCIÓN
Gracias por elegir el
conservador automático de batería de 2 amperios de Black & Decker
®
. Con el cuidado y
el uso apropiados, le brindará años de servicio confiable. Por favor, antes de instalar o utilizar este dispositivo, lea
todas las advertencias y precauciones de seguridad y todo este manual de usuario, y cumpla con las mismas. Se
debe conservar este manual para consultas rápidas cada vez que se usa la unidad. La Figura 1 muestra el
cargador de batería y sus componentes.
CARACTERÍSTICAS
• La unidad tiene dos posiciones de nivel de carga, controladas por un interruptor:
a) 2 A: para recargar motocicletas, cortadoras de césped, tractores, vehículos todo terreno, motos de nieve y
motos de agua
b) 1 A: para carga de mantenimiento de las baterías de vehículos recreativos, vehículos especiales, automóviles
antiguos y clásicos, marinas de ciclo profundo y mucho más.
• Mantiene la carga de la batería en vehículos que no se utilizan.
• Excelente para calentamiento de la batería previo al arranque, en el invierno.
• Incluye tres juegos de conectores:
a) Un enchufe para accesorio de CC
b) Conjunto de pinzas de batería
c) Conjunto de anillos terminales de batería
• Indicadores de carga:
a) Rojo: mala conexión, batería incapaz de recibir carga, polaridad invertida acople
b) Amarillo: conexión correcta y cargando
c) Verde: cargada completamente sobrecarga o cortocircuitos.
• Aprobada en seguridad por UL.
• Completamente automática; se enciende cuando se necesita, se apaga cuando la batería está completamente
cargada o al 100%.
• La protección de circuito incorporada protege contra sobrecarga o cortocircuitos.
• Controla automáticamente la polaridad correcta (requiere un mínimo de 2,0 voltios de voltaje de batería).
• Pinzas y anillos terminales codificados por color, muy convenientes para una instalación fácil y correcta.
• Carga con corriente CC pura de alta frecuencia.
INSTRUCCIONES DE OPERACIÓN
Asegúrese de que se han comprendido todas las instrucciones de instalación y operación y las precauciones de
seguridad, y que todas las personas que instalan o usan el cargador las cumplen atentamente. Siga los pasos detallados
en “Instrucciones de seguridad importantes” en el comienzo de este manual.
Indicadores de carga
Luz roja (LED) Mala conexión, batería incapaz de recibir carga, conexión con polaridad invertida
Luz amarilla (LED) Conexión correcta y cargando
Luz verde (LED) Batería completamente cargada
Cuando el cargador está conectado correctamente, se encenderá la luz (LED), indicando que el circuito interior
inteligente está funcionando para evaluar el estado de la batería. Este procedimiento puede tomar hasta dos
minutos si el voltaje de la batería es menor de 12,8 voltios.
ANILLOS TERMINALES
PARA BATERÍA
ENCHUFE PARA
ACCESORIOS DE CC
TOMACORRIENTE PARA ACCESORIOS
BATERÍA
BATERÍA
CABLES
Figura 1. Diagrama de conexión del conservador de batería de 2 A
EXTREMO CON ENCHUFE PARA CA DE 110/120 VOLTIOS
BASTIDOR
CONSERVADOR DE BATERÍA DE 2 A
CONJUNTO DE PINZAS DE BATERÍA
90556303 BM2B.qxp:BM2B ManualEN 061708 10/26/09 10:35 AM Page 14
Page 9

1716
CUIDADO Y MANTENIMIENTO
Con el cuidado apropiado y un mantenimiento mínimo, el
conservador automático de batería de 2 amperios
brindará años de servicio confiable. Para el rendimiento máximo, el fabricante recomienda:
1. Almacenar la unidad en un lugar limpio, seco y fresco cuando no se utiliza.
2. Limpiar la caja y los cables de la unidad (según sea necesario) con una tela seca (o ligeramente húmeda).
Asegúrese de que la unidad está completamente desconectada de la batería y de la fuente de energía antes de
limpiarla.
3. Para mantener la condición operativa y prolongar la vida de los cables del cargador, enróllelos flojamente
siempre para guardarlos. No los enrosque alrededor de la unidad ni los ate con una banda ajustada.
ADVERTENCIAS
• No utilice el cargador si los cables han sufrido algún daño; llame al Apoyo técnico a la línea gratuita (800) 544-6986.
• Esta unidad no contiene elementos a los que el usuario pueda hacerles mantenimiento.
• No abra la unidad. En el caso de que funcione mal, se debe devolver al fabricante para que se realicen
profesionalmente las comprobaciones y reparaciones. Abrir la unidad anulará la garantía del fabricante.
Accesorios
Los accesorios que se recomiendan para la herramienta están disponibles en su distribuidor local o en el centro de
mantenimiento autorizado. Si necesita asistencia en relación con los accesorios, por favor llame al: 1-800-544-6986.
ADVERTENCIA: El uso de accesorios no recomendados para utilizar con esta herramienta puede resultar peligroso.
INFORMACIÓN DE MANTENIMIENTO
Todos los Centros de servicio de Black & Decker cuentan con personal altamente
capacitado dispuesto a brindar a todos los clientes un servicio eficiente y confiable en la
reparación de herramientas eléctricas. Si necesita consejo técnico, reparaciones o piezas
de repuesto originales de fábrica, póngase en contacto con el centro de servicio de Black &
Decker más cercano a su domicilio. Para ubicar su centro de servicio local, consulte la
sección “Herramientas eléctricas” (Tools-Electric) de las páginas amarillas, llame al
1-800-544-6986 o visite nuestro sitio www.blackanddecker.com.
GARANTÍA COMPLETA DE DOS AÑOS PARA USO EN EL HOGAR
Black & Decker (Estados Unidos) Inc. ofrece una garantía de dos años por cualquier
defecto del material o de fabricación de este producto. El producto defectuoso se reparará
o reemplazará sin costo alguno de dos maneras.
La primera opción, el reemplazo, es devolver el producto al comercio donde se adquirió
(siempre y cuando se trate de un comercio participante). Las devoluciones deben
realizarse conforme a la política de devolución del comercio (generalmente, entre 30 y 90
días posteriores a la venta). Le pueden solicitar comprobante de compra. Consulte en el
comercio acerca de la política especial sobre devoluciones una vez excedido el plazo
establecido.
La segunda opción es llevar o enviar el producto (con flete pago) a un Centro de servicio
propio o autorizado de Black & Decker para su reparación o reemplazo según nuestro
criterio. Le pueden solicitar el comprobante de compra. Los Centros de servicio
autorizados y de propiedad de Black & Decker se detallan en la sección
“Herramientas eléctricas” (Tools-Electric) de las páginas amarillas de la guía telefónica.
Esta garantía no se extiende a los accesorios. Esta garantía le concede derechos legales
específicos; usted puede tener otros derechos que pueden variar según el estado o la
provincia. Si tiene alguna pregunta, comuníquese con el gerente del Centro de servicio de
Black & Decker de su zona. Este producto no está diseñado para uso comercial.
AMÉRICA LATINA: esta garantía no se aplica a los productos que se venden en América
Latina. Para los productos que se venden en América Latina, debe consultar la información
de la garantía específica del país que viene en el empaque, llamar a la compañía local o
visitar el sitio Web a fin de obtener esa información.
ESPECIFICACIONES
Entrada: 120 voltios CA, 60 Hz, .50 amps
Salida: 12 voltios CC, 2 Amps
· GARANTÍA BLACK & DECKER · BLACK & DECKER WARRANTY
. SOLAMENTE PARA PROPOSITOS DE MEXICO
Distributor Name · Sello firma del distribuidor
Date of purchase · Fecha de compra Invoice No. · No. de factura
PRODUCT INFOMATION · IDENTIFICACIÓN DEL PRODUCTO
Cat. No. · Catalogo ó Modelo Serial Number · No. de serie
Name · Nombre Last Name · Apellido
Address · Dirección
City · Ciudad State · Estado
Postal Code · Código Postal Country · País
Telephone · No. Teléfono
1 AÑO DE GARANTIA
Este producto cuenta con 1 año de garantía a partir de la fecha de compra contra
cualquier defecto de su funcionamiento, así como cualquier falla debido a materiales
empleados para su fabricación ó mano de obra defectuosa.
Nuestra garantía incluye la reparación o reposición del producto y/o componentes sin
cargo alguno para el cliente incluyendo la mano de obra, esta incluye los gastos de
trasportación erogados para lograr cumplimiento de esta garantía en los domicilios
diversos señalados.
Para hacer efectiva esta garantía deberá presentar su herramienta y esta póliza sellada
por el establecimiento comercial donde se adquirió el producto.
Nos comprometemos a entregar el producto en un lapso no mayor a 30 días hábiles
contados a partir de la fecha de recepción del mismo en nuestros talleres de servicio
autorizados.
ESTA GARANTIA NO APLICA CUANDO:
El producto se hubiese utilizado en condiciones distintas a las normales.
El producto no hubiese sido operado de acuerdo con el instructivo de uso que se acompaña.
El producto hubiese sido alterado o reparado por personas no autorizadas por nosotros
Importador: Black & Decker S.A. de .C.V
Bosque de Cidros Acceso Radiatas No.42
3ra.Seccion de Bosques de las lomas
C.P.05120, Mexico, D.F. Tel: (01 55) 5326 7100
90556303 BM2B.qxp:BM2B ManualEN 061708 10/26/09 10:35 AM Page 16
 Loading...