

Page 1
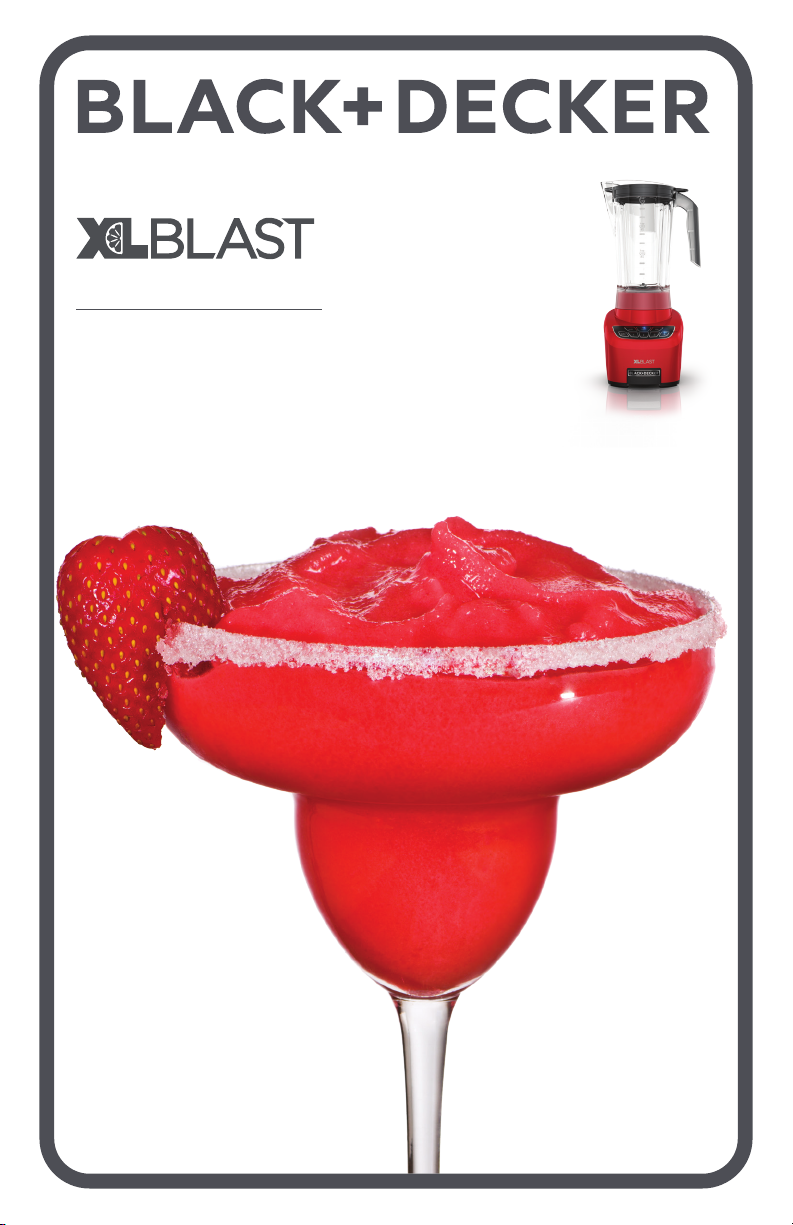
DRINK MACHINE
MÁQUINA PARA
PREPARAR BEBIDAS
BL4000R
TM
Customer Care Line:
USA 1-800-231-9786
Accessories/Parts (USA)
1-800-738-0245
Servicio para el cliente:
México 01-800 714-2503
Accesorios/Partes (EE.UU)
1-800-738-0245
www.prodprotect.com/applica
www.blackanddeckerappliances.com
Page 2

PLEASE READ AND SAVE THIS USE AND CARE BOOK.
IMPORTANT SAFEGUARDS.
When using electrical appliances, basic safety precautions should always be followed to
reduce the risk of fire, electric shock, and/or injury, including the following:
• Read all instructions.
• Unit has a motor protection system. If the indicator
light blinks rapidly, unplug it & let cool. Plug back in to
restart.
• To protect against risk of electrical shock, do not put
blender base, cord or plug in water or other liquid.
• Close supervision is necessary when any appliance is
used by or near children.
• Unplug from outlet when not in use, before
disassembly and before cleaning.
• Avoid contacting moving parts.
• Do not operate any appliance with a damaged cord
or plug, or after the appliance malfunctions or has
been damaged in any manner. Contact the consumer
service number listed in this manual.
• The use of attachments, including canning jars, not
recommended or sold by the appliance manufacturer
may cause fire, electric shock or injury.
• Do not use outdoors.
• The maximum rating is based on the blender jug
attachment. The power input of the optional personal
jar or herb jar is less than the allowable deviation.
• Do not let cord hang over the edge of table or
counter, or touch with hot surfaces.
• Keep hands and utensils out of container while
blending to reduce the risk of severe injury to persons
or damage to the blender. A scraper may be used but
must be used only when the blender is not running.
• Blades are sharp. Handle carefully.
• To reduce the risk of injury, never place cutter
assembly blades on base without the jar properly
attached.
• Do not blend hot liquids more than 600ml. Always
operate blender with cover in place. When blending
hot liquids, removed the lid cap from the lid. And
close any edge cover openings intended for pouring.
Do not blend hot liquids for the personal blender jar.
• Do not use appliance for other than intended use.
• The appliance is not intended for use by persons
(including children) with reduced physical, sensory
or mental capabilities, or lack of experience and
knowledge, unless they have been given supervision
or instruction concerning use of the appliance by a
person responsible for their safety.
• Children should be supervised to ensure that they do
not play with the appliance.
SAVE THESE INSTRUCTIONS.
This product is for household use only.
SAFETY FEATURES
POLARIZED PLUG (120V models only)
This appliance has a polarized plug (one
blade is wider than the other). To reduce
the risk of electric shock, this plug is
intended to fit into a polarized outlet only
one way. If the plug does not fit fully into
the outlet, reverse the plug. If it still does
not fit, contact a qualified electrician. Do
not attempt to modify the plug in any way.
TAM PER-R ESISTANT SCREW
Warning: This appliance is equipped
with a tamper-resistant screw to prevent
removal of the outer cover. To reduce
the risk of fire or electric shock, do not
attempt to remove the outer cover. There
are no user-serviceable parts inside.
Repair should be done only by authorized
service personnel.
ELECTRICAL CORD
1)
A short power-supply cord is provided to
reduce the risk resulting from becoming
entangled in or tripping over a longer cord.
2) Longer detachable power cords or
extension cords are available and may
be used if care is exercised in their use.
3) If a long detachable power-supply cord
or extension cord is used,
a) The marked electrical rating of the
extension cord should be at least as
great as the electrical rating of the
appliance,
b) If the appliance is of the grounded
type, the extension cord should be a
grounding-type 3-wire cord, and
c) The longer cord should be arranged so
that it will not drape over the countertop
or tabletop where it can be pulled on by
children or tripped over unintentionally.
Note: If the power cord is damaged,
please contact the warranty department
listed in these instructions.
2
Page 3

WELCOME!
Machine! You can use your blender to make awesomely delicious drinks including frozen
blends, chilled cocktails and all your party favorites. To learn more about Black & Decker
products, please visit www.blackanddeckerappliances.com
Congratulations on your purchase of the Black & Decker XL Blast Drink
GETTING TO KNOW YOUR
XL BLAST DRINK MACHINE
1
8
7
2
3
4
5
6
1. Shot Glass/Measuring Cup
(Part # BL4000-01) Measures liquid
ingredients; 2 oz shot glass
2. Easy-off lid (Part # BL4000-02) Seals
the blending jar with easy open/close
spout cover
3. Soft-touch handle - For optimal grip
4. One-piece maximum capacity 72 oz. jar
(Part # BL4000-03)
5. Stainless Steel Integrated blade – for
blended drinks
6. Base – Wide base for stability
7. Digital control panel with lighted LED
buttons – Four speeds/auto functions,
pulse and crush, on/off button
8. Insulated Chill Sleeve
(Part # BL4000-04) - Keeps drinks cool
for hours
3
Page 4
HOW TO USE
This product is for household use only.
GETTING STARTED
• Remove all packing material, any stickers, and the plastic band around the
power plug.
• Remove and save literature.
• Please visit www.prodprotect.com/applica to register your warranty.
• Wash all removable parts as instructed in CARE AND CLEANING
section of this manual.
USING YOUR XL BLAST DRINK MACHINE
1. Make sure your drink machine is OFF.
2. Place ingredients to be blended into jar. For best results, use ice that has
been out of the freezer for 10-15 minutes.
Tip: Place ingredients in the following order to get the most out of your blender:
• Liquid
• Powders
• Soft foods (like bananas or cucumbers)
• Hard foods (such as frozen fruit)
• Ice cubes
3. Use the shot glass/measuring cup for convenient
and accurate recipe measurement. Shot glass is 2
oz and is marked for 1 oz, 1.5oz and 2oz. Check out
the included recipe book for fun frozen blends and
cocktails using the shot glass and auto functions.
NOTE: The XL Blast Drink Machine makes a suggested
6-7 blended drinks (about 10-12oz each)
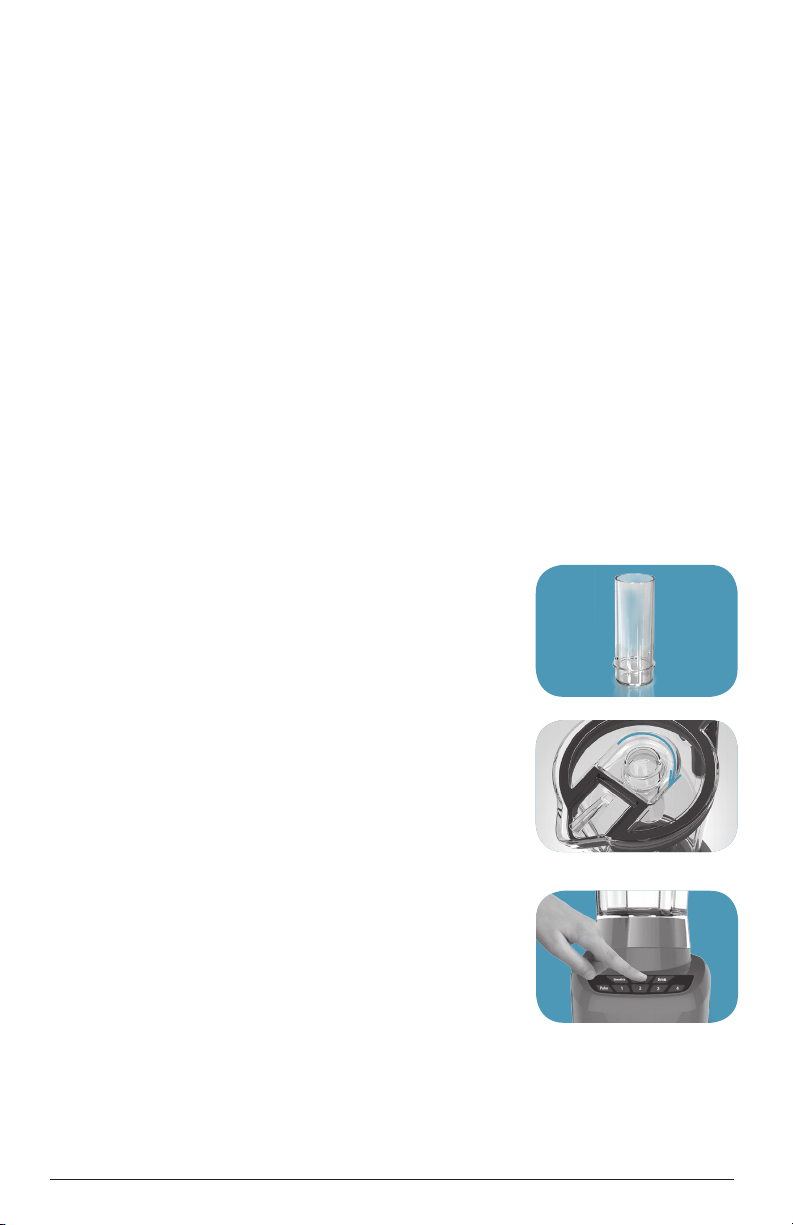
4. Place lid on jar; make sure shot glass is in place.
Shot glass is secure when it slides all the way into
the lid and is twisted clockwise.
5. Plug power cord into outlet. Press on/off button.
LED should turn a solid color to signify the blender
is in standby mode. After 60 seconds the unit will
automatically power off if no buttons are pressed.
The LED will blink slowly when the blender is in
use.
NOTE: When in use, do not leave blender unattended.
When processing hard foods, such as ice or cheese,
keep one hand on the lid to keep blender in place.
6. Select the speed or auto function that works best
for your desired outcome. See auto functions and
speed chart for drink and auto function correlations.
Important: Do not hold speed button, simply press
the desired speed, watch, and press Pulse/Stop when
4
Page 5

the desired consistency is achieved. Holding the button for longer than 30
seconds will cause an error. Unit must be unplugged to reset.
7. For blending tasks – or when blending thick mixtures – use the PULSE
button for several seconds, then release. Repeat until food has desired
consistency. Releasing pulse stops the blending and the unit returns to
standby.
8. Open the lid to add ingredients or add them through the shot glass opening.
Place shot glass back in lid opening after adding ingredients. Do not use the
pour spout to add ingredients
Important: Do not remove the lid while the blender is running.
9. When finished press STOP to stop blending. Make sure blades have
completely stopped before attempting to remove the blending jar from the
base (refer to troubleshooting for any issues).
10. To remove the jar, grasp the handle and lift up.
11. Press On/Off to power off. Unit will auto shutoff after 60 seconds without use.
12. Always unplug the appliance when not in use.
TO SERVE
• Lift and remove the blending jar
• Pop open pour tab
• Pour and Enjoy!
Keep drinks colder longer with the insulated Chill Sleeve
• Insert the blending jar into the Chill Sleeve from the top
• Pull up on the Chill Sleeve until it fits securely around the jar. There are
notches for the handle and spout. The measurements on the side of the jar
should be visible through the opening.
• Now chill! Enjoy cool drinks for hours.
• To clean your Chill Sleeve, remove the blender from the sleeve and wash with
warm soapy water. Hang to dry.
TIPS FOR BEST RESULTS
• For a thicker blended drink, gradually add more ice and use less liquid ingredients.
• For a thinner blended drink, blend for longer and gradually add more liquid mixer
to the jar.
• Cut food and solid ingredients into pieces no larger than ¾” for use in the blender.
• For best results when making blended cocktails, use ice that has been out of the
freezer between 10 and 15 minutes.
• Use ¾ cup of ice per serving, crushed .
• Do not fill blender more than 2/3 full with liquids.
• Layer ingredients starting with liquids on the bottom, followed by fruit and ending
with ice.
• When ingredients splatter onto the sides of the jar or the mixture is very thick,
turn the appliance off. Remove the lid and use a rubber spatula to scrape down
the sides of the jar and to redistribute the food, pushing food toward the blades.
Replace the lid and continue blending.
• Serve drinks in chilled or frozen glasses to slow down the melting process.
5
Page 6
• Start on low/slow speed and work your way up to the highest cycle.
• Blending for too long makes drinks runny and thin.
• When making beverages that include alcohol, please drink responsibly.
• When making bread, cookie, cereal or cracker crumbs, make sure blending jar is
completely dry.
• The PULSE function is helpful when short bursts of power are needed, such as
when preparing thick smoothies or milkshakes. Allow the blades to stop rotating
between pulses. Do not use PULSE for more than 30 seconds continuously.
• To stop blending at any time, press the START/STOP button .
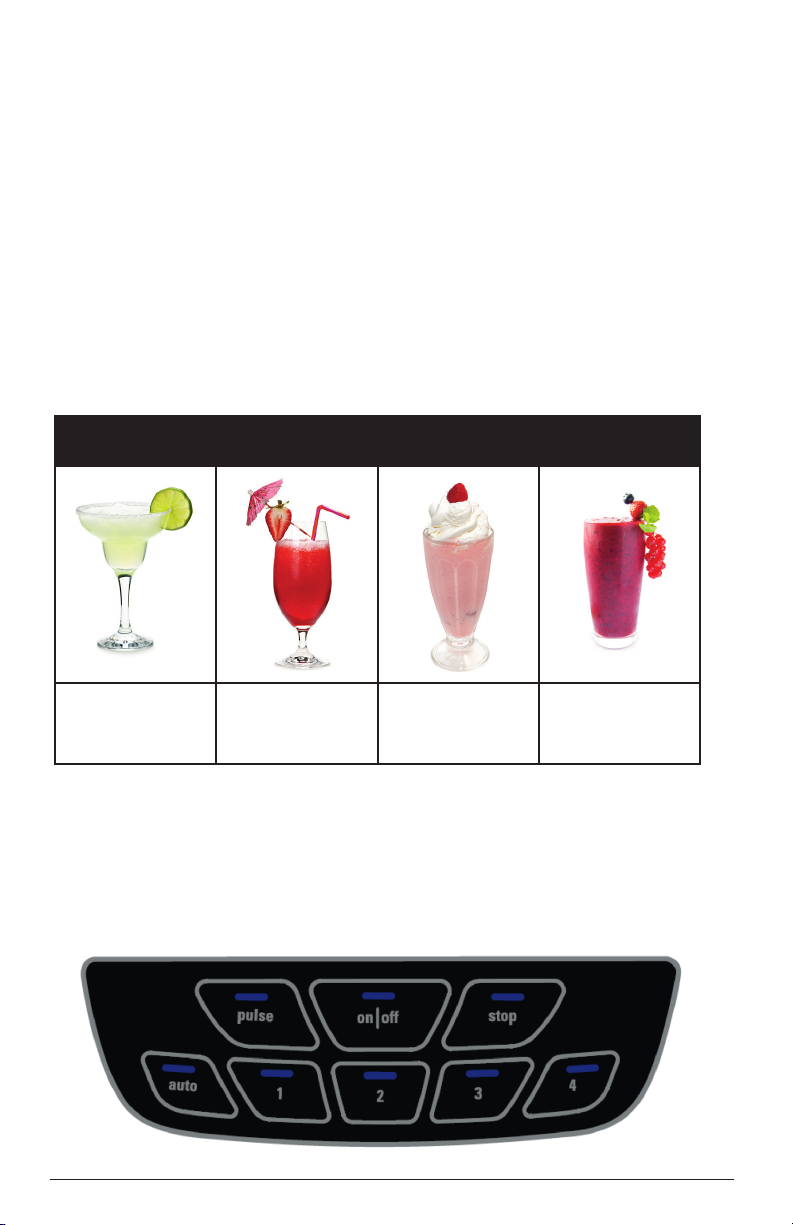
AUTO FUNCTIONS FOR BLENDED FROZEN
DRINKS AND COCKTAILS
This blender features four (4) different AUTO functions for exceptional
party results. To access this function, press AUTO. Once pressed, all four
buttons (1-4) will blink. Select the desired AUTO function to begin. The preprogrammed functions are:
Auto 1
Margaritas
Classic icy drink
with small ice
crystals and fruit
flavor
• When an AUTO Function is running, the blender will automatically pulse and
change speeds to deliver the optimal results. The LEDs will indicate what speed
the blender is operating.
• Once the AUTO Function is complete, the blender will return to standby mode.
• AUTO Mode can be stopped at any time by pressing STOP or ON/OFF.
Auto 2
Daiquiris
Simple blended
ice cocktail with
a smooth texture
Auto 3
Shakes
Thick, smooth
and creamy
frozen treats
Auto 4
Smoothies
Blended fruits
and vegetables
to a very smooth
consistency
6
Page 7

RECIPES:
EASY FROZEN MARGARITA
½ cup orange flavored liquor
1 cup tequila
1 (6 oz.) can frozen limeade mix
4 cups ice cubes
Place ingredients in blender with liquids first and ice last; cover. Blend on
AUTO setting 1. Serve with lime wedges if desired.
Makes 6 servings
STRAWBERRY DAIQUIRI
1 cup lemon lime soda
1 (6 oz.) can strawberry daiquiri mix
1 cup white rum
2 oz. Grenadine syrup
2 cups frozen whole strawberries
Place ingredients in blender in order shown above; cover. Blend on AUTO setting 2.
Makes 6 servings
VANILLA MALTED MILKSHAKE
4 large scoops Vanilla Ice cream
1 cup cold milk
¼ cup malted milk powder
1 tsp vanilla extract
Place ingredients into blender jar in order shown above; cover. Blend on
AUTO setting 3.
Makes 4 (1 cup) servings
Tips: Substitute your favorite ice cream flavor in place of vanilla.
CLASSIC SMOOTHIE
4 cups apple juice
4 medium bananas, cut into 2 pieces
4 cups frozen whole strawberries
Place ingredients in blender in order shown above. Cover; blend on AUTO
Setting 4
Makes 6 (1 cup) servings
Substitute: Substitute orange juice for apple juice
7
Page 8

SPEED CHART
The XL Blast Drink Machine can also be used a a regular blender.
Speed Function Usage
1 Stir
Mix
Crumb
Prepare salad dressings
Mix ingredients for baked goods
Make cookie, cereal, and bread crumbs
2 Chop
Whip
Blend
3 Puree
Ice Crush
Grind
4 Liquefy Blend ice drink
Chop fruits, vegetables, and cooked meats
Whip cream or butter
Blend salsas
Prepare sauces
Grind hard cheeses, cooked meats, and coconut
Puree fruits and vegetables
Blend milkshakes and malts
Create Mousse
CARE AND CLEANING
This product contains no user serviceable parts. Refer service to qualified
service personnel.
• Make sure the unit is unplugged before cleaning. Wipe the blender base
using a damp cloth. Do not immerse the blender base in water.
• Lift the blending jar by the handle off the base turning counterclockwise.
• Remove lid and measuring shot glass.
• Wash removable parts by hand or in the dishwasher. Place the jar on the
bottom rack and the rest of the parts on the top rack only.
CLEANING TIPS:
• For quick clean up, combine 1 cup hot water and a drop of liquid dish
soap in the blending jar.
• Cover and blend on medium speed for about 30 seconds.
• Discard liquid and rinse thoroughly.
Important:
• Do not place the jar parts in boiling liquids.
• Do not immerse the base in liquid. Wipe the base with a damp cloth and
dry thoroughly.
• Remove stubborn spots by rubbing with a damp cloth and dry.
Note: If liquids spill onto the base, wipe with a damp cloth and dry
thoroughly. Do not use rough scouring pads or cleansers on parts or finish.
TROUBLESHOOTING
Problem Possible Cause Solution
All LEDs blinking
quickly
(100 msec/time)
Unit stops/goes
into standby
mode
Overheat warning or
button held longer
than 30 seconds
Work time exceeds
150 seconds (2.5
minutes)
Unit must be reset. Unplug to
reset. Let unit cool for at least
20 minutes.
Re-select appropriate speed
8
Page 9

WARRANTY AND CUSTOMER
SERVICE INFORMATION
For service, repair or any questions regarding your appliance, call the
appropriate 800 number listed within this section. Please DO NOT return the
product to the place of purchase. Also, please DO NOT mail product back to
manufacturer, nor bring it to a service center. You may also want to consult
the website listed on the cover of this manual.
Two-Year Limited Warranty
(Applies only in the United States and Canada)
What does it cover?
• Any defect in material or workmanship provided; however, Spectrum Brands Inc’s
liability will not exceed the purchase price of product.
For how long?
• Two years from the date of original purchase with proof of purchase.
What will we do to help you?
• Provide you with a reasonably similar replacement product that is either new or
factory refurbished.
How do you get service?
• Save your receipt as proof of date of sale.
• Visit the online service website at www.prodprotect.com/applica, or call toll-free
1-800-231-9786, for general warranty service.
• If you need parts or accessories, please call 1-800-738-0245.
What does your warranty not cover?
• Damage from commercial use
• Damage from misuse, abuse or neglect
• Products that have been modified in any way
• Products used or serviced outside the country of purchase
• Glass parts and other accessory items that are packed with the unit
• Shipping and handling costs associated with the replacement of the unit
• Consequential or incidental damages (Please note, however, that some states do
not allow the exclusion or limitation of consequential or incidental damages, so
this limitation may not apply to you.)
How does state law relate to this warranty?
• This warranty gives you specific legal rights. You may also have other rights that
vary from state to state or province to province.
9
Page 10

Por favor lea este instructivo antes de usar el producto.
INSTRUCCIONES IMPORTANTES
DE SEGURIDAD
Al utilizar cualquier aparato eléctrico siempre deben tomarse precauciones básicas de
seguridad, incluyendo las siguientes:
• Lea todas las instrucciones.
• El aparato cuenta con un sistema de protección para
el motor. Si la luz indicadora parpadea rápidamente,
desenchúfelo y deje que se enfríe. Enchúfelo de
nuevo para hacerla funcionar.
• A fin de protegerse contra el riesgo de una descarga
eléctrica, no sumerja la base de la licuadora, el cable
ni el enchufe en agua ni en ningún otro líquido.
• Todo aparato eléctrico utilizado cerca de la
presencia de los niños o por ellos mismos, requiere la
supervisión de un adulto.
• Desenchufe el aparato del tomacorriente cuando no
esté en uso, antes de instalarle o retirarle piezas y
antes de limpiarlo.
• Evite el contacto con las piezas móviles.
• No utilice ningún aparato eléctrico que tenga el cable
o el enchufe averiado, que presente un problema de
funcionamiento o que esté dañado. Llame al número
de servicio para el cliente que aparece en este
manual.
• El uso de accesorios, incluyendo los tarros de envasar,
no recomendados por el fabricante pueden ocasionar
incendio, descarga eléctrica o lesiones.
• No utilice este aparato a la intemperie.
• La clasificación máxima otorgada es basada en el
accesorio de jarra. La potencia de entrada de la jarra
personal opcional o la jarra para hierbas es menor
que la desviación permitida.
• No permita que el cable cuelgue del borde de la mesa
o del mostrador ni que toque superficies calientes.
• Para reducir el riesgo de lesiones severas a las
personas o daño a la licuadora, mantenga las manos
y utensilios fuera de la jarra mientras la licuadora esté
en funcionamiento.
• Las cuchillas tienen filo. Manéjelas con cuidado.
• Para reducir el riesgo de lesiones, nunca coloque
el montaje de las cuchillas en la base sin haber
enganchado la jarra debidamente en su lugar.
• Nunca licúe más de 600 ml de líquidos calientes .
Siempre opere la licuadora con la tapa colocada en su
lugar. Cuando vaya a licuar líquidos calientes, retire la
taza insertada en la tapa. Cierre cualquier borde de la
tapa que tenga orificios para verter. No licue líquidos
calientes en la jarra personal de la licuadora.
• El aparato se debe usar sólo para el fin previsto.
• Este aparato no está diseñado para ser usado por
personas (incluyendo los niños) con su capacidad física,
psíquica o sensorial reducida, o con falta de experiencia
o sabiduria, a menos que sean supervisadas o instruidas
acerca del uso del aparato por una persona responsable
de su seguridad.
• Los niños deben ser supervisados para asegurar que no
jueguen con el aparato.
CONSERVE ESTAS INSTRUCCIONES.
Este aparato eléctrico es para uso doméstico solamente.
ENCHUFE POLARIZADO (Solamente
para los modelos de 120V)
Este aparato cuenta con un enchufe polarizado (un
contacto es más ancho que el otro). A fin de reducir
el riesgo de un choque eléctrico, este enchufe
encaja en un tomacorriente polarizada en un solo
sentido. Si el enchufe no entra en el tomacorriente,
inviértalo y si aun así no encaja, consulte con
un electricista. Por favor no trate de alterar esta
medida de seguridad.
TORNILLO DE SEGURIDAD
Advertencia: Este aparato cuenta con un tornillo
de seguridad para evitar la remoción de la cubierta
exterior del mismo. A fin de reducir el riesgo de
incendio o de choque eléctrico, por favor no trate
de remover la cubierta exterior. Este producto no
contiene piezas reparables por el consumidor. Toda
reparación se debe llevar a cabo únicamente por
personal de servicio autorizado.
CABLE ÉLECTRICO
1. El producto se debe de proporcionar con un
cable eléctrico corto, a fin de reducir el riesgo de
tropezar o de enredarse en un cable más largo.
2. Si se utiliza un cable separable o de extensión,
a) El régimen nominal del cable separable o del
cable de extensión debe ser, como mínimo, igual
al del régimen nominal del aparato.
b) Si el aparato es de conexión a tierra, el cable de
extensión debe ser un cable de tres alambres de
conexión a tierra.
c) Uno debe de acomodar el cable más largo de
manera que no cuelgue del mostrador o de la
mesa, para evitar que un niño tire del mismo o
que alguien se tropiece.
Nota: Si el cordón de alimentación es dañado,
en América Latina debe sustituirse por personal
calificado o por el centro de servicio autorizado.
10
Page 11

¡BIENVENIDO!
Preparar Bebidas de Black & Decker! Usted puede utilizar su licuadora para hacer
bebidas increíblemente deliciosas, incluyendo mezclas congeladas, cócteles fríos y todos
sus favoritos para fiestas.
Felicitaciones por la compra de XL Blast Máquina Para
CONOZCA SU MÁQUINA PARA
PREPARAR BEBIDAS XL BLAST
1
8
7
2
3
4
5
6
1. Vasito para licor/taza medidora (pieza
no. BL4000-01) – Mide los ingredientes
líquidos; vasito para licor de 2 onzas
2. Tapa fácil de remover (pieza no. BL4000-
02) – Sella la jarra con la tapa de la boquilla
fácil de abrir y cerrar
3. Asa suave al tacto – Para un agarre óptimo
4. Jarra enteriza con capacidad máxima de 72
onzas (pieza no. BL4000-03)
5. Cuchilla integrada de acero inoxidable –
Licúa las bebidas
6. Base – Base ancha para estabilidad
7. Panel de control digital con botones
LED iluminados – Cuatro velocidades /
funciones automáticas, función de pulso
y triturar, botón de encendido/apagado
(ON/OFF)
8. Bolsa de aislamiento para enfríar
(pieza no. BL4000-08)
11
Page 12

COMO USAR
Este producto es para uso doméstico solamente.
PRIMEROS PASOS
• Retire todo material de empaque y cualquier etiqueta adherida al producto.
• Retire y conserve la literatura.
• Por favor, visite www.prodprotect.com/applica para registrar su garantía.
• Lave todas las piezas removibles según las instrucciones en la sección de
CUIDADO Y LIMPIEZA de este manual.
USO DE XL BLAST MÁQUINA PARA
PREPARAR BEBIDAS
1. Asegúrese de que su máquina para preparar bebidas está apagada.
2. Coloque los ingredientes para licuar en la jarra. Para mejores resultados,
utilice hielo que ha estado fuera del congelador durante 10 a 15 minutos.
Consejo: Coloque los ingredientes en el siguiente orden para obtener el mejor
provecho de su licuadora.
• Líquidos
• Polvos
• Alimentos suaves (tales como los plátanos o pepinos)
• Alimentos duros (tales como las frutas congeladas)
• Cubos de hielo
3. Utilice el vasito para licor/taza medidora para su
conveniencia y medida correcta para su receta. El
vasito para licor es de 2 onzas y tiene marcas para
1 onza, 1.5 onzas y 2 onzas. Consulte el libro de
recetas incluído para preparar divertidas mezclas
congeladas y cócteles utilizando el vasito para licor
y la funciones automáticas.
NOTA: La licuadora XL Blast Máquina Para
Preparar Bebidas hace de 6 a 7 bebidas licuadas
como sugerencia (alrededor de 10 a 12 onzas cada
una).
4. Coloque la tapa en la jarra; asegúrese de que el
vasito para licor esté colocado en su lugar. El vasito
está seguro cuando se deslica completamente
dentro de la tapa y es girado hacia la derecha (en
dirección a las manecillas del reloj).
5. Enchufe el cable de alimentación al tomacorriente.
Presione el botón de encendido/apagado (ON/
OFF). La luz LED debe cambiar a un color sólido
para indicar que la licuadora está en modo de
espera. Después de 60 segundos, el aparato
se apagará automáticamente si ninguno de los
12
Page 13

botones se ha presionado. La luz LED parpadeará lentamente cuando la
licuadora está en uso.
NOTA: No deje la licuadora desatendida cuando esté en uso. Cuando esté
procesando alimentos duros, tales como el hielo o el queso, mantenga una
mano sobre la tapa para mantener la licuadora en su lugar.
6. Seleccione la velocidad o función automática que mejor funcione para
lograr el resultado deseado. Consulte la tabla de funciones automáticas y
velocidades para ver la relación entre una bebida y la función automática.
Importante: No sostenga el botón de velocidad, simplemente presione el
botón de la velocidad deseada, observe y presione el botón de la función de
Pulso/Parar una vez que se alcance la consistencia deseada. El mantener el
botón presionado por más de 30 segundos causará un error. Será necesario
desenchufar el aparato para reajustarlo.
7. Para tareas de licuado – o cuando se licuen mezclas espesas – utilice el
botón para la función de pulso por varios segundos y suéltelo. Repita el
procedimiento hasta que los alimentos alcancen la consistencia deseada.
El soltar el botón de pulso hace que pare la función de licuado y el aparato
regrese al modo de espera.
8. Abra la tapa para añadir ingredientes o añádalos a través de la abertura del
vasito para licor. Coloque el vasito para licor de nuevo en la abertura de la
tapa después de añadir los ingredientes. No utilice la boquilla vertedora para
añadir ingredientes.
Importante: No retire la tapa mientras la licuadora está funcionando.
9. Cuando haya terminado, presione el botón de parar (STOP) para parar
el ciclo de licuado. Asegúrese de que las cuchillas hayan parado de girar
completamente antes de tratar de retirar la jarra de la base (consulte la tabla
de RESOLUCIÓN DE PROBLEMAS para cualquier problema).
10. Para retirar la jarra, agarre por el asa y álcela.
11. Presione el botón de encendido/apagado (ON/OFF) para apagar el aparato.
El aparato se apagará después de 60 minutos de inactividad.
12. Siempre desenchufe el aparato cuando no esté en uso.
PARA SERVIR:
• Alce y retire la jarra.
• Presione y abra la lengüeta de la boquilla vertedora.
• Vierta y ¡disfrute!
* Mantenga las bebidas más frías por más tiempo con la bolsa aislante para
enfríar.
• Inserte la jarra en la bolsa aislante para enfríar.
• Tire de la bolsa hasta que quede acomodada firmemente alrededor de la
jarra. El asa y la boquilla tienen muescas para engancharla. Las medidas a un
lado de la jarra deben estar visibles a través de la abertura.
• Cierre la cremallera y ¡enfríe! Disfrute bebidas frías por horas.
13
Page 14

• Para limpiar la bolsa para enfríar, retire la licuadora de la bolsa y lave con
agua caliente jabonosa. Cuélguela para secarla.
CONSEJOS PARA OBTENER LOS MEJORES
RESULTADOS
• Para licuar una bebida espesa, añada más hielo y utilice menos
ingredientes líquidos.
• Para licuar una bebida más ligera, licúe por más tiempo y añada más
cantidad de mezcla líquida a la jarra.
• Corte los alimentos e ingredientes sólidos en pedazos de no más de 3/4
de pulgada para usar en la licuadora.
• Para obtener mejores resultados cuando esté licuando cócteles, utilice
hielo que ha estado fuera del congelador entre 10 a 15 minutos.
• Utilice 3/4 taza de hielo por cada porción, triturado.
• No llene la licuadora más de 2/3 de su capacidad con líquidos.
• Coloque los ingredientes en capas, comenzando con líquidos en el fondo,
seguido por frutas y terminando con el hielo.
• Cuando los ingredientes estén salpicando sobre los lados de la jarra o
la mezcla esté muy espesa, apague el aparato. Retire la tapa y utilice un
espátula de goma para raspar los lados de la jarra y volver a distribuir los
alimentos, empujandolos hacia las cuchillas. Coloque la tapa sobre la jarra
de nuevo y continue licuando.
• Sirva las bebidas en vasos enfirados o congelados para desacelerar el
proceso de descongelamiento.
• Comience con la velocidad baja/lenta y vaya aumentando gradualmente
hasta llegar a la más alta.
• El licuar por mucho tiempo hace que las bebidas resulten aguadas.
• Cuando esté preparando bebidas que incluyen alcohol, por favor sear
responsable cuando tome.
• Cuando esté haciendo migas de pan, galleticas, cereales o galletas,
asegúrese de que la jarra esté completamente seca.
• Cuando esté utilizando la función de pulso, impulse a cortos intervalos.
Permita que las cuchillas paren de girar entre los impulsos. No utilce la
función de pulso continuamente por más de 30 segundos.
• La función de pulso ayuda cuando se necesita dar impulsos de potencia
de cortos intervalos, tal como cuando se está preparando batidos
espesos de frutas o con leche.
• Para detener el proceso de licuado en cualquier momento, presione el
boton de iniciar/parar (START/STOP).
14
Page 15

FUNCIONES AUTOMÁTICAS PARA LICUAR
BEBIDAS CONGELADAS Y CÓCTELES
Esta licuadora cuenta con cuatro (4) diferentes funciones automáticas
(AUTO) para obtener resultados excepcionales en sus fiestas. Para obtener
acceso a esta función, presione el botón AUTO una vez. Una vez presionado,
los 4 botones parpadearán. Seleccione la función automática deseada para
comenzar. La funciones preprogramadas son las siguientes:
Auto 1
Margaritas
Bebida clásica
de hielo con
pequeños
cristales de hielo
y sabor de fruta.
• Cuando una función automática está funcionando, la licuadora automáticamente
utiliza la función de pulso y cambia la velocidad para brindar los mejores
resultados. Las luces LED indicarán la velocidad que está funcionando.
• Una vez que la función automática haya terminado, la licuadora volverá al modo
de espera.
• El modo automáico se puede detener en cualquier momento con solo presionar
el botón de parar (STOP) o el botón de encendido/apagado (ON/OFF).
Auto 2
Daiquiris
Cóctel simple
con hielo con una
textura suave.
Auto 3
Batidos con leche
Bebidas
sorpresas
congeladas
espesas, suaves y
cremosas
Auto 4
Batidos de frutas
Licúa frutas y
vegetales a una
consistencia bien
suave sin trozos
de hielo.
15
Page 16

RECETAS:
MARGARITA HELADA FÁCIL DE HACER
4 tazas de cubos de hielo
1 lata (6 onzas) de mezcla para margarita con sabor a lima, congelada
1 taza de tequila
1/2 taza de licor con sabor a naranja
Colocar los ingredientes en la licuadora en el orden mostrado arriba; tape.
Licúe en Auto, ajuste 1. Sirva con rodajas de lima, si es deseado.
Rinde 6 porciones.
DAIQUIRI DE FRESA
1 taza de refresco de lima-limón
1 lata (6 onzas) de mezcla de daiquiri de fresa
1 taza de ron blanco
2 onzas de sirope de granadina
2 tazas de fresas enteras, congeladas
Coloque los ingredientes en la licuadora en el orden mostrado arriba; tape.
Licúe en Auto, ajuste 2.
Rinde 6 porciones
MALTEADA DE VAINILLA
4 bolas grandes de helado de vainilla
1 taza de leche fría
1/4 taza de leche malteada en polvo
1 cucharadita de extracto de vainilla
Coloque los ingredientes en la jarra de la licuadora; tape. Licúe en Auto, ajuste 3.
Rinde 4 porciones (de 1 taza)
Consejos: En lugar de vainilla, sustituya con su sabor favorito de helado.
BATIDO DE FRUTAS CLÁSICO
4 tazas de jugo de manzana
4 plátanos medianos, cortados en 2 pedazos
4 tazas de fresas enteras, congeladas
Coloque los ingredientes en la licuadora en el orden mostrado arriba. Tape;
licúe en Auto, ajuste 4.
Rinde 6 porciones (de 8 onzas)
Sustituya: Sustituya el jugo de manzana con jugo de naranja.
16
Page 17

TABLA DE VELOCIDADES
VELOCIDAD FUNCIÓN USO
1 Revolver
Mezclar
Migas
2 Picar
Batir
Combinar
3 Hacer pure
Triturar hielo
Moler
4 Licuar Licúe bebidas con hielo.
Prepare aderezos para ensaladas.
Mezcle ingredientes para alimentos horneados.
Haga galleticas, cereals y migajas de pan.
Pique frutas, vegetales y carenes cocinadas.
Bata crema o mantequilla.
Combine salsas mejicanas.
Muela quesos duros, carnes cocinadas y coco.
Haga puré de frutas y vegetales.
Licúe batidos y malteadas.
Prepares salsas espesas.
Haga mousse
CUIDADO Y LIMPIEZA
Este producto no contiene piezas que puedan ser reparadas por el consumidor.
En caso de requerir servicio, acuda a personal de servicio calificado.
• Asegúrese de que el aparato esté desenchufado antes de limpiarlo.
Limpie la base de la licuadora con un paño húmedo. No sumerja la base
de la licuadora en agua.
• Para retirar la jarra de la base, levante la jarra por el asa y gírela hacia la
derecha (en dirección a las manecillas del reloj).
• Retire la tapa y el vasito para licor/taza medidora de la tapa.
• Lave las piezas removibles a mano o en la máquina lavaplatos. Coloque la
jarra en la rejilla inferior y el resto de las piezas sólo en la rejilla superior.
CONSEJOS DE LIMPIEZA:
• Para una limpieza rápida, combine 1 taza de agua caliente y una gota de
detergente líquido para fregar en la jarra.
• Tape y mezcle a velocidad mediana por aproximadamente 30 segundos.
• Deseche la mezcla de líquido y enjuáguela bien.
Importante:
• No coloque las piezas de la jarra en líquidos que están hirviendo.
• No sumerja la base en ningún líquido. Limpie la base con un paño
húmedo y séquela bien.
RESOLUCIÓN DE PROBLEMAS/FALLAS
PROBLEMA CAUSA POSIBLE SOLUCIÓN
Todas las luces
LED están
parpadeando
rápidamente
(100
millisegundos/
tiempo).
El aparato se
para y cambia al
modo de espera.
Aviso de
sobrecalentamiento o el
botón se ha mantenido
presionado por más de
30 segundos.
Tiempo de
funcionamiento necesita
150 segundos (2.5
minutos).
17
Es necesario reajustar el aparato.
Desenchufe para reajustar. Deje
que el aparato se enfríe por lo
menos 20 minutos.
Vuelva a seleccionar la velocidad
adecuada.
Page 18

INFORMACIÓN DE GARANTÍA Y
SERVICIO AL CLIENTE
Para servicio, reparaciones o preguntas relacionadas al producto, por favor
llame al número del centro de servicio que se indica para el país donde
usted compró su producto. NO devuélva el producto al fabricante. Llame o
lleve el producto a un centro de servicio autorizado.
Dos Años de Garantía Limitada
(No aplica en México, Estados Unidos y Canada)
¿Qué cubre la garantía?
• La garantía cubre cualquier defecto de materiales o de mano de obra que no haya
sido generado por el uso incorrecto del producto.
¿Por cuánto tiempo es válida la garantía?
• Por dos años a partir de la fecha original de compra mientras que tenga una
prueba de la compra.
¿Cómo se obtiene el servicio necesario?
• Conserve el recibo original como comprobante de la fecha de compra,
comuníquese con el centro de servicio de su país y haga efectiva su garantía si
cumple lo indicado en el manual de instrucciones.
¿Cómo se puede obtener servicio?
• Conserve el recibo original de compra.
• Para servicio al cliente y para registrar su garantía, visite www.prodprotect.com/
applica, o llame al número 1-800-231-9786, para servicio al cliente
• Por favor llame al número del centro de servicio autorizado. 1-800-738-0245.
¿Qué aspectos no cubre esta garantía?
• Los productos que han sido utilizados en condiciones distintas a las normales.
• Los daños ocasionados por el mal uso, el abuso o negligencia.
• Los productos que han sido alterados de alguna manera.
• Los daños ocasionados por el uso comercial del producto.
• Los productos utilizados o reparados fuera del país original de compra.
• Las piezas de vidrio y demás accesorios empacados con el aparato.
• Los gastos de tramitación y embarque asociados al reemplazo del producto.
• Los daños y perjuicios indirectos o incidentales.
¿Qué relación tiene la ley estatal con esta garantía?
• Esta garantía le otorga derechos legales específicos y el consumidor podría
tener otros derechos que varían de una región a otra.
18
Page 19

19
Page 20

TM
BLACK+DECKER and the BLACK+DECKER logo are trademarks of
The Black & Decker Corporation and are used under license. All rights reserved.
BLACK+DECKER y el logo tipo BLACK+DECKER son marcas registradas de
The Black&Decker Corporation y son utilizados bajo licencia. Todos los derechos reservados.
© 2014 The Black & Decker Corporation
and Spectrum Brands, Inc.,
Middleton, WI 53562
Made and Printed in People’s Republic of China
T22-5001 070
2014/3/21/137 E/S/F
20
 Loading...