

Page 1
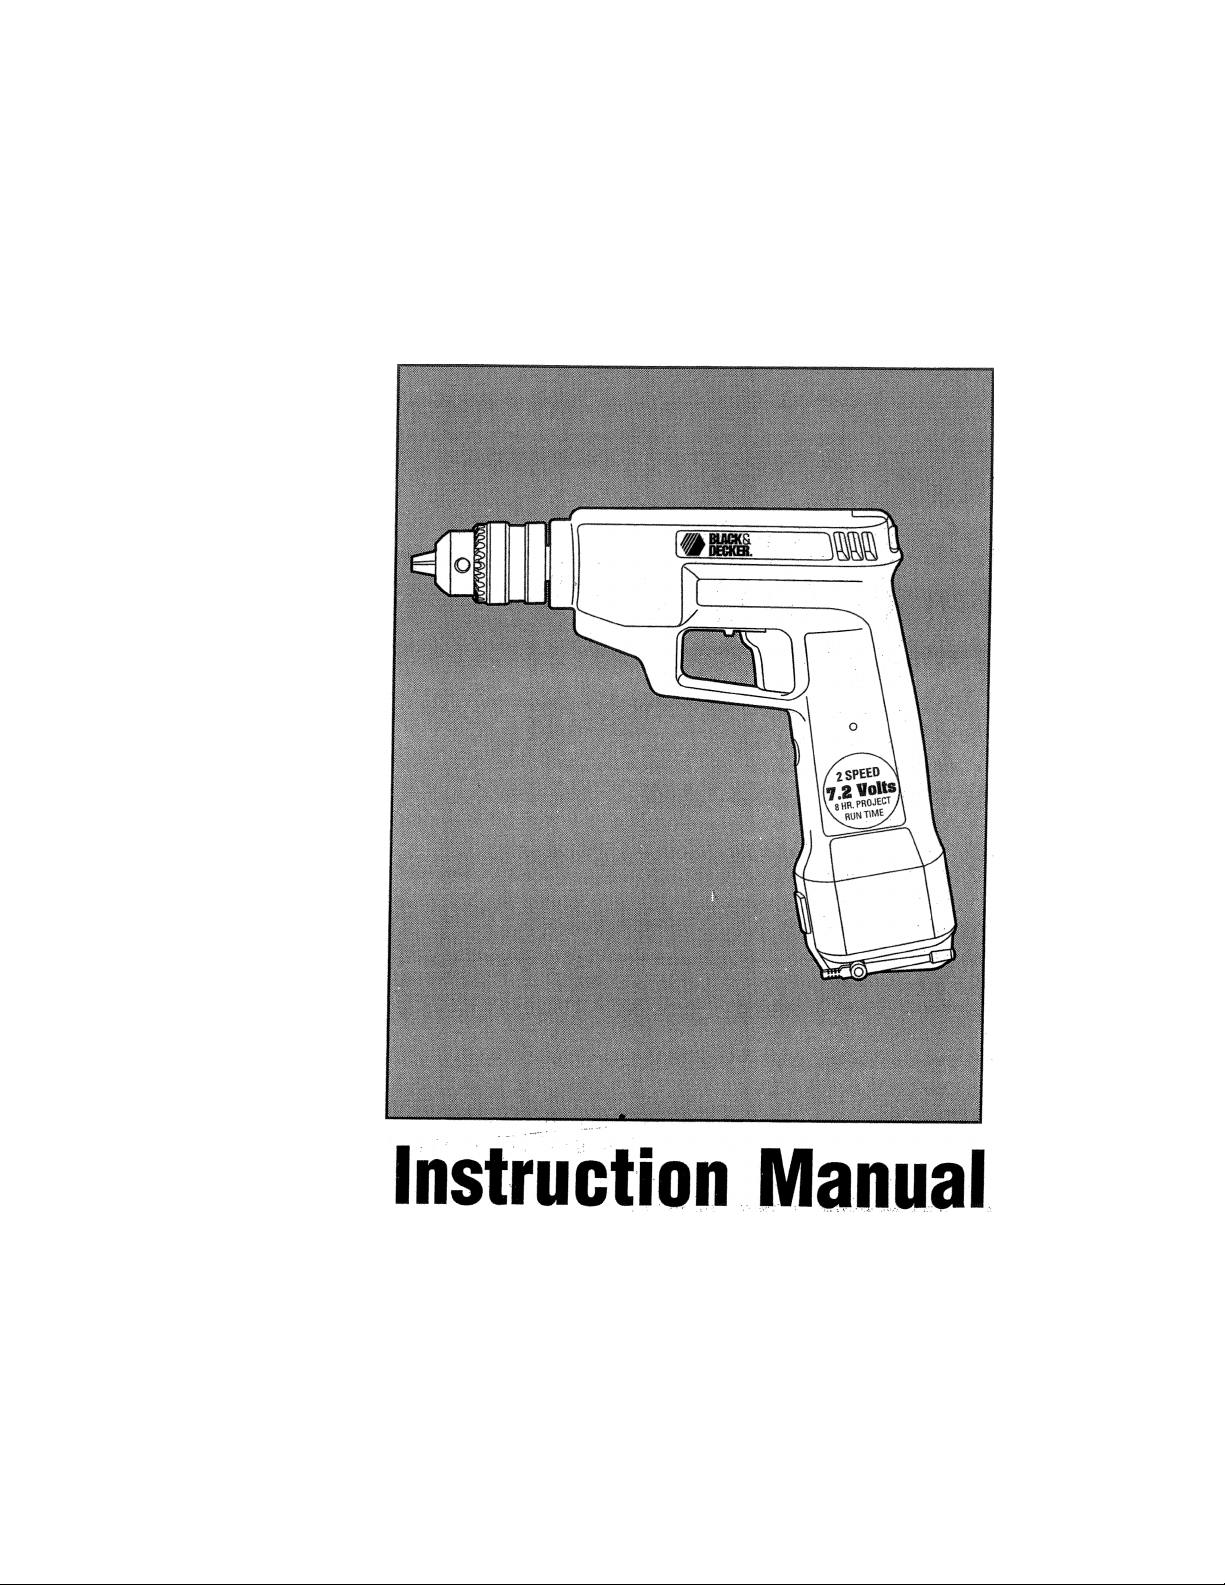
#B1ACK&DECKEII
7.2 Volt Two Speed
Coitlless Drill
CaLNo. 9013
Page 2

Welcome to the
Wonderful World
of Black & Decker
Power Tools.
"X
If you already own a Black &
Decker Power Tool you know the
pleasure a quality, high perform
ance tool can deliver.
Your new 3/8" Compact
Cordless Drill is built in that same
tradition that has kept Black &
Decker the most respected
name in power tools for over
seventy years.
Full power in forward and
reverse, a big 3/8" chuck, and no
cord to worry about...ever, make
your drill a real value that wilt
deliver power and convenience
for years to come.
BUCKSDECKBr
#
A convenient charger is
included to keep your drill
constantly fresh and ready for
work.
Take a few minutes to read
this informative instruction
manual. Pay particular attention
to the safety rules we've provided
for your protection.
We want you to enjoy your
Black & Decker tool and the more
you know about it and its
capabilities, the happier you'll be
with it.
Don't forget to send in your
owner's registration card.
Thanks for selecting Black &
Decker!
Page 3

IMPORTANT SAFETY INSTRUCTIONS
WARNING: When using Electric Tools, basic safety precautions shouid aiways be
followed to reduce risk of fire, electric shock, and personal injury, inciuding the
foliowing:
NOTE: The following safety instructions contain some references that only make sense for
corded tools. Although your new drill is cordless, it's a good practice to review all of the
instructions.
READ ALL INSTRUCTIONS
1. KEEP WORK AREA CLEAN. Cluttered areas and benches invite injuries.
2. CONSIDER WORK AREA ENVIRONMENT. Don’t expose power tools to rain. Don’t
use power tools in damp or wet locations. Keep work area well lit.
3. GUARD AGAINST ELECTRIC SHOCK. Prevent body contact with grounded sur
faces. For example: pipes, radiators, ranges, refrigerator enclosures.
4. KEEP CHILDREN AWAY. All visitors should be kept away from work area. Do not let
visitors contact tool or extension cord.
5. STORE IDLE TOOLS. When not in use, tools should be stored in dry, and high or
locked-up place - out of reach of children.
6. DON’T FORCE TOOL. It will do the job better and safer at the rate for which it was
intended.
7. USE RIGHT TOOL. Don’t force small tool or attachment to do the job of a heavy-duty
tool. Don’t use tool for purpose not intended, for example, don’t use circular saw for
cutting tree iimbs or logs.
8. DRESS PROPERLY. Do not wear loose clothing or jewelry. They can be caught in
moving parts. Rubber gloves and non-skid footwear are recommended when working
outdoors. Wear protective hair covering to contain iong hair.
9. USE SAFETY GLASSES. Aiso use face or dustmask if cutting operation is dusty.
10. DON’T ABUSE CORD. Never carry tool by cord or yank it to disconnect from
receptacle. Keep cord from heat, oil, and sharp edges.
11. SECURE WORK. Use clamps or a vise to hold work. It’s safer than using your hand
and it frees both hands to operate tool.
12. DON’T OVERREACH. Keep proper footing and balance at all times.
13. MAINTAIN TOOLS WITH CARE. Keep tools sharp and clean for better and safe per
formance. Follow instructions for iubricating and changing accessories, inspect tool
cords periodically and if damaged have repaired by authorized service facility. Inspect
extension cords periodicaliy and replace if damaged. Keep handles dry, clean, and
free form oil and grease.
14. DISCONNECT TOOLS. When not in use, before servicing, and when changing
accessories, such as blades, bits, cutters.
15. REMOVE ADJUSTING KEYS AND WRENCHES. Form habit of checking to see that
keys and adjusting wrenches are removed from tool before turning it on.
16. AVOID UNINTENTIONAL STARTING. Don’t carry plugged-in tool with finger on
switch. Be sure switch is off when plugging in.
17. OUTDOOR USE EXTENSION CORDS. When tool is used outdoors, use only
extension cords intended for use outdoors and so marked.
18. STAY ALERT. Watch what you are doing. Use common sense. Do not operate tool
when you are tired.
19. CHECK DAMAGED PARTS. Before further use of the tool, a guard or other part that
is damaged should be carefully checked to determine that it will operate properly and
perform its intended function. Check for alignment of moving parts, binding of moving
parts, breakage of parts, mounting, and any other conditions that may affect its
operation. A guard or other part that is defective should be properly repaired or
replaced by an authorized service center unless otherwise indicated elsewhere in this
instruction manual. Have defective switches replaced by authorized service center. Do
not use tooi if switch does not turn it on and off.
20. DO NOT OPERATE portabie electric tools near flammable liquids or in gaseous or
explosive atmospheres. Motors in these tools normally spark, and the sparks might
ignite fumes.
SAVE THESE INSTRUCTIONS
Page 4

Additional Drill Safety Rules
1. Be aware that this tool is always in
an operating condition, because it
does not have to be plugged into an
electrical outlet.
2. When drilling or driving screws into
walls, floors or wherever "live"
electrical wires may be encountered,
DO NOT TOUCH ANY FRONT
METAL PARTS OF THE TOOL!
Hold the tool only by the plastic
handle to prevent electric shock if
you drill or drive into a "live" wire.
Important Charger & Drill
Safety Instructions
1. SAVE THESE INSTRUCTIONS -
This manual contains important
safety and operating instructions.
2. Before using battery charger, read
all instructions and cautionary
markings on battery charger and
drill.
3. The charger and drill are specifically
designed to work together. DO NOT
attempt to charge any other cordless
tool or battery pack with this
charger. DO NOT attempt to charge
the drill with any other charger than
the one supplied with the tool.
4. Do not expose charger to rain or
snow.
5. The battery charger is not intended
for any uses other than charging tbe
product shown in this manual. Other
uses may result in risk of fire or
electric shock.
6. To reduce the risk of damage to
electric plug and cord, pull by plug
rather than cord when disconnecting
charger.
7. Make sure cord is located so that it
will not be stepped on, tripped over,
or otherwise subjected to damage or
stress.
8. An extension cord should not be
used unless absolutely necessary.
Use of improper extension cord
could result in risk of fire and electric
shock. If extension cord must be
used, make sure:
a. That pins on plug of extension
cord are the same number, size,
and shape as those of plug on
charger;
b. That extension cord is properly
wired and in good electrical condi
tion; and
c. That wire is large enough for AC
ampere rating of charger as
specified in Table 1 (see Table
that follows).
9. Do not operate charger with
damaged cord or plug - replace
them immediately.
10. Do not operate charger if it has re
ceived a sharp blow, been dropped,
or otherwise damaged in any way;
take it to a qualified Black & Decker
Service Center.
11. Do not disassemble charger; take it
to a qualified Black & Decker
Service Center when service or
repair is required. Incorrect
reassembly may result in risk of
electric shock or fire. There are no
consumer serviceable parts inside.
12. To reduce risk of electric shock, un
plug charger from outlet before
cleaning.
13. NEVER attempt to connect 2
chargers together.
14. DO NOT store the tool in locations
where the temperature may reach or
exceed 120°F (such as outside
sheds or metal buildings in
summer).
Page 5

15. DO NOT charge drill when it or air
temperature is BELOW +40°F or
ABOVE +105°F.
16. DO NOT incinerate the drill even if
it is severely damaged or is com
pletely worn out. The batteries can
explode in a fire.
A small leakage of liquid from the
battery cells may occur under ex
treme usage, charging or tempera
ture conditions. This does not
indicate a failure. However, if the
outer seal is broken and this
leakage gets on your skin a. Wash quickly with soap and water.
b. Neutralize with a mild acid such
as lemon juice or vinegar.
c. If the battery liquid gets in your
17. The charger is designed to operate
on standard household electrical
power (120 volts AC only). Do not
attempt to use it on any other
voltage!
18. Do not attempt to open the drill
housing.
19. UNPLUG CHARGER WHEN NOT
IN USE.
Table 1 RECOMMENDED MINIMUM AWG* SIZE FOR
EXTENSION CORDS FOR BATTERY CHARGERS
YOUR CHARGER'S INPUT RATING IS LESS THAN 2 AMPERES.
eyes, flush them with clean water
for a minimum of 10 minutes and
seek immediate medical attention.
(Medical Note; The liquid is a 2535% solution of potassium hy
droxide.)
X
AC Input Ratina Amperes
Equal to or
greater than
But less
than
0 2
‘American Wire Gauge
AWG* Size of Cord
Length of Cord, Feet
25 50 100 150
18 18 18 16
Page 6

Bubble Level
Your drill is equipped with a bubble level
that assists you in drilling level holes.
For horizontal drilling, tilt the drill up
or down as required so that the bubble
floats in the center of the parallel lines
drawn on the glass.When the bubble is
centered between the lines, as shown in
Figure 1, the drill is level.
For vertical drilling, align the drill so
that the bubble floats in the center of the
bull's eye, as shown in Figure 2.
To assure accuracy, first place a
level on your workpiece and position the
piece so that it's level. Then, when the
drill reads level, the two will be aligned.
(Any level can only indicate level with
respect to the earth's gravitational field.)
NOTE: The level is filled with
mineral oil that may cause minor skin or
eye irritation when contacted. If the level
breaks and the fluid gets on your skin,
rinse thoroughly with water. If the liquid
gets in your eyes, rinse thoroughly with
water and contact a physician immedi
ately.
SCREWDRIVER BIT
RELEASE BUTTON
Bit storage
A double ended (#2 Phillips and
Straight) screwdriver bit is included with
your drill. The bit stores in the drill handle,
as shown in Figure 3. To remove the bit
from the handle, hold the drill normally
and depress the button shown in Figure 3.
The bit will drop out of the handle. To
reinstall into handle, simply push it into
the hole as far as it will go. (You may have
to twist it slightly in order for it to go all the
way in.)
Page 7

Squeezing the switch just far enough so
that the tool runs yields 300 RPM.
Squeezing a little farther until you hear
the drill speed up produces 600 RPM.
NOTE: There is a slight pause between
the two speeds. Keep squeezing the
trigger and the drill will start again.
The two position Control Lever
switches the drill from Forward for drilling
holes and driving screws to Reverse for
backing out broken drill bits and removing
screws.
To run the drill in Forward, pull the
Control Lever forward toward the chuck,
as shown in Figure 4. To run the drill in
Reverse, push the lever back toward the
trigger switch.
Chuck & Key
Turn Chuck collar to open Chuck
jaws. Place bit in Chuck as far as it will go.
Tighten Chuck collar by hand. Place
Chuck Key in each of the three holes, and
tighten in clockwise direction (Figure 5).
It's important to tighten Chuck with all
three holes to prevent slippage. To
release bit, turn the Chuck Key counter
clockwise in just one hole, then loosen
Chuck by hand. '
When not in use, the Chuck Key can
be stored in the tool. To remove the Key,
place thumb as shown in Figure 5 and push
key firmly downward out to its holding clip.
To replace Key, push firmly and completely
up into the socket. (Figure 7.)
Page 8

Charging the Drill
Before attempting to charge your
drill, thoroughly read ALL of the safety
instructions. To charge your drill, follow
the steps below. .
1. Remove any accessories from the
chuck and plug the output cord of
the charger into the socket in the
front of the drill handle.
2. Plug the charger into any standard
120 volt electrical outlet.
3. Allow the tool to remain in this con
dition for three hours.
4. Unplug the charger from the
power supply, then unplug the
tool from the charger.
Charge Indicator
Your drill is equipped with a charge
indicator light that comes on whenever
the drill is charging. The light remains lit
whether the drill is fully charged or not
and goes out when the tool is taken off
charge. The light is located on the side of
the handle near the charging socket.
Important Charging Notes
1. After normal usage, your drill should
be fully charged in 3 hours or less.
If the drill is run-down completely, it
may take up to 5 hours to become
fully charged. Your drill was sent
from the factory in an uncharged
condition. Before attempting to use
it, it must be charged for at least 5
hours.
2. DO NOT charge the batteries in an
air temperature below -i-40°F or
above +105°F. This is important and
will prevent serious damage to the
batteries.
3. While charging, the charger may
hum and become warm to touch.
This is a normal condition and does
not indicate a problem.
4. If the batteries do not charge
properly—(1) Check current at
receptacle by plugging in a lamp or
other appliance. (2) Check to see if
receptacle is connected to a light
switch which turns power off when
you turn out the lights.
(3) Move charger and drill to a
surrounding air temperature of
+40°F to 105°F, (4) If the receptacle
and temperature are o.k., and you
do not get proper charging, take or
send the tool and charger to your
local Black & Decker Service
Center. See “TOOLS ELECTRIC” in
yellow pages.
5. The drill should be recharged when
it fails to produce sufficient power on
the jobs which were easily done
8
Page 9

previously. DO NOT CONTINUE to
use the drill with its battery in a
depleted condition.
6. To prolong battery life, avoid leaving
the tool on charge for more than 5
hours. Although overcharging is not
a safety concern, it can significantly
reduce overall battery life.
7. A fully charged product, after being
off charge for 1 month, will still have
75% of its energy in the battery
pack; after 6 months, 50% will
remain.
8. Since the unit is designed for
cordless applications, use of the unit
while plugged in is of no benefit. ■
Batteries will still become depleted.
9. Unplug your tool’s charger from the
power supply before disconnecting
the charger from the tool. Under
certain conditions, with the charger
plugged in to the power supply, the
exposed charging plug can be
shorted by foreign material and may
cause a fire. Foreign materials of
conductive nature, such as but not
limited to, steel wool, aluminum foil,
or any build up of metallic particles
should be kept away from the
charging plug. Unplug charger
before attempting to clean.
10. Longest life and best performance
can be obtained if the batteries are
charged when the air temperature is
about +75°F. DO NOT charge the
batteries in an air temperature below
+40°F or above 105°F. This is im
portant and may prevent serious
damage to the batteries.
Operation
FOR LONGEST PRODUCT LIFE, DON’T
FORCE TOOL!
DRILLING
1. Use sharp drill bits only. For WOOD,
use twist drill bits, spade bits, power
auger bits, or hole saws. For
METAL,
drill bits. For MASONRY, such as
brick, cement, cinder block, etc., use
carbide tipped bits.
2. Be sure the material to be drilled is
anchored or clamped firmly. If drilling
thin material, use a wood "back-up"
block to prevent damage to material.
3. Center-punch an indentation at the
point to be drilled. This will overcome
tendency of bit to slip around on a
smooth surface. Place the tip of bit in
indentation and turn motor "ON". See
Figure 8.
4. Always apply pressure in a straight
line with the bit. Use enough pres
sure to keep Drill biting, but do not
push hard enough to stall motor or
deflect bit. To minimize stalling on
breaking through the material,
reduce pressure on Drill and ease
the bit through the last part of hole.
5. Field Drill firmly to control its twisting
action.
DRILLING IN WOOD
Floles in wood can be made with the
same twist drill bits used for metal. These
bits should be sharp and should be pulled
out frequently when drilling to clear chips
from the flutes. Work that is apt to splinter
should be backed up with a block of wood.
Let up on the pressure just before the tip
cuts through, this will give a good clean
hole.
use high-speed steel twist
DRILLING IN METAL
Use a cutting lubricant when drilling
ferrous metals. The exceptions are iron
and brass which should be drilled dry. The
cutting lubricants that work best are
sulphurized cutting oil or lard oil; bacon
grease will also serve the purpose.
Page 10

Cleaning & Lubrication
Use only mild soap and a damp
X
■
cloth to clean the tool. Never let any
liquid get inside the tool; never immerse
any part of the tool into a liquid.
Self lubricating bearings are used
In the tool and periodic lubrication is not
required. In the unlikely event that your
drill should ever require service, take or
send it to your local Black & Decker
Service Center or Authorized Service
Station. Service Center addresses are
listed on the owner's registration card
packed with your drill.
or above +120°F. Avoid storage in
outside metal buildings where the
temperature could go above +120°F
in summer, as this could damage
the drill.
3. Long storage will not harm the drill
or charger. Under the proper
conditions (given above) they can
be stored for 5 years or more
without harm.
Important
To assure product SAFETY and
RELIABILITY, repairs, maintenance and
adjustment should be performed by
Black & Decker Service Centers or other
qualified organizations, always using
Black & Decker replacement parts.
Storage
1. The best storage place is one that is
cool and dry - away from direct
sunlight, heating pipes and ducts,
furnaces, etc.
2. Best storage temperature is approxi
mately +50°F. Do not store where
temperatures may go below +40°F
10
Page 11

Accessories
The accessories listed in this
manual are available at extra cost from
your local Dealer or Black & Decker
Service Center. A complete listing of
service centers is included on the
owner's registration card packed with
your tool. If you need assistance in
locating any accessory, please contact:
Black & Decker (U.S.) Inc., Consumer
Service Dept., 626 Hanover Pike, P.O.
Box 618, Hampstead, MD 21074-0618.
Recommended accessories for your
tool are shown in this manual. The use of
any other accessory or attachment might
be hazardous.
We strongly recommend that you
first purchase the No. 72-000 Safety
Glasses which should be worn when
using all power tools.
For safety in use, the following
accessories should be used only in the
sizes specified below:
BITS, METAL DRILLING-Up to 3/8".
BITS, MASONRY DRILLING-Up to 3/8".
rx
BITS, WOOD DRILLING-Up to 3/8".
Holster
This holster fastens to your belt and
keeps the tool handy and ready for work.
It also frees both hands when you are
not actually using the tool.
Never holster your drill with a bit in
the chuck.
11
Page 12

Batteries
When they reach the end of their useful life, the batteries in your tool will no longer accept a charge.
This is a normal occurrence and signifies only that your tool needs battery replacement or it's time to
replace the tool entirely.
Before discarding the old tool, the nickel cadmium batteries must be removed and recycled or
disposed of property. Cadmium is a toxic form of waste and Isharmful to the environment. Contact your
local municipality to find out how to properly recycle or dispose of the batteries or take or send the
complete tool to your local Black & Decker Service Center. The service technicians will test the tool’s
battery at no labor charge and if battery replacement is required they will, at your direction, replace the
battery and properly recycle or dispose of the old one. If you choose to replace the tool, they will be glad
to take the old one and see to its proper recycling or disposal.
Tools which use nickel cadmium batteries have been designedforeasy battery removal. They ARE
NOT designed to be re-assembled except by qualified service technicians at Black & Decker Service
Centers. To remove the batteries from your tool, refer to the section entitled "Battery Removar in this
manual.
Battery Removal
IMPORTANT: This tool is designed for easy
disassembly for the purpose of battery removal. It is
not designed to be re-assembled by the consumer.
Before attempting to disassemble this tool, turn it on
and run it in either direction until it stops to ensure
a complete discharge of the batteries. To disas
semble the tool, remove the screws in the side of the
tool body. Take the two body halves apart and you
will find the batteries. Lift the batteries out and pull
off the two terminal clips shown in Figure 7. Take or
send the batteries to your local Black & Decker
Service Center where they will be recycled or disposed of properly. If you decide to dispose of the
batteries yourself, check with your municipality to (earn about the local restrictions concerning disposal
of nickel cadmium batteries. The rest of your tool can be disposed of as normal trash. Do not attempt
to re-assemble the drill.
Cleaning & Lubrication
Use only mild soap and a damp cloth to clean the tool. Never let any liquid get inside the tool; never
Immerse any part of the tool into a liquid.
Self lubricating bearings are used in the tool and periodic lubrication is not required. In the unlikely
event that your drill should ever require service, take or send it to your local Black & Decker Service
Center or authorized repair facility.
Home Use Warranty (A Full Two Year Warranty)
Black & Decker (U.S.) Inc. warrants this product for two years against any defects that are due to
faulty material or workmanship. Please return the complete unit, transportation prepaid, to the seller (if
a participating retailer) for free replacement (proof of purchase may be required). This unit may also be
returned to a Black & Decker Service Center or Authorized Service Station, listed under "Tools Electric"
in the yellow pages for free replacement or repair at our optk>n. This warranty does not apply to
accessories. This warranty gives you specific legal rights and you may have other rights which vary from
state to state. Should you have any questions, contact your nearest Black & Decker Service Center
Manager.
Every Black & C^ker tml fe of the richest quality. If you wish to contact us r^arding
this product,pleasecalltollfr^b^TOn 8:00am. and 5:Q0p,m. ET, Monday through FitJay.
1-W0-762-W72
This symbol on the nameplate
means the product is list^ by
Underwriters Laboratories, Inc.
////A Dmm/oiiroi#i!n Copyright ©1992 Black & Decker
BUllHlbillCIHlER. (JAN93-CO-3) 1993 Printed in U.S.A.
Black & Decker (U.S.) Inc., U.S. Power Tools Group, 701 E. Joppa Rd., Towson, MD 21286 U.S.A.
9013
See Tools-Eledric'
-Yellow Pages-
for Service & Sales
Form No. 741380-05
 Loading...