


VIDEO FRAME 12
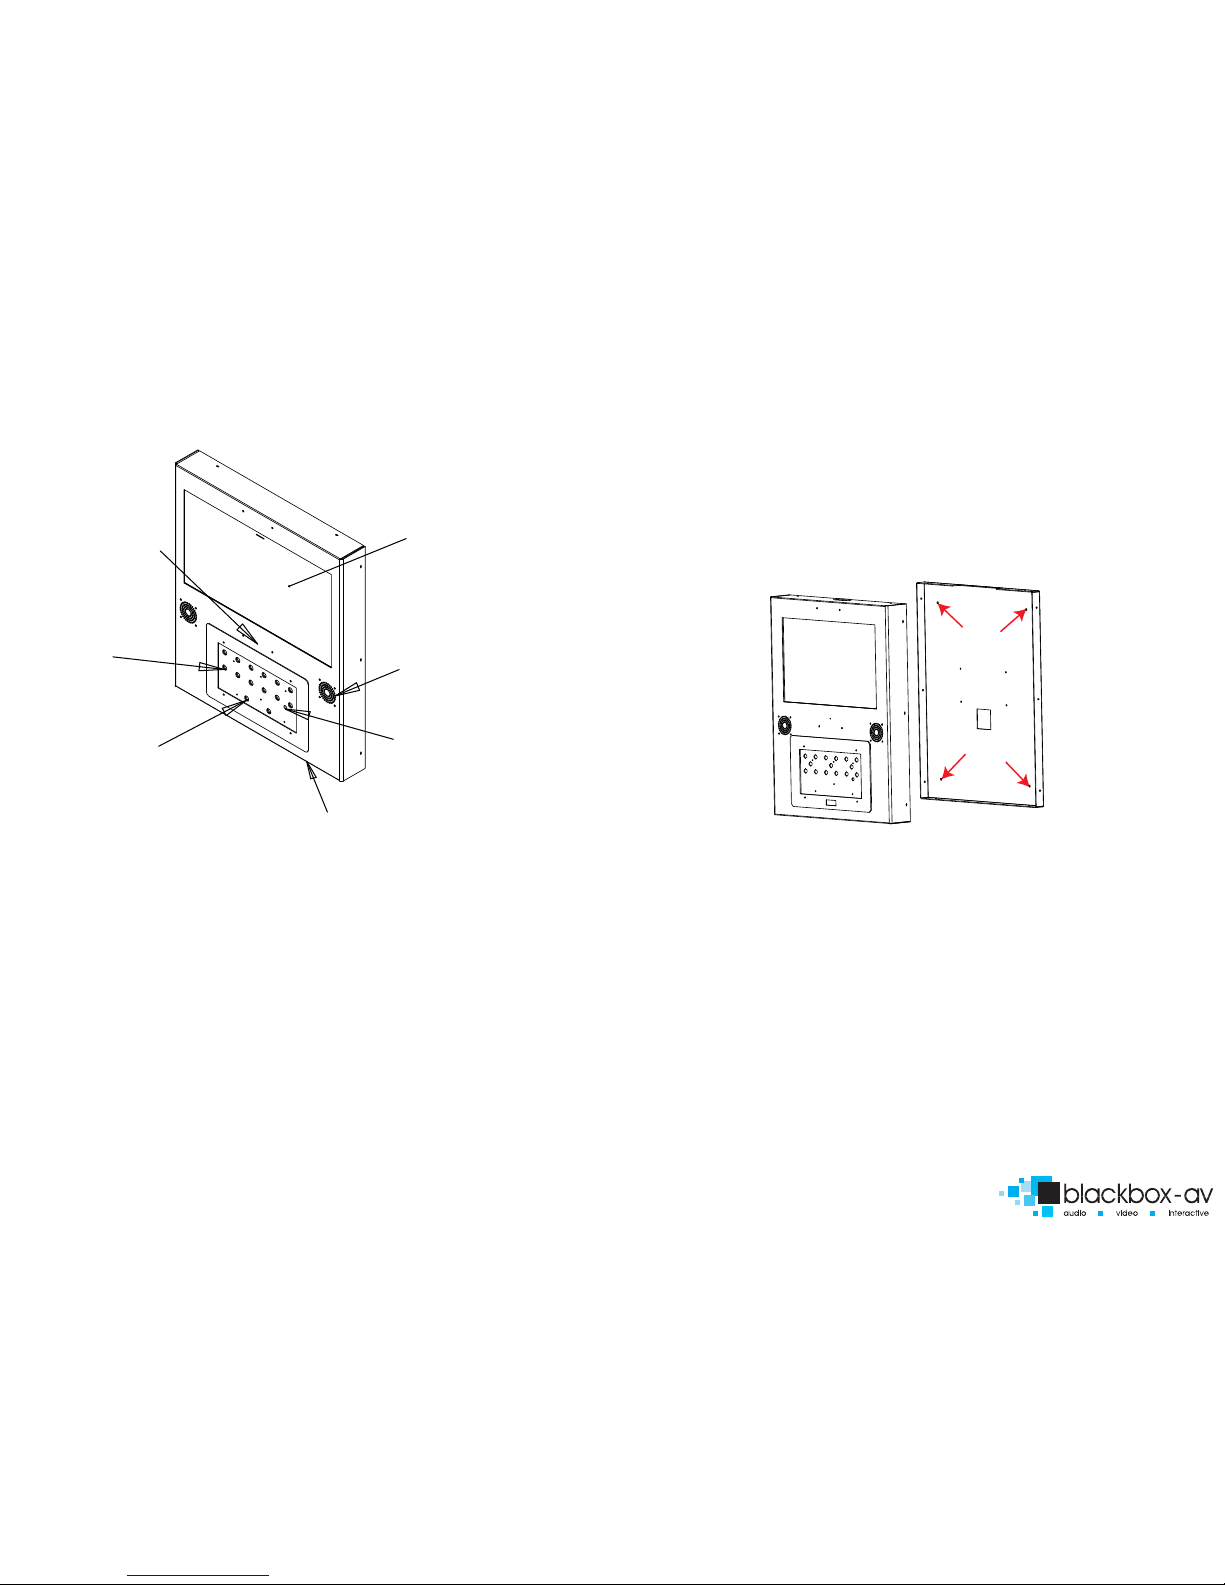
PARTS DIAGRAM
General Specications
Video storage medium: 1 SD Card
Maximum SD Card capacity: 4 Gb
Maximum number of videos: 12 folders / 4gb
Playable Format: .Mpg1 / .JPG / .MP3 / .AVI
Audio Output: Stereo
Content Formats
Video : MPEG 2 (720 x 480, 30fps PAL)
Still Picture: JPEG (1280 x 608px, 300DPI)
Audio: 44.1kHz Stereo, 224kbit/s
Codec: MPEG 2 (.mpg), JPEG (.jpg
Weight - 18kg
VIDEO FRAME 12
VIDEO PRODUCT MANUAL
There are two ways of xing the video frame to a wall.
1) Using a screen bracket (provided) - this is an easier option although there will
be a gap between the unit and the wall. If you would like the unit to sit ush
with the wall you will need to follow the instructions below for option 2.
2) Use incorporated mounting holes, to x the Video Frame 12 you will need to
take the unit apart and x through the 4 holes in the rear of unit.
1. Ensure that the power is disconnected.
2. Place the unit at, (screen face down) using some bubble wrap to avoid
scratching.
3. Remove the 10 screws around the edges of the unit. (3 on each side and 2 on
the top and bottom.)
4. Seperate the back from the front - see diagram above.
5. Fix the seperated back to the wall using the 4 holes indicated in the diagram
above .
6. Re-attach the front to the back and replace the 10 screws around the edges
of the unit. (3 in each side and 2 in the top and bottom.)
7. Reconnect the power.
WALL MOUNTING
23" Screen
Speaker x 2
Volume -/+
SD/Player Access
(4 star screws for access)
Monitor Status LED
Master Volume Control
(clockwise to increase)
12 Activation
Buttons
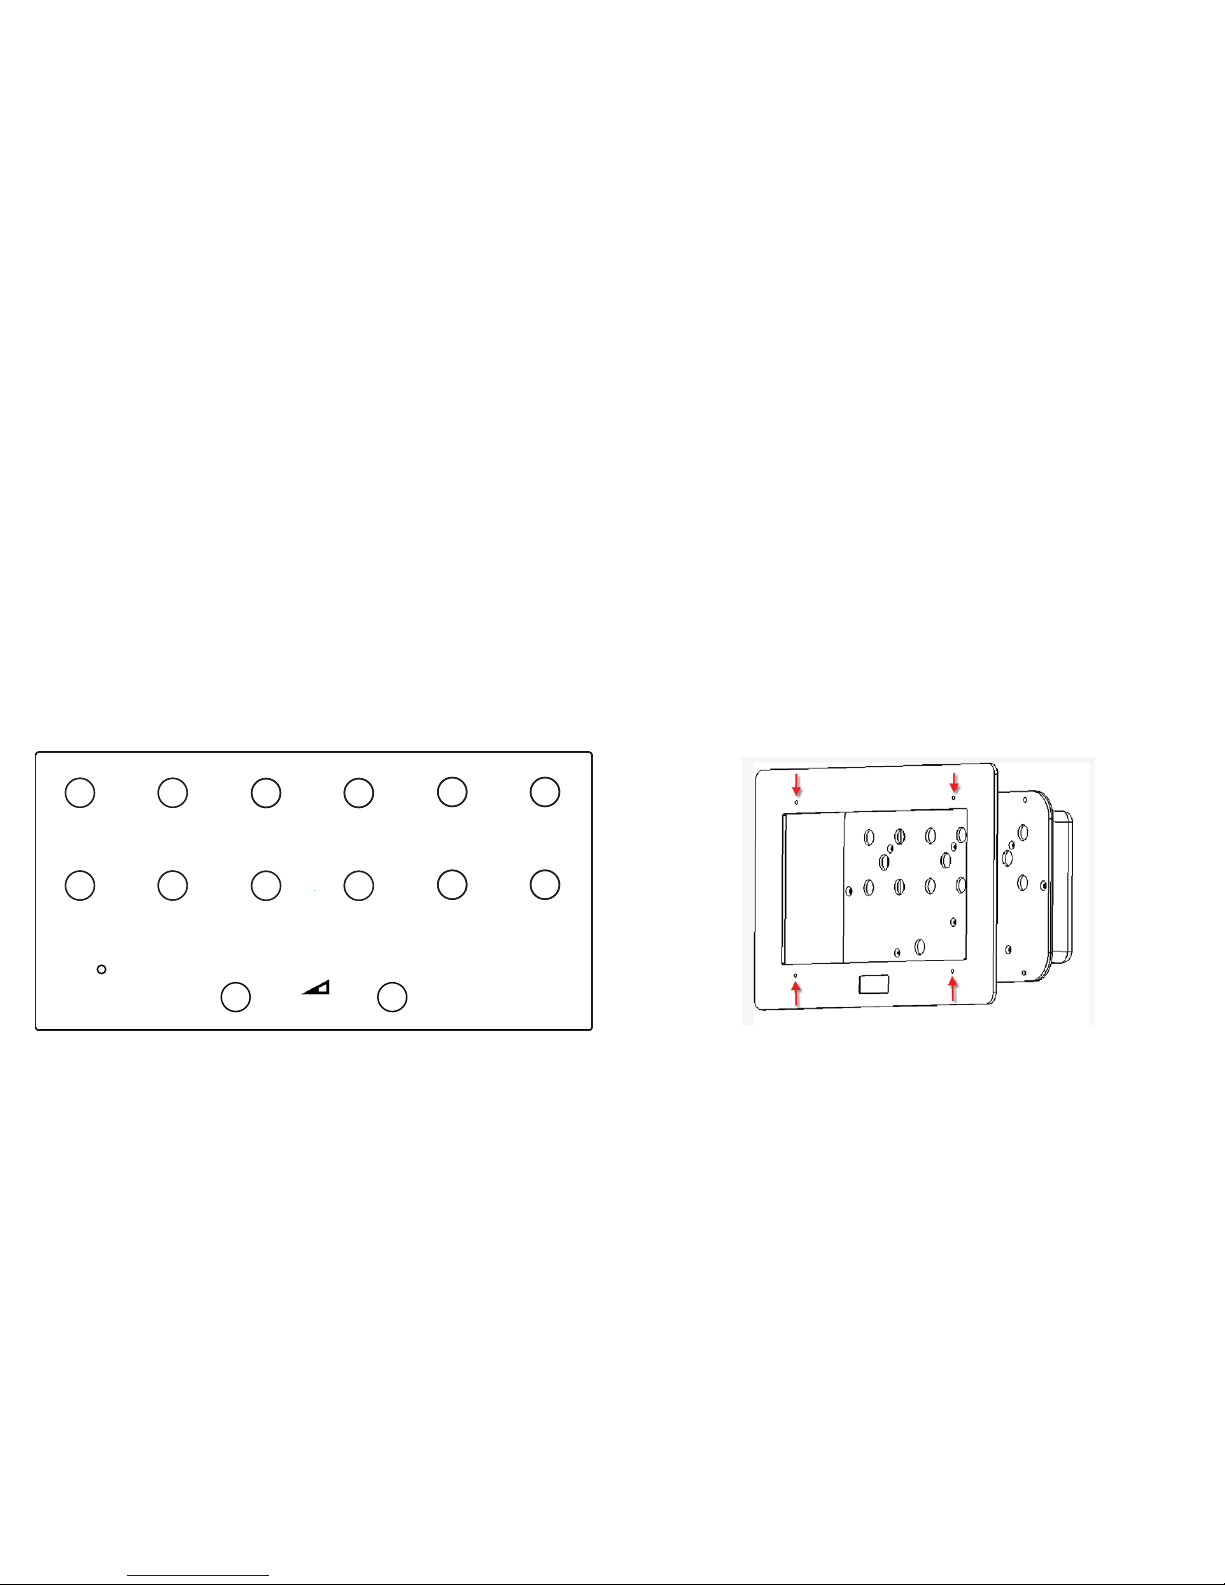
Before you start
You must think about what information you have and how you want to
display the information to your visitors/ users
Button Layout
You can use the 12 buttons in any conguration that you want depending
upon what content you are displaying.
Minimum use: 1 button with 1 video/ jpg
Maximum use: 12 buttons with up to 4gb of video/ jpg content
Below shows how the buttons are arranged within the frame. You can download a scale template from our website. The volume buttons cannot be used for
content.
GENERAL INFORMATION
VIDEO FRAME 12
VIDEO PRODUCT MANUAL
ARTWORK
Creating Artwork
Once you have decided on the content and how you want to lay out the buttons
you will need to produce the artwork for the frame.
You can download a template from the Video Frame 12 page on our webstie.
http://blackboxav.co.uk/product-downloads/vf12/VF12-template.pdf
If you need help creating the artwork we are able to do this for a small fee - ask
our sales sta for further details.
We recommend printing on 120GSM paper and laminating in 150MIC. Punch 4
holes to allow screws to secure the artwork in place.
Installing Artwork
To t new artwork you must undo the 4 screws and remove the frame. Punch
holes in the artwork to allow the screws to pass through and secure in place
between the frame and metalwork. Then reattach the frame.
1
10
11 12
2
3
4
5
6
7
89
VIDEO FRAME 12
“WE’VE GOT THE MESSAGE”
Volume Down
Volume Up
INSTRUCTIONS:
Please select one of the buttons
to view the content.
VOLUME
+
_
MENU CARD ARTWORK DEMO
 Loading...