

Page 1
CUSTOMER
SUPPORT
INFORMATION
Order toll-free in the U.S.: Call 877-877-BBOX (outside U.S. call 724-746-5500)
FREE technical support 24 hours a day, 7 days a week: Call 724-746-5500 or fax 724-746-0746
Mailing address: Black Box Corporation, 1000 Park Drive, Lawrence, PA 15055-1018
Web site: www.blackbox.com • E-mail: info@blackbox.com
MARCH 2005
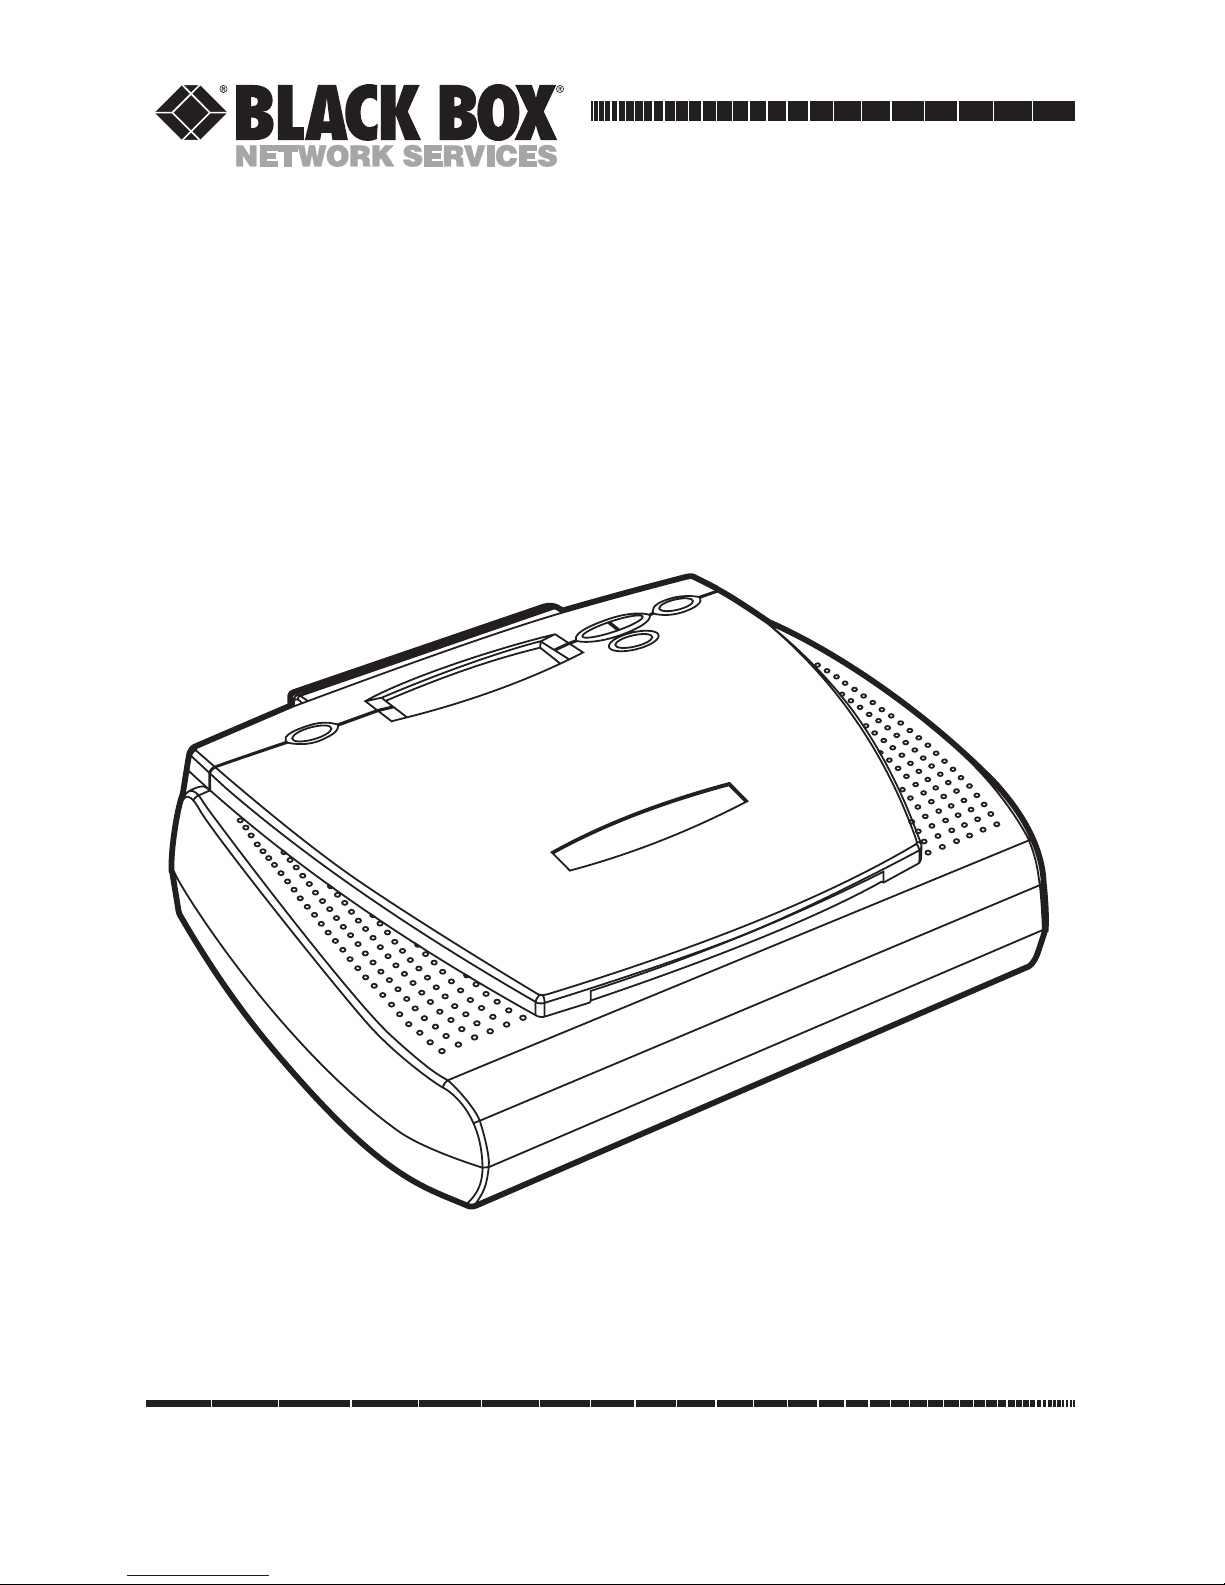
TE150A-R2
TE151
Music On-Hold Plus
Page 2

Page 3

1
WARNINGS/CAUTIONS
WARNING
To prevent fire or electrical shock, do not expose the unit to rain or
moisture. DO NOT open the cabinet—YOU MIGHT GET SHOCKED. Refer
servicing to qualified service personnel only.
When the unit is used with an AC power adapter, DO NOT wrap the unit
in a cloth, blanket, etc. If you do, the temperature inside and outside the
unit may rise considerably, and YOU MIGHT GET SHOCKED OR
BURNED.
WARNING
NEVER attempt to service the Music On-Hold Plus yourself. The laser
beam used in this compact disc player may cause permanent damage to
your eyes. Refer servicing to qualified personnel only.
DO NOT use optical instruments with this product. IT COULD DAMAGE
YOUR EYES.
Do not put any foreign objects in the safety slot inside the disc
compartment. If you do, the laser beam could come out when you open
the lid.
Do not put any foreign objects in the DC IN 6V (external power input)
jack. If any solid object or liquid falls into the unit, disconnect the power
supply and have qualified service personnel check the unit for safety
before operating it any further.
CAUTION
Since the CD system offers a wide dynamic range, the peaks of the high
input level inputs are recorded with high fidelity, and the noise level is
very low. DO NOT turn up the volume while listening to a part of the disc
with no audio signals or very low-level inputs. If you do, the speakers
may be damaged when the peak level of the sound plays.
Keep the lens on the disc table clean. Do not touch the lens with your
finger or foreign objects. If you do, the lens may be damaged and the
unit will malfunction.
If you bring the unit directly from a cold to a warm location or place it in
a damp room, moisture may condense on the lens inside the unit. If this
happens, the unit will not operate. Remove the disc and leave the unit in
a warm place for several hours until the moisture evaporates.
For the unit to operate at its best, do not subject it to temperatures
below 41°F (5°C) or above 95°F (35°C).
Page 4

2
MUSIC ON-HOLD PLUS
FEDERAL COMMUNICATIONS COMMISSION
and INDUSTRY CANADA
RADIO FREQUENCY INTERFERENCE STATEMENTS
Class B Digital Device. This equipment has been tested and found to comply with
the limits for a Class B computing device pursuant to Part 15 of the FCC Rules.
These limits are designed to provide reasonable protection against harmful
interference in a residential installation. However, there is no guarantee that
interference will not occur in a particular installation. This equipment generates,
uses, and can radiate radio frequency energy, and, if not installed and used in
accordance with the instructions, may cause harmful interference to radio
communications. If this equipment does cause harmful interference to radio or
telephone reception, which can be determined by turning the equipment off and
on, the user is encouraged to try to correct the interference by one of the following
measures:
• Reorient or relocate the receiving antenna.
• Increase the separation between the equipment and receiver.
• Connect the equipment into an outlet on a circuit different from that to which
the receiver is connected.
• Consult an experienced radio/TV technician for help.
Caution:
Changes or modifications not expressly approved by the party
responsible for compliance could void the user’s authority to operate
the equipment.
To meet FCC requirements, shielded cables and power cords are required to
connect this device to a personal computer or other Class B certified device.
This digital apparatus does not exceed the Class B limits for radio noise emission from digital
apparatus set out in the Radio Interference Regulation of Industry Canada.
Le présent appareil numérique n’émet pas de bruits radioélectriques dépassant les limites
applicables aux appareils numériques de classe B prescrites dans le Règlement sur le brouillage
radioélectrique publié par Industrie Canada.
Page 5

3
NOM STATEMENT
NORMAS OFICIALES MEXICANAS (NOM)
ELECTRICAL SAFETY STATEMENT
INSTRUCCIONES DE SEGURIDAD
1. Todas las instrucciones de seguridad y operación deberán ser leídas antes de
que el aparato eléctrico sea operado.
2. Las instrucciones de seguridad y operación deberán ser guardadas para
referencia futura.
3. Todas las advertencias en el aparato eléctrico y en sus instrucciones de
operación deben ser respetadas.
4. Todas las instrucciones de operación y uso deben ser seguidas.
5. El aparato eléctrico no deberá ser usado cerca del agua—por ejemplo, cerca
de la tina de baño, lavabo, sótano mojado o cerca de una alberca, etc..
6. El aparato eléctrico debe ser usado únicamente con carritos o pedestales que
sean recomendados por el fabricante.
7. El aparato eléctrico debe ser montado a la pared o al techo sólo como sea
recomendado por el fabricante.
8. Servicio—El usuario no debe intentar dar servicio al equipo eléctrico más allá
a lo descrito en las instrucciones de operación. Todo otro servicio deberá ser
referido a personal de servicio calificado.
9. El aparato eléctrico debe ser situado de tal manera que su posición no
interfiera su uso. La colocación del aparato eléctrico sobre una cama, sofá,
alfombra o superficie similar puede bloquea la ventilación, no se debe colocar
en libreros o gabinetes que impidan el flujo de aire por los orificios de
ventilación.
10. El equipo eléctrico deber ser situado fuera del alcance de fuentes de calor
como radiadores, registros de calor, estufas u otros aparatos (incluyendo
amplificadores) que producen calor.
11. El aparato eléctrico deberá ser connectado a una fuente de poder sólo del
tipo descrito en el instructivo de operación, o como se indique en el aparato.
Page 6

4
MUSIC ON-HOLD PLUS
12. Precaución debe ser tomada de tal manera que la tierra fisica y la polarización
del equipo no sea eliminada.
13. Los cables de la fuente de poder deben ser guiados de tal manera que no
sean pisados ni pellizcados por objetos colocados sobre o contra ellos,
poniendo particular atención a los contactos y receptáculos donde salen del
aparato.
14. El equipo eléctrico debe ser limpiado únicamente de acuerdo a las
recomendaciones del fabricante.
15. En caso de existir, una antena externa deberá ser localizada lejos de las lineas
de energia.
16. El cable de corriente deberá ser desconectado del cuando el equipo no sea
usado por un largo periodo de tiempo.
17. Cuidado debe ser tomado de tal manera que objectos liquidos no sean
derramados sobre la cubierta u orificios de ventilación.
18. Servicio por personal calificado deberá ser provisto cuando:
A: El cable de poder o el contacto ha sido dañado; u
B: Objectos han caído o líquido ha sido derramado dentro del aparato; o
C: El aparato ha sido expuesto a la lluvia; o
D: El aparato parece no operar normalmente o muestra un cambio en su
desempeño; o
E: El aparato ha sido tirado o su cubierta ha sido dañada.
Page 7

5
TRADEMARKS USED IN THIS MANUAL
TRADEMARKS USED IN THIS MANUAL
Any trademarks mentioned in this manual are acknowledged to be the property of the
trademark owners.
Page 8

6
MUSIC ON-HOLD PLUS
Contents
Chapter Page
1. Specifications ...........................................................................................................7
2. Introduction.............................................................................................................8
2.1 Description .........................................................................................................8
2.2 Features...............................................................................................................8
2.3 What the Package Includes ...............................................................................9
3. Installation..............................................................................................................10
3.1 Connecting the Unit to PBX or Key Phone Systems.....................................10
3.2 Connecting the Unit to Standard Analog or KSU-less Phones ....................11
4. LCD Display and Controls.....................................................................................12
4.1 LCD Display......................................................................................................12
4.2 Player Controls .................................................................................................13
5. Operation ...............................................................................................................14
5.1 Playback ............................................................................................................14
5.1.1 Playing Audio Stored in Memory.............................................................14
5.1.2 Playback After Power Loss ........................................................................14
5.2 Recording .........................................................................................................14
5.2.1 Recording Single-Track CDs ....................................................................14
5.2.2 Recording Multi-Track CDs......................................................................14
5.2.3 Previewing a Track on a CD .....................................................................15
5.3 External Recording..........................................................................................15
6. Settings ...................................................................................................................16
6.1 Impedance Switch............................................................................................16
6.2 Speaker Switch .................................................................................................16
6.3 Volume Control ...............................................................................................16
6.4 Power Switch.....................................................................................................16
7. Other Functions.....................................................................................................17
7.1 Remote Trigger ................................................................................................17
7.2 Auxiliary In .......................................................................................................17
8. Adding Additional Memory ..................................................................................18
8.1 Configuration...................................................................................................18
8.2 Installing Memory ............................................................................................18
Page 9

7
CHAPTER 1: Specifications
1. Specifications
System Requirements and Compatibility: Phone system must be KSU or PBX
Memory: 8 minutes standard record time upgradeable to 32 minutes
Connectors: (1) RCA female, (1) 3.5-mm jack for power
Indicators: LCD panel
Power: Input: 120 VAC, 60 Hz, 20 W; Output: 12 VDC, 1000 mA
Size: 2"H x 10.6"W x 8.7"D (5.1 x 26.9 x 22.1 cm)
Weight: 2.4 lb. (1.1 kg)
Page 10

8
MUSIC ON-HOLD PLUS
2. Introduction
2.1 Description
The Music On-Hold Plus is easy to use and simple to understand. Just drop in a
single-track CD and close the lid. The Music On-Hold Plus spins the disc and
records it into digital flash memory. Playback begins immediately. Or, you can also
record tracks individually.
The Music On-Hold Plus comes with an 8-minute recording capability and can be
upgraded in 8-minute increments up to 32 minutes. Simply lift a door to add
memory modules.
2.2 Features
• Digital flash memory: Design retains music/message content even during
power loss. The Music On-Hold Plus ships with preloaded audio.
• Integrated CD mechanism: Quickly and easily record high-quality audio. CD
media is easy and inexpensive to duplicate and distribute.
• CD Autoload: Drop in a CD with a single track, close the lid, and the Music
On-Hold Plus automatically records the content.
• Multi-Track Programmable: Drop in a multi-track CD and choose which tracks
and in what order to record.
• LCD Control Panel: Displays program length, time remaining in the Music
On-Hold Plus’s memory, and the unit’s status.
• Trigger switch: The unit can be triggered to start program content from the
beginning with an external trigger switch.
• Optional Plug-In Analog Phone Adapter Module: Connects to the Music OnHold Plus’s internal slot to add music on-hold to standard analog and KSU-less
telephones with up to 4 lines and 50 station sets. Works with all types of
phones, even cordless.
• HoldTracks audio CD: Choose new, royalty-free music from a pre-recorded
audio CD featuring a variety of music styles.
• CustomWorks CD-ROM: A wizard for creating professional-sounding on-hold
message scripts.
Page 11

9
CHAPTER 2: Introduction
• MessageStudio Software Compatible: Works with award-winning
MessageStudio software (available separately), which allows you to create new
on-hold audio content on a PC and record directly into the Music On-Hold
Plus’s digital memory.
• External Recording Capability: Audio input allows you to record from any
external audio source.
• Built-in Monitor Speaker: Allows you to monitor sound with the flip of a
switch.
• May be wall-mounted: The Music On-Hold Plus can be mounted, played, and
recorded in a vertical position.
2.3 What the Package Includes
Your package should include the following items:
• Music On-Hold Plus
• (1) 6-ft. (1.8-m) RCA male connector cable
• AC adapter
• HoldTracks audio CD
• CustomWorks CD-ROM
If anything is missing or damaged, contact Black Box at 724-746-5500.
Figure 2-1. Some of the included items.
Connector
Cable
AC
Adapter
CustomWorks
CD-ROM
HoldTracks
Audio CD
Page 12

10
MUSIC ON-HOLD PLUS
3. Installation
3.1 Connecting the Unit to PBX or Key Phone Systems
1. Plug the AC adapter into a wall outlet.
2. Plug the AC adapter cable into the jack marked “12 VDC.”
3. Plug the connector cable into the “AUDIO OUT” jack.
4. Plug the other end of the connector cable into the phone system’s music-onhold (moh) jack.
Figure 3-1 illustrates this installation.
Figure 3-1. Connecting to PBX or Key phone systems.
NOTE
If you cannot locate the music-on-hold jack, contact your phone vendor
for information.
PBX or Key
System
Music OnHold Input
Page 13

11
CHAPTER 3: Installation
3.2 Connecting the Unit to Standard Analog or KSU-less Phones
For connection to standard analog or KSU-less phones, call Black Box Technical
Support at 724-746-5500.
Page 14

12
MUSIC ON-HOLD PLUS
4. LCD Display and Controls
4.1 LCD Display
Figure 4-1 illustrates the LCD panel on the Music On-Hold Plus.
Figure 4-1. LCD panel.
• Track Number: Displays the CD track number during programming.
• Track Select Indicator: Displays when a track is selected for recording.
• Track Indicator: Displays the CD track length or running time when in “play”
mode.
• Memory Available: Displays available recording time during programming.
• Playback Indicator: Displays when the unit is playing.
• Record Mode Indicator: Displays when audio is being recorded to memory.
Track
Number
Track
Select
Indicator
Track
Indicator
Memory
Available
Record Mode
Indicator
Playback
Indicator
Page 15

13
CHAPTER 4: LCD Display and Controls
4.2 Player Controls
Figure 4-2 shows the controls on the CD player.
Figure 4-2. Player controls.
• Record: Used to initiate recording from a multi-track CD.
• Track Search: Navigates forward and backward through tracks on the CD.
• Preview: Plays the selected audio track.
• Select: Designates the current track for recording.
• Speaker: Turns the speaker on or off.
• Impedance: Allows selection between 8- or 600-ohm audio output.
• Memory-Expansion Access Panel: Remove the door to add memory modules
for additional audio recording time.
Record
Track
Search
Preview
Select
Speaker
Impedance
Memory-Expansion
Access Panel
Page 16

14
MUSIC ON-HOLD PLUS
5. Operation
5.1 Playback
5.1.1 P
LAYINGAUDIO
S
TORED INMEMORY
By default, the unit is always in playback mode. When the unit is playing, the LCD
will display a running time and the segments on the speaker icon will move.
5.1.2 P
LAYBACKAFTERPOWERLOSS
If power to the unit is lost, the unit will resume playback as soon as power is
reapplied. The unit retains its recorded content after power loss.
5.2 Recording
5.2.1 R
ECORDINGSINGLE-TRACKCDS
1. Open the cover.
2. Insert the CD.
3. Close the cover.
4. Once the cover is closed, the unit will automatically begin recording the
content of the track into the unit’s digital memory. During the recording
process, the contents of what is being recorded to memory will be heard
through the speaker. The unit automatically switches over to “playback” mode
when the recording is complete.
5.2.2 R
ECORDINGMULTI-TRACKCDS
1. Open the cover.
2. Insert the CD.
3. Close the cover.
4. Use the “track search” buttons to navigate to the desired track.
5. Press the Select button. (To deselect a track, press the Select button again.)
6. Repeat steps 4 and 5 until you have selected all desired tracks or have used
the unit’s available memory.
Page 17

15
CHAPTER 5: Operation
7. Press the REC button to begin recording.
8. Once you press the Record button, the unit will begin recording the selected
tracks into the unit’s digital memory. During the recording process, the audio
being recorded to memory will be heard through the speaker. The unit
automatically switches over to “playback” mode when recording is complete.
5.2.3 P
REVIEWING A
T
RACK ON A
CD
1. Use the left-arrow or right-arrow buttons to navigate to a track.
2. Press the “Preview” button to start preview.
3. Press the “Preview” button again to stop the preview.
5.3 External Recording
1. Insert a 3.5-mm mini plug into the jack marked AUX in.
2. Press the REC button to begin recording.
3. Begin playback of your external source.
4. When finished, press the REC button again to stop recording.
5. Once you press the REC button, the unit will begin recording the content of
external source audio into the unit’s digital memory. During the recording
process, the audio being recorded to memory will be heard through the
speaker.
NOTE
You will not be able to record audio from the CD autoloader with the
cable plugged into the AUX IN jack.
Page 18

16
MUSIC ON-HOLD PLUS
6. Settings
6.1 Impedance Switch
The Impedance switch is located under the cover, on the right side of the unit,
below the Speaker switch. Most telephone systems prefer an 8-ohm output. If you
are working with an older phone system, you might prefer the 600-ohm setting.
6.2 Speaker Switch
The Speaker switch is located under the cover, on the right side of the unit, above
the Impedance switch. To operate, turn the switch to the “ON” position to listen to
program playing from digital memory. Audio being recorded plays through the
speaker, regardless of the speaker switch position. The speaker switch position has
no effect on AUDIO OUT playback.
6.3 Volume Control
The Volume Control switch is located on the rear panel of the unit. It controls the
output level of the AUDIO OUT jack. To adjust the volume, turn the control knob
clockwise to increase the sound. Set the proper volume level by calling in from a
phone close to the unit (or cell phone) and having your call placed on hold.
6.4 Power Switch
The Power switch is located on the rear panel. It turns the power on or off. When
power is on, the LCD is lit
Page 19

17
CHAPTER 7: Other Functions
7. Other Functions
7.1 Remote Trigger
The Remote Trigger 2.5-mm mini jack is located on the rear panel. To operate the
Remote Trigger, connect a momentary switch to this jack. The unit will play audio
content from memory when triggered. The content will play through once and
then reset, ready for the next trigger sequence.
7.2 Auxiliary In
The Auxiliary In 3.5-mm mini jack is located on the rear panel next to the Trigger
jack. To operate the Auxiliary In, connect the audio cable from the LINE OUT or
“headphone out” jack of any external audio source to the AUDIO IN jack. Audio
from an external source (CD, radio, tape, or PC) can be recorded to the unit’s
memory without using the unit’s integrated CD.
Page 20

18
MUSIC ON-HOLD PLUS
8. Adding Additional Memory
8.1 Configuration
The Music On-Hold Plus comes with 8 minutes of flash memory. Memory can be
expanded to 16, 24, or 32 minutes by adding memory modules in 8-minute
increments (via the 8-Minute Memory Expansion Module, part number TE151).
You can place memory modules into three available memory expansion slots
located under the memory expansion access panel door.
8.2 Installing Memory
1. Turn the power switch to the OFF position.
2. Open the player lid.
3. Remove the memory expansion access panel door located to the left of the
CD drive.
4. Carefully insert the 24-pin memory module chip in an open expansion slot
(beginning at the top of the unit).
5. Turn the power switch to the ON position. The LCD will display the
additional memory in the MEM AVAIL counter.
Page 21

1000 Park Drive • Lawrence, PA 15055-1018 • 724-746-5500 • Fax 724-746-0746
© Copyright 2005. Black Box Corporation. All rights reserved.
 Loading...