

Page 1
Page 2

QUICK START
Following is a guide to quickly install and operate your ServSwitch.
Refer to the connection diagram on the following page.
1- Connect your CPUs to the ServSwitch using an appropriate
CPU Adapter Cables. Connect the DB25M end of the CPU
Adapter Cable to the DB25F connector labeled CPU x on the
ServSwitch’s rear panel. Connect the keyboard, mouse, and
video card connectors to your CPUs keyboard, monitor, and
mouse ports.
2- Connect your KVM station to the ServSwitch using an
appropriate KVM Adapter Cable. Connect the DB25M end
of the KVM Adapter Cable to the DB25F connector labeled
monitor / keyboard / mouse on the ServSwitch’s rear panel.
Connect the other end of the KVM Adapter Cable to the
mouse, keyboard, and monitor cables.
3- Connect the power adapter to ServSwitch and a power
source.
4- Turn on ServSwitch
5- Turn on the KVM monitor
6- Sequentially boot the CPUs starting with CPU #1
(You should see the boot up sequence on CPU #1 on the
KVM monitor)
7- Press the #2 select button on the front panel and boot CPU
#2. (You should see CPU #2’s boot up sequence on the
KVM monitor)
8- Press the #3 select button on the front panel and boot CPU
#3. (You should see CPU #3’s boot up sequence on the
KVM monitor)
9- Press the #4 select button on the front panel and boot CPU
#4. (You should see CPU #4’s boot up sequence on the
KVM monitor)
This completes the easy installation process. Refer to the
Installation manual for an expanded explanation of the
installation process and for additional commands.
Page 3
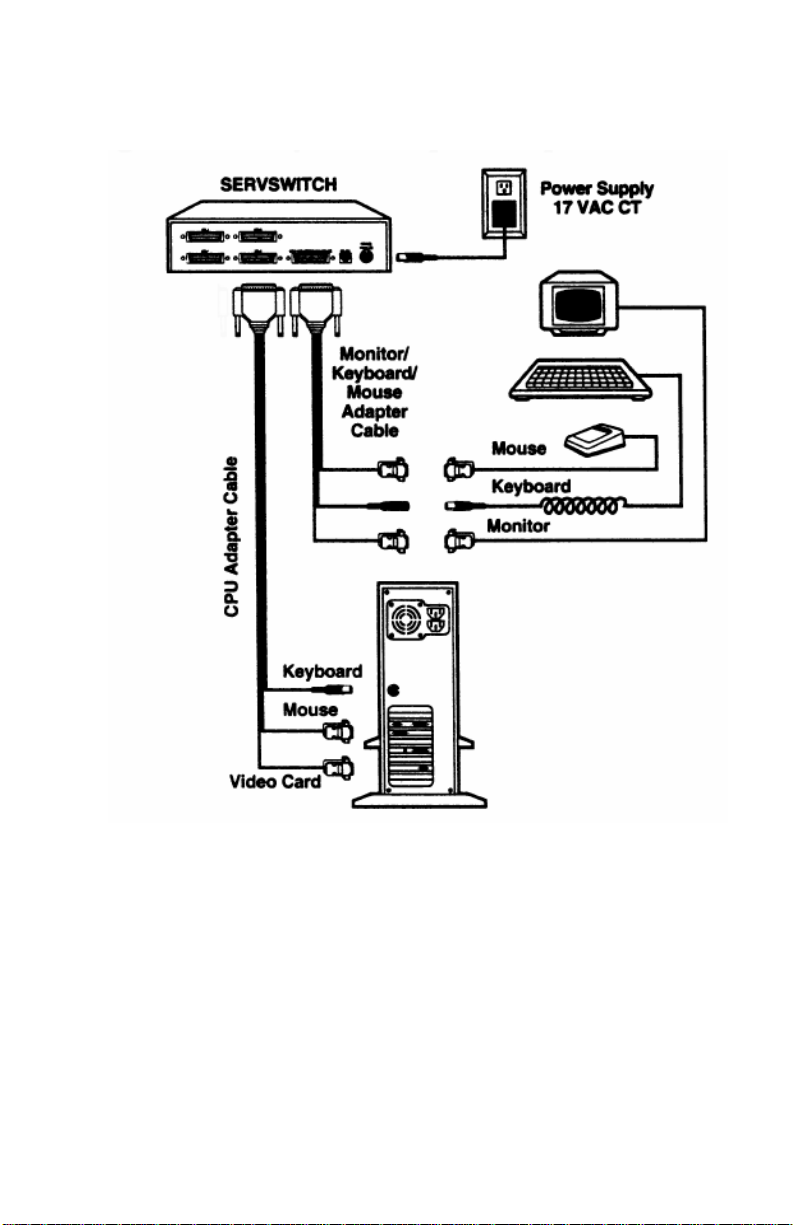
Below shows a basic example of connecting a CPU, a keyboard. A monitor, and a
mouse to the ServSwitch. Connections will vary depending on the types of
equipment you are installing.
Page 4

 Loading...