

Page 1
Order toll-free in the U.S.: Call 877-877-BBOX (outside U.S. call 724-746-5500)
FREE technical support 24 hours a day, 7 days a week: Call 724-746-5500 or fax 724-746-0746
Mailing address: Black Box Corporation, 1000 Park Drive, Lawrence, PA 15055-1018
Web site: www.blackbox.com • E-mail: [email protected]
CUSTOMER
SUPPORT
INFORMATION
DECEMBER 2005
RMT385
19" Sliding Pivoting Keyboard
with Mouse Tray
Description
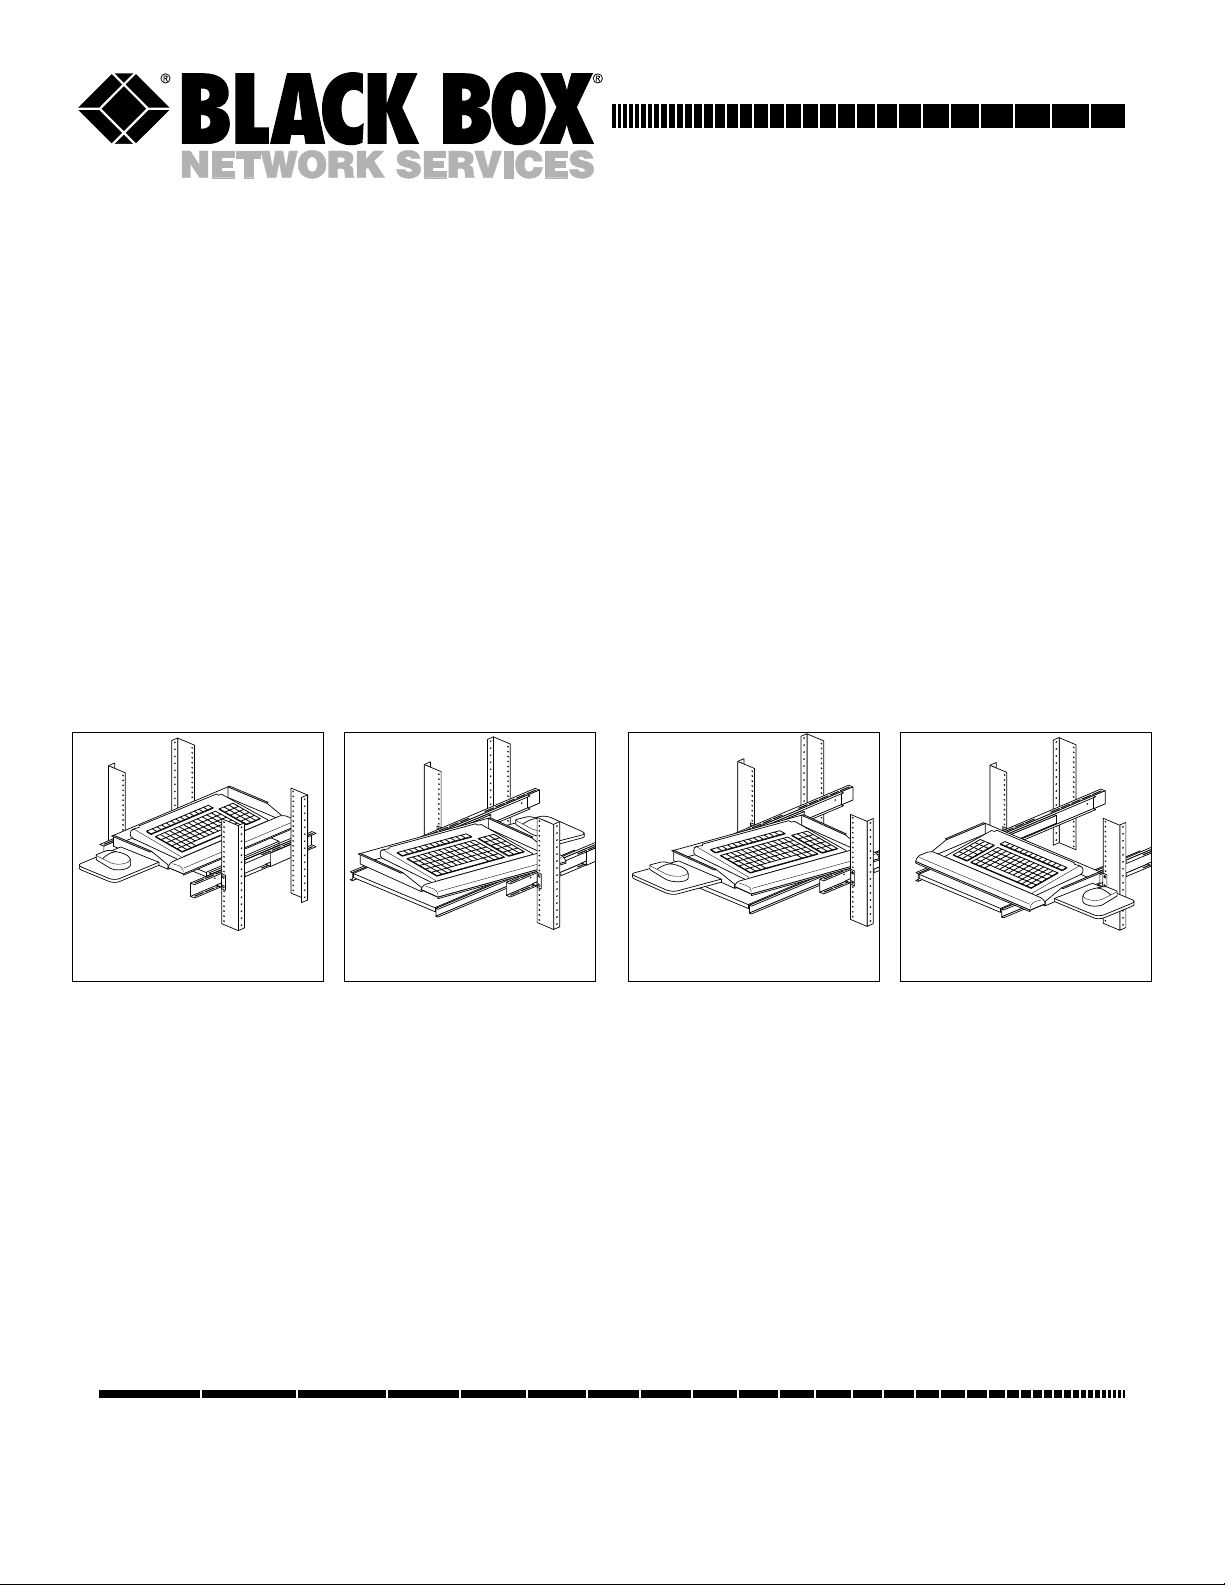
The 19" Sliding Pivoting Keyboard with Mouse Tray is designed for 19" EIA mounting applications. This 20.625"W x
9.5"D tray uses adjustable four-point 19" EIA mounting to swivel, rotate, and slide in sideways in case the keyboard is too
wide for the rack. (See the illustrations below.) Keyboard tray slides provide 19" of travel.
The mouse tray can be mounted on either the left- or right-hand side. The Tray also includes a cushioned wrist rest.
❷(pivoting, with mouse on right) ❹
❶
❸ (pivoting, with mouse on left)
What’s Included
• (1) Keyboard tray with adjustable brackets
• (1) Wrist pad
• (8) 12-24 Mounting screws
• (8) 10-32 Mounting screws
• (8) M6-16 Cage nuts
Installation See the other side of this page for installation instructions.
Page 2
1000 Park Drive • Lawrence, PA 15055 • 724-746-5500 • Fax 724-746-0746
© Copyright 2005. Black Box Corporation. All rights reserved.
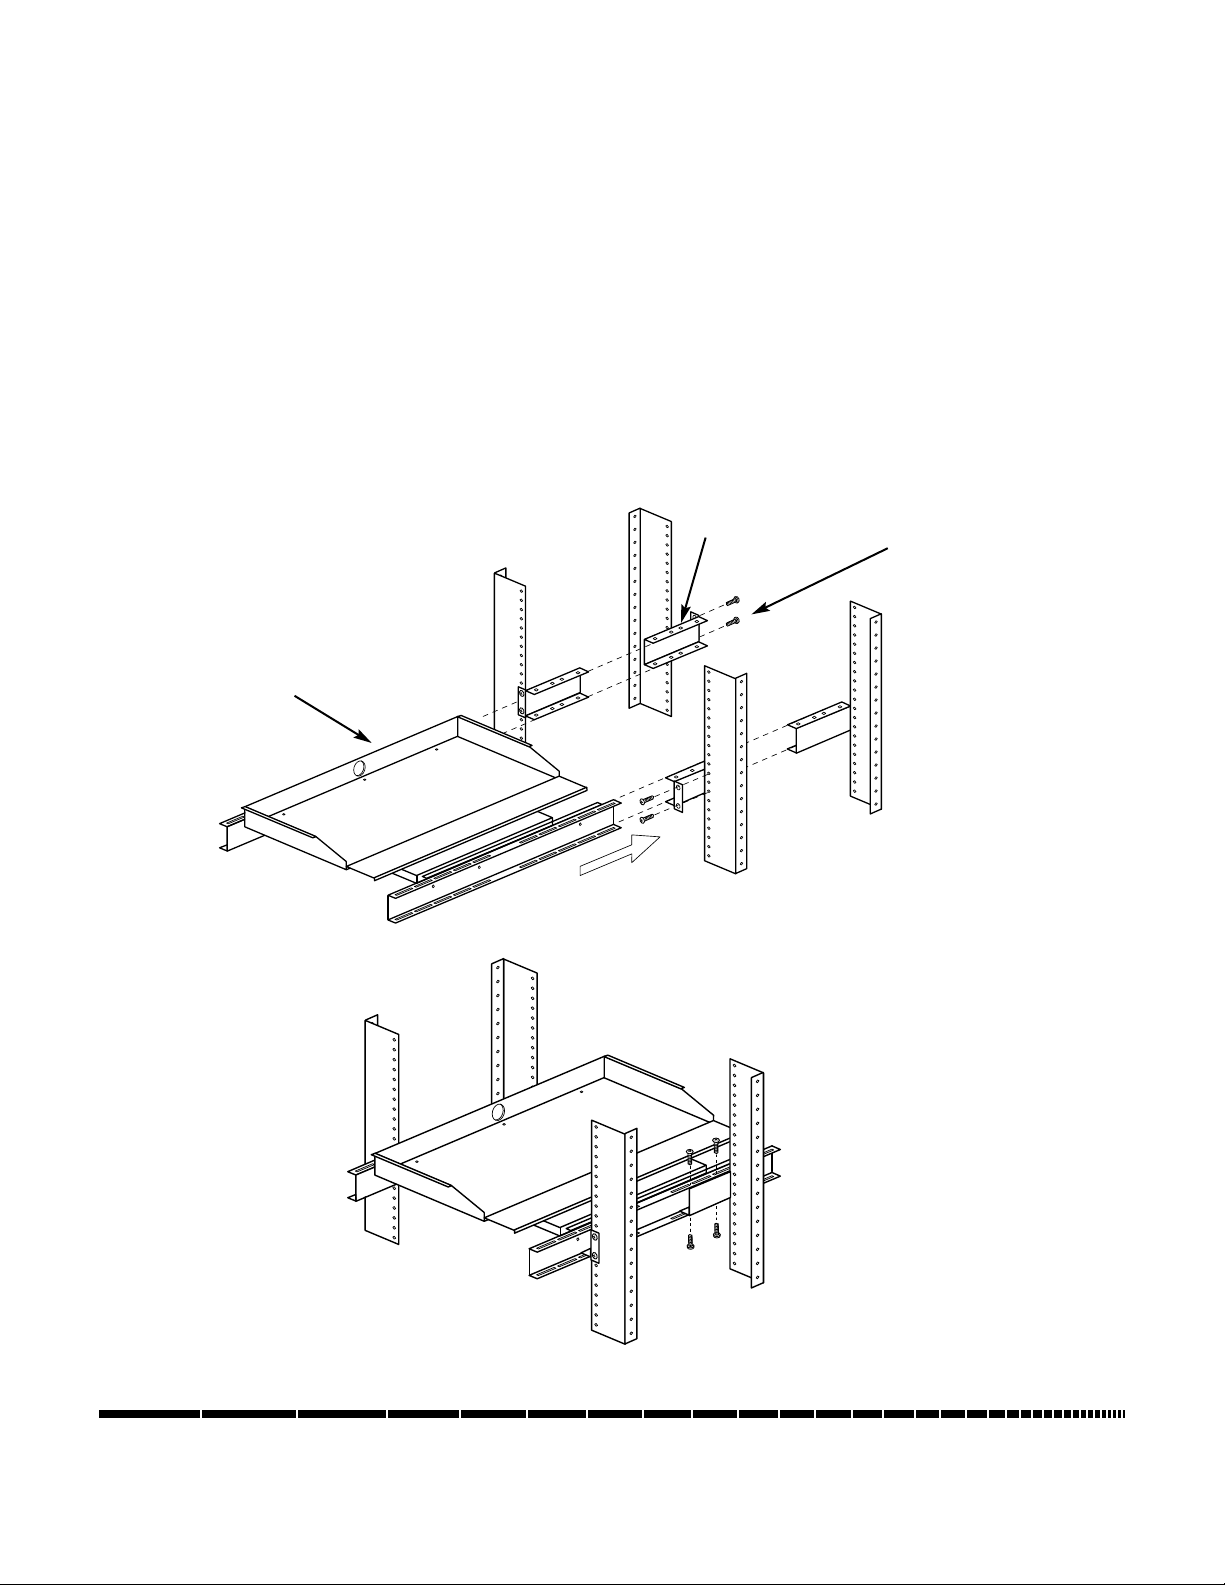
1) Remove the four mounting brackets from the assembled shelf by removing the four screws per bracket
(two on the top and two on the bottom).
2) Mount the four mounting brackets on the mounting rails (at the desired height) as shown in Figure 1
using two 10-32 screws per bracket. Tighten the screws.
3) Slide the shelf onto the mounting brackets so that the mounting brackets are inside the mounting
channels, as shown in Figure 2.
4) Replace the four screws per mounting bracket (two in the top and two in the bottom) so that the shelf is
now secured to the mounting brackets. (See Figure 2.) Tighten all screws.
5) Attach wrist pad to keyboard tray by removing double-sided tape and placing firmly to tray .
Figure 1
Figure 2
Mounting
brackets
Mounting
screws
Shelf
assembly
 Loading...