

Page 1
NL600
————User Manual
浏
Page 2

【Notice】
Thank you for purchasing Black Box.
In order to easily use this device, please read the manual before using.
The product version may upgrade in ceaseless, this document is used only as a
guide. All of representations, informations and advices within this document,
does not constitute any express or implied warranty. If there is any information of
this user manual are subject to change without notice, and don't take any
responsibility that manual errors generated or omissions caused.
【Precautions】
● In order to assure the safety, please select the power adapter appointed or
provided by our factory
● In the boot state, please do not directly pulled out power adapter in order to
avoid suddenly power off caused damage.
● Please do not move the device when it is running.
● Keep far away from high temperature or low temperature environment, try to
keep moisture proof and ventilated working environment.
● Please do not hurl, knock or shake the device, the non-professional workers do
not unpack the device without any guides. improper operating will cause damage
for device.
● Do not clean the device with harsh chemical or corrosive cleaner.
Page 3

Catalogue
1 Component.............................................................................................................................4
2 Connection ............................................................................................................................. 6
2.1 Connect with Monitor .......................................................................................................................... 6
2.2 Connect with Lan Cable .......................................................................................................................8
2.3 Connect with Mouse&Keyboard .......................................................................................................... 8
2.4 Connect with Mic&Speaker ................................................................................................................. 8
2.5 Connect with Power .............................................................................................................................8
3 Operating Instruction...........................................................................................................9
3.1 Remote Connection Settings ................................................................................................................9
3.1.1 Find A Host .................................................................................................................................9
3.1.2 Configuration & Shortcut ..........................................................................................................10
3.1.3 Shutdown & IP address .............................................................................................................11
3.2 Control Panel......................................................................................................................................12
3.2.1 Network.....................................................................................................................................13
3.2.2 Display & Sound ..................................................................................................................... 14
3.2.3 Peripherals & Start ....................................................................................................................15
3.2.4 Date & Time..............................................................................................................................16
3.2.5 Password ...................................................................................................................................17
3.2.6 Upgrade & Reset .......................................................................................................................18
3.2.7 Language Selection ...................................................................................................................19
3.2.8 Software & Hareware
Information.....................................................................................20
3.3 Video Display..................................................................................................................................... 20
3.3.1 Setup of
player....................................................................................................................20
3.3.2 Usage of
player .................................................................................................................20
3.3.3
Button................................................................................................................................. 21
4 FAQ ......................................................................................................................................24
Page 4
1
Component
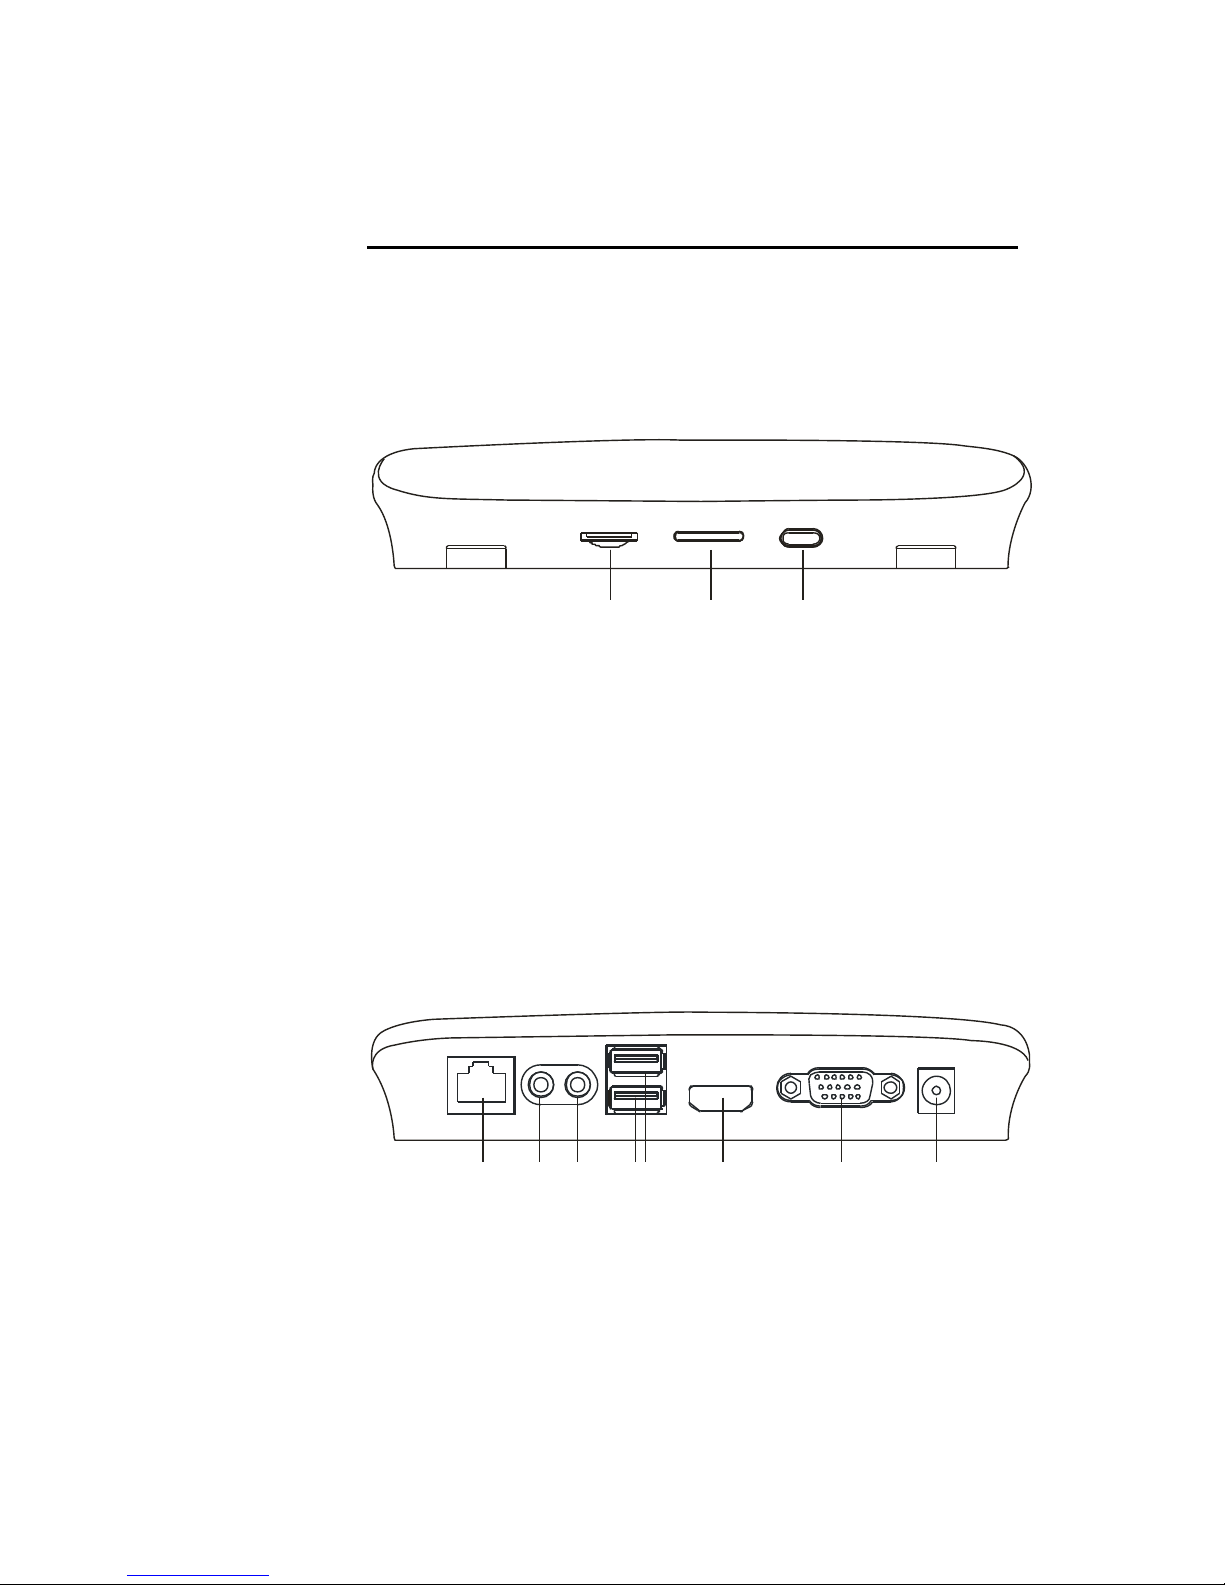
Front Panel
A B C
A:TF card port
B:Nonopaque Bar
C:On/Off button
Back Panel
D E GF H I J
D:RJ45Lan port
E:Audio Output SPK Port
F:Audio Input MIC Port
G:USB Port 1; USB Port 2
H::HDMI Port
Page 5

I:VGA Port
J:5V/2A Power Port
Side Panel
K L
K: USB Port 3
L:WIFI port
Page 6

2
Connection
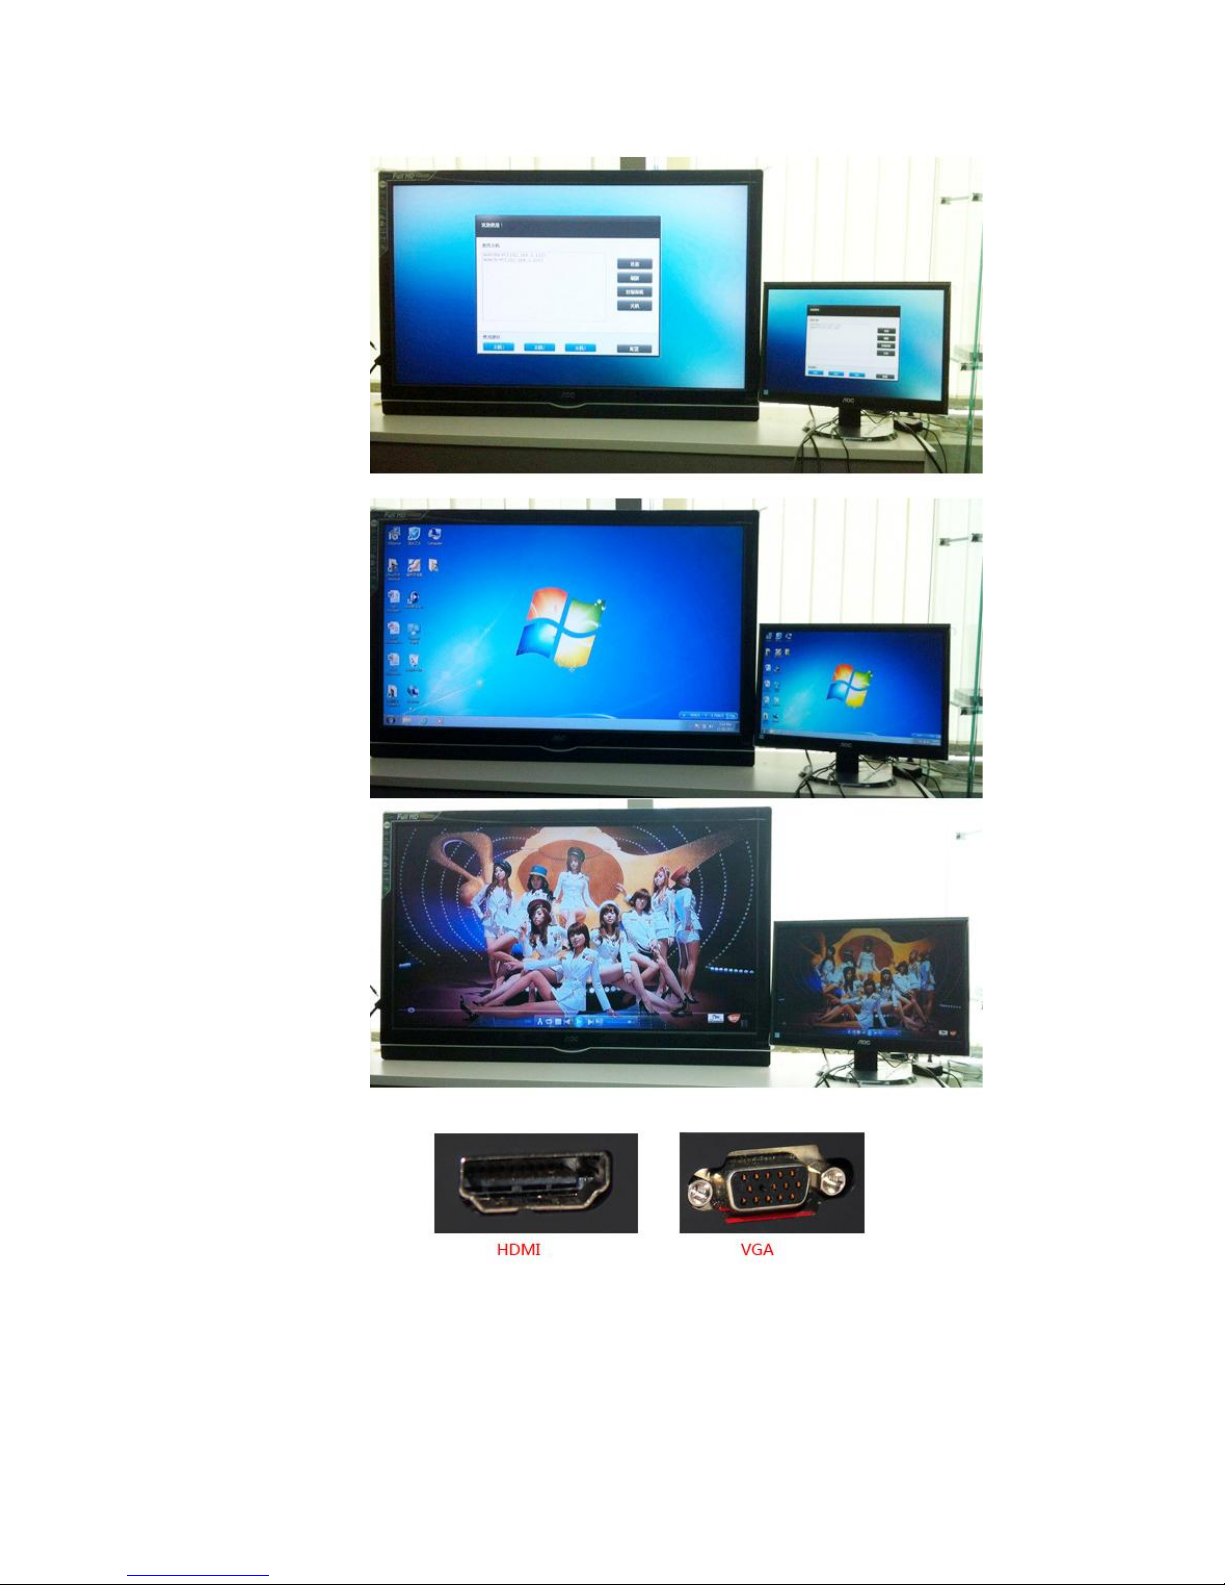
2.1 Connect with Monitor
Pls connect LCD singal wire with VGA port of cloud computer.
Pls connect HDMI singal wire with HDMI port of cloud computer if HD display
is requested,such as HDTV.Cloud computer NL600 can support dual-screen
display.
Page 7
2.2 Connect with Lan Cable
Pls connect lan cable (10~100M ) with lan port of cloud computer,and connect
opposite end with switch or router.
Page 8
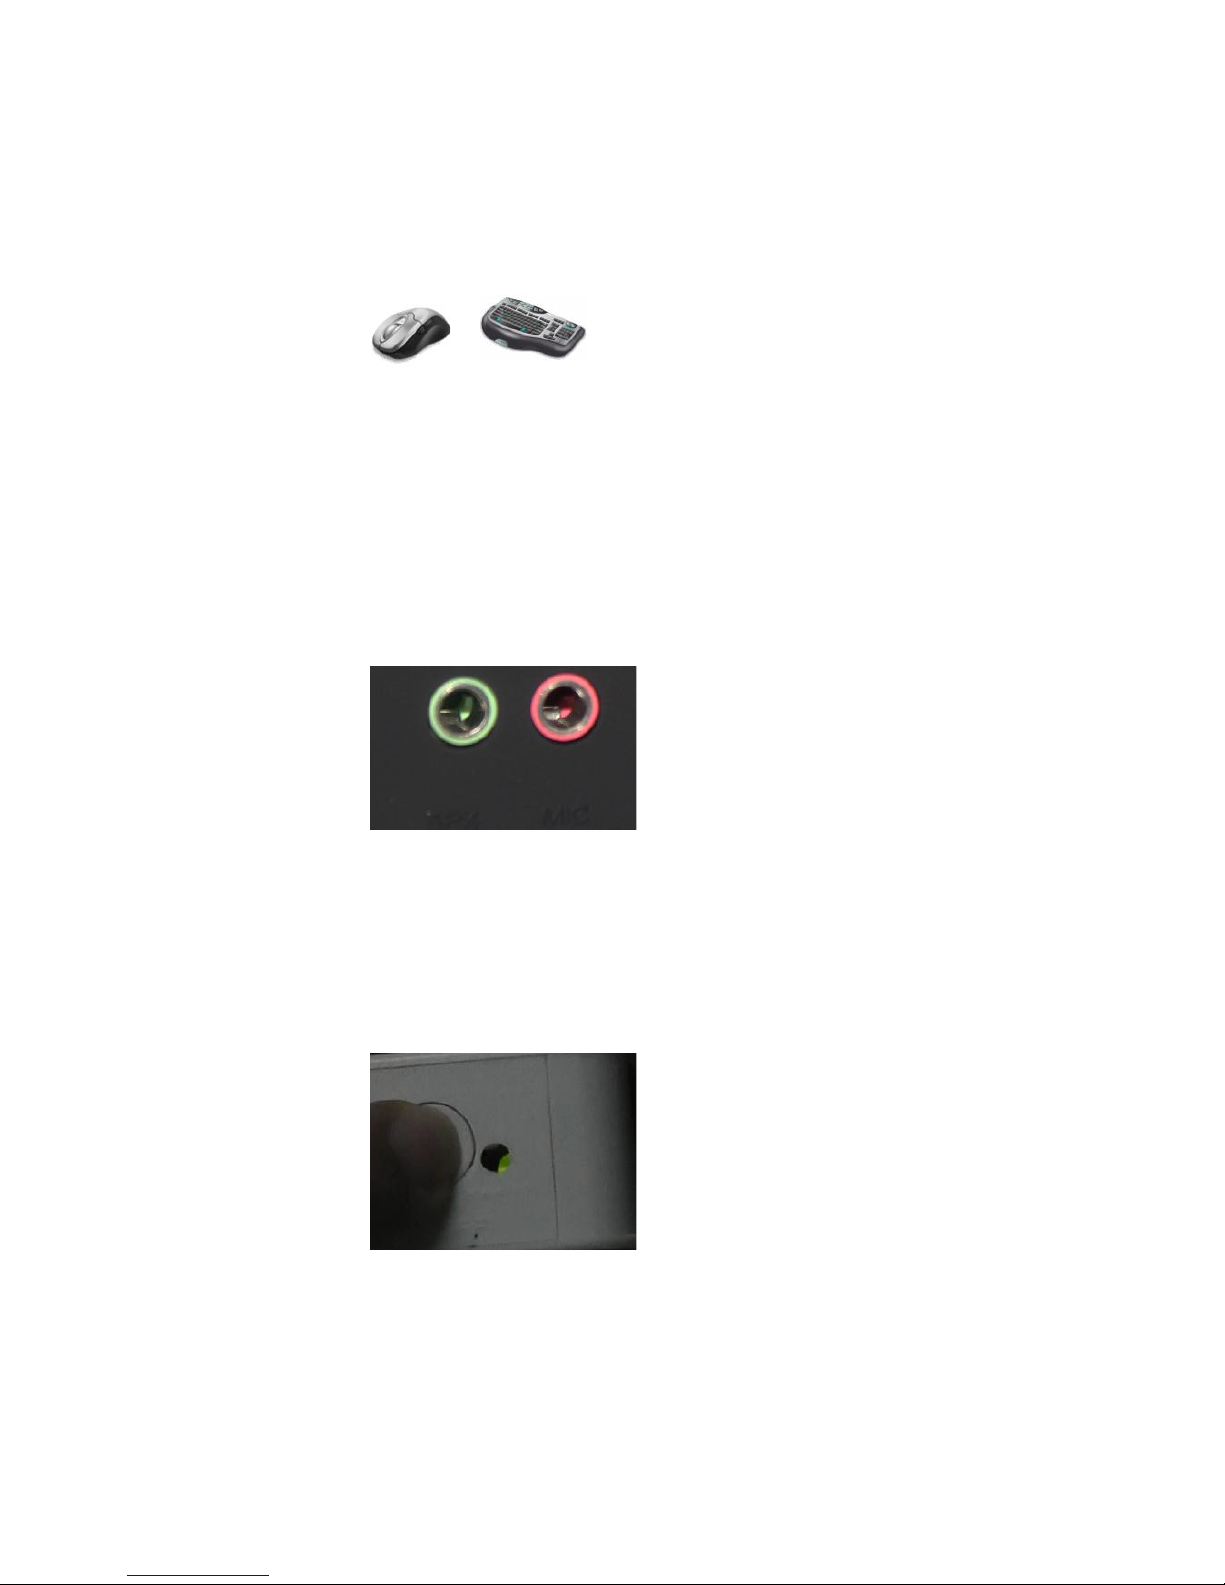
2.3 Connect with mouse & keyboard
Connect mouse & keyboard with cloud computer by USB 2.0 port.
2.4 Connect with Mic & Speaker
1. Connect Earphone with SPK port
2. Connect Mic with MIC port
Note: Earphone port is in green color,and Mic port is in red color.
2.5 Connect with Power
1) Plug power adapter in,the power indicator light will be green color.
Page 9
3. Operating
Instruction
Cloud Computer NL600 is built-in RDP7.1 protocol,it supports 32 bit color and
1080P full screen hd video (local display). NL600 is compatible with 99% of
Windows platform application,brings users a rich windows experience.
3.1 Remote connection Settings
Plug power adapter in, the device enter boots interface.
置
Note: Pls set the resolution in control panel before remote connection,and
choose the network settings according to actual network condition.Other
functions setup according to personal requirements.
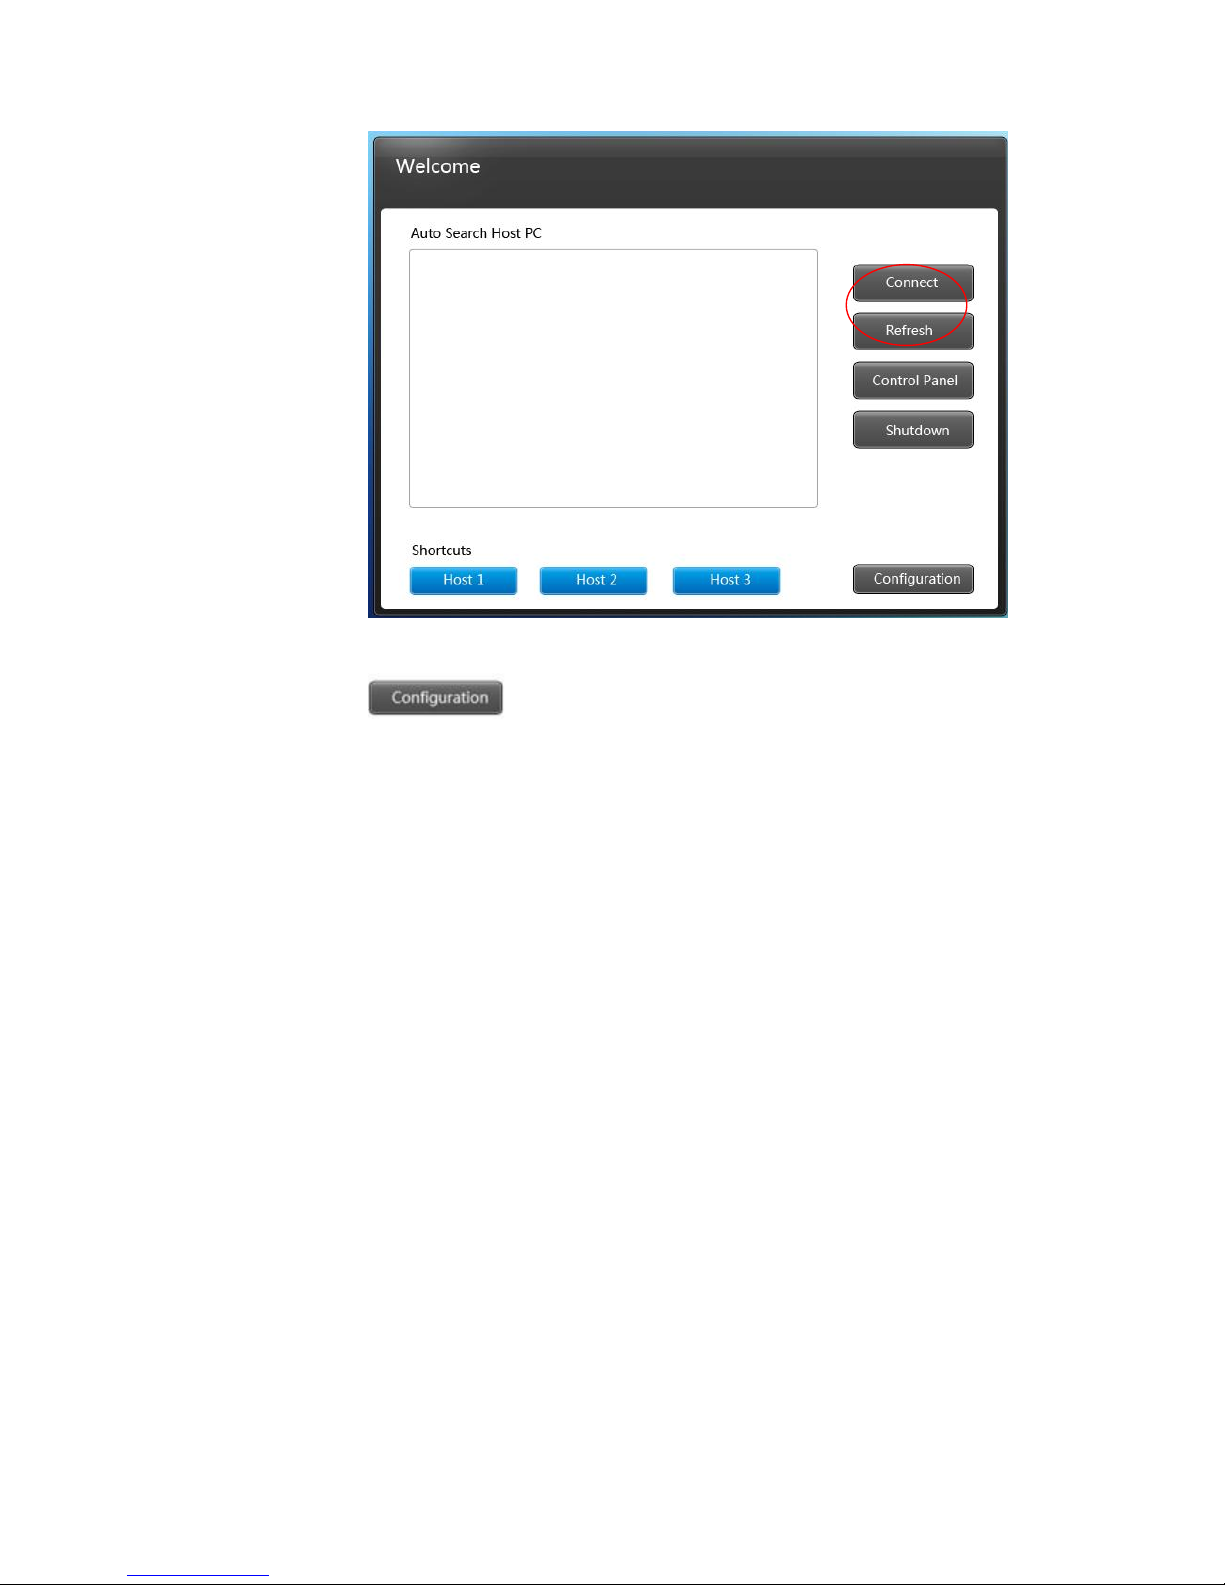
3.1.1 Find A Host
It will automatically search all HOST which has installed Shineplayer , (Pls
note that shineplayer was developed by our company must installed in the server
first.)then choose the host record by double-clicking or clicking "connect" in the
right side,to enter into the login interface.With user name,password,domain and
port info,then enter the remote system.
Note: It may show the host that are not eligible due to network delay,pls click
"refresh" in the right side or reboot the device.
Page 10
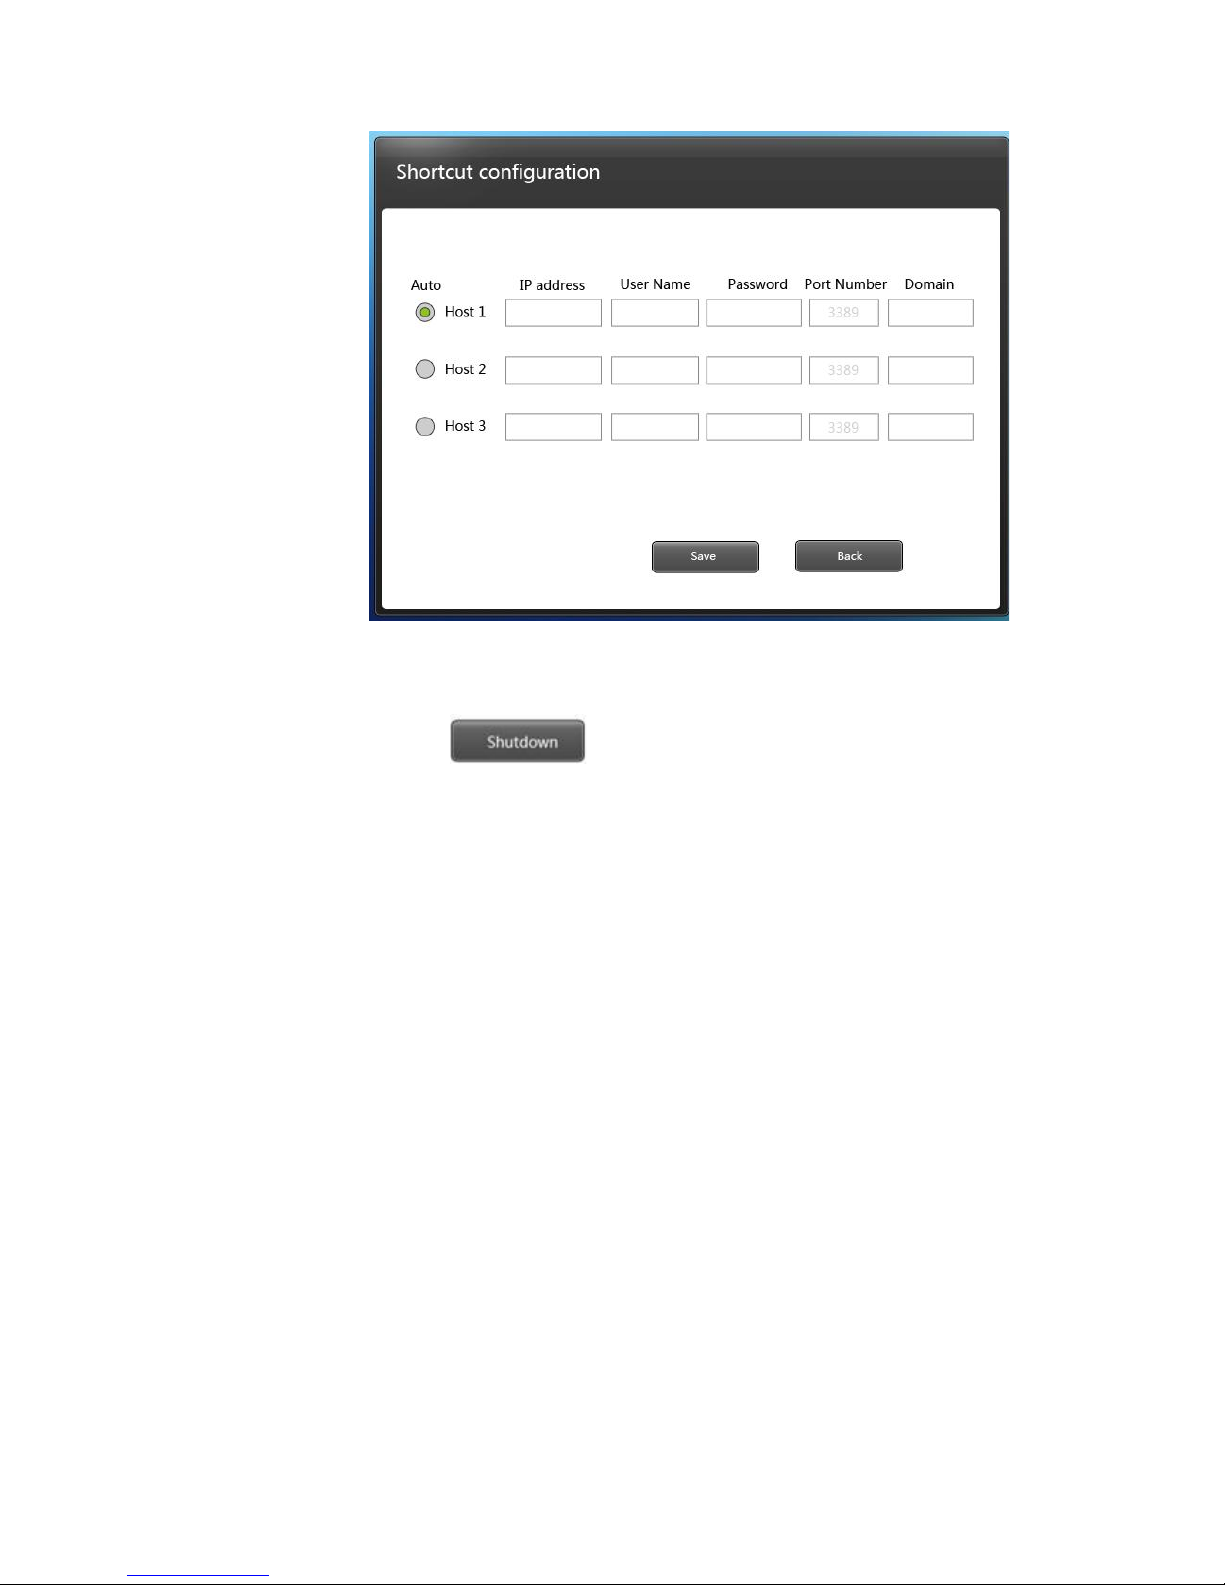
3.1.2 Configuration & Shortcut
To set the related shortcut of HOST login.
Configuration:For example,HOST 1,once user input and save IP address,Host
name,Password,Port & Domain info under Configuration,it can access to the
HOST 1 by the shortcut with info above.
Auto:It will automatically enter into the HOST you choose after rebooting.
If user want to cancel or revise this AUTO function,pls disconnect remote system
then enter the “configuration” for settings.
Note: It needn’t to input domain if there is not domain in the server.
Port Info is 3389 by default. User can input the new number only when port info
is revised in the server, or it is no need.
Page 11
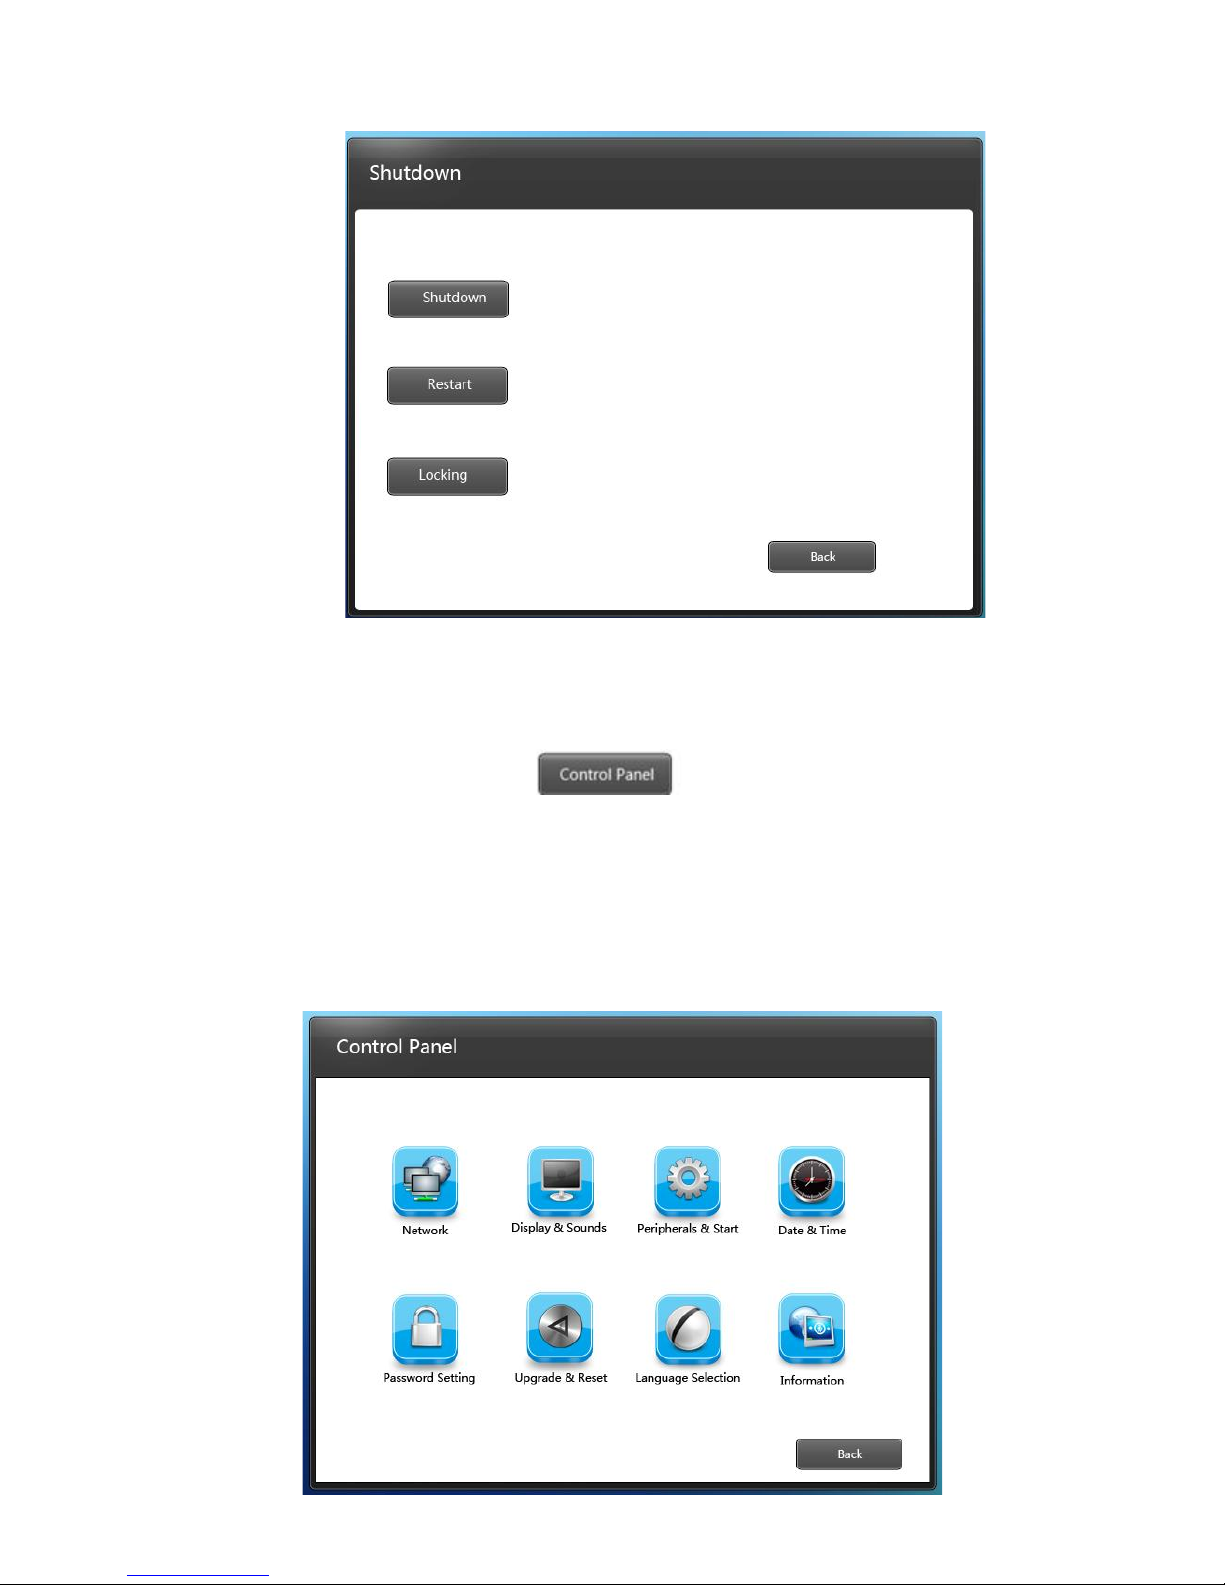
3.1.3 Shutdown and Local IP
Shutdown click this button, device will shutdown, restart and
locked.
After clicking this button , the indicating light will turn red ,the device goes into
electricity-saving state. To wake up the device , you only need to push the
standby or restart key .
When you click the “Lock” key ,the interface will stay in a locked state ,the
“Lock” icon shifts into “Unlock ” ,click it one more time will unlock the
interface .
Page 12
Local IP : When linked to network, it will show the IP address of the device.
3.2 Control Panel
Password of control panel : the default password is empty, needn’t to input
There are eight settings in total :Network display and Sound ,Peripheral and
Start
Date and Time ,Password, Upgrade and Restore, Language Selection, System
information.
Page 13

3.2.1 Network
This function is mainly used to set the network of the device ,when using static
state , such as the subnet mask ,route , DNS must in accord with current
network.
Network test : Manually used to test if the device and target host computer
are connected .
Input IP address of target host computer into :Destination” ,test number of
times into “Number of times “ ,then click “Test” , test result page will display
information of network test ,MAC address of the Device will be displayed at the
left bottom.
If the test page don't have rection or slow in reacting , please check if the
network cable has been plugged well , columns of “Destination ” and “ Number
of times ”have been input completely and if the target host computer is in
starting state .
Page 14
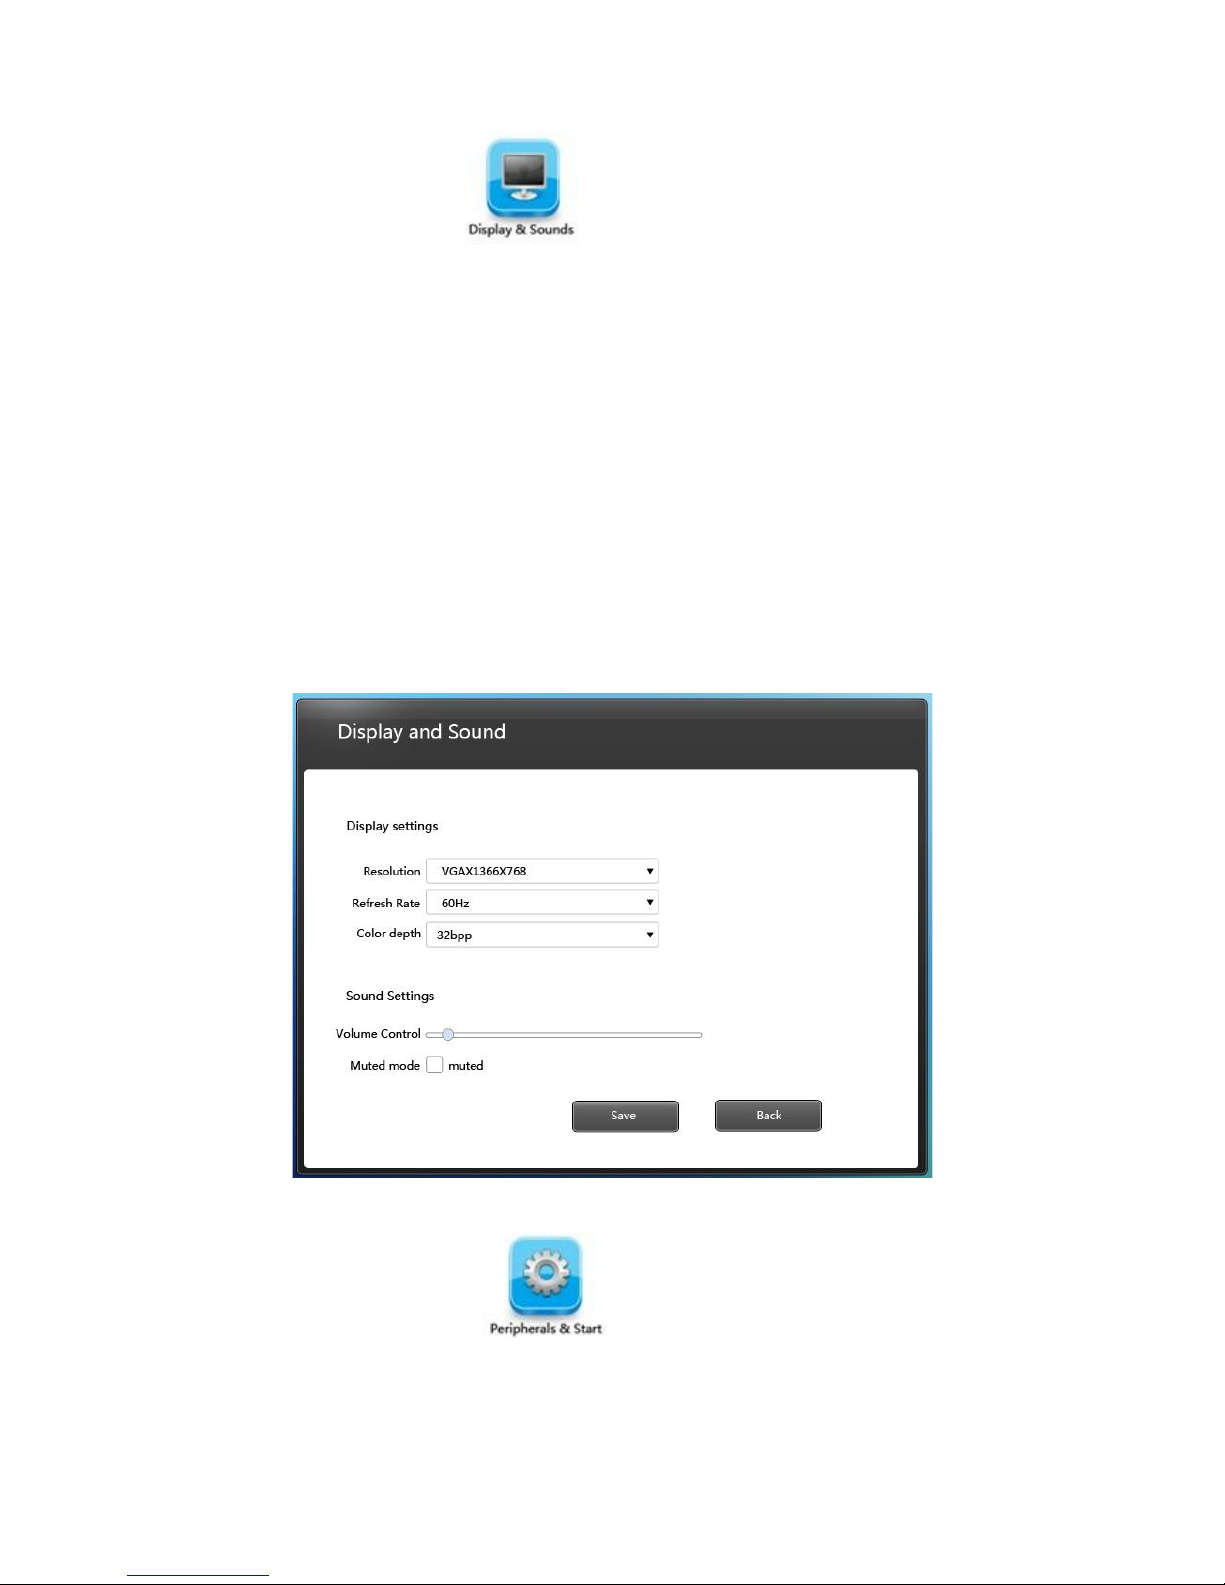
3.2.2 Display and sound
Set up functions of display and sound after connected with Remote
Desktop .
Resolution : choose resolution according to the size of monitor , using
mouse to click the icon of inverted triangle behind “ Resolution” button , then
optional list of resolution will be opened , click “ Save “ after selection , the
system will restart itself automatically to load the new resolution .
Refresh rate : default 60 HZ
Color depth: there are 16 bit and 32 bit to choose from the color display list
after connected with the Remote Desktop
Souns volume : dragging the slider to adjust volume when connected with
Remote Desktop
Sound off : choose it to turn on or off the “ sound off ” state when connected
with Remote Desktop .
3.2.3 Peripheral and start
Select access equipments used in “Remote” mode
Forbid U-disk :The U-dish can’t use on remote mode after choosing this icon.
If you want to use U disk in “ Remote ” mode , cancel the selection, then
function of U disk will be opened .The default for this function is on state
Page 15
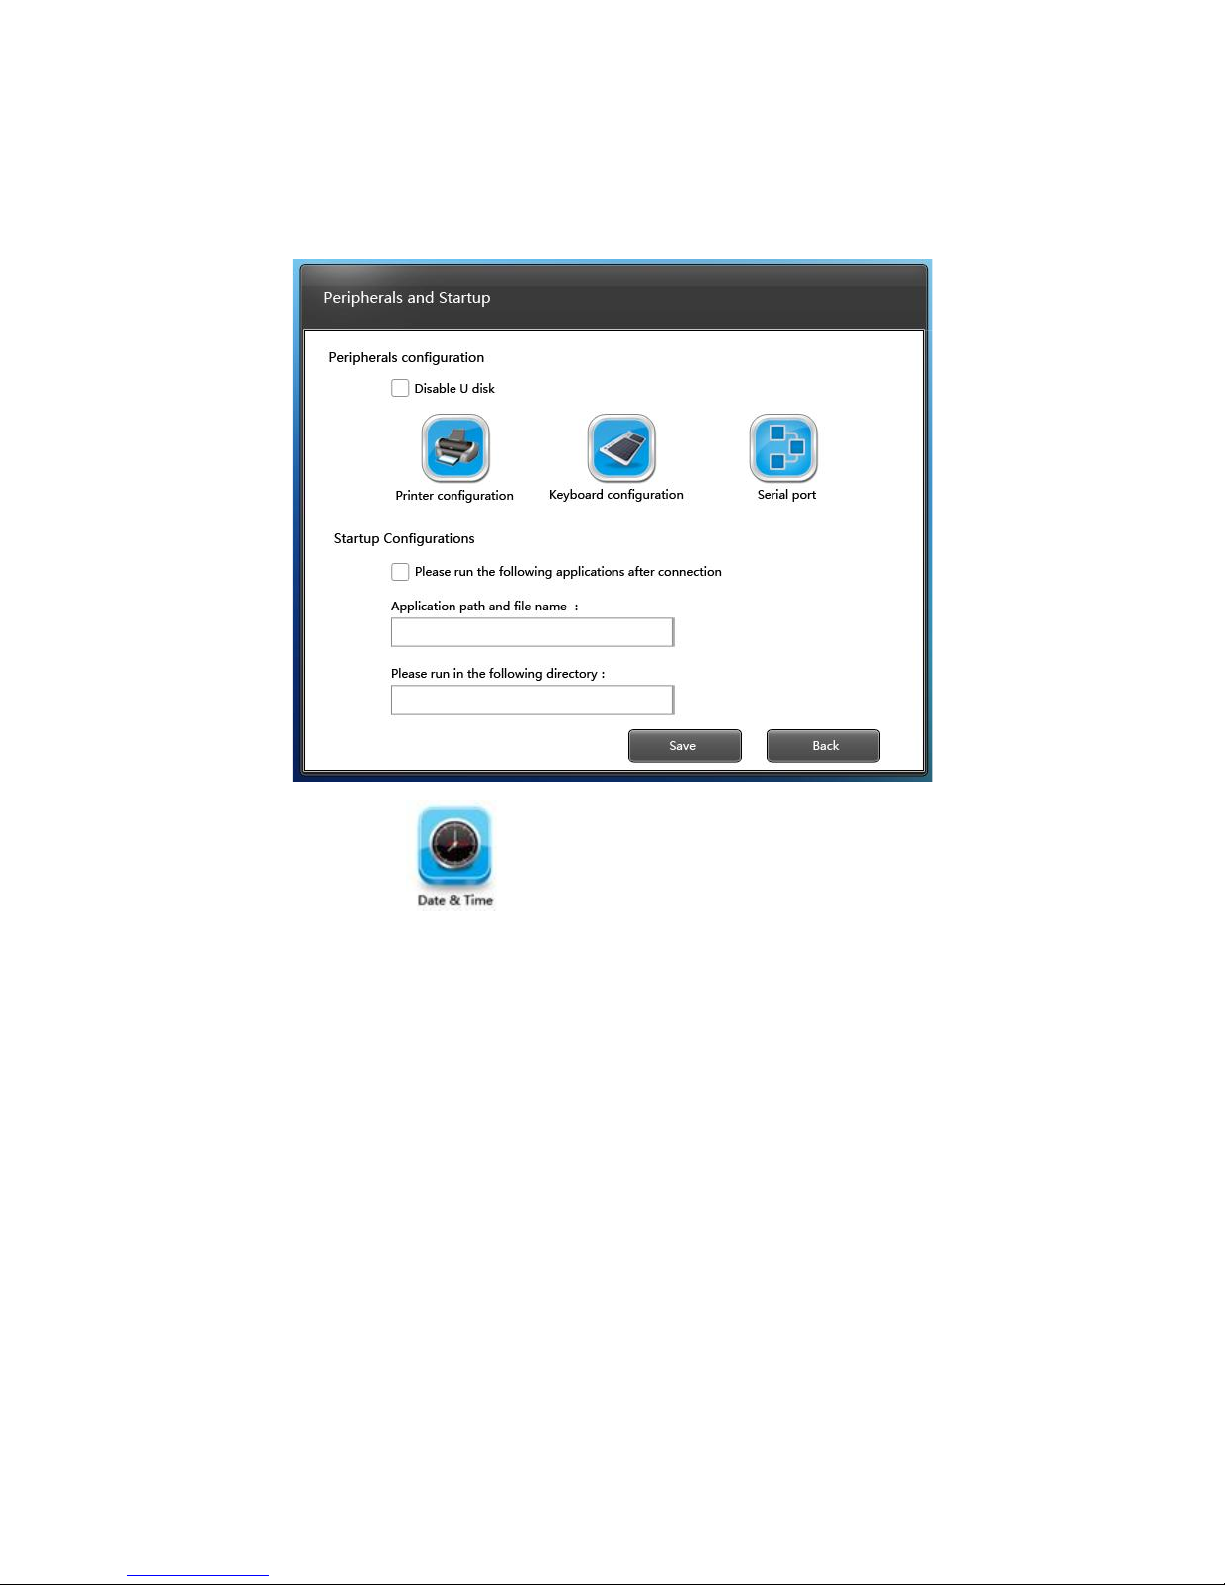
Do not support : printer, keyboard ,serial, set up of startup temporarily .
3.2.4 Date and time
Used to check date and time in Control Panel .
Click the left or right green icon in date column to adjust month ,use the cursor to
click “month” or choose from the drop-down list to set month .
Use cursor to choose year ,you can fast input the year you need directly or click
the up or down black triangle arrow to adjust year .
Choose time : use the cursor to choose “hour ”, “ minute” , “second ” ,
input the time you need directly or use the up or down arrow to set it .Click the
“Save” icon below to save the settings of date and time you have set .
Page 16

3.2.5 Password
System default password is empty
Change password : after changing password , exit Control Panel and enter
again ,you need to input the new password
Create password : when you change the password to empty , you can create a
new password in this column.
Page 17

3.2.6 Upgrade and restore
This function is used to do the upgrade and restore to default of the device
Local upgrade : Copy upgrade bag to U disk or SD card , then click local
upgrade , the device will be upgraded to new version .
Attention: Please wait patiently during the upgrading process , please do not
move the device, do not draw out U disk , do not cut off electricity .
Restore to default
This function will restore the device to factory state, please use it cautiously .It
will clear off all the settings .
Saving settings : this option is used to save related settings set in current
control panel .
The settings will be save as a file , when you need to use them next time ,just
load them .
Loading settings: execute loading process to settings saved by users , use the
cursor to choose saved rdp suffix files , double click it will load and reproduce
saved settings of last time , choose “ delete file point ” can delete this setting
file .
If the current resolution and that of saved settings are the same , the system will
not restart during loading process ,if not ,the system will restart itself and
then the resolution take effect .
Page 18

3.2.7Language option
Select language displayed in Control Panel , Support Multi-Language version
as blew: Chinese, English, French ,Japanese, Thai ,Portuguese
Choose one language then click “Save” to save the current selection , click
“Return” to cancel selection .
3.2.8 Information of software and hardware
3.3Video play
3.3.1 Setup of player
Put the setup.exe and ShinePlayer.msi of the disk under the catalogue of server
host machine. Double click stup.exe file , install playing plug-in units of server
port .
After the installation ,restart the host machine .
3.1.2Usage of player
1)Choose the player icon and double click it to open it in the remote desktop ,then add
some files to play.
Page 19

2)Choose a video file ,click the right button of mouse and select “Using Shine
Player to open it ” in menu list to use the player .
3.3.3 Button Feature
Open single file
Minimize player interface
Exit player interface
Play Video file at random
Play Video file circularly
Stop play video
Playing status, click once is for the suspended state
Short Press will switch to next or previous file, long press will fast
forward or fast backward
Click will switch to muted state
Volume bar, drag the slider to adjust the video volume
Page 20

Note:Please adjust video volume on display menu panel when plug HDMI cable.
Video progress bar, drag the slider directly to adjust fast
forward and fast backward.
The former is for present video playing time ,and the latter is for
Video total duration.
Click enter into the list of the files ,that is the interface as below,
You can add multiple files on the list interface ,below the green font bar
that displays the number of the add files.
Page 21

Select one file and click then will delete the listed file records ,such as
shown below is the interface for one deleted file from the list .
Double-Click the selected file can be played. ,click will exit from the
list ,back to play interface.
4 Configure Sever
4.1 Configure with windows
4.1.1 create new account
1.open control panel ,open User Accounts
Page 22

2. open create a new account
3.New account name,”next”
Page 23

4.pick an account type(XP is “Computer administrator ”)”Create Account”
Page 24

6. “createa password”
7.user password,”Create Password”
Page 25

8. create other new account
Page 26

2.1setting Remote desktop user
1.My computer,”Properties”
2.”Remote”,”allow
users to connect remotely to thin computer ”。
Page 27

3.”Select Remote Users…”
Page 28

Page 29

5.”find Now” user name,”OK”
6.”OK”
Page 30

7.”OK”
8.”OK”
Page 31

Page 32

3.1setup system
1.OPEN autorun.exe
2.”Run”
Page 33

3.Open
system(XP-SP2-SP3)”register
Componts”
Page 34

4.”RUN”
Page 35

Page 36

6. “Simple Installation”
Page 37

Page 38

8.”OK”
Page 39

Page 40

4.2 Configure with Linux
XRDP connect with LINUX OS remotely
Usually we use ssh client to login in linux OS remotely,and vnc will be considered once
linux remote-login tool is mentioned.but it has the insufficient security.Hereby we
introduce how to install and configure XRDP.
How to install and configure XRDP
1、If that is Debian Distro,set the resource first,and then apt-get install xrdp.
If RedHat Distro,u can download the package from here.http://xrdp.sourceforge.net
xrdp replys on pam and openssl-del,it request to install pam-devel and openssl-devel
before Compile.(the name maybe a bit different if different Distro)
2、To download xrdp package,and unzip it by tar-xwzf;
In the directory of that package has unzipped,to do MAKE by ROOT
account,and then do MAKE INSTALL.
3、Xdrp requests vnceserver,so it needs to install vncserver first.
4、After above steps is ready,there is Script (xrdp-control.sh) of directory
Page 41

(NL600)
- 20 -
(Instfiles),user can start xrdp
xrdp-control.sh start of this script,
User can add this script into /etc/rc.d/init.d/,let it run automatically when booting.
5、Make sure xrdp is running,and connect with rdp client of server,it can use mstsc if
windows server,and it can use rdesktop or krdp if linux server.
module choose sesman-Xvnc
6、xrdp.ini and sesman.ini of directory /etc/xrdp,configuration documentation of xrdp
xrdp,ini keys at globals.
[globals]
bitmap_cache=yes
bitmap_compression=yes
port=3389
crypt_level=low
channel_code=1
sesman.ini
[Globals]
ListenAddress=127.0.0.1
ListenPort=3350
EnableUserWindowManager=1
UserWindowManager=startwm.sh
DefaultWindowManager=startwm.sh
[Security]
AllowRootLogin=1
MaxLoginRetry=4
TerminalServerUsers=tSUSErs
TerminalServerAdmins=tsadmins
[Sessions]
MaxSessions=10
KillDisconnected=0
IdleTimeLimit=0
DisconnectedTimeLimit=0
[Logging]
LogFile=./sesman.log
LogLevel=DEBUG
EnableSyslog=0
SyslogLevel=DEBUG
After installation,we can login in directly by runing mstsc of windows OS.
And, it requests to run rdesktop if linux OS.
Page 42

(NL600)
- 21 -
5 FAQ(Frequently Asked Questions)
What is RDP?
Remote Display Protocol (RDP) is a proprietary protocol developed by Microsoft,
which based on multi-user windows and provides a user with a graphical interface to
another computer over a network connection. Mainly used to connect Windows
2003Server or Windows Server 2008 with a client service.
Which video file can't be played?
This product support RMVB, RM, AVI, MP4, MKV, FLV, and WMV main stream
formats. Firstly check if the file formats is supported by this product or not, for those
file formats cannot be supported by the product, it may can't be played; if supported
file format can't be played, please use the computer play this file, if it still can't be
played, maybe the file has been damaged.
Flash device doesn't recognize.
Please exit remote interface, back to Control Panel in Welcome page, view in the
Peripherals and Set up , and confirm disable Flash device is not selected, if still doesn't
recognize, please confirm whether the Flash device can be recognized on the computer
or not.
The LAN already connected, but the cloud computer welcome page
can't refresh the server information.
Please make sure cloud computer has installed authorized Shine Player, manual refresh
identification, if still can't refresh out, please input “services.msc” on server start->run,
open the service manager, check whether Terminal Service start or not, and please set
this service on auto start.
How to install player software?
Please confirm the computer have installed dotNetFx Service, if not please install,
please uncompressed the player software on the server any directory, then double-click
setup.exe, start install, after that restart computer; it can use after boot, note: if the
computer has installed 360antivirus software, please choose allowed to use.
When the player installation appear code for 1001 wrong tip.
Page 43

(NL600)
- 22 -
Please input “cmd” on start->run, open the console, and input "sc delete Terminal
Service", key Enter, exit console, and reinstall again.
No sound on remote desktop mode
Please exit remote interface, back to control panel in welcome page, check whether
mute are selected in display and voice or not. If the video is still no sound, please
check whether the sound service is running in task manager or not, if running, then
terminate the service and reopen.
How to modify server port?
1.Open start->run , input “regedit”, open the registry, go in the path
[HKEY_LOCAL_MACHINE\SYSTEM\CurrentControlSet\Control\TerminalServer\
Wds\rdpwd\Tds\tcp]
Find out “Port Number”, its default value is 3389, you can changed to which port you
want, e.g 3380,Pay attention to use the decimal.
Turn it on again
2.[HKEY_LOCAL_MACHINE\SYSTEM\CurrentControlSet\Control\TerminalServer\
WinStations\RDP-Tcp]
Find out “PortNamber”,it default value is 3389,you can change to which port you want,
such as 3380. Pay attention to use the decimal. If the Windows system is XP or 2003,
just reboot system and use the port 3380 for remote desktop connection.
3.[In Vista or Win7, the Client is still unable access to remote desktop connection.
Because the Vista or Win7 has own firewall. You also need to modify firewall policy
through registration list.
Go in
[HKEY_LOCAL_MACHINE\SYSTEM\CurrentControlSet\services\SharedAccess\De
faults\FirewallPolicy\FirewallRules],Find out “Remote Desktop-In-TCP”, changed all
of 3389 to 3380, and go in again
[HKEY_LOCAL_MACHINE\SYSTEM\CurrentControlSet\services\SharedAccess\Pa
rameters\FirewallPolicy\FirewallRules],Find out “Remote Desktop-In-TCP”, changed
all of 3389 to 3380 ,save and reboot computer will only take effect, then you can use
the port 3380 for remote desktop connection in future.
How to set up the display resolution for device?
Please long press standby or restart button, after reboot the display resolution will be
automatically reset to default 720P, interface is normal display.
Page 44

(NL600)
- 23 -
Individual monitor cannot reach the best performance regardless of which resolution
Open panel menu on display , select automatically adjust size.
When the device choose 32-bit color, remote desktop icon display still
fuzzy, you need to do the following settings on the server :
When virtual machine operate system is Win7, enter into control panel -Appearance
and Personalization-adjust resolution-senior setting-monitor-color-true color(32 bit)
save and then ok.
When virtual machine operating system is WIN XP, enter into virtual desktop, in the
taskbar click "start" > "run", display operation window,input command"MMC" in
operation window and click "ok".
1.Click ‘‘add’’ and select ‘‘Standalone Snap-in’’ -‘‘Group Policy Object Editor’’.
Page 45

(NL600)
- 24 -
2.Click ‘add’, display window "Select Group Policy Object’’, click“ finish”.
3.Add Group Policy Object successfully as shown
Page 46

(NL600)
- 25 -
4.On left side "Local Computer Policy" choose "Computer
Configuration>Administrative Templates>Windows Components>Terminal Services",
as the picture:
5.double-click "maximum color depth limitation", display "maximum color depth limitation
property" as picture shown, choose "24-bit", click confirm
Page 47

(NL600)
- 26 -
Page 48

(NL600)
- 27 -
 Loading...