

Page 1
CUSTOMER
SUPPORT
INFORMATION
Order toll-free in the U.S. 24 hours, 7 A.M. Monday to midnight Friday: 877-877-BBOX
FREE technical support, 24 hours a day, 7 days a week: Call 724-746-5500 or fax 724-746-0746
Mail order: Black Box Corporation, 1000 Park Drive, Lawrence, PA 15055-1018
Web site: www.blackbox.com • E-mail: info@blackbox.com
FEBRUARY 1999
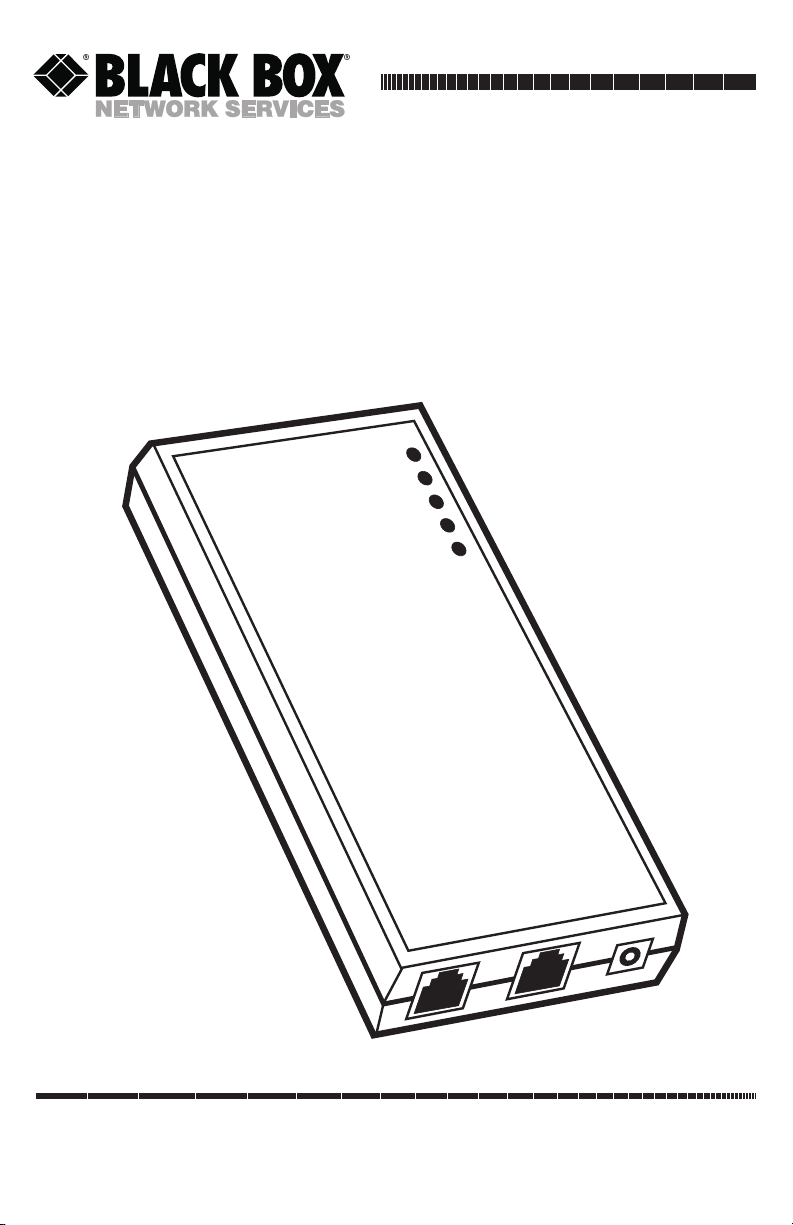
LZ6000A-R4
10BASE-T Extender
Power
10BASE-T
Single UTP
10BASE-T Extender
Jabber
Link Test
Activity
Power
Collision
Page 2

1
10BASE-T EXTENDER
FEDERAL COMMUNICATIONS COMMISSION
AND
INDUSTRY CANADA
RADIO FREQUENCY INTERFERENCE STATEMENTS
This equipment generates, uses, and can radiate radio frequency energy and if not
installed and used properly, that is, in strict accordance with the manufacturer’s
instructions, may cause interference to radio communication. It has been tested
and found to comply with the limits for a Class A computing device in accordance
with the specifications in Subpart J of Part 15 of FCC rules, which are designed to
provide reasonable protection against such interference when the equipment is
operated in a commercial environment. Operation of this equipment in a
residential area is likely to cause interference, in which case the user at his own
expense will be required to take whatever measures may be necessary to correct
the interference.
Changes or modifications not expressly approved by the party responsible
for compliance could void the user’s authority to operate the equipment.
This digital apparatus does not exceed the Class A limits for radio noise emission from
digital apparatus set out in the Radio Interference Regulation of Industry Canada.
Le présent appareil numérique n’émet pas de bruits radioélectriques dépassant les limites
applicables aux appareils numériques de la classe A prescrites dans le Règlement sur le
brouillage radioélectrique publié par Industrie Canada.
Page 3

2
10BASE-T EXTENDER
NORMAS OFICIALES MEXICANAS (NOM)
ELECTRICAL SAFETY STATEMENT
INSTRUCCIONES DE SEGURIDAD
1. Todas las instrucciones de seguridad y operación deberán ser leídas antes
de que el aparato eléctrico sea operado.
2. Las instrucciones de seguridad y operación deberán ser guardadas para
referencia futura.
3. Todas las advertencias en el aparato eléctrico y en sus instrucciones de
operación deben ser respetadas.
4. Todas las instrucciones de operación y uso deben ser seguidas.
5. El aparato eléctrico no deberá ser usado cerca del agua—por ejemplo, cerca
de la tina de baño, lavabo, sótano mojado o cerca de una alberca, etc..
6. El aparato eléctrico debe ser usado únicamente con carritos o pedestales que
sean recomendados por el fabricante.
7. El parato eléctrico debe ser montado a la pared o al techo sólo como sea
recomendado por el fabricante.
8. Servicio—El usuario no debe intentar dar servicio al equipo eléctrico más allá
a lo descrito en las instrucciones de operación. Todo otro servicio deberá ser
referido a personal de servicio calificado.
9. El aparato eléctrico debe ser situado de tal manera que su posición no
interfiera su uso. La colocación del aparato eléctrico sobre una cama, sofá,
alfombra o superficie similar puede bloquea la ventilación, no se debe colocar
en libreros o gabinetes que impidan el flujo de aire por los orificios de
ventilación.
10. El equipo eléctrico deber ser situado fuera del alcance de fuentes de calor
como radiadores, registros de calor, estufas u otros aparatos (incluyendo
amplificadores) que producen calor.
11. El aparato eléctrico deberá ser connectado a una fuente de poder sólo del
tipo descrito en el instructivo de operación, o como se indique en el aparato.
Page 4

3
10BASE-T EXTENDER
12. Precaución debe ser tomada de tal manera que la tierra fisica y la polarización
del equipo no sea eliminada.
13. Los cables de la fuente de poder deben ser guiados de tal manera que no
sean pisados ni pellizcados por objetos colocados sobre o contra ellos,
poniendo particular atención a los contactos y receptáculos donde salen del
aparato.
14. El equipo eléctrico debe ser limpiado únicamente de acuerdo a las
recomendaciones del fabricante.
15. En caso de existir, una antena externa deberá ser localizada lejos de las lineas
de energia.
16. El cable de corriente deberá ser desconectado del cuando el equipo no sea
usado por un largo periodo de tiempo.
17. Cuidado debe ser tomado de tal manera que objectos liquidos no sean
derramados sobre la cubierta u orificios de ventilación.
18. Servicio por personal calificado deberá ser provisto cuando:
A: El cable de poder o el contacto ha sido dañado; u
B: Objectos han caído o líquido ha sido derramado dentro del aparato; o
C: El aparato ha sido expuesto a la lluvia; o
D: El aparato parece no operar normalmente o muestra un cambio en su
desempeño; o
E: El aparato ha sido tirado o su cubierta ha sido dañada.
Page 5

4
10BASE-T EXTENDER
TRADEMARKS
The trademarks mentioned in this manual are the sole property of their owners.
Page 6

5
10BASE-T EXTENDER
CONTENTS
1. Specifications . . . . . . . . . . . . . . . . . . . . . . . . . . . . . . . . . . . . . . . . . . . . . 6
2. Introduction . . . . . . . . . . . . . . . . . . . . . . . . . . . . . . . . . . . . . . . . . . . . . . 7
2.1 Overview . . . . . . . . . . . . . . . . . . . . . . . . . . . . . . . . . . . . . . . . . . . . . . 7
2.2 What’s Included in the Package . . . . . . . . . . . . . . . . . . . . . . . . . . . 7
2.2 Equipment Protection . . . . . . . . . . . . . . . . . . . . . . . . . . . . . . . . . . . 7
3. Installation . . . . . . . . . . . . . . . . . . . . . . . . . . . . . . . . . . . . . . . . . . . . . . . 9
3.1 Tools Needed . . . . . . . . . . . . . . . . . . . . . . . . . . . . . . . . . . . . . . . . . . 11
3.2 About the Wiring Closet. . . . . . . . . . . . . . . . . . . . . . . . . . . . . . . . . . 12
3.3 UTP Phone Wire. . . . . . . . . . . . . . . . . . . . . . . . . . . . . . . . . . . . . . . . 12
3.4 Patch Cables . . . . . . . . . . . . . . . . . . . . . . . . . . . . . . . . . . . . . . . . . . . 12
3.5 Straight-through Wiring . . . . . . . . . . . . . . . . . . . . . . . . . . . . . . . . . . 13
3.6 Preparing the Site Plan. . . . . . . . . . . . . . . . . . . . . . . . . . . . . . . . . . . 13
3.7 Measuring Phone Wire. . . . . . . . . . . . . . . . . . . . . . . . . . . . . . . . . . . 15
3.8 Installing the Extenders . . . . . . . . . . . . . . . . . . . . . . . . . . . . . . . . . . 16
3.9 Connecting the Extender to the Phone Block . . . . . . . . . . . . . . . . 16
3.10 Connecting the Extender to 10BASE-T . . . . . . . . . . . . . . . . . . . . 18
3.10.1 Connecting to a Hub . . . . . . . . . . . . . . . . . . . . . . . . . . . . . . 18
3.10.2 Connecting to a Node (NIC) . . . . . . . . . . . . . . . . . . . . . . . 19
3.11 Starting the Network. . . . . . . . . . . . . . . . . . . . . . . . . . . . . . . . . . . . 19
4. Monitoring and Troubleshooting . . . . . . . . . . . . . . . . . . . . . . . . . . . . . 20
4.1 Monitoring the 10BASE-T Extender LEDs . . . . . . . . . . . . . . . . . . . 20
4.2 Troubleshooting . . . . . . . . . . . . . . . . . . . . . . . . . . . . . . . . . . . . . . . . 21
4.2.1 Solving Common Extender Problems . . . . . . . . . . . . . . . . . 21
4.2.2 Collision Indicator is Lit Continuously. . . . . . . . . . . . . . . . . 21
4.2.3 Link is Not Lit on the Extender . . . . . . . . . . . . . . . . . . . . . . 21
Page 7

6
10BASE-T EXTENDER
1. Specifications
Speed—10 Mbps
Standards—IEEE 802.3 Ethernet
Connectors—(1) RCA male, (2) RJ-45
Indicators—(5) LEDs: Power, Activity, Link Test, Jabber, Collision
Power—100-250 VAC, autosensing wallmount power supply, 47-63 Hz, 9 V at
1 Amp
Size—0.8”H x 2.7”W x 4.5”D (2 x 6.9 x 11.4 cm)
Weight—4 oz. (0.1 kg)
Page 8

7
10BASE-T EXTENDER
2. Introduction
2.1 Overview
The 10BASE-T Extender is a high-performance Ethernet repeater that operates
over a spare pair of telephone wires already in the walls or buried in the ground.
It works with any IEEE 802.3 compatible Ethernet system.
2.2 What’s Included in the Package
Check to make sure that your LZ6000A-R4 kit contains the following items.
If anything is missing or damaged, please call Black Box at 724-746-5500.
• (1) 10BASE-T Extender (part number LZ6000A-R3)
• (1) surge protector (part number SP512A-R2)
• (1) Velcro®strip for wall mounting
• (1) AC power supply, 100-250 VAC autosensing
• (1) North American power cord
2.3 Equipment Protection
You must be extremely careful to ensure the safety of persons and equipment
whenever using wires that run between buildings. Both underground cable runs
that are near the surface and overhead runs are at risk of damage from lightning
strikes and must be suitably protected. This protection must be in place or there
will be risk of serious injury or death. The service entrance at each end of the wires
should be protected in strict accordance with local safety codes. In addition, to
further reduce the risk of injury and/or damage to equipment due to lightning
strikes or accidental connection to hazardous AC line voltages, secondary circuit
protection, included with this product, must be installed.
Outdoor cabling installed by the phone company is typically installed with gasdischarge protection devices, carbon blocks, or no protection devices at all. If
cabling has protection, DO NOT BYPASS these devices—they will help protect
both your equipment and all those who work with it.
Page 9

8
10BASE-T EXTENDER
WARNING
If the cable run you will be using is not protected, DO NOT continue with
the installation. STOP.
Install suitable protection devices before proceeding and be sure that
the instruction are followed fully (including connecting the ground
strap)!
NOTE
Many carbon-block protection devices add a significant load to the line
and will not work with the 10BASE-T Extender. These must be removed
and replaced with suitable protection devices.
Figure 2-1 shows a 10BASE-T Extender installed with surge protection.
Figure 2-1. Lightning protection.
GroundPunchdown
Block
Single
UTP
Link Test
Power
Collision
Single UTP
10Base-T
Power
Long Distance
10Base-T Repeater
Jabber
Activity
XL600L
Surge
Surge
Protector
Page 10

9
10BASE-T EXTENDER
3. Installation
Figures 3-1 and 3-2 show typical installations of the 10BASE-T Extender.
Figure 3-1. Complete hub-to-hub connection.
10Base-T Hub
To Stations
To Stations
Location One
Location Two
Existing
Phone
Wire
10Base-T Hub
RJ-45
Jumper
RJ-45 Jumper
RJ-45
Jumper
RJ-45 Jumper
Punchdown Block
Punchdown Block
XL600L
XL600L
Extender
Extender
Use a straight-pinned RJ-45 cable.
Use a straight-pinned RJ-45 cable.
Page 11

10
10BASE-T EXTENDER
Figure 3-2. Complete hub-to-node connection.
Use an RJ-45
crossover cable
10Base-T Hub
To Stations
Up to 600 Feet of Existing Phone Wire
Remote Location
RJ-45 RJ-45
RJ-45 RJ-45
Punchdown Block
Punchdown Block
XL600L
XL600L
Existing
Phone
Wire
Extender
Extender
Use a straight-pinned RJ-45 cable.
Page 12

11
10BASE-T EXTENDER
3.1 Tools and Parts Needed
Installing the 10BASE-T Extender is fast and simple, but does require tools you
may not normally have around the office. Before you begin installation, be sure
you have everything on this list:
• A site plan for your office showing the locations of all the wiring closets
(a rough sketch will do)
• A punchdown tool (sometimes called an impact tool)
• An RJ-45 crimping tool
• An ohm meter
Call Black Box Technical Support at 724-746-5500 to find out how to obtain
these tools.
Figure 3-3. Punchdown tool.
Page 13

12
10BASE-T EXTENDER
Figure 3-4. RJ-45 crimping tool.
3.2 About the Wiring Closet
A 10BASE-T Extender is typically installed in a wiring closet, making it possible to
connect the phone wires carrying network traffic to the repeater using short patch
cables.
3.3 UTP Phone Wire
The 10BASE-T Extender is intended for use with 100Ω unshielded twisted pair
telephone wire (UTP) already installed in and between buildings. Buildings,
individual floors and wings of a building are often interconnected with 25-pair,
50-pair, or 100-pair level 2 UTP cables. At least one pair in these cables is usually
available for long distance LAN connections.
3.4 Patch Cables
A patch cable connects each phone-wire pair to a 10BASE-T Extender port. Each
patch cable extends from the Extender port to the phone punchdown block or
patch panel containing the phone-wire connection. You must make your own
patch cables for an installation. They are not included with your Extender. Call
Technical Support for more information about patch cables. When making patch
cables to connect patch panels to repeaters, use pins 3 and 6 of the RJ-45
connectors by joining one wire to pin 3 on both plugs and the other to pin 6 on
both plugs with a crimping tool (see straight-through cabling in Figure 3-5). If
making patch cords for connecting the repeaters directly to the punchdown
blocks, make sure that the wire used is compatible with the punchdown block.
Page 14

13
10BASE-T EXTENDER
Most blocks do not work properly with stranded wires. These cables will typically
have a connector on only one end, with the other end connected directly to the
punchdown block.
NOTE
Because standard telephone patch cords contain a crossover in their
wiring, they will not function in a network. Flat “Silver Satin” telephone
patch cords are not made of twisted-pair wires and should also not be
used for Extender wiring.
3.5 Straight-Through Cabling
Figure 3-5. Straight-through cabling.
3.6 Preparing the Site Plan
1. Find or create a site plan. It must show the location of one or more phone
closets where the Extender units will be installed.
1
2
1 1-1
2 2-2
3
6
3 3-3
6 6-6
1 2 3 4 5 6 7 8
1 2 3 4 5 6 7 8
Optional for XL links
Required for 10Base-T connections
Required for 10Base-T and XL connections
Page 15

2. Locate and identify each pair of wires that you will use for the long distance
interconnection. The wire pairs must only run between the two points to be
connected. The link will not connect if there is a bridge tap anywhere on the
link (see Figure 3-6).
Figure 3-6. Long-distance links and bridge taps—correct connection.
Figure 3-7. Long-distance links and bridge taps—incorrect connection.
1
2
3
To
XL600L
To
XL600L
A third point
cannot be tied
into the link.
To
XL600L
To
XL600L
To
10BASE-T
Extender
14
10BASE-T EXTENDER
To
10BASE-T
Extender
To
10BASE-T
Extender
To
10BASE-T
Extender
Page 16

15
10BASE-T EXTENDER
3.7 Measuring Phone Wire
1. Use a cable scanner or an ohmmeter to measure the lengths of phone wire
that will connect the Extenders. When using an ohmmeter, short-circuit one
end of the phone wire and measure the resistance between the two wires at
the other end (see Figure 3-8).
Figure 3-8. Using an ohmmeter to measure the length of phone wire.
2. Multiply the resistance by 20 to find the length of the wire in feet. For
example, 26.4 ohms would indicate a cable length of about 525 feet: 26.4 x 20
@ 525 (+/-). This formula works for 24-gauge phone wire. For a maximum of
600 feet of wire the resistance must measure 30 ohms or less. Refer to Table
3-1 for maximum acceptable resistance values of other wire gauges.
54.6
OHMS
Short Pair
Together
Ohm Meter
Punchdown Block Punchdown Block
Page 17

16
10BASE-T EXTENDER
Table 3-1. Maximum resistance values of other wire gauges.
Gauge Maximum Resistance (for 600 ft. [272 m])
24GA 30 Ω
22 19
20 12
18 7.5
NOTE
Wire smaller than 24 gauge is not recommended, and any wire used
must be 100-ohm impedance, unshielded twisted pair.
Telephone wire connected between two Extender units may span up to 600 feet
(272 m) in length.
3.8 Install 10BASE-T Extenders
Follow these steps to set up the Extenders:
1. Install the Extender in the wiring closet near the punchdown block or patch
panel. You can mount it with the Velcro
®
strip provided.
2. Plug the power supply into the wall and attach it to the Extender.
3. Observe the LEDs on the Extender.
• The green power LED will be on.
• The LZ6000A-R3 is shipped with the Link Integrity Test set to ON (enabled).
When power is connected, the Link Test indicator should not light, showing
that the link is not yet established. After connecting to a 10BASE-T line, the
indicator will light amber, indicating a “good link.” Check the manual that
came with the 10BASE-T device that you are connecting to. If it requires Link
Integrity Test to be OFF, move the jumper so it covers only one pin (see
Figure 3-9). This will set the Link Integrity to OFF and the indicator on the
face of the unit will not be lit.
Page 18

17
10BASE-T EXTENDER
Figure 3-9. Jumper Settings.
3.9 Connecting the Extender to the Phone Block
Attaching the cable wires to the phone block requires the use of a punchdown or
impact tool. The wires must be “punched down” on forked pins corresponding to
the phone wire pair used for each end of the long-distance span.
Shorting Plug
Typical for
Connection to
10 Base-T Hub
(Default)
(looks like
a NIC)
Moving Jumpers
"Crosses Over"
signals (the
same as if
using a
Crossover
Cable)
Link Test
Disabled
Link Test
Enabled
(Default)
Page 19

18
10BASE-T EXTENDER
Figure 3-10. Connected patch cable.
1. Form a loop at the end of each patch cable wire and place the loop under the
lip of a pin. Position the punchdown tool over the pin, with the cutting edge
above the short end of the wire, and press down firmly. The tool forces the
wire down between the halves of the forked pin and severs its short end
(Figure 3-11).
Punchdown Block
To Single UTP
1 2 3 4 5 6 7 8
Page 20

19
10BASE-T EXTENDER
Figure 3-11. Punching wires onto a punchdown block.
An RJ-45 crimping tool is required for attaching the RJ-45 connector to the
other end of the patch cable. Use pins 3 and 6 of the connector and make a
straight-through patch cable. To be straight-through, pin 3 on one connector
must connect to pin 3 on the connector at the other end of the long-distance
span and pin 6 to 6.
3.10 Connecting the Extender to 10BASE-T
3.10.1 C
ONNECTING TO AHUB
The Extender is shipped configured to connect to a 10BASE-T hub “downlink”
port like a network interface card (NIC) with Link Integrity enabled. This means
the Extender can be connected to a standard downlink port of a hub, using a
straight-through 10BASE-T cable (see Figure 3-5 on page 13).
The Extender is shipped with Link Integrity Test set to ON (enabled). When
power is connected, the Link Test Indicator should not be lit, showing that link
is not yet established. After connecting the 10BASE-T port to a powered-up
10BASE-T hub, the indicator will light green, indicating a “good link.”
Page 21

20
10BASE-T EXTENDER
3.10.2 C
ONNECTING TO ANODE
(NIC)
The Extender is shipped configured to connect in a manner similar to a network
interface card (NIC) with Link Integrity enabled. To connect the Extender to a
NIC use a crossed 10BASE-T cable. See Figure 3-12.
Figure 3-12. Crossed 10BASE-T cable.
The Extender is shipped with Link Integrity Test set to ON (enabled). When
the power is connected, the Link Test Indicator should not light, showing that the
link is not yet established. After connecting the 10BASE-T port to a powered up
NIC, the indicator will light green, indicating a “good link.”
3.11 Start the Network
The Extenders are now fully installed and ready to transmit data. Power up the
network (if it is not powered up already) and use it. If you encounter any
problems, refer to Chapter 4, Monitoring and Troubleshooting..
1
2
3
6
1
2
3
6
1 - 3
2 - 6
3 - 1
6 - 2
Page 22

21
10BASE-T EXTENDER
4. Monitoring and Troubleshooting
If you find that the information in this section does not address a problem you are
having with your network, call Black Box Technical Support at 724-746-5500.
Besides software issues, the most common network problems are cable faults,
which account for over 75% of all network hardware problems. Always suspect the
cabling, and always suspect the connections to the cabling first—connectors
unplugged, wires not making good contact in the connectors, faulty punchdownblock connections, etc.
4.1 Monitoring the 10BASE-T Extender LEDs
• Jabber—The amber indicator is on when the link is disabled due to a jabber
condition.
• Link Test—The green indicator is on when the 10BASE-T link is good.
• Activity—The green indicator is on when data is passing through the Extender.
• Power—The green indicator is on when the unit is plugged in and power is on
• Collision—The amber indicator is on when there is a collision on the line. Two
or more devices attempted to transmit at the same time. The Ethernet
protocol takes care of this, and the units will retransmit.
Figure 3-12. LEDs on the 10BASE-T Extender.
Link Test
Power
Collision
Single UTP 10Base-T Power
Long Distance
10Base-T Repeater
Jabber
Activity
XL600L
Page 23

22
10BASE-T EXTENDER
4.2 Troubleshooting
4.2.1 S
OLVINGCOMMONEXTENDERPROBLEMS
Make sure the Extender link is 600 feet (272 m) or less in length and that the cable
is of unshielded twisted-pair construction. Do not use flat telephone cables for
patch cables or any other Extender network connection for two reasons:
1. Some devices are quite sensitive to EMI and RFI noise. If you use flat
untwisted wire—even short patch cables—you may experience very poor
performance.
2. Flat telephone cables typically have their polarity reversed; any device on
a leg with the wrong polarity will not communicate with the repeater.
4.2.2 C
OLLISIONINDICATOR ISLITCONTINUOUSLY
Check that the Extender port:
• is connected
• does not have an open circuit
• does not have a crossed cable (instead of a straight-through cable) connected
to it
Be sure that one pair in the cable has pins 3 and 6 in the same pair
(see Figure 3-5 on page 13). Do not split pairs.
Figure 3-13. Incorrect cabling.
t
DO NOT SPLIT PAIRS
If using premade 4 pair
patch cords be sure they
are wired so that pins
3 and 6 are in the
same pair.
1
2
3
4
5
6
7
8
1
2
3
4
5
6
7
8
Pins 3
▲
and 6 are
in differen
pairs
▲
NO GOOD
Page 24

23
10BASE-T EXTENDER
4.2.3 L
INK ISNOTLIT ON THEEXTENDER
Make sure the 10BASE-T port on the Extender is connected:
1. to a functional, powered up 10BASE-T hub via a straight-through 10BASE-T
cable, or
2. to a functional, powered up 10BASE-T NIC via a crossed 10BASE-T cable
(1-3, 2-6; 3-1, 6-2).
Page 25

1000 Park Drive • Lawrence, PA 15055-1018 • 724-746-5500 • Fax 724-746-0746
© Copyright 1999. Black Box Corporation. All rights reserved.
 Loading...