

Black Box KV3104MA-R4, KV3108SA-R4, SW723A-R4, SW722A-R4, SW724A-R4 Quick Install Manual
...
MARCH 2004
SW721A-R4 SW722A-R4
KV3104MA-R4 KV3108SA-R4
SW723A-R4 SW724A-R4
SW725A-R4
Step-By-Step Quick Install Guide for the
ServSwitch
This guide is designed to quickly show you how to attach cables and
equipment in order to install a ServSwitch™ system. For the basics, look over
the diagram on the next two pages.
Power
1
5
9
13
2
6
10
14
3
7
11
15
4
8
12
16
CUSTOMER
SUPPORT
INFORMATION
Order toll-free in the U.S. 24 hours, 7 A.M. Monday to midnight Friday: 877-877-BBOX
FREE technical support, 24 hours a day, 7 days a week: Call 724-746-5500 or fax 724-746-0746
Mail order: Black Box Corporation, 1000 Park Drive, Lawrence, PA 15055-1018
Web site: www.blackbox.com • E-mail: info@blackbox.com
BLACK BOX and the logo are registered trademarks, and ServSwitch is a trademark, of Black Box Corporation.
PS/2 is a registered trademark of International Business Machines Corporation.
Any other trademarks mentioned in this document are acknowledged to be the property of the trademark owners.
2
SERVSWITCH QUICK INSTALL GUIDE
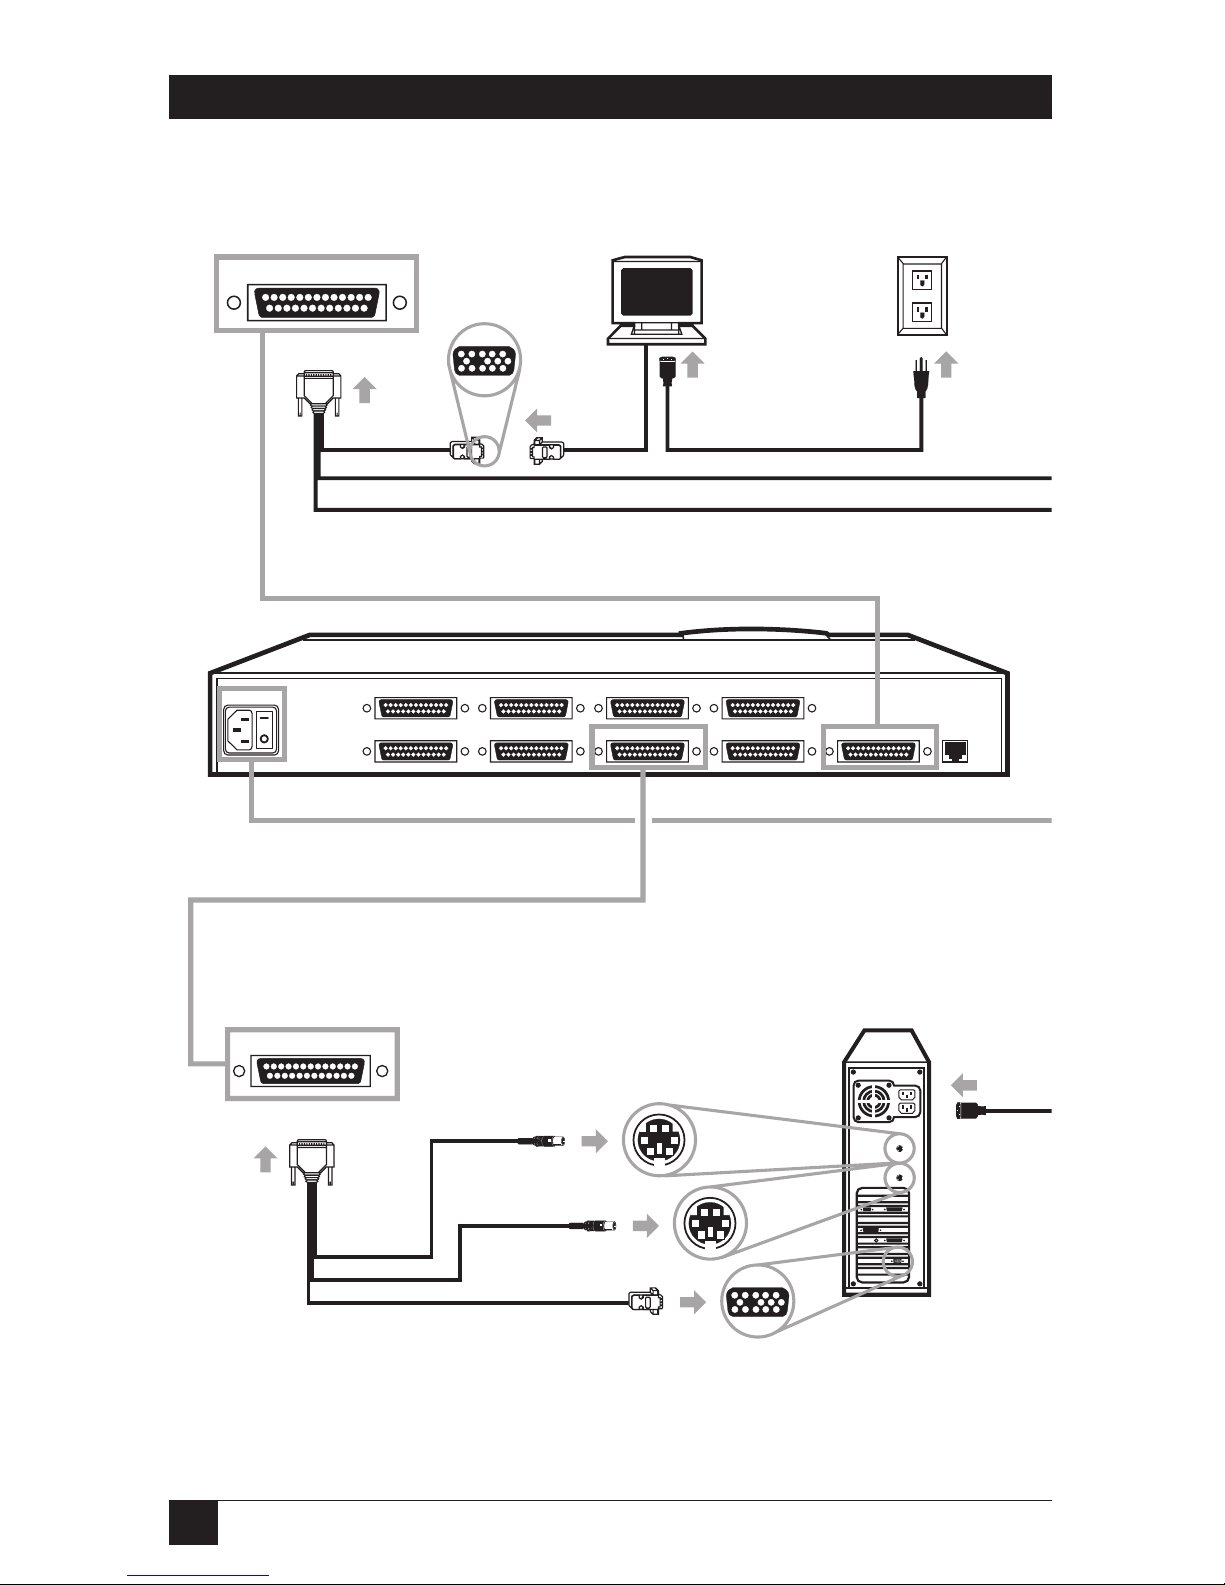
RS-232
POWER
MONITOR/KEYBOARD/MOUSE
CPU 5 CPU 6CPU 7 CPU 8
CPU 2CPU 1CPU 4CPU 3
Mouse
Keyboard
ServSwitch
MONITOR/KEYBOARD/MOUSE
CPU 1
1
Attach User Adapter Cable.
2
Attach monitor
(VGA type shown).
3
Plug in monitor.
5
Use CPU Adapter Cable to attach CPU this way (PS/2 CPU shown):
 Loading...