

Page 1
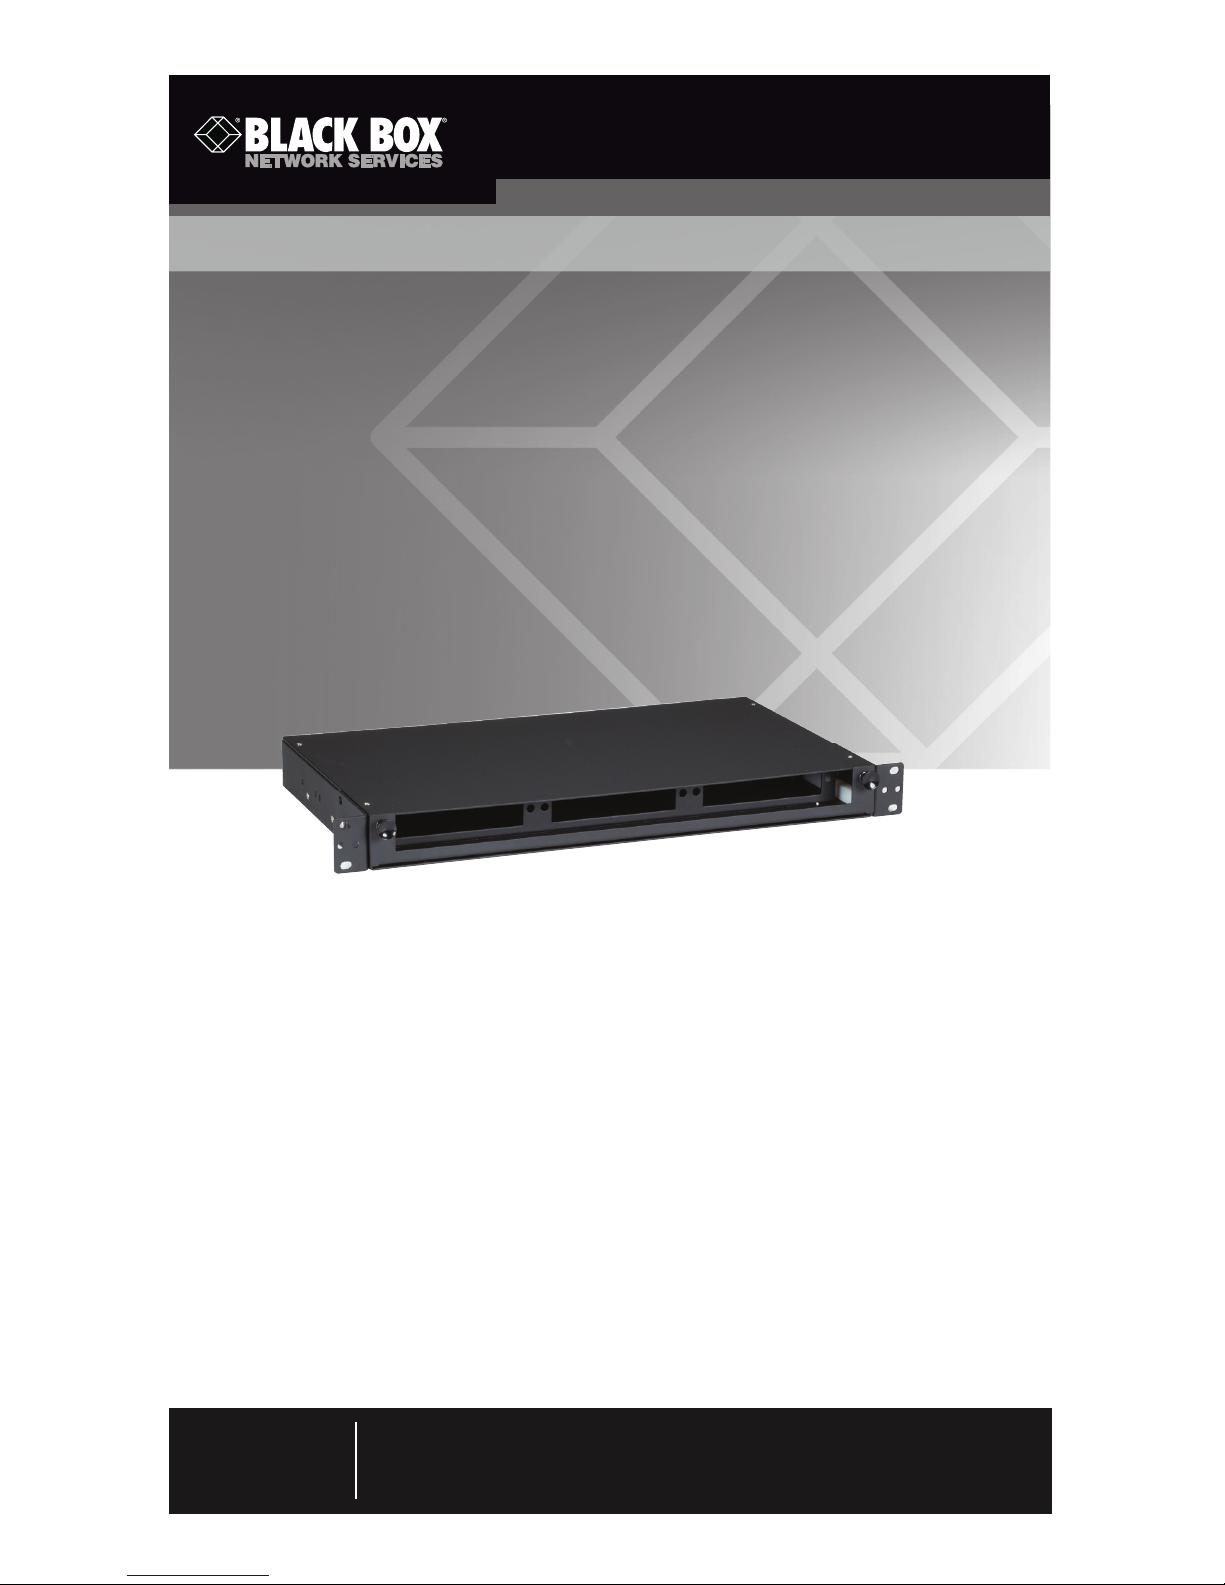
Internal tray pulls out towards the user,
providing room to manage the fiber cable
behind the fiber adapter panels.
Supports up to three fiber panels.
1U Pull-Out Fiber Splice Tray Enclosure
Order toll-free in the U.S.: Call 877-877-BBOX (outside U.S. call 724-746-5500)
FREE technical support 24 hours a day, 7 days a week: Call 724-746-5500 or fax
724-746-0746 • Mailing address: Black Box Corporation, 1000 Park Drive, Lawrence,
PA 15055-1018 • Web site: www.blackbox.com • E-mail: info @blackbox.com
Customer
Support
Information
JP M427A
Page 2

Page 2
724-746-5500 | blackbox.com
1U Pull-Out Fiber Splice Tray Enclosure
1. Specifications
Size — 1.8"H x 16.9"W x 10.4"D (4.5 x 43 x 26.4 cm)
Weight — 14.3 lb. (6.5 kg)
2. Overview
2.1 Description
This rackmount fiber enclosure supports up to three fiber adapter panels. It has
an internal tray that pulls out towards the user, providing plenty of room to
manage the fiber cable behind the fiber adapter panels. The tray has a pair of
“rail stops” to prevent the tray from pulling out all the way, which could damage
the installed bulk fiber and fiber splicing. The tray locks in place when closed by
using a pair of front push/pull buttons to secure the tray inside the enclosure.
The fiber enclosure is rackmountable and only requires 1RU of mounting space.
The rack mounting ears support both 19" and 23" cabinets and can be front- or
center-mounted, depending on the user’s application. The enclosure includes two
pairs of distribution rings to provide cable management for the fiber distribution
cable trunk entering the enclosure from the back. You can re-position the
distribution rings in various ways, depending upon your application. If required,
the enclosure can support up to a pair of Fiber Splice Trays (sold separately).
Using the distribution rings and optional Fiber Splice Tray, you can set up different
internal configurations for your application. The fiber enclosure has two separate
Kevlar® clamps to secure the fiber trunk to the enclosure.
2.2 What’s Included
• (1) 1RU Pull Out Tray Fiber Rackmount Enclosure
• (1) DANGER Sticker
• (4) 4-inch (10.2-cm) cable ties
• (6) 1-inch (2.5-cm) cable organizers
• (4) 10-32 rackmount cup-head screws
• (4) 12-24 rackmount cup-head screws
• (30) 3-inch (7.6-cm) cable ties
• (2) sets of cable distribution rings
• This user’s manual
Page 3

Page 3
724-746-5500 | blackbox.com
1U Pull-Out Fiber Splice Tray Enclosure
3. Installation
1. Find one rack unit of space in your data cabinet or rack to mount the fiber
enclosure.
2. The mounting ears are attached in the 19" front mounting position from the
factory, but you can adjust them to suit your cabinet.
NOTE: The fiber cabinet ships with the mounting ears installed. It supports
optional 23" and center mounting.
3. Use the supplied cup-head screws to securely mount the enclosure to your data
cabinet.
4. Install your fiber adapter panels inside the enclosure. This enclosure supports up
to three fiber adapter panels. The footprint of the adapter opening is the
standard LGX layout, so basically any LGX fiber adapter panel should mount in
the enclosure, but we recommend that you use Black Box fiber adapter panels
for the best fit.
5. Bring your bulk fiber trunk cable inside the enclosure. It can enter the
enclosure from either one of the two openings in the rear of the enclosure.
6. Strip the outer cable jacket away from the fiber trunk. Make sure that you
secure the fiber trunk to the tray using the Kevlar clamps located on the left or
right side of the tray. Using Kevlar clamps is the only correct method to secure
bulk fiber to an enclosure
7. Configure the distribution rings to dress the fiber before you field-terminate or
begin splicing.
NOTE: You can configure the distribution rings in multiple ways. Install an optional
fiber splice tray if fiber splicing is necessary. See Figure 3-2.
Page 4

Page 4
724-746-5500 | blackbox.com
1U Pull-Out Fiber Splice Tray Enclosure
Figure 3-1. Inside front view of the fiber adapter panel.
Figure 3-2. Different configuration options for the distribution rings and splice tray.
8. After you terminate the bulk fiber cables, connect them to the rear of the fiber
adapter panels already installed.
9. Neatly dress the excess fiber strands and close the tray. To lock the tray in place,
push the two buttons in place after closing the tray.
Page 5

Page 5
724-746-5500 | blackbox.com
NOTES
Page 6

Page 6
724-746-5500 | blackbox.com
NOTES
Page 7

Page 7
724-746-5500 | blackbox.com
NOTES
Page 8

Black Box Tech Support: FREE! Live. 24/7.
Tech support the
way it should be.
Great tech support is just 30 seconds away at
724-746-5500 or blackbox.com.
724-746-5500 | blackbox.com
JPM427A, version 1
About Black Box
Black Box provides an extensive range of networking and infrastructure products.
You’ll find everything from cabinets and racks and power and surge protection
products to media converters and Ethernet switches all supported by free, live 24/7
Tech support available in 30 seconds or less.
© Copyright 2012. Black Box Corporation. All rights reserved. Black Box® and the Double Diamond logo
are registered trademarks of BB Technologies, Inc. Kevlar is a registered trademark of E. I. du Pont de Nemours
and Company. Any third-party trademarks appearing in this manual are acknowledged to be the property
of their respective owners.
 Loading...