

Page 1
iCompel Data Engine V3.1.2
Set up vibrant, real-time digital displays easily and affordably.
All-in-one, plug-and-display unit works right out of the box.
V3.1.2 (30971)
Page 2

iCompel Data Engine
Federal Communications Commission and Industry Canada Radio Frequency Interference
Statements
This equipment generates, uses, and can radiate radio-frequency energy, and if not installed and usedproperly, that is, in strict
accordance with the manufacturer’s instructions, may cause inter-ference to radio communication. It has been tested and found to
comply with the limits for a Class A computing device in accordance with the specifications in Subpart B of Part 15 of FCC rules,
which are designed to provide reasonable protection against such interference when the equipment is operated in a commercial
environment. Operation of this equipment in a residential area is likely to cause interference, in which case the user at his own
expense will be required to take whatever measures may be necessary to correct the interference.
Changes or modifications not expressly approved by the party responsible for compliance could void the user’s authority to operate
the equipment.
This digital apparatus does not exceed the Class A limits for radio noise emis-sion from digital apparatus set out in the Radio
Interference Regulation of Industry Canada.
Le présent appareil numérique n’émet pas de bruits radioélectriques dépassant les limites applicables aux appareils numériques
de la classe A prescrites dans le Règlement sur le brouillage radioélectrique publié par Industrie Canada.
2 724-746-5500 | blackbox.com
Page 3

NOM Statement
Instrucciones de Seguridad
(Normas Oficiales Mexicanas Electrical Safety Statement)
1. Todas las instrucciones de seguridad y operación deberán ser leídas antes de que el aparato eléctrico sea operado.
2. Las instrucciones de seguridad y operación deberán ser guardadas para referencia futura.
3. Todas las advertencias en el aparato eléctrico y en sus instrucciones de operación deben ser respetadas.
4. Todas las instrucciones de operación y uso deben ser seguidas.
5. El aparato eléctrico no deberá ser usado cerca del agua—por ejemplo, cerca de la tina de baño, lavabo, sótano mojado o cerca
de una alberca, etc..
6. El aparato eléctrico debe ser usado únicamente con carritos o pedestales que sean recomendados por el fabricante.
7. El aparato eléctrico debe ser montado a la pared o al techo sólo como sea recomendado por el fabricante.
8. Servicio El usuario no debe intentar dar servicio al equipo eléctrico más allá a lo descrito en las instrucciones de operación.
Todo otro servicio deberá ser referido a personal de servicio calificado.
9. El aparato eléctrico debe ser situado de tal manera que su posición no interfiera su uso. La colocación del aparato eléctrico
sobre una cama, sofá, alfombra o superficie similar puede bloquea la ventilación, no se debe colocar en libreros o gabinetes que
impidan el flujo de aire por los orificios de ventilación.
10. El equipo eléctrico deber ser situado fuera del alcance de fuentes de calor como radiadores, registros de calor, estufas u otros
aparatos (incluyendo amplificadores) que producen calor.
11. El aparato eléctrico deberá ser connectado a una fuente de poder sólo del tipo descrito en el instructivo de operación, o como
se indique en el aparato.
12. Precaución debe ser tomada de tal manera que la tierra fisica y la polarización del equipo no sea eliminada.
13. Los cables de la fuente de poder deben ser guiados de tal manera que no sean pisados ni pellizcados por objetos colocados
sobre o contra ellos, poniendo particular atención a los contactos y receptáculos donde salen del aparato.
14. El equipo eléctrico debe ser limpiado únicamente de acuerdo a las recomendaciones del fabricante.
15. En caso de existir, una antena externa deberá ser localizada lejos de las lineas de energia.
16. El cable de corriente deberá ser desconectado del cuando el equipo no sea usado por un largo periodo de tiempo.
17. Cuidado debe ser tomado de tal manera que objectos liquidos no sean derramados sobre la cubierta u orificios de ventilación.
18. Servicio por personal calificado deberá ser provisto cuando:
A: El cable de poder o el contacto ha sido dañado; u
B: Objectos han caído o líquido ha sido derramado dentro del aparato; o
C: El aparato ha sido expuesto a la lluvia; o
D: El aparato parece no operar normalmente o muestra un cambio en su desempeño; o
E: El aparato ha sido tirado o su cubierta ha sido dañada.
724-746-5500 | blackbox.com 3
Page 4

Trademarks Used in this Manual
Black Box and the Double Diamond logo are registered trademarks of BB Technologies, Inc.
Any other trademarks mentioned in this manual are acknowledged to be the property of the trademark owners.
All rights reserved. No parts of this work may be reproduced in any form or by any means - graphic, electronic, or mechanical,
including photocopying, recording, taping, or information storage and retrieval systems - without the written permission of the
publisher.
Products that are referred to in this document may be either trademarks and/or registered trademarks of the respective owners. The
publisher and the author make no claim to these trademarks.
While every precaution has been taken in the preparation of this document, the publisher and the author assume no responsibility
for errors or omissions, or for damages resulting from the use of information contained in this document or from the use of
programs and source code that may accompany it. In no event shall the publisher and the author be liable for any loss of profit or
any other commercial damage caused or alleged to have been caused directly or indirectly by this document.
Printed: June 2012
4 724-746-5500 | blackbox.com
Page 5

iCompel Data Engine - User Guide (V3.1.2) Contact Black Box
Table of Contents
1.
iCompel Data Engine Overview
2.
Building a Connection
......................................................................................................................................................8
......................................................................................................................................................10
................................................................................................................................... 102.1 The Connection Editor Application
................................................................................................................................... 102.2 QuickStart
................................................................................................................................... 112.3 Connectors and Data Sources
................................................................................................................................... 262.4 Results
................................................................................................................................... 382.5 Specifying when to execute
................................................................................................................................... 382.6 Connection Properties
................................................................................................................................... 382.7 Testing a Connection
3.
Monitoring and Managing Connections
......................................................................................................................................................40
................................................................................................................................... 403.1 Creating a new Connection QuickStart
................................................................................................................................... 413.2 System Status
................................................................................................................................... 413.3 Monitoring Active Connections
................................................................................................................................... 423.4 Managing Connections
................................................................................................................................... 453.5 Bulk Modify Connections
................................................................................................................................... 473.6 Connection Retry and Backoff Policies
................................................................................................................................... 473.7 Configuration
4.
Application Licensing
......................................................................................................................................................50
................................................................................................................... 122.3.1 Microsoft Excel Connector
....................................................................................................................................................................... 12- Basic Settings
....................................................................................................................................................................... 14- Advanced Settings
................................................................................................................... 162.3.2 Microsoft Exchange Server Connector
....................................................................................................................................................................... 16- Basic Settings
................................................................................................................... 172.3.3 Google Calendar Connector
....................................................................................................................................................................... 17- Settings
................................................................................................................... 182.3.4 SQL Connector
....................................................................................................................................................................... 19- Advanced Settings
................................................................................................................... 192.3.5 XML Connector
....................................................................................................................................................................... 20- Settings
................................................................................................................... 212.3.6 Text Connector
....................................................................................................................................................................... 22- Basic Settings
....................................................................................................................................................................... 23- Format Settings
....................................................................................................................................................................... 25- Advanced Settings
................................................................................................................... 272.4.1 XML Output Format
................................................................................................................... 282.4.2 Locating Media Items using the Media Item Finder
....................................................................................................................................................................... 29- Copying and Modifying Media Items
................................................................................................................... 302.4.3 Text Output Format
................................................................................................................... 322.4.4 Custom Output Formats using a Presentation Format File
................................................................................................................... 362.4.5 Specifying the Destination Players and Limiting Output Size
................................................................................................................... 372.4.6 Applying a Player DATA IN license
................................................................................................................... 423.4.1 Managing Active Connections
................................................................................................................... 433.4.2 Outstanding Actions
................................................................................................................... 443.4.3 View Status
Copyright (c) 2009 - 2012 Black Box Corporation
724-746-5500 | blackbox.com 5
Page 6

iCompel Data Engine - User Guide (V3.1.2) Application Licensing
................................................................................................................................... 504.1 Reviewing and Adding a new License
5.
Deployment Considerations
......................................................................................................................................................54
................................................................................................................................... 545.1 Deploying to a Black Box Channel
................................................................................................................................... 545.2 File Organization for Channel or Layout Package Use
................................................................................................................................... 555.3 User Management
................................................................................................................................... 555.4 FTP and Proxy Details
6.
Using the SQL Connector
......................................................................................................................................................57
................................................................................................................................... 576.1 Creating an ODBC System Data Source Name
................................................................................................................................... 576.2 Using the SQL Connector on a 64bit Operating System
................................................................................................................................... 586.3 Connecting to a Black Box iDigitalManager
7.
Using the Excel Connector
......................................................................................................................................................62
................................................................................................................................... 627.1 Advanced Excel Settings
8.
Using the Microsoft Exchange Connector
......................................................................................................................................................66
................................................................................................................................... 668.1 Advanced Exchange Server Settings
9.
Using the Google Calendar Connector
......................................................................................................................................................69
................................................................................................................................... 699.1 Connecting to a Google Calendar
10.
Media Widgets
......................................................................................................................................................71
................................................................................................................................... 7110.1 Installing Sample Layouts and Widgets
................................................................................................................................... 7210.2 Charts and Tabular Widgets
................................................................................................................................... 7710.3 Calendar Widgets
................................................................................................................................... 7910.4 Widget Settings
................................................................................................................... 8010.4.1 Charts and Tabular Widget Settings
....................................................................................................................................................................... 81- Tabular Widget Settings
....................................................................................................................................................................... 82- Chart Widget Settings
................................................................................................................... 8410.4.2 Calendar Widget Settings
....................................................................................................................................................................... 84- Timeline Widget Settings
....................................................................................................................................................................... 85- Diary Widget Settings
....................................................................................................................................................................... 85- Room Summary Widget Settings
11.
Contact Black Box
......................................................................................................................................................88
Index
Copyright (c) 2009 - 2012 Black Box Corporation
724-746-5500 | blackbox.com 6
89
Page 7

Part
I
iCompel Data Engine
Overview
Page 8

iCompel Data Engine - User Guide (V3.1.2)
1. iCompel Data Engine Overview
The iCompel Data Engine, from Black Box Corporation, is a solution for capturing, collating and presenting data held
in external systems for graphical display on a Black Box Digital Signage System.
The iCompel Data Engine product comprises of three components:
A manager application (the Connection Manager) which allows the user to manage which queries will be run
automatically. The Connection Manager relies on the Connection Windows Service for unattended background
execution of queries.
An editor application (the Connection Editor) to create, modify, and test queries.
Specially created iCOMPEL media which is responsible for graphically displaying data.
This User Guide covers basic operation and configuration of these components.
Copyright (c) 2009 - 2012 Black Box Corporation
724-746-5500 | blackbox.com 8
Page 9

Part
II
Building a Connection
Page 10

iCompel Data Engine - User Guide (V3.1.2)
The iCompel Data Engine Connection Editor application has the icon on the left. A link will be found
in the Black Box iCompel Data Engine group on the Microsoft® Windows® Start menu, and may also
be found on your Windows® desktop.
2. Building a Connection
A iCompel Data Engine (iDE) Connection specifies what data to read, where to write the results, and when to do so.
The iDE collects (queries) a data Source (for example, a database, or a Microsoft® Excel® file). The results of the
query are written to one or more Destination locations (typically a iCOMPEL). This process is repeated on a user
defined Schedule. These properties are all specified by a Connection.
Connections can be viewed, modified and tested using the Connection Editor, which is a Microsoft Windows
graphical user interface application.
Connections are managed using the iDE Connection Manager application. To automatically execute the
Connection on the specified schedule, it must be added, and made Active within the Connection Manager. This
process is described in the Quick Start section.
Connections are executed automatically, without user input, by the iCompel Data Engine Windows® Service.
2.1 The Connection Editor Application
The iCompel Data Engine (iDE) Connection Editor is a Microsoft® Windows® application that allows the user to
create, view, update and test iDE Connections.
This section describes the operation of the iDE Connection Editor in more detail.
Please note that to automatically execute the Connection according to its schedule, it must be deployed to the Connection Manager, as described in the QuickStart section of Monitoring and Managing Connections.
2.2 QuickStart
Please ensure the included media Widgets Layout Packages are installed on each Destination Player before
proceeding. The Layout Pack ages are available in the specified sample media folder - please see Installing Sample
Layouts and Widgets section for details. Please review the iCOMPEL Layout Pack age feature for more information.
If required, then each Destination Player must be licensed to display results. If player licensing is required, this will
be clearly indicated in the Destination page.
The following steps show how to configure a new Connection:
1. Start the iCompel Data Engine Connection Editor application.
A link will be found in the Black Box iCompel Data Engine entry on the Microsoft® Windows® Start menu,
and may also be found on your Windows desktop.
2. Select the Source tab, then the Data Source tab, select the source that you want to process data from.
Typically, this will be Microsoft® Excel®, Google® Calendar or Microsoft® Exchange® server.
Copyright (c) 2009 - 2012 Black Box Corporation
724-746-5500 | blackbox.com 10
Page 11

Building a Connection
3. The tab to the right of the Source tab will update to show configuration properties specific to the selected
data source. Click on this tab, and complete all mandatory sections. Mandatory sections will be flagged
with an error icon when incomplete ( )
4. Select the Destination tab, then the Media tab. Ensure the media entry is set to 'Create and copy an XML
file to one or more players'.
5. On the Location tab, click the Add button, and supply the iCOMPEL (iCOMPEL) hostname, and iCOMPEL
username and password. Click OK when complete.
6. Click the browse button ( ) next to the XML filename entry. In the Media Item Finder dialog, select
the media file to which result should be sent. Click the OK button.
7. Select the Test tab, and click the 'Test Query' button and confirm that no errors are shown.
Please refer to the Connection Manager QuickStart section for details on how to add and automatically execute
this Connection.
2.3 Connectors and Data Sources
The iCompel Data Engine (iDE) uses special code, called a Connector, to read and process data from many
different locations. A Connector specifies, in detail, how the iDE should read and process a specific type of data.
Please note that some Connectors may require additional licenses.
In the Connection Editor application, the Source pages allow the user to configure which Connector to use, and
configure various parameters for that Connector.
The Data Source page lists all Connectors available on this machine. If a Connector is not shown, then please refer
to the Licensing section to determine if a suitable license has been installed.
Click on an entry to select the Connector to use. The tab pages that follow allow various Connector properties to be
configured, and will be dependent upon the selected Connector.
Copyright (c) 2009 - 2012 Black Box Corporation
724-746-5500 | blackbox.com 11
Page 12

iCompel Data Engine - User Guide (V3.1.2)
2.3.1 Microsoft Excel Connector
The Microsoft Excel Connector is used to retrieve and process Microsoft® Excel® spreadsheet data.
The iCompel Data Engine (iDE) is able to read spreadsheets produced by the following Microsoft® Excel® versions:
Excel® 97
Excel® 2000
Excel® XP
Excel® 2003
Excel® 2007
Excel® 2010
It is not possible to open password protected files with the iDE.
Please select the Microsoft® Excel® option from the Data Source page, and visit the Excel page to specify the
Microsoft® Excel® filename and other configuration properties.
Before using the Microsoft® Excel® Connector, please ensure the '2007 Office System Driver: Data Connectivity
Components' component is downloaded from Microsoft and installed. Please reboot the system to apply the
changes.
Note: This Connector may require an additional license to operate.
2.3.1.1 Basic Settings
The Excel Filename field specifies the Microsoft® Excel® file the iCompel Data Engine (iDE) should process. This
field must be specified.
Press the View button to open the specified Excel® filename.
The Cell Range setting defines which cells the iDE should collect. The Cell range setting is expressed in the same
format as within Microsoft® Excel®.
The Cell Range setting options are as follows:
(default) If this field is left empty then all cells in the first worksheet (only) of the specified file will be
processed.
To specify a range of cells in the first worksheet, enter the start and finish cell references separated by a
colon. For example, A1:D30. To specify a single cell, use the format cell:cell. For example, D1:D1.
To specify a range of cells in a named worksheet, then specify the worksheet name, followed by a dollar
symbol, and the cell range on the named worksheet. For example Year2009$A1:D30 would read cells A1 to
D30 from the worksheet Year2009.
Copyright (c) 2009 - 2012 Black Box Corporation
724-746-5500 | blackbox.com 12
Page 13

Building a Connection
To specify all cells in a named worksheet, simply enter the worksheet name with a trailing dollar symbol,
e.g. Year2009$.
To select a named range, then enter the range name (only).
To select a range of cells from different worksheets, then enter the specify worksheet name and cell range
as above and surround with square brackets, separate each entry with a comma, and surround the entire
string with double quotes. For example: "[Year2009$A1:D30],[Year2008$A1:D30]" would process cells A1
to D30 from worksheet Year2009 and cells A1 to D30 from worksheet Year2008.
Copyright (c) 2009 - 2012 Black Box Corporation
724-746-5500 | blackbox.com 13
Page 14
iCompel Data Engine - User Guide (V3.1.2)
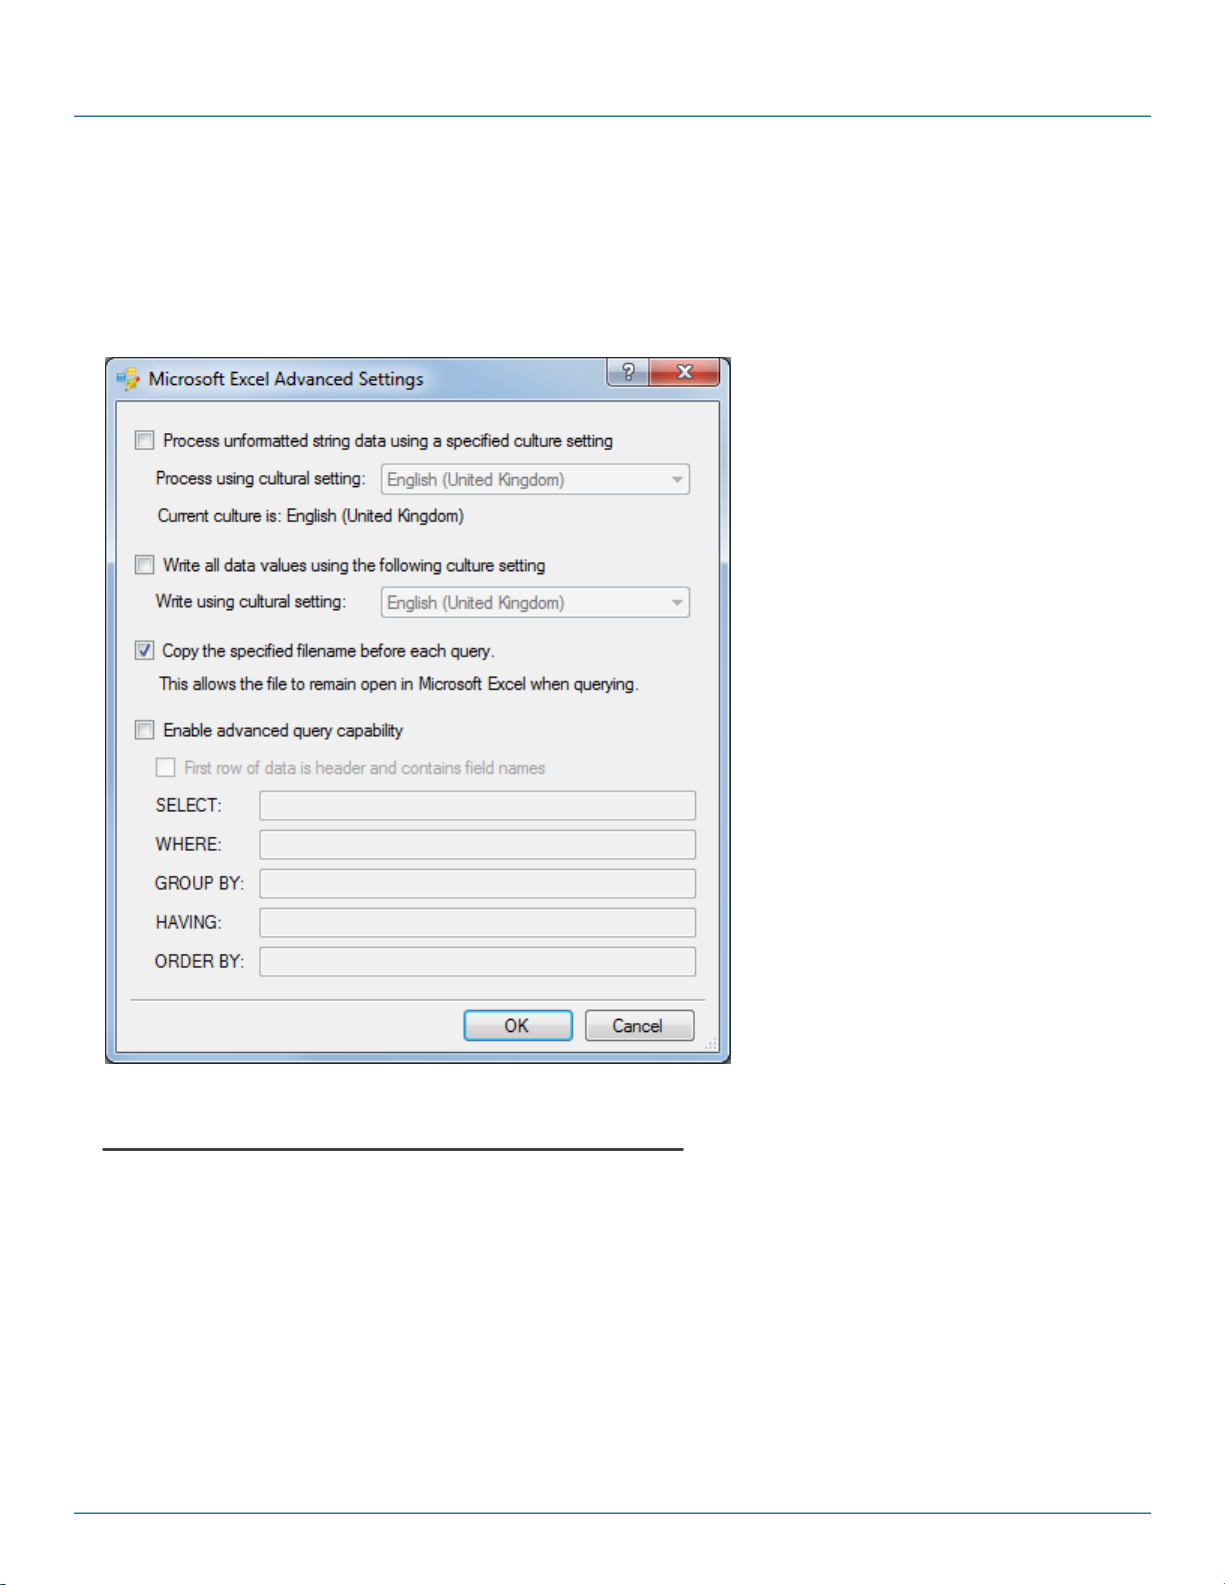
2.3.1.2 Advanced Settings
The Advanced Settings dialog provides options for fine tuning how the iCompel Data Engine interacts with the
specified spreadsheet file.
Specifying how Dates and Numbers are processed
For some applications, it is necessary to provide hints to the iCompel Data Engine (iDE) about how dates and
numbers are represented in the spreadsheet. This is particularly important when the file contains values whose
interpretation is language specific. For example, the date 1/4/1972 could be interpreted as 1st of April (in the UK),
or the 4th of January (if in the US).
The Processing setting specifies the culture setting used when processing dates and numbers.
Note this setting does not control how date and number values are presented by the media - see the following
section for more information.
Copyright (c) 2009 - 2012 Black Box Corporation
724-746-5500 | blackbox.com 14
Page 15

Building a Connection
If this option is enabled, then a summary of the current setting will be shown the Excel page.
Specifying how Dates and Numbers are written
To ensure the widest possible compatibility with media, by default, the iDE will write all numbers and dates in a
general, non-locale specific manner. However, in some instances, particularly when using the native iCOMPEL
features, it will be necessary to write data values using a specific locale representation.
The 'Write all data values using the following culture setting' controls this.
If this option is enabled, then a summary of the current setting will be shown the Excel page.
Copy Excel file before query
This option will copy the specified Microsoft® Excel® file prior to each query. Enabling this option allows the iDE to
access the file when it is open in Microsoft® Excel®. However, this may reduce query performance, particularly for
large spreadsheets.
By default, this option is enabled.
Specifying Advanced Query Settings
The Advanced Settings mode provides fine grained control over the data processed and written by the iDE. It will not
normally be necessary to modify these settings.
If Advanced Settings have been specified, then a summary of the current settings will be shown the Excel page.
Click the Advanced Settings button to view or modify the settings.
Check the Enable advanced query capability box to configure the advanced query settings.
The first row of data is header and contains field names checkbox specifies that the first row of the data
contains the column headings, and not data values. There are two common cases where this setting will need to be
changed:
If the file contains headings, and both the data and the headings are numeric (e.g. column heading is years
and the data is numbers), then the checkbox should be checked, to indicate the first row is headings.
If the file contains heading text which are dates, then the checkbox should be unchecked if the dates are not
correctly detected by the iDE.
The remaining fields are described in the Advanced Microsoft Excel Query Settings section.
Copyright (c) 2009 - 2012 Black Box Corporation
724-746-5500 | blackbox.com 15
Page 16
iCompel Data Engine - User Guide (V3.1.2)
2.3.2 Microsoft Exchange Server Connector
The Exchange® Connector is used to retrieve and process calendar and email items stored in Microsoft® Exchange
Server.
The iCompel Data Engine (iDE) is able to process items stored in the following versions of Exchange® Server:
Exchange® Server 2003
Exchange® Server 2007
Exchange® Server 2010
To use this Connector, please select the Microsoft® Exchange® option from the Data Source page, and visit the
Exchange page to specify the configuration properties.
Note: By default, the Enterprise Web Services query method is selected, which is compatible with Exchange
Server 2007 Service Pack 1 and above. If earlier versions of Exchange® Server are in use, please use the WebDAV
query method instead. The query method in use is summarized at the bottom of the the Exchange page, and can
be altered on the Advanced Microsoft Exchange Server Settings page.
Note: This Connector may require an additional license to operate.
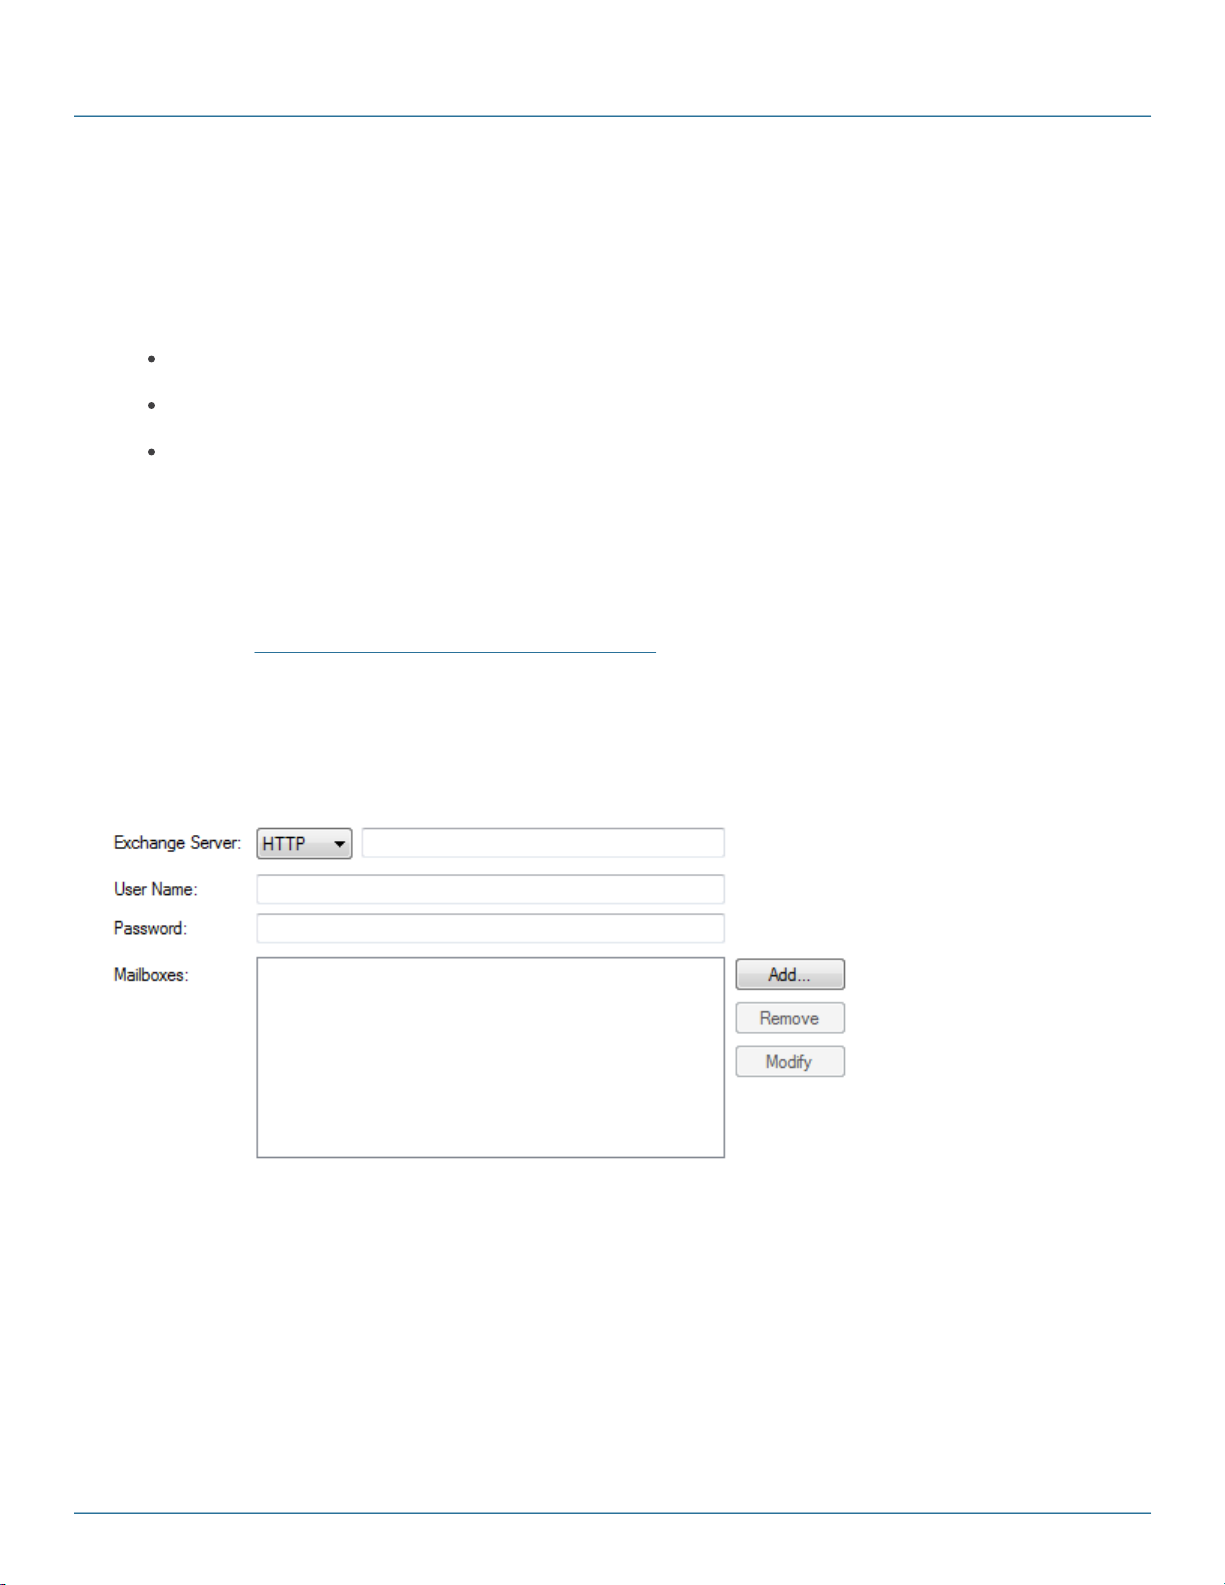
2.3.2.1 Basic Settings
This page is used to configure the Microsoft Exchange® Connector.
®
®
The Exchange® server property specifies the hostname (or IP address) for the Exchange® server you wish to
connect to. Please ensure the protocol entry is set to either HTTP or HTTPS as needed.
User Name and Password properties specify the credentials used to connect to the above Exchange Server, and in
general will refer to an ActiveDirectory® user. This user must also have an Exchange® Mailbox account, and the
Exchange® user must have been granted permission to view all resources listed in the Mailboxes section.
Copyright (c) 2009 - 2012 Black Box Corporation
724-746-5500 | blackbox.com 16
Page 17
Building a Connection
The Mailboxes section lists all Exchange® Server Mailboxes for which calendar or email information will be retrieved.
Click the Add button to add a new Mailbox, select a Mailbox and press Remove to delete, or Modify to view or
change. The Exchange® Mailbox Display Name should be entered, exactly as shown in your Global Address List.
Note that within Exchange® Server, the Mailbox Display Name can be found in the General tab of the Exchange
Mailbox user properties dialog.
All the above information should be provided by your system administrator.
The Advanced Microsoft Exchange Server Settings page provides fine grained control over the settings used to query
the Exchange Server. It will not normally be necessary to modify these settings.
2.3.3 Google Calendar Connector
The Google® Calendar Connector is used to retrieve and display events from one or more Google® Calendars.
To use this Connector, please select the Google® Calendar option from the Data Source page, and visit the
Google Calendar page to specify the configuration properties.
Note: This Connector may require an additional license to operate.
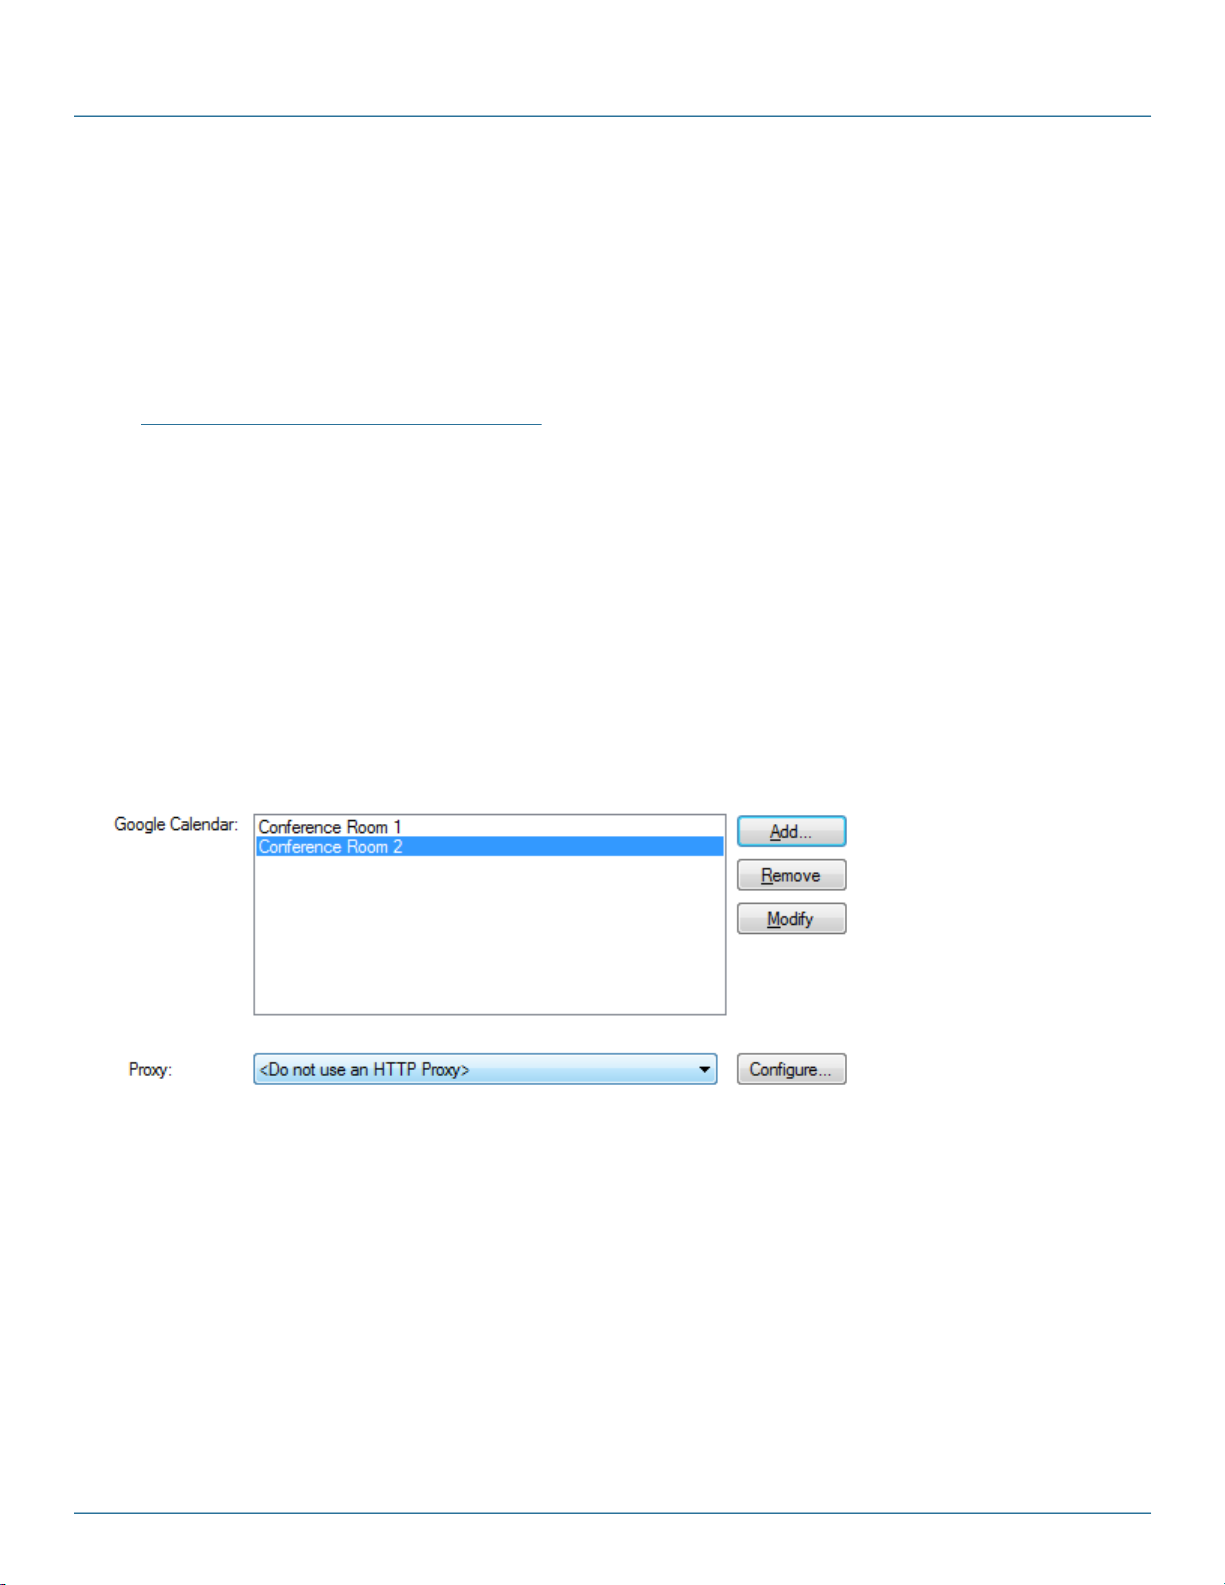
2.3.3.1 Settings
This page is used to configure the Google® Calendar Connector.
Currently configured Google® Calendars are shown. To add a new Google® Calendar, click the Add button. To
modify or remove an existing Google® Calendar, select the entry, and press Modify or Remove buttons respectively.
Copyright (c) 2009 - 2012 Black Box Corporation
724-746-5500 | blackbox.com 17
Page 18
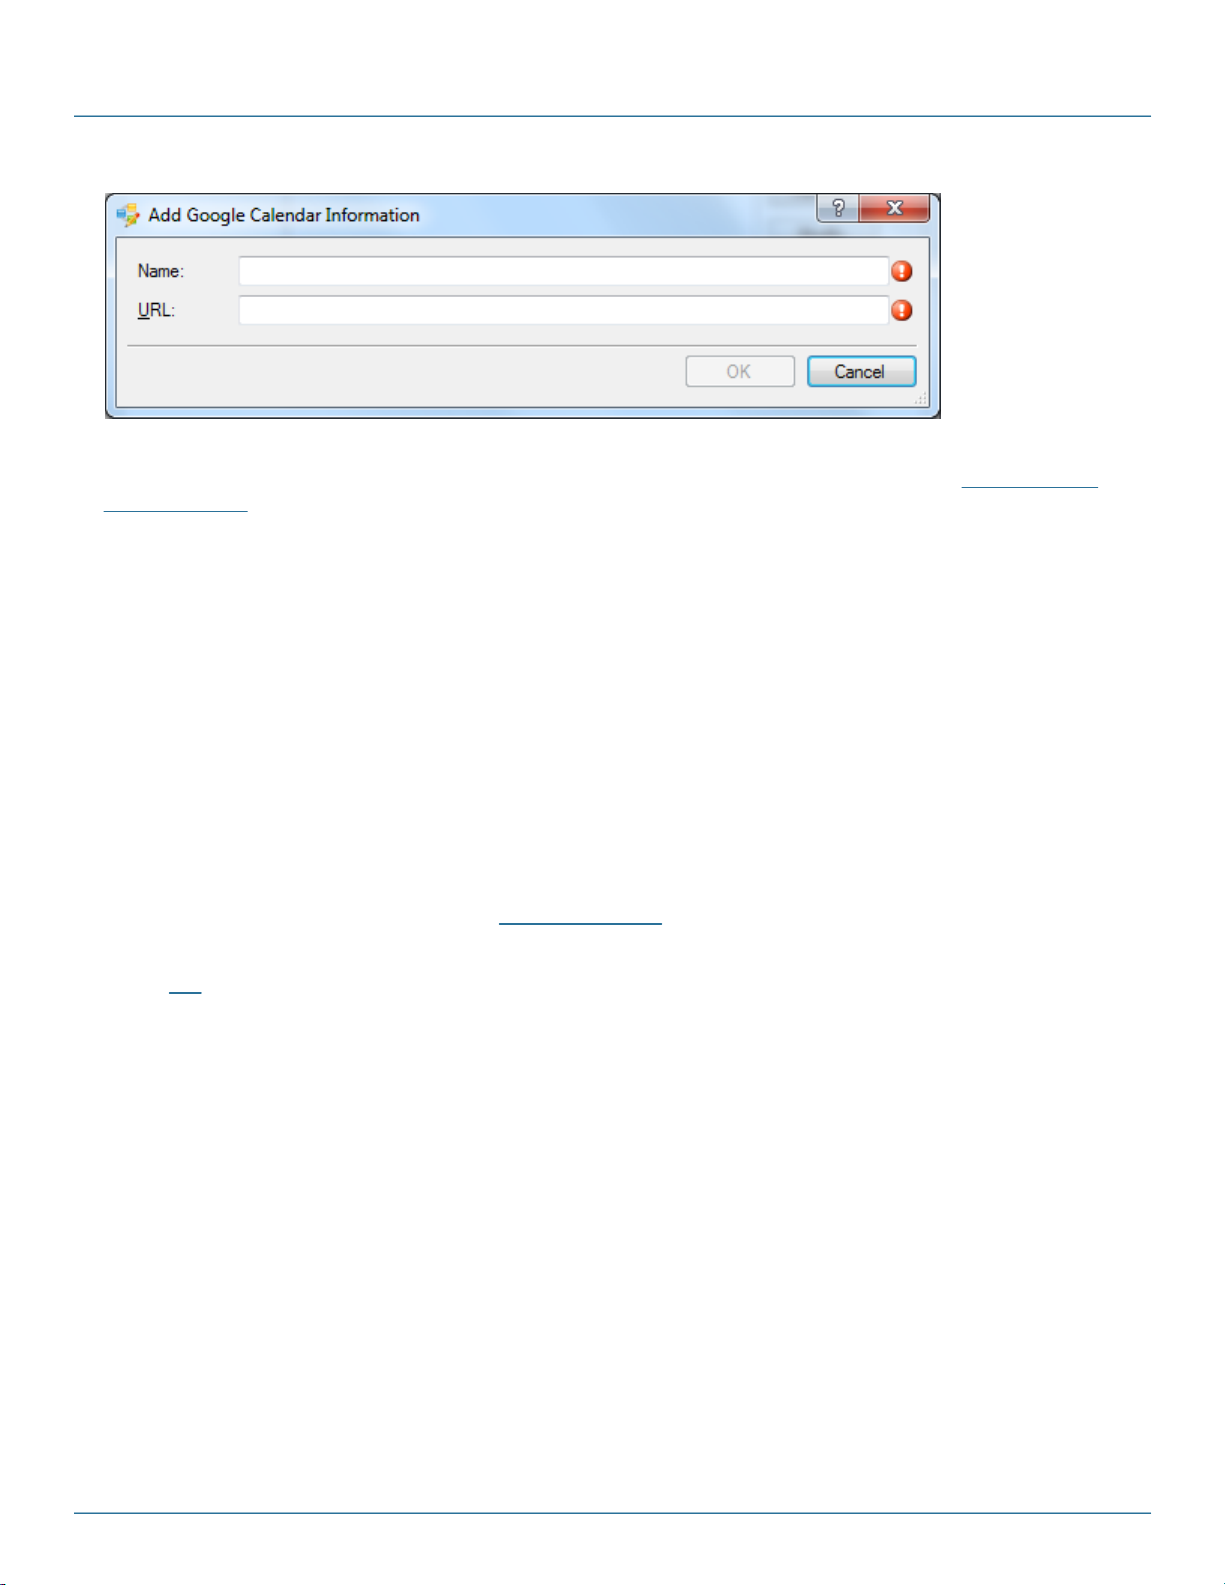
iCompel Data Engine - User Guide (V3.1.2)
The Name property is used to uniquely identify the calendar entry within the iCompel Data Engine user interface.
The URL is the location of the Google® Calendar feed. This can be determined as described in the Connecting to a
Google Calendar section.
Both properties are mandatory.
2.3.4 SQL Connector
The SQL Connector is used to retrieve and process data from a database, for example, Oracle® or Microsoft® SQL Server®.
The iDE uses Microsoft® Windows Open Database Connectivity (ODBC) to access and query the database.
In order to use the SQL Connector the user must create one or more valid ODBC System Data Source Name (
System DSN) entries on the local PC. Further information on this topic can be found in the Microsoft® Windows
help system.
Please select the SQL Connector option from the Data Source page, and visit the SQL Command page to specify
both the ODBC User DSN and SQL Query command to be executed. If user credentials are required to access the
database, then these can be specified on the Advanced Settings page.
Press the ODBC button to automatically start the Windows® ODBC Data Source Administrator application. Please
refer to this section if using the application on a 64bit operating system.
Note: This Connector may require an additional license to operate.
®
Copyright (c) 2009 - 2012 Black Box Corporation
724-746-5500 | blackbox.com 18
Page 19
Building a Connection
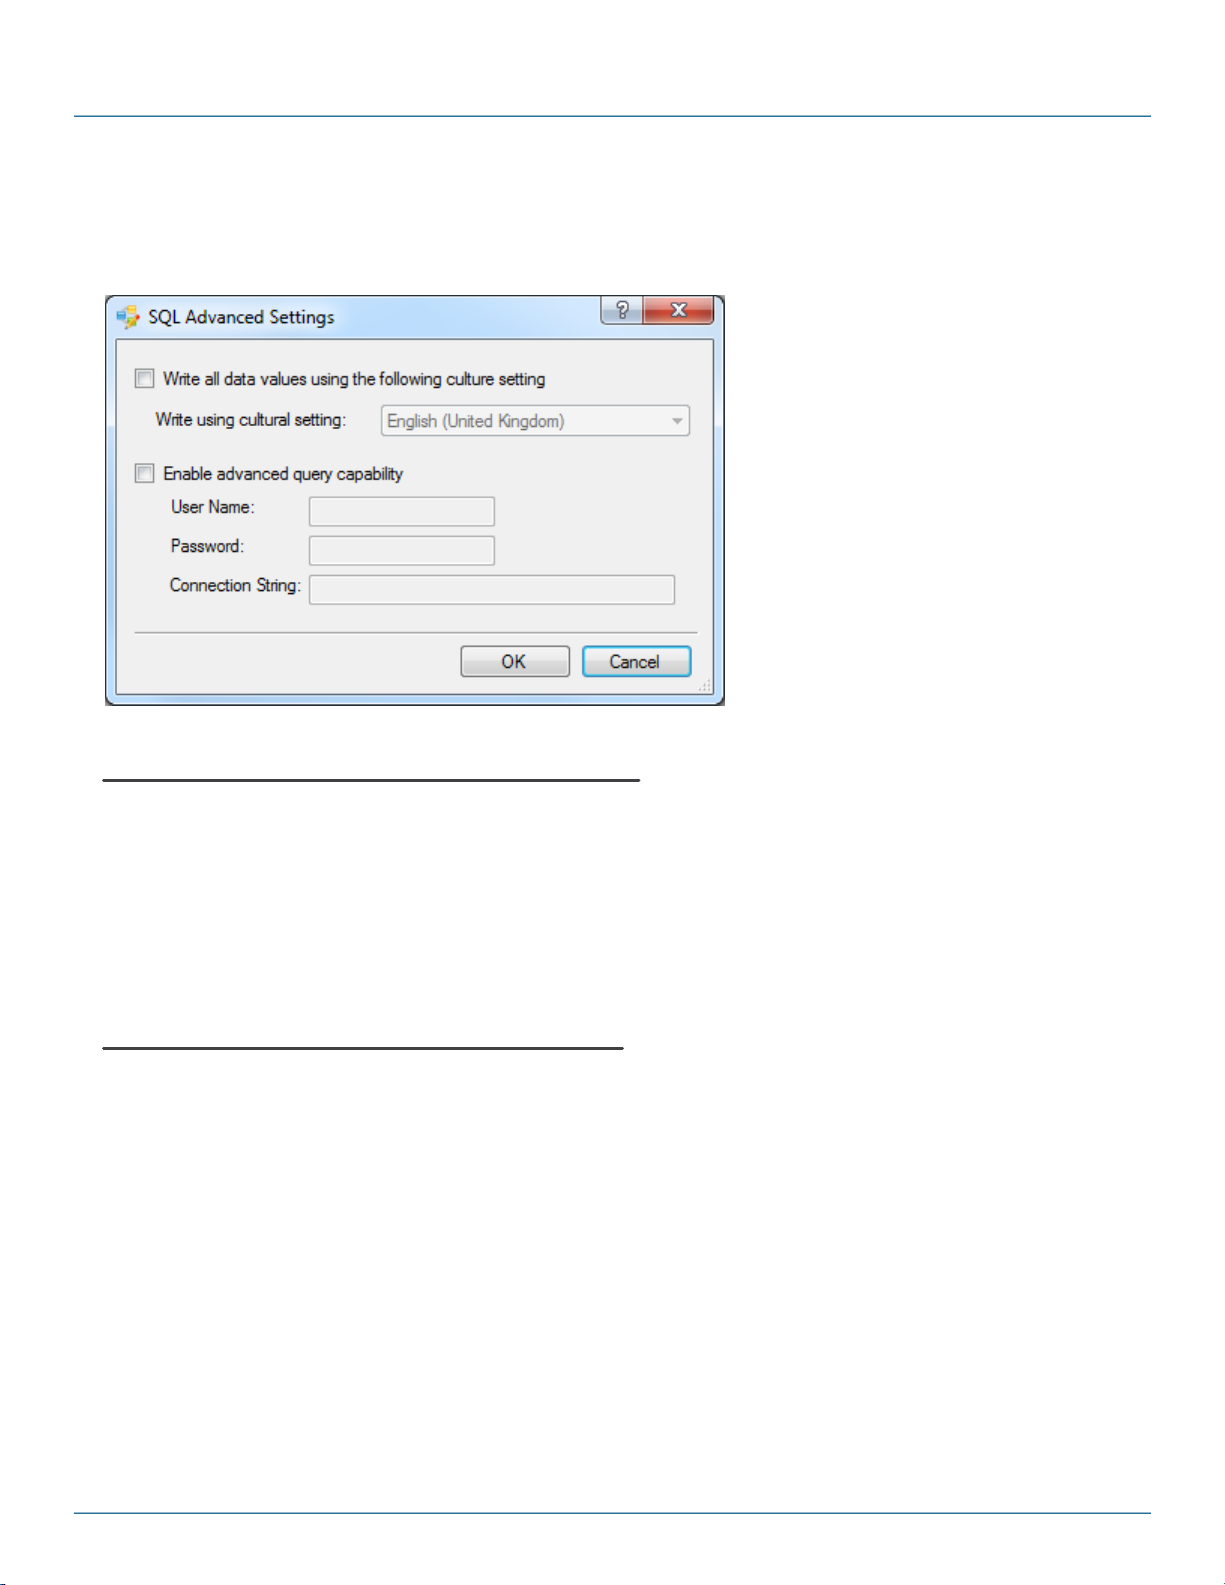
2.3.4.1 Advanced Settings
The Advanced SQL Settings page allows the username, password and additional ODBC Connection String
settings to be specified.
Specifying how Dates and Numbers are written
To ensure the widest possible compatibility with media, by default, the iDE will write all numbers and dates in a
general, non-locale specific manner. However, in some instances, particularly when using the native iCOMPEL
features, it will be necessary to write data values using a specific locale representation.
The 'Write all data values using the following culture setting' controls this.
If this option is enabled, then a summary of the current setting will be shown the SQL page.
Specifying Additional Connection Parameters
The username and password fields will be used to connect to the database specified in the ODBC DSN setting.
2.3.5 XML Connector
The XML Connector is used to retrieve and process XML data.
To use this Connector, please select the XML option from the Data Source page, and visit the XML Location and
XML Schema pages to specify the configuration properties.
Note: This Connector may require an additional license to operate.
Copyright (c) 2009 - 2012 Black Box Corporation
724-746-5500 | blackbox.com 19
Page 20
iCompel Data Engine - User Guide (V3.1.2)
2.3.5.1 Settings
The XML Connector is configured in two stages:
1. Enter the source location for the XML data using the XML Location page
2. Specify which elements and attributes to return data for using the XML Schema page.
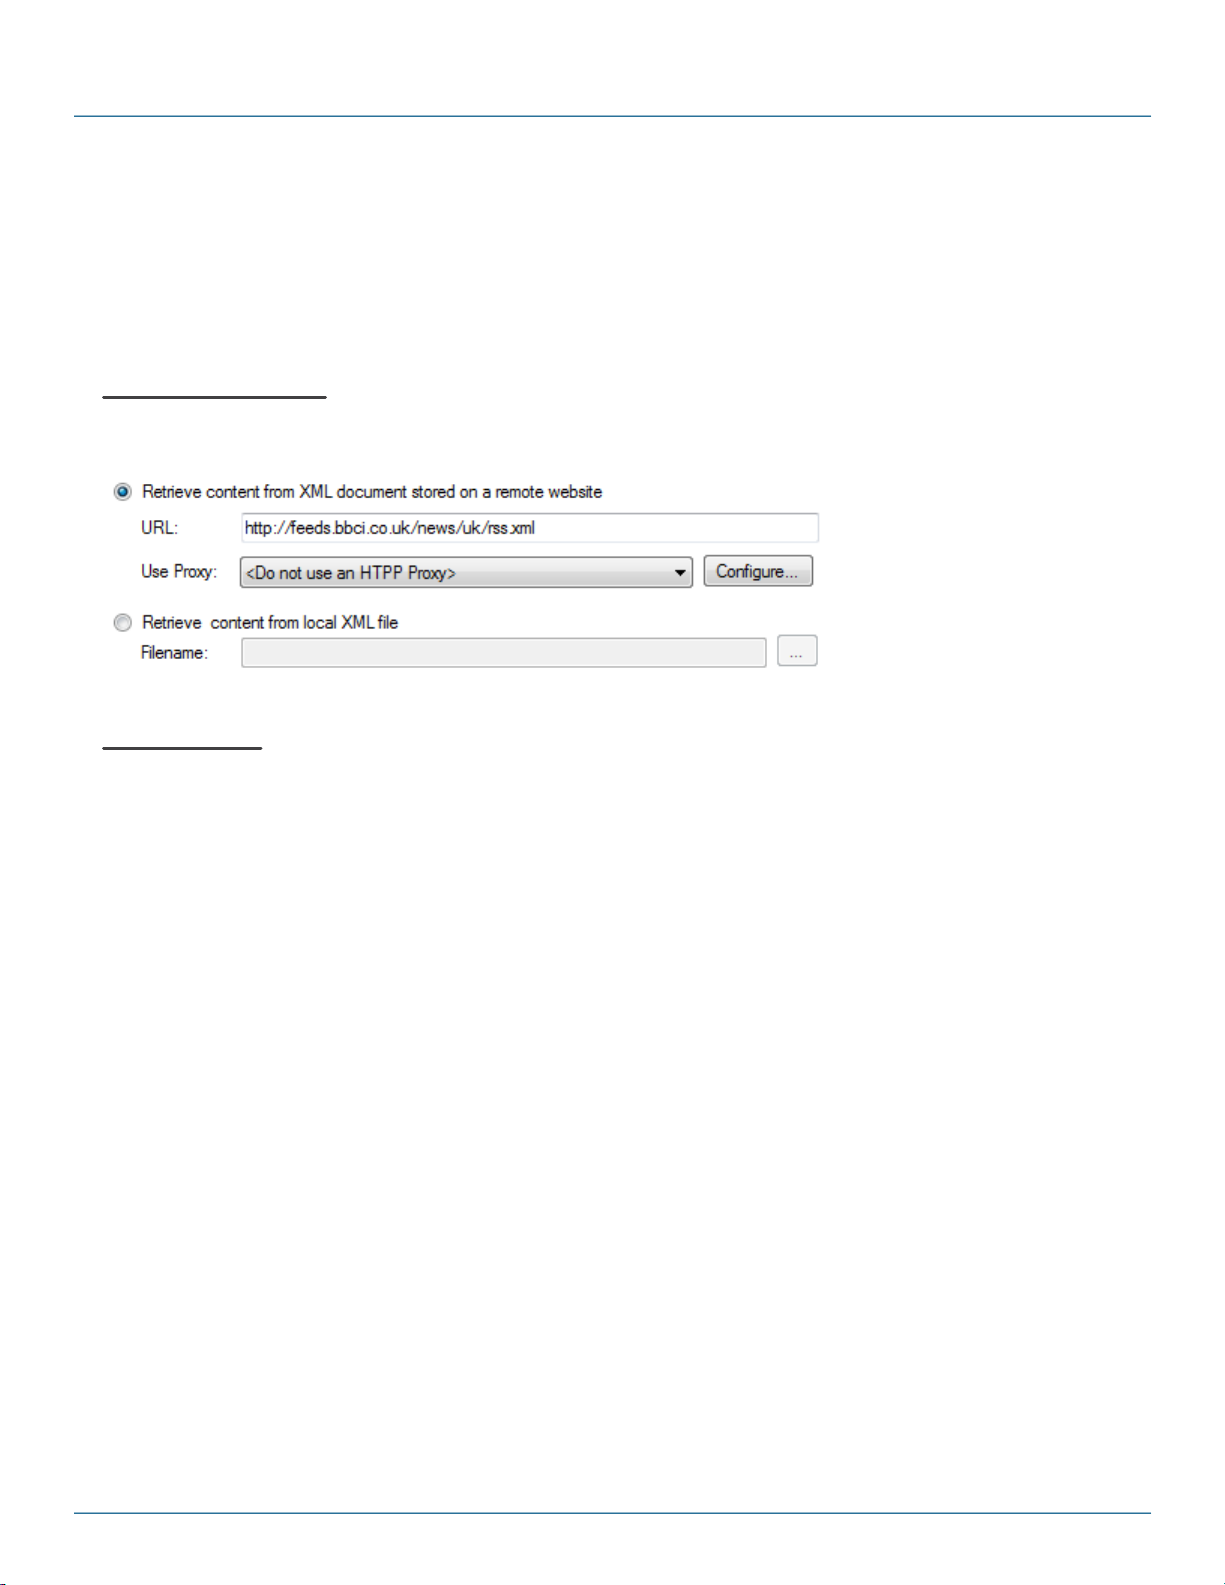
XML Location Page
The XML Location page specifies where the XML will be retrieved from.
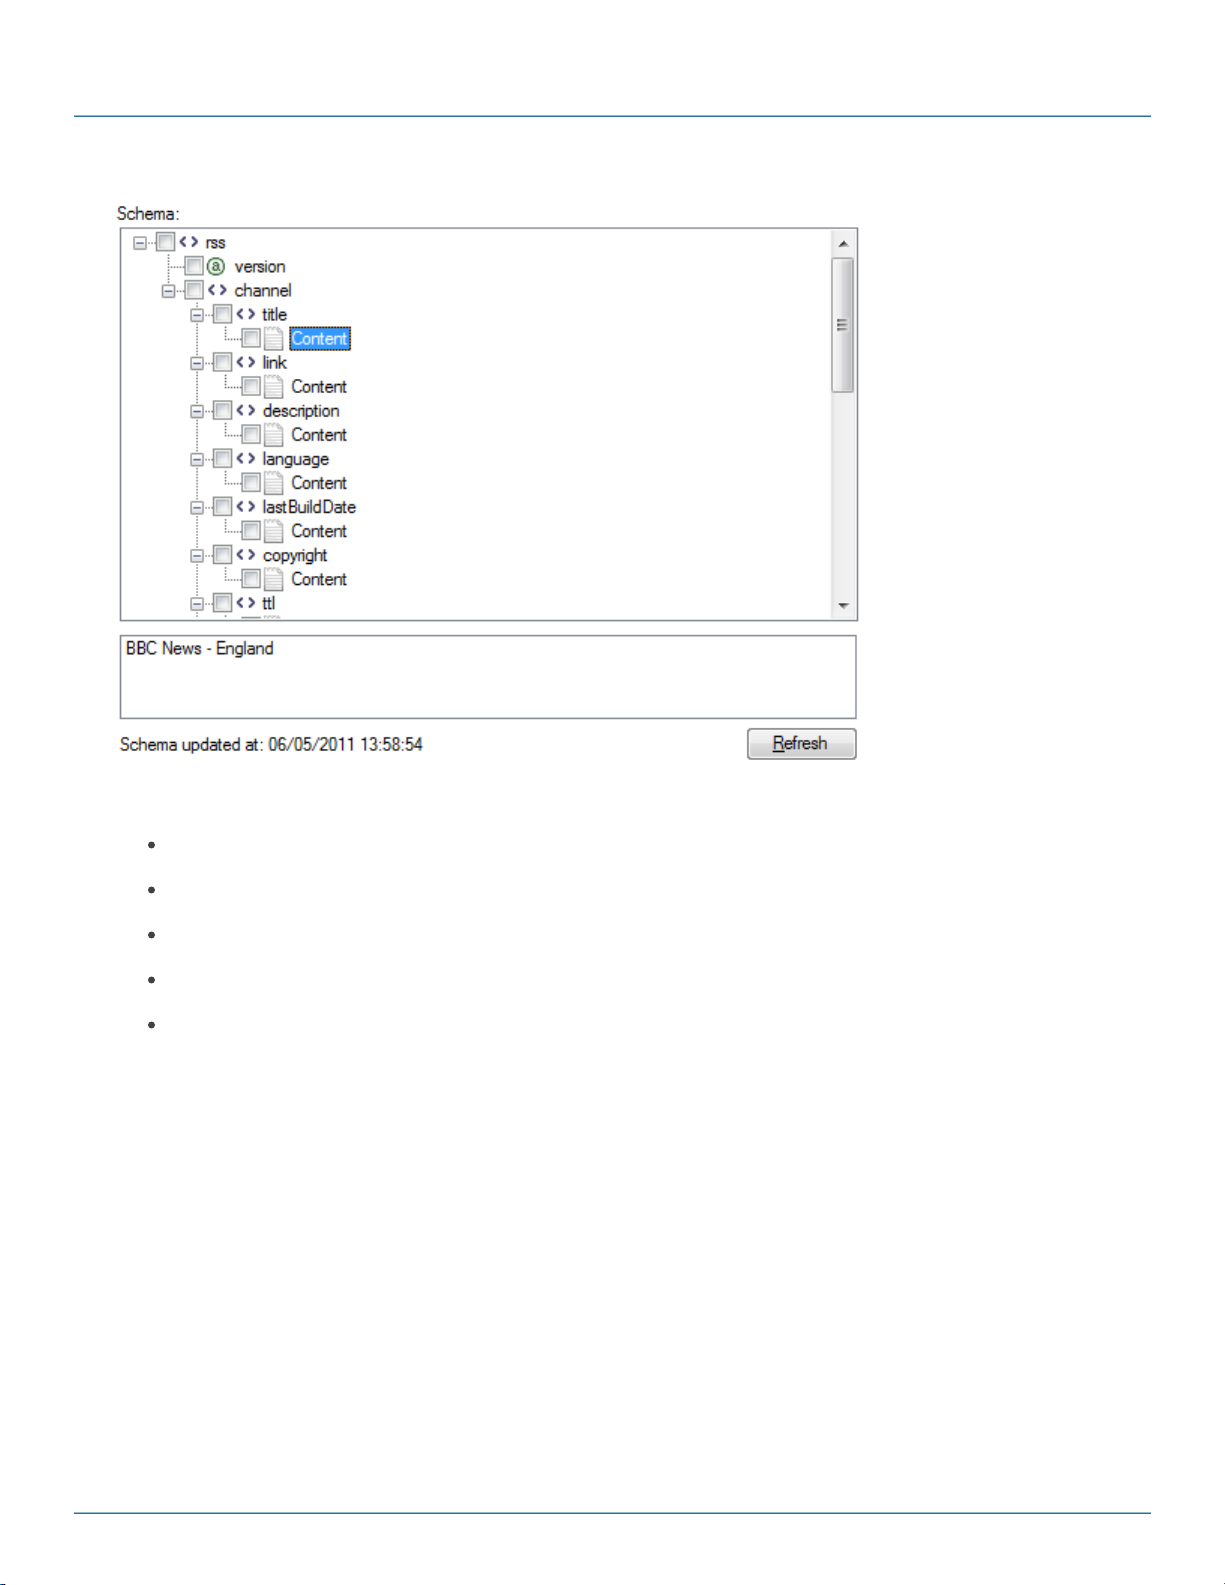
Schema Page
The Schema page defines which element and attributes should be retrieved. This setting allows the fields unused by
the media to be removed, which increases efficiency when displaying results from large XML files. If a node is
selected on the tree, then sample value panel (below) will update to show up to ten values retrieved from the source
for the selected item. If there are no values found, then '[No Values]' is displayed.
The Schema is refreshed by clicking the Refresh button.
Copyright (c) 2009 - 2012 Black Box Corporation
724-746-5500 | blackbox.com 20
Page 21
Building a Connection
The Schema right click (context menu) provides access to the following functionality:
Collapse All Items. This will collapse (shrink) all nodes in the Schema tree.
Expand All Items. This will expand all nodes in the Schema tree.
Expand only Enabled Items. Expands all enabled items, and collapses the remainder.
Enable all Items. This will enable all items.
Disable all Items. Disables all items.
2.3.6 Text Connector
The Text Connector is used to process Text data retrieved from a local file or web site URL.
To use this Connector, please select the Text option from the Data Source page, and visit the Text page to specify
the configuration properties.
Note: This Connector may require an additional license to operate.
Copyright (c) 2009 - 2012 Black Box Corporation
724-746-5500 | blackbox.com 21
Page 22

iCompel Data Engine - User Guide (V3.1.2)
2.3.6.1 Basic Settings
The Text page specifies where the text data will be retrieved from.
Copyright (c) 2009 - 2012 Black Box Corporation
724-746-5500 | blackbox.com 22
Page 23
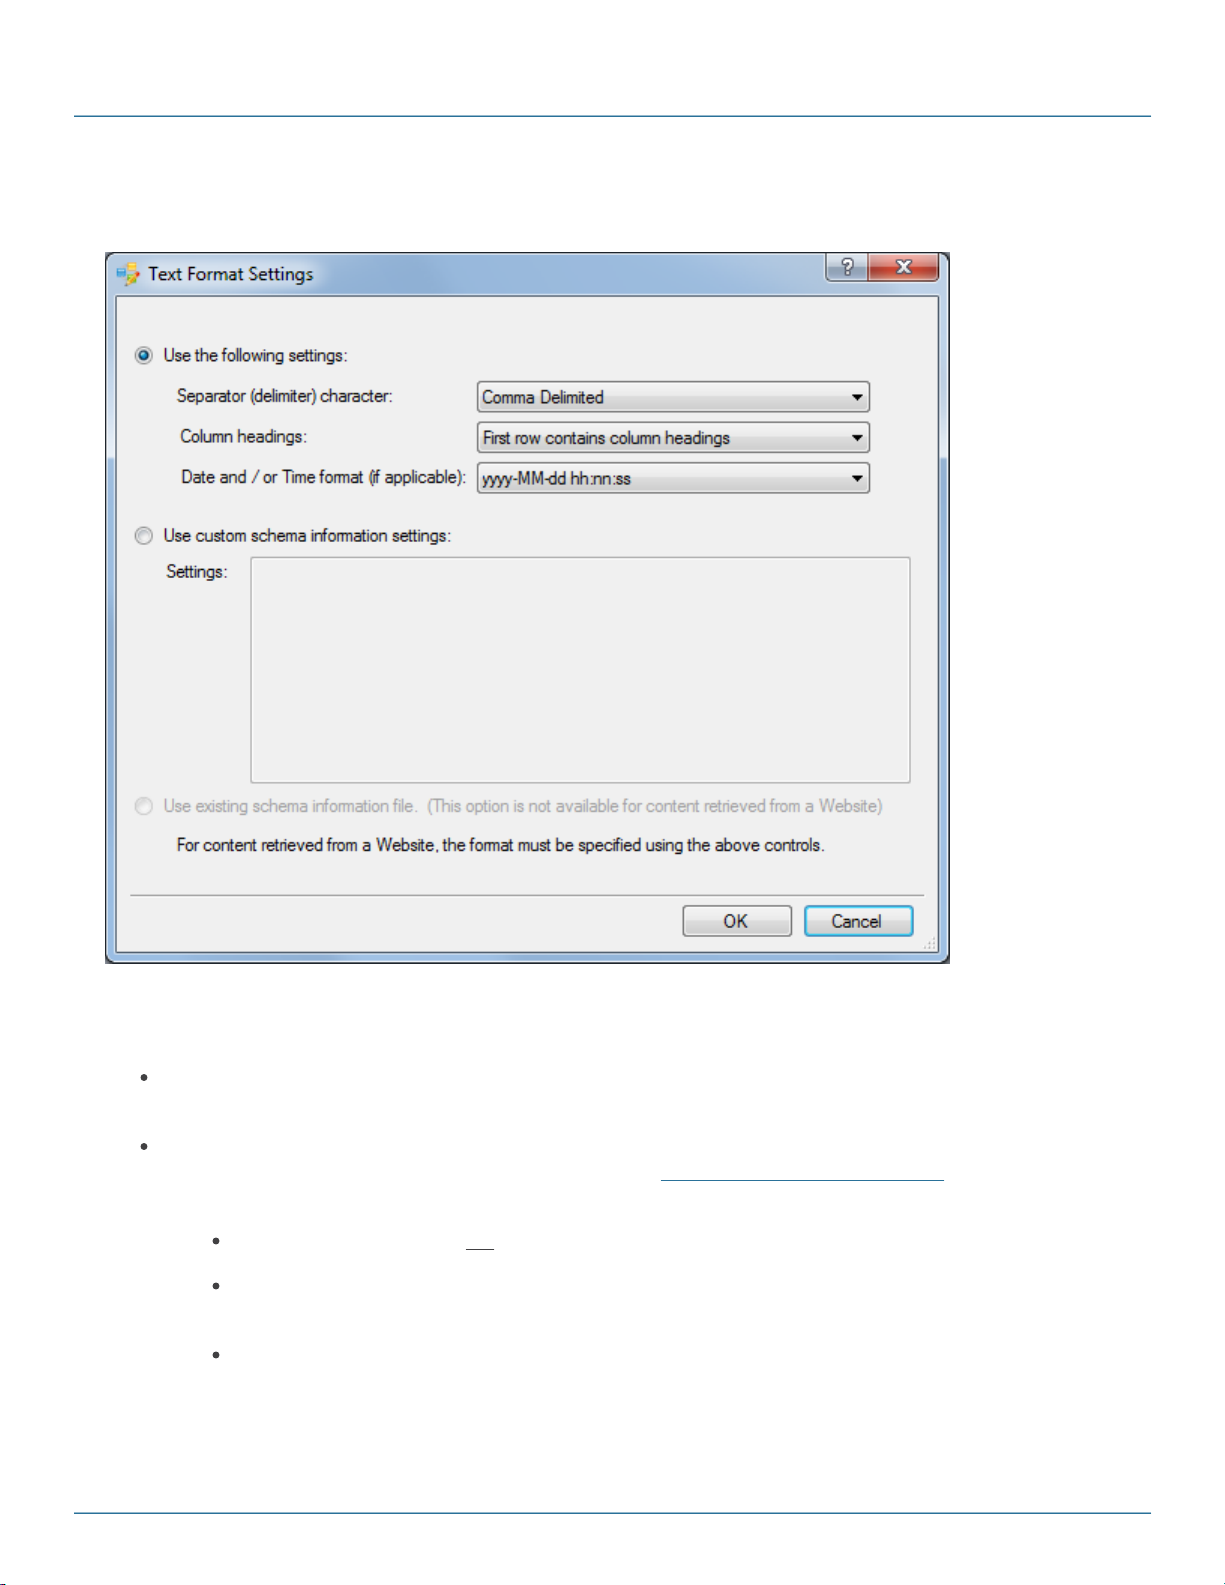
2.3.6.2 Format Settings
Building a Connection
To allow for a variety of text file formats, the way the iCompel Data Engine handles text files can be finely controlled.
The following settings are available:
Use the following settings. The setting will use the specified separator, column headings settings and date
and time format (if applicable). This is the default setting.
Use custom schema information settings. The specified settings will be used. This option provides very
fine grained controlled over the file format. Please refer to Schema.ini File (Text File Driver) in the Microsoft
documentation for further information. Please note the following:
The filename section must not be specified.
The ColNameHeader entry should be specified, and if set to false, then the fields must be specified in
the Settings, as described in the 'Specifying the Fields' section of the above web page.
The CharacterSet entry should be specified
Copyright (c) 2009 - 2012 Black Box Corporation
724-746-5500 | blackbox.com 23
®
Page 24

iCompel Data Engine - User Guide (V3.1.2)
Use existing schema information file. This setting will use the settings present in the file schema.ini
contained in the same folder as the source file, and current registry settings to determine how the source file
should be processed.
Note this option is only available for local files.
Specifying a Separator Delimiter Character
The Separator option specifies if a tab or comma should be treated as the value delimiter.
Specifying Column Headings
The Column headings entry indicates how the iCompel Data Engine should detect column headings in the data.
The following options are available:
First row contains column headings. The first row in the source data contains column headings.
No column headings are present. No column headings are present. All rows in the source contain data
values.
Specifying Date and Time Format
This entry specifies the mask used to process date and time values. The following notation is used:
d, dd = day; ddd, dddd = day of week, M = month, yy, yyyy = year
hh = hour, nn = minute, ss = second
Number Formatting
By default, a period symbol is assumed for number and currency separators. These can be modified by using
custom schema information settings.
Copyright (c) 2009 - 2012 Black Box Corporation
724-746-5500 | blackbox.com 24
Page 25
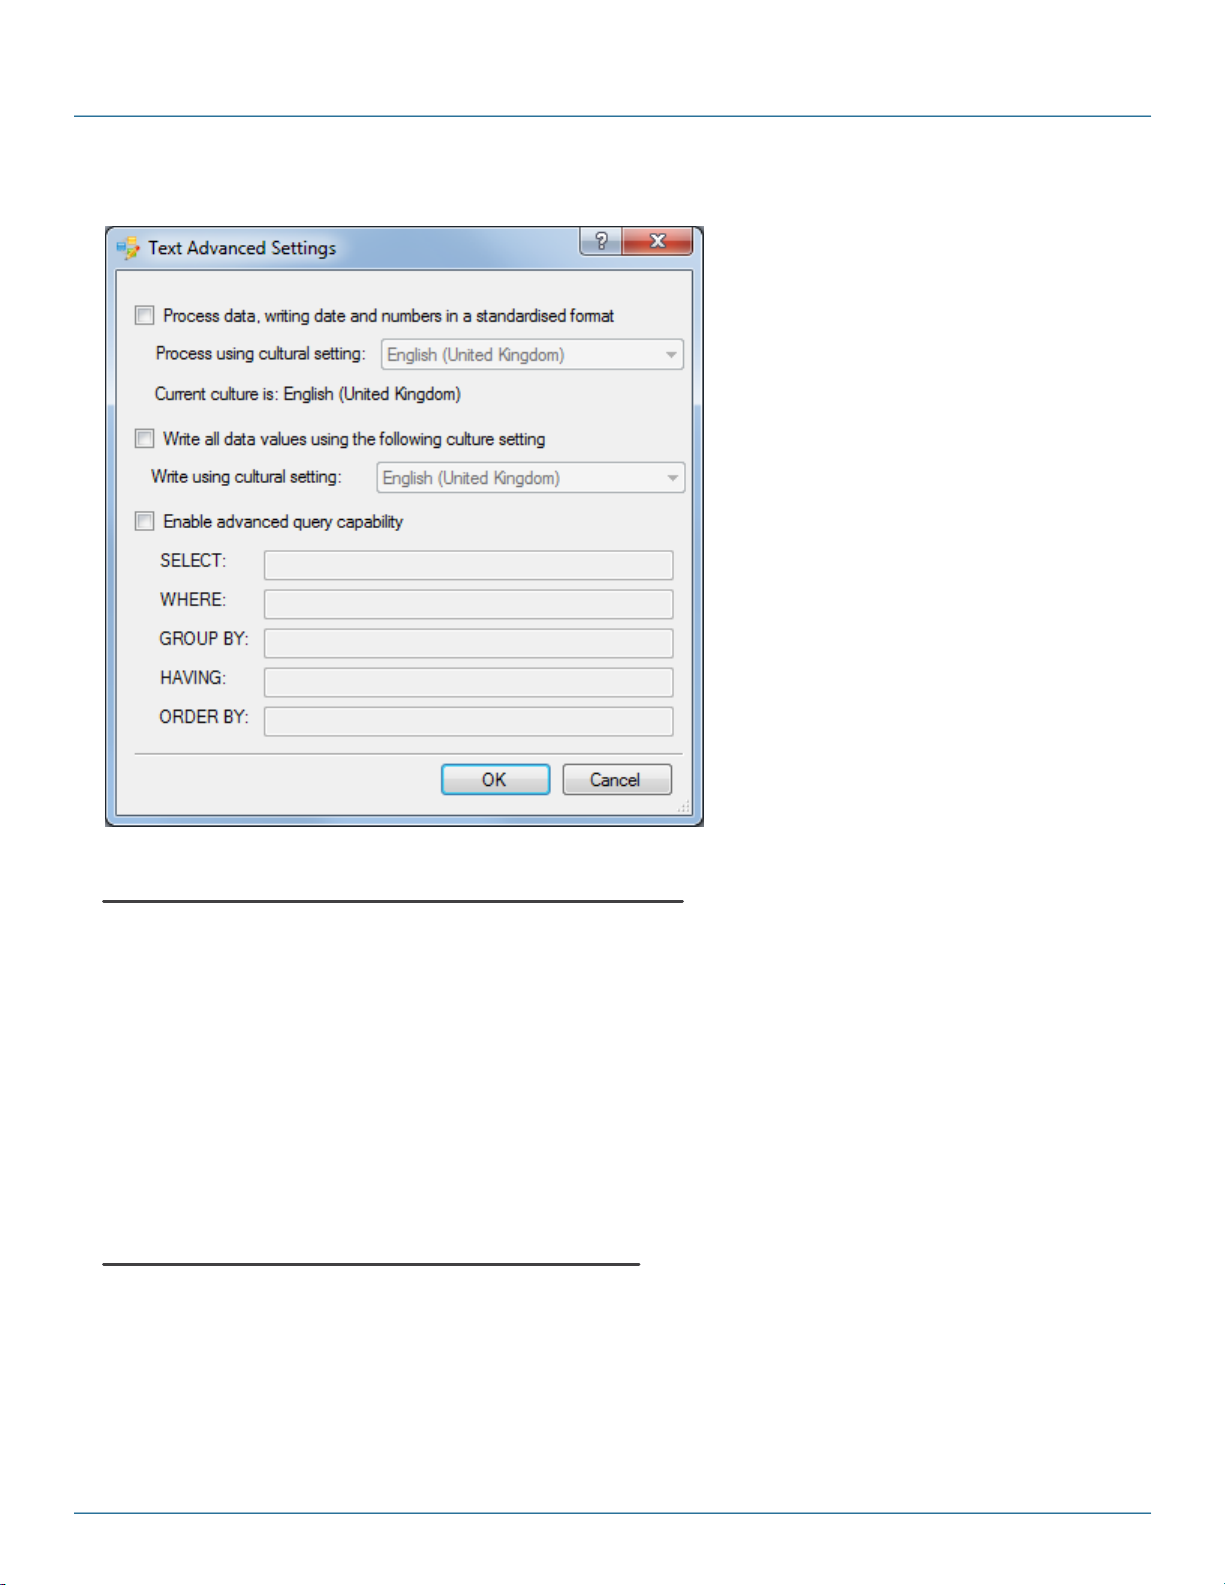
2.3.6.3 Advanced Settings
Building a Connection
Specifying how Dates and Numbers are processed
For some applications, it is necessary to provide hints to the iCompel Data Engine (iDE) about how dates and
numbers are represented in the Microsoft® Excel® spreadsheet. This is particularly important when the file contains
values whose interpretation is language specific, or where the Time Zone component must be honored in times. For
example, the date 1/4/1972 could be interpreted as 1st of April (in the UK), or the 4th of January (if in the US).
The Processing setting specifies the culture setting used when processing dates and numbers.
Note this setting does not control how date and number values are presented by the media - see the following
section for more information.
If Data Processing is enabled, then a summary of the current setting will be shown the Text page.
Specifying how Dates and Numbers are written
To ensure the widest possible compatibility with media, by default, the iDE will write all numbers and dates in a
general, non-locale specific manner. However, in some instances, particularly when using the native iCOMPEL
features, it will be necessary to write data values using a specific locale representation.
Copyright (c) 2009 - 2012 Black Box Corporation
724-746-5500 | blackbox.com 25
Page 26

iCompel Data Engine - User Guide (V3.1.2)
The 'Write all data values using the following culture setting' controls this.
If this option is enabled, then a summary of the current setting will be shown the Excel page.
Specifying Advanced Query Settings
The Advanced Settings mode provides fine grained control over the data processed and written by the iDE. It will not
normally be necessary to modify these settings.
If Advanced Settings have been specified, then a summary of the current settings will be shown the Text page.
Click the Advanced Settings button on the Text page to view or modify the settings.
Check the Enable advanced query capability box to configure the advanced query settings. The fields are
described in the Advanced Microsoft Excel Query Settings section.
2.4 Results
The iCompel Data Engine (iDE) can process and write results in multiple output formats. The output format chosen
will depend on how the data will be used or displayed, and will be subject to product licensing.
In most cases, the results will be written as XML to one or more Players (the first option).
This section describes the various result output data formats available, and their typical uses.
The Media page allows the user to set the following output formats:
Copyright (c) 2009 - 2012 Black Box Corporation
724-746-5500 | blackbox.com 26
Page 27

Building a Connection
XML (default). The eXtensable Markup Language (XML) output format allows results to be displayed in a
highly graphical manner, utilizing specially written HTML pages or Flash content running on the destination
machine to format the results.
Text. This output format option writes each individual result value as a separate text file
Presentation Format file. User defined custom format.
If required, then each Destination Player must be licensed to display results. If player licensing is required, this will
be clearly indicated in the Destination page.
2.4.1 XML Output Format
The eXtensable Markup Language (XML) output format allows results to be displayed in a highly graphical manner,
utilizing specially written HTML pages or Flash content running on the destination player.
For example, the XML result format could be used to display results in a pie chart, a bar graph, or a table as
required.
Note: This format should be used when displaying included results on a iCOMPEL (iCOMPEL).
Please ensure the included media Widgets Layout Packages are installed on each Destination Player before
proceeding. The Layout Pack ages are available in the specified sample media folder - please see Installing Sample
Layouts and Widgets section for details. Please review the iCOMPEL Layout Pack age feature for more information.
If required, then each Destination Player must be licensed to display results. If player licensing is required, this will
be clearly indicated in the Destination page.
All Destination Players
This section specifies which Players will display the results of this Connection query.
The following functions are available:
Add. Add a new iCOMPEL to the list. The hostname, and credentials for the iCOMPEL user must be known
and specified.
Remove. Removes the selected iCOMPEL from the list. The results will not be written to this player.
Modify. Allows the properties for the selected iCOMPEL to be modified.
At least one Player must be specified.
These settings are described in more detail on the Specifying the Destination Players and Limiting Output Size
section.
Copyright (c) 2009 - 2012 Black Box Corporation
724-746-5500 | blackbox.com 27
Page 28

iCompel Data Engine - User Guide (V3.1.2)
XML Filename
The XML filename field specifies the file to write on all Destination iCOMPEL's.
Providing at least one Destination Player has been specified, the Media Item Finder dialog can be used to easily
locate the XML filename from the media items present on a Player. Click the browse button ( ) next to the XML
Filename field to open the Media Item Finder. Please refer to the Specifying the XML Filename section for more
information.
The file will be written to each iCOMPEL specified in the All Destination Players setting. Please note if entering
this location by hand that it must exactly match the location the media being displayed expects to find data in.
The exact location written on each iCOMPEL will be dependent upon to the Media Folder folder setting for the
specified Username for each destination iCOMPEL. The Media Folder folder setting is set per user on the Users
page of the iCOMPEL. It is mandatory that all specified Destination Users have the same Media Folder setting.
2.4.2 Locating Media Items using the Media Item Finder
The Media Item Finder feature makes it very easy to locate and specify the media that will display the results of
this Connection.
On the Location page, click the browse button ( ) next to the XML Filename field to open the Media Item
Finder. If this button is disabled, please ensure at least one Destination Player has been added.
The Media Item Finder will examine the first available specified Destination Player and will locate details of all valid
media items which are able to display the current results.
To select and use a specified media item, select the media item and press the OK button, or simply double click
the required entry.
Copyright (c) 2009 - 2012 Black Box Corporation
724-746-5500 | blackbox.com 28
Page 29

Building a Connection
Hover the mouse cursor over an item to show detailed information about the item.
To refresh the media item list, click the Refresh Media Item list button.
It is possible to edit the Media Item name and description properties by clicking the Edit.. button, and to create a
copy of the Media Item by clicking the Copy... button. These features are described on the following page.
Only the media items that are able to display the specified Data Source are displayed. To display all results, enable
the Show all Media Items check box. Media items which can not display the current data are displayed in grey
text.
2.4.2.1 Copying and Modifying Media Items
Edit Media Item Properties
The Name property is mandatory, and Description property is optional. These properties are displayed on the
Media Item Finder dialog.
The OK button will apply the specified changes. Cancel will ignore changes and close the dialog.
Copyright (c) 2009 - 2012 Black Box Corporation
724-746-5500 | blackbox.com 29
Page 30

iCompel Data Engine - User Guide (V3.1.2)
Copy Media Item
The Location field specifies the name of the new media item. The new media item will be created in the same folder
as the original media item.
The Location and Name properties are mandatory, and Description property is optional. These properties are
displayed on the Media Item Finder dialog.
The OK button will apply the specified changes and close the dialog. Cancel will ignore changes and close the
dialog.
2.4.3 Text Output Format
This output format option writes each individual result value as a separate text file. All values for the same result
column are placed in a single folder, providing easy grouping.
The Text file output format allows the results to be formatted, displayed and managed using native iCOMPEL
mechanisms, which offers a number of benefits:
No custom media is required, since built in iCOMPEL formatting and display mechanisms are used.
The iCOMPEL media item synchronization feature can be used to ensure that other content is displayed at the
same time. For example, this would allow a picture to be displayed at the same time as a price.
Typically, the user would add specific result files to a Playlist as either individual text files, or using the Folder Play
feature. Note that the Character set option for the media item on the iCOMPEL should be set to UTF-8.
Output Location
The exact destination filenames are dependent upon the iCompel Data Engine (iDE) Source Data, Destination and
iCOMPEL (iCOMPEL) User settings.
Copyright (c) 2009 - 2012 Black Box Corporation
724-746-5500 | blackbox.com 30
Page 31

Building a Connection
The general format is:
[player host name]:/[user media folder]/[relative output folder]/
[source data container name]/[source data column name]/nnnnn.txt
The relative output folder is specified on the Location page.
The source data container name setting indicates the source of the data. This is always set to row for the SQL
Connector.
The source data column name is the name of the column for which the results apply.
nnnnn.txt is the filename written, with one file for each column for each record. nnnnn is the record number,
counting from one and containing leading zeros to ensure the filename is always 5 digits long.
All files will be written to each iCOMPEL specified in the All Destination Players setting.
The exact location written on each iCOMPEL will be dependent upon the Media Folder folder setting the user
specified for each destination iCOMPEL. The Media Folder folder setting is set per user on the Users page of the
iCOMPEL.
Note during the query execution, exiting files in the folder which match the above pattern (nnnnn.txt), but which are
not included in the result of the current query will be deleted. This ensures the content of the folder always exactly
matches the results returned from the last query.
As both the source data container name and the source data column name are used in the filename, the
following characters, if present, will be removed and replaced with an underscore:
\ (backslash)
/ (forward slash)
: (colon)
* (asterisk)
? (question mark)
" (double quotes)
< (left angle bracket)
> (right angle bracket)
| (pipe)
Note in all cases, the case is preserved, so Name is different from name.
Output Location Example
For example, if the Media Folder for user fred is:
Copyright (c) 2009 - 2012 Black Box Corporation
724-746-5500 | blackbox.com 31
Page 32

iCompel Data Engine - User Guide (V3.1.2)
Name
Age
Joe Blogs
32
Jane Smith
56
Filename
Filename Content
ftp://Player11407/media/media/dynamic_sample/output/row/Name/00001.txt
Joe Blogs
ftp://Player11407/media/media/dynamic_sample/output/row/Name/00002.txt
Janes Smith
ftp://Player11407/media/media/dynamic_sample/output/row/Age/00001.txt
32
ftp://Player11407/media/media/dynamic_sample/output/row/Age/00002.txt
56
/media/dynamic_media
the Relative Output Folder setting is:
/main_campus/timetable/
and the SQL Connector is used, and a two records are returned for field start. The files would be written:
/media/dynamic_media/main_campus/timetable/row/start/00001.txt
/media/dynamic_media/main_campus/timetable/row/start/00002.txt
This folder, and any individual files, can then be added to a Playlist.
Example
If the source data is a database table (containing below data) queried using the SQL Connector:
The relative output folder is set to /media/dynamic_sample/output, and the iCOMPEL destination location is
Player11407.
The following files will be written:
2.4.4 Custom Output Formats using a Presentation Format File
This output format applies the values for each record to slots within a Presentation Format file, and writes the
resulting file to a unique file.
This format shares a lot of the properties and benefits of the Text file output format.
The unique benefits of this result format are that it allows the values in each record to be easily combined or specific
values inserted within a predefined Presentation Format file. The Presentation Format file must be text based, but
can contain any content. This allows highly customized content, without requiring custom media creation.
Copyright (c) 2009 - 2012 Black Box Corporation
724-746-5500 | blackbox.com 32
Page 33

Building a Connection
Marker Format
Description
{field name}
Replace each instance of this marker with the current record value for
this field name.
{field name.FieldName}
Replace each instance of this marker with the name of this field as
specified in the original data.
The feature can be used for many scenarios including:
Produce a text file containing the name and price of each item on special offer today presented within a
sentence (e.g. 'Today's special is Baked Beans - only 49p a can!'. The resulting files can be displayed using a
iCOMPEL text folder play item. This example is described in more detail below.
Produce a series of HTML files containing specific Key Performance Indicator (KPI) values for each region. The
HTML file contains special formatting code to highlight KPI values which have not been met. Within a single
Channel, the iCOMPEL Conditional Play feature can be used to display the correct region file.
Note that the Character set option for the media item on the iCOMPEL should be set to UTF-8.
Presentation Format File
The Presentation Format file can be any text based format, including HTML and XML, and can have any extension.
Within the Presentation Format file contents, special markers are used to indicate where to substitute a value from
the current record.
The following markers are used:
The field name is the exact name of the field to replace. The field name is case sensitive, so Name is treated
differently from name.
The following field names are reserved for use by the iCompel Data Engine (iDE). These field names may be used
within the Presentation Format file. If the result data contains identical field names, the result data value will be used
in preference to the iDE supplied value.
Copyright (c) 2009 - 2012 Black Box Corporation
724-746-5500 | blackbox.com 33
Page 34

iCompel Data Engine - User Guide (V3.1.2)
Field Name
Description
query_time
Specifies the time and date the query data was created. Specified in
ISO8601 format.
field_name_significant
Indicates if the attribute names are important. Value 'True' or 'False'
only.
query_source
Specifies the source of the data. Value includes 'SQL'
product_version
The long version of the iCompel Data Engine which wrote these results.
Character
Replaced with
< (left angle bracket)
<
> (right angle bracket)
>
" (double quotes)
"
' (apostrophe)
'
& (ampersand)
&
If the Presentation Format filename extension is XML, HTM or HTML, then all values will be correctly encoded
(escaped). In all other cases, the values will be substituted exactly.
Encoding Data Values
To ensure content is correctly interpreted, values written to XML or HTML files will be encoded (escaped). The
following characters are replaced:
Data values will automatically be escaped if the Presentation Format filename extension is XML, HTM or HTML.
Output Location
The exact destination file written is dependent upon the source data and the destination settings as follows. The
format is:
[relative output folder]/[source data container name]/nnnnn.ext
The relative output folder is the folder specified on the destination Location page.
The source data container name setting indicates the source of the data. This is always set to row for the SQL
Connector.
Copyright (c) 2009 - 2012 Black Box Corporation
724-746-5500 | blackbox.com 34
Page 35

Building a Connection
Item Name
Price
Tuna
69p
Chocolate
£1.12
As the source data container name used in a filename, the following characters, if present, will be removed and
replaced with an underscore:
\ (backslash)
/ (forward slash)
: (colon)
* (asterisk)
? (question mark)
" (double quotes)
< (left angle bracket)
> (right angle bracket)
| (pipe)
Note in all cases, the case is preserved, so Name is different from name.
nnnnn.ext is the file name written, with one file for each column for each record. nnnnn is the record number,
counting from one and containing leading zeros. The ext is the filename extension, and is identical to the
Presentation Format filename.
Note during the query execution, exiting files in the folder which match the above pattern (nnnnn.ext), but which are
not included in the result of the current query will be deleted. This ensures the content of the folder always exactly
matches the results returned from the last query.
Example
The user wishes to display a sentence describing the current special offers. The special offer data is read from a
database, using the SQL Business Connector.
The query results contain the following:
The Presentation Format file contains the following text:
Special offer {Item Name} - {Price}. Today Only!
Copyright (c) 2009 - 2012 Black Box Corporation
724-746-5500 | blackbox.com 35
Page 36

iCompel Data Engine - User Guide (V3.1.2)
Filename
Filename Content
ftp://Player11407/media/dynamic_sample/output/
row/00001.txt
Special offer Tuna - 69p. Today
Only!
ftp://Player11407/media/dynamic_sample/output/
row/00002.txt
Special offer Chocolate - £1.12.
Today Only!
The relative output folder is set to /media/dynamic_sample/output, and the iCOMPEL destination location is
Player11407.
The following files will be written:
2.4.5 Specifying the Destination Players and Limiting Output Size
The iCOMPEL's (iCOMPEL) to copy results to are specified in the following control:
The list shows all iCOMPEL's the result/s will be copied to.
At least one iCOMPEL's must be specified in order to successfully execute the query.
The text at the bottom of the list indicates where the results will be written on each destination Player.
The following functions are available:
Add. Add a new iCOMPEL to the list. The hostname, and credentials for the iCOMPEL user must be
known and entered.
Remove. Removes the selected iCOMPEL from the list. Further results will not be written to this player.
Note the player will contain to display the last results written (if any).
Modify. Allows the properties for the selected iCOMPEL to be modified.
Pressing Add or Modify button will display the Player Details dialog:
Copyright (c) 2009 - 2012 Black Box Corporation
724-746-5500 | blackbox.com 36
Page 37

Building a Connection
The Host Name field specifies the Player network host name or IP address. The Username and Password field
specify the credentials for iCOMPEL defined user. All fields must be specified.
Limiting the number of records written
The maximum number of records processed and written (not retrieved) is controlled by the limit setting.
Typically this would be enabled in the following conditions:
To restrict the number of records written to the output, particularly where it was only possible or relevant to
display a small number.
Where there was a performance penalty or network bandwidth concern when copying large numbers of results.
To use this setting, check the Enable limit option, and specify a number greater than zero in the limit count entry.
Note for performance reasons it's recommended the limit setting is enabled when using Text file output, and there
ARE more than a couple of columns or where the output is written to more than a few iCOMPEL's.
Note for performance reasons, the included graph media is capable of displaying up to 75 records.
2.4.6 Applying a Player DATA IN license
With specific iCompel Data Engine licensing options, you will need to install additional licenses on the iCOMPEL
(iCOMPEL) and may require specific minimum iCOMPEL firmware version.
If licensing is required but not installed, then an error message, such as shown below, will be displayed clearly
indicating the cause and resolution.
Copyright (c) 2009 - 2012 Black Box Corporation
724-746-5500 | blackbox.com 37
Page 38

iCompel Data Engine - User Guide (V3.1.2)
Additional licenses can be applied from the iCOMPEL Setup - System Setup - Licensing Web page. Further
information about applying licensing can be found in the iCOMPEL documentation.
2.5 Specifying when to execute
The iCompel Data Engine can execute queries on the following schedules:
One time, by using the Test Query button on the Test page within the Connection Editor.
At a specified time every day - a periodic query.
Every interval.
Use the Schedule page in the Connection Editor to describe when the Connection should be executed.
Note the Schedule is only applied when the Connection is made Active, and not when the Connection is tested in the
Connection Editor. Please refer to the Managing Active Connections section for more information.
2.6 Connection Properties
This page allows a user to specify an additional Name and optional Comment properties for this Connection.
These values will be displayed in the Service Manager application, and can be used to assist in identifying a
Connection.
The Name field is mandatory, but is automatically populated when the Connection is first saved.
2.7 Testing a Connection
The Test page allows the user to execute the current Connection.
Note that the Connection is executed once only each time the Test button is pressed.
The log message window shows execution and other status messages. Right click on the message window to copy
messages to the clipboard, or to clear the message window.
Copyright (c) 2009 - 2012 Black Box Corporation
724-746-5500 | blackbox.com 38
Page 39

Part
III
Monitoring and Managing
Connections
Page 40

iCompel Data Engine - User Guide (V3.1.2)
The iCompel Data Engine Connection Manager application has the icon on the left. A link
will be found in the Black Box iCompel Data Engine group on the Microsoft® Windows® Start
menu, and may also be found on your Windows desktop.
3. Monitoring and Managing Connections
A iCompel Data Engine (iDE) Connection specifies what data to read, where to write the results, and when to do so.
Connections can be viewed, modified and tested using the Connection Editor, which is a Microsoft® Windows
application.
Connections are managed using the iCompel Data Engine (iDE) Connection Manager Windows application.
This section introduces this application.
The Connection Manager can execute many connections simultaneously, subject to installed licenses, and will
continue to operate even when no user is logged into the system.
The iCompel Data Engine Service, which is a Microsoft Windows Service, continues to execute Connections when
no user is logged into the system. This Service must be installed and running to execute and monitor Connections
in the background.
The Connection Manager application will show a warning message if the iDE Service could not be contacted.
To automatically execute the Connection according to the schedule specified by the Connection, it must first be
added, then made active within the Connection Manager. This is described in the QuickStart section.
®
3.1 Creating a new Connection QuickStart
The following steps show how to create a new Connection, and make it Active (which executes it periodically,
regardless of the current logged in Windows® user):
1. Start the iCompel Data Engine Connection Manager application.
A link will be found in the Black Box iCompel Data Engine group on the Microsoft® Windows® Start
menu, and may also be found on your Windows® desktop.
2. Click the Create New button and wait for the Connection Editor application to start.
3. In the iCompel Data Engine Connection Editor application:
Complete the Source, Destination and Schedule pages as needed. These fields are described in the
Building a Connection part of this guide.
On the file menu, select Update (or CTRL+S). Correct any errors if needed.
4. In the iCompel Data Engine Connection Manager application, click Apply button.
Note, by default, the Connection will check the source and update the destination every 15 minutes. Please review
the Schedule page setting for this Connection in the Connection Editor to adjust this value.
Copyright (c) 2009 - 2012 Black Box Corporation
724-746-5500 | blackbox.com 40
Page 41

3.2 System Status
The Status page shows the current live system status.
An example system Status page is shown below:
If the following message is shown:
Monitoring and Managing Connections
Please review and check the following:
If Microsoft® Excel® functionality is required, please ensure the '2007 Office System Driver: Data Connectivity
Components' component is downloaded from Microsoft® and installed. Please reboot the system to apply the
changes, even if not explicitly requested to do so.
Please ensure anti-virus and firewall software is set to allow the iCompel Data Engine to communicate with the
iCompel Data Engine Service. The Connection Manager application will attempt to open an IP socket on local host
to the iCompel Data Engine Service to determine the live service status.
3.3 Monitoring Active Connections
The Active page shows the live and current status for all Active Connections.
The following status fields are shown.
Status. Graphically indicates the last execution status. The status may be:
Successfully executed.
Failed to execute. The Last Status column will indicate the reason.
Unknown. Unknown means the Service Manager was unable to obtain the status from the
Connection Service.
Copyright (c) 2009 - 2012 Black Box Corporation
724-746-5500 | blackbox.com 41
Page 42

iCompel Data Engine - User Guide (V3.1.2)
New Connection that will be made Active when Apply button is pressed.
Name. The Connection name field as specified in the Properties page of the Connection Editor.
Type. The Connector used.
Last Execute Time / Next Execute Time. The last and next date and time for this Connection, presented
in locale specific format.
Last Status. Textual description of the last execution status. An asterisk in this column indicates that
changes have been applied to the Connection since the status was last collected.
Comment. The Connection comment field as specified in the Properties page of the Connection Editor.
The columns can be reordered by drag-and-dropping to their new position. They may be sorted alphabetically by
clicking on the column label.
To view detailed status messages for the selected Active Connection, open the Connection menu and select View
Status Messages.
3.4 Managing Connections
The Active page shows the details and status for all Active (executing) Connections, and allows Active Connections
to be modified or removed, and new Connections to be added.
3.4.1 Managing Active Connections
The below actions are possible from the Active page.
Note that all listed Outstanding actions are only performed once the Apply button has been pressed. To minimize
disruption to existing Active Connections, changes are not applied as they are made!
Creating a New Connection
A new Connection can be added by clicking the Create New button.
This will open a new and empty Connection in the Connection Editor. In the Connection Editor, click Update
(shortcut CTRL+S) on the File menu to save changes, and automatically add the new Connection to the Connection
Manager interface. Note that execution will not start until changes are Applied in the Connection Manager (see
below).
Add an existing Connection file
Select Add Existing... from the File menu, then select the Connection file to add. Click OK to add the Connection.
Copyright (c) 2009 - 2012 Black Box Corporation
724-746-5500 | blackbox.com 42
Page 43

Monitoring and Managing Connections
If successful, a new Add action will be created, and added to the Outstanding actions page.
Remove an Active Connection
To mark an Active Connection for removal, select the Connection, and click Remove.
A remove Action will be created and displayed in the Outstanding Actions page.
View or modify an Active Connection
To view or modify an Active Connection, select it, and click View.
The Connection Editor will be launched, and the Active Connection shown.
If the Connection is modified and saved within Connection Editor, a modified Action will be created on the
Outstanding Actions page.
Undo or revert Changes
If an action has been successfully performed, a record of the action will be added to the Outstanding actions page.
The action can be undone, by either:
Selecting the Action in the Outstanding Actions page, and clicking the Undo button.
Selecting the Active Connection on the Active page and clicking the Undo button.
This process is described in more detail on the Outstanding Actions section.
Applying Changes
The Apply button will apply all specified actions, and restart the Connection Service.
3.4.2 Outstanding Actions
The Outstanding actions page lists all actions that will be performed when the Apply changes button is pressed.
A summary of the outstanding actions is shown on the Status page.
The following Actions may be listed.
Connection will be added
The listed Connection will be added and made Active, when the Apply button is pressed.
Copyright (c) 2009 - 2012 Black Box Corporation
724-746-5500 | blackbox.com 43
Page 44

iCompel Data Engine - User Guide (V3.1.2)
Select the action, and click the Configure button to view or modify the Connection.
To remove this action, select the action and click the Undo Add button.
Note that if this Connection was Added from a file, the original file will not be deleted.
Active Connection has been modified
There are modifications to the specified Connection. These modifications will be made to the Connection when the
Apply button is pressed.
To view the current modifications to the Active Connection, select the action on the Outstanding actions page, then
click the View button.
To view the currently Active Connection, select the Connection in the Active page. If there are modifications then the
original Active Connection will be marked as read only, and changes are only allowed to the modified version,
accessed through the Outstanding Actions page.
To revert (undo) changes, select the action and click the Undo button.
Active Connection will be removed
The specified currently Active Connection will be removed when Apply is pressed.
To reverse this action, select the action and click the Undo button.
3.4.3 View Status
When an Active Connection is not working as expected, detailed status messages can be viewed by selecting the
Active Connection from the Active page, then View Status Messages... from either the right click context menu or
the Connection menu.
The following dialog is shown:
Copyright (c) 2009 - 2012 Black Box Corporation
724-746-5500 | blackbox.com 44
Page 45

Monitoring and Managing Connections
Current status messages can be retrieved by clicking the Refresh button.
3.5 Bulk Modify Connections
If a new iCOMPEL (iCOMPEL) is added to an existing signage network, or a iCOMPEL is replaced or user
credentials modified, the Bulk Modify feature can be used to quickly update all available Connections with the
Player details.
Copyright (c) 2009 - 2012 Black Box Corporation
724-746-5500 | blackbox.com 45
Page 46

iCompel Data Engine - User Guide (V3.1.2)
The following options are available:
Add new or modify existing Player. This option will:
Add the specified player details to each Active, Added or Modified Connection, if it hasn't already been
added or
If a player with Host name has already been added, then the username and password are updated to
those specified
The Host Name field specifies the Player network host name or IP address. The Username and
Password field specify the credentials for iCOMPEL defined user. All fields must be specified.
Note the player is not added if doing so would exceed any licensing restrictions.
Update specified property value. This option will update the specified property to new value if its value is
identical to match value.
Remove Player. This option will remove the player the specified host name from all Active, Added or
Modified Connections, providing the Connection has 2 or more players already.
Note that all Active, Added, and Modified Connections are updated. If changes have been made, these will need to
be Applied.
Copyright (c) 2009 - 2012 Black Box Corporation
724-746-5500 | blackbox.com 46
Page 47

Monitoring and Managing Connections
3.6 Connection Retry and Backoff Policies
If a Connection fails to execute, then execution will be retried 3 times, at intervals proportional to the scheduled
interval. The interval between retries is dependent upon the Connection Schedule setting as follows:
Periodic. 1/4 of the interval time, to a maximum of 2 minutes.
Specific time. 2 minutes.
The backoff feature detects when a Connection is taking longer than the scheduled execution interval to complete
and automatically delays for a period of time if two scheduled simultaneous execution times have been missed. The
backoff time is dependent upon the Connection schedule as follows:
Periodic. Interval time.
Specific time. 5 minutes.
3.7 Configuration
This dialog provides access to common configuration settings. It should not normally be necessary to change these
settings.
The Log Files section applies to all log files, including application and service logs. Each log file will grow to the
maximum size specified before being closed and a new file opened. The second setting specifies the maximum
number of old log files to keep.
Pressing the View... button will show the following dialog, allowing the user to view the contents of each log file.
Copyright (c) 2009 - 2012 Black Box Corporation
724-746-5500 | blackbox.com 47
Page 48

iCompel Data Engine - User Guide (V3.1.2)
The Service Configuration section provides access to the following settings:
The Enable detailed Service Log messages will configure the Service to show detailed status messages.
These are typically used to diagnose problems.
Clear Log file when Service is started. This setting is typically used to assist in diagnosing problems when a
large number of Connections have been created.
The Service must be manually restarted after these settings are changed. This can be performed from the Microsoft
Services control panel.
®
Copyright (c) 2009 - 2012 Black Box Corporation
724-746-5500 | blackbox.com 48
Page 49

Part
IV
Application Licensing
Page 50

iCompel Data Engine - User Guide (V3.1.2)
4. Application Licensing
The iCompel Data Engine (iDE) requires a valid license to be entered before operation.
Initial product licensing is performed using a wizard. The Licensing Wizard will be shown automatically when no valid
licenses are detected.
To successfully complete the Licensing wizard you will need:
Your unique five digit iCompel Data Engine serial number. This can be found on your original installation CD,
or purchase order. Please contact Black Box Corporation Black Box Network Services if you are unable to
locate your serial number.
Access to an email account to receive the product License file.
Note the license is specific to the machine running the Wizard and is not transferable. Licensing will need to be
completed successfully on each Windows machine that will run the iCompel Data Engine product.
Additional licenses may be required for each iCOMPEL that will display results. This will be clearly indicated on the
Destination Media page. Please refer to the Player documentation for more information about installing a player
license.
4.1 Reviewing and Adding a new License
Licenses can be reviewed and added in the Production Licensing dialog. This can be accessed from the Licensing
menu in any iCompel Data Engine application.
Reviewing Installed Licenses
The License page shows all installed licenses.
Currently valid licenses are identified with a green tick, while invalid licenses are identified with a red cross.
An example is shown below.
Copyright (c) 2009 - 2012 Black Box Corporation
724-746-5500 | blackbox.com 50
Page 51

Application Licensing
Adding a new License
A new License can be added from the Add page.
Only licenses for this iCompel Data Engine installation on the local machine can be applied.
The application will restart when the dialog is closed, if one or more new licenses have been entered successfully.
Copyright (c) 2009 - 2012 Black Box Corporation
724-746-5500 | blackbox.com 51
Page 52

iCompel Data Engine - User Guide (V3.1.2)
Copyright (c) 2009 - 2012 Black Box Corporation
724-746-5500 | blackbox.com 52
Page 53

Part
Deployment
Considerations
V
Page 54

iCompel Data Engine - User Guide (V3.1.2)
5. Deployment Considerations
The following topics discuss various deployment considerations.
5.1 Deploying to a Black Box Channel
iCompel Data Engine (iDE) media can be included and distributed as part of a Black Box Channel.
There are three approaches to achieve this:
a. iDE media is deployed on the Publisher only, and is referenced by Playlist items within a Publisher
Channel. The Channel Publishing and Subscription process ensures all Subscribers show exactly the
same media. The iCompel Data Engine writes results to the Publisher only, and these results will be shown
on the subscriber only after the channel has been published, and the subscriber/s have polled and updated
their channel content.
b. Media is deployed as above, however Subscribers show specific content based on Subscriber defined Local
Information values. Items of media should be set to play only when specific Player Local Information values
are defined. A typical use for this scenario would be showing a local weather report. The iDE media
deployed to the Publisher must contain all required data values, and special media to extract and correctly
process Local Information values. This is more flexible, but has the same restrictions and trade-offs as
above.
c. iDE media is deployed to an Ad hoc folder media on each Player (Subscriber or Publisher) within a
Channel. Using this approach, completely different media can be shown on each Player. This media is
remembered after Channel updates, but media updates must be copied manually when needed.
5.2 File Organization for Channel or Layout Package Use
To include XML and some types of Presentation Format media in a Channel or Layout Package the following
prerequisites must be met:
An HTML or Flash file which renders the content must be added to a Playlist.
If a subfolder called xxx_files (where xxx is the filename above) is found in the same folder as the above file,
then all files in this folder will be included in the Channel or Layout Package.
For example, if the file dynamic_media.html was added to the Playlist, then all files in the subfolder
dynamic_media_files (if found) would be automatically included.
To include the XML (or Presentation Format) query results file it must be deployed to the xxx_files folder, and not
the folder containing the HTML or Flash file.
Copyright (c) 2009 - 2012 Black Box Corporation
724-746-5500 | blackbox.com 54
Page 55

Deployment Considerations
5.3 User Management
For production use, its recommended that an iCOMPEL (iCOMPEL) User is specially created and used by the iDE.
This user should:
Only have FTP Read/Write Access permission enabled
The Users' Media Folder is set to the folder containing the iDE media
If deploying to multiple Players from a single Connection, all Users referenced by the Connection must specify the
same iCOMPEL User Home Folder setting.
Further details regarding User management are covered in the iCOMPEL help pages.
5.4 FTP and Proxy Details
The iCompel Data Engine supports passive mode FTP transfer only.
Proxy support is available for HTTP transfers when using the Microsoft Exchange, Google Calendar, XML or Text
Connectors.
Copyright (c) 2009 - 2012 Black Box Corporation
724-746-5500 | blackbox.com 55
Page 56

Part
VI
Using the SQL Connector
Page 57

Using the SQL Connector
6. Using the SQL Connector
This section covers advanced topics related to the use of the SQL Connector.
6.1 Creating an ODBC System Data Source Name
In order to use the SQL Connector, one or more ODBC System Data Source Names (DSN) must be created.
ODBC System DSNs are managed using the Microsoft® Windows® ODBC Data Source Administrator application. If
a 64bit version of Windows® is used, the correct version of the ODBC administration application must be started as
described in the next section. The correct application is started from the ODBC button in the user interface.
Start the correct ODBC Data Source Administrator application, and create a new ODBC DSN on the System DSN
tab.
Note that the iCompel Data Engine will not work with ODBC 'Windows NT Authentication using the network login id'
setting as the iCompel Data Engine Service does not have access to the network id. In this case, user credentials
must be entered on the iDE Advanced Settings page.
Further ODBC help can be found in the Microsoft® Windows® help file.
6.2 Using the SQL Connector on a 64bit Operating System
This section is only relevant if the iCompel Data Engine is deployed to a 64bit operating system.
While the iCompel Data Engine will run successfully on a 64bit operating system, for compatibility reasons, it is a
native 32bit application. As a result, the iCompel Data Engine runs in compatibility mode, and can not reference any
native 64bit configuration information. This means the normal ODBC configuration tools can not be used since they
write 64bit configuration files - the 32bit versions must be explicitly specified instead.
The 32bit ODBC Data Source Administrator program must be used to manage the System DSN entries. The
program can be started as follows:
1. Click the Windows Start button.
2. In the Search programs and files box, enter %WINDIR%\SYSWOW64\odbcad32.exe
3. One file should be found and displayed above. Click on the file to run it.
Alternatively, the program can be located and run from Windows® Explorer as follows:
1. Start a new instance of the Windows Explorer application
2. Navigate to the folder %WINDIR%\SYSWOW64. %WINDIR% is your Windows installation folder (normally C:
\Windows)
3. Locate the file 'odbcad32.exe'
4. Double click the above file to run.
The correct program is started if the ODBC button is pressed from the SQL Command page.
Copyright (c) 2009 - 2012 Black Box Corporation
724-746-5500 | blackbox.com 57
Page 58

iCompel Data Engine - User Guide (V3.1.2)
6.3 Connecting to a Black Box iDigitalManager
This page describes how to use a iCompel Data Engine (iDE) to access and display data from a Black Box
iDigitalManager (iDM) version 2.1 or above.
Prerequisites
The following prerequisites must be satisfied before proceeding:
Create a user on the iDM with the user permission "External Database Reports"
TCP/IP connectivity to the iDM from the Windows system running the iCompel Data Engine
Installing the PostgreSQL ODBC Database Driver
You will need an PostgreSQL ODBC driver to connect to the iDM database.
For 32bit versions of Windows®:
1. Download the PostgreSQL ODBC driver (psqlodbc_08_03_0400.zip) from:
http://wwwmaster.postgresql.org/download/mirrors-ftp/
odbc/versions/msi/psqlodbc_08_03_0400.zip
2. Open the ZIP file and execute the file psqlodbc.msi. This will install the driver.
For 64bit versions of Windows®:
1. Download the PostgreSQL ODBC driver (setup_psqlODBC_x64_8.3.4.0.exe) from:
http://code.google.com/p/visionmap/downloads/list
2. Double click the file to execute and follow on-screen instructions to install.
The above installation should complete without errors.
Create an ODBC System DSN
Set up an ODBC System Data Source Name (DSN) referencing your iDM.
1. Launch the correct version of the Microsoft® Windows® ODBC Administrator application.
2. Select "System DSN" tab. Click the "Add" button. Select "PostgreSQL Unicode" (or "PostgreSQL 64-bit
ODBC Driver") driver.
2. Fill in the fields as follows (bold underlined fields should be entered or selected exactly as written below):
Copyright (c) 2009 - 2012 Black Box Corporation
724-746-5500 | blackbox.com 58
Page 59

Using the SQL Connector
Property
Value
Data Source
(Enter a meaningful name in Data Source entry - e.g. 'iDM')
Description
(Anything)
Database
iDM
Server
(the iDM network hostname e.g. iDM11407)
User Name
(Name of iDM User with 'External Database Reports' permission. Please
see the iDM Users page help for more information)
Password
(password for above iDM User)
SSL Mode
Select Disable
Port
5432 (This is the default port, but may change for a hosted iDM).
3. Click the "Test" button and ensure successful connection.
4. Click the "Save" button.
The System DSN should now appear in the list in the System ODBC Data Source Name list on the SQL Command
tab in the Connection Editor. You may need to click the Refresh button to update the list.
Configuring a iCompel Data Engine Connection
Start the iDE Connection Editor application.
1. Select the Source tab, and on the Data Source tab, ensure 'Execute SQL Command to a database via ODBC'
option is selected.
2. On the SQL Command tab, select the System DSN created above in the 'System ODBC Data Source
Name' drop down list. You may need to click the Refresh button to update the list.
3. In the SQL Query text box enter:
select * from dsm_view_basic.func_current_organisation_operational_summary();
To display the results using a Pie chart, the following SQL should be used:
Copyright (c) 2009 - 2012 Black Box Corporation
724-746-5500 | blackbox.com 59
Page 60

iCompel Data Engine - User Guide (V3.1.2)
select
organisation_name as "Organisation Name",
(total_ntbs-total_ntbs_with_alarms) as "Total working players",
total_ntbs_with_alarms As "Total alarmed players"
from dsm_view_basic.func_current_organisation_operational_summary();
The following 'widget_config.txt' file can used to generate a suitable display:
application.display_style=PIE_CHART
application.background.colour=#FFFFFF
# Rows are series in the DSM SQL data
data.series.orientation=row
# Normally, if we have a single row of data, we don't have enough data to auto detect row headings.
# Force detection for single row results such as this.
data.process.row_headings=yes
# Caption will be determined from the supplied DCE data.
# Fill these in if the data does not contain a caption / subcaption, or you wish to override the caption / subcaption.
chart.title.caption=Current Digital Signage Player Status
# These control the colour and size of all labels, including caption and axis labels.
chart.all_labels.colour=#000000
chart.legend.position=se
chart.legend.background_colour=#CCCCCC
# Controls the colours the pie segments are displayed in.
# Pipe character seperates colours.
chart.series.colours=#60BB22|#B80028
Copyright (c) 2009 - 2012 Black Box Corporation
724-746-5500 | blackbox.com 60
Page 61

Part
VII
Using the Excel Connector
Page 62

iCompel Data Engine - User Guide (V3.1.2)
Name
BirthCity
A A Milne
London
Abi Titmuss
London
Ainsley Harriott
London
7. Using the Excel Connector
This section covers advanced topics related to the use of the Microsoft® Excel® Connector.
7.1 Advanced Excel Settings
Overview
The iCompel Data Engine Microsoft® Excel® Connector uses a dialect of SQL to specify the data to retrieve. The
exact query issued can be finely controlled using the Advanced Query settings from the Excel page.
On the Excel page, click the Advanced Query button to modify the settings. A summary of the current settings is
shown alongside the Advanced Query button.
The following parts of the SQL query can be specified:
SELECT
WHERE
GROUP BY
HAVING
ORDER BY
The FROM part is is specified by the Cell Range field.
The contents of the SELECT field will be processed to ensure field names are surrounded by square brackets.
Surround the SELECT field entry with double quotes to avoid this processing and use the string exactly as entered.
If field names are referenced by any field, these must exactly match the field names in the first row (if first row is data
header is enabled) or must follow the format Fn, where n is the one based column number of the field within the
worksheet.
If field names contain blank spaces, the field name must be surrounded by square brackets when referenced.
If the field name is incorrectly specified, then the error 'No value given for one or more parameters' is likely to
be returned.
Advanced Query Example
Display the number of celebrities born in London.
The spreadsheet is replicated in entirety below:
Copyright (c) 2009 - 2012 Black Box Corporation
724-746-5500 | blackbox.com 62
Page 63

The iCompel Data Engine advanced query configuration is shown below:
Using the Excel Connector
This results in the following results (assuming XML output):
<?xml version="1.0" encoding="utf-8"?>
<output query_source="Excel" version="V2.1.0" checksum="xEwfu7UNfnE0vlLLwnY/TQ==" query_time="2010-05-19T14:06:27">
<all_data field_name_significant="True" query_row_count="1">
<row Born_x0020_in_x0020_London="3" />
</all_data>
</output>
Note the result should be displayed using tabular media as only one record is present.
Data Detection and Scan Settings
By default, the Excel® driver will examine the first 8 rows of data to determine the correct data representation to use.
If the data contains mixed data types in the same column (e.g. strings and numbers), particularly if the mixed type
data occur after the first 8 rows, the driver may ignore or truncate values. The current setting is displayed in the Test
window when a Excel connection is tested from the Connection Editor application.
To avoid this, please follow the advice in Microsoft knowledge base article 189897.
Copyright (c) 2009 - 2012 Black Box Corporation
724-746-5500 | blackbox.com 63
Page 64

iCompel Data Engine - User Guide (V3.1.2)
Copyright (c) 2009 - 2012 Black Box Corporation
724-746-5500 | blackbox.com 64
Page 65

Part
VIII
Using the Microsoft
Exchange Connector
Page 66

iCompel Data Engine - User Guide (V3.1.2)
8. Using the Microsoft Exchange Connector
This section covers advanced topics related to the use of the Exchange® Server Connector.
8.1 Advanced Exchange Server Settings
The Exchange Advanced Settings page provides fine grained control over the settings used to query the Exchange
®
Server. It will not normally be necessary to modify these settings.
If Advanced Settings have been specified, then a summary of the current settings will be shown the Exchange page.
Click the Advanced Settings button to view or modify the settings.
By default, the iCompel Data Engine will use Exchange Web Services (EWS) calls to obtain information from your
Microsoft Exchange® Server. If EWS is not available or configured on your server, then the WebDAV protocol can be
used.
Copyright (c) 2009 - 2012 Black Box Corporation
724-746-5500 | blackbox.com 66
Page 67

Using the Microsoft Exchange Connector
By default, the Enterprise Web Services query method is selected, which is compatible with Exchange® Server 2007
Service Pack 1 and above. If earlier versions of Exchange® Server are in use, please select WebDAV. The
functionality is the same for both cases.
The Exchange Server Timeout setting specifies, in seconds, how long the iCompel Data Engine should wait before
the query attempt is abandoned. The default value is 100 seconds.
When referring to a unique resource, a user will often specify the resource name. However, Exchange® Server
internally uses the resource alias property to uniquely track resources, which may bear no resemblance to the more
user friendly resource name. When executing a query, the iDE must resolve the resource name to a resource alias,
which it does by consulting the Exchange® Server Global Address List (GAL), using a Outlook® Web Access (OWA
) call (call name: galfind). If OWA is not enabled on your Exchange® Server, or is not accessible, then please
disable this feature. If this feature is disabled, then the resource alias must be entered in the Resources section,
and not the more user friendly resource name.
By default, this is checked and the GAL is consulted to translate each entered Resource Name to a resource alias.
The Query Type setting specifies what type of data should be returned. By default, calendar events are returned.
The query setting indicates the time window that data should be returned for. Only events which start or end within
the time window, or emails that received within the time window are returned. By default, data for 32 days before and
after the current date is returned. It may be desirable to reduce this window, if for example, the now and next style
view is being displayed. Reducing this time window will reduce the number of records returned and increase
processing efficiency.
If the calendar event applies to different time zone from that specified on the player displaying the media, the event
times will be displayed at the wall clock time they would occur in the players time zone.
Copyright (c) 2009 - 2012 Black Box Corporation
724-746-5500 | blackbox.com 67
Page 68

Part
IX
Using the Google Calendar
Connector
Page 69

Using the Google Calendar Connector
9. Using the Google Calendar Connector
This section covers advanced topics related to the use of the Google® Calendar Connector.
9.1 Connecting to a Google Calendar
This page describes how to use a iCompel Data Engine (iDE) to access and display calendar information retrieved
from Google® calendar.
Prerequisites
The following prerequisites must be satisfied before proceeding:
The user credentials for a Google® Calendar account. These are only required to determine settings for the
iDE.
The Calendar must be made public. Please refer to the Google® documentation to determine how to make
your Calendar public.
Determine the unique Google Calendar URL
1. Open the Google® Calendar page in a web browser.
2. Click the 'Settings' menu (top right) then select 'Calendar settings'. Menu can be found in the top right
of the page.
3. Select 'Calendars' tab page.
4. From the 'My Calendars - Calendars' section, click the underlined Calendar name link. This will show the
Calendar details for the specified calendar.
5. In the Private Address field (bottom of page), click the XML button.
6. A popup will show displaying a web address. Click on this address, which should then open the link in a
new browser window.
7. Select the full address in the browser address entry, and copy to clipboard.
Note: This address can be used by any user to view the contents of the specified calendar!
Copyright (c) 2009 - 2012 Black Box Corporation
724-746-5500 | blackbox.com 69
Page 70

Part
Media Widgets
X
Page 71

Media Widgets
10. Media Widgets
The iCompel Data Engine includes a number of ready to use Media Widgets, used to display the results of common
iCompel Data Engine Connection queries.
Note: If the Media Widgets are used to display results, they must be installed on each iCOMPEL on which results are to be displayed. Please refer to the section Installing Sample Layouts and Widgets for more information.
The Media Widgets have been specifically designed and developed for use in digital signage applications.
All Media Widgets present a read-only view of the data - the source data cannot be changed from either the player or
the iCompel Data Engine product.
The Media Widgets automatically scale to the size of the Zone they are placed in, and will automatically and fluidly
update when the source data changes.
The included Media Widgets have been designed to act as a starting point only. Many options, including colors, and
labels are easily configurable using simple text based files. The full range of configuration options can be found in
the Widget Settings section.
10.1 Installing Sample Layouts and Widgets
All Media Widgets can be installed directly on the player using the iCOMPEL Layout Package feature. Layout
Packages are self contained compressed files, which include all media and configuration files required to reconstitute
one or more Layouts on other iCOMPEL.
The Media Widget Layout Packages (special files ending ZIP) can be found in:
My Documents\Black Box iDE Media\media\widgets
folder on the machine the iCompel Data Engine is installed on.
Alternatively, Media Widgets can be found in the 'My Documents\Black Box iDE Media\media\widgets\source'
folder.
Install the Sample Layouts on a iCOMPEL
This process describes how to install the sample Layouts on an iCOMPEL. This should be performed on the PC on
which the iCompel Data Engine is installed.
1. Start a web browser. Browse to your iCOMPEL and supply user credentials as required.
2. Navigate to the Layout Packages web page.
This can be found on the Layouts menu on recent versions of iCOMPEL.
3. Click the Browse button, and navigate to your My Documents\Black Box iDE Media\media\widgets folder.
Select the first file and click the Open button.
4. Click the Install button, and please wait a few moments while the Layout Package installs. Repeat this for each
file uploaded above.
Copyright (c) 2009 - 2012 Black Box Corporation
724-746-5500 | blackbox.com 71
Page 72

iCompel Data Engine - User Guide (V3.1.2)
Repeat the above for each ZIP file in the folder My Documents\Black Box iDE Media\media\widgets.
Showing a Sample Layout on the iCOMPEL
This process describes how to show a specific Layout on a iCOMPEL.
1. Select Manage Layouts entry from the Layouts menu.
2. Scroll down until the required Layout name is located. The list is presented alphabetically.
3. Click the audition ( ) button at the start of the line displaying the required Layout name.
The programmed Schedule will be interrupted and the named Layout will be shown indefinitely. To resume the
programmed Schedule, click the Activate Schedule and Layouts button at the top of the screen.
10.2 Charts and Tabular Widgets
Tabular Widget
The Tabular widget is designed to show data in a tabular format. The widget will automatically paginate as needed to
show more data rows than can be displayed on a single page.
Columns will be compressed as much as reasonably possible to fit on screen, but if it is not possible to display all
data columns, the following options are available:
Increase the width of the Zone which displays this Media Widget.
Remove any non-required columns from the output.
Reduce the size of the font used to display the table content. See the tabular.content.font_size setting.
Using the default tabular Widget settings, results are shown as follows:
Copyright (c) 2009 - 2012 Black Box Corporation
724-746-5500 | blackbox.com 72
Page 73

Media Widgets
Bar Chart Widget
Using the default bar chart Widget settings, results are shown as follows:
Copyright (c) 2009 - 2012 Black Box Corporation
724-746-5500 | blackbox.com 73
Page 74

iCompel Data Engine - User Guide (V3.1.2)
Line Chart Widget
Using the default line chart Widget settings, results are shown as follows:
Copyright (c) 2009 - 2012 Black Box Corporation
724-746-5500 | blackbox.com 74
Page 75

Media Widgets
Pie Chart Widget
Using the default pie chart Widget settings, results are shown as follows:
Copyright (c) 2009 - 2012 Black Box Corporation
724-746-5500 | blackbox.com 75
Page 76

iCompel Data Engine - User Guide (V3.1.2)
Source Microsoft Excel spreadsheet
The above screen shots use the following spreadsheet (top left cell is A1). This spreadsheet is included in the 'Black
Box Corporation iDE Media\ExcelExample' folder as huntley_sales.xls.
Copyright (c) 2009 - 2012 Black Box Corporation
724-746-5500 | blackbox.com 76
Page 77

Media Widgets
10.3 Calendar Widgets
Diary Widget
The diary Widget is designed to show event summaries for between a week and a month.
The diary Widget shows all events, with all day events spanning the days on which they apply, and appear with a
solid background.
Up to six different resources can be represented on a single Diary widget. Different resources are shown in different
colors (olive green, light blue, orange, purple, pink, golden yellow).
Copyright (c) 2009 - 2012 Black Box Corporation
724-746-5500 | blackbox.com 77
Page 78

iCompel Data Engine - User Guide (V3.1.2)
Timeline Widget
The Timeline widget is designed to show events details for a small number of days. Details for all events, except all
day events, are shown.
Up to six different resources can be represented on a single Timeline widget. Different resources are shown in
different colors and in separate columns.
The minimum Zone height for this widget is 420px.
Room Summary Widget
The Room Summary widget shows all events except all day events for the current day. The current event is shown in
the central area, with a timeline summary below.
Copyright (c) 2009 - 2012 Black Box Corporation
724-746-5500 | blackbox.com 78
Page 79

Media Widgets
Note when using this widget, the iCompel Data Engine should be configured to retrieve results for a single resource
only.
10.4 Widget Settings
A simple text format file is used to specify configuration and customization options for each of the media widgets.
The configuration file is named widget_config.txt, and is placed in the xxx_files folder, where xxx is the name of
the HTML file included in the Playlist.
Note: Please exercise care when editing the configuration settings file as it is possible to stop the media from
displaying correctly. If this is done, the original configuration file can be found in the Black Box iDE
Media\media\source folder.
Many other options are also available - please contact Black Box Network Services if you have additional
requirements.
Configuration Settings
Each non-blank text line is interpreted as a containing a configuration setting or a comment line.
A configuration setting has a name and a value pair separated by an equals symbol (=). The text to the left of the
first equals symbol is the configuration setting name, and everything that follows, including additional equals
symbols, is the configuration value.
Valid values for boolean configuration settings are 'true' or 'false' only. Case is not important.
Copyright (c) 2009 - 2012 Black Box Corporation
724-746-5500 | blackbox.com 79
Page 80

iCompel Data Engine - User Guide (V3.1.2)
All color values must be expressed in hex format (expressed Red Green Blue values). The color value must start
with a hash symbol (#). For example, the value #000000 specifies the color black.
Configuration setting names are not case sensitive, but lower case is recommended for readability.
Invalid configuration setting names are ignored.
Comments and Blank Lines
Lines starting with a hash (#) are interpreted as comments and are ignored.
Blank lines are ignored.
10.4.1 Charts and Tabular Widget Settings
Display Style and Update Options
application.display_style
This mandatory parameter specifies how the data should be shown.
One of the following values must be specified (case is not important):
TABULAR
LINE_CHART
BAR_CHART
PIE_CHART
application.background.image_url & application.background.colour
Optional value which specifies the display background color or image file.
If the color field is specified, color must be specified in hex format.
If the image_url is specified, then the image_url may be prefixed with %ASSETS_DIR%/, to reference an image in
the _files folder. For example, %ASSETS_DIR%/large_fade_background.jpg. The referenced image file must be
in JPEG format.
This value defaults to #FFFFFF (white).
Data Processing Options
data.series.orientation
Indicates if each data column is a series or each row contains series data.
Copyright (c) 2009 - 2012 Black Box Corporation
724-746-5500 | blackbox.com 80
Page 81

Media Widgets
One of the following values may be specified (case is not important):
COL
ROW
This value is optional, and if not specified, will default to columns.
data.process.column_headings
Optional value which specifies if the first row of the source data contains column labels. Possible values are:
AUTO. Examine the data to determine if column headings are present. This is the default value.
YES. Assume first row is column headings.
NO. Assume no column labels are present.
data.process.row_headings
Optional value which specifies if the first column of the source data contains row labels. Possible values are:
AUTO. Examine the data to determine if row headings are present. This is the default value.
YES. Assume first row is column headings.
NO. Assume no column labels are present.
data.headings.column_labels & data.headings.row_labels
Optional list of column names. Each name is separated by a pipe symbol ( | ).
If present, these are used in preference to any names extracted from the data. data.process.column_headings
and data.process.row_headings indicate if the source data contains column or row labels.
10.4.1.1 Tabular Widget Settings
tabular.title.caption
Specifies the chart title, overriding any title present in the data.
If left blank, and title text was found in the data, then this will be displayed, otherwise not title is shown.
Default is blank.
tabular.title.subcaption
Specific the chart sub-title. If left blank, no subtitle will be displayed. A subtitle is only displayed if a title is
displayed.
Copyright (c) 2009 - 2012 Black Box Corporation
724-746-5500 | blackbox.com 81
Page 82

iCompel Data Engine - User Guide (V3.1.2)
Default is blank.
tabular.title.text_colour
Optional value which specifies the title and subtitle text color.
If the color field is specified, color must be specified in hex format. This value defaults to #000000 (black).
tabular.pagination.page_display_time_s
If a Tabular display is used, and the table requires pagination, this optional setting controls in seconds, how long
each page should be displayed.
Expressed as a positive whole number. The default is 10 seconds.
tabular.zebra.show
Optional setting indicating if a colored background will be shown on alternate row (a zebra strip). Default is true
specifying the zebra strip will be shown.
tabular.zebra.background_colour
Optional value which specifies the Zebra strip background color.
If the color field is specified, color must be specified in hex format. This value defaults to #B7CEEC (light blue).
tabular.content.font_size
Optionally specifies the font sizes, in pixels, to use for the table content. Defaults to empty, which will use default
font size.
10.4.1.2 Chart Widget Settings
chart.title.caption
Specifies the chart title, overriding any title present in the data.
If left blank, and title text was found in the data, then this will be displayed, otherwise not title is shown.
Default is blank.
chart.title.subcaption
Specific the chart sub-title. If left blank, no sub-title will be displayed. A sub-title is only displayed if a title is
displayed.
Copyright (c) 2009 - 2012 Black Box Corporation
724-746-5500 | blackbox.com 82
Page 83

Media Widgets
Default is blank.
chart.all_labels.colour
Specifies the color of all chart labels. Color is expressed in hex format, as Red Green Blue values. The color value
must start with a hash symbol (#).
The default value is #000000 (black).
chart.series.colours
The colors to use when presenting series data. For pie charts, these are the segment colors, for line charts, these
specify the line color and for bar charts these are the bar colors.
Specified as a list of colors (with prefixing hex symbol), with the pipe symbol ( | ) separating values.
chart.series.line_width
The width, in pixels, of each Line Chart series line.
Optional and defaults to 4px.
chart.legend.show
Optional boolean value indicating if we should show a chart legend or not.
Defaults to true, which shows the legend.
chart.x_axis.label.text
Optional x-axis label, which overrides an x axis label determined from the data.
Defaults to blank, which indicates use the source data label if present.
chart.y_axis.label.text
Optional y-axis label, which overrides an y axis label determined from the data.
Defaults to blank, which indicates use the source data label if present.
Copyright (c) 2009 - 2012 Black Box Corporation
724-746-5500 | blackbox.com 83
Page 84

iCompel Data Engine - User Guide (V3.1.2)
10.4.2 Calendar Widget Settings
Common Options
application.display_style
This mandatory parameter specifies how the data should be shown.
For calendar display, the following value must be specified (case is not important):
CALENDAR
calendar.display
This mandatory parameter specifies how the calendar data should be shown.
One of the following values must be specified (case is not important):
DIARY
TIMELINE
ROOM_SUMMARY
Diary and Timeline Display Options
calendar.options.day_count
Number of days to display. If specified, this must be a positive number.
For the Timeline Widget this defaults to 3, and for the Diary widget this defaults to 5.
calendar.title.text_colour
Specifies the text color of the the title label. This defaults to #666666, which is dark grey.
calendar.title.label_format
Specifies the format mask to use when creating the label. By default, this is {mmmm yyyy}, which displays the full
month name and four digit year.
10.4.2.1 Timeline Widget Settings
calendar.timeline.display_days
Which days we display only, expressed as 0-6 (where 0 is Sunday). Day numbers are separated with a comma.
Copyright (c) 2009 - 2012 Black Box Corporation
724-746-5500 | blackbox.com 84
Page 85

The default is 1,2,3,4,5 (Monday - Friday).
calendar.timeline.start
Time to start time line, expressed as hh:00 in 24 hour format. This defaults to 9:00.
calendar.timeline.end
Time to end time line, expressed as hh:00 in 24 hour format. Defaults to 18:00.
10.4.2.2 Diary Widget Settings
calendar.diary.view
The view to display. The following views are available:
DAY
WEEK
MONTH
Media Widgets
The default is week.
calendar.diary.week_starts_on
Day number the week starts on expressed as 0-6 (where 0 is Sunday). Defaults to 1 for Monday.
10.4.2.3 Room Summary Widget Settings
calendar.room_summary.label.status.free
The label used for resource free in the status bar top of screen. The default value is 'Free'.
calendar.room_summary.label.status.busy
The label used for resource busy in the status bar top of screen. The default value is 'Busy'.
calendar.room_summary.label.readout.title
Title label of the readout section. The default value is 'Now'.
Copyright (c) 2009 - 2012 Black Box Corporation
724-746-5500 | blackbox.com 85
Page 86

iCompel Data Engine - User Guide (V3.1.2)
calendar.room_summary.label.readout.free
The label used for room free in the central readout panel. The default value is 'Available'.
calendar.room_summary.label.event.free
The label used for free timeline events. The default value is 'Free'.
calendar.room_summary.label.timeline.today
The label for Today's events section. The default value is 'Today's Bookings'.
calendar.room_summary.label.timeline.tomorrow
Tomorrows events label. The default value is 'Tomorrow's Bookings'.
Copyright (c) 2009 - 2012 Black Box Corporation
724-746-5500 | blackbox.com 86
Page 87

Part
XI
Contact Black Box
Page 88

iCompel Data Engine - User Guide (V3.1.2)
Name
Contact
Email:
techsupport@blackbox.com
Telephone:
+1 (724) 746-5500
Fax:
Not available
11. Contact Black Box
If you have any questions about the iCompel Data Engine or iCOMPEL please contact Black Box Network Services
on:
Copyright (c) 2009 - 2012 Black Box Corporation
724-746-5500 | blackbox.com 88
Page 89

Index
Contact Black Box
Index
- 2 -
2007 Office System Driver: Data Connectivity
Components
Installation 12
- A -
Active Connection Status
Monitoring 41
Add Player
All existing Connections 45
Anti-virus Software
Settings 41
- B -
Backoff
Connection policy 47
Bulk modify
Connections 45
- C -
Calendar Event times
Time Zone handling and display 66
Connecting to a Player Management system 58
Connecting to Google Calendar 69
Connection 10
Destination location for results 26
Execution schedule 38
Overview 10
Source data location and query 11
Connection Editor Application
Overview 10
Viewing Connections 10
Connection Manager Application
Managing Connections 42
Monitoring Connections 41
Overview 40
System status 41
View Status Messages for Active Connections
41
Connection Status Messages 44
Connection Windows Service
Overview 40
Connector
Microsoft Excel 12
Microsoft Exchange Server 16
SQL 18
Text 21, 22, 23, 25
Text Connector query settings 25
Text format 23
XML 19, 20
Contact details 88
Copying Media Items 29
- D -
Data Source 11
Excel Connector 12
Exchange Server Connector 16
SQL Connector 18
Text Connector Advanced query Settings 25
Text Connector Basic Settings 22
Text Connector format Settings 23
XML Connector Settings 20
XML Location and Schema settings 20
XML Location page 20
XML Schema page 20
Date and Number format 14
Dates
Handling international formats 14
Deployment considerations
Channel 54
Files to include 54
Player Local Information 54
Destination
Limiting number of results returned 36
Player location 36
Presentation (template) Format file output 32
Text file output 30
XML file 27
Destination XML Filename
Setting the Output XML Filename 28
Diagnostics
Detailed Service diagnostics 47
Log files 47
- E -
Excel Connector
Advanced query example 62
Advanced query settings 62
Advanced settings 14
Copyright (c) 2009 - 2012 Black Box Corporation
724-746-5500 | blackbox.com 89
Page 90

iCompel Data Engine - User Guide (V3.1.2)
Index
Excel Connector
Cell range setting 12
Data loss and data truncation 62
Excel filename 12
Refining results using SQL statements 62
Supported Microsoft Excel versions 12
Worksheet and cell range 12
Exchange Connector
Advanced settings 66
Supported Microsoft Exchange Server versions
16
Exchange query protocol
Enterprise Web Services (EWS) 16, 66
WebDAV 16, 66
Executing a Connection 38
- F -
Firewall Software
Settings 41
FTP and Proxy Details 55
- G -
Google Calendar Connector 17
How to configure 69
- I -
iDigitalManager
Connecting to 58
- L -
Licensing
Adding a new License 50
Overview 50
Reviewing installed Licenses 50
Limiting record count 36
Log Files
Configuration 47
Diagnostics 47
View 47
- M -
Managing Connections
Adding 42
Creating 42
Outstanding Actions 43
Overview 42
Removing 42
Viewing or modifying 42
Media Item Finder 28
Modify 45
Modify Player
All Connections 45
All existing Connections 45
- N -
Numbers
Handling international formats 14
- O -
ODBC Data Source Name
Creating an ODBC System Data Source Name
57
Using on 64bit versions of Windows 57
Outlook
Displaying Calendar events 16
Outstanding Actions
Overview 43
Undo Action 43
Viewing Actions 43
- P -
Player
Adding a DATA IN license 37
Failure to play due to licensing restriction 37
Presentation (template) file output
Details and settings 32
Properties
Mode description 38
Name and Description 38
- Q -
Query type
Exchange Calendar events 66
Exchange Emails 66
- R -
Result location
See destination 26
Retry
Connection policy 47
- S -
Sample media
724-746-5500 | blackbox.com 90
Copyright (c) 2009 - 2012 Black Box Corporation
Page 91

Index
Contact Black Box
Sample media
Displaying results 71
Installing 71
Overview 71
Schedule
Defining 38
Service Configuration
Diagnostics 47
Service is not running message 41
SQL Command 18
SQL Connector
Connecting to a Player Management system
example 58
Creating an ODBC System Data Source Name
57
SQL Command 18
System ODBC Name 18
Using on 64bit versions of Windows 57
System Configuration 47
- T -
Template file output
Details and settings 32
Testing
Executing 38
Log window 38
Text file output
Details and settings 30
Pie chart Widget settings 80
Room Summary 85
Room Summary Widget settings 84
Tabular 81
Timeline 84
Timeline Widget settings 84
Widget settings and configuration
Configuration file 79
Overview 79
Widgets
Bar chart screen shot 72
Diary screen shot 77
Included examples 71
Installing 71
Line chart screen shot 72
Overview 71
Pie chart screen shot 72
Room Summary screen shot 77
Tabular screen shot 72
Timeline screen shot 77
- X -
XML Output
Details and settings 27
Setting the Output XML Filename 28
- U -
Updating Media Item properties 29
User Management 55
- V -
View Status Messages
Overview 41, 44
- W -
Widget Configuration
Bar chart 82
Bar chart Widget settings 80
Diary 85
Diary Widget settings 84
Line chart 82
Line chart Widget settings 80
Pie chart 82
Copyright (c) 2009 - 2012 Black Box Corporation
724-746-5500 | blackbox.com 91
Page 92

About BlackBox
Black Box Network Services is your source for more than 118,000 networking and infrastructure products. You’ll find
everything from cabinets and racks and power and surge protection products to media converters and Ethernet switches all
supported by free, live 24/7 Tech support available in 30 seconds or less.
© Copyright 2010. All rights reserved. Black Box® and the Double Diamond logo are registered trademarks of BB
Technologies, Inc. Any third-party trademarks appearing in this manual are acknowledged to be the property of their
respective owners.
ICOMP, rev. <%REVISION_NUMBER%> (build: V3.1.2 (30971))
724-746-5500 | blackbox.com 92
 Loading...