

Page 1

1000 Park Drive • Lawrence, PA 15055-1018 •
724-746-5500 • Fax 724-746-0746
© Copyright 2007. Black Box Corporation.
All rights reserved.
Page 2

FEBRUARY 2007
IC149A-R4
USB 2.0↔USB 2.0
Data Transfer Cable
CUSTOMER SUPPORT INFORMATION
Order toll-free in the U.S.: Call 877-877-BBOX (outside
U.S. call 724-746-5500) • FREE technical support 24 hours
a day, 7 days a week: Call 724-746-5500 or fax 724-746-0746 •
Mailing address: Black Box Corporation, 1000 Park Drive,
Lawrence, PA 15055-1018 • Web site: www.blackbox.com •
E-mail: [email protected]
Page 3

1
TRADEMARKS USED IN THIS
MANUAL
BLACK BOX and the Double
Diamond logo are registered
trademarks of BB Technologies, Inc.
Intel and Pentium are registered
trademarks of Intel Corporation.
Windows is either a registered
trademark or a trademark of Microsoft
Corporation in the United States
and/or other countries.
Any other trademarks mentioned in this
manual are acknowledged to be the property
of the trademark owners.
TRADEMARKS USED IN THIS MANUAL
Page 4

2
USB 2.0↔USB 2.0 DATA TRANSFER CABLE
Contents
Chapter Page
1. Specifications.................................3
2. Overview ........................................4
2.1 Introduction...........................4
2.2 System Requirements ............4
2.3 What’s Included.....................5
3. Installation.....................................6
3.1 The Setup Program ...............7
3.2 The Cable and Software ......10
4. Running the USB 2.0↔USB 2.0
Data Transfer Cable Program ....15
5. Uninstalling the Cable................19
Page 5

3
CHAPTER 1: Specifications
1. Specifications
System Requirements: Windows®98,
Me, XP, or Windows 2000, Intel
®
Pentium®133 MHz or better
computer, USB 1.1 or 2.0 port
Speed: Up to 480 Mbps
Connectors: (2) USB Type A
Cable Length: Integral 6-foot (1.8-m)
cable at each end
Page 6

4
USB 2.0↔USB 2.0 DATA TRANSFER CABLE
2. Overview
2.1 Introduction
Share network files via the USB port
on your PCs. The USB 2.0↔USB 2.0
Data Transfer Cable provides true
plug-and-play capability while
transferring files at greater speed than
traditional USB or other legacy port
file-transfer products. This high-speed
USB 2.0 cable provides speeds up to 40
times faster than the average full-speed
USB 1.1 cable.
2.2 System Requirements
• Windows 98, Me, XP, Windows
2000 or above
• Intel Pentium 133 MHz or better
computer
• Standard USB 1.1 or USB 2.0
(recommended) port
Page 7

5
CHAPTER 2: Overview
2.3 What’s Included
Your package should include the
following items. If anything is missing
or damaged, please call Black Box at
724-746-5500.
• USB 2.0↔USB 2.0 Data Transfer
Cable
• Cable setup program on
CD-ROM
• This user’s manual
Page 8

6
USB 2.0↔USB 2.0 DATA TRANSFER CABLE
3. Installation
Before you plug in and use the USB
2.0↔USB 2.0 Data Transfer Cable for
the first time with your local and
remote computers, you’ll need to run
the setup program to preload the
drivers and programs into your
computers. This enables you to use the
USB 2.0↔USB 2.0 Data Transfer
Cable properly under the Windows
operating system. You’ll also need to
install the cable and software.
On the local computer, you will install
the setup program, then install the
cable and software. Then, you will
repeat this installation on the remote
computer.
This chapter tells you how to install
the cable under Windows XP. If you
are using other Windows OS versions,
the installation will still be the same
but the look of the dialog boxes may
be a bit different. The setup program
supports only Windows 98, Me, XP,
and Windows 2000.
Page 9
7
CHAPTER 3: Installation
3.1 The Setup Program
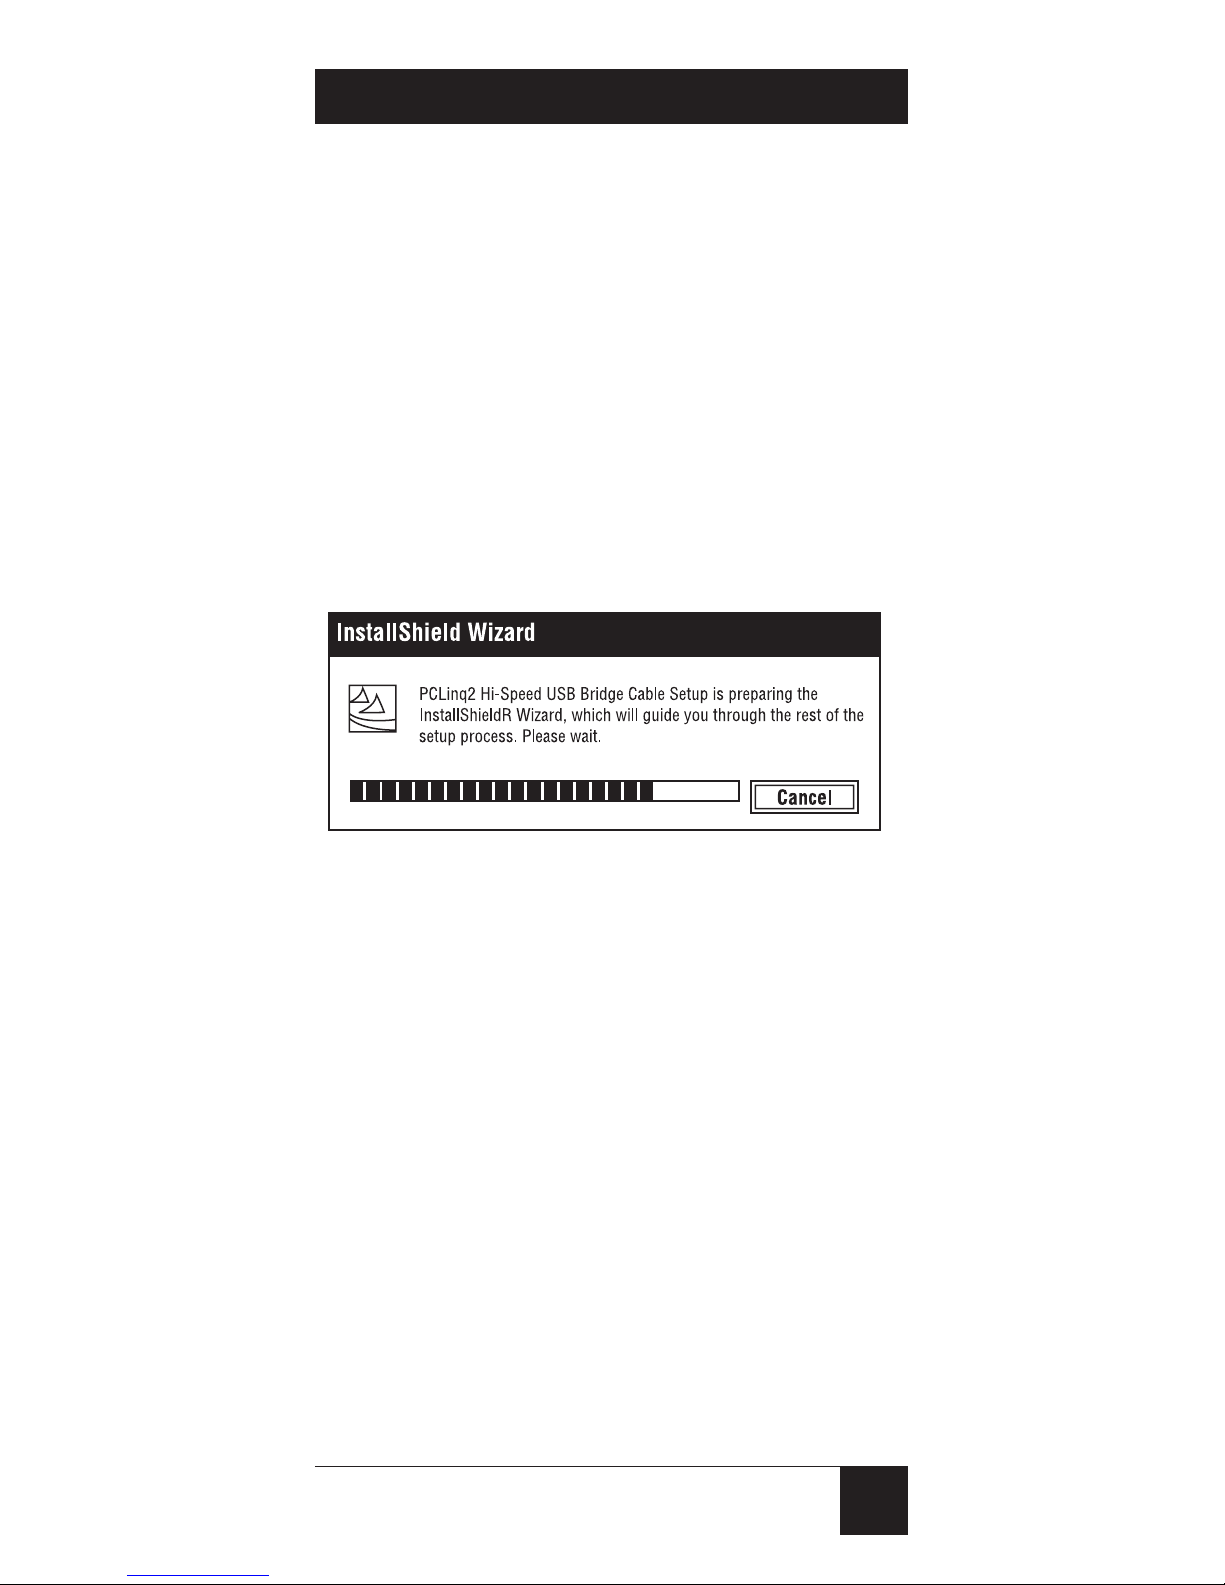
1. Power on your local PC and start
Windows. Load the included
driver CD and run the
SETUP.EXE program file. The
setup program will begin
preparing the InstallShield
Wizard. This is what will guide
you through the setup process.
Figure 3-1. InstallShield Wizard startup screen.
Page 10
8
USB 2.0↔USB 2.0 DATA TRANSFER CABLE
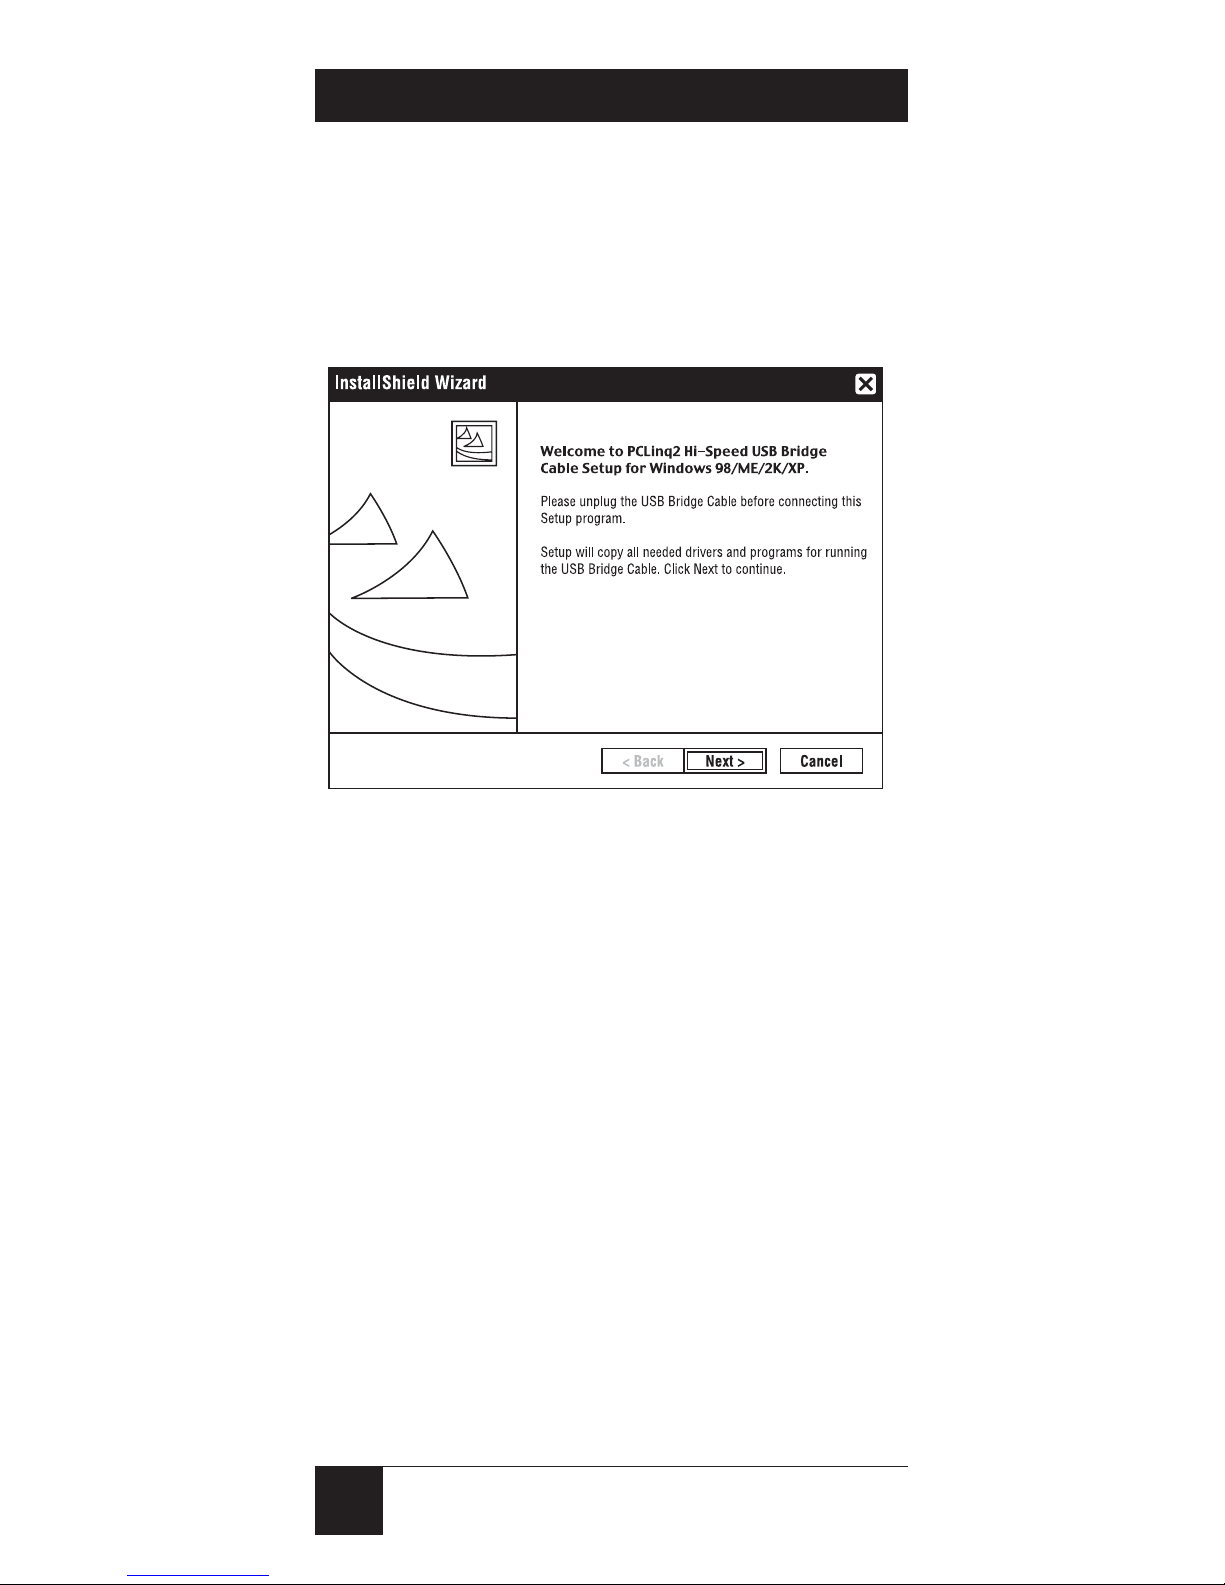
2. The InstallShield Wizard
welcome box will appear. Follow
the instructions, then press Next
to continue.
Figure 3-2. InstallShield Wizard welcome screen.
Page 11
9
CHAPTER 3: Installation
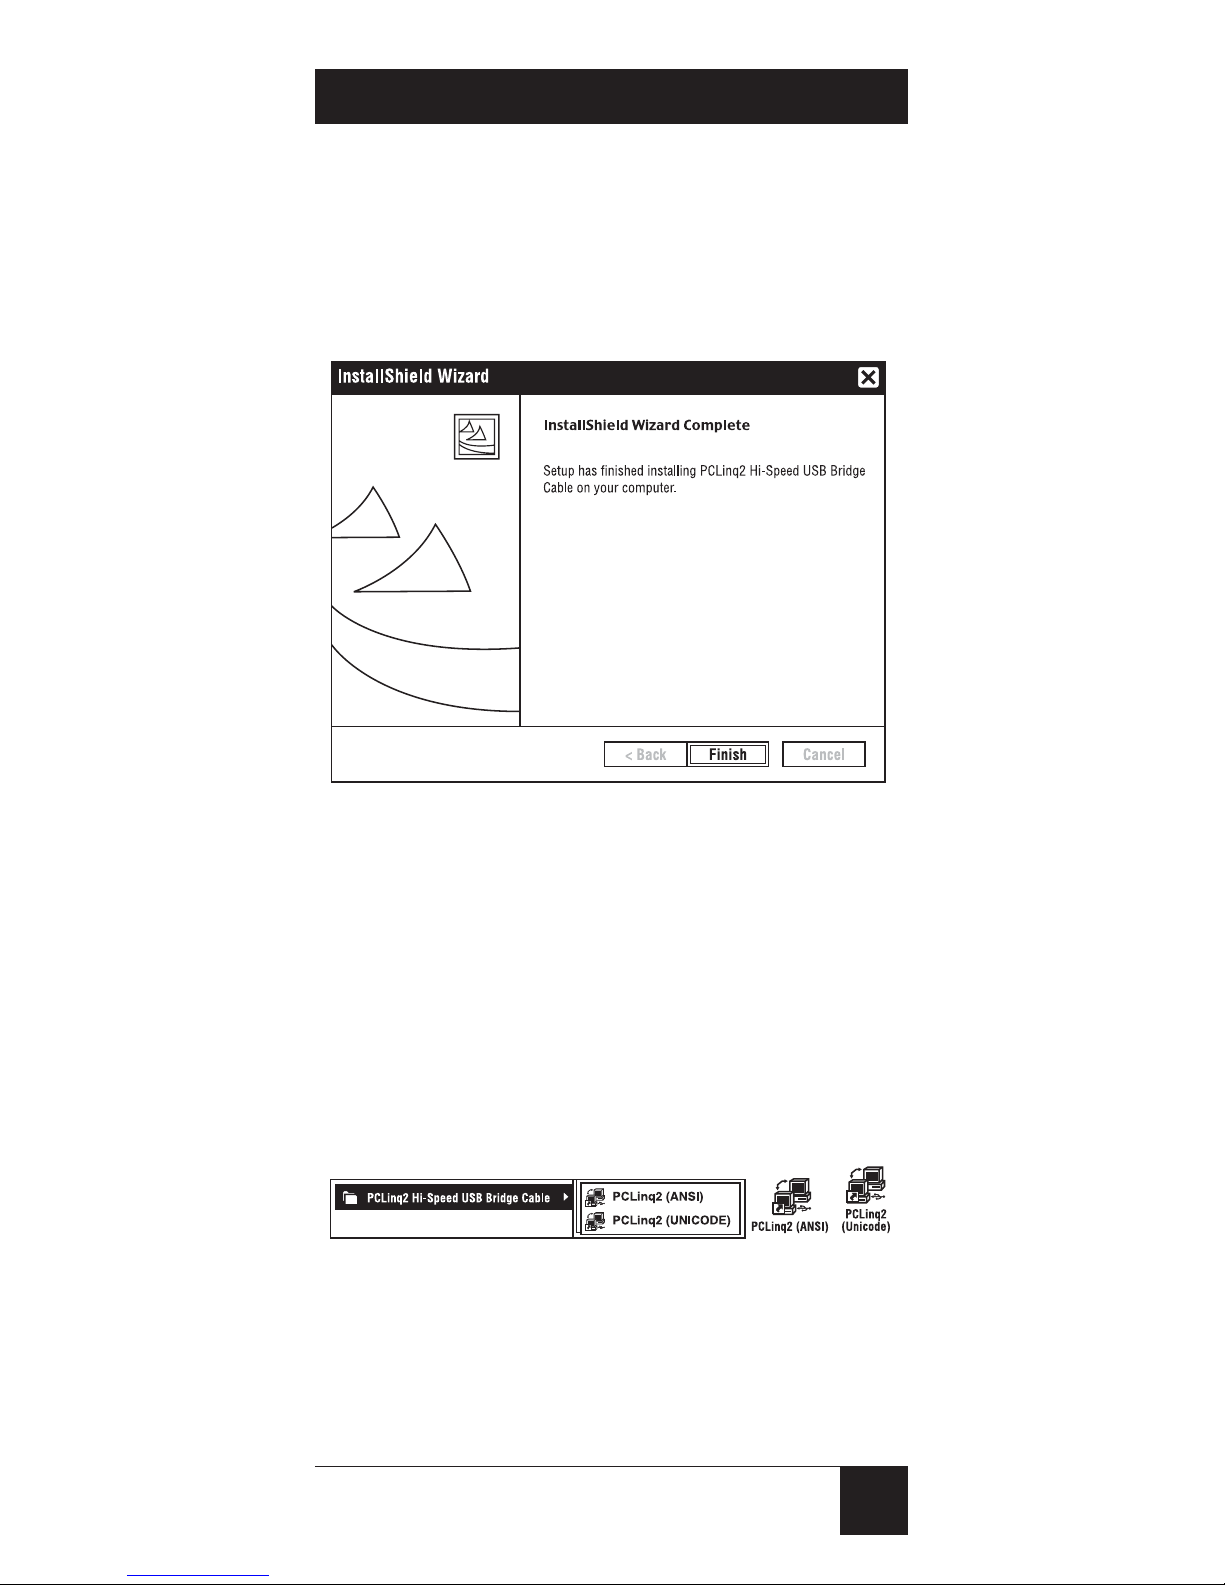
3. Wait until the program has
finished installing the driver.
When it tells you the installation
is complete, press Finish.
Figure 3-3. InstallShield driver installation is
complete.
4. Click on Start > Program Files.
Look for the USB 2.0↔USB 2.0
Data Transfer Cable program
folder to verify that it was created
during setup.
Figure 3-4. USB 2.0↔USB 2.0 Data Transfer
Cable program folder and shortcuts.
Page 12

10
USB 2.0↔USB 2.0 DATA TRANSFER CABLE
For Windows XP and Windows
2000, two programs are
provided: ANSI mode and
Unicode mode. For Windows 98
and Me, only ANSI mode is
available.
Check your desktop screen to
make sure that the appropriate
shortcuts were created for the
cable programs.
3.2 The Cable and Software
Locate your local PC’s USB ports and
plug the USB 2.0↔USB 2.0 Data
Transfer Cable into one of them. If
your computer has a high-speed USB
2.0 port, it’s recommended that you
use this port.
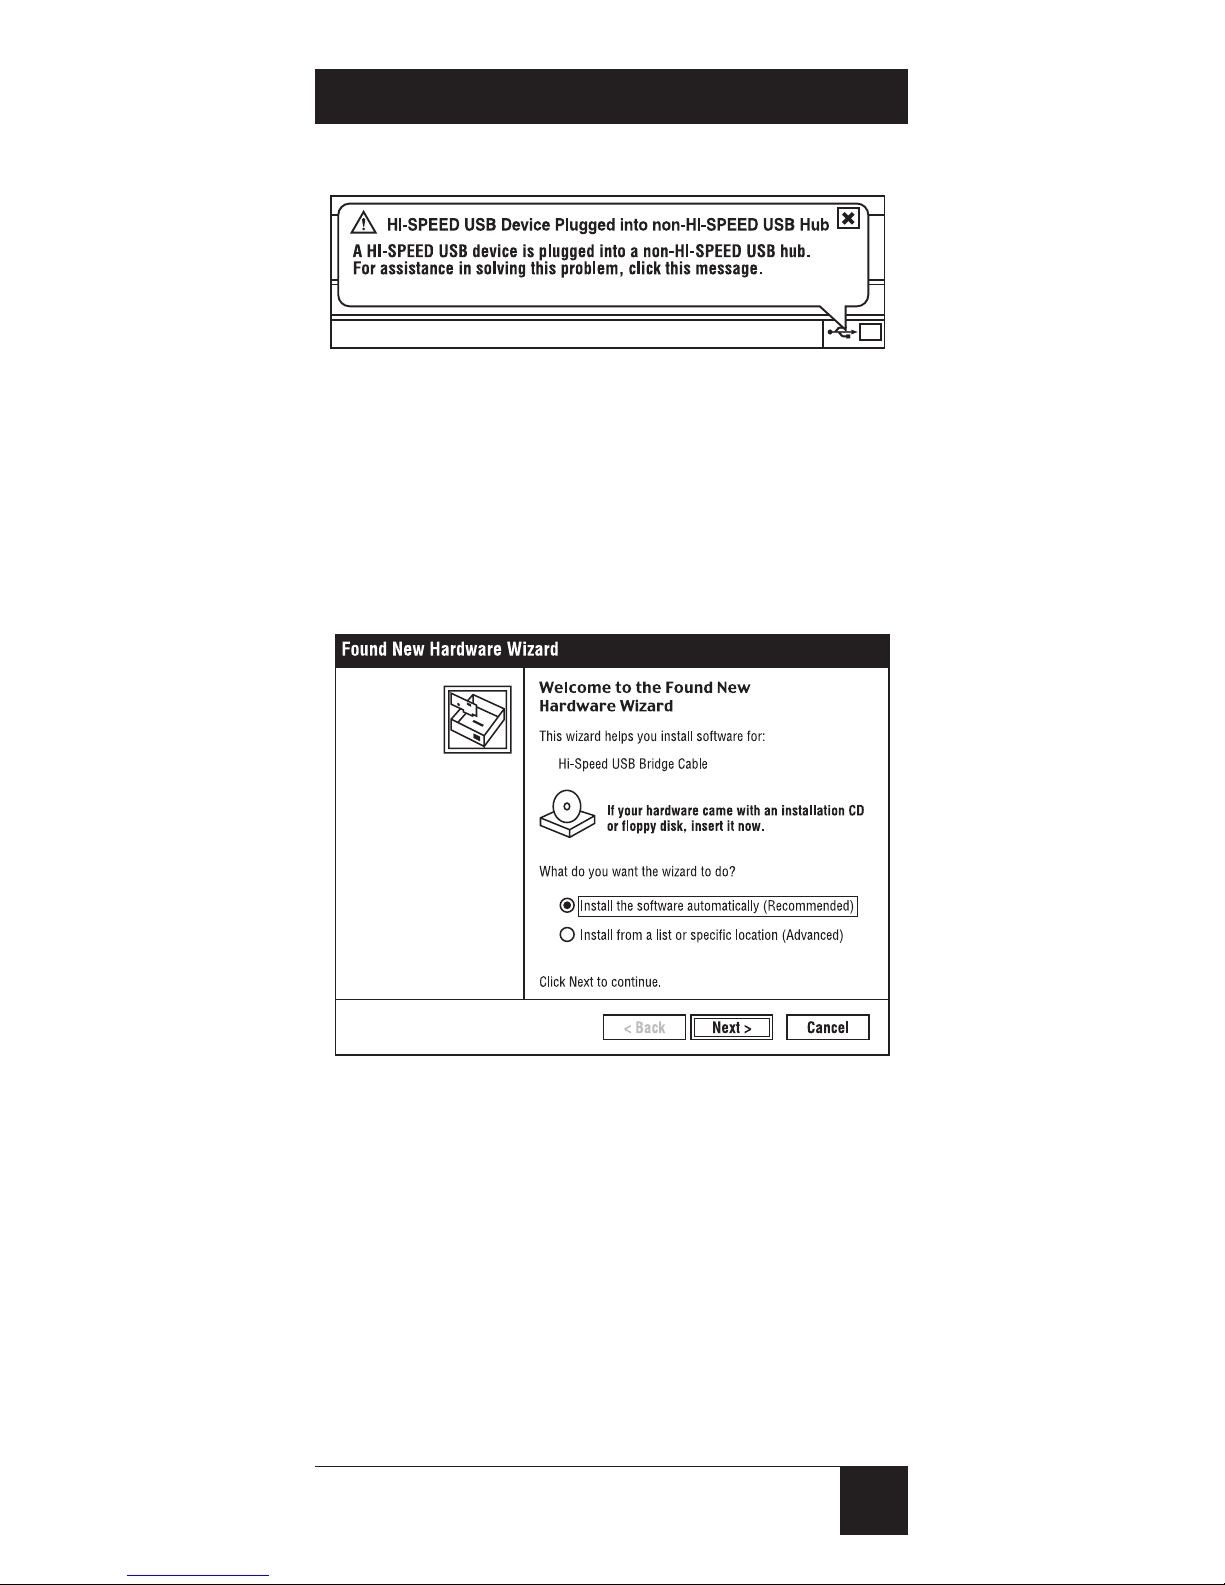
NOTE
If you plug the cable into a USB 1.1
port, an alert message will appear.
You may continue to use the cable,
but it will run at a reduced speed.
Windows will recommend that you
add a high-speed USB host
controller to your computer to obtain
maximum performance.
Page 13
11
CHAPTER 3: Installation
Figure 3-5. The alert message.
Windows will detect the USB 2.0↔USB
2.0 Data Transfer Cable. Choose
“Install the software automatically” and
press Next.
Figure 3-6. Installing the software.
Page 14
12
USB 2.0↔USB 2.0 DATA TRANSFER CABLE
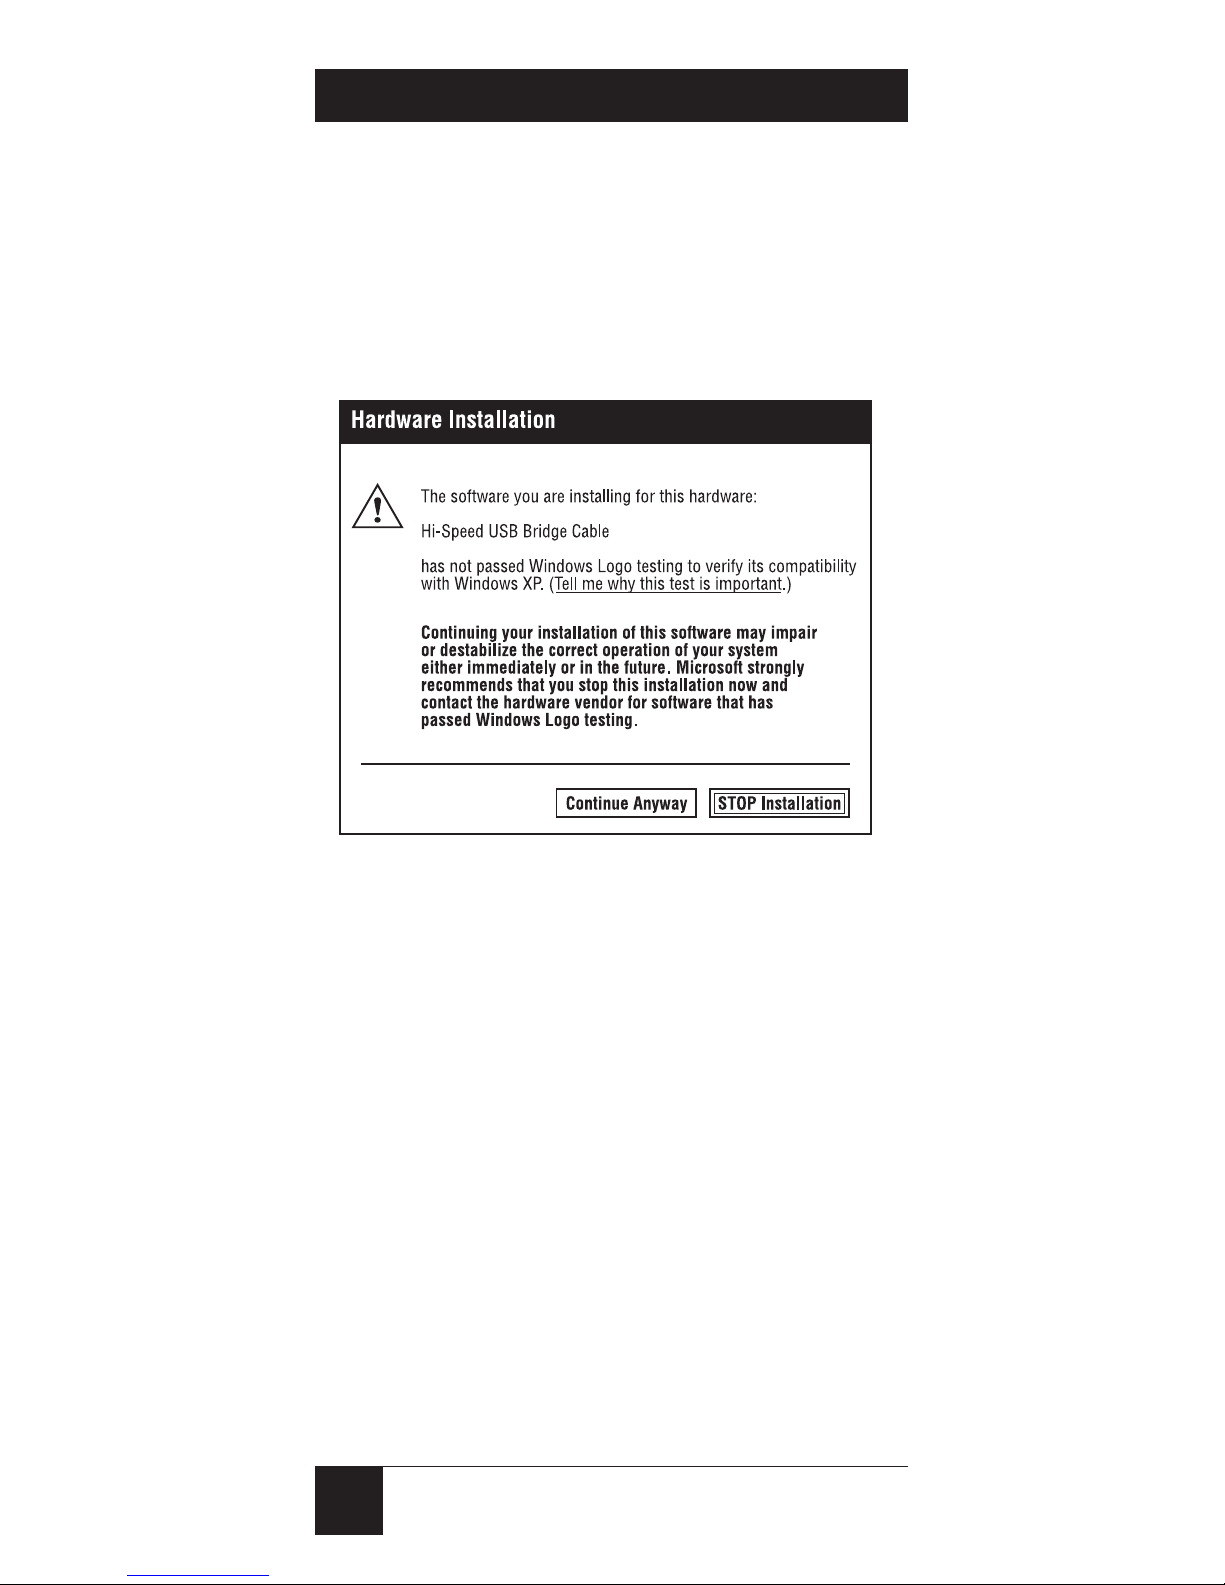
Before Windows installs the software, it
may notify you that the software has
not yet passed Windows XP logo
compatibility. Press Continue Anyway.
Figure 3-7. Warning screen.
Page 15
13
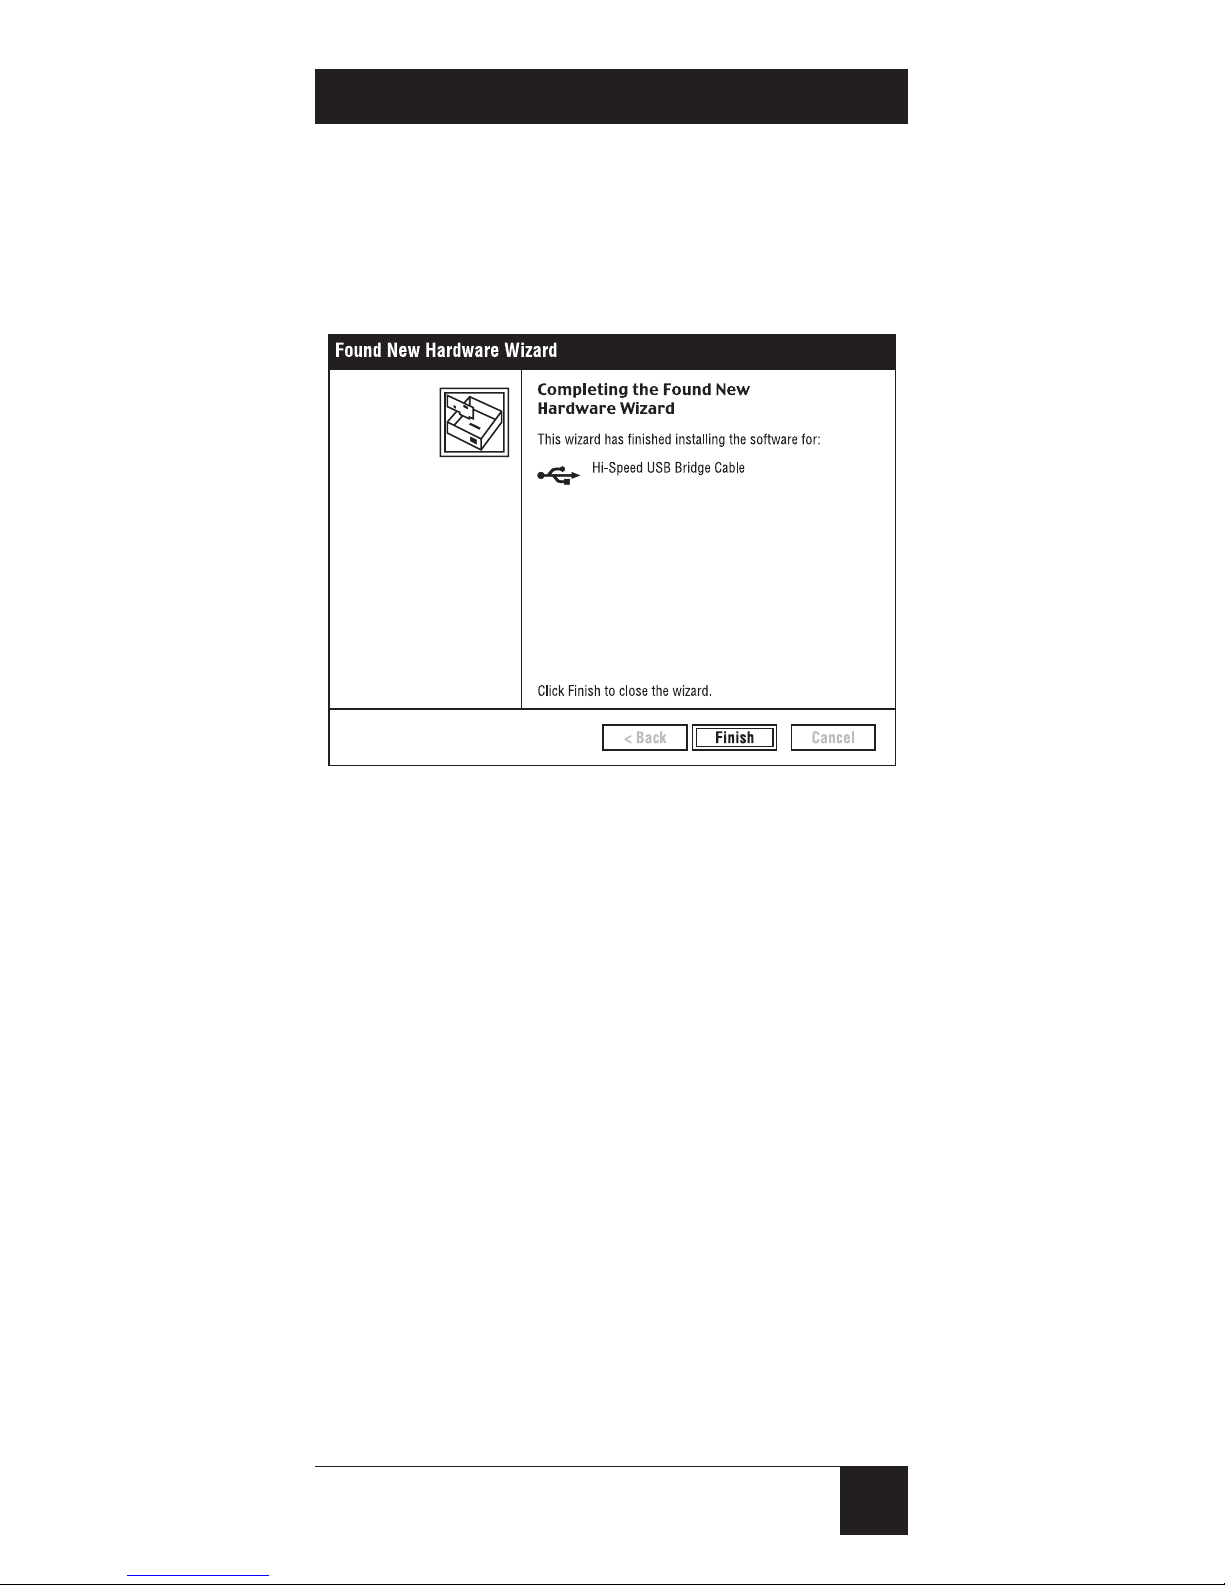
Windows will then install the cable’s
software. Once installation is
complete, press Finish.
Figure 3-8. Software installation is complete.
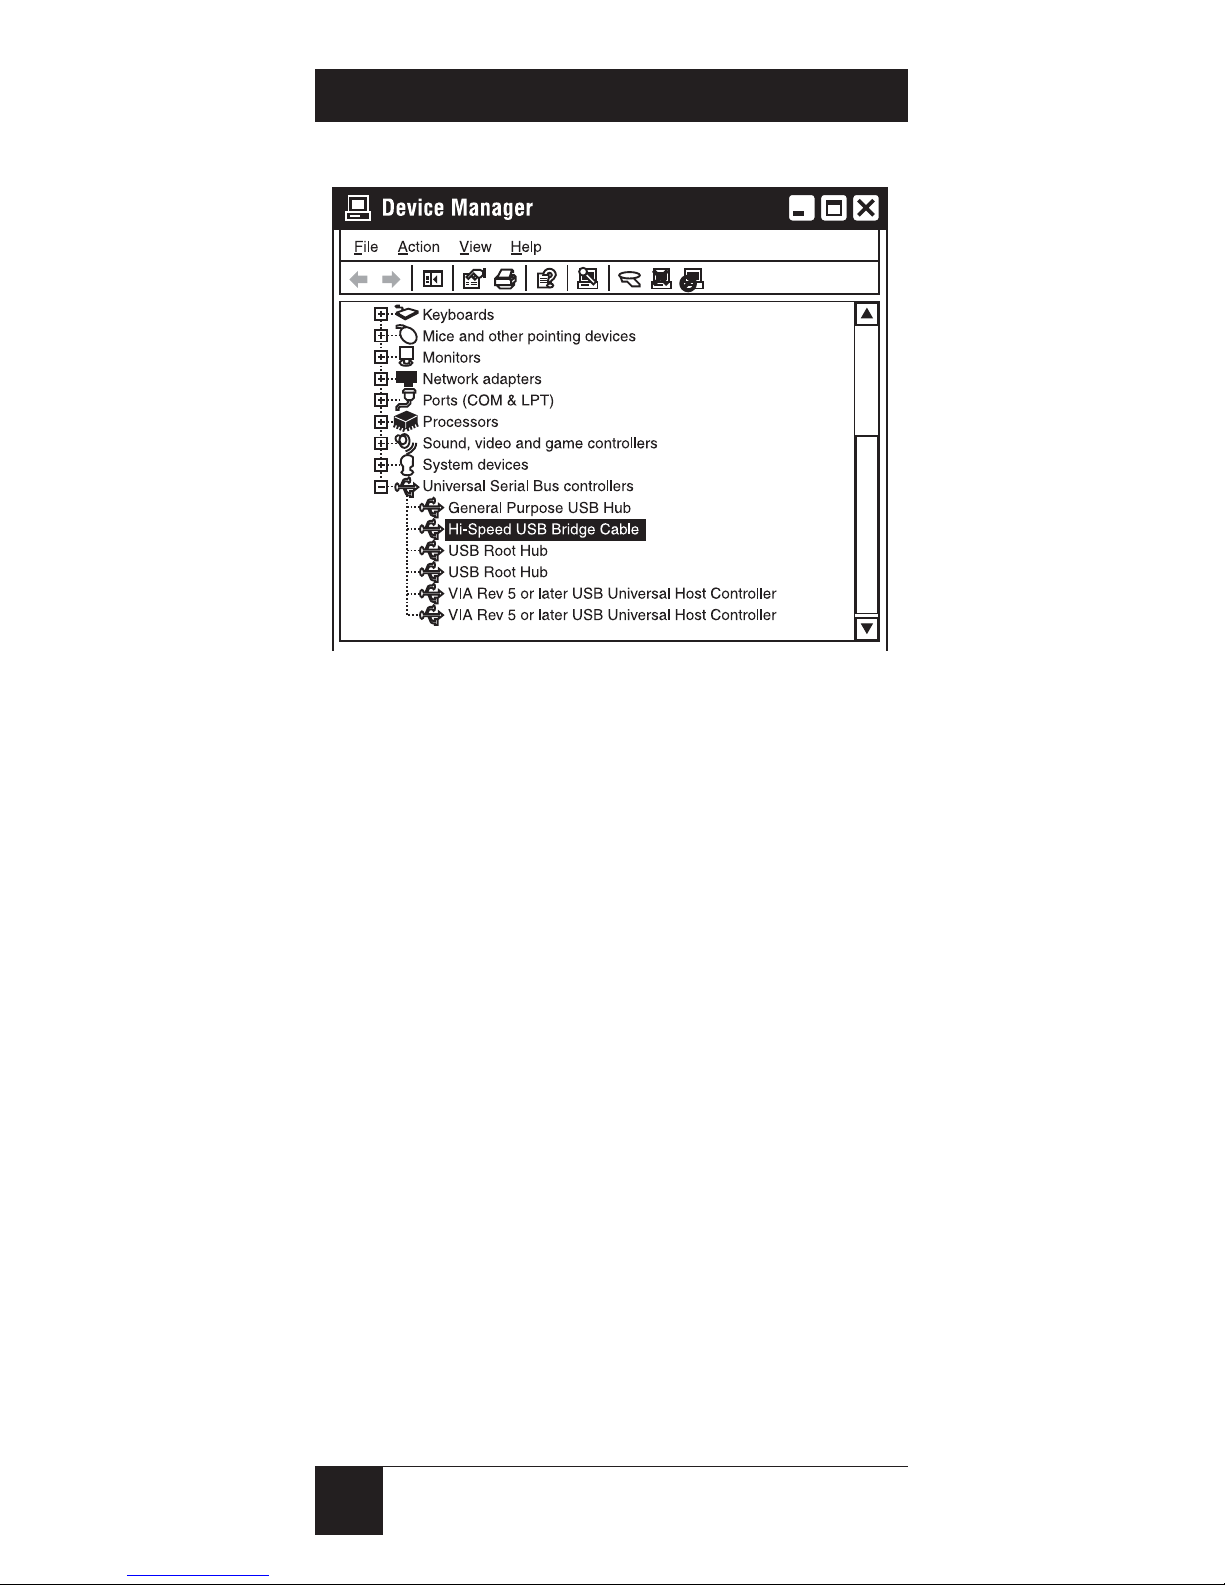
Verify the software installation in the
Device Manager. Right-click on My
Computer. Then select Hardware
Device Manager. Click on Universal
Serial Bus controllers and make sure
the USB 2.0↔USB 2.0 Data Transfer
Cable (called Hi-Speed USB Bridge
Cable on the actual software screen) is
present.
CHAPTER 3: Installation
Page 16
14
USB 2.0↔USB 2.0 DATA TRANSFER CABLE
Figure 3-9. The Device Manager.
Remove the CD from the local
computer and load it onto the remote
computer. Repeat the steps in Sections
3.1 and 3.2 to install the setup
program, cable, and software on the
remote computer.
Page 17

15
CHAPTER 4: Running the Cable Program
4. Running the
USB 2.0↔USB 2.0
Data Transfer Cable
Program
The USB 2.0↔USB 2.0 Data Transfer
Cable allows you to easily link two
computers by plugging an end of the
cable into the USB port of both
computers. Before you can start using
the cable program, you must run the
setup program, then install the cable
and software on the local computer as
mentioned in Chapter 3. Then repeat
this setup and installation procedure
on the remote computer.
Windows will detect the cable on the
computer and check if it is properly
installed. Use the same program mode
(ANSI or Unicode) for each
computer.
PCLinq2 is the application program
used to control the file sharing and
data transfer of linked computers (the
local and remote PCs). After you have
successfully completed the setup
program, and installed the cable and
Page 18
16
USB 2.0↔USB 2.0 DATA TRANSFER CABLE
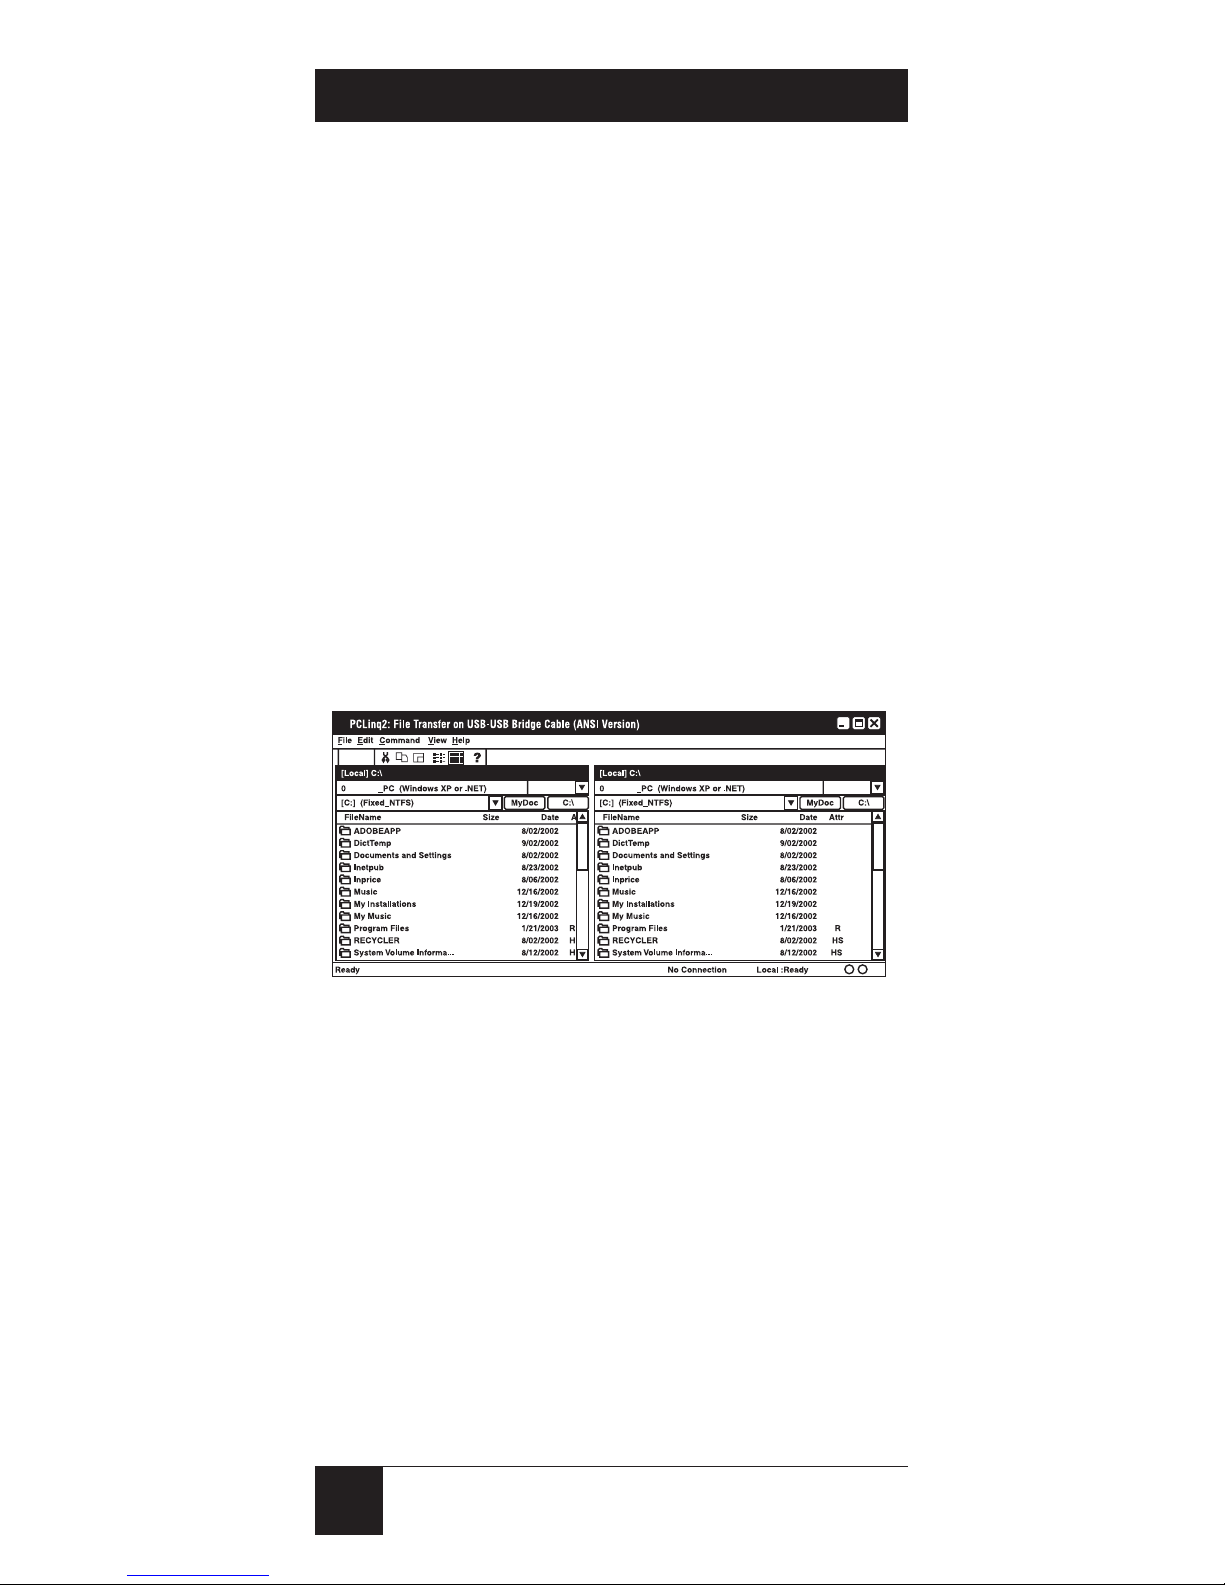
software, double-click on the PCLinq2
shortcut found on your desktop
screen. (An illustration of these
shortcuts can be found in Chapter 3,
Figure 3-4.) The cable’s file-transfer
program will appear (see Figure 4-1).
NOTE
The PCLinq2 Unicode mode is
available only under Windows 2000
and XP. The PCLinq2 ANSI program
is available for all Windows OS
versions.
Figure 4-1. File-transfer screen.
Check the dual-state Status LED on the
bottom right of the program dialog
box to see if it is ready or not (see
Figure 4-1). Green signifies a ready
status; red means not ready or not
found. Make sure that the program
shows two green LEDs to indicate a
linked connection.
Page 19

17
CHAPTER 4: Running the Cable Program
NOTE
You can have more than one cable
program running at a time.
Now that you have control of the local
and remote PCs, you can:
• Display files/folders.
• Open files/folders.
• Create files/folders.
• Delete files/folders.
• Copy files/folders.
• Move files/folders.
• Change file/folder names.
Drag and drop the files/folders you
want to transfer from one computer to
the other. You can change disk drives
or directories by using the pull-down
directory menu. You can also use the
pull-down File menu for other
program functions, such as starting
and stopping data transfer.
Page 20
18
USB 2.0↔USB 2.0 DATA TRANSFER CABLE
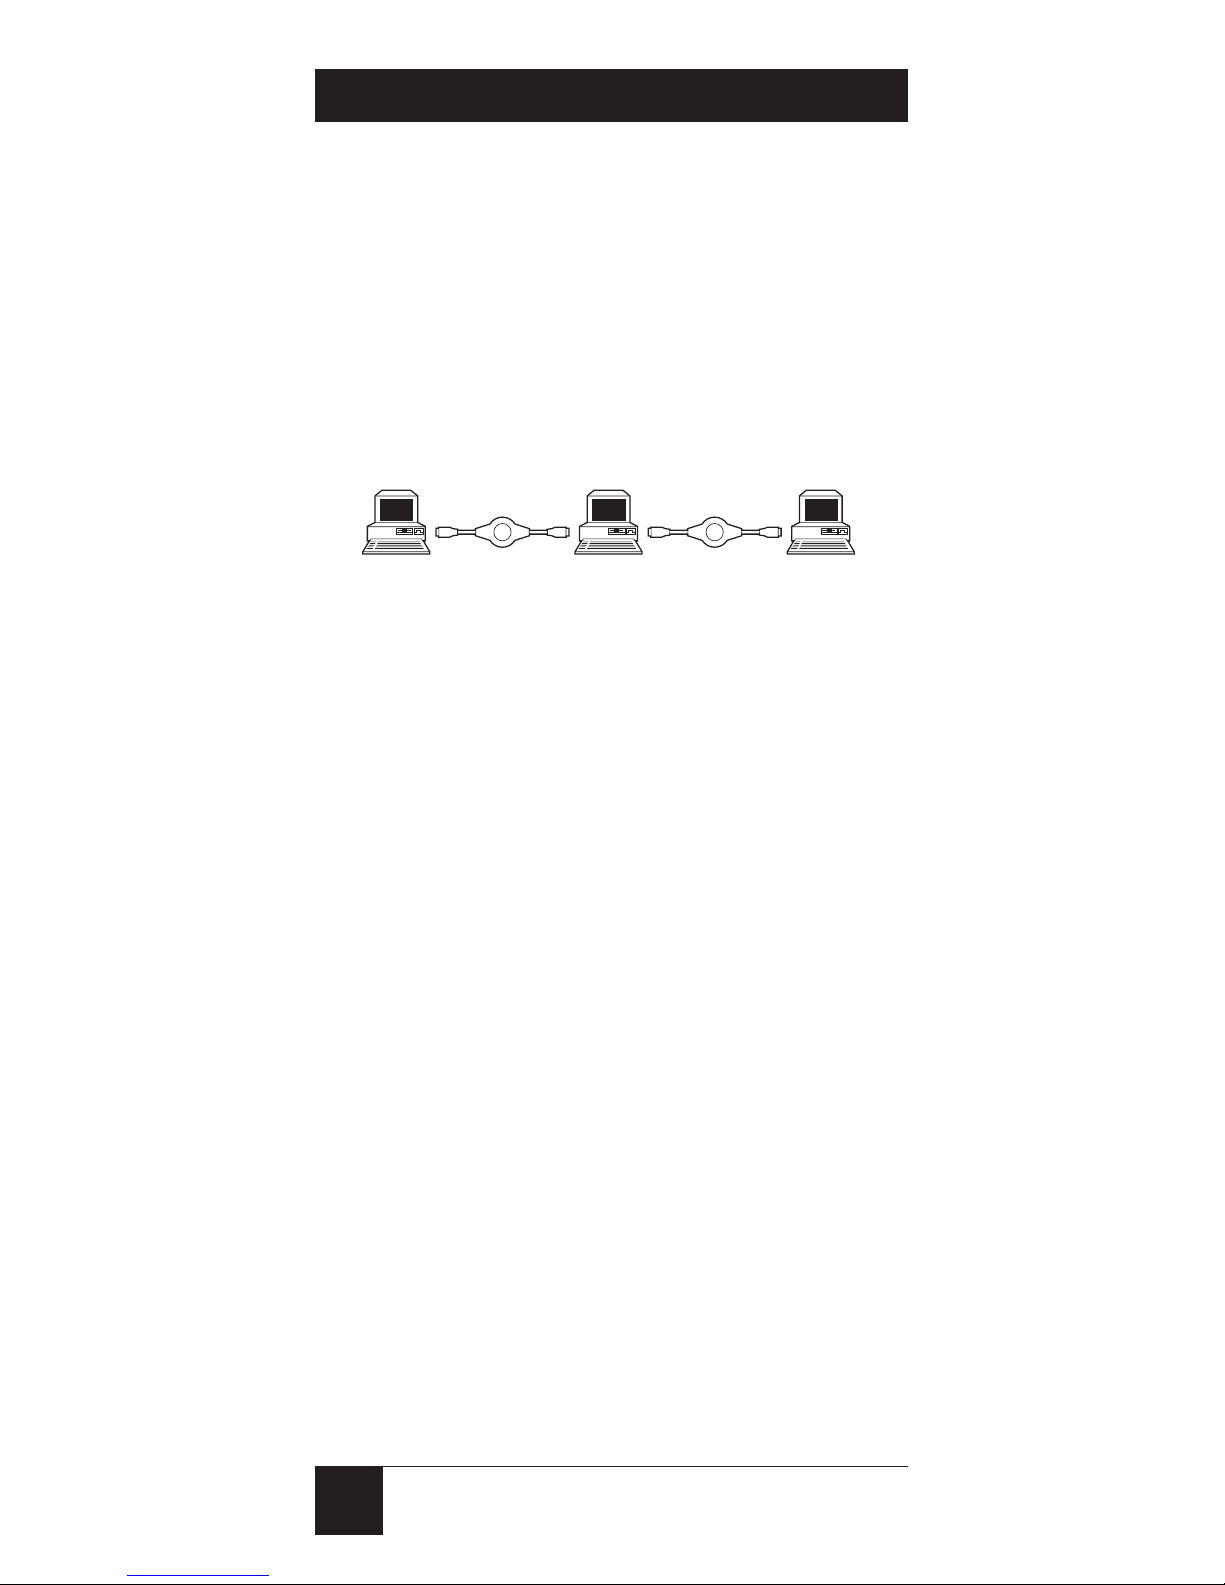
Note that if there are three computers
linked together using two USB
2.0↔USB 2.0 Data Transfer Cables,
you can control two computers (A-to-B
or B-to-C) at a time. See the
illustration below.
Figure 4-2. Multiple cable application.
Windows USB Host A
Windows USB Host B
Windows USB Host C
USB 2.0↔USB 2.0
Data Transfer Cable
USB 2.0↔USB 2.0
Data Transfer Cable
Page 21

19
5. Uninstalling the
Cable
When you’re done using the USB
2.0↔USB 2.0 Data Transfer Cable,
follow these steps to properly uninstall
it.
1. Close all USB 2.0↔USB 2.0 Data
Transfer Cable programs and
unplug the cable.
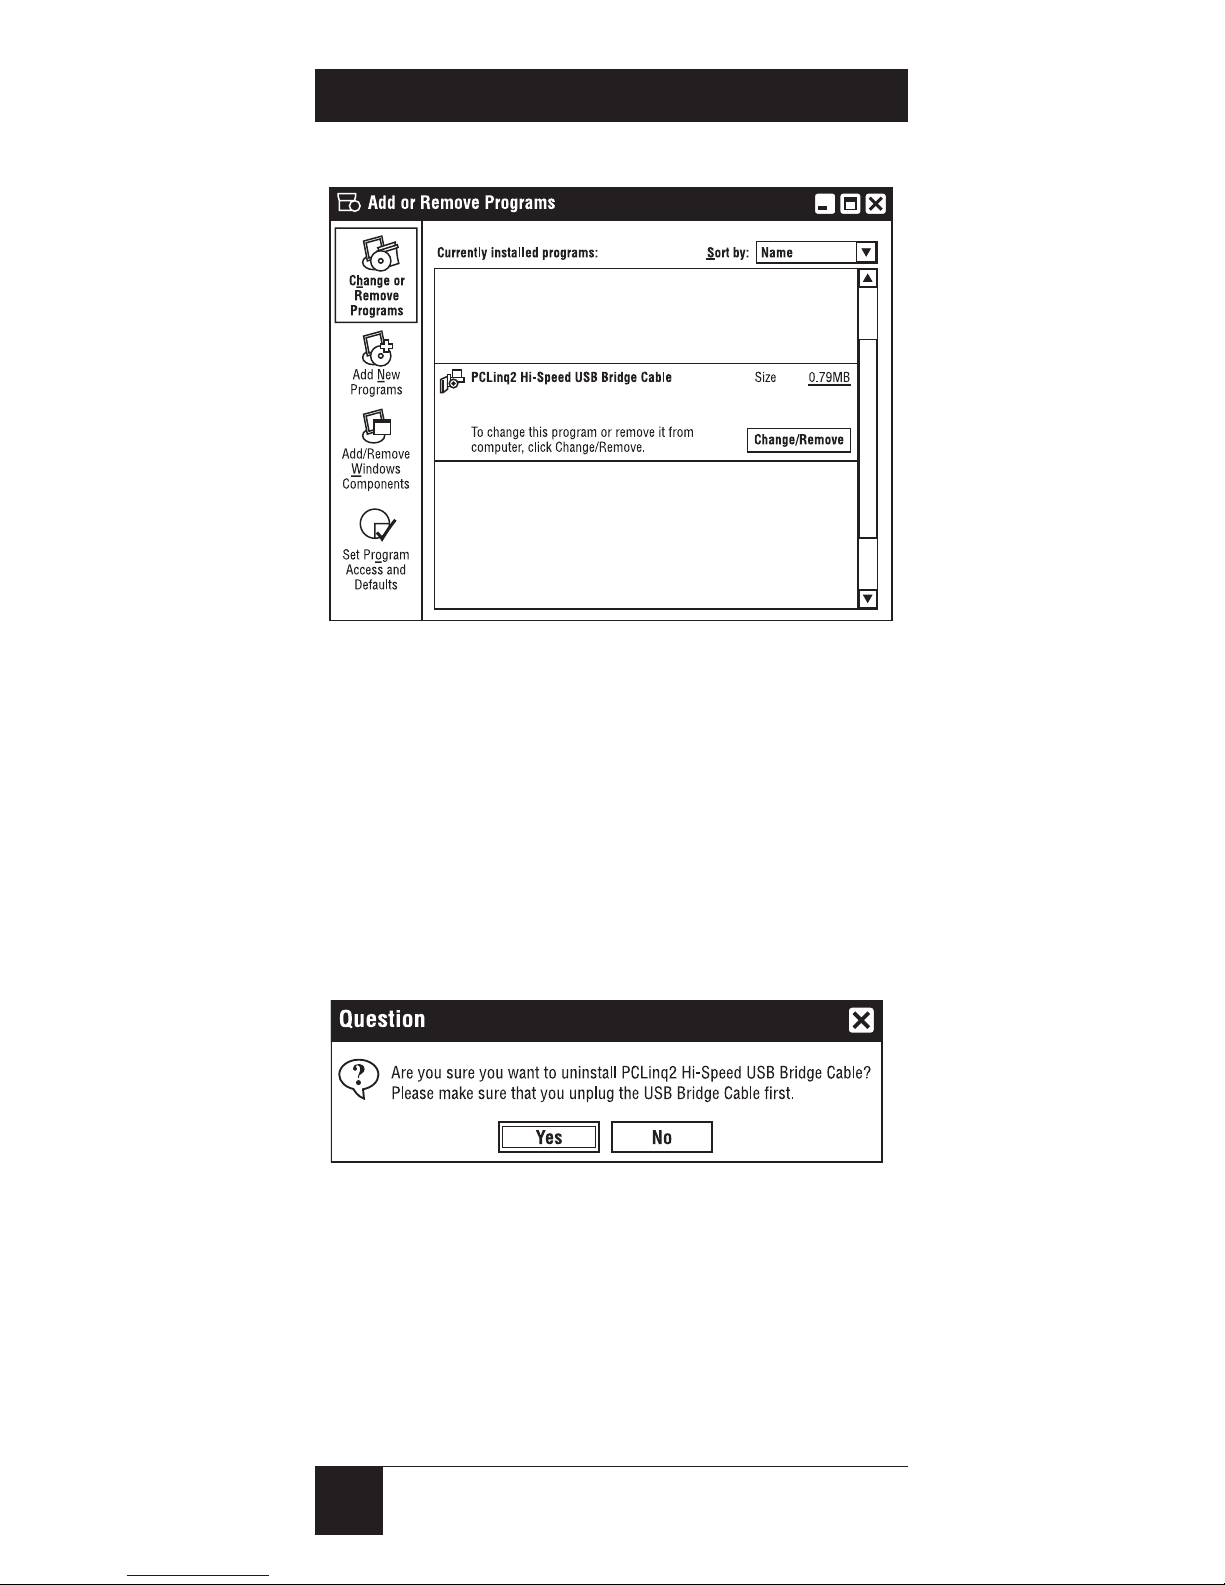
2. Go to the Control Panel and
double-click on Add or Remove
Programs.
3. Look for the USB 2.0↔USB 2.0
Data Transfer Cable (called
PCLinq2 Hi-Speed USB Bridge
Cable in the actual software) and
press Change/Remove.
CHAPTER 5: Uninstalling the Cable
Page 22
20
USB 2.0↔USB 2.0 DATA TRANSFER CABLE
Figure 5-1. Add or Remove Programs screen.
4. You will be asked whether you
want to uninstall it. Make sure
that you have unplugged the
cable (as requested in Step 1 on
the previous page) and press
Yes.
Figure 5-2. Uninstall prompt.
5. The USB 2.0↔USB 2.0 Data
Transfer Cable driver and
programs will be uninstalled.
Page 23
21
CHAPTER 5: Uninstalling the Cable
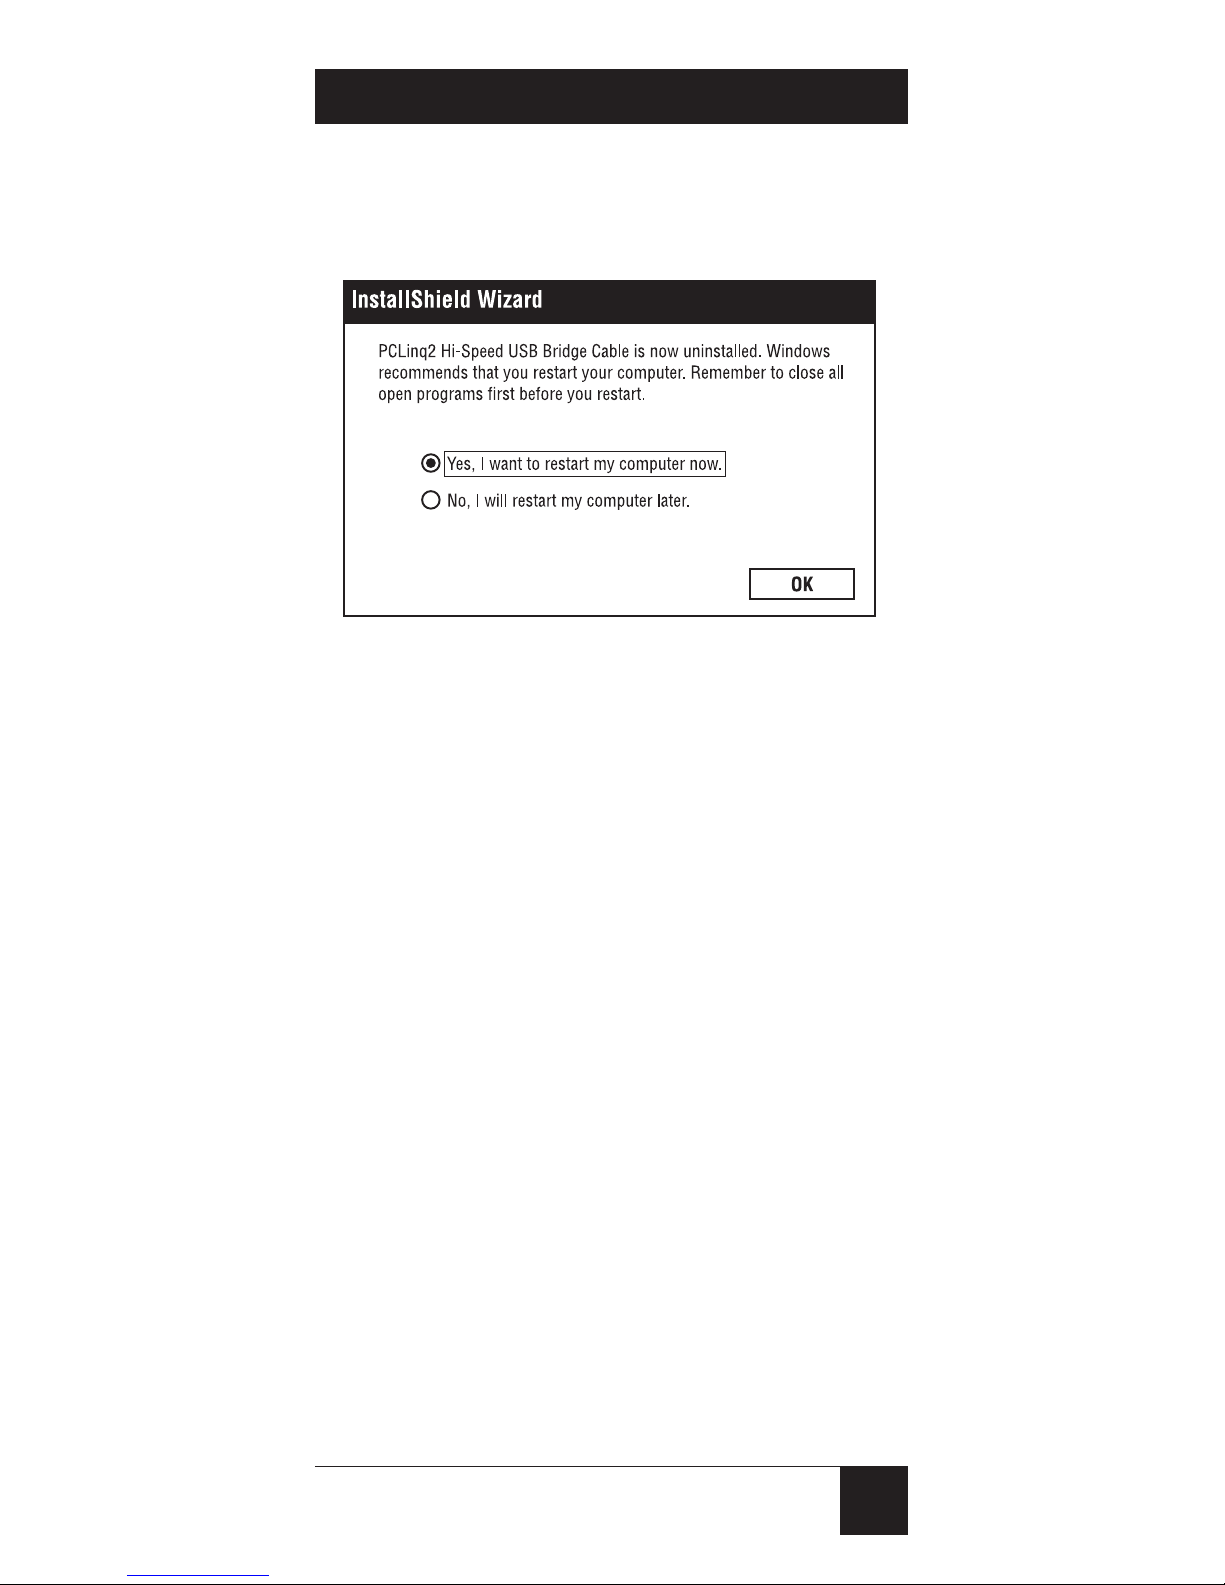
6. You will be asked to restart your
computer. Press OK.
Figure 5-3. Restart prompt.
 Loading...