

Page 1
724-746-5500 | blackbox.com724-746-5500 | blackbox.com 724-746-5500 | blackbox.com
Page 5 Page 6
© Copyright 20 09. Black Box Corporation. All rights reserved.
Black Box and the Double Diamond logo are registered trademarks of
BB Technologies, Inc. Any other trademarks mentioned in this manual
are acknowledged to b e the prop erty of the trademark owner s.
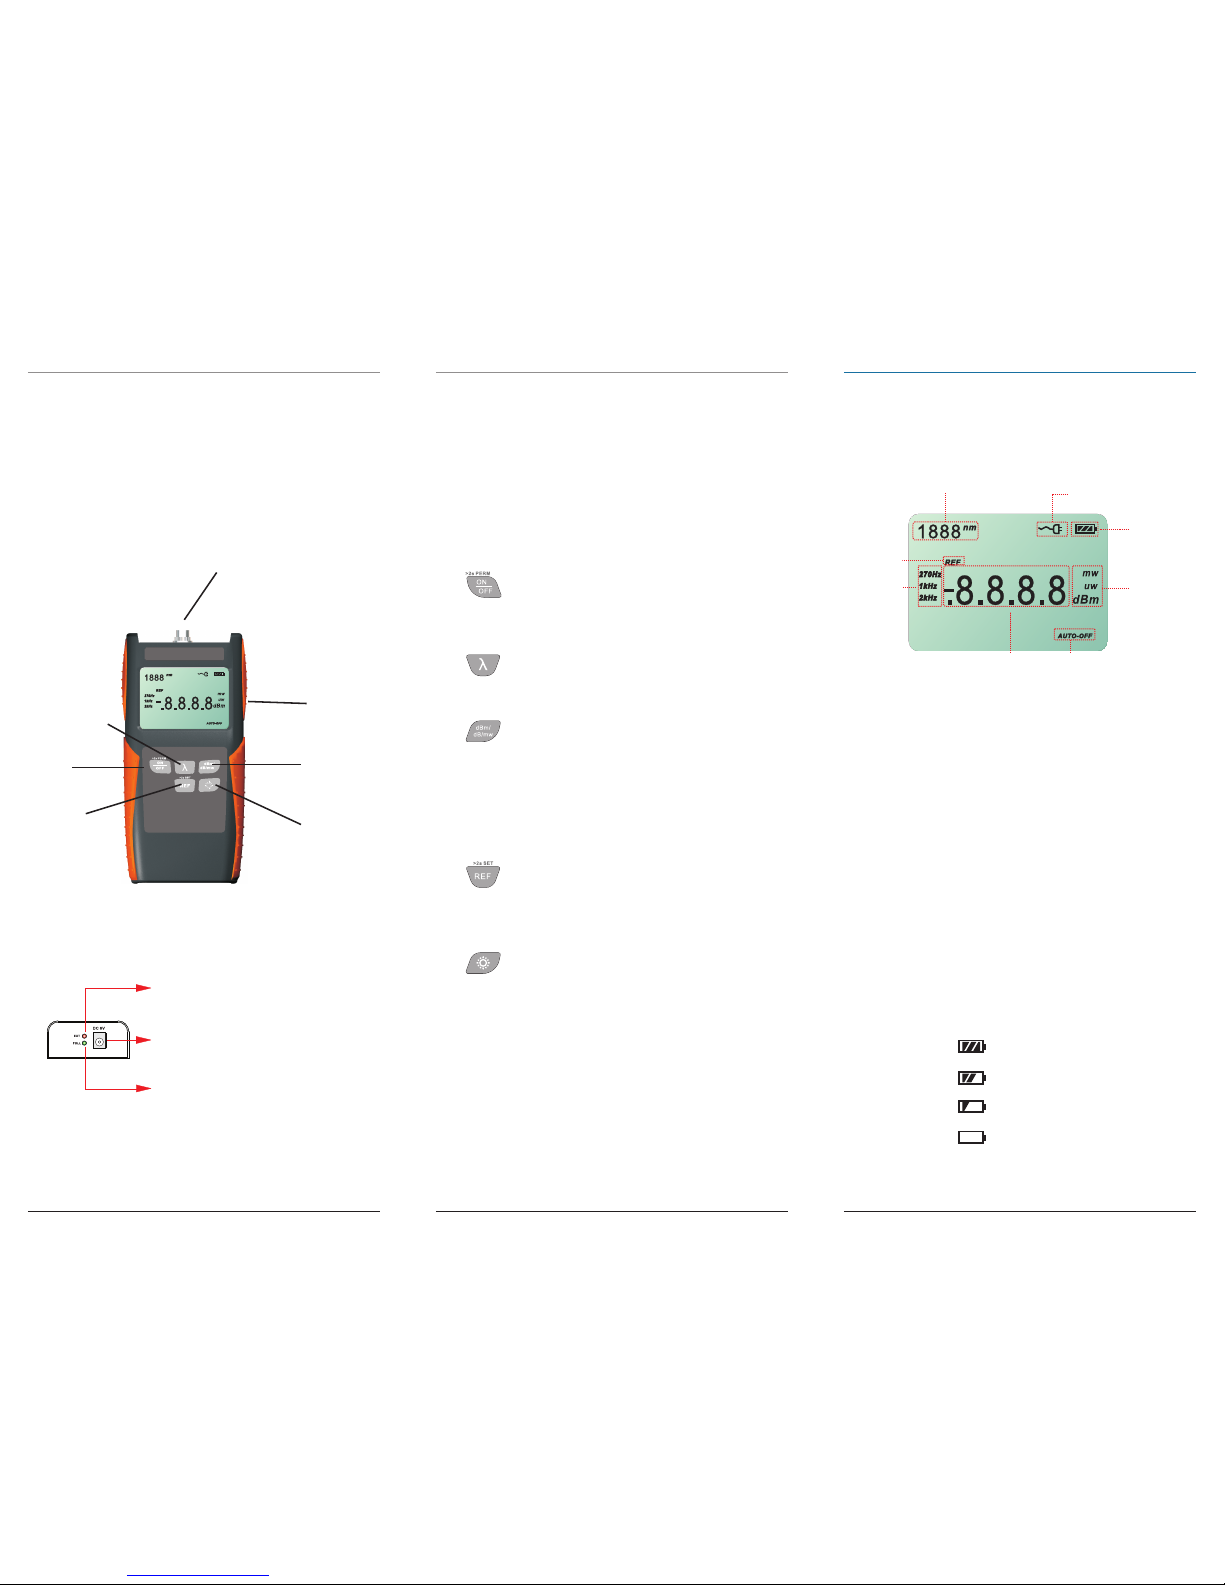
Works with an optical laser
source to test optical fiber
cables for optical loss.
Works at six wavelengths: 850, 1300,
1310, 1490, 1550, and 1625 nm.
Deluxe Optical Power Meter
October 2009
FOPM-200
Black Box Tech
Support : FREE! Live.
24 / 7. Tech support
the way it should be.
Great tech support is just 20 seconds
away at 724-746-5500 or blackbox.com.
Order toll-free in the U.S.:
Call 877-877-BBOX
(outside U.S. call 1-724-746-5500)
FREE technical support
24 hours a day, 7 days a week:
Call 724-746-5500 or
fax 724-746-0746
Mailing address:
Black Box Corporation
1000 Park Drive
Lawrence, PA 15055-1018
Web site: www.blackbox.com
E-mail: info @blackbox.com
Customer
Support
Information
FOPM-200 Quick Start Guide
3. Specifications
NOTE: Valid at 1550 nm, CW. 23° C ±3° C, relative
humidity less than or equal to 70%, with an
FC connector.
General Specifications:
Connectors: FC/PC (SC/PC, ST/PC interchangeable
connector optional)
Temperature Tolerance: Operating: +4 to +122° F
(-10 to +50° C);
Storage: -4 to +155° F (-20 to +70° C)
Humidity Tolerance: Less than 90%
Power: (2) 1.2-V Ni-MH batteries; AC adapter for
continuous use
Size: 4.6”H x 3”W x 1.8”D x x (11.6 x 7.6 x 4.5 cm)
Weight: 0.6 lb. (0.3 kg)
Optical Specifications:
Function Value
Calibrated 850/1300 /1310/1490/1550/
wavelength (nm) 1625
Detector Type InGaAs
Accuracy ±0.35 dB ±10 nW
Resolution 0.01 dB
Linearity ±5%
Auto Power Off Yes
Page 2
724-746-5500 | blackbox.com724-746-5500 | blackbox.com 724-746-5500 | blackbox.com
FOPM-200 Quick Start Guide FOPM-200 Quick Start GuideFOPM-200 Quick Start Guide
Page 3Page 2 Page 4
1. Display and Keypad
Figure 1 shows the optical power meter’s display and
keypad.
Interchangeable
connector
LCD screen
Figure 2 shows the power meter’s LCD display and
Table 2 describes its functions. Table 3 shows the
battery indicator status.
1
3
2
4
5
6
7
Figure 2. LCD.
Table 2. LCD functions.
Number Function
1 Wavelength reference
2 AC adapter
3 Battery charge
4 Measurement unit
5 Auto-off
6 Power value
7 Frequency
8 Reference value
Table 3. Battery indicator status.
Status Icon Description
Full Battery at 100% capacity
2 Bars Battery at 50–75% capacity
1 Bar Battery at 25–50% capacity
Empty Battery at 0–25% capacity*
* Battery icon flashes when power is almost depleted.
Connect the AC adapter to recharge the battery.
2. Keypad Functions, LCD Functions, and
Battery Indicator Status
Table 1 describes the optical power meter’s keys.
Table 1. Keypad functions.
No. Key Function
1 Switches tester on/off. Press and hold for
more than two seconds while turning on
to disable the auto-off feature.
2 Press to set the wavelength. Select from
six possible wavelengths: 850, 1300, 1310,
1490, 1550, and 1625 nm.
3 Press to select measurement mode. Three
modes are available: dBm for the power
value, dB for the relative value, and mw
for the logarithmic value. (Hi/Lo will be
displayed if the measured power value is
out of range [-60 to +3 dBm]).
4 Press for less than two seconds to display
the wavelength reference level. Press and
hold for more than two seconds to set a
new wavelength reference level.
5 Press to switch backlighting on/off.
Figure 1. Display and keypad.
1
3
2
4
5
DC input jack
Battery fully charged LED
External power/
Recharging LED
Figure 2. Bottom of power meter.
8
 Loading...