

Page 1

FEATURES
• Programmable group/channel selector
• Programmable top switches
• Programmable keypad menu
• DTMF
• ANI
• Time-out timer
• Group scan
• Scan delay
• Talkback scan
• Nuisance channel delete
• Dual-priority scan with Code Guard
• Alphanumeric display
• Up to 240 channels available in 15
groups of 16 channels
• 2.5 kHz interstitial channel spacing
• Enhanced user Code Guard that
accesses all 16 guards
• Group scan with group lockout
• Clonable alphanumeric display data
• Clonable low-power select per channel
2 BK Radio
Page 2
TABLE OF CONTENTS
Introduction................................................................................................. 3
Basic Operation........................................................................................... 4
Radio Controls ............................................................................................ 5
Code Guard Operation ................................................................................ 6
Built-In Features ......................................................................................... 7
Alphanumeric Display .............................................................................. 12
Channel Groups......................................................................................... 13
Scan Operation.......................................................................................... 15
Priority Scan.............................................................................................. 17
User Selected Code Guard ........................................................................ 22
Busy Channel ............................................................................................ 23
Cloning Procedure..................................................................................... 25
Battery Installation and Removal.............................................................. 28
Definitions and Acronyms ........................................................................ 29
Service....................................................................................................... 30
INTRODUCTION
CONGRATULATIONS, you now own a BK Radio GPH Flex•Mode™
radio. This synthesized portable radio uses a microprocessor core allowing
features and performance previously unavailable in a hand-held two-way
radio. The GPH radio has been designed to meet the tough requirements of
today’s communications environment. Please take a moment to read the
information in this manual so you can get optimum performance from your
new radio.
FCC REQUIREMENTS
Your radio must be properly licensed by the Federal Communications
Commission prior to use. Your BK Radio dealer can assist you in meeting
these requirements. Your dealer will program each radio with your
authorized frequencies, signaling codes, etc., and will be there to meet your
communications needs as your system expands.
SAFETY PRECAUTIONS
• Do not operate the transmitter in close proximity to
blasting caps.
• Do not operate the radio in an explosive atmosphere
(petroleum fuels, solvents, dust, etc.) unless your
radio is an intrinsically safe model designed for such
use.
GPH Owner’s Manual 3
Page 3
BASIC OPERATION
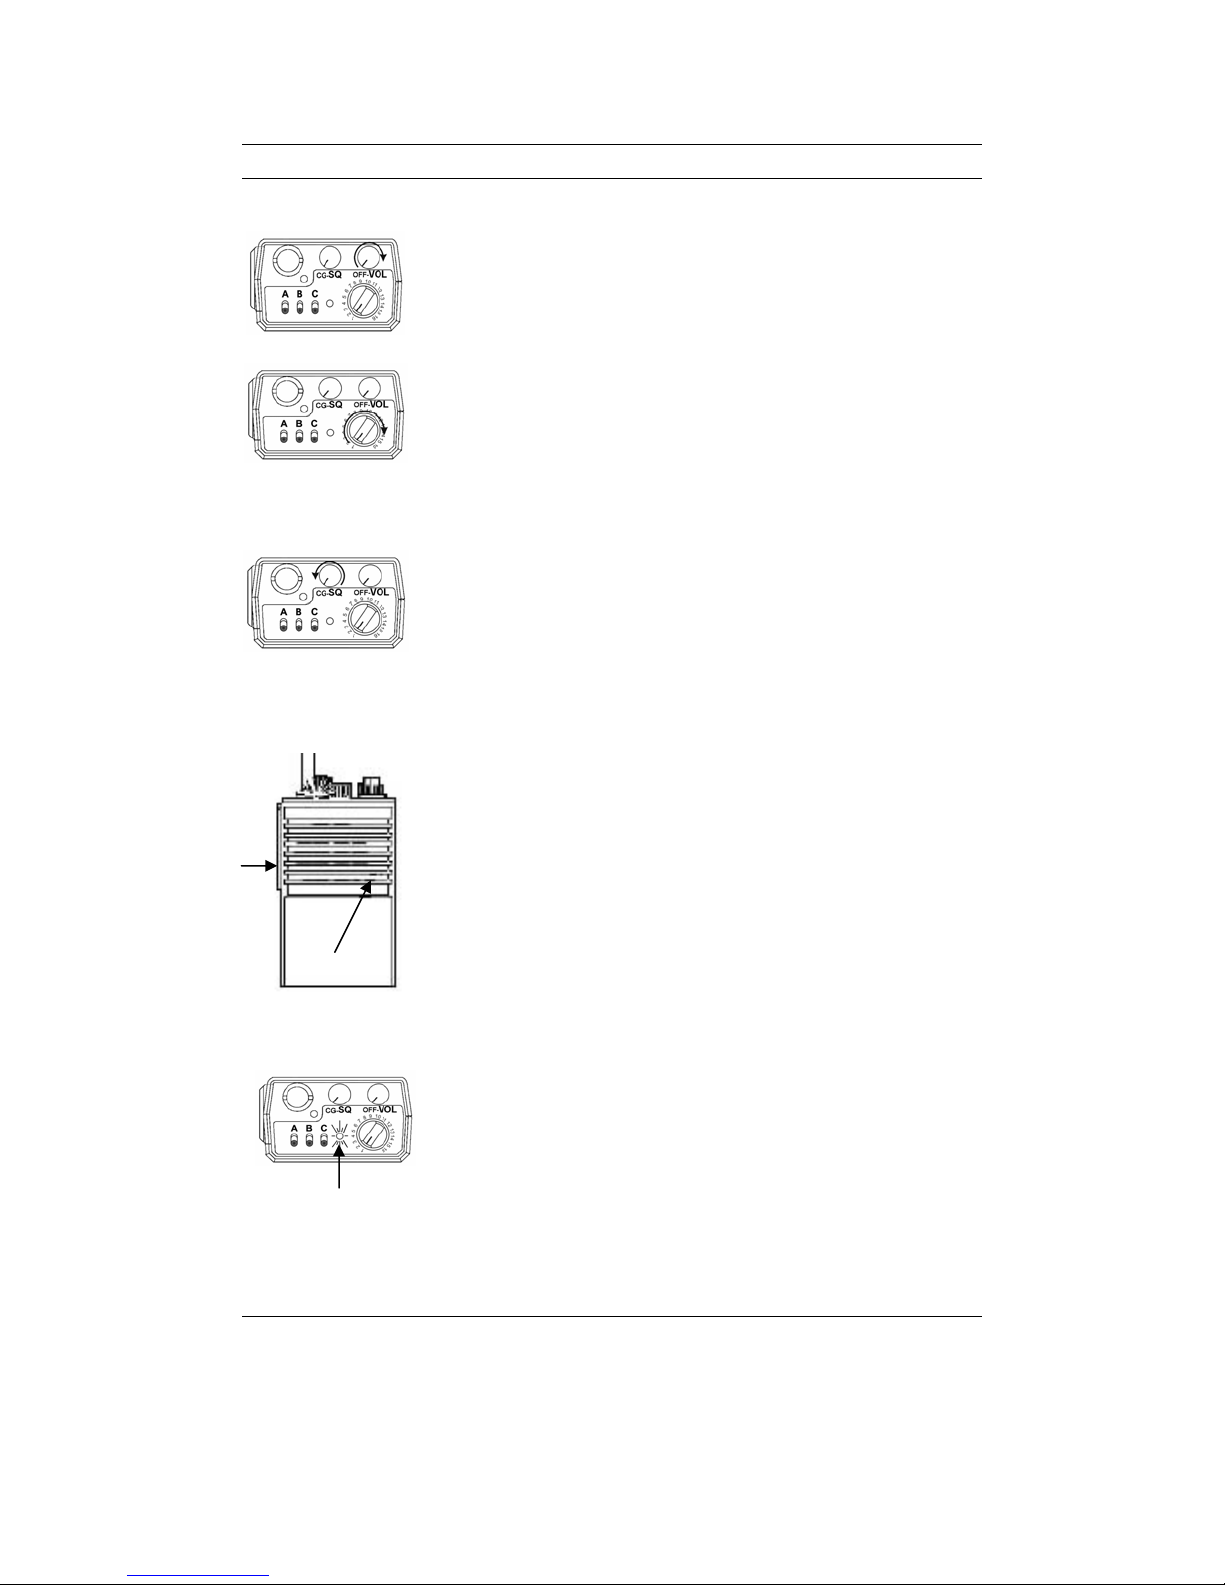
RECEIVE 1. TURN POWER ON by turning the volume knob
clockwise. A beep sounds, indicating the radio is
operational. The LCD display, if installed, shows
the current channel.
2. SELECT A CHANNEL by turning the channel
selector knob.
3. ADJUST SQUELCH AND VOLUME by turning the
squelch knob clockwise until you hear noise. Set
TRANSMIT 1. PRESS THE PTT (Push To Talk) switch. When
the volume to a comfortable level. Then turn the
squelch knob counterclockwise until the noise
stops. This is called the threshold squelch setting.
Turning the squelch knob fully counterclockwise past
the detent places the receiver in Code Guard mode.
A message will be heard only when the proper Code
Guard value is received.
the transmitter is on, the red transmit indicator
glows and TX appears in the display.
2. TALK IN A NORMAL VOICE with the microphone
1–2 inches from your mouth.
3. RELEASE THE PTT switch to stop transmitting.
PTT
If the transmit indicator does not glow when you
press the PTT switch, the battery pack may need to
Microphone
be charged. If so, the display will indicate Lobat, and
the yellow low-battery indicator will flash. If the
transmit indicator does not glow and a tone sounds,
you are on a receive-only channel or the channel is
busy (if busy channel lockout is enabled). Select an
authorized transmit channel.
If the length of your message exceeds the preset timeout timer setting, the transmitter automatically shuts
BUSY CHANNEL
INDICATOR
off and a tone sounds. To continue transmission,
release the PTT switch, and then press it again and
continue talking.
4 BK Radio
Page 4
X
R
G
.
.
O
A
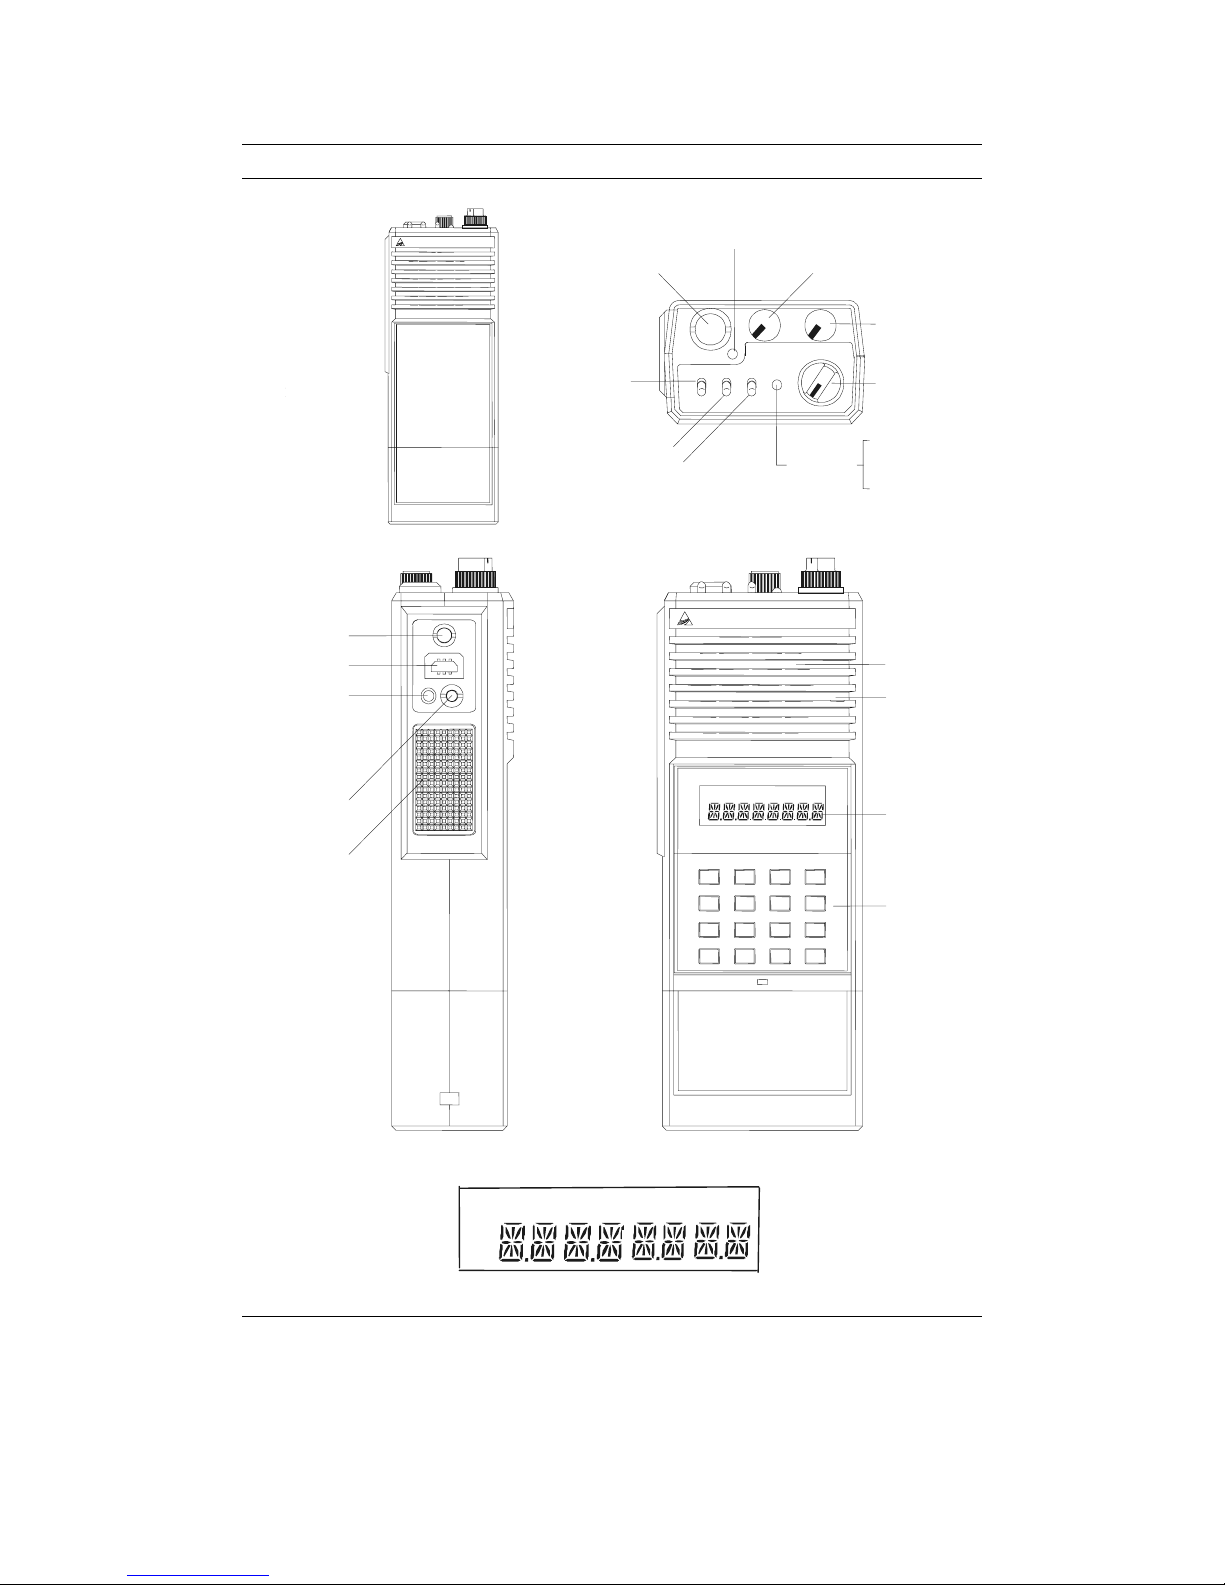
RADIO CONTROLS
TRANSMIT
INDICATOR
B C
CODE GUARD
CG- OFF-
SQ VOL
7
6
5
4
3
2
INDICATOR
SQUELCH
9
8
10
11
12
13
14
15
161
ON/OFF
VOLUME
CHANNEL
SELECT
PRIORITY
BUSY CHANNEL
LOW BATTERY
DPH RADIO WITH
GPH
KEYBOARD/DISPLAY
COVERED OR
NOT INSTALLED
(REDUCED VIEW)
BK RADIO
ANTENNA
HI/LO
TRANSMIT
POWER
SCAN
PRIORITY
ANTENNA
ACCESSORY
MOUNT
EARPHONE
(PUSH TO TALK)
PTT
PRG ID CG
TX
P
SCN
R
.
BK RADI
PRG TXRXSCN
G
R
P
1 2 3
4 5 6
7 8 9
*
SPEAKER
MICROPHONE
ID CG
LCD DISPLAY
FCN
PRI
ENT
0
CLR
#
KEYBO ARD
ALPHANUMERIC DISPLAY
GPH Owner’s Manual 5
Page 5
CODE GUARD OPERATION
Code Guard™ allows one radio or group of radios to be selectively called
within a system. If the radio has been programmed with Code Guard, use
the following receive and transmit instructions.
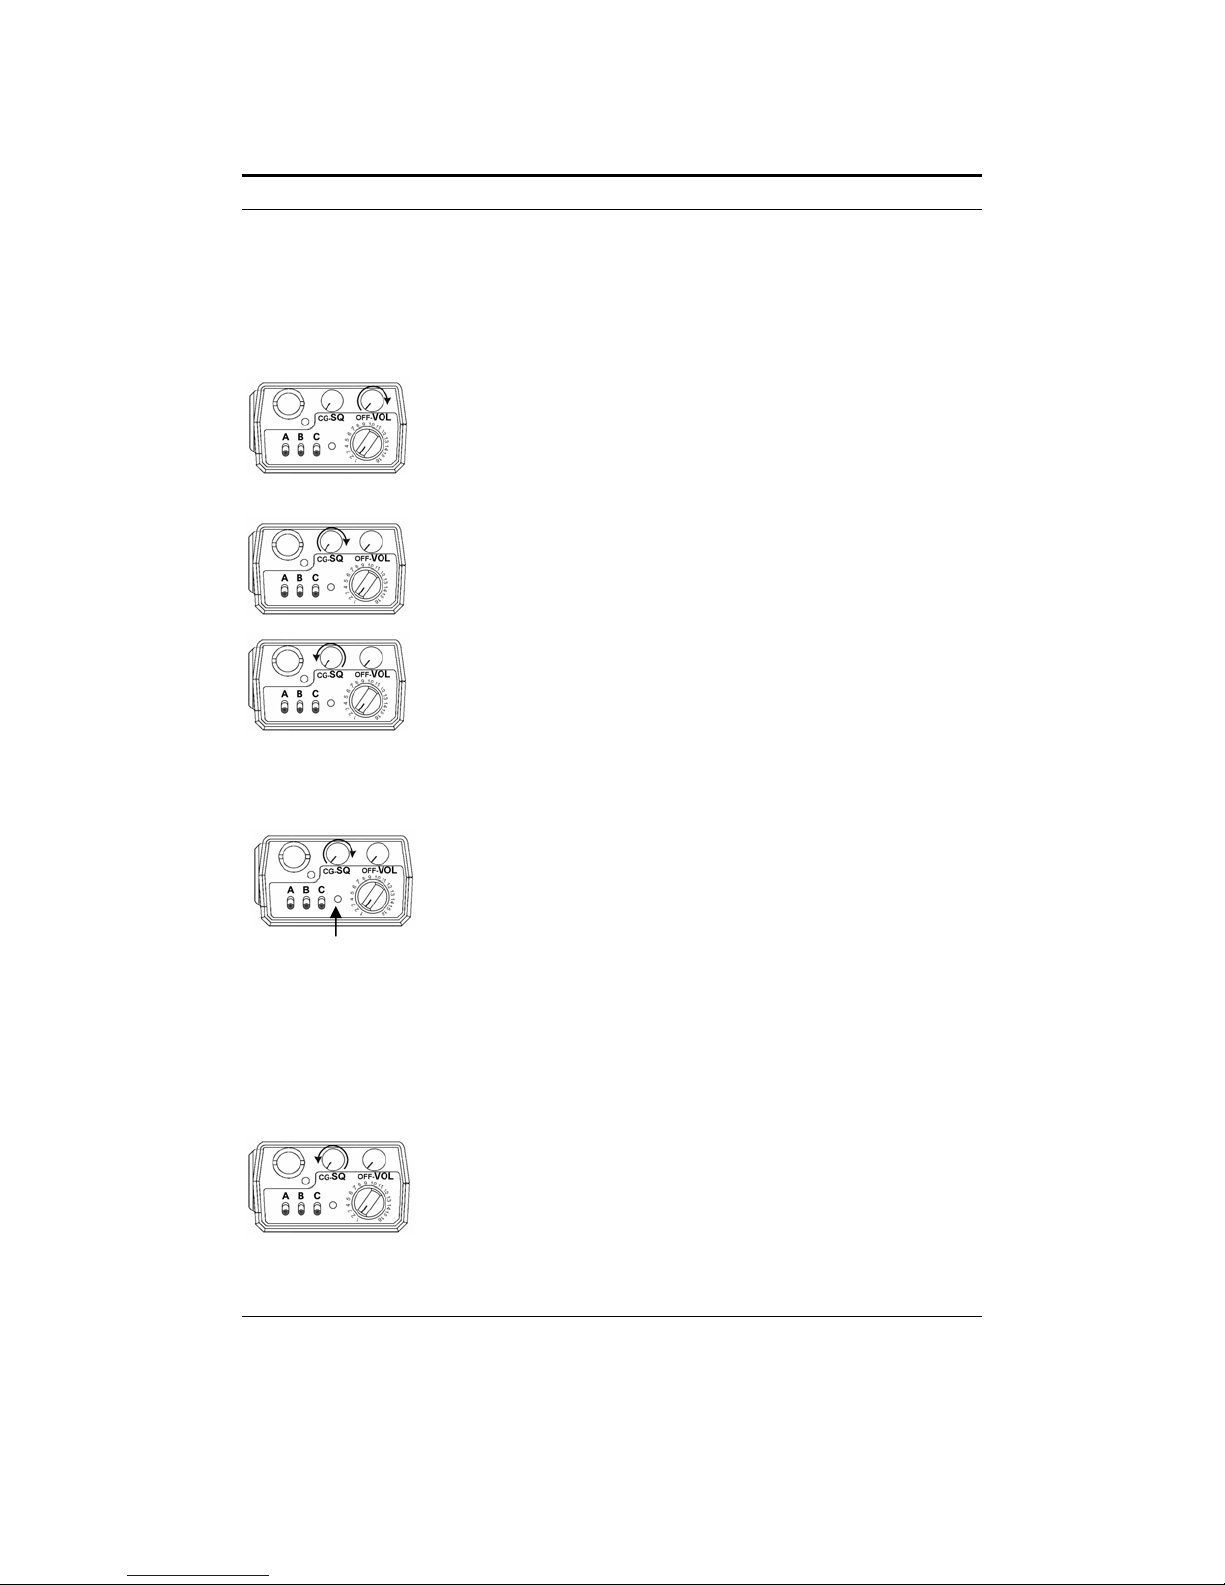
CODE GUARD RECEIVE
1. TURN POWER ON by turning the volume knob
clockwise.
ELECT A CODE GUARD CHANNEL by turning the
2. S
channel selector knob.
3. A
DJUST VOLUME by turning the squelch knob
clockwise until a rushing noise is heard. Then
turn the volume knob to a comfortable level.
4. SET CODE GUARD MODE by turning the squelch
knob off (counterclockwise) into the Code Guard
Position. A message will be heard only when the
proper Code Guard value is received.
CODE GUARD TRANSMIT
1. TURN THE SQUELCH KNOB ON (clockwise).
2. MONITOR THE CODE GUARD CHANNEL before
BUSY CHANNEL
INDICATOR
transmitting.
NOTE: Do not transmit if the channel is busy
(the busy channel indicator is lit).
6 BK Radio
3. PRESS THE PTT (Push To Talk) switch. When
the transmitter is on, the red transmit indicator
glows and TX appears in the display.
ESET THE SQUELCH KNOB to the Code Guard
4. R
position to receive only the messages with the
proper Code Guard value. During extended
transmissions, the squelch can be left open until
the exchange has ended.
Code Guard is a trademark of BK Radio
Page 6
BUILT-IN FEATURES
The BK Radio G Series is based on a microprocessor core that allows extra
features and operational characteristics to be programmed into the radio.
Your dealer can help define the best operational settings for your system
and program them into the radio.
PROGRAMMABLE GROUP/CHANNEL SELECTOR
9
8
7
6
5
4
3
2
10
11
12
13
14
15
161
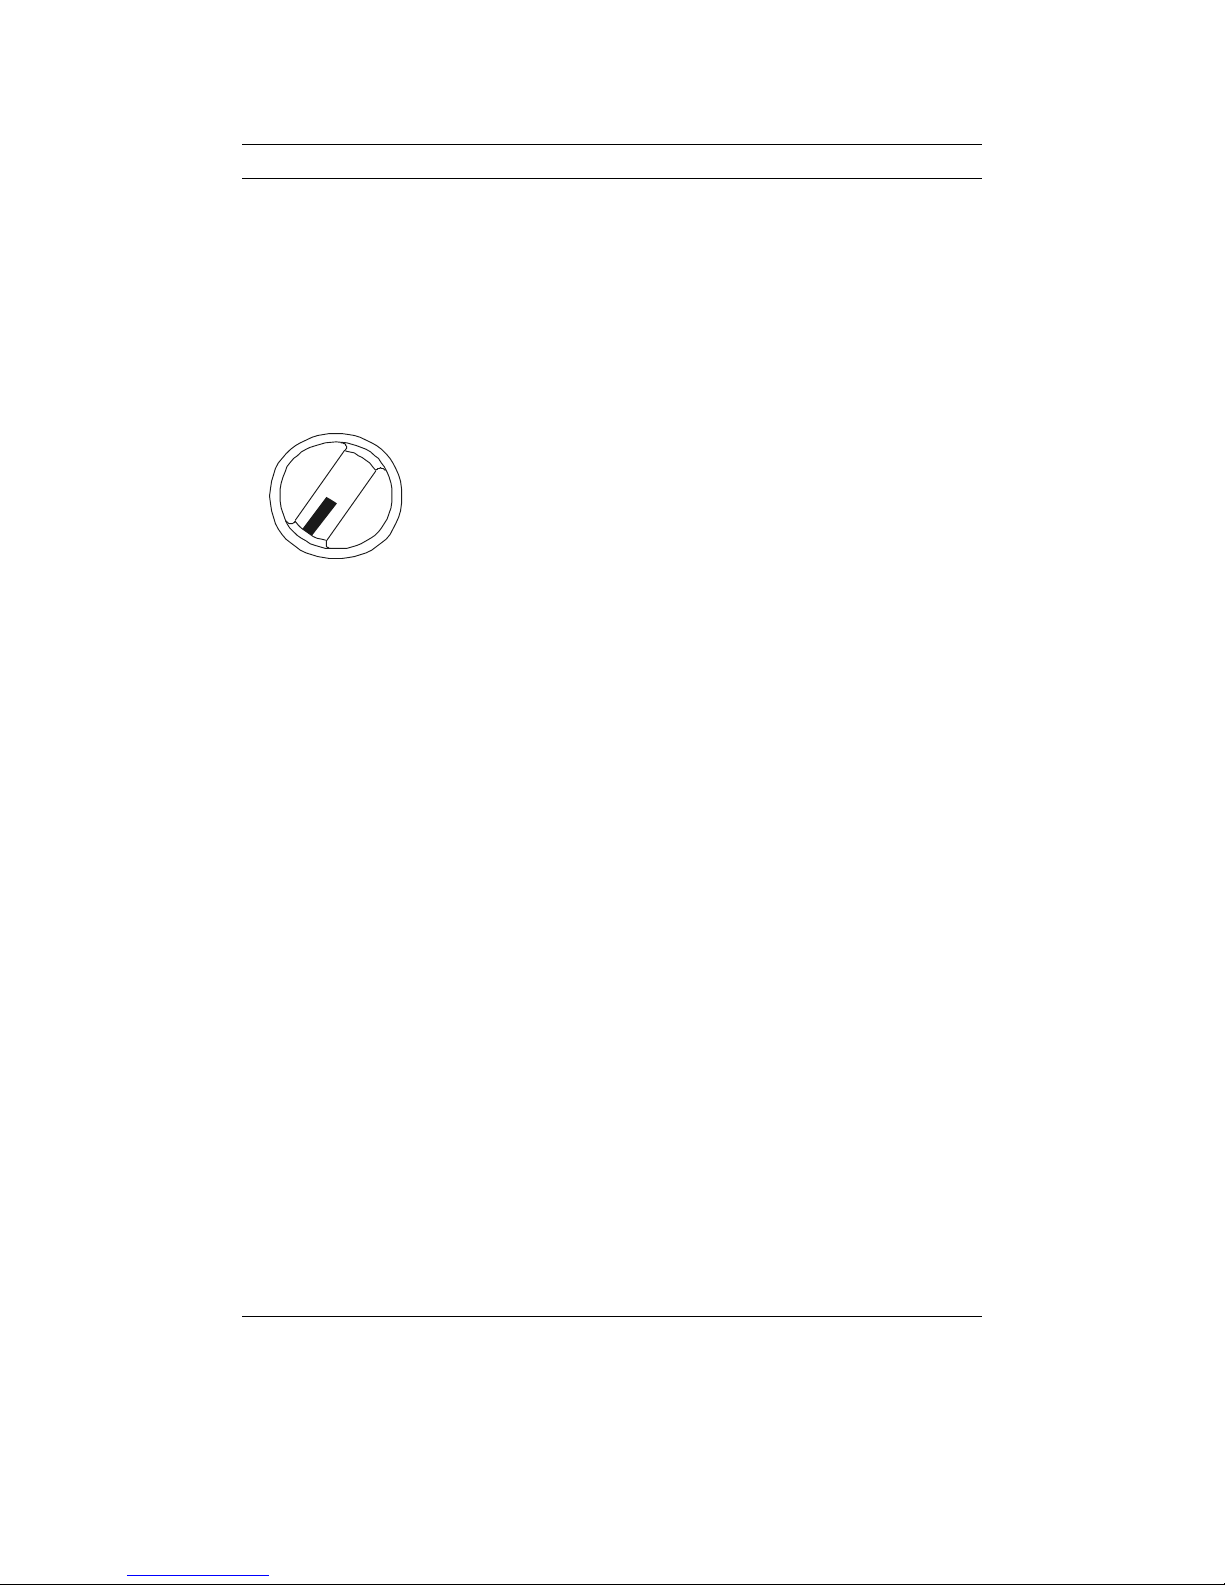
The group/channel selector knob can be
customized by your dealer to select your
preferred group/channel combinations. The
following three options are available:
• CHANNEL SELECTOR. Each switch position
selects a different channel in the same
group. The group is selected with the
keypad.
• GROUP SELECTOR. Each switch position
selects the same channel in a different
group. The channel is selected with the
keypad. Changing switch positions would
select a different set of “group parameters,”
such as Code Guards, User-Selected Code
Guard, Scan List ANI, and Priority
Channels.
• CUSTOM SELECTOR. The switch can be
programmed to select up to 16 of your
favorite group/channel combinations.
Each switch position can be programmed to
allow selection of the group and/or channel with
the keypad or stay locked to its pre-programmed
group/channel.
Your dealer can help define the best
configuration for your system.
GPH Owner’s Manual 7
Page 7
g
5
*
PROGRAMMABLE TOP SWITCHES
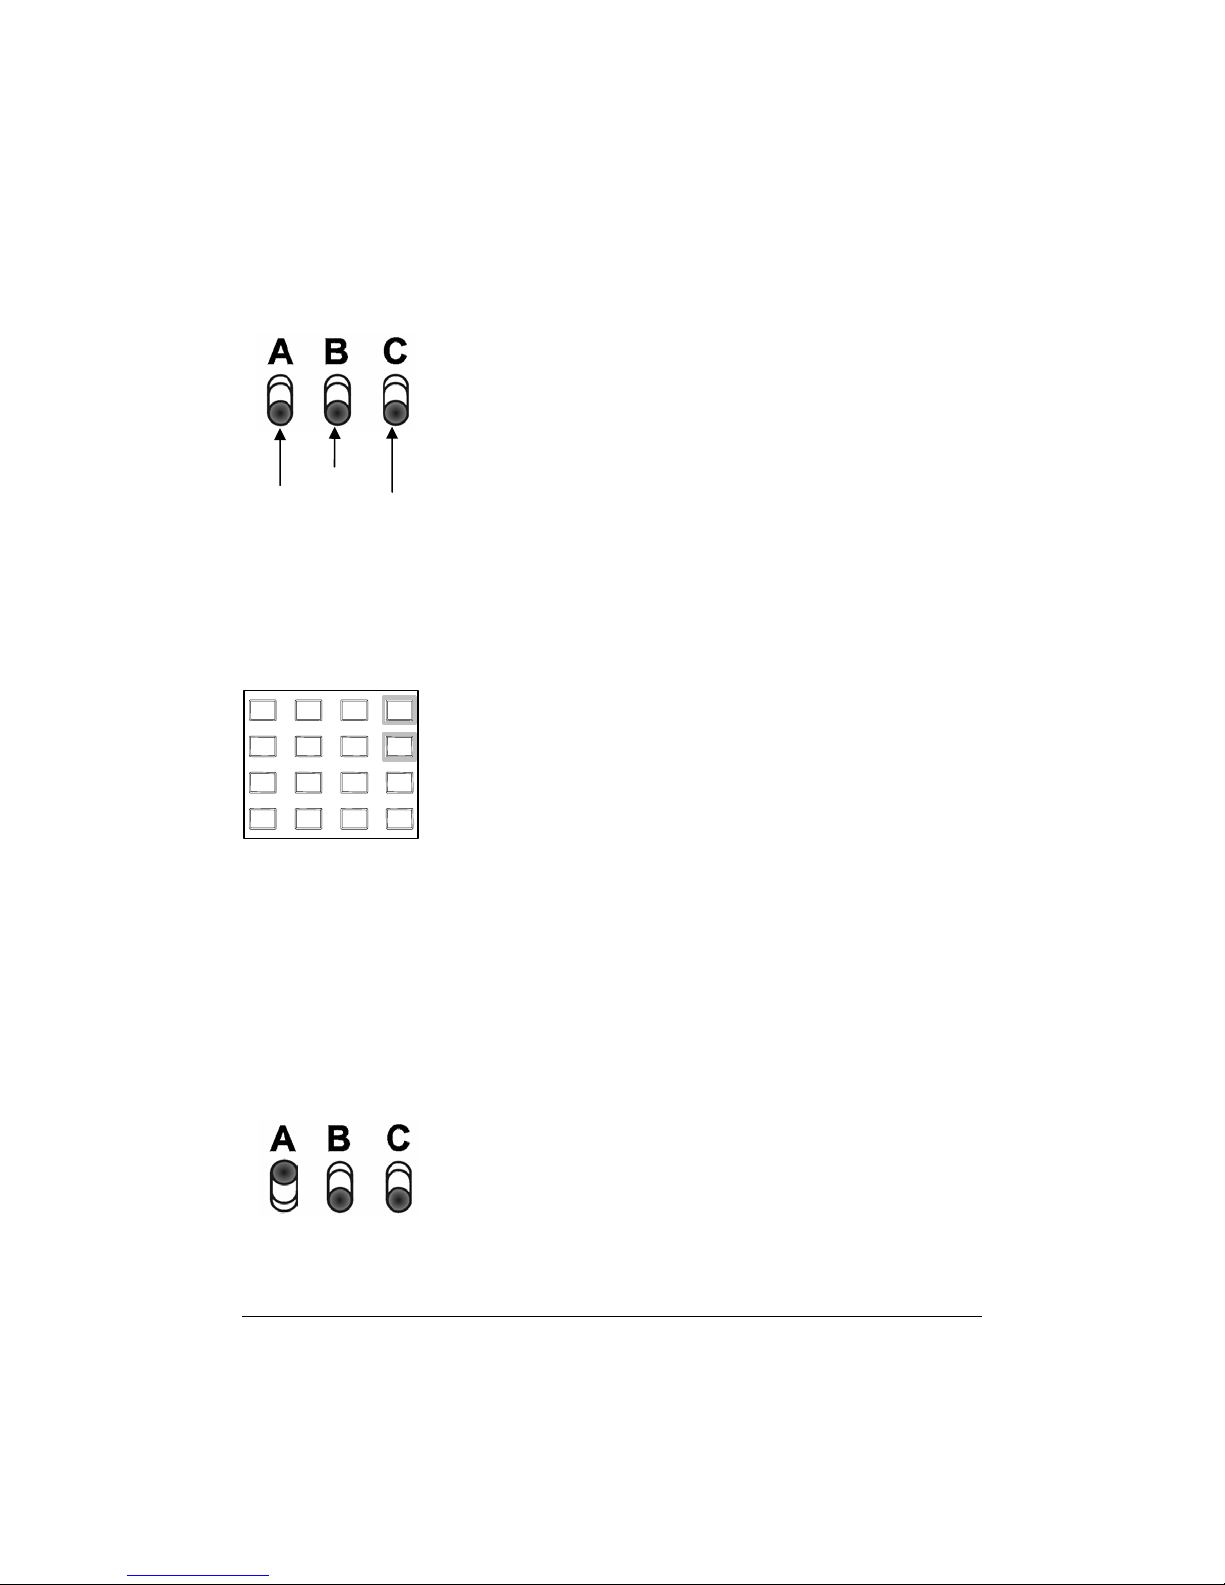
The three top switches can be programmed by your
dealer for channel scan, dual priority scan, group
scan, low-power select, and RTA (Repeater Talk
Around). Your dealer can also assign two functions to
the same switch. For example, both low-power select
and RTA could be enabled by the same switch.
NOTE: Assume for this User’s Manual that
Switch A has been programmed for
HI/LO transmit power and
muting/scrambling, Switch B has been
HI/LO
Muting/
Scramblin
Scan
Priority
Scan
programmed for Scan, and Switch C
has been programmed for Priority Scan.
PROGRAMMABLE KEYPAD MENU
1 2 3
4
6
7 8 9
FCN
PRI
ENT
Any functions not assigned to a top switch can
be enabled/disabled with the keypad.
1. PRESS THE FCN KEY to display the function
menu.
0
CLR
#
2. REPEATEDLY PRESS FCN to step through the
menu.
3. PRESS PRI TO TOGGLE the function on/off
when the desired menu item is displayed.
When the display flashes, the function is
enabled
HI/LO TRANSMIT POWER
Each channel in the radio can be individually
programmed to always transmit in low-power mode,
regardless of the position of the radio's top switch (or
BATTERY SAVER OPTION
keypad menu setting). If the programming for the
channel allows high-power transmissions, the power
level can be selected with a top switch or the keypad
menu.
.
8 BK Radio
Page 8
DTMF ENCODING
123
456
FCN
PRI
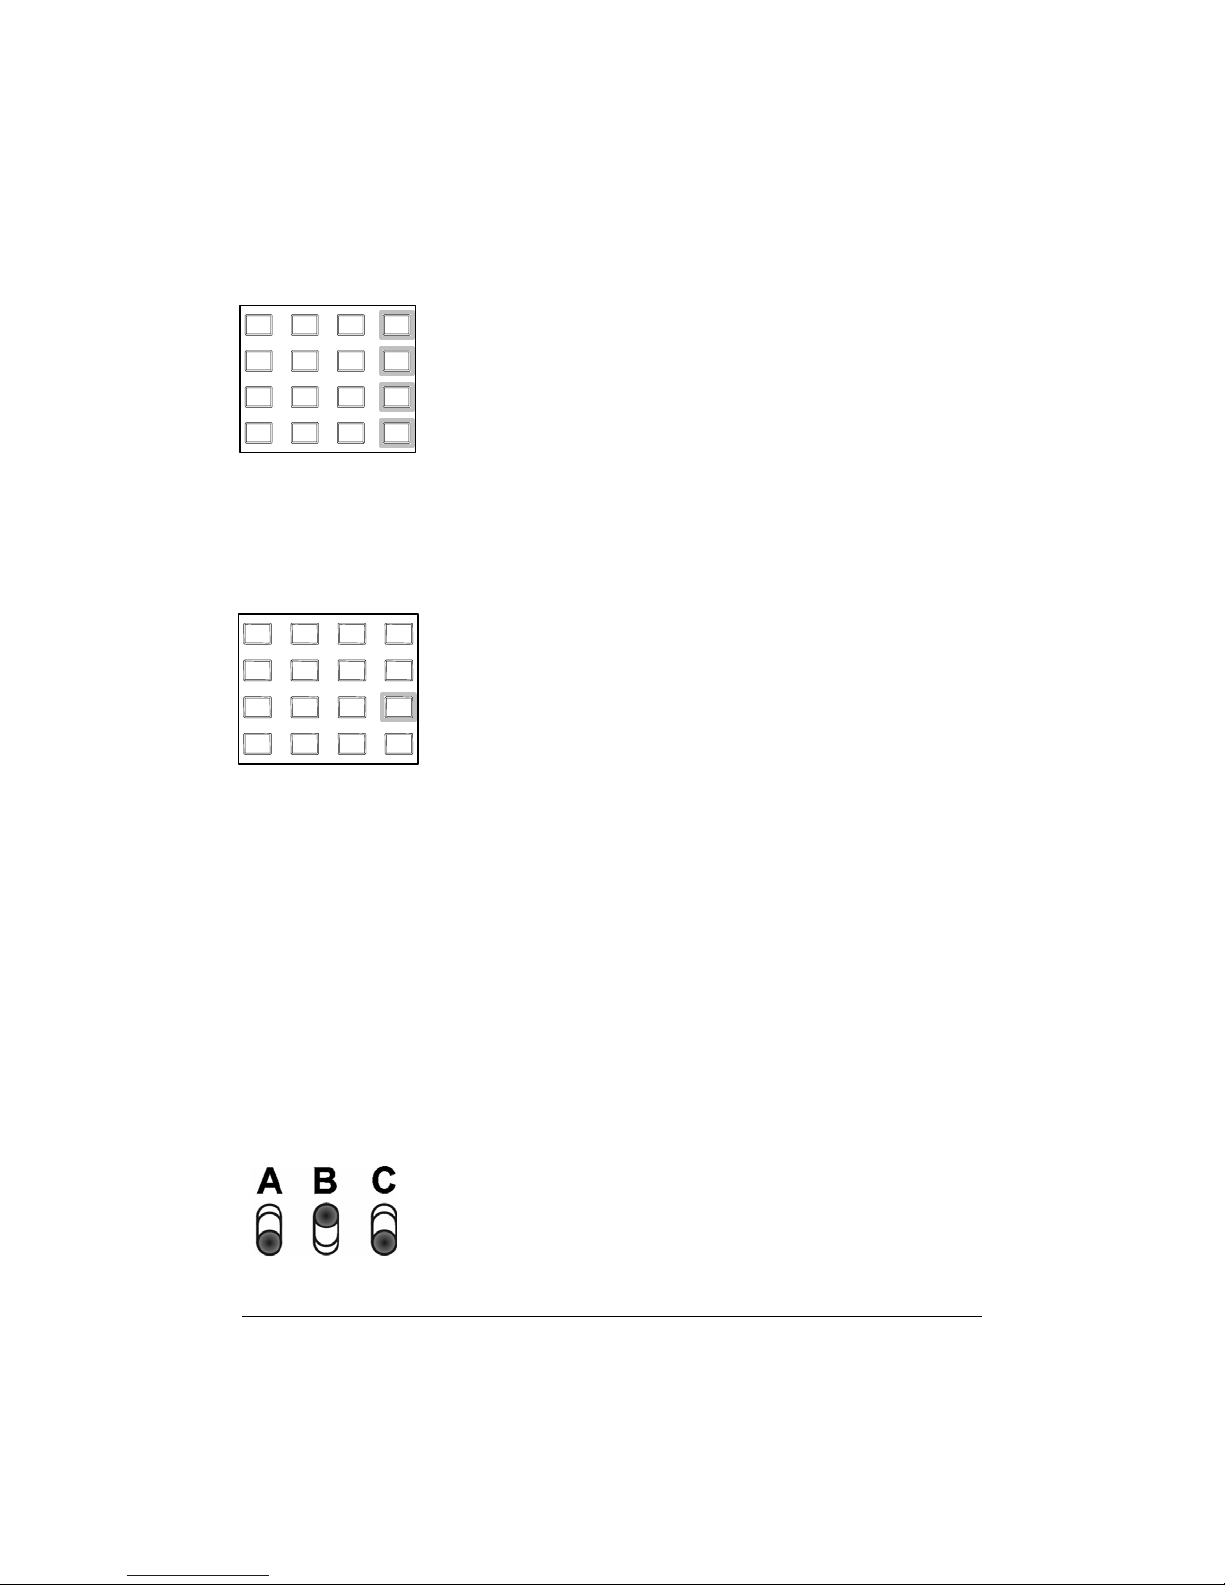
Keypad-equipped radios can be programmed to
enable DTMF (Dual Tone Multiple Frequency)
encoding. To send DTMF tones (similar to the
tones used by a standard push-button telephone):
1. PRESS AND HOLD the PTT switch.
789
0
*
ENT
CLR
#
ANI ENCODING
1 2 3
4 5 6
7 8 9
0
*
FCN
PRI
ENT
CLR
#
TIME-OUT TIMER
2. PRESS ANY OF THE KEYS on the keypad.
You will hear a sidetone.
The FCN, PRI, ENT, and CLR keys respond as DTMF
tones A, B, C, and D, respectively
.
ANI encoding (Automatic Number Identification), if
enabled, transmits a sequence of DTMF tones each
time you press the PTT switch. You will hear a
sidetone. Your dealer can program the ANI number
to be sent.
If DTMF and ANI are both enabled, the ANI tone
sequence is transmitted only after the ENT key is
pressed while the PTT switch is activated. You will
hear a sidetone.
The transmit time-out timer limits the duration of
calls and guards against accidentally locking on the
transmitter and tying up the radio system. Your
dealer can program the duration of the time-out timer
(15–225 seconds, or disabled).
NUISANCE CHANNEL DELETE
GPH Owner’s Manual 9
If nuisance channel delete is enabled in your radio,
and the scan function is assigned to a top switch
(Switch B, for example), you can delete a nuisance
channel. To temporarily lockout an active nuisance
channel, slide Switch B (scan) down momentarily
and then back up.
Page 9
GROUP SCAN
SCAN DELAY
Channels on each “channel scan list” and groups on
the “group scan list” are scanned sequentially. The
knob-selected group is always scanned when group
scan is enabled, even if that group is not on the group
scan list.
When group scan is enabled, the following features
are disabled:
• Dual Priority Scan
• User-Selected Code Guard
• Nuisance Channel Delete
Scan delay lets the radio receive a response to a
transmission before scanning the other channels for
activity. If you find that your scanner is restarting
before message replies are received, you can ask your
dealer to increase the scan delay time (0–7.5
seconds).
TALKBACK SCAN
Your dealer can program your radio for talkback
scan. When enabled, if scan hold time remains after
you receive a call, transmission occurs on the
transmit frequency (or talk-around frequency) of the
received channel. However, if dual priority scan is
active with the transmit-on-priority feature enabled,
talkback scan becomes disabled.
10 BK Radio
Page 10
DUAL PRIORITY SCAN
Up to 2 of the 16 channels in each group can be
designated as priority channels. These two
channels, PR1 and PR2, are checked at a preset
rate (.25–2.0 seconds) for activity, even if you are
listening to a different transmission. Activity on
PR1 will preempt PR2. Activity on PR2 will
preempt any of the non-priority channels.
Your dealer can assign dual priority scan to one of
the top switches, to the FCN menu, always turned
on, or always turned off. Your dealer can also
assign priority channels for you. When you
operate your radio, you will be prompted for
priority channel assignments.
1 2 3
4 5 6
7 8 9
FCN
PRI
ENT
1. PRESS PRI REPEATEDLY to cycle through the
2. PRESS CLR to turn the channel off.
CLR
0
*
#
If a carrier is detected, you will hear the message
unless the proper Code Guard is missing. If a
carrier is present but the correct Code Guard is not
found, the radio will only monitor the priority
channel every 4 seconds.
choices of Off, Main, and numbers 1–16.
If a frequency is found on both PR1 and PR2 but
the frequency has an improper Code Guard, the
radio will perform a priority test each 4 seconds.
Because the priority test alternates between PR1
and PR2, the “hole” in the audio occurs every 2
seconds, half the original time.
If PR1 is a fixed channel and the PRI key is not
locked out, you can move the channel selector to a
new channel and press the PRI key to choose a
new PR1 channel.
Dual priority scan is automatically disabled when
group scan is on.
GPH Owner’s Manual 11
Page 11
ALPHANUMERIC DISPLAY
4
G
.
PRG ID CG
R
P
SCN
TX
RX
.
.
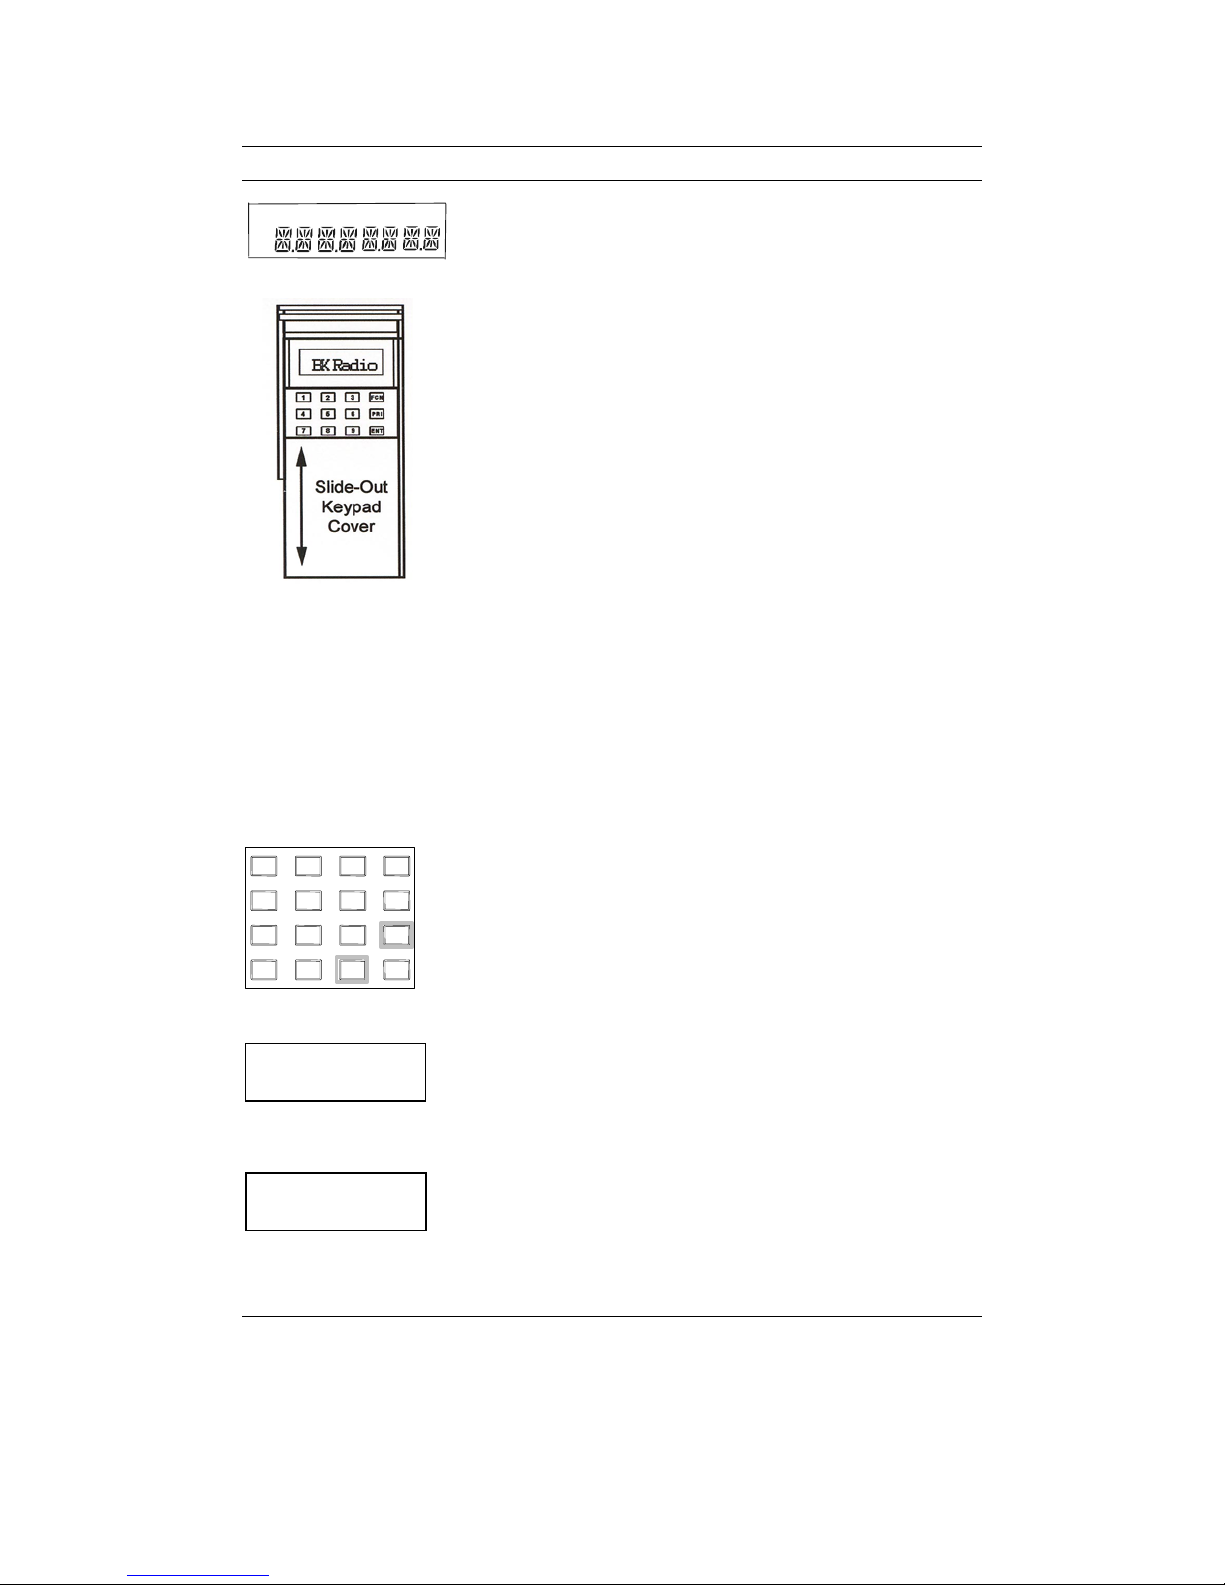
The G Series portable radios are built with one of the
following display options:
• No keypad and no display or
• Keypad and alphanumeric display
With obvious exceptions, the operational procedures
are the same for both these radios.
Radios with a keypad and display have a slide-out
keypad cover. To remove or install the cover, turn off
the radio and remove the battery (see Battery
Installation and Removal, page 28).
Radios with alphanumeric displays can be
programmed to operate one or more channel groups.
DISPLAY BACKLIGHTING
The GPH radios can be programmed by your dealer
to backlight the display when a signal is received or
when a key is pressed. The time duration of the
backlighting can also be programmed.
CHANNEL LABELS
You can program the radio with a label for each of
1 2 3
5 6
7 8 9
0
*
FCN
PRI
ENT
CLR
#
the 15 channel groups and a label for each of the 16
channels within each group.
To display the channel number associated with a
channel label:
1. PRESS THE # KEY to display the group number.
RESS THE # KEY AGAIN to display the channel
2. P
number.
3. PRESS AND HOLD THE # KEY to display the
F i re net
CHANNEL LABEL
channel label.
4. P
RESS ENT.
Each label can include up to eight characters, with
decimal points available between characters.
ch 12
CHANNEL NUMBER
Characters can include A–Z, 0–9, -, *, $, /, +, %, \, |,
_, <, >, h, or a blank space.
12 BK Radio
Page 12
GROUP LABELS
3
5 6 7 8
*
#
T
The display can show group labels in addition to
group numbers.
To display a group label:
1. SLIDE SWITCHES B (programmed for scan) AND
C (programmed for priority scan) DOWN.
1 2
4
9
0
FCN
PRI
EN
CLR
2. PRESS THE # KEY on the keypad to display the
group number.
RESS AND HOLD THE # KEY to display the group
3. P
label.
4. P
RESS THE ENT KEY OR WAIT for about 5 seconds
to revert to normal radio operation.
CHANNEL GROUPS
9
8
7
6
5
4
3
2
10
11
12
13
14
15
161
SELECT A GROUP/CHANNEL
Grp 01
GROUP NUMBER
The channel selector knob has 16 positions. Each of
these 16 channels is separated into a group of 15
channels. Each of the 15 groups of 16 channels can
be programmed to have an “individual personality”
with the operational features described earlier.
The group/channel selector knob can be programmed
by your dealer as a channel selector, a group selector,
or a custom group/channel selector.
1 2 3
4 5 6
7 8 9
0
*
GPH Owner’s Manual 13
FCN
PRI
ENT
CLR
#
HANNEL SELECTOR. Knob positions 1–16
• C
select channels in the group selected by the
keypad.
1. PRESS THE # KEY on the keypad to display the
current group number.
2. P
RESS A NUMBER KEY for the new group number.
Only valid group entries will be accepted. For
example, if your radio only has five channel
groups programmed, digits greater than five will
be ignored.
Page 13
When changing groups, invalid entries will not be
4 5
*
accepted, and the radio remains in the previously
selected group.
3. PRESS THE ENT KEY or wait 5 seconds. The radio
returns to normal operation for the new group,
and the selected channel is displayed. All selected
scanning and priority functions affect only the
channels in the group you are operating in.
• GROUP SELECTOR. Knob positions 1–15 select
groups 1–15.
1 2 3
6
7 8 9
0
FCN
PRI
ENT
CLR
#
1. PRESS # TWICE to select a channel.
2. PRESS A NUMBER KEY for the new channel
number.
3. PRESS THE ENT KEY or wait 5 seconds. The radio
returns to normal operation for the new channel,
and the selected group is displayed.
• CUSTOM SELECTOR. Your dealer will provide
you with the pre-programmed group/channel
combinations for your radio.
If a knob position is programmed to allow selection
of the group and/or channel with the keypad:
1. PRESS #.
2. PRESS THE NUMBER OF THE GROUP you want to
change.
RESS # TWICE.
3. P
14 BK Radio
4. PRESS THE NUMBER OF THE CHANNEL you want
to change.
If the group or channel is locked to a switch position,
pressing # will only display the knob-selected value.
New entries will not be accepted.
Page 14
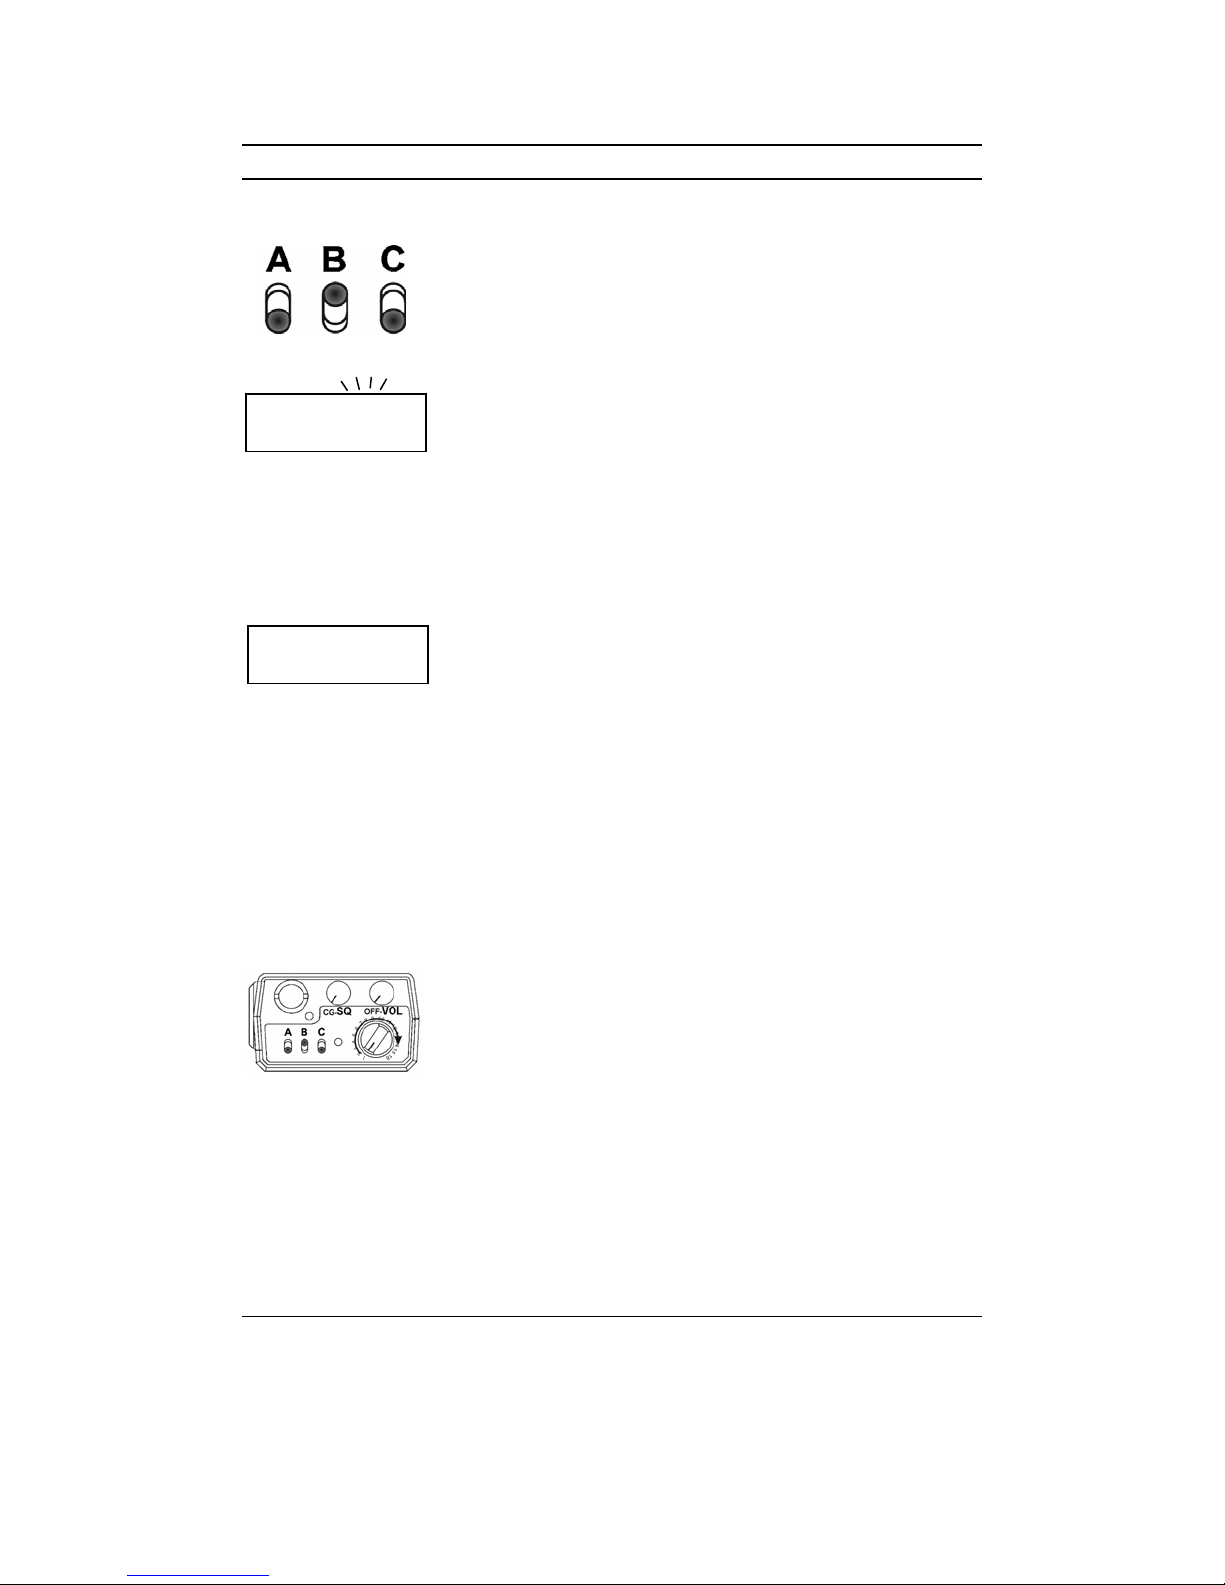
SCAN OPERATION
3
3
1. SLIDE SWITCH B (SCAN) UP.
2. SLIDE SWITCH C (PRIORITY) DOWN.
SCN
Label
RX SCN
Label
The display indicates scan operation by flashing
Scan operates only while the radio is not transmitting.
The radio checks for signals on channels in the preset
scan list, as well as the channel selected by the
channel selector knob.
When a signal is detected, scanning stops and the
message is received. The received channel is shown
in place of the transmit channel.
Once the signal ends, the radio continues to monitor
the channel for the preset scan delay time before it
resumes scanning.
If your radio is programmed for Nuisance Channel
delete and channel scan is assigned to a top switch
(Switch B, for example), a nuisance channel can be
temporarily removed from the scan list by sliding
Switch B down and then back up.
SCN.
TRANSMIT WITH SCAN ON
When Switch B (scan) is up, the radio transmits on
the channel selected by the channel selector knob.
1. S
ELECT A TRANSMIT CHANNEL by turning the
channel selector knob.
2. PRESS THE PTT SWITCH and talk in a normal
voice.
When the PTT switch is released, the radio continues
to monitor the selected channel for the preset scan
delay time before it resumes scanning.
GPH Owner’s Manual 15
Page 15
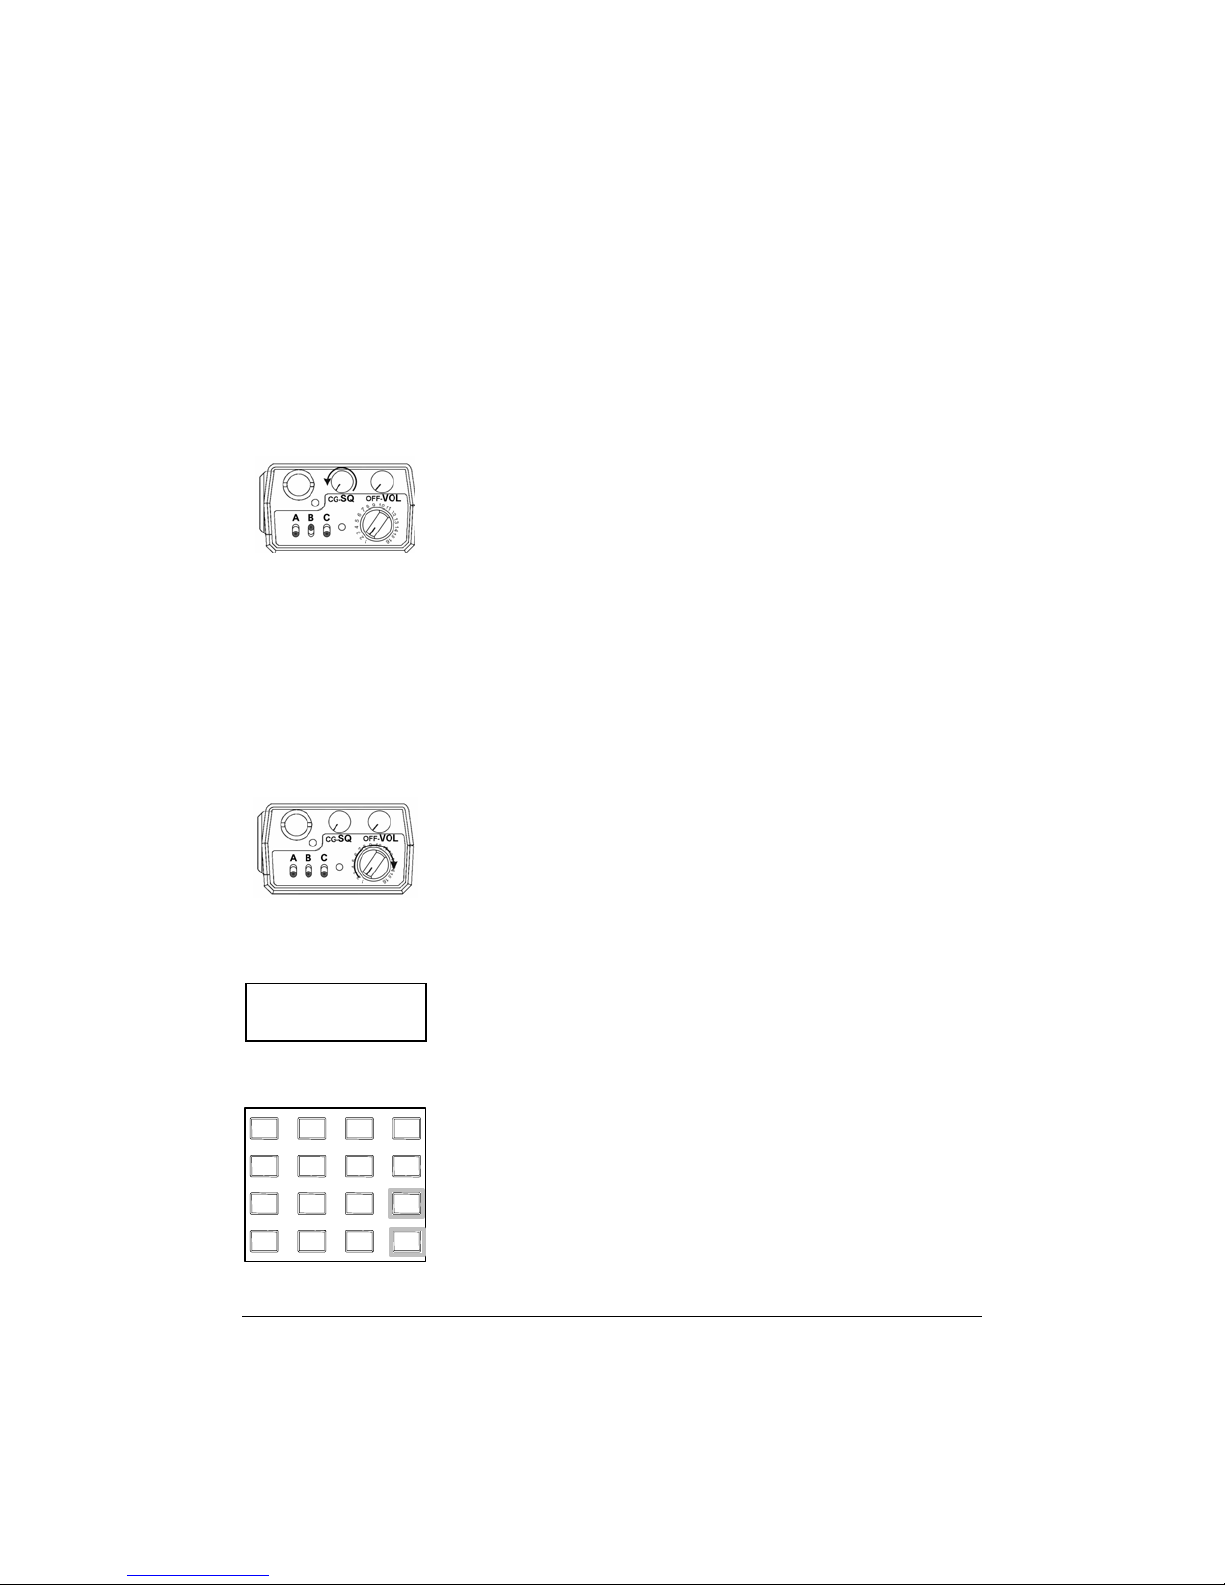
TALKBACK SCAN
5
*
If your radio is programmed for talkback scan, press
PTT while a channel is active or while scan-delay
time remains. You will be responding on the transmit
frequency of the received channel.
Talkback scan will not work if priority scan is also on
and your radio is programmed to always transmit on
the Priority 1 channel.
SCAN CODE GUARD CHANNELS
1. SLIDE SWITCH B (SCAN) UP.
2. TURN THE SQUELCH KNOB COMPLETELY
COUNTERCLOCKWISE
Code Guard position.
When a signal is detected, scanning stops while the
radio checks for the proper Code Guard value. If the
signal contains the proper Code Guard value, the
radio receives the message. Otherwise, the radio
resumes scanning immediately.
, past the detent, to the
CHANGE THE SCAN LIST
The radio can be programmed to enable the user to
add or remove channels from the scan list. If user
changes are enabled, follow these steps to change the
scan list:
1. S
LIDE SWITCHES B (SCAN) AND C (PRIORITY)
.
ELECT A CHANNEL to be added or removed from
SCN
DOWN
2. S
the scan list by turning the channel selector knob.
If the channel is already on the scan list,
SCN
appears in the display.
RESS THE ENT KEY to add a channel to the scan
1 2 3
4
6
7 8 9
0
16 BK Radio
FCN
PRI
ENT
CLR
#
3. P
list. A short beep sounds and SCN appears in the
display.
4. P
RESS THE CLR KEY to remove a channel from
the scan list. A short beep sounds and SCN
disappears from the display.
Page 16
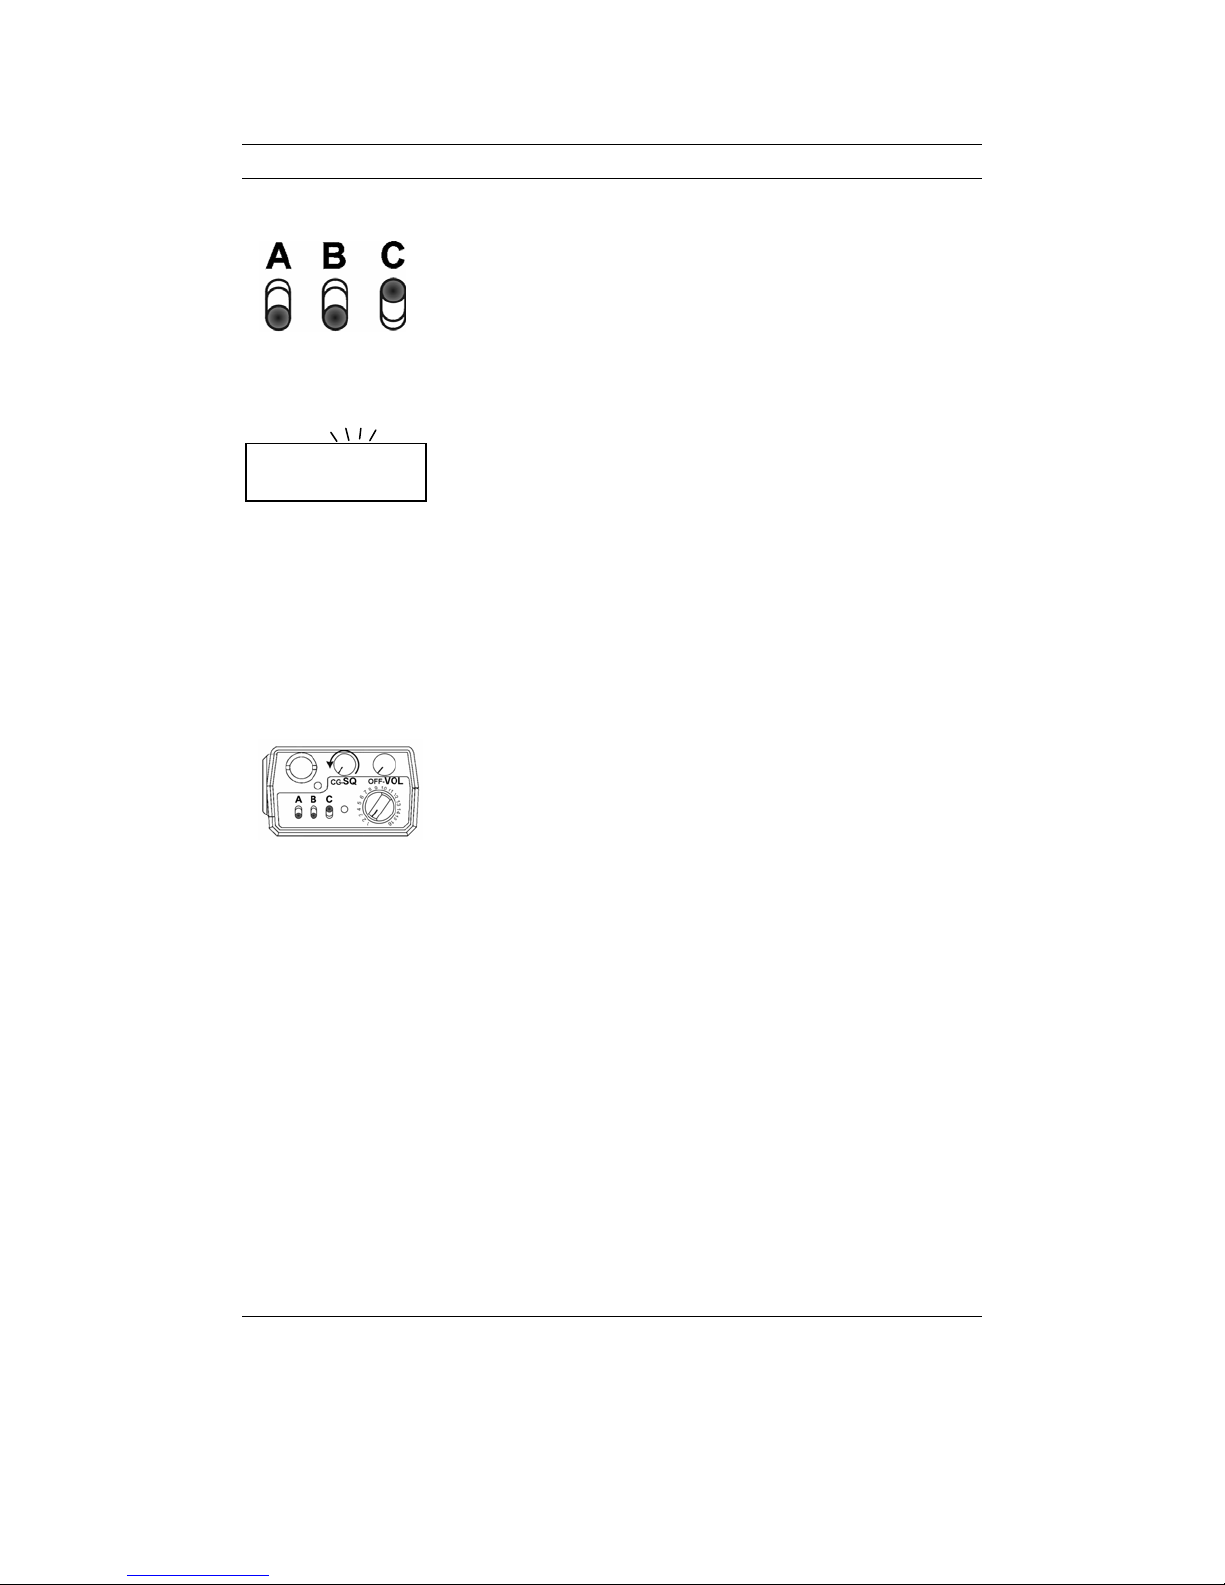
PRIORITY SCAN
Priority scan enables the radio to receive on any
channel while monitoring for a message on the
designated priority channel. The radio samples the
priority channel at a preset rate (.25–2.0 seconds)
regardless of activity on any other channel. Priority
scan operates only while the radio is not transmitting
and can be used in combination with scan operation.
PR SCN
When Switch C (priority) is up, the display shows
SCN. If a message is received on the priority channel,
the radio receiver locks onto that channel for the
duration of the transmission.
PRIORITY SCAN WITH CODE GUARD
Priority scan can be used in combination with Code
Guard:
• with Switch C up
• the squelch knob in the Code Guard position (off)
and
• the priority channel programmed with Code
Guard
If a message is received on the priority channel, the
radio receiver locks on to the priority channel for the
duration of the signal. The message can be heard only
if the proper Code Guard value is received. The radio
resumes scanning after the message ends and the scan
delay time expires.
PRIORITY MODES
GPH Owner’s Manual 17
The radio can be programmed with one of three
priority modes: A, B, or C. The table on the next
page shows how the priority channels and the
transmit channels are selected in each mode.
Page 17
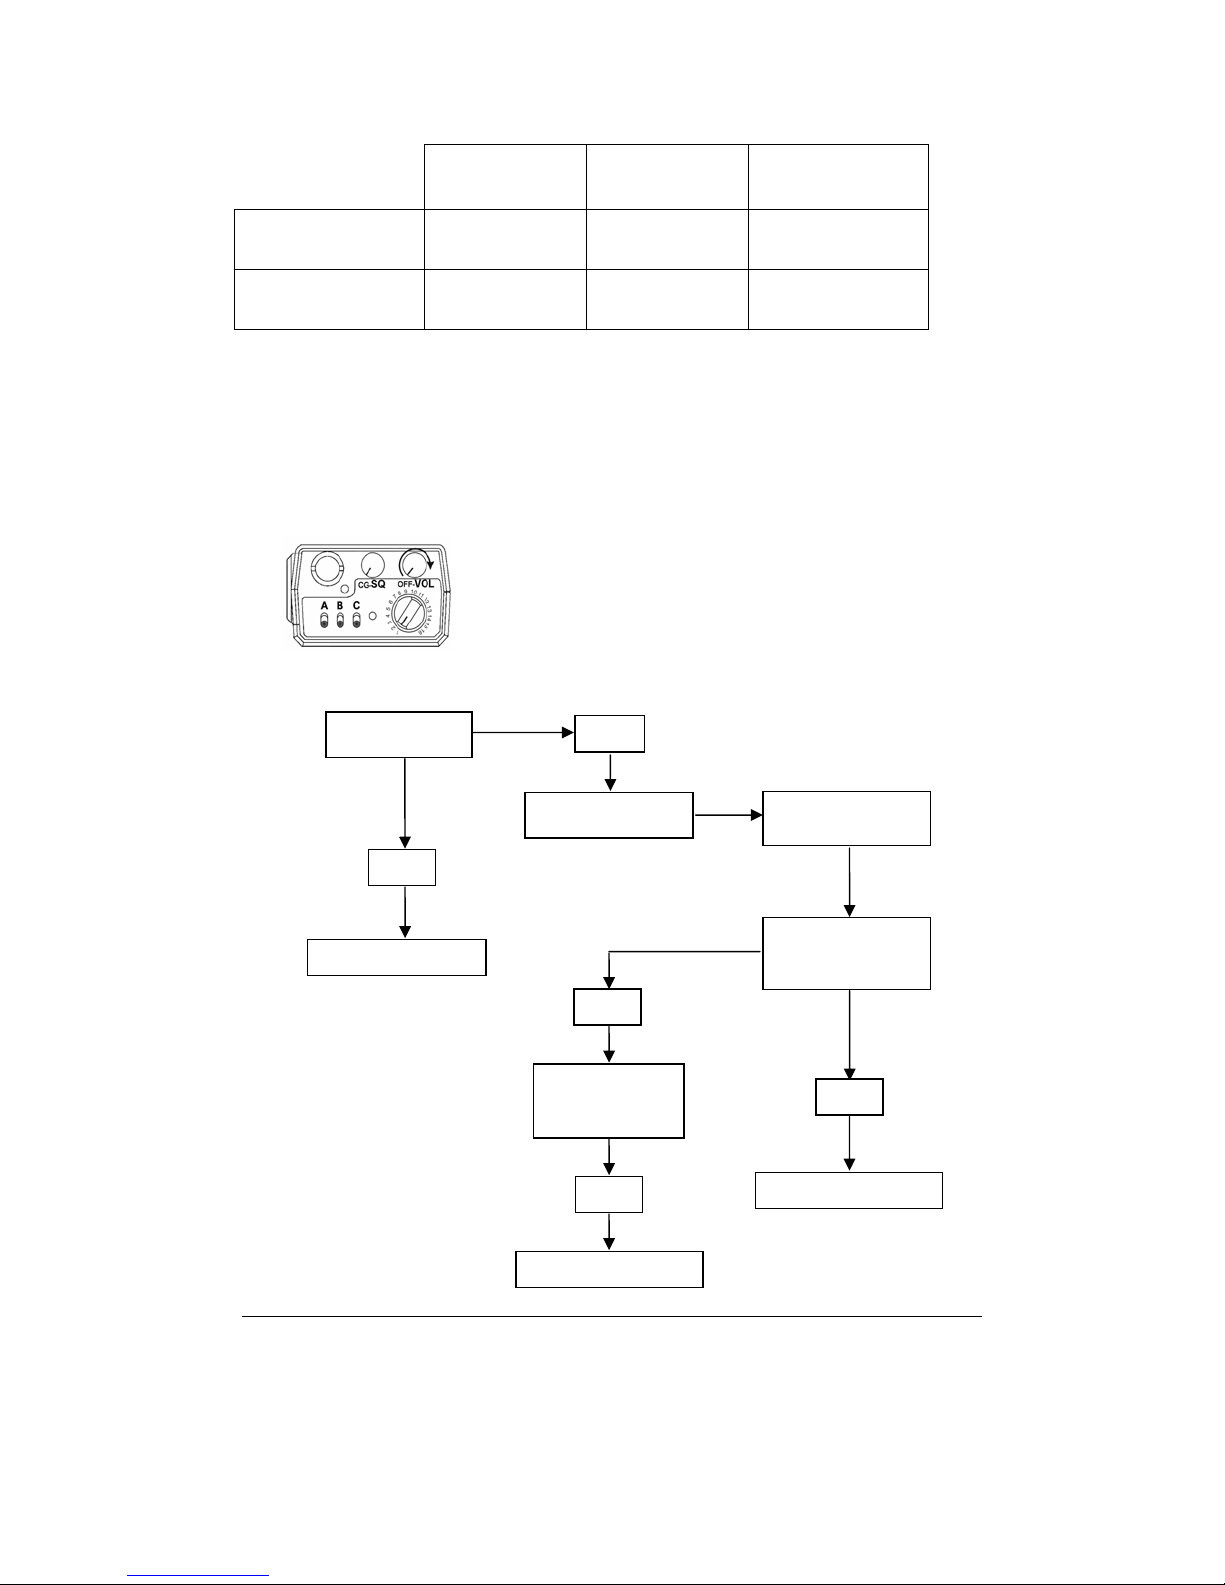
Mode A Mode B Mode C
Priority Channel
Transmit Channel
Channel Knob Preset Preset
Channel Knob Channel Knob Priority Channel
WHICH MODE IS INSTALLED?
If the radio has a display and keypad, follow these
steps to determine which priority mode is
programmed:
1. SLIDE SWITCHES B (SCAN) AND C (PRIORITY)
DOWN
.
2. TURN THE CHANNEL SELECTOR KNOB, stopping
at each channel to view the LCD display.
Does PR appear
in the display?
No
Yes
Turn channel knob
to different channel
.
Slide Switch C up
Priority Mode A
No
Does display show
knob-selected
channel?
Does display
change to priority
Yes
Yes
Priority Mode B
Priority Mode C
18 BK Radio
Page 18
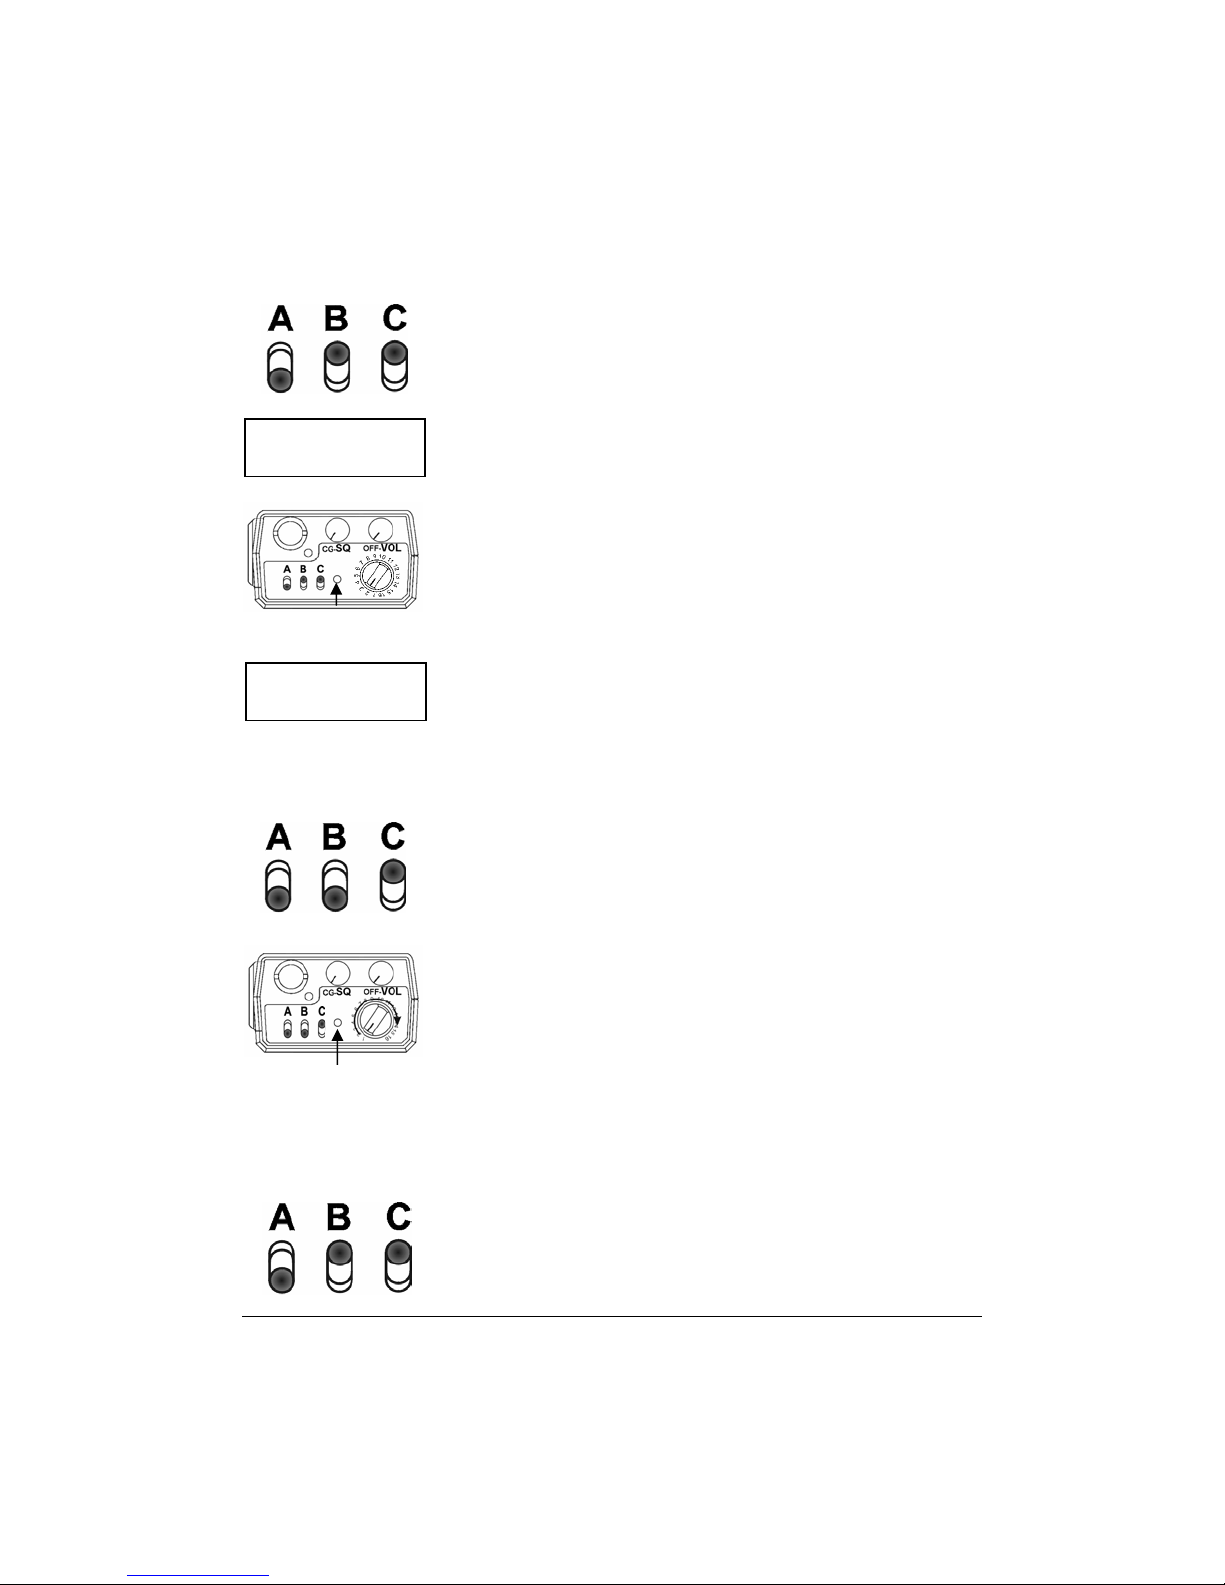
Priority Mode A With Scan
In Priority Mode A, the priority channel is set by
the channel selector knob. Priority Mode A is
seldom used by itself because the radio receives
and transmits only on the knob-selected channel.
When Switches B (scan) and C (priority) are up,
scanning occurs until an active scan channel is
found. The radio receives the message while
PR RX SCN
continuing to check the priority channel. The
display shows the scan channel.
Label 12
If the priority channel becomes active during this
message, the priority indicator will light. The
radio changes to the priority channel and holds for
BUSY CHANNEL
INDICATOR
PR RX SCN
Label 3
the duration of the message. The display shows
the priority channel.
To reply to a message on the priority channel,
press the PTT switch and transmit on the priority
channel. Once activity ceases on the priority
channel, the radio returns to scan operation.
Priority Mode B
With Switch C (priority) up and Switch B (scan)
down, the radio can receive on the knob-selected
channel while sampling the priority channel. If the
priority channel becomes active, the priority
indicator lights up. The radio changes to the
priority channel and holds for the duration of the
transmission.
To reply to a message on the priority channel, turn
BUSY
CHANNEL
INDICATOR
Priority Mode B with Scan
the channel selector knob to the priority channel,
and then transmit.
With Switches B (scan) and C (priority) up, the radio
scans until it locks on to an active channel. The radio
continues to sample the priority channel while
listening to the active
GPH Owner’s Manual 19
scan channel.
Page 19
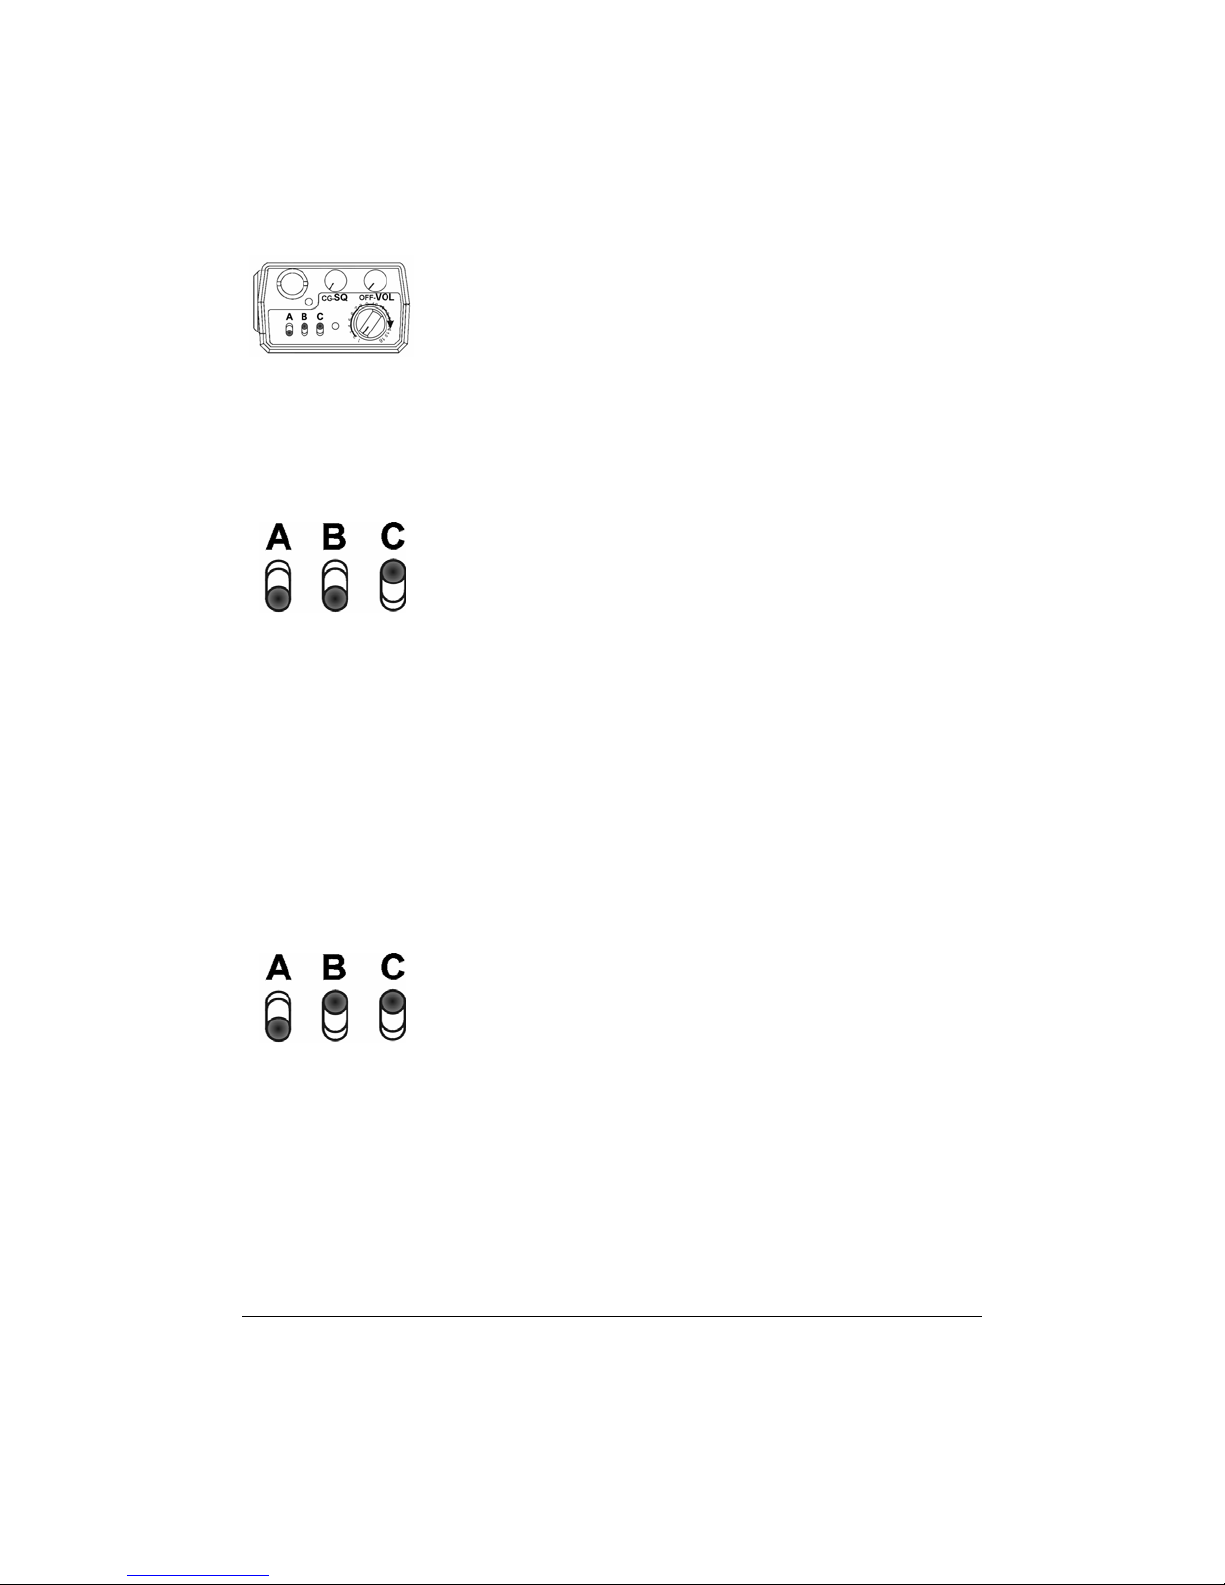
Priority Mode C
If activity occurs on the priority channel, the radio
overrides the active scan channel, changes to the
priority channel, and holds for the duration of the
transmission.
To reply to a message on the priority channel, turn
the channel selector knob to the priority channel, and
then transmit. Once activity has ceased on the
priority channel, the radio returns to scan operation.
With Switch C (priority) up and Switch B (scan)
down, the radio samples the fixed priority channel at
the preset rate. If activity occurs on the priority
channel the radio changes to the priority channel and
holds for the duration of the transmission.
To reply to a message heard on the priority channel,
press the PTT switch. The radio transmits only on the
priority channel when Switch C (priority) is up.
Once activity has ceased on the priority channel, the
radio returns to the receive channel on the channel
selector knob.
Priority Mode C with Scan
With Switches B (scan) and C (priority) up, the radio
scans until it locks on to an active channel. The radio
continues to sample the priority channel while
listening to the active channel. If activity occurs on
the priority channel, the radio overrides the active
scan channel, changes to the priority channel, and
holds for the duration of the transmission.
To reply to a message heard on the priority channel,
press the PTT switch. The radio transmits only on the
priority channel when Switch C (priority) is up. Once
activity has ceased on the priority channel, the radio
returns to scan operation.
20 BK Radio
Page 20
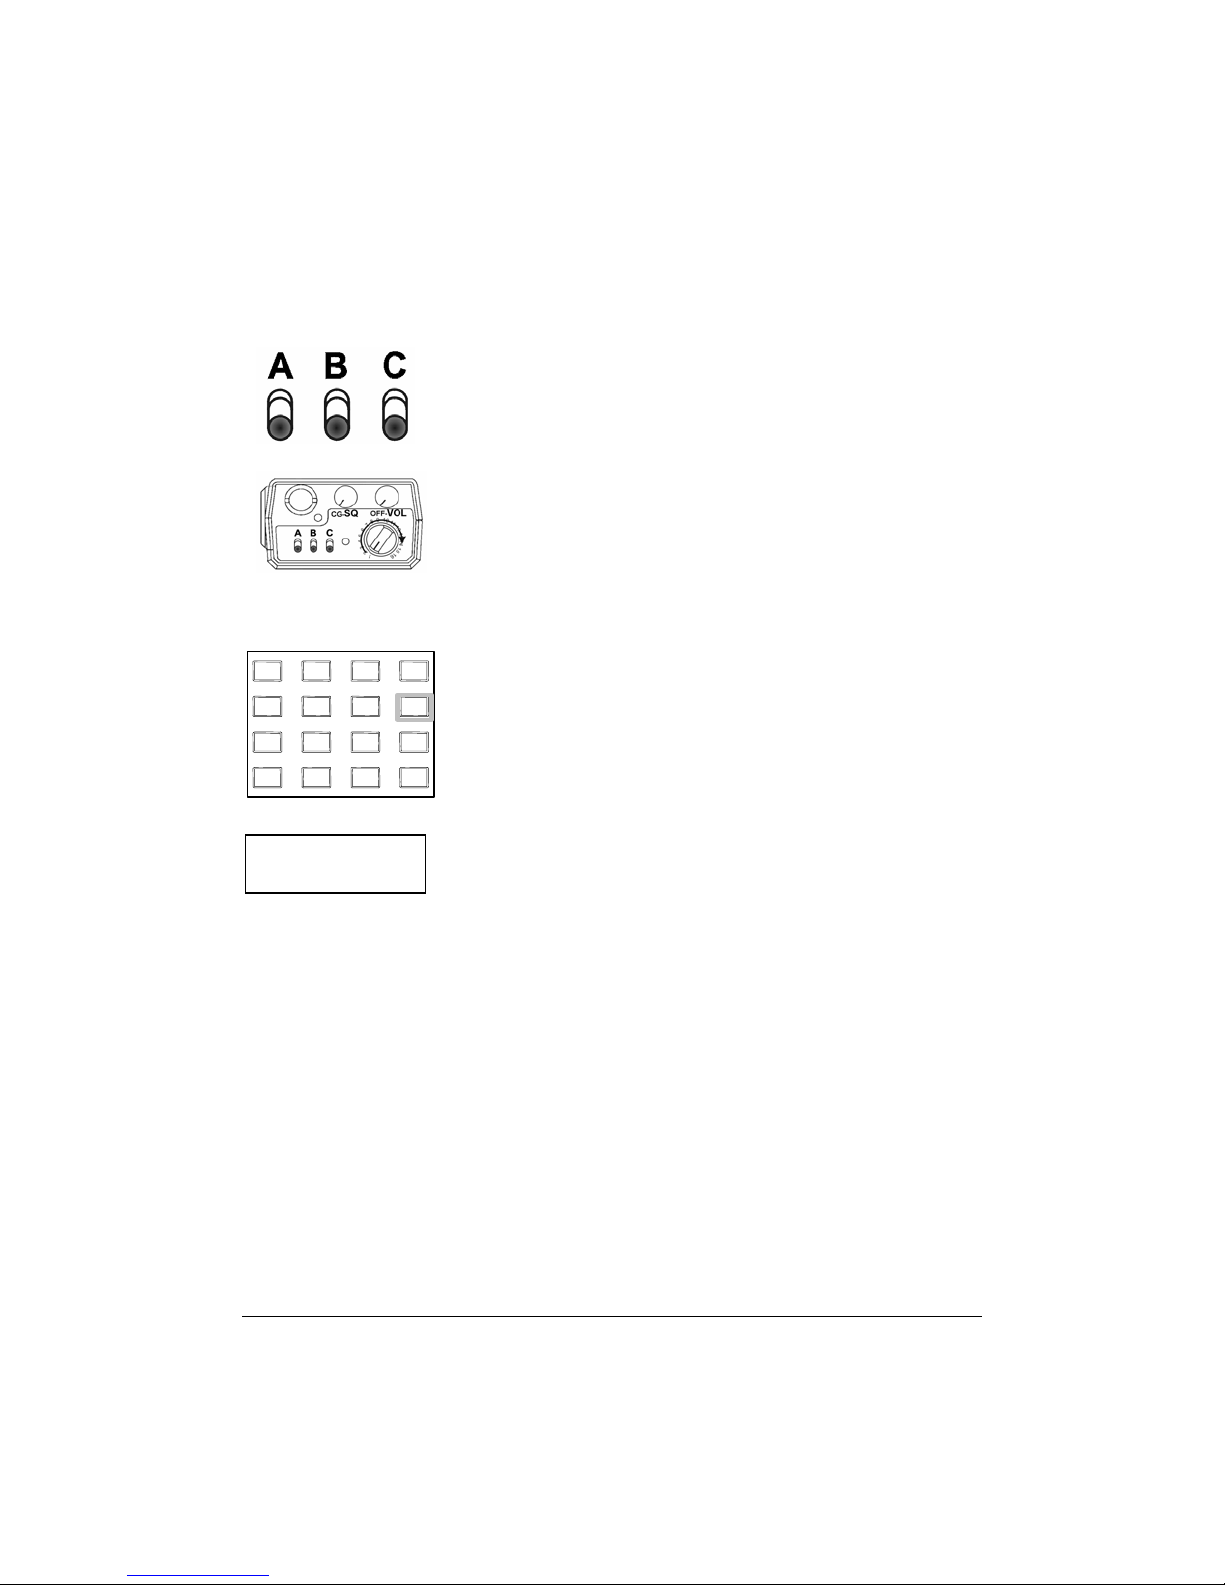
CHANGE THE PRIORITY CHANNEL
The fixed priority channel used in Priority Modes B
and C can be permanently set or can be changeable.
If the radio has a changeable priority channel, use the
following steps to make this change.
1. SLIDE SWITCHES B (SCAN) AND C
(PRIORITY) DOWN.
2. TURN THE CHANNEL SELECTOR KNOB to the
channel you want to enter as the new
priority channel.
1 2 3
4 5 6
7 8 9
0
*
FCN
3. PRESS THE PRI KEY. A short beep sounds
PRI
ENT
CLR
#
and PR appears in the display, indicating
that the displayed channel is now the
priority channel.
PR
Label 3
NOTE: Only one channel at a time can be
designated as the priority channel.
NOTE: A channel can be the priority channel
even if it is on the scan list. Due to
multiple sampling of the same channel,
however, maximum performance
occurs when the priority channel is not
on the scan list.
GPH Owner’s Manual 21
Page 21
9
Guard Values for C
USER SELECTED CODE GUARD
When the radio is being programmed with transmit and receive frequencies
for each channel, a receive Code Guard value and a transmit Code Guard
value can also be assigned to each channel. If User Code Guard Selection is
enabled, the Code Guard values for any channel can be copied to another
channel in the radio. If your channel selector does not have the same group
assigned to each position, the user-selected guard from the knob-selected
group will be linked with the knob-selected channel.
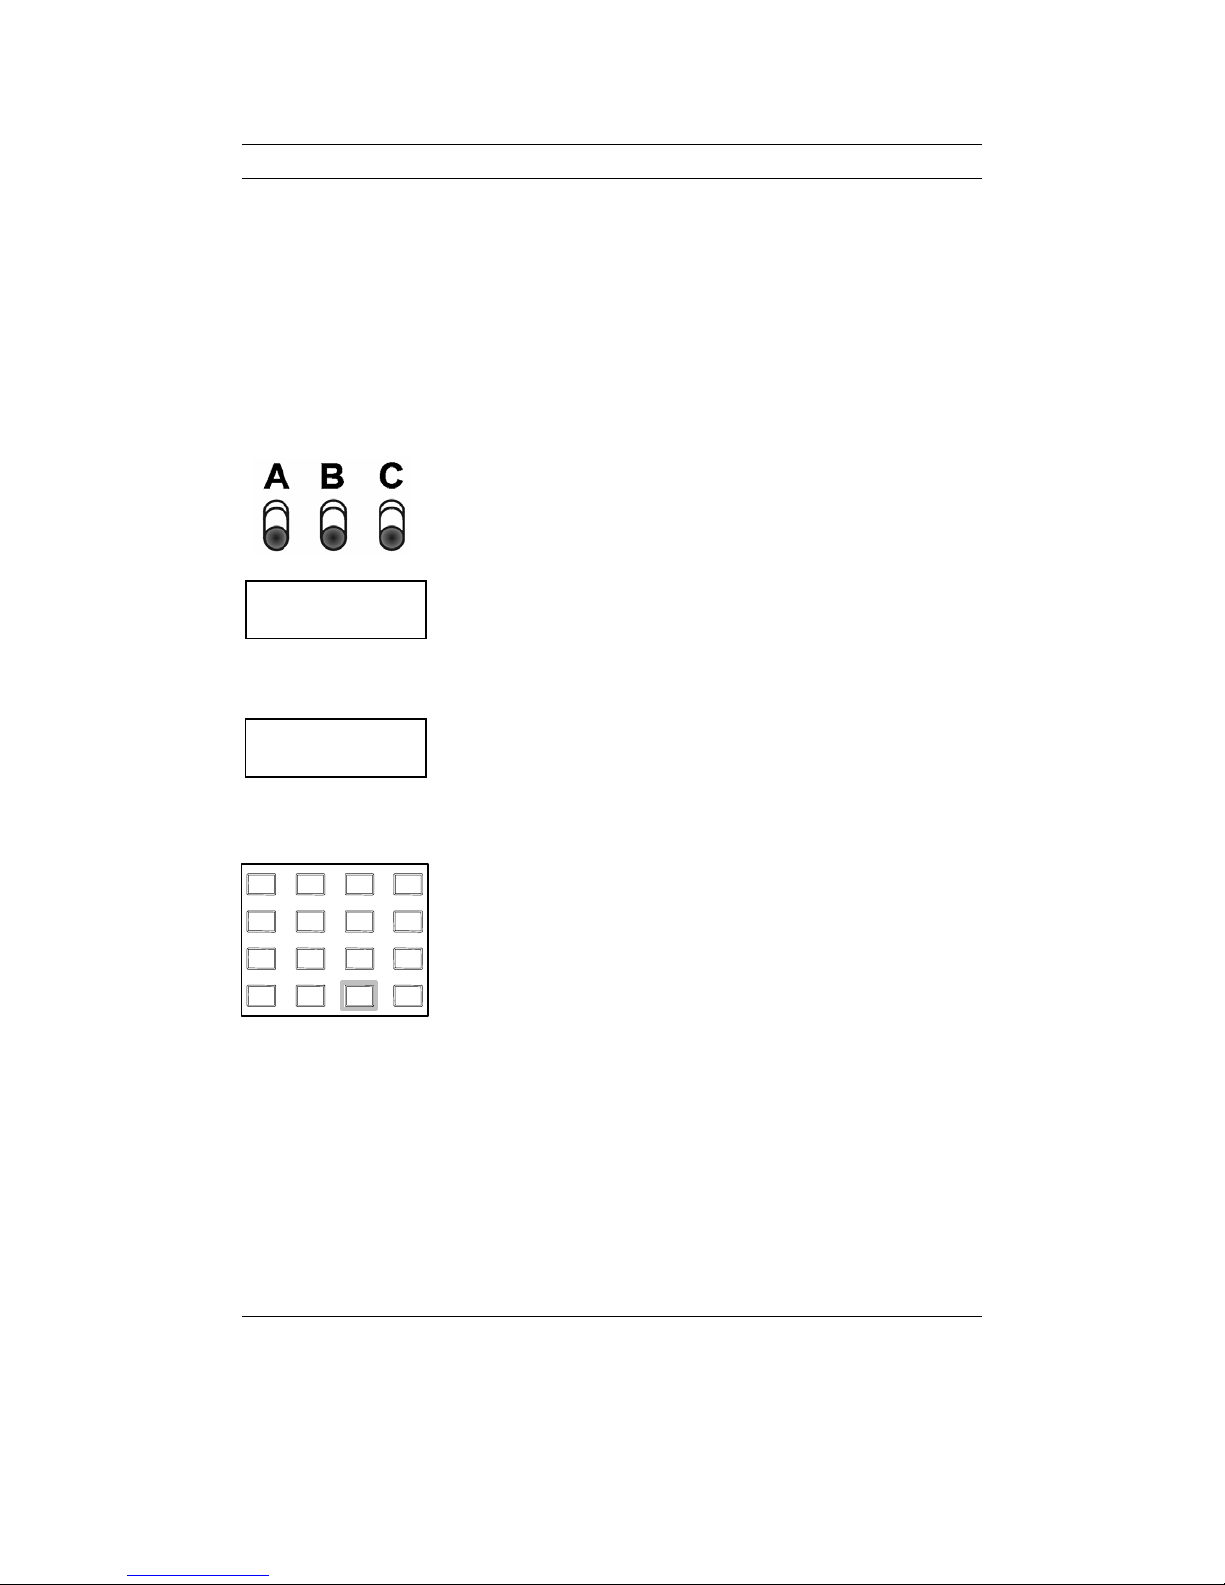
For example, to use the Code Guard values of
Channel 9 with the frequencies of Channel 5:
LIDE SWITCHES B AND C DOWN.
1. S
2. T
URN THE CHANNEL SELECTOR KNOB to
CG
Channel 5.
label
Copy Code Guard
Values from Channel 9
CG
Label 5
Use Channel 9 Code
hannel
1 2 3
4 5 6
7 8 9
0
*
FCN
PRI
ENT
CLR
#
3. PRESS THE 9 KEY on the keypad. The display
shows CG.
The radio will now operate on the
frequencies of Channel 5 with Channel 9
Code Guard values. The display shows the
Code Guard channel (9), and then the
selected channel (5).
4. PRESS THE # KEY to display the Code Guard
channel briefly. The display shows the group
number, followed by the Code Guard channel,
and then the selected channel.
5. PRESS THE 0 KEY to reset all values to the
original programming, or press different number
keys (1–16) to select a different set of Code
Guard values.
NOTE: During scan or priority scan, the display does
not show user-selected Code Guard values,
nor does it access user-selected Code Guard
values in scan mode.
22 BK Radio
NOTE: If the channel selector knob is on a different
group, when you rotate the knob, the new
group is programmed differently.
Page 22
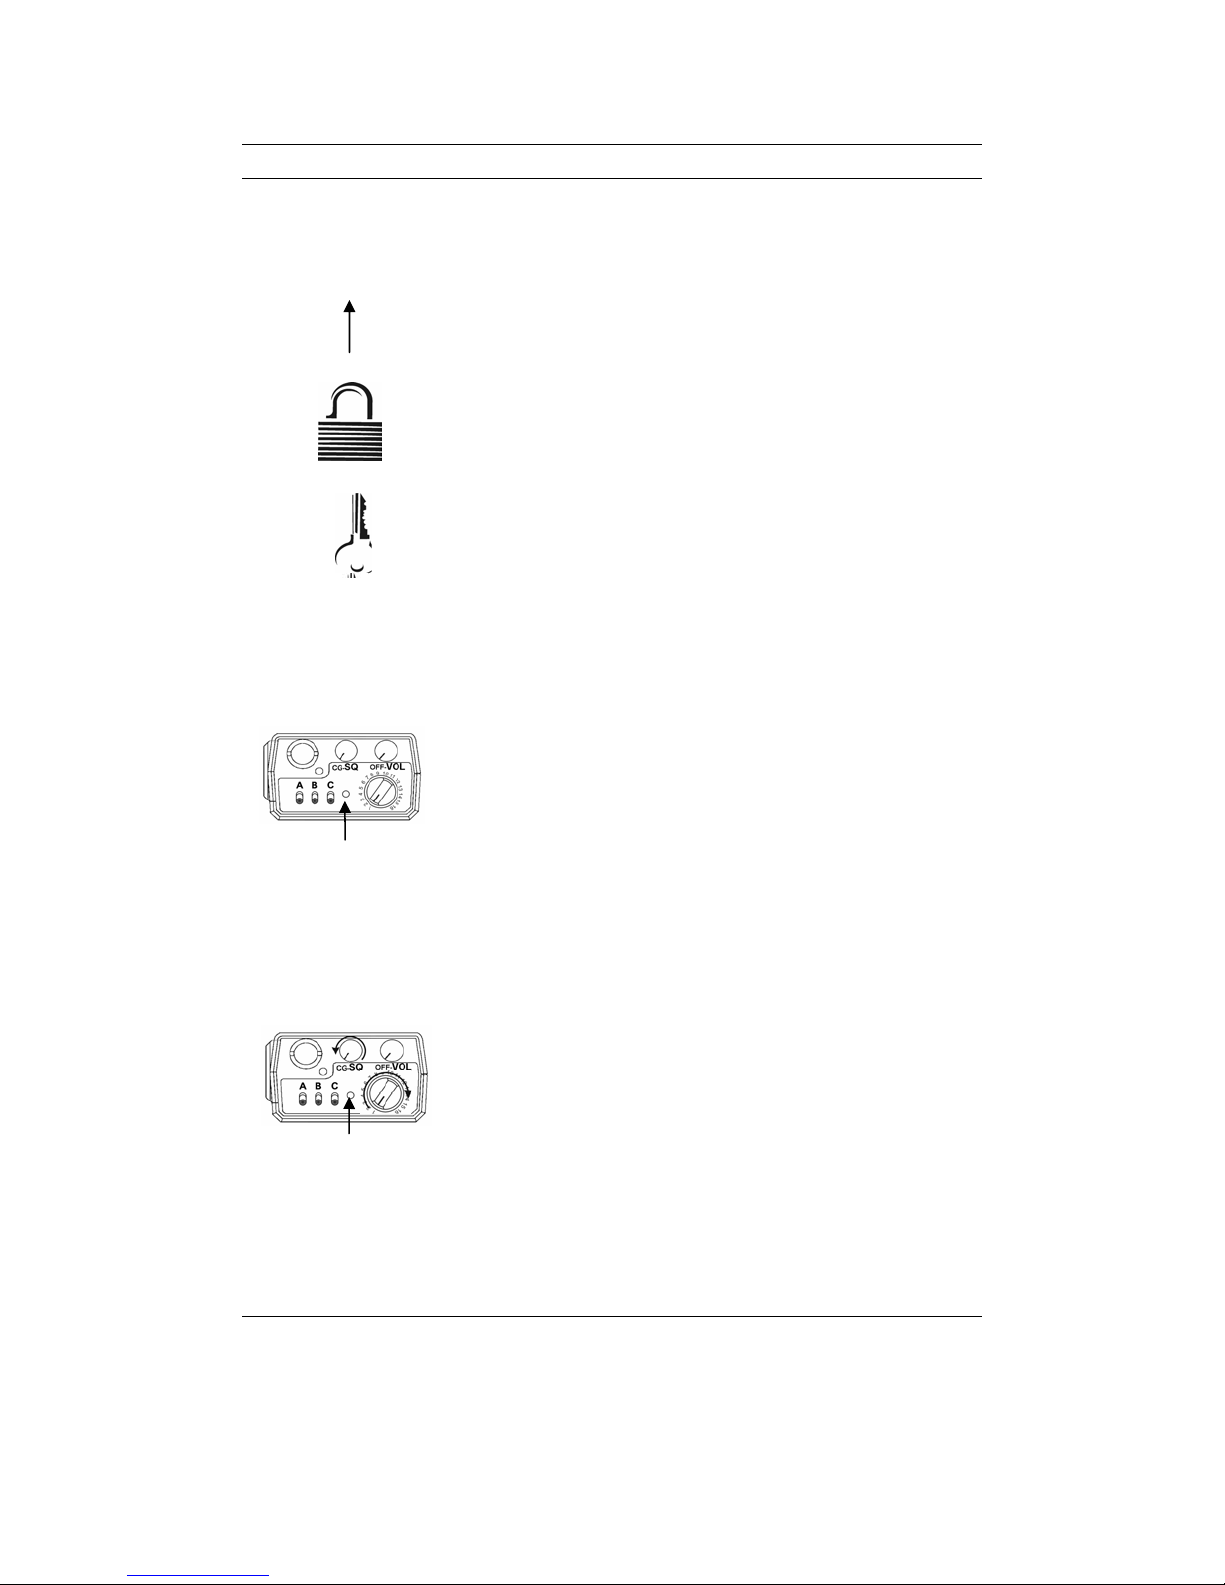
BUSY CHANNEL
If the radio has been programmed for busy channel operation, it will operate
in one of the following three modes:
• Busy Channel Indication
• Busy Channel Lockout
• Busy Channel Lockout Override
BUSY CHANNEL INDICATION
The yellow busy channel indicator glows if
there is carrier activity on the selected
channel. If the selected channel is a Code
Guard channel and the proper Code Guard
value is not detected, the busy channel
BUSY CHANNEL
indicator remains on for the duration of the
carrier activity and no message is heard.
During scan and priority scan operation, the
busy channel indicator glows when activity is
detected on any channel on the scan list.
BUSY CHANNEL
INDICATOR
GPH Owner’s Manual 23
When scanning or priority scanning Code
Guard channels with the squelch knob in the
Code Guard position and activity has been
detected, the busy channel indicator glows for
the time period necessary to determine if the
proper Code Guard value has been received,
causing the busy channel indicator to flash at
various rates.
Page 23
BUSY CHANNEL LOCKOUT
The busy channel lockout feature applies only to
those channels programmed to receive Code
Guard operation. When carrier activity is detected
on the channel selected, the radio checks the
receive Code Guard value. If the proper Code
Guard value is present, the radio can transmit on
that channel, even if the squelch knob is not in the
Code Guard position.
If the radio detects an incorrect value or carrier
B U S Y
activity only, the transmitter is disabled, an alert
tone is heard, and the display shows the word
“BUSY” when the PTT switch is pressed, whether
the squelch knob is in or out of the Code Guard
detent.
Channels not programmed to receive Code
Guard operation can be used to transmit
regardless of carrier activity.
BUSY CHANNEL LOCKOUT OVERRIDE
This mode operates in the same manner as busy
channel lockout except that the user can override
and transmit by turning the squelch knob off the
Code Guard detent. The transmitter is locked out
only if the squelch knob is set to the Code Guard
detent.
24 BK Radio
Page 24
0
CLONING PROCEDURE
STANDARD INSTRUCTIONS
Any “master” radio (a GPH Flex•Mode™ with the desired radio frequencies
and settings) is capable of transferring its program to another GPH
Flex•Mode™ or “slave” radio. The radio receiving the program is also
referred to as the “clone.” The LAA0700 cloning cable will be required in
the following procedure.
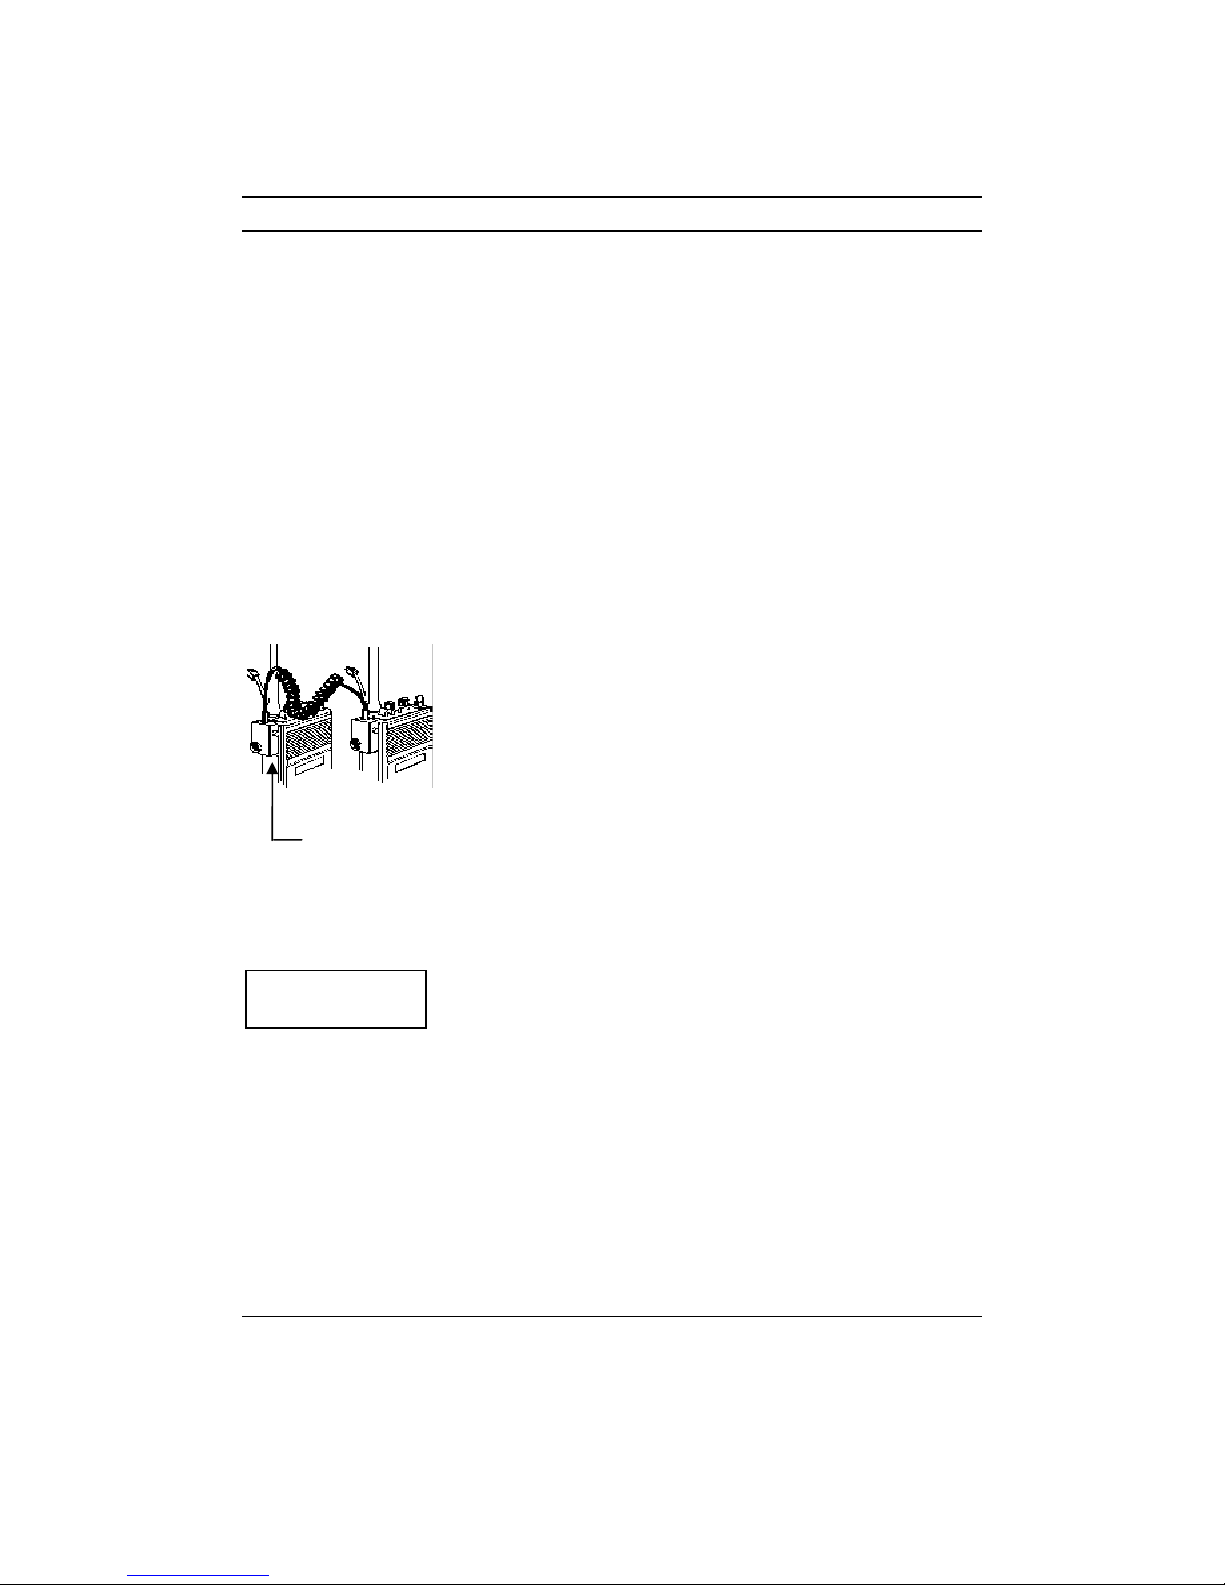
1. MAKE SURE the battery packs for both
radios are charged.
2. ATTACH THE MASTER SWITCH END of the
Master
Clone
cloning cable to the side connector of the
master radio.
NOTE: One plug of the cloning cable has a
push-button master switch. This
plug must be attached to the master
radio.
Master
Switch
3. TURN ON THE MASTER RADIO.
4. SELECT THE GROUP to be cloned from the
master radio.
5. PUT THE MASTER RADIO IN PROGRAMMING
PRG
MODE
by pressing and holding the master
switch. Enter the password of the selected
ch
group. The display shows “
6. REVIEW THE VALUES in the program. Any
PRG Ch 0.”
required changes must be made now.
7. CONNECT THE OTHER PLUG of the cable to
the side connector of the radio you want to
clone.
8. TURN ON THE CLONE and set it to the
desired channel group.
GPH Owner’s Manual 25
Page 25
PRG
4
P
R O G
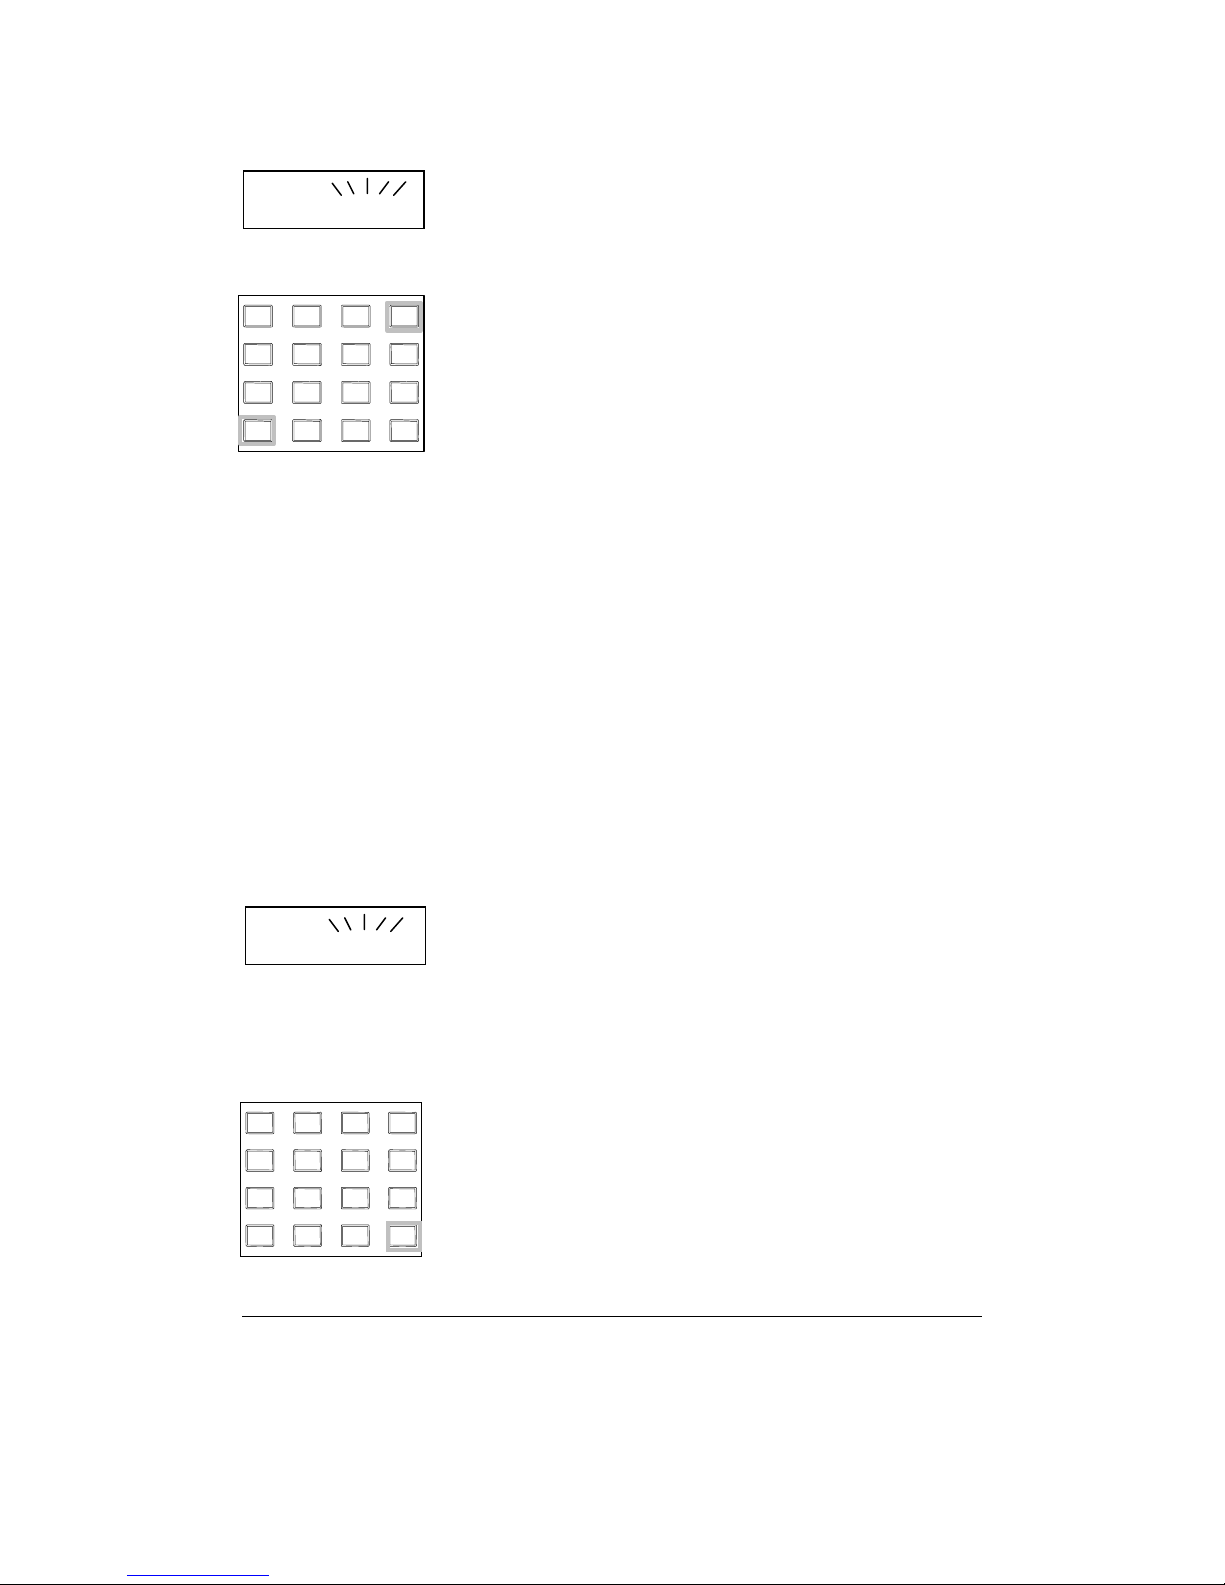
9. PRESS THE * KEY on the master radio
keypad. The display will flash “PROG”
signifying that the radio is ready to
download its program to the clone.
1 2 3
5 6
7 8 9
#
0
*
PRG
F A I L
FCN
PRI
ENT
CLR
10. PRESS THE FCN KEY on the master radio
keypad. The program in the master will
then be downloaded to the clone. The clone
will automatically send back the program to
the master to verify a successful cloning.
11. I
F THE DOWNLOAD WAS SUCCESSFUL, the
display on the master will resume flashing
“PROG”.
• To clone the other channel group, turn
off both radios and go back to Step 3 on
the previous page, changing the channel
group as required.
• If cloning is finished, turn off the clone
and disconnect the cloning cable.
Normal radio operation will occur when
you turn on the clone.
12. I
F THE DOWNLOAD WAS NOT SUCCESSFUL,
the master will display “FAIL” and multiple
beeps will follow. Failure of downloading
can be due to:
1 2 3
4 5 6
7 8 9
0
*
26 BK Radio
FCN
PRI
ENT
CLR
#
• Improper connection
• Failure to turn on the clone
• Setting the clone in programming mode
NOTE: To stop the “FAIL” mode, press CLR,
turn off both radios, and try again,
starting with Step 1 on the previous
page.
Page 26
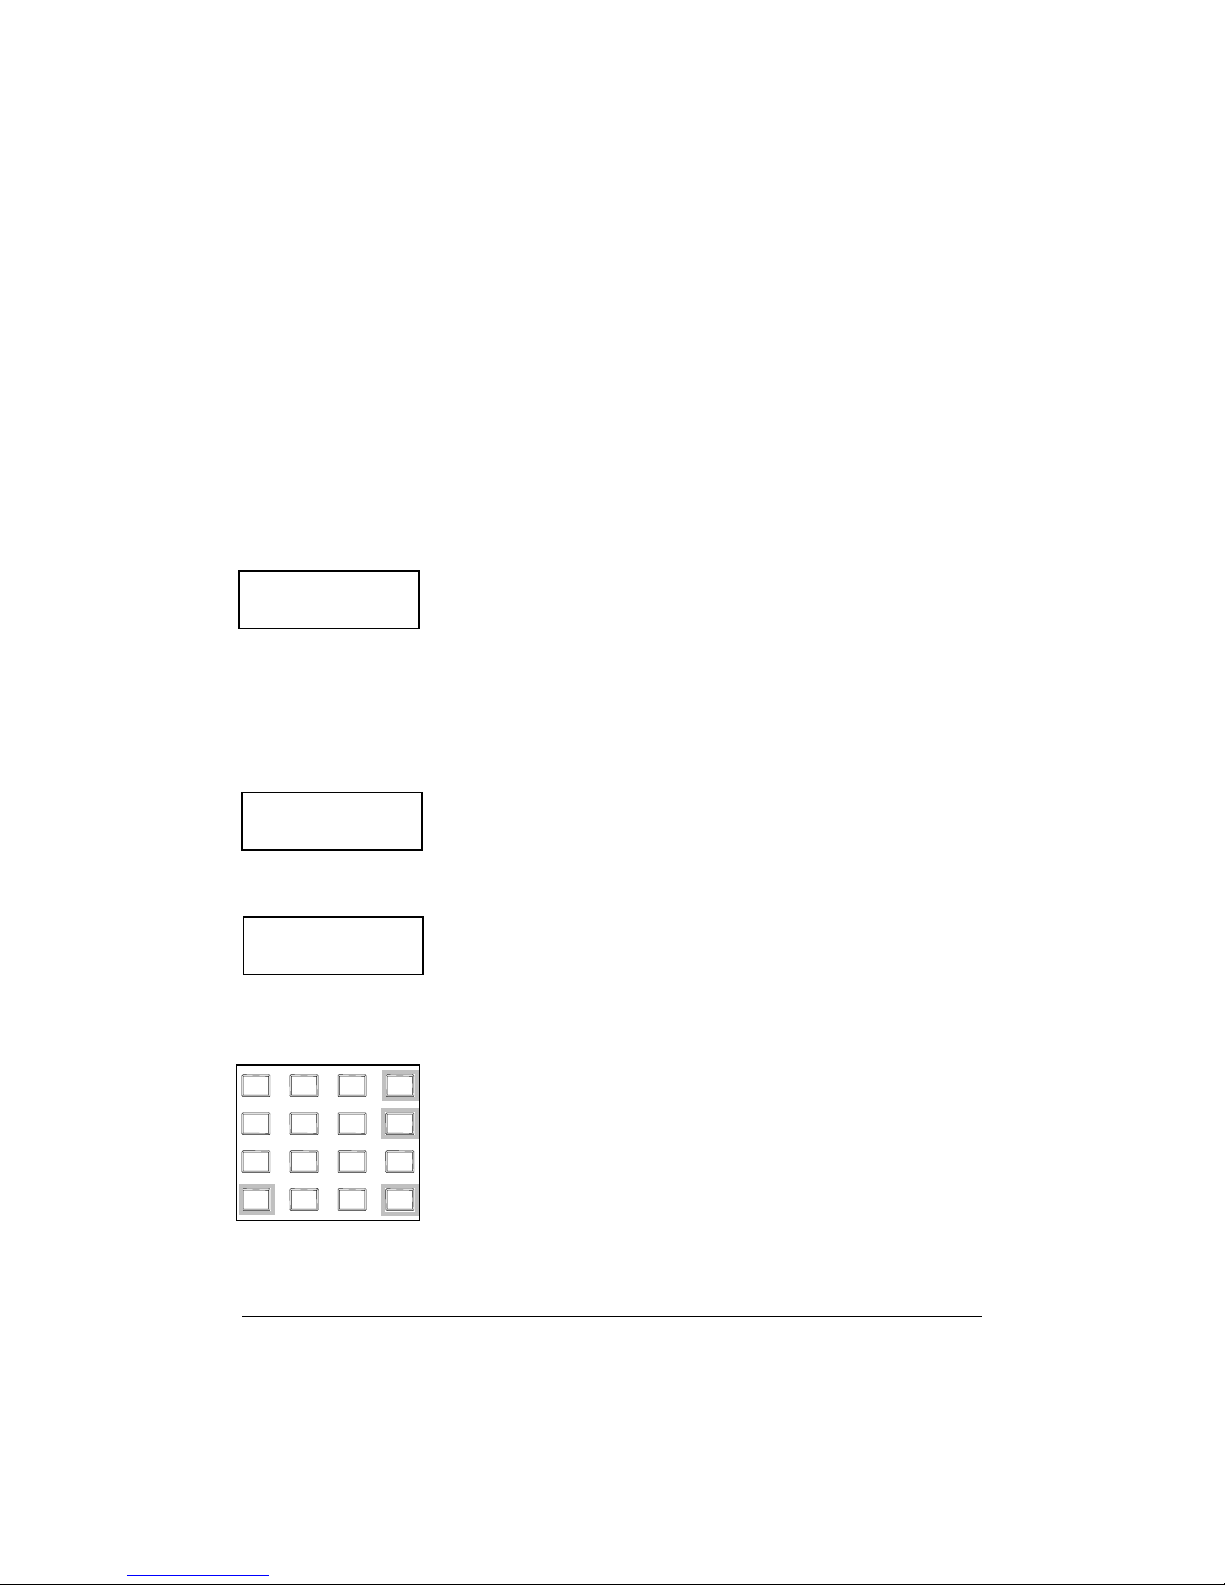
SPECIAL CLONING INSTRUCTIONS
5
5
You can change Channel 0 values on the master radio, hold them in a temporary
memory, and download them to the clone without actually entering them into the
permanent memory of the master. This is convenient if sequential identification
numbers are used to identify a series of portables in a radio system. Assuming that
the frequencies, Code Guard values, and other CH 0 values are common for all
radios in the system, but that the radio identification number should be unique to
each radio, the following method can be used to clone additional radios for the
system:
1. P
ROGRAM THE MASTER with all frequencies,
Code Guard values, and Channel 0 values that will
be common to all radios.
2. A
DVANCE THE DISPLAY to show the ID number
of the master (for example 100).
PRG ID
RESS CLR; press 1, 2, and 5. The ID number 125
12
3. P
is now only in temporary memory.
4. P
RESS *, connect the cloning cable to the clone
radio, and download by pressing FCN. ID number
125 is now stored in the permanent memory of the
clone.
FTER DOWNLOADING, PRESS CLR. Disconnect
PRG ID
12
PRG ID
126
1 2 3
4 5 6
7 8 9
0
*
GPH Owner’s Manual 27
#
FCN
PRI
ENT
CLR
5. A
the clone. The master radio display will show that
125 is still being held in the temporary memory of
the master.
6. P
RESS PRI. This will increment the ID number one
digit to 126.
NOTE: Any new number can be entered at this
point by pressing CLR and using the
keypad to enter the new number.
7. P
RESS *. Connect the cloning cable to the next
clone and download by pressing FCN.
Any number of radios can be coded with different or
sequential ID numbers using this technique. The ID
number in the permanent memory of the master will
remain unchanged at 100.
Page 27
BATTERY INSTALLATION AND REMOVAL
BK Radio battery packs are available in a variety of sizes and types for special
applications. Rechargeable battery packs can be charged separately or while
attached to a radio.
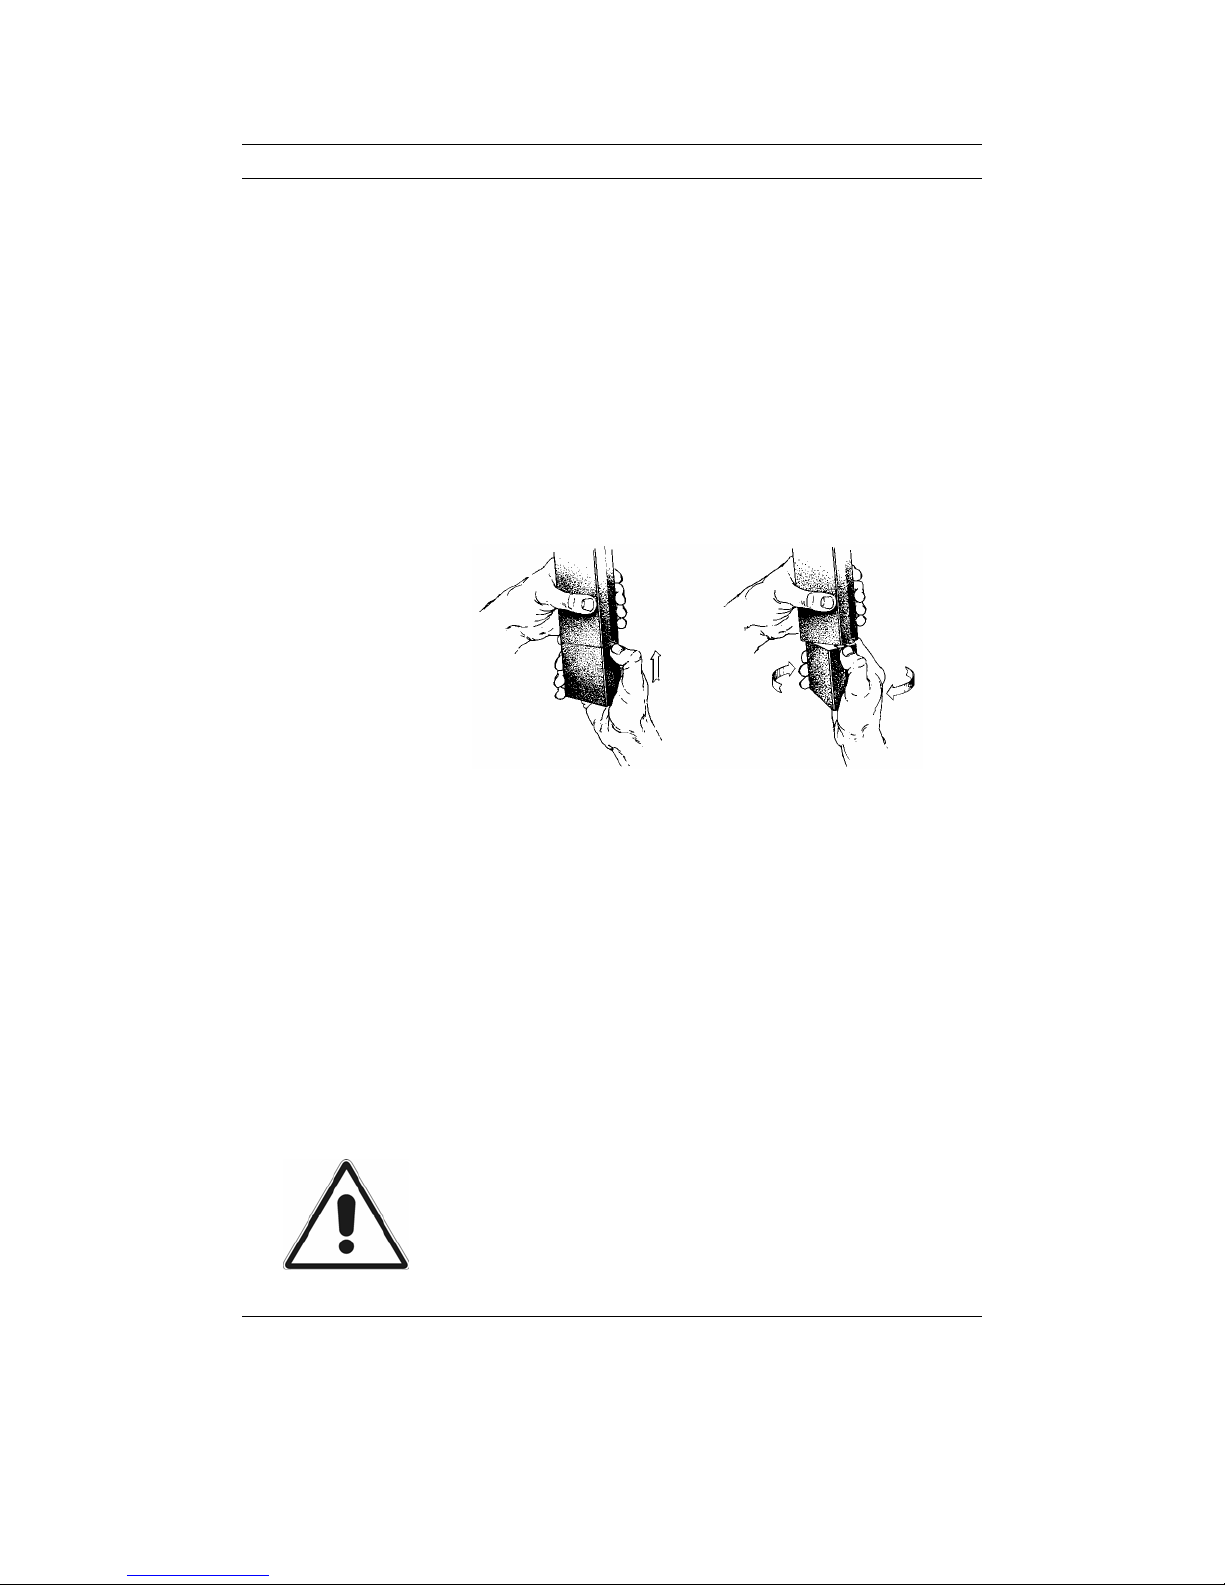
INSTALLING THE BATTERY
1. LOCATE THE CENTER HUB on the radio base and
place it in the recess of the battery pack.
OSITION THE BATTERY PACK at the 30° offset,
2. P
seating the two metal studs in their recess.
PPLY UPWARD PRESSURE to the pack while
3. A
twisting the pack to its original position. The
metal tab will click, locking the pack in position.
REMOVING THE BATTERY
1. TURN THE RADIO OFF.
USH UP THE METAL TAB on the side of the case
2. P
while twisting the battery pack approximately 30°.
EMOVE BATTERY PACK from the radio.
3. R
NOTE: Periodically check the contacts on the
battery pack for dirt that could prevent
a good electrical contact with the
charging base.
WARNING: Explosion Hazard
Do not dispose a battery pack into a fire.
To avoid explosion, intrinsically safe radios designed for
use in hazardous environments MUST use replacement
batteries approved by Factory Mutual.
28 BK Radio
Page 28

DEFINITIONS AND ACRONYMS
ANI Automatic Number Identification
CG Code Guard
CLR Clear
Cloning The process of copying data from one radio, called
“master,” to other radios, called “slaves” or “clones”
Code Guard A subaudible tone for selective listening and
receiving
Detent The click/hesitation you feel as you turn a knob
from one position to another
DTMF Dual Tone Multiple Frequency
DTMF Tones Tones that sound like those used by a standard
push-button telephone
ENT Enter
FCN Function
LCD Liquid Crystal Display
Individual The information programmed with a PC on
Personality both a global and by-channel basis that tells the
radio exactly how to operate
PRG Program
PRI Priority
PTT Push To Talk
RTA Repeater Talk Around
RX Receive
SCN Scan
SQ Squelch
Squelch A control that eliminates background noise
Talkback Scan When scanning, if a signal is present, the scan will
stop and you will hear the signal. If you then push
the PTT switch to talk back to the person, you are
in talkback scan mode.
Time-Out Timer A feature that limits the duration of calls
TX Transmit
GPH Owner’s Manual 29
Page 29

SERVICE
If you need service, contact your local BK Radio dealer equipped to service your
radio. If you find it impractical to have service performed by your local dealer,
contact BK Radio at the address below:
30 BK Radio
BK Radio, Inc.
ATTN: Customer Service
7100 Technology Drive
West Melbourne, FL 32904
(800) 422-6281
 Loading...