

Page 1
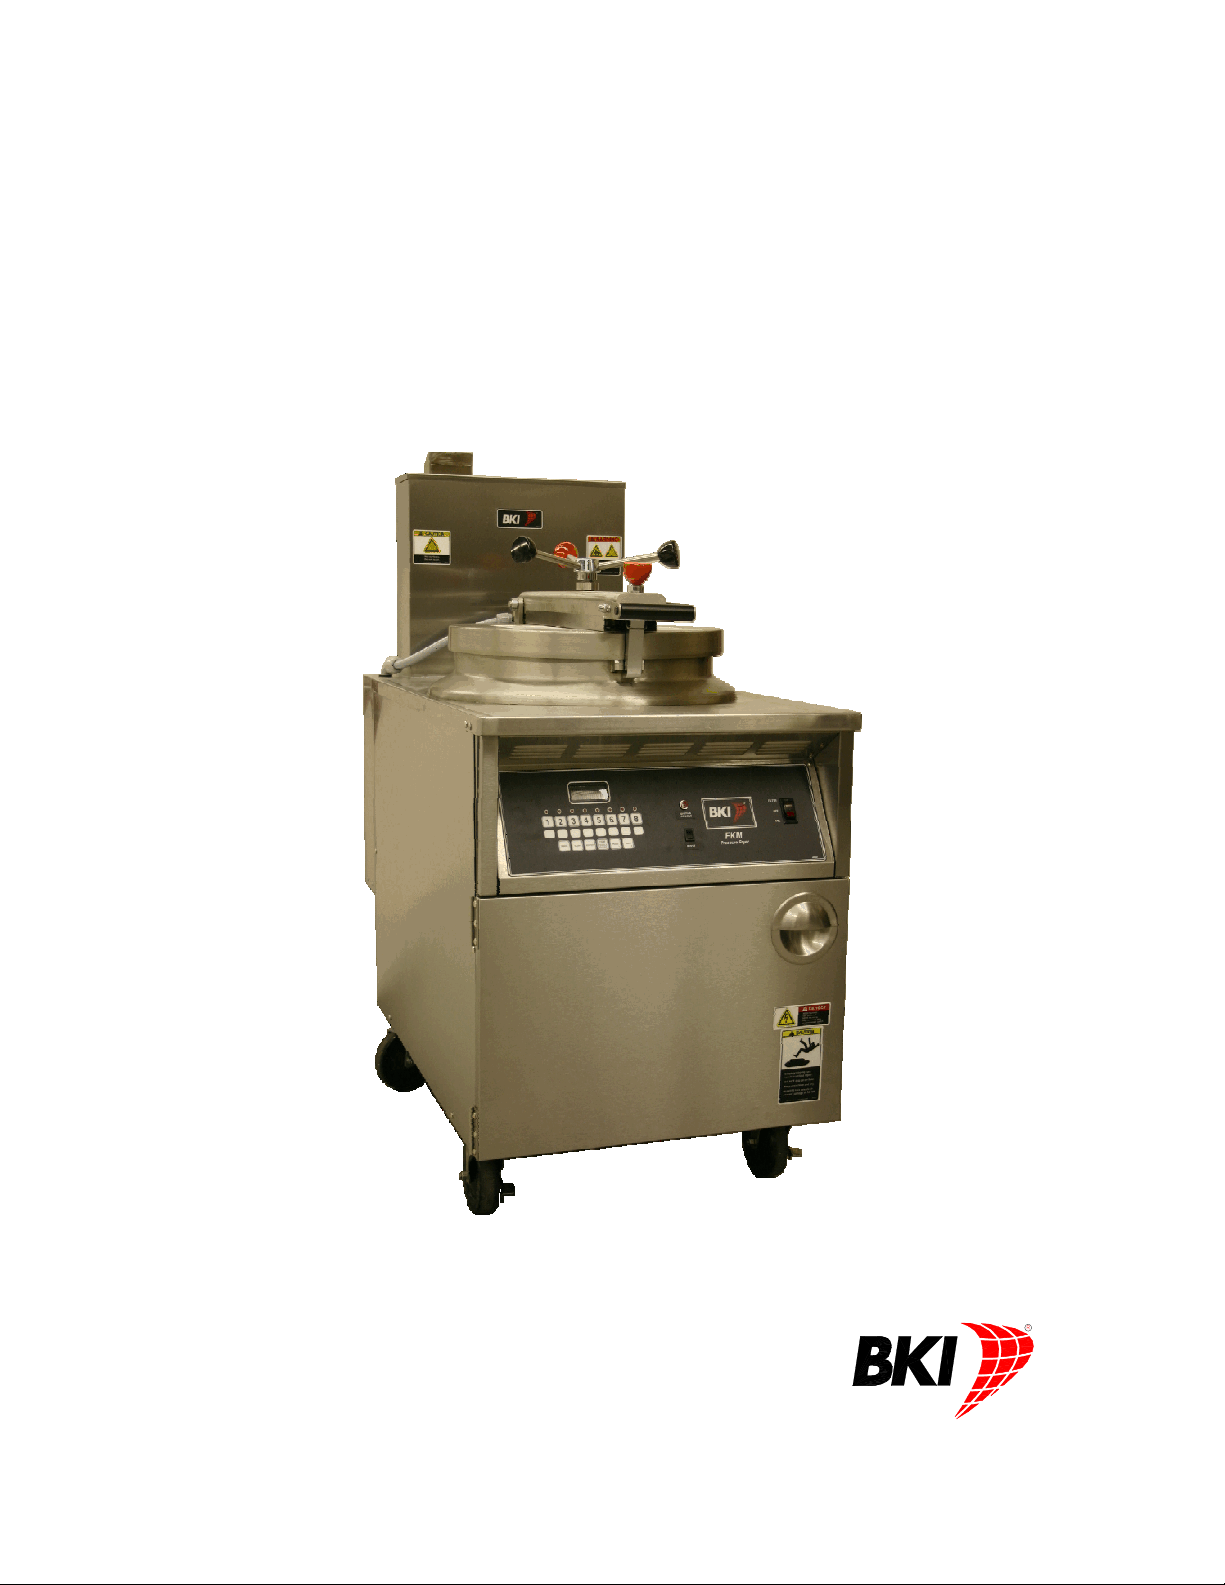
Gas Pressure Fryer
MODELS FKG, FKG-F, & FKG-FC
Installation and Operation Manual
Serial Numbers 000001 and higher
SS-OM-048 Revised 10/1/2013
Page 2

Gas Pressure Fryer
BKI LIMITED W ARRANTY
2812 Grandview Dr. • Simpsonville, SC 29680 • USA
(864) 963-3471 • Toll Free: (800) 927-6887 • Fax: (864) 963-5316
WHAT IS
WHO IS COVERED This
COVERAGE PERIOD
WARRANTY COVERAGE This
EXCEPTIONS Any exceptions must be pre-approved in advance and in writing by BKI. The extended
EXCLUSIONS
INSTALLATION Leveling, as well as
REPLACEMENT PARTS
COVERED This warranty covers defects in material and workmanship under normal use, and applies only to
the original purchaser providing that:
អ
The equipment has not been accidentally or intentionally damaged, altered or misused;
អ
The equipment is properly installed, adjusted, operated and maintained in accordance with
national and local codes, and in accordance with the installation and operating instructions
provided with this product.
អ
The serial number rating plate affixed to the equipment has not been defaced or removed.
warranty
purchased
អ Warranty claims must be received in writing by BKI within one (1) year from date of
installation or within one (1) year and three (3) months from data of shipment from the
factory, whichever comes first.
អ COB Models: One (1) Year limited parts and labor.
អ
COM Models: Two (2) Year limited parts and labor. COM convection ovens also have a two (2)
year door warranty.
អ CO1 Models: Two (2) Year limited parts and labor. Five (5) Year limited door warranty.
អ
BevLes Products: Two (2) Year limited parts and labor.
អ Warranty period begins the date of dealer invoice to customer or ninety (90) days after
shipment date from BKI, whichever comes first.
authorized
performed during regular, weekday business hours.
door warranty on convection ovens years 3 through 5 is a parts only warranty and does not include
labor, travel, mileage or any other charges.
អ Thermostat calibrations
អ
Air and gas
អ
Light
អ
Glass doors and
អ Fuses,
អ Adjustments
អ Tightening
អ
Failures
អ Unauthorized
អ Damage
អ Alteration,
អ Thermostats
អ
Freight –
អ Ordinary
អ
Failure to follow
អ
Events
appropriate installation
manufacturer.
BKI genuine
installation
for use in the U.S.A.
warranty
covers on-site labor, parts and
service
អ Negligence
adjustments,
bulbs,
of screws or
caused
in
shipment,
misuse or
and safety valves with
other than normal UPS charges,
wear and
beyond control
Factory OEM parts receive a (90) day
by a BKI F
is
extended
representative
or acts of
after (30) days
door adjustments,
to
burner
flames and
fasteners,
by erratic
repair by
installation and/or operating instructions,
anyone other than
improper installation,
tear,
of the
proper installation
and use materials – is the responsibility of the
actory Authorized
to the original
up to (100) miles
God,
cleaning of
voltages
or gas
broken
company.
purchaser
reasonable
round
from equipment installation date,
pilot
burners,
suppliers,
a BKI F
capillary tubes,
Service
actory Authorized
and check out of all
materials warranty
Center.
and applies only to
travel
time
trip and (2)
and travel e
hours
new equipment -
dealer
effective from the date of
equipment
xpenses
travel time and
Service Center,
per
or installer, not the
of the
1
Page 3
Gas Pressure Fryer
The purchaser must post, in a prominent location, instructions to be followed in
the event the user smells gas. This information shall be obtained by consulting
the local gas supplier.
FOR YOUR SAFETY
Do not store or use gasoline or other flammable vapors or liquids in the
vicinity of this or any other appliance.
Improper installation, adjustment, alteration, service or maintenance can
cause property damage, injury or death. Read the installation, operation
and maintenance instructions thoroughly before installing or servicing
this equipment.
2
Page 4

Gas Pressure Fryer Table of Contents
Table of Contents
Table of Contents..................................................................................................................................................... 3
Introduction .............................................................................................................................................................. 4
Safety..................................................................................................................................................................... 4
Safety Signs and Messages.............................................................................................................................. 4
Specific Precautions .......................................................................................................................................... 5
Equipotential ground plane ........................................................................................................................... 5
Full Disconnection......................................................................................................................................... 5
Safe Work Practices .......................................................................................................................................... 6
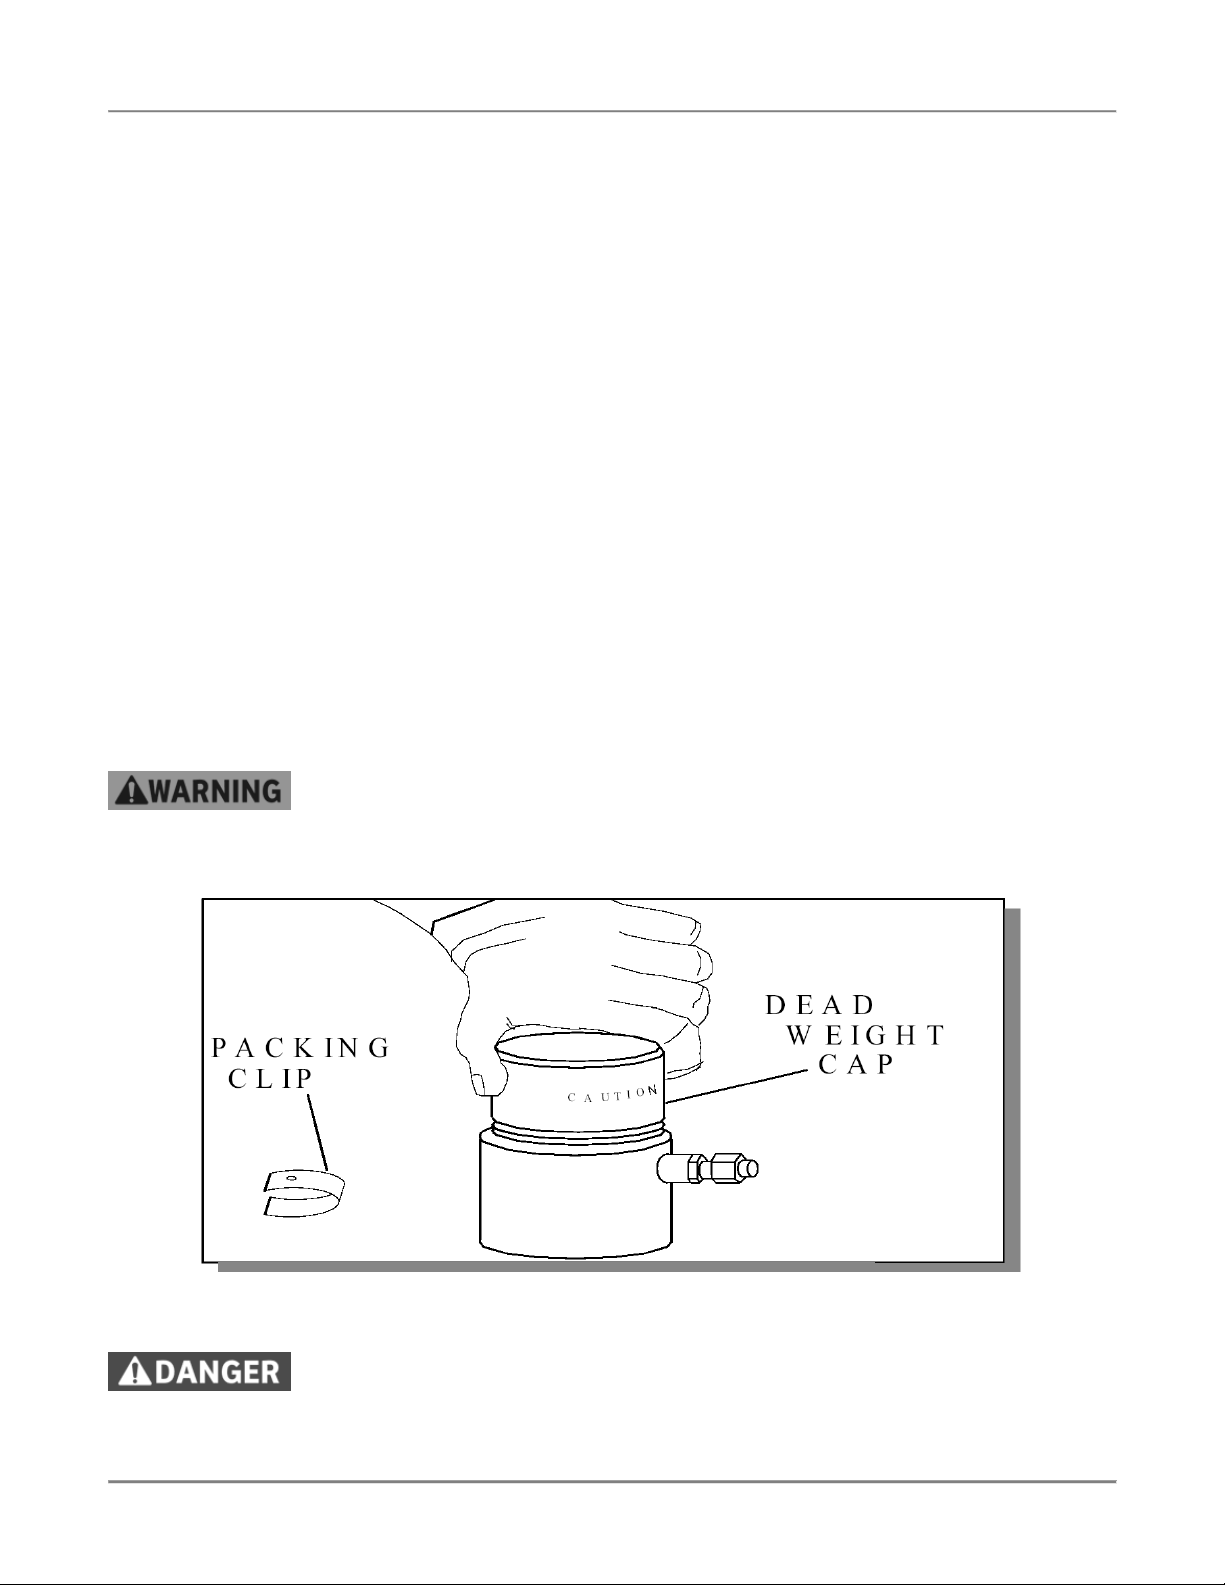
Safety Labels................................................................................................................................................... 11
Installation .............................................................................................................................................................. 12
Inspection for Shipping Damage ......................................................................................................................... 12
Preparation .......................................................................................................................................................... 12
Location and Clearance....................................................................................................................................... 12
Installation Procedure .......................................................................................................................................... 13
Initial Test and Adjustment .................................................................................................................................. 14
Gas Conversion Instructions ............................................................................................................................... 15
Operation ................................................................................................................................................................ 16
Controls and Indicators........................................................................................................................................ 16
Care of the Shortening ........................................................................................................................................ 20
FKG and FKG-F Operation.................................................................................................................................. 21
Start-Up (FKG and FKG-F) ............................................................................................................................. 21
Cooking (FKG and FKG-F).............................................................................................................................. 22
FKG-FC Operation............................................................................................................................................... 23
System Programming ...................................................................................................................................... 23
Product Programming ..................................................................................................................................... 25
Start-Up (FKG-FC) .......................................................................................................................................... 28
Cooking (FKG-FC) .......................................................................................................................................... 28
Recipes ................................................................................................................................................................ 29
Operation After Gas or Power Outage ................................................................................................................ 32
Normal Shutoff..................................................................................................................................................... 32
Maintenance ........................................................................................................................................................... 33
Scheduled Maintenance ...................................................................................................................................... 33
Safety Pop Valve Procedure ........................................................................................................................... 34
Filtering Procedure .......................................................................................................................................... 35
FKG-F and FKG-FC .................................................................................................................................... 35
FKG...............................................................................................................Error! Bookmark not defined.
Boil-Out Procedure .......................................................................................................................................... 37
Filter Pad Replacement................................................................................................................................... 39
Troubleshooting ................................................................................................................................................... 40
Appendix A ............................................................................................................................................................. 41
3
Page 5
Gas Pressure Fryer Introduction
Introduction
The FKG Pressure Fryer is compact, attractive and functional in design. It is constructed of a stainless steel fryer
pot for cleaning ease. Exclusive BKI patented features and safety devices offer flexibility, efficiency and reliability
plus PERFECTION IN PRESSURE FRYING!
The BKI name and trademark on this unit assures you of the finest in design and engineering -- that it has been
built with care and dedication -- using the best materials available. Attention to the operating instructions
regarding proper installation, operation, and maintenance will result in long lasting dependability to insure the
highest profitable return on your investment.
PLEASE READ THIS ENTIRE MANUAL BEFORE OPERATING THE UNIT. If you have
any questions, please contact your BKI Distributor. If they are unable to answer your
questions, contact the BKI Technical Service Department, toll free: 1-800-927-6887.
Outside the U.S., call 1-864-963-3471.
Safety
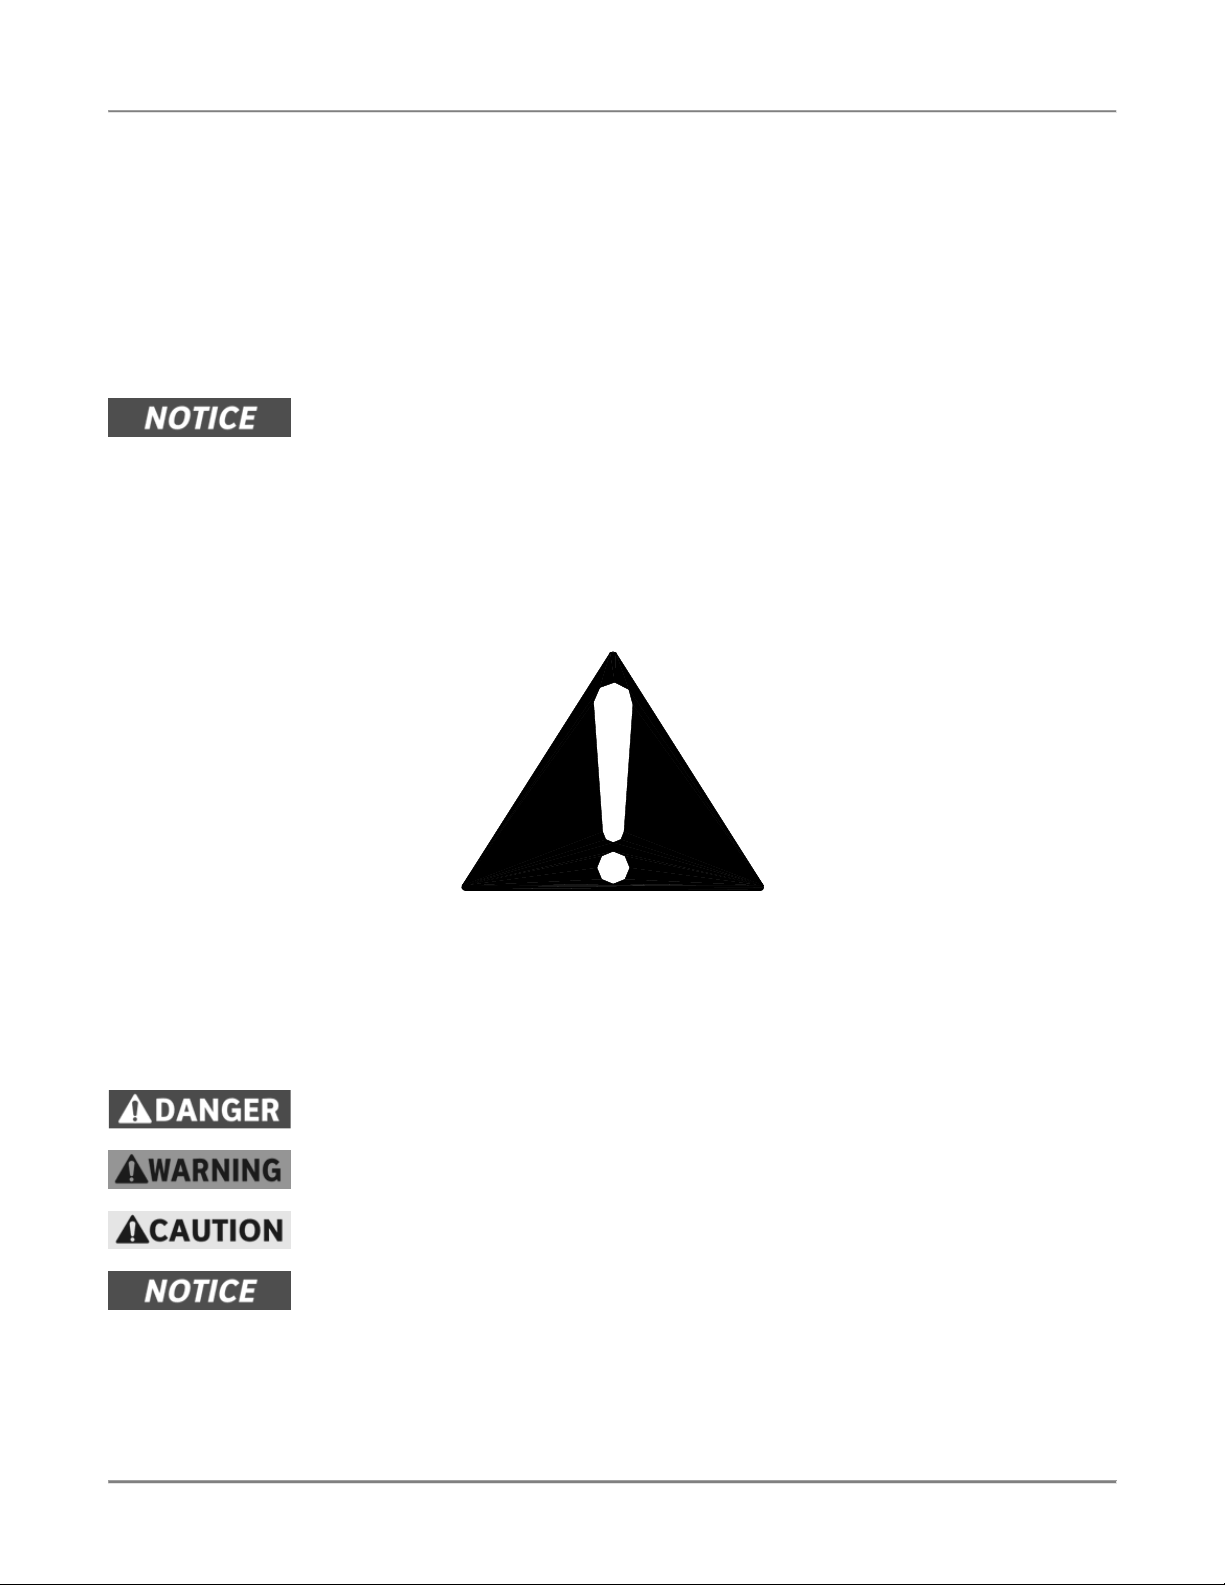
Always follow recommended safety precautions listed in this manual. Below is the safety alert symbol. When you
see this symbol on your equipment, be alert to the potential for personal injury or property damage.
Safety Signs and Messages
The following Safety signs and messages are placed in this manual to provide instructions and identify specific
areas where potential hazards exist and special precautions should be taken. Know and understand the meaning
of these instructions, signs, and messages. Damage to the equipment, death or serious injury to you or other
persons may result if these messages are not followed.
This message indicates an imminently hazardous situation which, if not avoided, will
result in death or serious injury.
This message indicates a potentially hazardous situation, which, if not avoided, could
result in death or serious injury.
This message indicates a potentially hazardous situation, which, if not avoided, may
result in minor or moderate injury. It may also be used to alert against unsafe practices.
This message is used when special information, instructions or identification are required
relating to procedures, equipment, tools, capacities and other special data.
4
Page 6
Gas Pressure Fryer Introduction
Specific Precautions
Risk of fire exists if the oil level drops below 5mm of the maximum oil level.
Use of oil/shortening older than the manufacturer’s recommendations for life of
the oil is prone to surge boiling and flash fires. Follow the oil manufacturer’s
guidelines for the life cycle of oil/shortening.
Do not open the drain valve or the fill valve while the fryer is under pressure.
Serious burns may result.
Follow instructions regarding effects of surge boiling of over-wet foods and
proper load size.
Equipotential ground plane
When a high current flows through a conductor, differences in potential appear
between the conductor and nearby metallic surfaces near the appliance. As a
result, sparks may be produced between the appliance and surrounding metal
surfaces. These sparks could cause serious injury, damage, or fire.
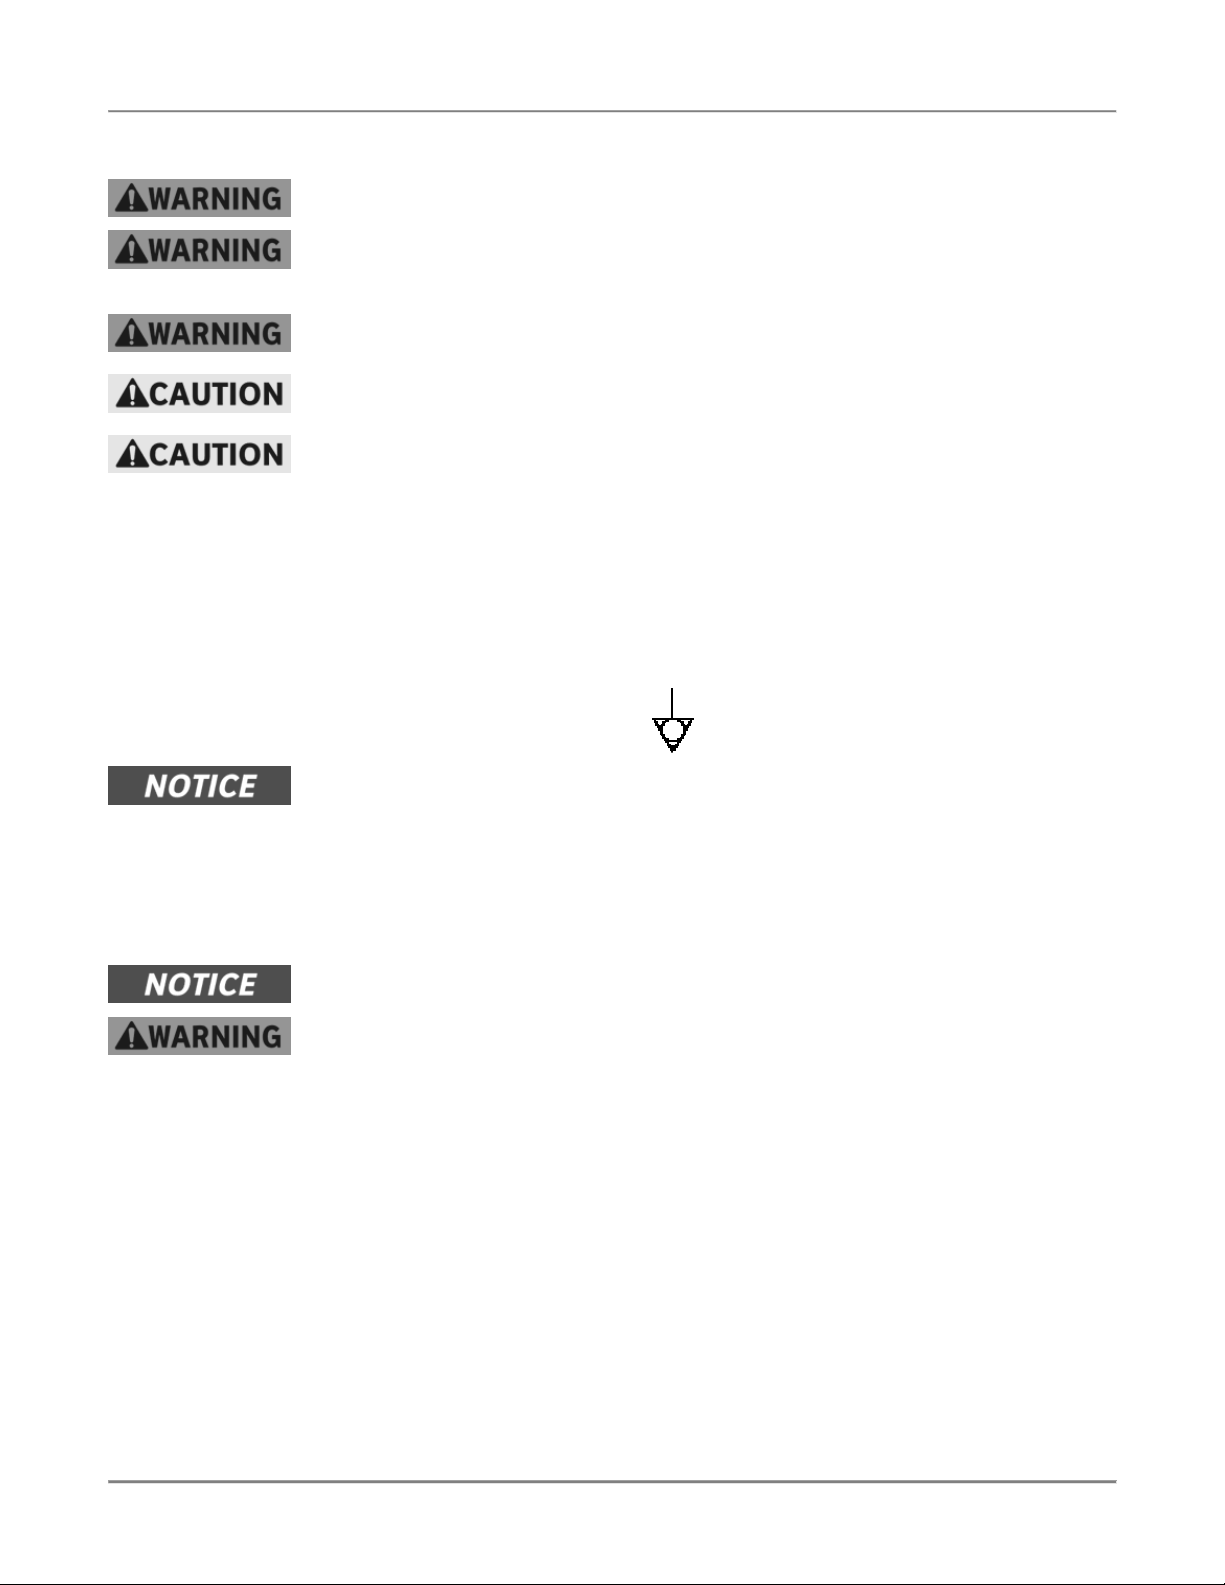
BKI provides an Equipotential ground terminal for the connection of a bonding
conductor after the installation of the appliance per lEC60417-1. This terminal is
located on the inside of the Power Entry Supply box near the Earth connection
and is marked with this symbol.
Full Disconnection
In accordance with Local and/or National wiring codes, the installer must provide
a means of full disconnection under over voltage Category III conditions. An IEC
approved cord and plug combination will meet this requirement.
Units not provided with a cord and plug do not meet this requirement. In
accordance with Local and/or National wiring codes, the installer must provide
the means of full disconnection.
The fryer is designed to hold a maximum of 75lbs (34KG) of oil/shortening.
The appliance and its individual shutoff valve must be disconnected from the gas
supply system during any pressure testing of that system at test pressures in
excess of ½ psi (3.5 kPa).
5
Page 7
Gas Pressure Fryer Introduction
Safe Work Practices
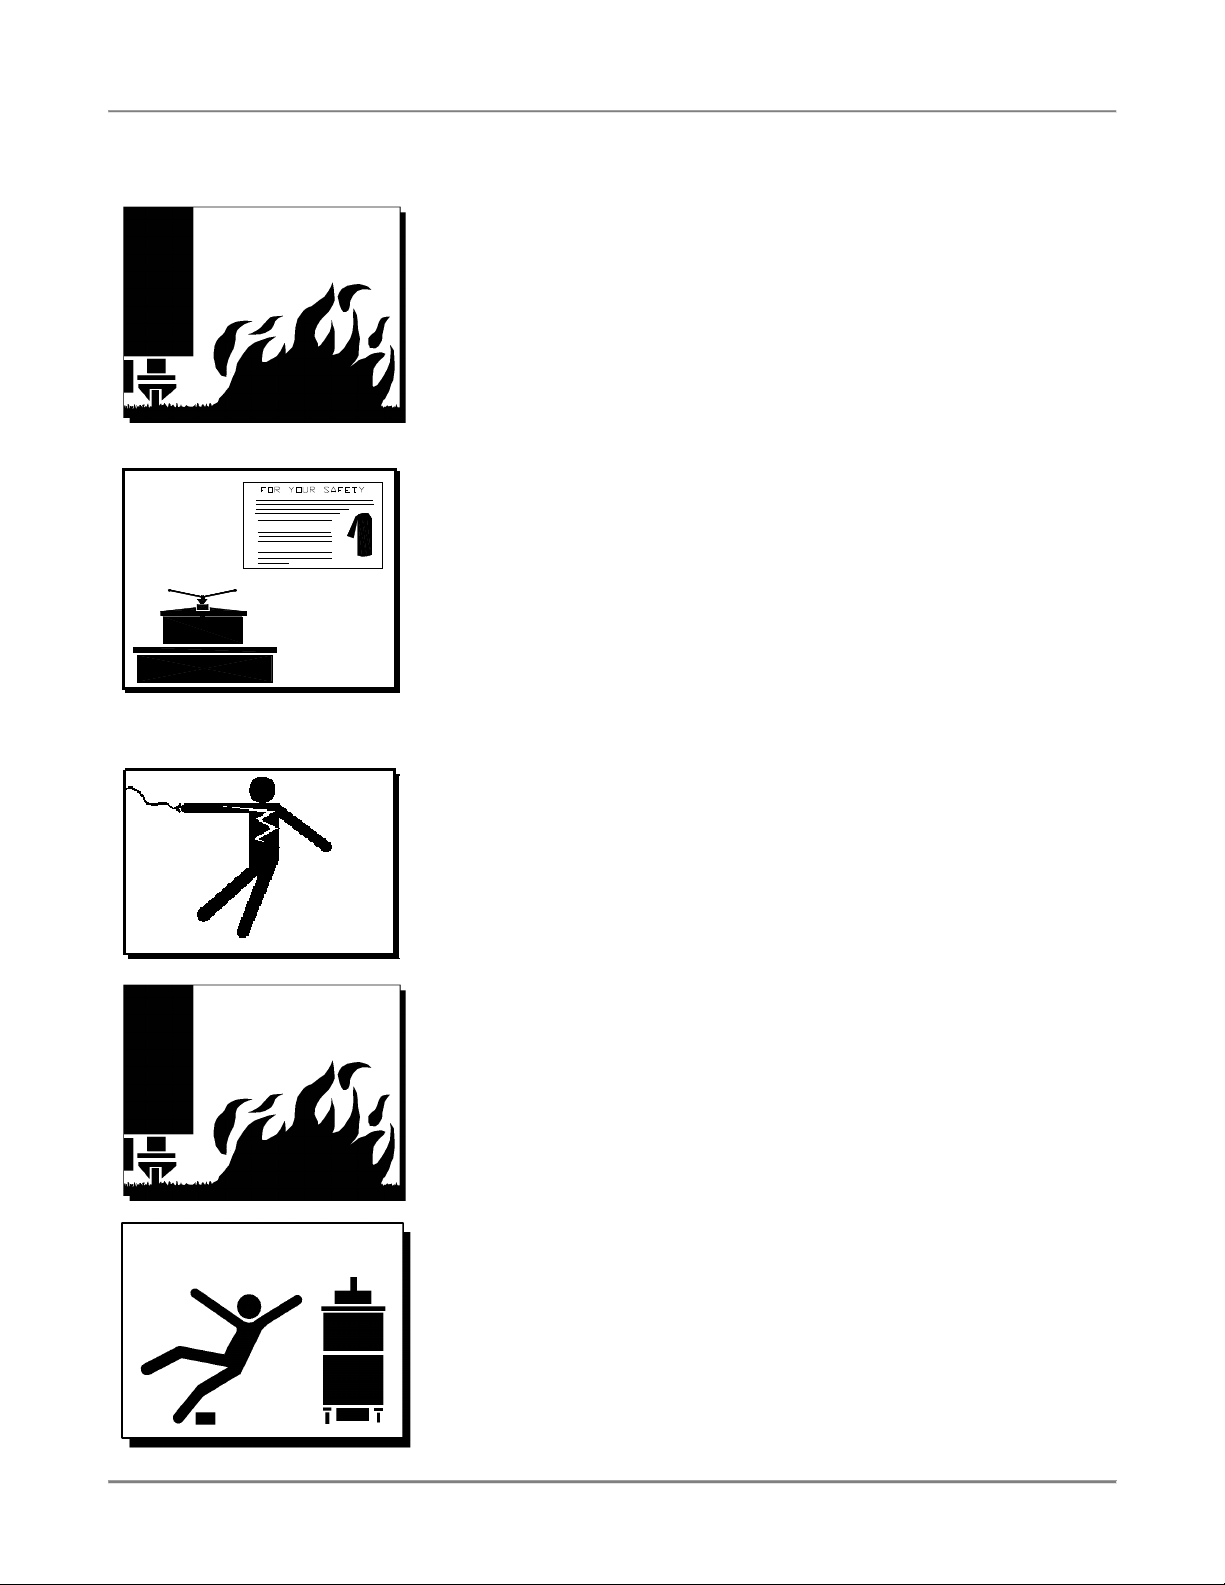
Do Not Store or Use Anything Flammable Near
The Fryer
Your pressure fryer is powered by either natural gas or LP gas. Do not
store or use gasoline or any flammable liquids or vapors near this or any
other appliance. Flammable materials will burn easily. Letting any
flammable liquid or vapor get too close to the fryer could cause an
explosion or fire. Serious injury could result. Examples of flammables that
you should not store near the fryer are gasoline, paint, thinners or
removers, gas tanks, and cleaning materials.
Use Gas Safely-- Avoid Danger
Gas can be a dangerous fuel if not handled safely.
Make sure to ventilate the fryer properly. If the fryer is not properly
ventilated, carbon monoxide can be released around the fryer.
Asphyxiation or suffocation can occur if gas is not ventilated properly.
Before using this appliance for the first time, contact your local gas supplier
for instructions about what to do if you smell gas. Post those instructions
somewhere near the fryer, so that everyone who uses or works near the
fryer knows what to do if they smell gas.
Beware of High Voltage
This equipment uses high voltage. Serious injury can occur if you or any
untrained or unauthorized person installs, services, or repairs this
equipment. Always Use an Authorized Service agent to Service Your
Equipment.
Use the Fryer on Noncombustible Floors Only
Make sure your floor is noncombustible. Do not operate your fryer on floors
that are wood, carpeted or have rubber mats. Placing your fryer on a
combustible floor could cause a fire. Serious injury could result. Examples
of noncombustible floors where you can safely place your fryer are
concrete, tile, and ceramic.
Keep the Area Around Your Fryer Uncluttered
Make sure to keep the area around your fryer clear of any obstacles.
Serious injury can occur if you trip or fall near the fryer. You could be
burned by hot shortening that splashes out of the fryer or by falling against
the hot metal of the fryer.
6
Page 8
Gas Pressure Fryer Introduction
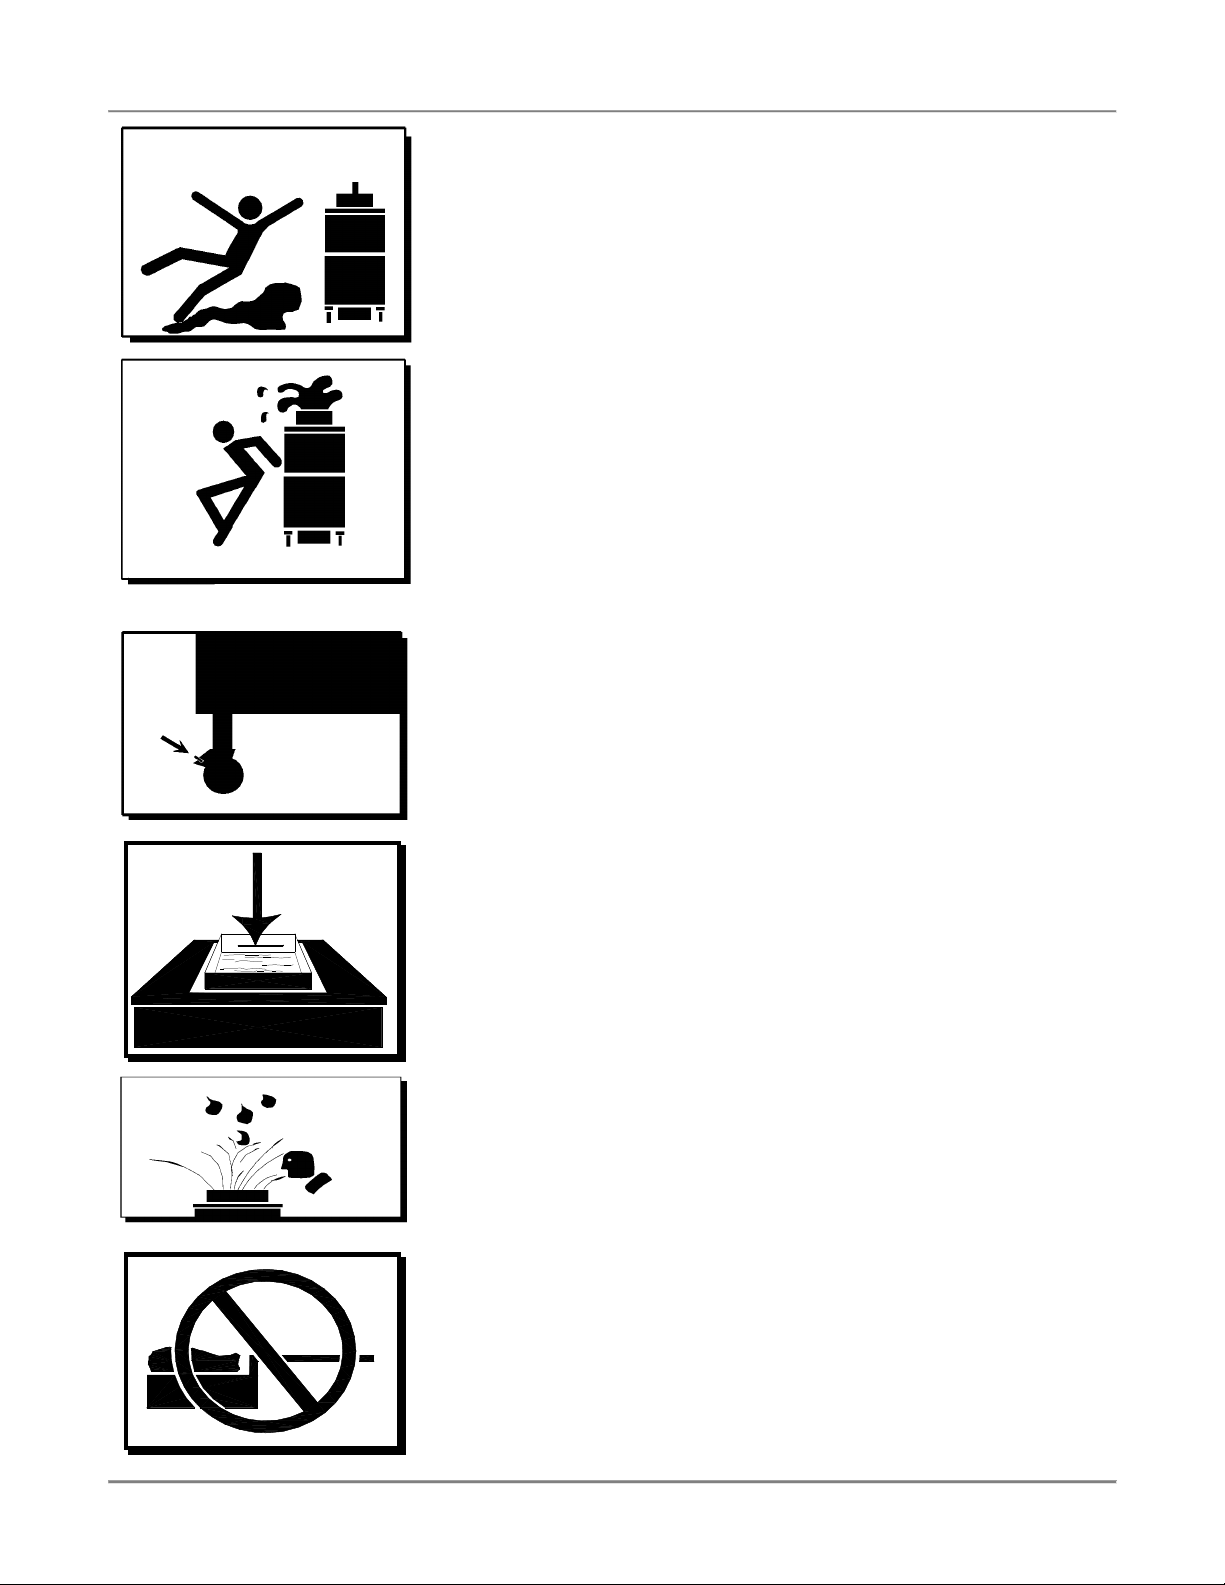
Keep the Floor Around Your Fryer Clean Of
Shortening
Make sure to keep the floor around your fryer clean of shortening and
other liquids. Serious injury can occur if you slip near your fryer. You could
be burned by hot shortening that splashes out of the fryer or by falling
against the hot metal of the fryer.
Keep the Lid Closed When The Fryer Is Not In
Use
Hot shortening can splash if someone moves the fryer or bumps into it.
Serious injury can occur if hot shortening splashes out of the fryer.
Do not lean, sit or stand on the fryer or perform any maintenance or
cleaning duties while the fryer or the shortening is hot. You could be
burned.
Keep the Casters Locked
To avoid spilling shortening, keep the casters locked. If any shortening
spills near your fryer, clean it up immediately.
Do Not Overfill the Fryer with Shortening
Hot shortening and steam may escape and burn you if you put too much
shortening in the fryer. Fill the fryer to the fill marks that are inside the fryer
pot. Heat the shortening.
Do Not Let Any Water Get into The Fryer
Always remove excess moisture from food before placing it into the fryer
basket. Water will cause the hot shortening to spatter. You could be
burned.
Do Not Overload the Basket With Food
Hot shortening and steam may escape and burn you if you place too much
food in the basket.
7
Page 9
Gas Pressure Fryer Introduction
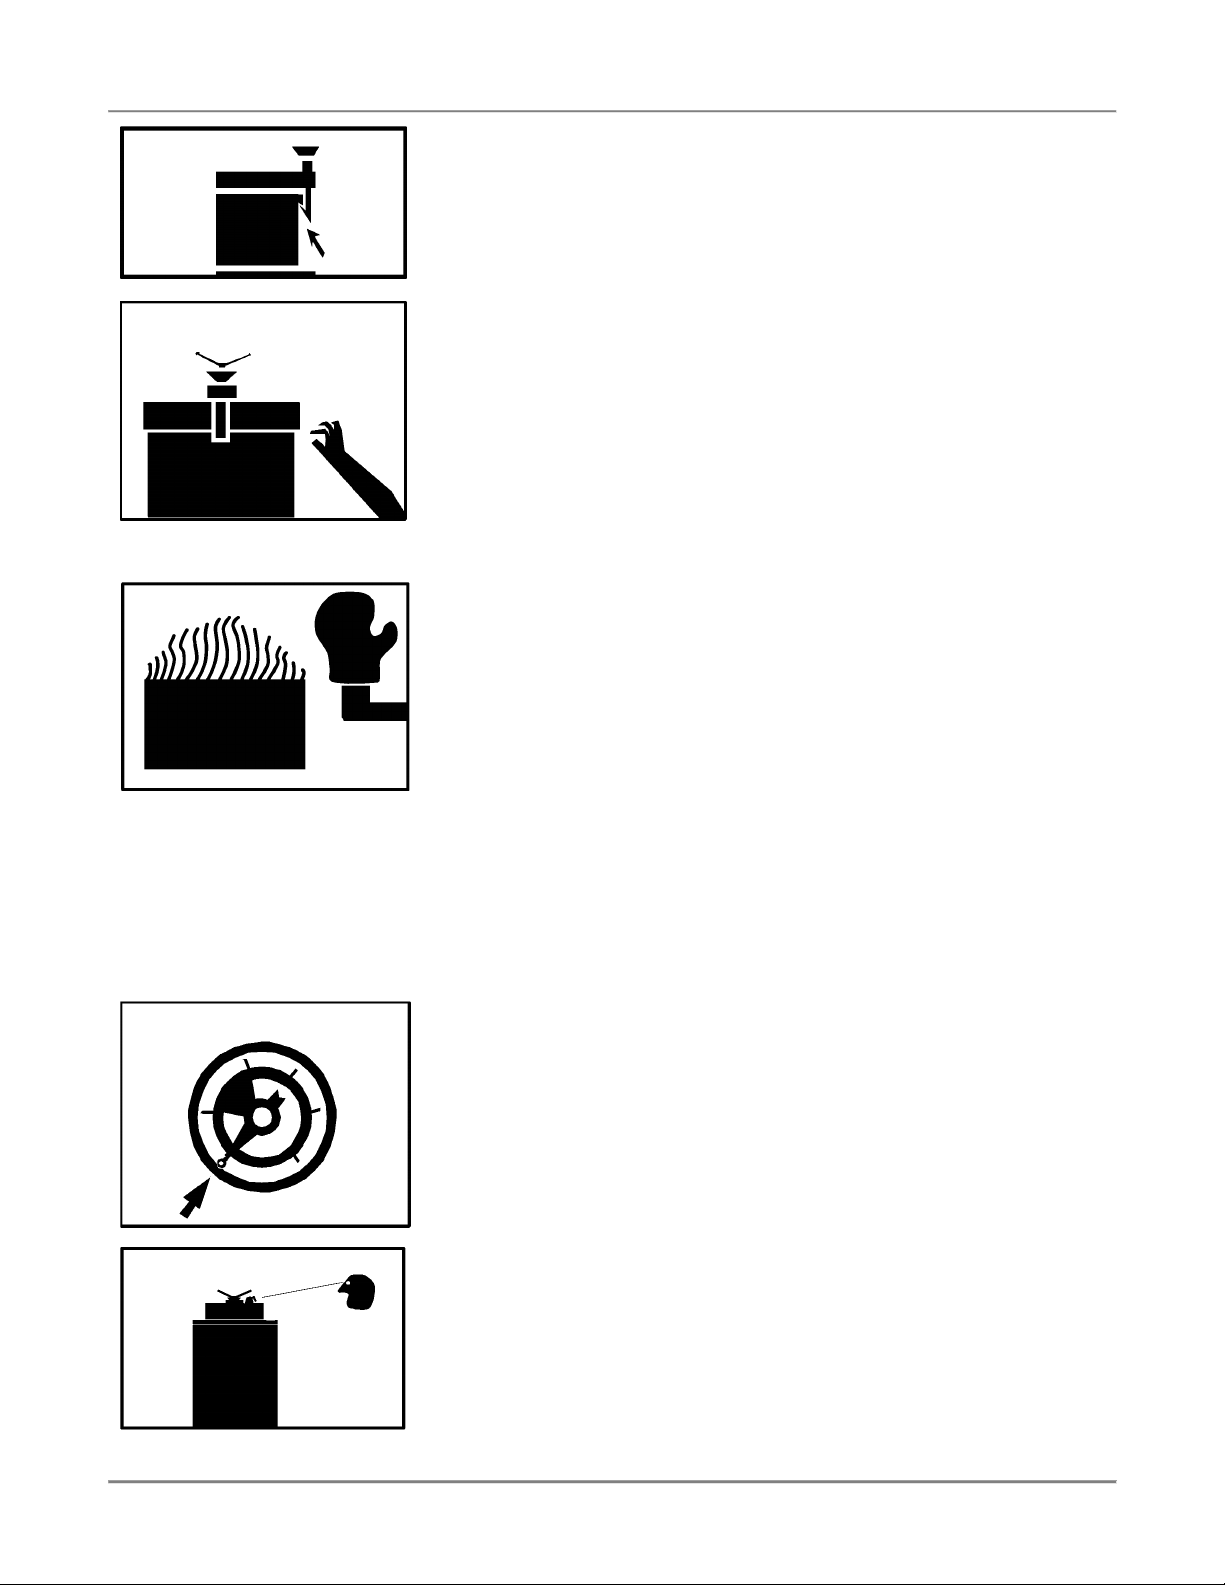
Always Make Sure the Lid Hook Is Latched When
Closing The Fryer
To make sure the lid hook is latched properly, press down the lid until the
hook snaps shut. Hot shortening and steam can escape if the lid hook is
not latched properly. You could be burned.
Always Tighten the Spin Handle When Closing
The Fryer
Hot shortening and steam can escape if you do not tighten the spin handle
properly. You could be burned. Line up the orange knobs on the fryer lid
handle and the front hook when tightening.
Do Not Over-Tighten the Spin Handle
You could damage the fryer.
Wear Safe Clothing Appropriate To Your Job
Always wear your insulated mitts when handling the fryer basket or touch
any hot metal surfaces. You received a pair of insulated mitts with your
fryer. If you lose or damage your mitts, you can buy new ones at your local
restaurant equipment supply store or from your local BKI Distributor.
Always wear non-skid shoes when working around the fryer or any other
equipment that uses shortening. Never wear loose clothing such as
neckties or scarves while operating your fryer. Keep loose hair tied back or
in a hair net while operating your fryer.
Always wear appropriate personal protection equipment during the filtering
process to guard against possible injury from hot oil.
Always wear appropriate personal protection equipment during the boil-out
process to guard against possible injury from hot cleaning solution.
Never Loosen the Spin Handle Until The Pressure
Gauge Is At Zero
Steam may escape suddenly if you loosen the spin handle before the
gauge is at zero. If steam escapes suddenly, you could be burned.
After the pressure gauge is at zero, wait 5 seconds. Then loosen the spin
handle slowly to open the lid of the fryer. By doing this, the steam will
escape slowly and you will not be burned.
Seal the Safety Valve Properly
To seal the safety valve, lift the arm on the side of the valve. Then release
it. The valve should snap closed. Hot steam can escape from the valve
and you could be burned if you do not seal the valve properly.
8
Page 10
Gas Pressure Fryer Introduction
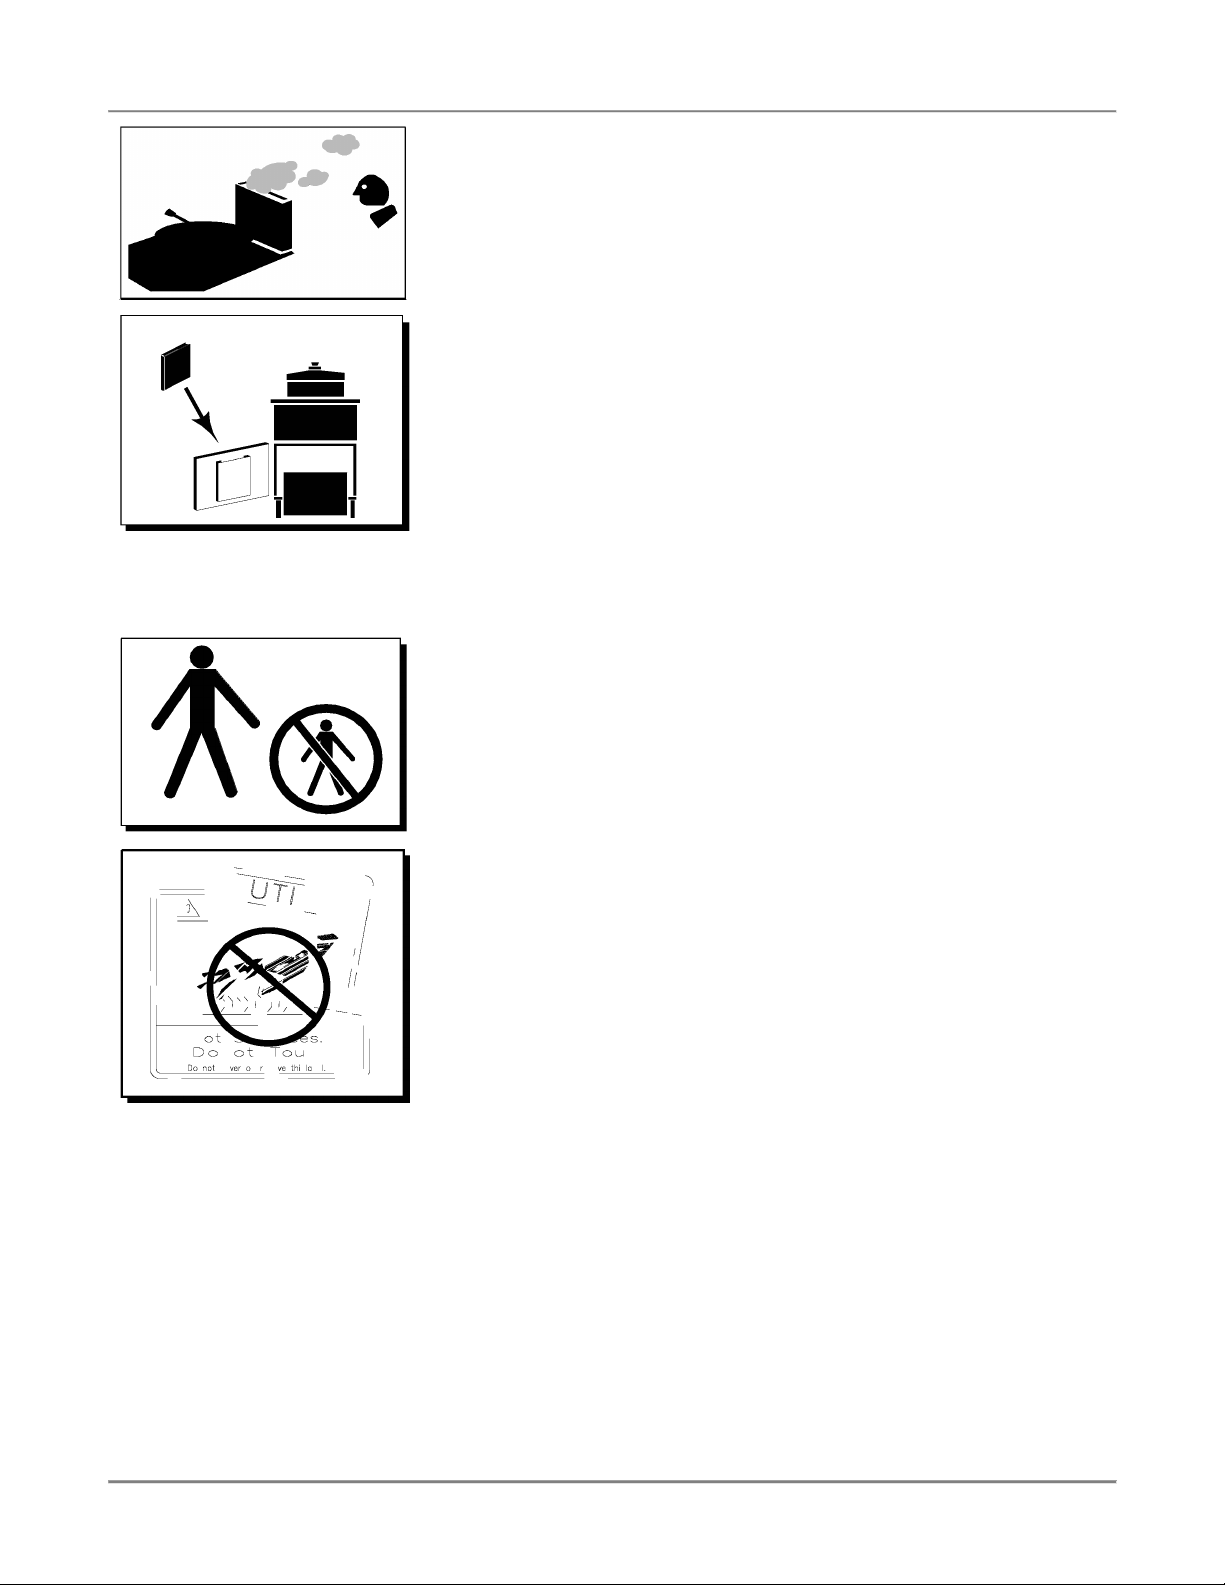
Keep Away From the Vent
Hot steam escapes from the vent continuously when you are using your
fryer. You could be burned if you get too close to the vent.
Keep this manual with the Equipment
This manual is an important part of your equipment. Always keep it near
for easy access.
If you need to replace this manual, contact:
BKI
Technical Services Department
2812 Grandview Drive
Simpsonville, S.C. 29680
Or call toll free: 1-800-927-6887
Outside the U.S., call 864-963-3471
Protect Children
Keep children away from this equipment. Children may not understand that
this equipment is dangerous for them and others.
NEVER allow children to play near or operate your equipment.
Keep Safety Labels Clean and in Good Condition
Do not remove or cover any safety labels on your equipment. Keep all
safety labels clean and in good condition. Replace any damaged or
missing safety labels. Refer to the Safety Labels section for illustration and
location of safety labels on this unit.
If you need a new safety label, obtain the number of the specific label
illustrated on page 11, then contact:
BKI
Technical Services Department
2812 Grandview Drive
Simpsonville, S.C. 29680
Or call toll free: 1-800-927-6887
Outside the U.S., call 864-963-3471
9
Page 11
Gas Pressure Fryer Introduction
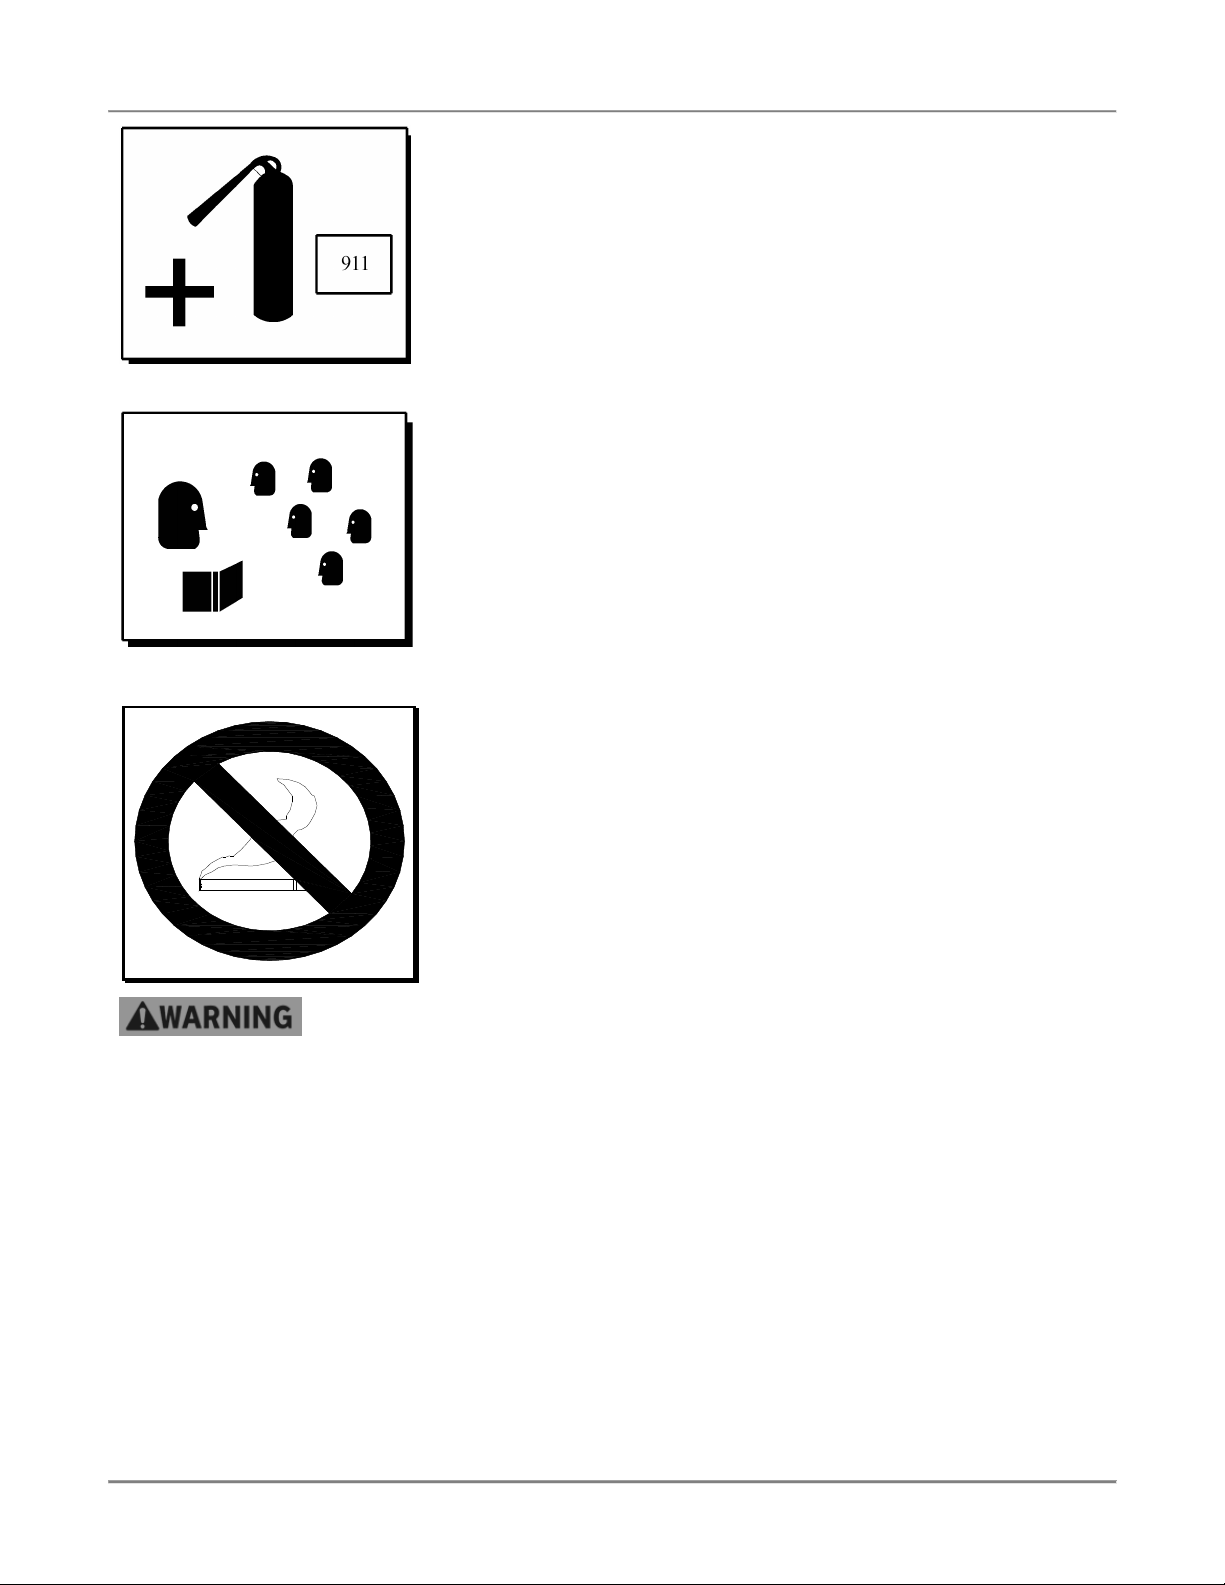
Be Prepared for Emergencies
Be prepared for fires, injuries, or other emergencies.
Keep a first aid kit and a fire extinguisher near the equipment. You must
use a 40-pound Type BC fire extinguisher and keep it within 25 feet of your
equipment.
Keep emergency numbers for doctors, ambulance services, hospitals, and
the fire department near your telephone.
Know your responsibilities as an Employer
• Make certain your employees know how to operate the equipment.
• Make certain your employees are aware of the safety precautions on
the equipment and in this manual.
• Make certain that you have thoroughly trained your employees about
operating the equipment safely.
• Make certain the equipment is in proper working condition. If you make
unauthorized modifications to the equipment, you will reduce the
function and safety of the equipment.
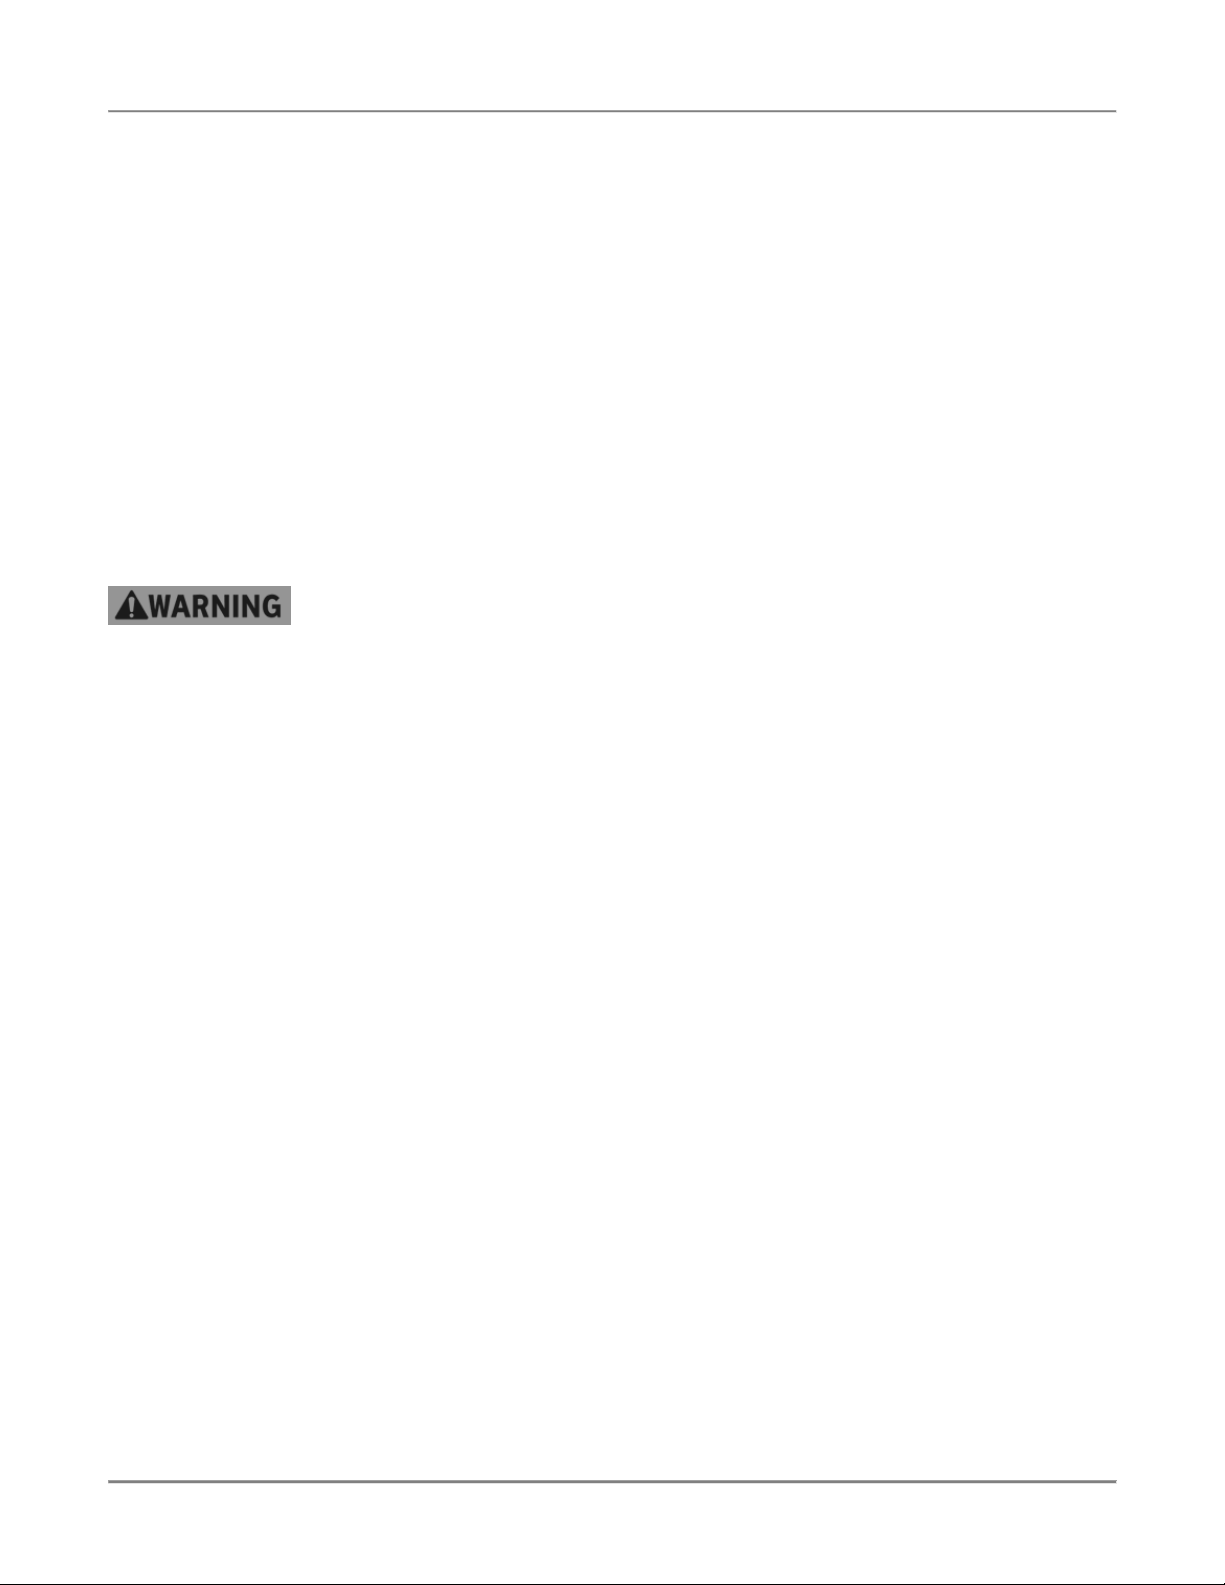
Do Not Smoke Near The Fryer.
Electrical Grounding Instructions:
This appliance is equipped with a three-prong (grounding) plug for your
protection against shock hazard and should be plugged directly into a
properly grounded three-prong receptacle. Do not cut or remove the
grounding prong from this plug.
10
Page 12
Gas Pressure Fryer Introduction
Safety Labels
11
Page 13
Gas Pressure Fryer Installation
Installation
Inspection for Shipping Damage
It is the owners’ responsibility to file all freight claims with the delivering truck line. Inspect all cartons and crates
for damage as soon as they arrive. If damage to cartons or crates is found, or if a shortage is found, note this on
the bill of lading (all copies) prior to signing.
If damage is found when the equipment is opened, immediately call the delivering truck line and follow up the call
with a written report indicating concealed damage to your shipment. Ask for an immediate inspection of your
concealed damage item. Packaging material MUST be retained to show the inspector from the truck line.
Preparation
There are several things the installer must know before installing the fryer. These are listed below:
• The fryer installation must conform with city or county standards for gas appliances and gas piping. If your
area does not have local codes, consult the National Fuel Gas Code, ANSI Z223.1/NFPA 54, or the
Natural Gas and Propane Installation Code, CSA B149.1. In Europe, city and country codes are enforced.
Do not attempt to test the gas pressure of your fryer. Pressure testing should be done
only by an authorized Service Agent.
• During any pressure testing of the gas supply system, the fryer must be protected. The fryer and its
individual shutoff valve must be disconnected from the gas supply piping system during any pressure
testing of that system at test pressures in excess of ½ psi (3.5 kPa). The fryer must be isolated from the
gas supply piping system by closing its individual manual shutoff valve during any pressure testing of the
gas supply piping system at test pressures equal to or less than ½ psi (3.5 kPa).
• The fryer must be electrically grounded to conform with the local code of your city or county. If your area
does not have local codes, consult the latest version of the National Electrical Code ANSI/NFPA 70, or
the Canadian Electrical Code, CSA C22.2. In EUROPE, city and country codes are enforced.
• A schematic diagram of the unit is glued to the back of either the left or right side panel.
• The Authorized Service Agent that installs your fryer must connect the cord set at the rear of the fryer to
an electrical source with a voltage matching that stamped on the name and rating tag. Refer to the wiring
diagrams in this manual.
• Make sure a connector is used that complies with the Standard for Connectors for Movable Gas
Appliances, ANSI Z21.69 • CSA 6.16.
• Make sure a quick-disconnect device is used that complies with the Standard for Quick-Disconnect
Devices for Use With Gas Fuel, ANSI Z21.41 • CSA 6.9.
• In Europe, the installer must supply the gas supply connector.
• Make sure a restraining device is used that complies with the Standard for Commercial Gas Ranges,
ANSI Z83.11/CGA 1.8 (such as BKI part number FT0279) to guard against transmission of strain to the
connector.
• Retain the manual for future reference.
Location and Clearance
Install your fryer in a well-ventilated area. This will ensure that the gas burns properly and will help prevent any
fires. When deciding on a location for your fryer, remember the following:
12
Page 14
Gas Pressure Fryer Installation
• All gas-burning appliances need enough fresh air for combustion.
• Locate the fryer where it can be vented into an adequate exhaust hood. Your local gas utility must
approve your ventilation system. Consult a ventilation or heating company to help you design an
adequate system that meets ventilation codes and standards for your city or county. In Europe, install
according to local codes.
• Keep the fryer away from any combustibles such as curtains, wood paneling, boxes, or towels. The flue
riser at the rear of the fryer should also be kept away from any flammable material.
• Use this fryer on non-combustible flooring only. Examples of non-combustible floors where you can safely
locate your fryer are concrete, tile, and ceramic. Minimum clearance from combustible and noncombustible construction is 0 inches from the sides and 6 inches from the flue riser at the rear. DO NOT
locate your fryer on floors that are wood, have rubber mats, or, are carpeted. In Europe, no less than 6"
(15.24 cm.) from the rear and 0" to the sides of non-combustible walls.
• Keep the work area around the fryer free of objects that might block fresh air or that might cause a fire.
• Do not attach an extension to the exhaust stack. This may stop the burner from operating properly, cause
the burner to go off, or, cause other dangerous malfunctions. It may also cause a strong draft in the room.
A draft can interfere with the burner.
• Do not locate the fryer near strong drafts. Keep the fryer away from doors that are opened and closed
frequently.
Installation Procedure
Ensure that an authorized BKI service agent installs the fryer. An authorized BKI service
agent should be a qualified gas service technician and a licensed electrician.
1. Remove the shipping packing clip from underneath the dead weight cap.
2. Replace the dead weight and cover.
Failure to restrain the fryer could allow it to move, causing hot shortening to spill out, or a
possible break in the gas line causing an explosive condition.
13
Page 15
Gas Pressure Fryer Installation
3. Install an ANSI Z83.11/CGA 1.8 compliant restraining device (such as BKI part number FT0279) per the
instructions below:
• Mount the wall attachment according the restraining device manufacturer instructions.
• Attach the spring-loaded hook on the restraining device to the eye-bolt mounted to the fryer then
attach the other spring-loaded hook to the wall attachment.
Use appliance connectors and quick-disconnect devices that are in compliance with the
applicable ANSI and CSA standards.
4. Attach an appliance connector to the fryer according to the instructions provided by the appliance
connector manufacturer.
5. Connect the gas supply to the fryer. In Europe, the gas supplier must provide the gas hookup connecting
line.
6. Lock the casters so the fryer does not move. Every time you use the fryer, make sure the casters are
locked so the fryer cannot move. (In Canada: refer to caster codes CAN 1-6.10 M88 and CAN 1-6.9
M79.)
7. Check for gas leaks from the gas supply to the fryer gas valve using a soap and water solution. If a leak is
detected, tighten the connection where the leak occurs.
8. Connect fryer wiring according to the appropriate wiring diagram in this manual.
9. Apply power to the fryer.
10. Perform the following procedures provided in the Startup and Checkout section of the
SV9401/SV9402/SV9403, SV9501/SV9502/SV9503, SV9601/SV9602 SmartValve™ SYSTEM
CONTROLS Installation Instructions (69-1004-2). Refer to Appendix A.
• Gas Leak Test
• Check and Adjust Pilot Flame
• Check and Adjust Gas Input Burner Ignition
Initial Test and Adjustment
1. Cut on the gas at the gas supply valve.
2. Place the DRAIN handle in the CLOSED position.
3. Fill pot with shortening to about one inch below the mark.
Risk of fire exists if the oil level drops below the minimum oil level. The level of oil
within the pot must not fall below 5mm of the maximum oil level.
Use of oil/shortening older than the manufacturers recommendations for life of
the oil is prone to surge boiling and flash fires. Follow the oil manufacturers
guidelines for lifecycle of oil/shortening.
Overfilling the fryer pot with shortening could lead to serious injury. Ensure that
the fryer pot is filled with shortening only to the fill mark when shortening is hot.
Do not use any shortening other than what is specified in this manual and do not
overfill the fryer pot.
14
Page 16

Gas Pressure Fryer Installation
The fryer has a maximum temperature setting of 375º F/190º C (for FKG and
FKG -F) or 390º F/200º C (for FKG -FC). Do not use oil/shortening with a
flashpoint less than 554º F (290º C)
Use only high-quality shortening that has low moisture content, a high smoke
point and no additives.
4. Place the gas control ON/OFF switch in the OFF position.
5. Place the FILTER/OFF/FRY switch in the OFF position.
6. Before you turn on the gas, wait at least five minutes to allow any gas that may have accumulated in the
burner compartment to escape.
7. Place the gas control ON/OFF switch in the ON position.
8. Place the FILTER/OFF/FRY switch to the FRY position. The shortening should begin to heat and begin to
reach the fill mark inside the pot. Add more shortening as required to reach the fill mark.
Gas Conversion Instructions
To convert the gas system from a Natural Gas to LP Gas application or vice versa, contact the BKI Technical
Service Department, toll free: 1-800-927-6887. Outside the U.S., call 1-864-963-3471.
15
Page 17

Gas Pressure Fryer Operation
Operation
Controls and Indicators
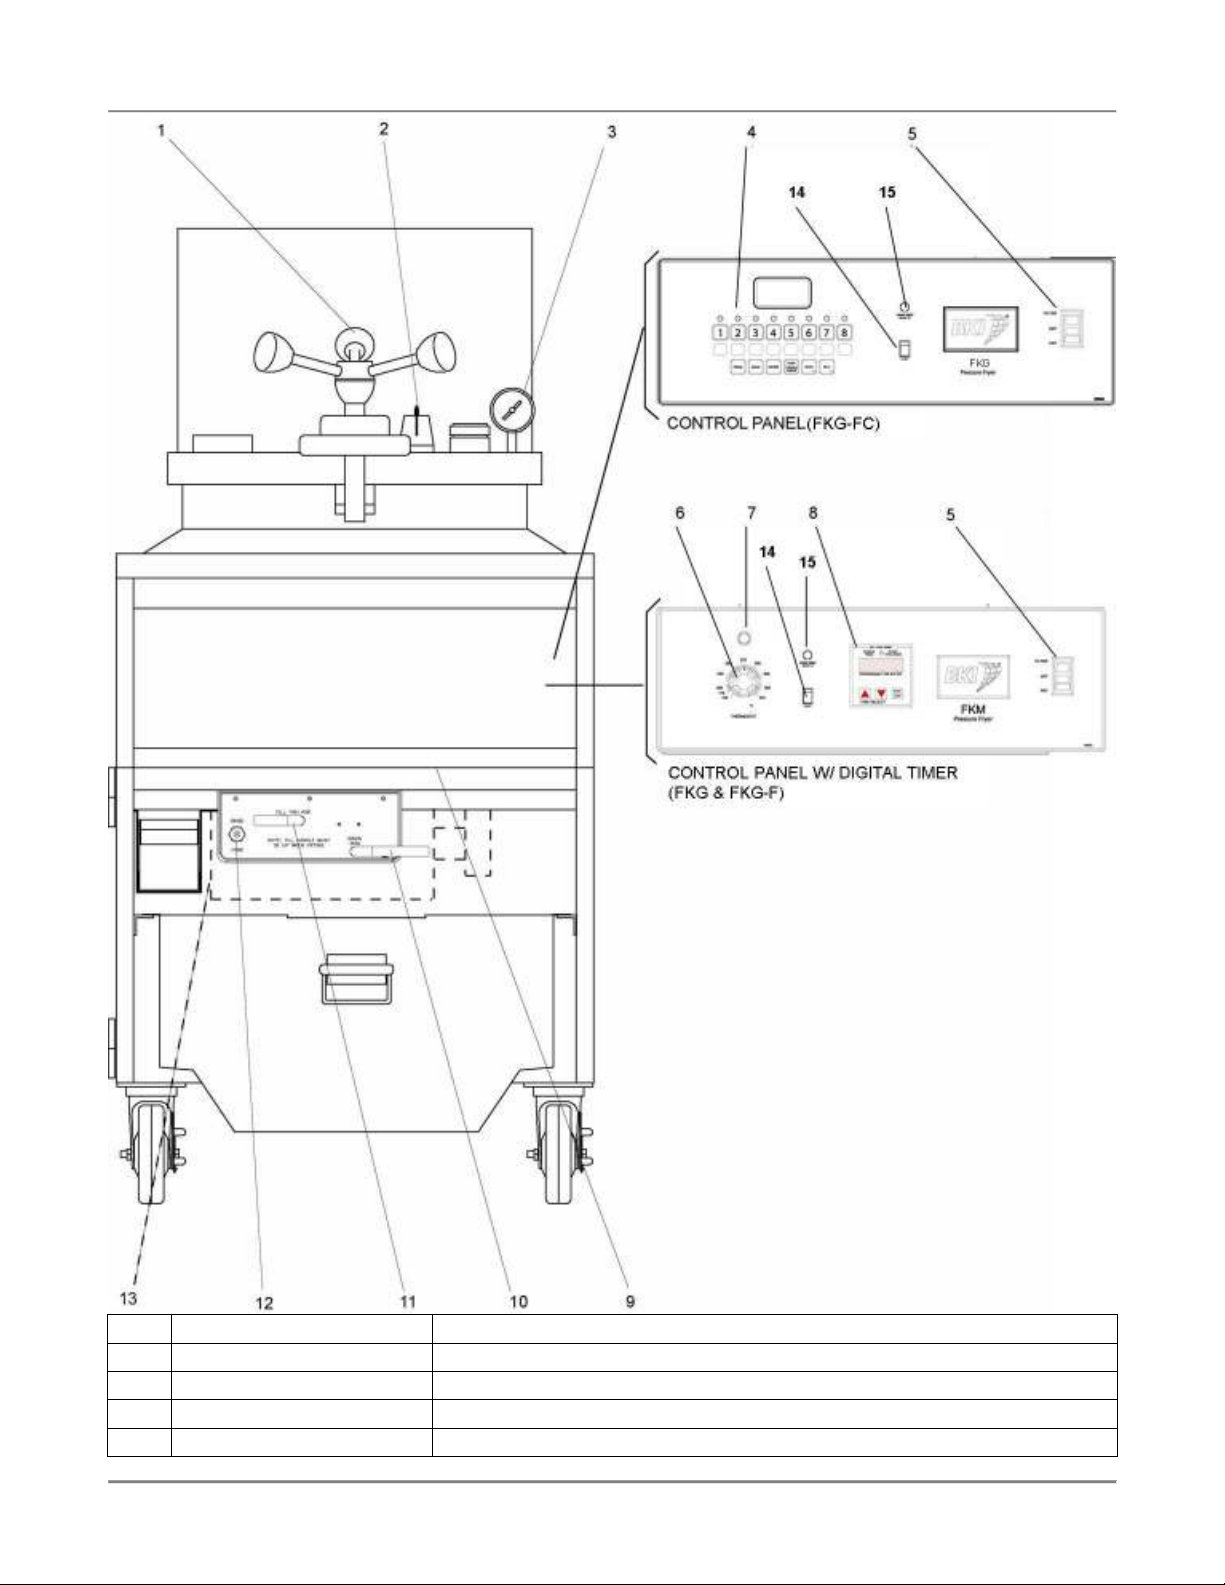
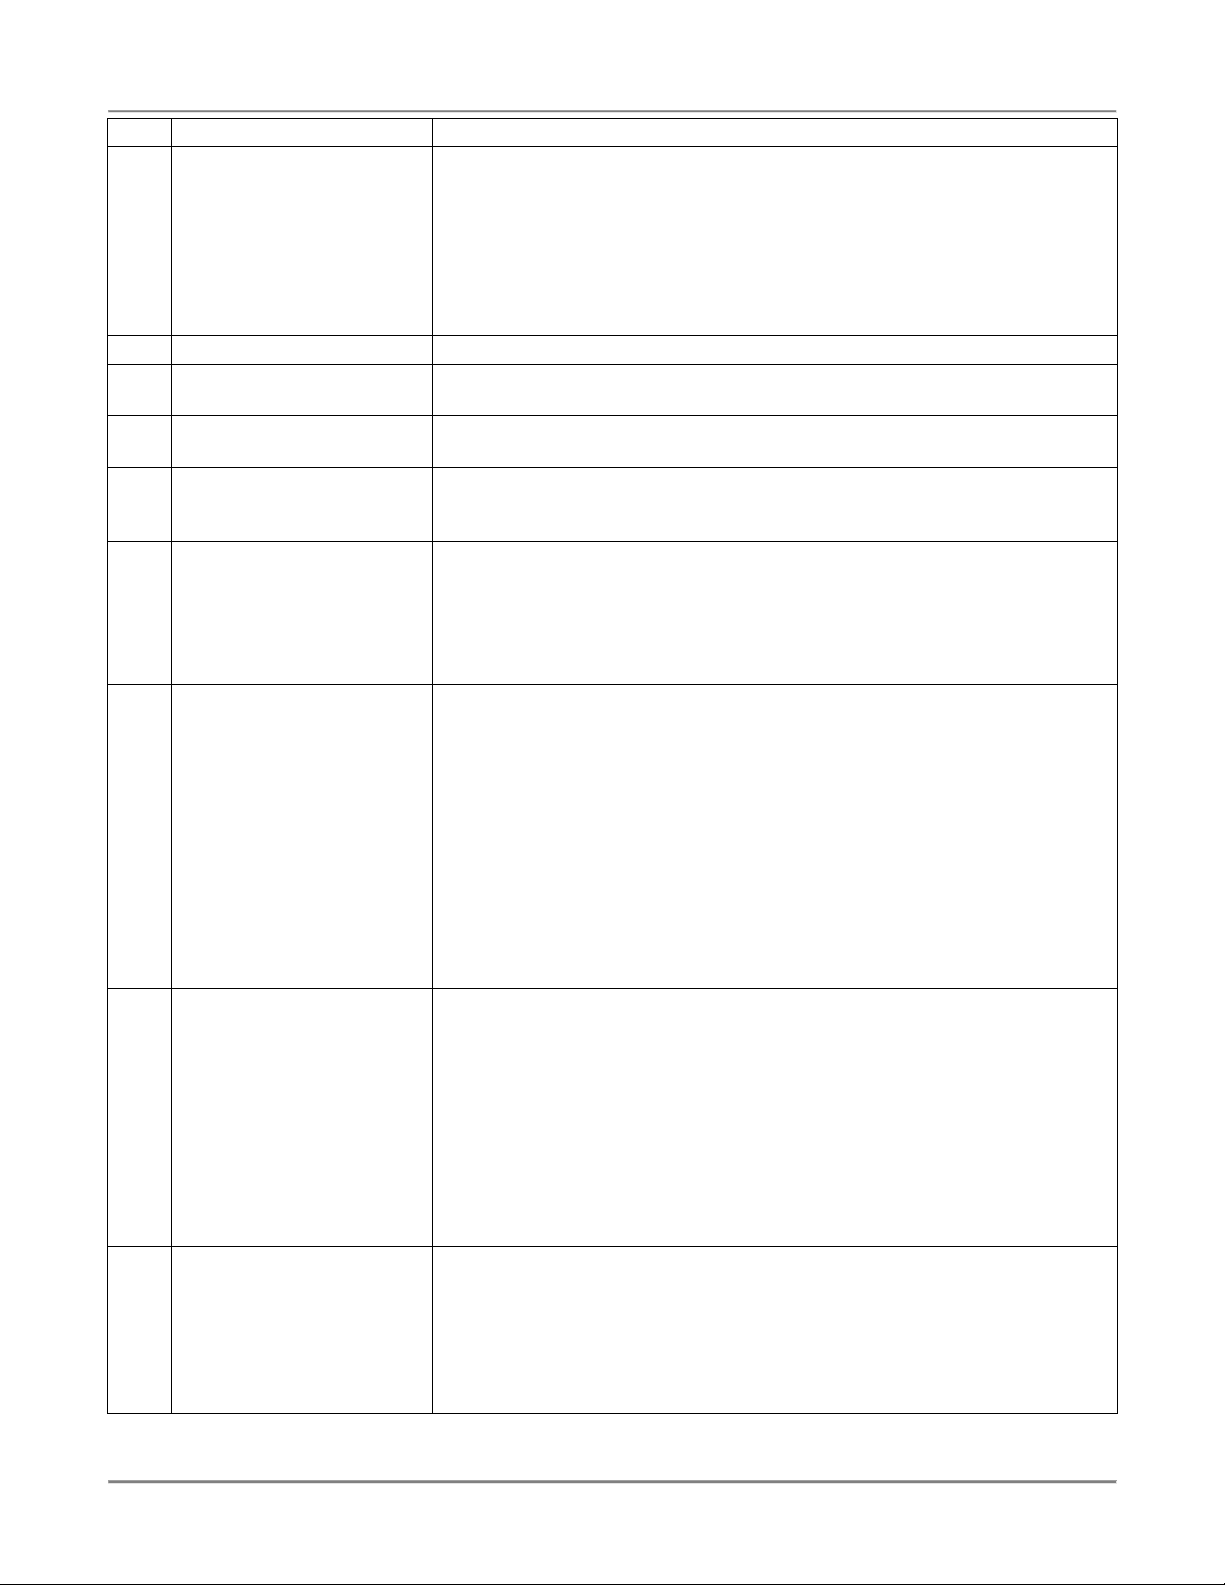
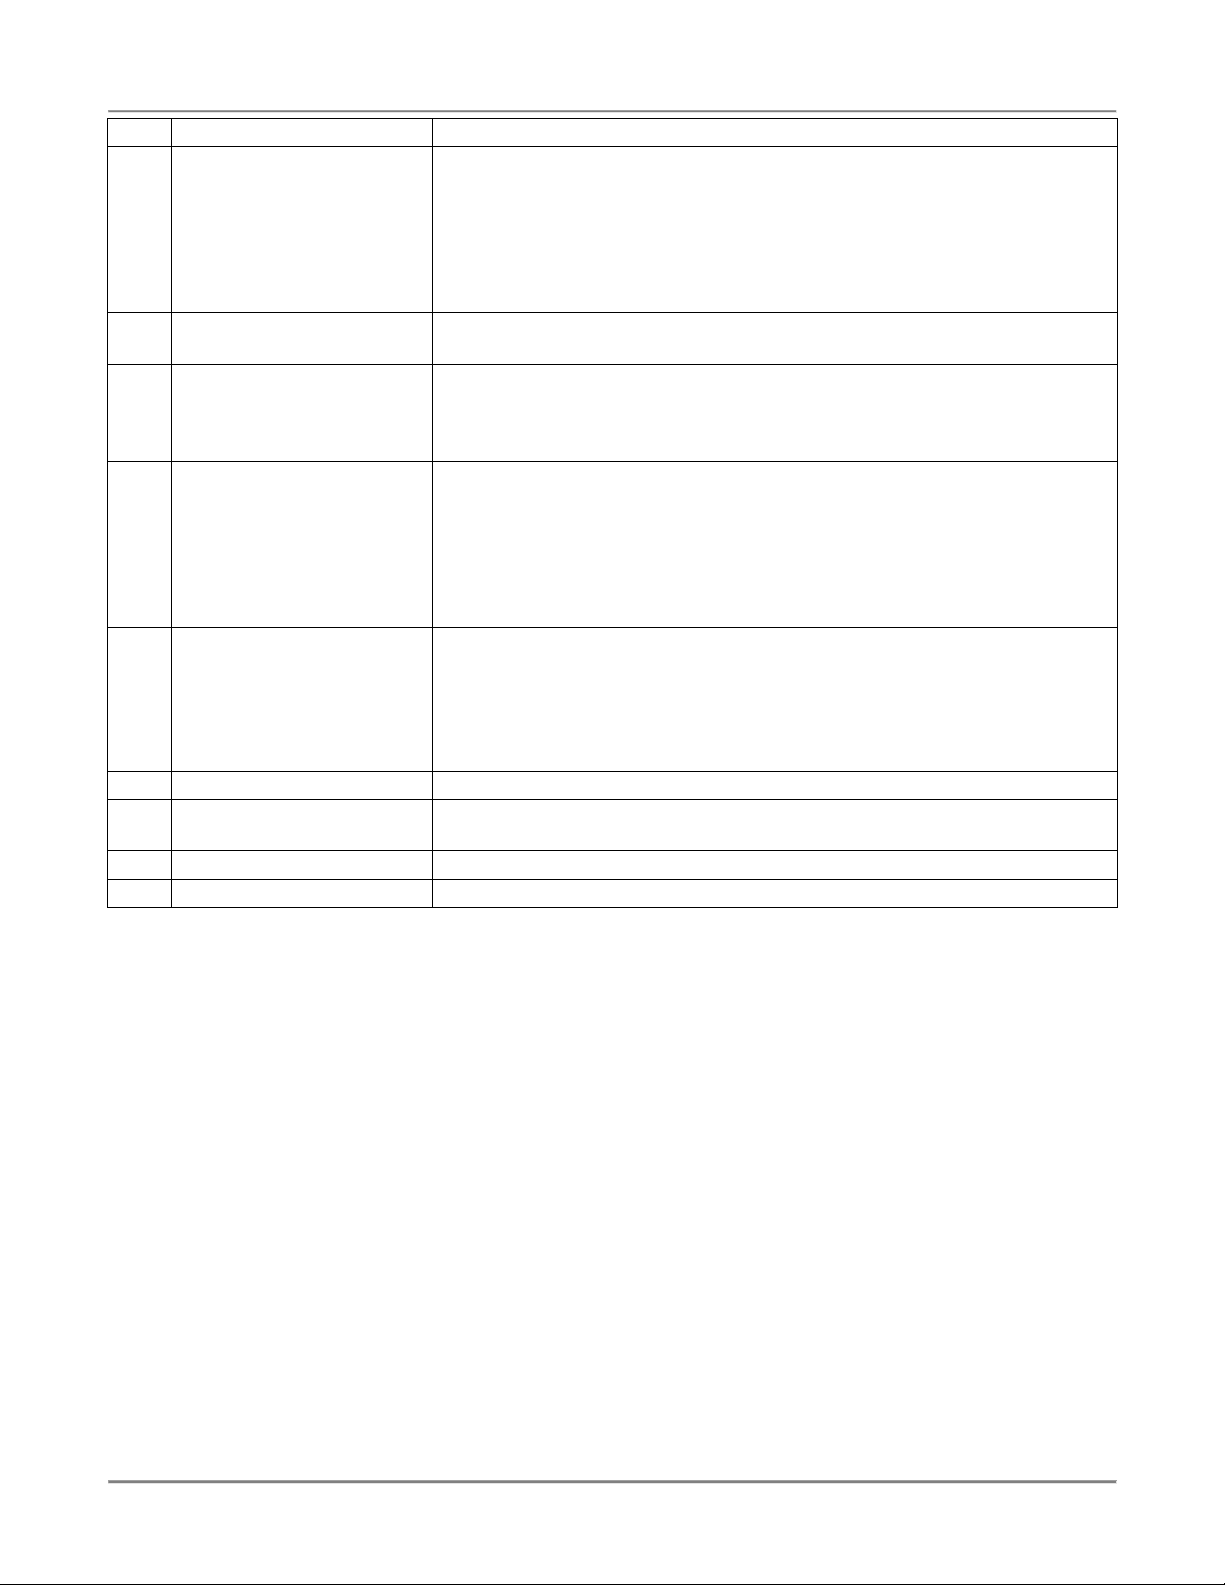
Refer to the figure and table below for an explanation of the fryer’s controls and indicators.
16
Page 18
Gas Pressure Fryer Operation
Item Description Function
1 Spin Handle Used to tighten the lid to the pot once it is latched.
2 Pop Safety Valve lever Used to release pressure periodically to prevent the seat from sticking.
3 Pressure Gauge Indicates the pressure inside the pot.
4 Computer Used to set and activate product programs.
17
Page 19
Gas Pressure Fryer Operation
Item Description Function
5 Rocker Switch FILTER – When placed in this position, power is applied to the motor and
shorting is pumped into the pot directly or thru the fill hose.
OFF – When placed in this position, power is removed from both the pump
motor and gas system.
FRY – When placed in this position, power is supplied to the thermostat
and gas system.
6 Thermostat Knob Used to set the temperature of the shortening.
7 Thermostat Light Illuminates when the thermostat calls for heat. Extinguishes when the
shortening temperature is reached.
8 Digital Timer The digital timer consists of an LED, display, beeper and 8 buttons
described below:
LED indicator Prior to the start of a timing cycle the LED will be OFF. When running a
timing cycle the LED will flash. At the end of a timing cycle the LED will
turn ON steady. When idle the LED is off.
TIME SELECT (2
arrow buttons)
START/STOP button
ALARM button This button allows the user to set an elapsed time at which the internal
A, B, C, D preset
buttons
Two arrow buttons on the front panel are used to set the time. Hold the UP
ARROW button down to increase the time. The longer the button is held
down, the faster the rate at which the time will increase. The DOWN
ARROW button is used in the same manner as the UP ARROW button
except it will cause the time to decrease. The time is increased or
decreased in 30-second increments.
Starting the Timer - Pressing this button while the timer is not active will
cause the timer to begin counting down the time on the display.
Stopping the Timer - Pressing this button while the timer is active will
stop the timer from counting down and display the remaining time. Time
cannot be changed with the TIME SELECT buttons at this point. If this
button is pressed again the timer will continue counting down from the
point it was stopped.
Resetting the Timer - Pressing and holding this button for longer than two
(2) seconds will reset the timer and the display will return to the original
starting time. At this point, time can be changed using the TIME SELECT
buttons or the preset buttons.
Canceling The STIR OIL Function - Pressing this button cancels the
STIR OIL function while it is active.
alarm will sound during a cycle. The time is set by pressing and holding
the ALARM button while using the UP and DOWN arrows to change the
time. The controller will limit the alarm time to be less than the currently
programmed interval cycle time. The default alarm time is 0:00 which
disables it. The ALARM time is saved on power down in the same manner
as the last interval time. When a time cycle is running and the alarm time
has elapsed the internal alarm will sound for 10 seconds. For example, a
cycle time 10:00 and alarm time of 2:00 would cause the alarm to sound
for 10 seconds once the controller has counted down from 10:00 to 8:00.
This button is also used to cancel the STIR OIL function.
These buttons are used to save and recall preset cycle and alarm times,
saving operator time and minimizing error when changing interval cycle
times and alarm times. To save the current interval and alarm times into
one of the preset locations, press and hold the A, B, C, or D preset button
for 2 seconds and the controller will double chirp to indicate the times have
been saved. To recall any preset time, press and quickly release the
appropriate button and the time values are loaded and displayed.
18
Page 20
Gas Pressure Fryer Operation
Item Description Function
8 Beeper A beeper sounds when the timer counts down to 0. Pressing the
START/STOP button stops the beeper and resets the timer causing the
display to return to the original starting time. At this point, time can be
changed using the TIME SELECT buttons or the preset buttons. The
beeper will also sound for 10 seconds if the alarm time has elapsed during
a timing cycle. When the STIR OIL function begins the beeper will sound
until the ALARM or START/STOP button is pressed.
Display Used to display the time. It also displays the words “STIR” then “OIL” in .5
second intervals until the ALARM or START/STOP button is pressed.
9 High Limit Reset Switch If shortening inside the pot reaches an unsafe temperature, power is
automatically removed from the control panel and the gas system shuts
off. Pressing this switch returns power to the control panel and resets the
gas system.
10 Drain Lever DRAIN OPEN – When placed in this position, the drain valve opens and
shortening drains into the vat. Also power is removed from the control
panel and gas system.
DRAIN CLOSED – When placed in this position, the drain valve is closed
to prevent shortening from draining into the pot. Also power is restored to
the control panel and gas system.
11 Fill Lever FILL THRU POT – When placed in this position, shortening will be pumped
from the vat to the pot if the rocker switch is in the FILTER position.
FILL THRU HOSE – When placed in this position, shortening will be
pumped from the vat to the pot via a fill hose if the rocker switch is in the
FILTER position.
12 Rinse Hose Connector Used to connect the Rinse hose for cleaning and refilling the pot.
13 Pump Motor Reset Switch If the motor overheats while filtering, it will automatically shut off. Wait 15
minutes to allow motor to cool before pressing this switch.
14 Reset Switch Used to reset the Ignition Module when it locks out during ignition.
15 Ignition Lock-out Light Illuminates when the Ignition Module locks out during ignition.
19
Page 21

Gas Pressure Fryer Operation
Care of the Shortening
Solid shortening should always be returned to the filter vat while in the liquid state. If this is not done, it will have
to be heated to a liquid state. When using solid shortening, the fryer must be equipped with a pump heater. After
filtering with solid shortening, the filter lines must be completely emptied of shortening. The pump heater will take
care of any residual shortening in the pump, but cannot melt all of the shortening in the filter lines. The pump
heater accessory may be purchased separately from BKI.
To extend the life of your shortening, for the best possible flavor in your products, and for economy and efficiency
of operation, we urge you to follow these recommendations:
1. Use only high-quality frying shortening without additives, of low moisture content and with a high smoke
point.
2. Press excess moisture from products before breading. The more moisture released in the shortening, the
quicker it will break down.
3. Filter at least once a day or once every three loads during frequent cooking.
4. Clean any residue or crust formations from the sides and bottom of the pot each time you filter the
shortening.
5. Add fresh shortening as needed to maintain the proper shortening level TO THE FILL MARK ON THE
POT WALL.
6. DO NOT HOLD SHORTENING AT HIGH TEMPERATURE when the fryer is not in use. If you expect an
elapsed time of one hour or more between cooking, close the lid and press the “0” button on the FKG-FC
model. On Models FKG and FKG-F, set the thermostat to 150º F.
7. Shortening changes are determined by the quantity and type of food prepared. Excessive boiling and
foaming are definite signs of shortening breakdown.
8. After you have finished frying for the day, filter the shortening and replace the filter pad. Also, thoroughly
clean the pot of sediment and crumbs and empty the condensate pan.
9. IMPORTANT! Before the first cooking operation each day, stir the shortening freely while it is heating to
provide a balanced shortening temperature for excellent results with the first cooking. Failure to do this
can result in a crusty skin on the product surface with an undercooked product internally. In addition, in
some cases, failure to stir the shortening while it is initially heating may cause the HI-LIMIT safety to
disable the power due to a false overshoot condition.
20
Page 22
Gas Pressure Fryer Operation
FKG and FKG-F Operation
Start-Up (FKG and FKG-F)
1. Make sure the main drain valve is closed.
2. Fill pot with shortening to about one inch below the fill mark.
Risk of fire exists if the oil level drops below the minimum oil level. The level of oil
within the pot must not fall below 5mm of the maximum oil level.
Use of oil/shortening older than the manufacturer’s recommendations for life of
the oil is prone to surge boiling and flash fires. Follow the oil manufacturer’s
guidelines for lifecycle of oil/shortening.
Overfilling the fryer pot with shortening could lead to serious injury. Ensure that
the fryer pot is filled with shortening only to the fill mark when shortening is hot.
Do not use any shortening other than what is specified in this manual and do not
overfill the fryer pot.
The FKG/FKG-F fryer has a maximum temperature setting of 375º F (190º C).
Do not use oil/shortening with a flashpoint less than 554º F (290º C)
Use only high-quality shortening that has low moisture content, a high smoke
point and no additives.
3. Place the gas control ON/OFF switch in the ON position.
4. Once the fryer is filled with shortening, place the FILTER/OFF/FRY switch in the FRY position. Unless the
STIR OIL function is operating in the –OFF mode, the digital timer activates a STIR OIL function and
begins an internal six minute countdown (not displayed). At the end of the internal countdown, the display
shows the words “STIR” then “OIL” in .5 second intervals and the alarm sounds. Depress the ALARM
button and stir the shortening freely while it is heating.
IMPORTANT! Before the first cooking operation each day, stir the shortening freely while it is heating to
provide a balanced shortening temperature for excellent results with the first cooking. Failure to do this
can result in a crusty skin on the product surface with an undercooked product internally. In addition, in
some cases, failure to stir the shortening while it is initially heating may cause the HI-LIMIT safety device
to disable the power due to a false overtemperature condition.
5. Set the thermostat to the desired cook temperature. The temperature light will go on. When the
temperature is reached, the light will go off. The light will continue to cycle on and off as the fryer
maintains the set temperature.
6. Press and hold the TIME SELECT arrow buttons on the digital timer until the desired cook time is
displayed or recall a preset time by quickly pressing the appropriate preset button.
7. The shortening will heat and begin to reach the fill mark inside the pot. Add more shortening as required
to reach the fill mark.
21
Page 23
Gas Pressure Fryer Operation
Cooking (FKG and FKG-F)
Do not open the drain valve or the fill valve while the fryer is under pressure.
Serious burns may result.
1. Ensure that the Start-Up procedures have been performed.
2. When frying chicken, connect the basket handle and lower the basket into the shortening in the fryer pot.
Hot shortening may splash out of the pot causing severe injury when dropping chicken
into pot. Carefully drop pieces of chicken into pot to prevent shortening splashes.
3. Carefully drop the chicken in the shortening one piece at a time starting with thighs and drumsticks. The
fryer is designed to accommodate 48-50 pieces of chicken.
Failure to use the insulated mitts will result in severe injury. Always use the insulated
mitts when handling the hot fry basket.
4. Lift the basket approximately 2 to 3 inches (6.35 cm.) above the shortening and shake it. This keeps the
food from sticking together and causing white spots on the cooked food.
Hot shortening may splash out of the pot causing severe injury when lowering basket into
pot. Carefully lower basket into pot to prevent shortening splashes.
5. Slowly lower the fryer basket into fryer pot and remove the detachable handle.
6. Close the lid. Make sure the lid hook latches securely under the catch.
7. Tighten the spin handle until the lid is firmly sealed. Then line up the orange knob on the spin handle with
the orange knob at the front of the fryer.
8. Activate the timer by pressing the START/STOP button on the digital timer. The timer will begin the count
down.
9. At the end of the frying cycle, the digital timer beeper will sound and the fryer will automatically release
pressure into the baffle box. Press the START/STOP button.
10. When the pointer on the pressure gauge is at zero, wait 5 seconds then slowly turn the spin handle
counterclockwise to break the seal around the lid. The fryer has a locking pin that prevents turning the
spin handle until the pressure drops to zero. Do not force the spin handle to open the lid.
11. Slowly open the lid.
Failure to use the insulated mitts will result in injury. Always use the insulated mitts when
handling the hot fry basket.
12. Connect the basket handle then lift the basket and hang it on the front of the fryer pot to drain.
13. Empty the basket.
14. Remember to filter the shortening at least every third frying cycle load. Refer to the procedure in this
manual. Also filter the shortening and clean the fryer at the end of each day. If you do not plan to use the
22
Page 24
Gas Pressure Fryer Operation
fryer for an hour or more, turn the thermostat down to 150° F and close the lid.
15. When you have finished frying for the day, turn the FILTER/OFF/FRY switch to the OFF position.
16. Place the gas control ON/OFF switch in the OFF position.
FKG-FC Operation
System Programming
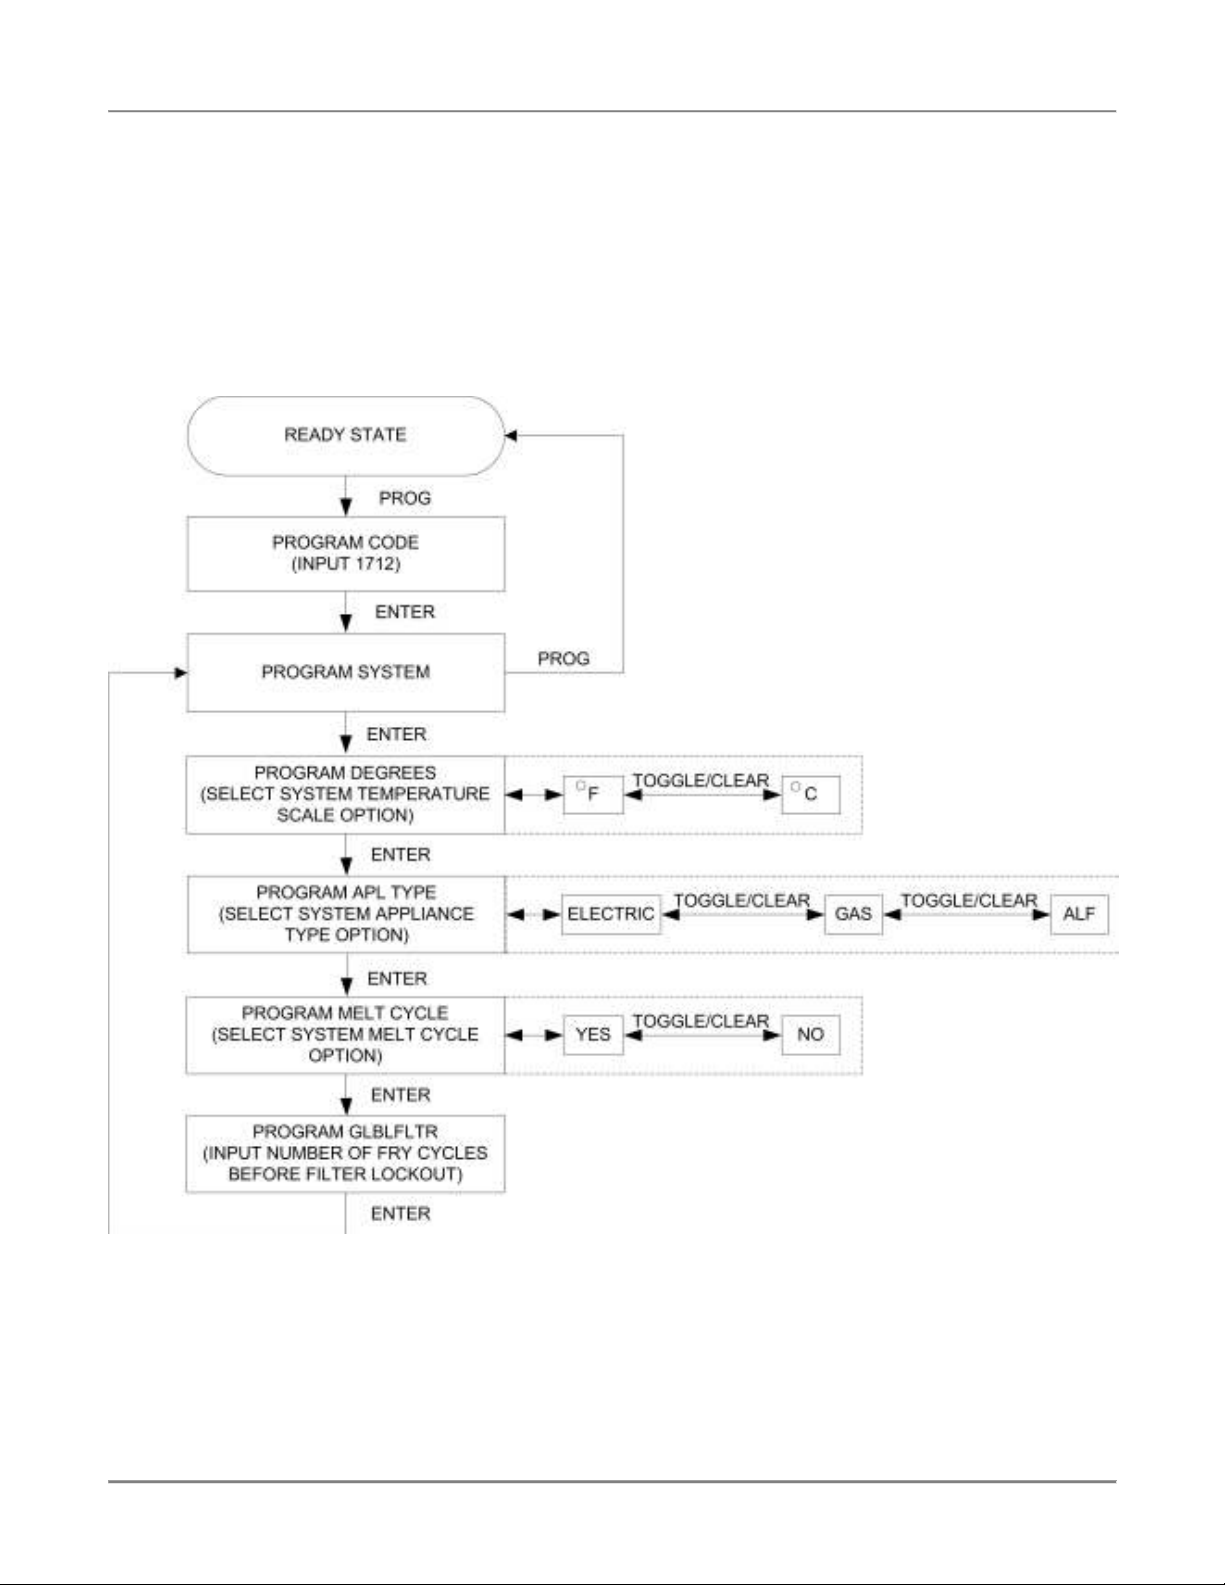
Use the following figure and table to set options that apply to each product programs.
Figure 1. System Programming Sequence
23
Page 25
Gas Pressure Fryer Operation
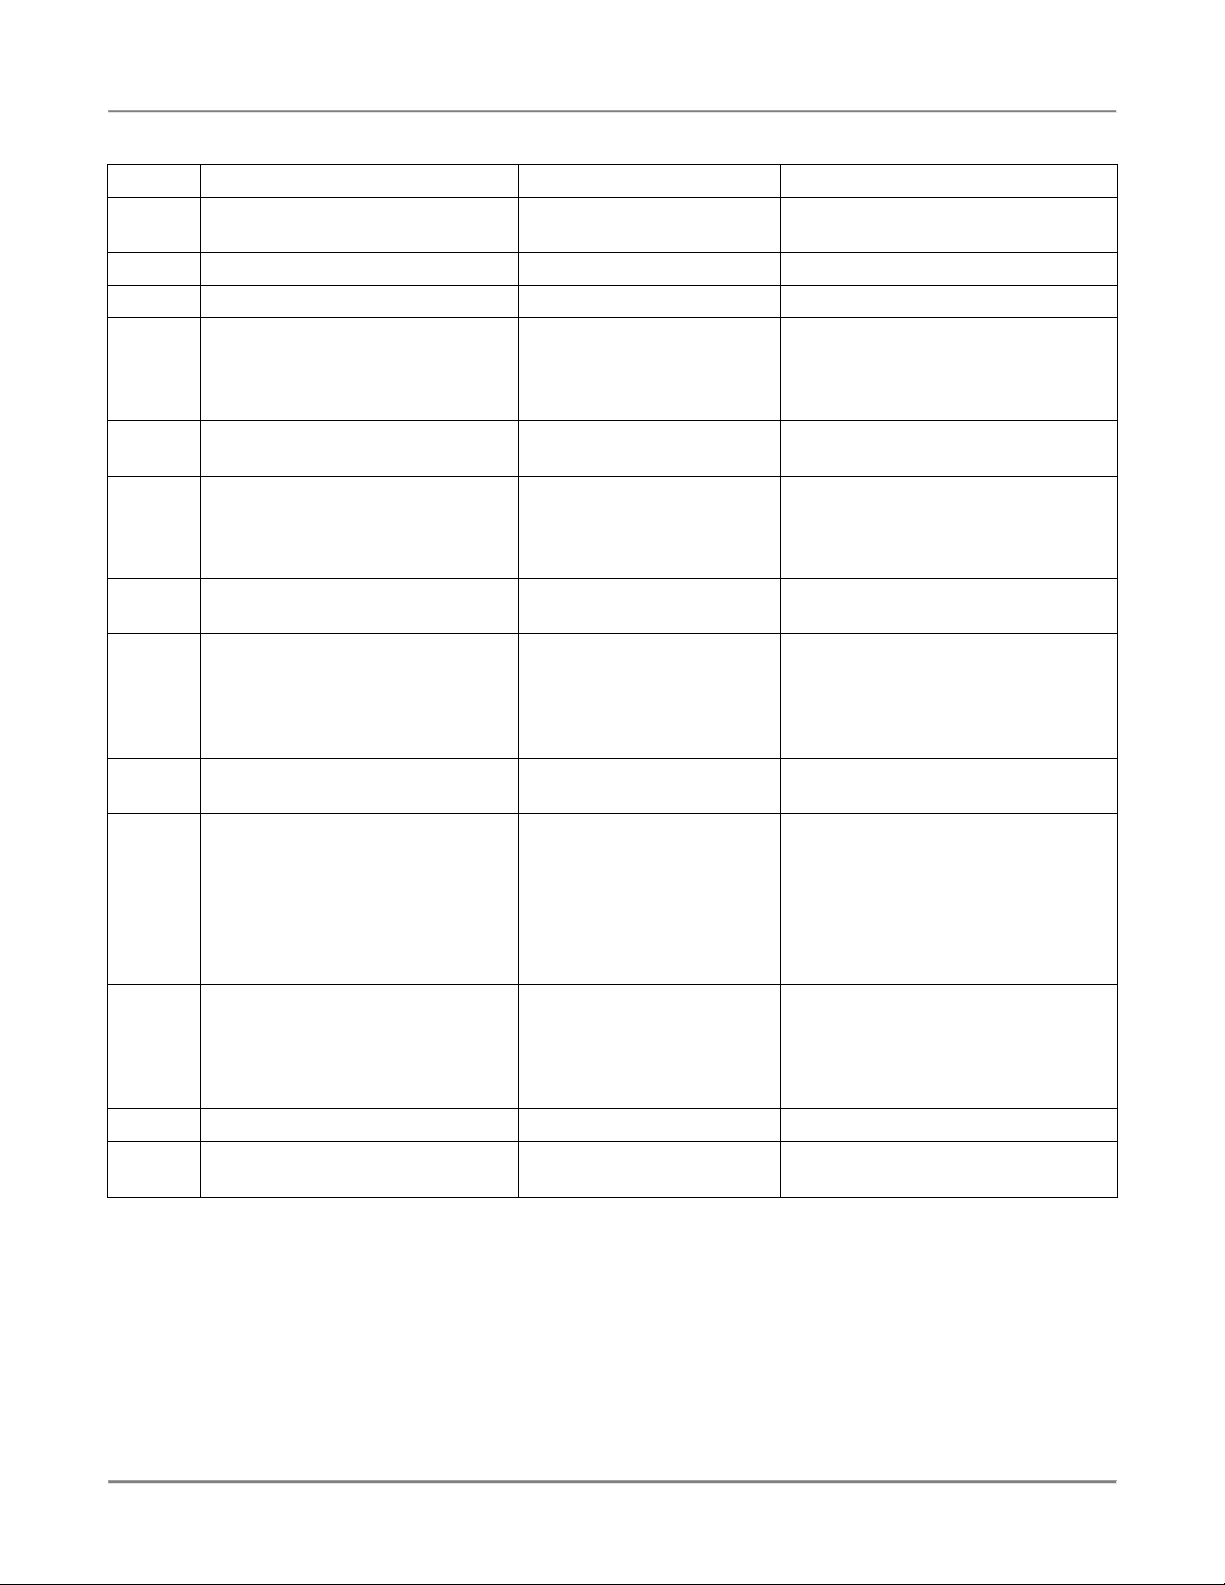
Table 1. System Programming Procedure
STEP ACTION DISPLAY COMMENTS
1
2 Press PROG on the keypad. PROGRAM CODE
3 Input 1712 and ENTER. PROGRAM SYSTEM
4 Press ENTER. PROGRAM DEGREES
5 Press TOGGLE/CLEAR until the
6 Press ENTER. PROGRAM APL TYPE
7 Press TOGGLE/CLEAR until the
8 Press ENTER. PROGRAM MELTCYCL
9 Press TOGGLE/CLEAR until the
10 Press ENTER. PROGRAM GLBLFLTR 0 This command allows you to
11 Press TOGGLE/CLEAR and
12 Press ENTER. PROGRAM SYSTEM
13 Press PROG to exit the
Press the FILTER/OFF/FRY
switch to FRY.
desired option is displayed.
desired option is displayed.
desired option is displayed.
input the number of fry cycles
you want to complete among all
product programs before
enabling filter lockout.
programming mode.
LOW
This command allows you to
choose the temperature scale
°F
option you want to use. The display
will show either show °F or °C.
PROGRAM DEGREES X X refers to the temperature scale
you have chosen.
This command allows you to
GAS
PROGRAM APL TYPE X X refers to the appliance type you
YES
PROGRAM MELTCYCL X X refers to the melt cycle option
PROGRAM GLBLFLTR X X refers to the number of program
LOW
choose the appliance type you are
using. The display may show
ELECTRIC, GAS OR ALF.
have chosen.
This command allows you to set
the melt cycle option. This is
normally set to yes if you are using
solid shortening. The display will
show either YES or NO.
chosen.
specify the total number of fry
cycles to complete among all
product programs before a
message is displayed reminding
you to filter the shortening (filter
lockout).
cycles you want to complete
among all product programs before
filtering the shortening.
24
Page 26
Gas Pressure Fryer Operation
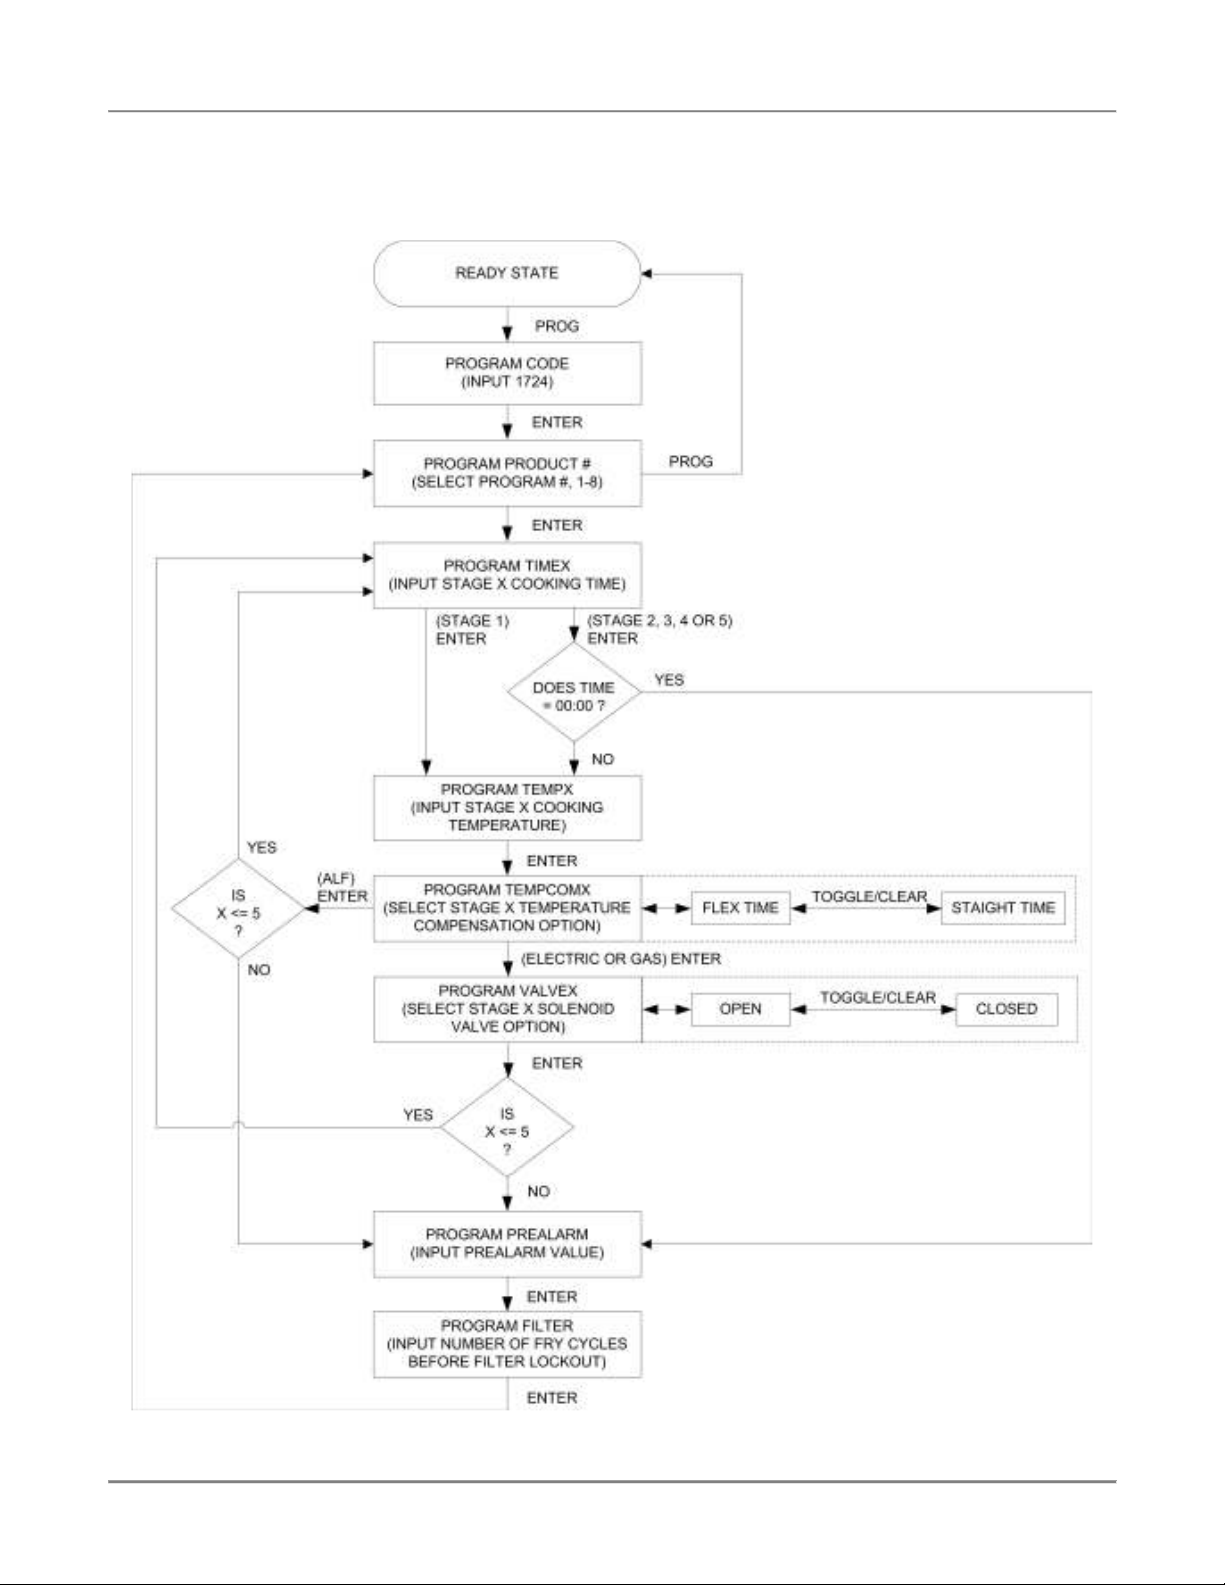
Product Programming
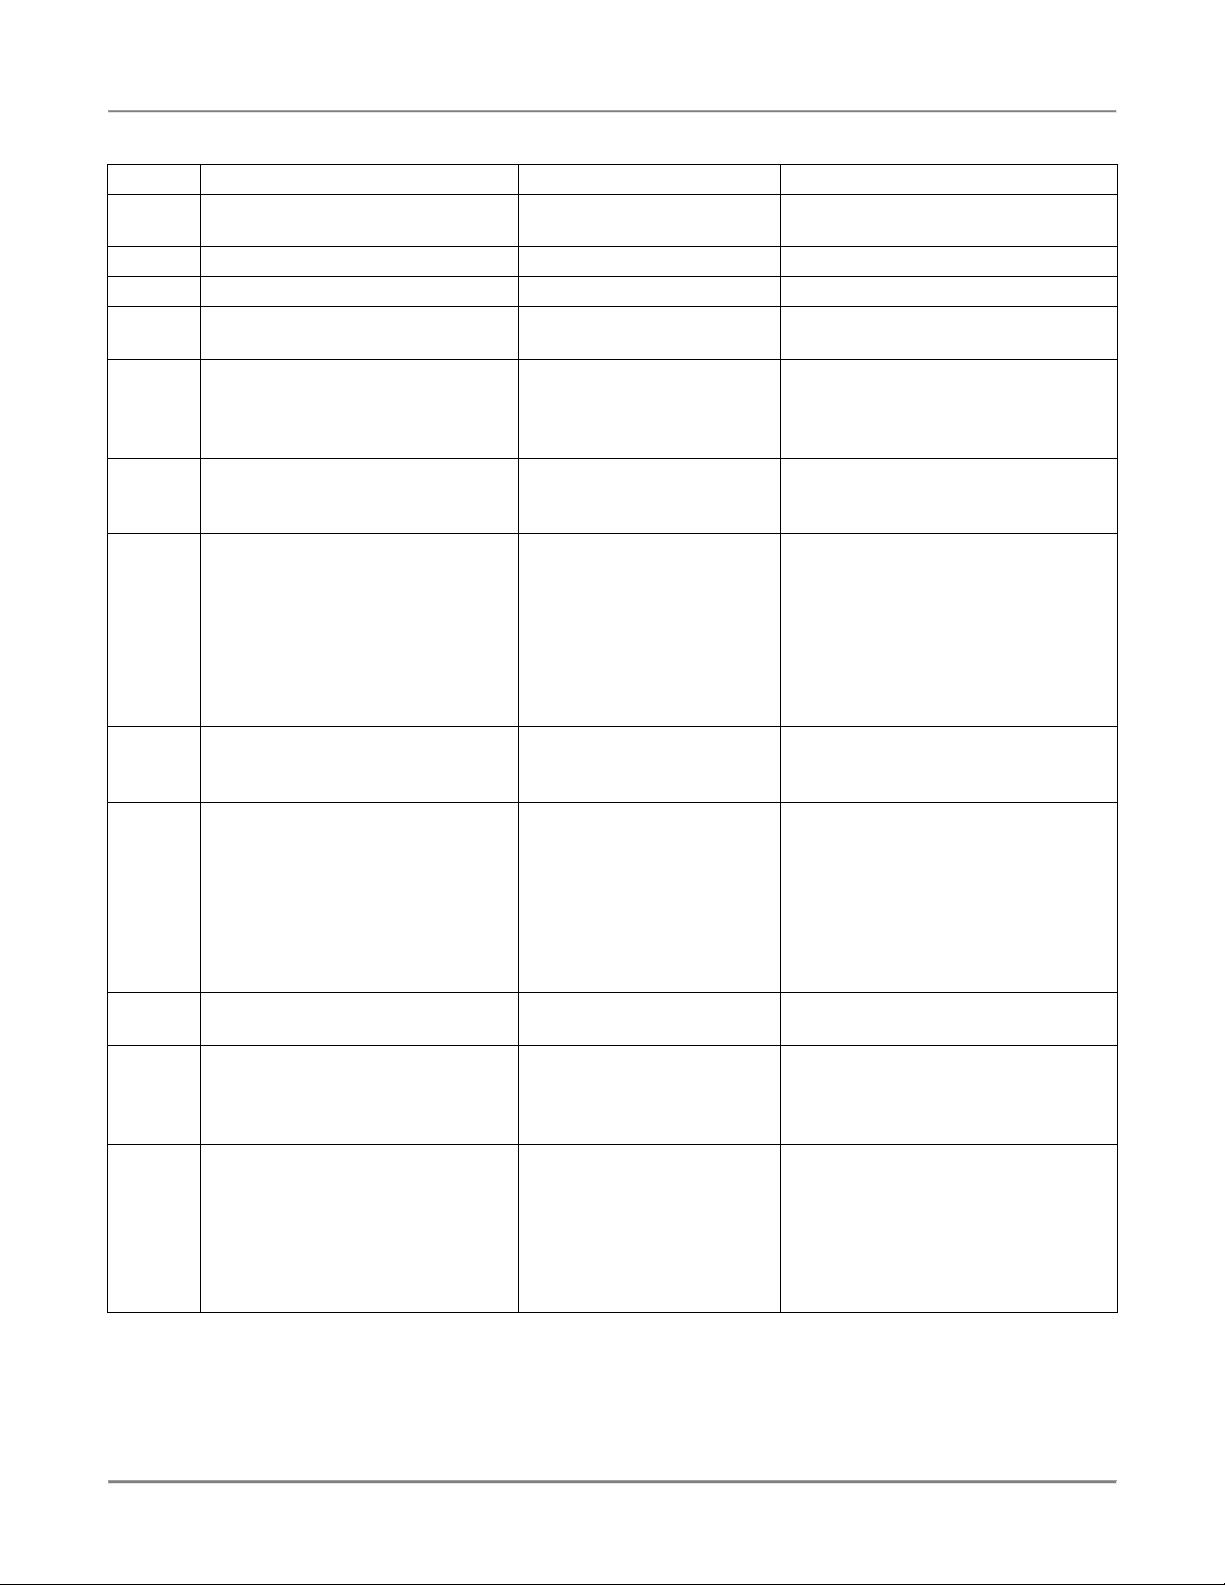
Use the following figure and table to set a maximum of eight product programs. The product programs must be
set before cooking can begin.
Figure 2. Product Programming Sequence
25
Page 27
Gas Pressure Fryer Operation
Table 2. Product Programming Procedure
STEP ACTION DISPLAY COMMENTS
1
Press the FILTER/OFF/FRY
LOW
switch to FRY.
2 Press PROG on the keypad. PROGRAM CODE
3 Input 1724 and press ENTER. PROGRAM PRODUCT #
4 Select the program product
number (1-8).
5 Press ENTER. PROGRAM TIME1
PROGRAM PRODUCT X X refers to the program number
you selected.
This command allows you to
00:00
specify the cooking time for this
stage. The time displayed may be
a previously programmed value.
6 Press TOGGLE/CLEAR and
input the number of minutes you
PROGRAM TIME1
XX:XX
XX:XX refers to the number of
minutes you input.
want to cook.
7 Press ENTER. PROGRAM TEMP1
000 °F
This command allows you to
specify the cooking temperature for
this stage. The temperature
displayed may be a previously
programmed temperature. The
temperature scale may also display
°C depending on the system option
that is set.
8 Press TOGGLE/CLEAR and
input the cooking temperature for
PROGRAM TEMP1
XXX °F
XXX refers to the cooking
temperature you input.
product to be cooked.
9 Press ENTER. PROGRAM TEMPCOM1
FLEX TIME
This command enables you to
select whether or not time is
allowed for the fryer to recover
from temperature loss while
cooking during this stage. The
FLEX TIME option will allow the
fryer to recover from temperature
loss.
10 Press TOGGLE/CLEAR until the
desired option is displayed.
11 Press ENTER. PROGRAM VALVE1
PROGRAM TEMPCOM1 X X refers to the temperature
compensation option selected.
This command allows you to
CLOSED
specify whether the solenoid valve
will be open or closed during this
stage.
12 Press TOGGLE/CLEAR until the
desired option is displayed.
PROGRAM VALVE1 X X refers to the solenoid valve
option selected. OPEN is used for
Models ALF and BLF Automatic
Lift fryers. If your program requires
the solenoid valve to be closed
while cooking, choose the
CLOSED option.
26
Page 28
Gas Pressure Fryer Operation
STEP ACTION DISPLAY COMMENTS
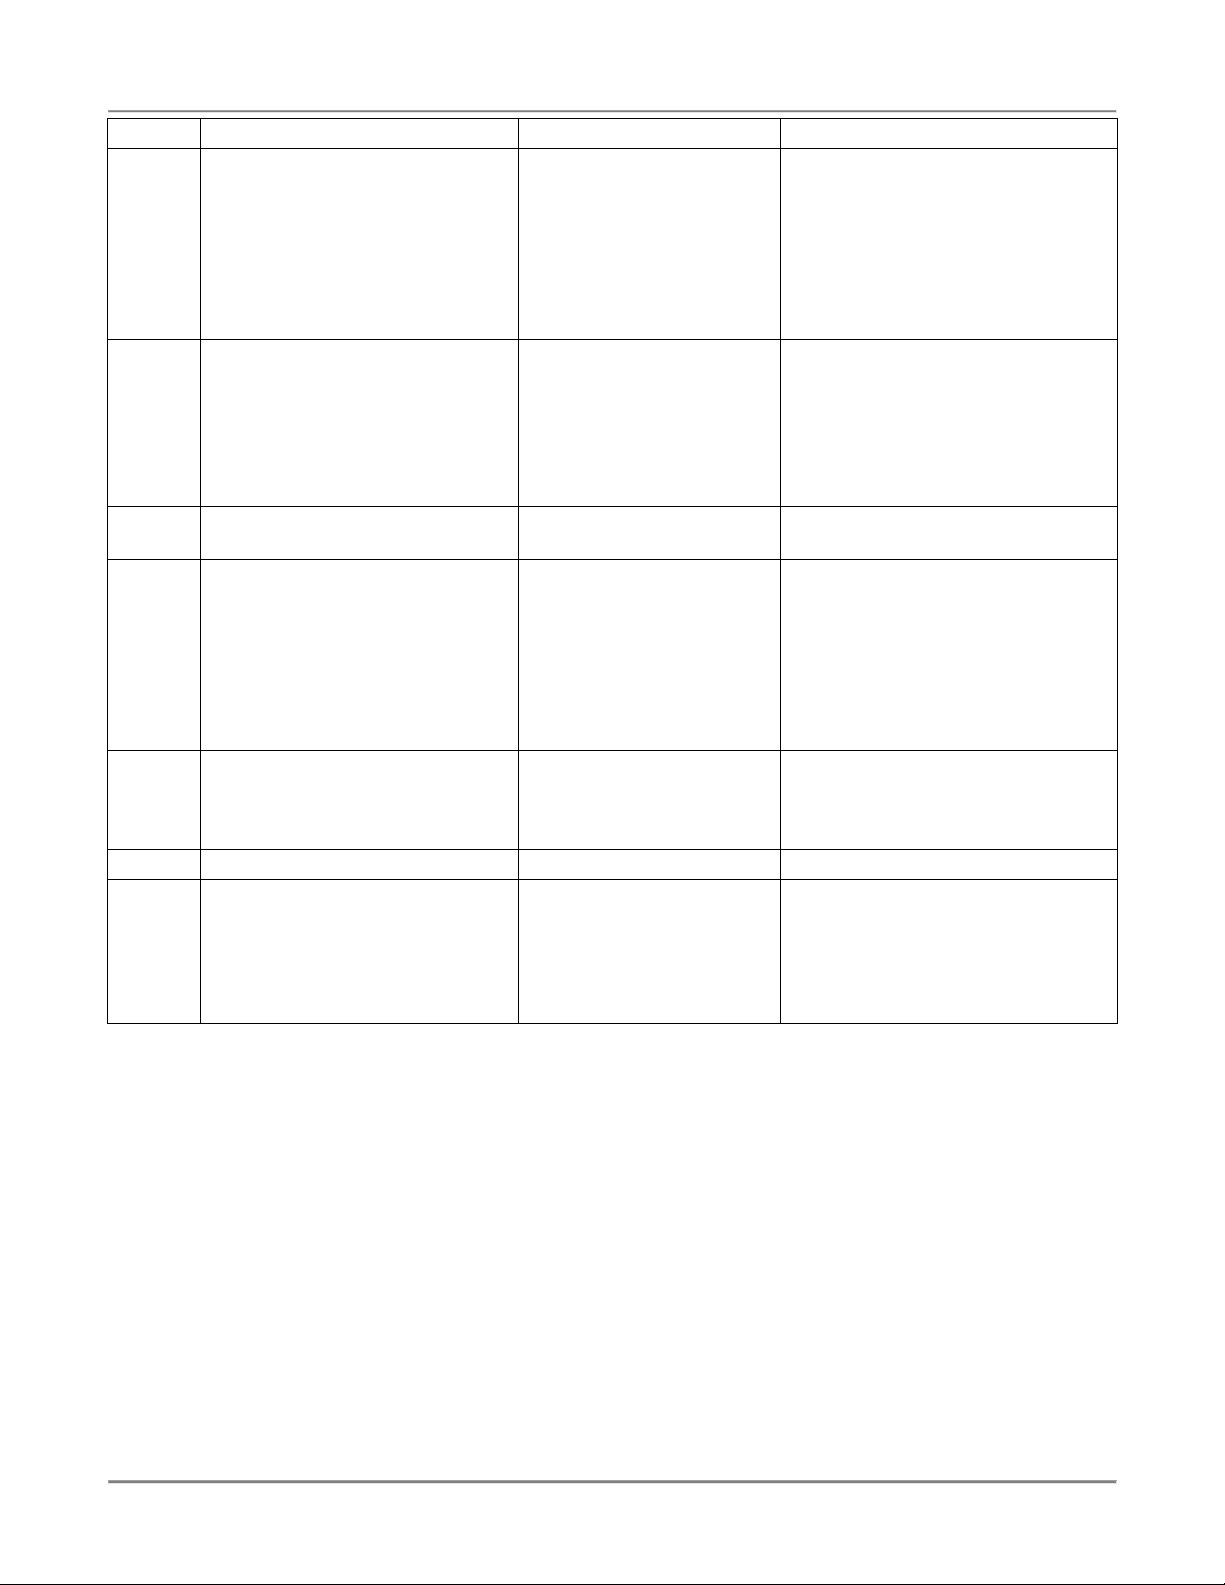
13 Repeat steps 5-12 when
programming stages 2, 3, 4 and
5 for Electric and Gas appliance
types.
Repeat steps 5-10 when
programming stages 2, 3, 4 and
5 for an ALF appliance type.
14 Press ENTER. PROGRAM PREALARM
15 Press TOGGLE/CLEAR and
input the prealarm minutes.
16 Press ENTER. PROGRAM FILTER 0 This command allows you to
17 Press TOGGLE/CLEAR and
input the number of fry cycles
you want to complete before
enabling filter lockout.
18 Press ENTER. PROGRAM PRODUCT #
19 If you wish to input more
programs, proceed by pressing
the next program number and
follow steps 5 through 18 or
press PROG to exit the
programming mode.
PROGRAM PREALARM
XX:XX
PROGRAM FILTER X X refers to the number of program
The time and temperature of each
stage has to be less than the
preceding stage.
This command allows you to
00:00
specify the number of minutes
before the end of the cooking time
(for each stage) until the alarm
sound The prealarm value
displayed may be a previously
programmed value.
XX:XX refers to the prealarm
minutes you input.
specify the number of fry cycles
you want to complete for this
program before a message is
displayed reminding you to filter
the shortening (filter lockout). The
filter value displayed may be a
previously programmed value.
cycles you want to complete before
filtering the shortening.
27
Page 29
Gas Pressure Fryer Operation
Start-Up (FKG-FC)
1. Make sure the main drain valve is closed.
2. Fill pot with shortening to the mark.
Risk of fire exists if the oil level drops below the minimum oil level. The level of oil
within the pot must not fall below 5mm of the maximum oil level.
Use of oil/shortening older than the manufacturers recommendations for life of
the oil is prone to surge boiling and flash fires. Follow the oil manufacturers
guidelines for lifecycle of oil/shortening.
Overfilling the fryer pot with shortening could lead to serious injury. Ensure that
the fryer pot is filled with shortening only to the fill mark when shortening is hot.
Do not use any shortening other than what is specified in this manual and do not
overfill the fryer pot.
The FKG-FC fryer has a maximum temperature setting of 390º F (200º C). Do
not use oil/shortening with a flashpoint less than 554º F (290º C)
Use only high-quality shortening that has low moisture content, a high smoke
point and no additives.
3. Place the FILTER/OFF/FRY switch to the FRY position. The question “Is the Fry Pot filled – If yes press
ENTER” will appear on the computer display. The shortening will heat and begin to reach the fill mark
inside the pot.
4. Add more shortening as required to reach the fill mark. Once the oil reaches the fill mark, press the
ENTER button. The computer will display “STIR OIL” and automatically enter the STIR OIL mode. In this
mode the computer will heat the oil to 255°F and hold that temperature.
5. Stir the oil freely while it is heating. Press the 0 button when finished stirring the oil.
IMPORTANT! Before the first cooking operation each day, stir the shortening freely while it is heating to
provide a balanced shortening temperature for excellent results with the first cooking. Failure to do this
can result in a crusty skin on the product surface with an undercooked product internally. In addition, in
some cases, failure to stir the shortening while it is initially heating may cause the HI-LIMIT safety device
to disable the power due to a false overtemperature condition.
Cooking (FKG-FC)
1. Ensure that the Start-Up procedures have been performed.
2. Press the desired program number on the keypad. The computer will still display "LOW". The fryer will
begin to heat to the temperature that has been factory preset. When "READY" appears on the display,
the fryer is up to the desired temperature and the product can be loaded.
3. When frying chicken, connect the basket handle and lower the basket into the shortening in the fryer pot.
Hot shortening may splash out of the pot causing severe injury when dropping chicken
into pot. Carefully drop pieces of chicken into pot to prevent shortening splashes.
4. Carefully drop the chicken in the shortening one piece at a time starting with thighs and drumsticks. The
fryer is designed to accommodate 48-50 pieces of chicken.
28
Page 30
Gas Pressure Fryer Operation
Failure to use the insulated mitts will result in severe injury. Always use the insulated
mitts when handling the hot fry basket.
5. Lift the basket approximately 2 to 3 inches (6.35 cm.) above the shortening and shake it. This keeps the
food from sticking together and causing white spots on the cooked food.
Hot shortening may splash out of the pot causing severe injury when lowering basket into
pot. Carefully lower basket into pot to prevent shortening splashes.
6. Slowly lower the fryer basket into fryer pot and remove the detachable handle.
7. Close the lid. Make sure the lid hook latches securely under the catch.
8. Tighten the spin handle until the lid is firmly sealed. Then line up the orange knob on the spin handle with
the orange knob at the front of the fryer.
9. Press the desired program number a second time. The red light above the program number will flash and
the computer will display “COOK”. This will start a countdown in minutes and seconds until the end of the
cycle.
10. At the end of the cooking cycle, the computer will display "DONE" and signal with a series of audible
"beeps". Press the selected number once again to stop the cook cycle. Fifteen seconds before the end of
the cook cycle, the program will automatically release the pressure from the fryer. For your safety, the lid
will not unlock, even at the end of the cook cycle, until the pressure has been fully released.
Hot steam will escape when you open the lid possibly causing severe injury. Keep your
face and arms away from the fry pot.
11. Slowly turn the spin handle counterclockwise to break the seal around the lid. Your fryer has a locking pin
that prevents turning the spin handle until the pressure drops to "0".
12. Slowly open the lid.
Failure to use the insulated mitts will result in injury. Always use the insulated mitts when
handling the hot fry basket.
13. Connect the basket handle then lift the basket and hang it on the front of the fryer pot to drain.
14. Empty the basket.
15. Remember to filter the shortening at least every third frying cycle load. Refer to the procedure in this
manual. Also filter the shortening and clean the fryer at the end of each day.
16. Close the lid and press the 0 button. Idle 255°°°°F will display. This will automatically hold the shortening at
a cooler temperature.
17. To escape the idle mode, press the 0 button again and the fryer will heat to its original temperature.
18. When you have finished frying for the day, turn the FILTER/OFF/FRY switch to the OFF position.
19. Place the gas control ON/OFF switch in the OFF position.
Recipes
29
Page 31

Gas Pressure Fryer Operation
Fried Onion Rings
1. Take frozen onion rings from freezer or bread fresh onion rings with Imperial breading.
2. Place onion rings into fryer basket.
3. Close cover to begin pressure frying.
4. Cook for 4 minutes at 350°F for frozen product.
OR
5. Cook for 3 minutes at 350°F for fresh product.
Potato Wedges
1. Wash and cut potatoes.
2. Season and bread each stick with Imperial breading.
3. Place potato wedges into fryer basket.
4. Close cover to begin pressure frying.
5. Cook for 7 to 8 minutes at 325°F depending on size.
French Fries
1. Take frozen french fries from freezer or wash and cut fresh potatoes.
2. Place french fries into fryer basket.
3. Close cover to begin pressure frying.
4. Cook for 4 to 6 minutes at 325°F depending on size.
Fresh Chicken
Use fresh 8 or 9-piece cut chicken. Use 2-1/2 to 3 pounds for best results.
1. Rinse product under cold water.
2. Bread each piece with Imperial breading.
3. Place product into fryer basket.
4. Close the cover to begin pressure frying.
5. Cook for 12 minutes at 325°F.
Frozen Chicken ( MRB ) except wings
1. Take product from freezer.
2. Place product into fryer basket.
3. Cook for 3 minutes (open) at 325°F.
4. Add wings to fryer basket.
5. Close the cover to begin pressure frying.
6. Cook for 17 minutes at 325°F.
Fresh Chicken Wings
1. Rinse product under cold water.
2. Bread each piece with Imperial breading.
3. Place product into fryer basket.
4. Close cover to begin pressure frying.
5. Cook for 12 minutes at 325°F.
Chicken Wings (Frozen - 5 kilograms or 10 pounds)
1. Take product from freezer.
2. Place wings into fryer basket.
3. Close cover to begin pressure frying.
4. Cook for 8 minutes at 325°F or 9½ to 10 minutes at 320°F.
Chicken Drummettes
1. Take product from freezer.
2. Place drummettes into fryer basket.
3. Close cover to begin pressure frying.
4. Cook for 9 to 11 minutes at 325°F.
30
Page 32

Gas Pressure Fryer Operation
Whole Turkey (12 to 14 pounds)
1. Rinse and bread turkey with Imperial breading.
2. Place turkey into fryer basket.
3. Close cover to begin pressure frying.
4. Cook for 45 to 55 minutes at 300°F.
Whole Duckling
1. Rinse and bread duck with Imperial breading.
2. Place duck into fryer basket.
3. Close cover to begin pressure frying.
4. Cook for 20 to 25 minutes at 300°F.
Pork Chops
1. Bread each chop with Imperial breading.
2. Place pork chops into fryer basket.
3. Close cover to begin pressure frying.
4. Cook for 8 to 10 minutes at 325°F depending on size.
Cube Or Minute Steaks
1. Bread each steak with Imperial breading.
2. Place steaks into fryer basket.
3. Close cover to begin pressure frying.
4. Cook for 2 to 4 minutes at 325°F depending on size.
Milanese
It is best to use 5 to 7 ounce beef steaks.
1. Season and bread each steak as desired.
2. Place steaks into fryer basket.
3. Close cover to begin pressure frying.
4. Cook for 5 to 6 minutes at 325°F depending on size.
Fresh Shrimp
1. Season and bread shrimp as desired.
2. Place shrimp into fryer basket.
3. Close cover to begin pressure frying.
4. Cook for 2½ to 3½ minutes at 350°F depending on size.
Fresh Fish or Frozen Fish
For best results, use a tiered basket. The best fish for frying are Flounder, Cod, Walleyed Pike, or any other
popular frying fish.
1. Bread each piece of fish as desired.
2. Place fish in tiered basket.
3. Close cover to begin pressure frying.
4. Cook for 5 to 7 minutes at 325°F depending on size for fresh fish.
OR
5. Cook for 8 to 10 minutes at 325°F depending on size for frozen fish.
Corn On The Cob
Corn can be fried either plain or breaded.
1. Take frozen corn ears from freezer and rinse.
2. Bread with Imperial breading as desired.
3. Place corn ears into fryer basket.
4. Close cover to begin pressure frying.
5. Cook for 6 to 8 minutes at 325°F depending on size.
Egg Rolls (frozen)
1. Take egg rolls from freezer.
2. Place egg rolls into basket.
3. Close the cover to begin pressure frying.
4. Cook for 6 to 8 minutes at 325°F depending on size.
31
Page 33
Gas Pressure Fryer Operation
Operation after Gas or Power Outage
The fryer may shut off automatically if the gas supply is interrupted or the power goes out. If either of these
conditions occur, you should perform the following procedure:
For your safety, if the gas supply stops, or, if the power goes out, make sure to wait for at
least five minutes before restarting your fryer. This allows time for any unburned gas to
dissipate. (LP gas may take longer than five minutes.) If you smell gas, do not start your
fryer.
1. Place the gas control ON/OFF switch in the OFF position.
2. Place the FILTER/OFF/FRY switch in the OFF position.
3. Wait at least five minutes to allow any gas that may have accumulated in the burner compartment to
escape.
4. Follow normal operating procedures once the power or gas is restored.
Normal Shutoff
1. Place the FILTER/OFF/FRY switch in the OFF position.
2. Place the gas control ON/OFF switch in the OFF position.
3. Wait at least five minutes to allow any gas that may have accumulated in the burner compartment to
escape.
32
Page 34
Gas Pressure Fryer Maintenance
Maintenance
Failure to comply with the maintenance below could result in a serious accident.
Do not over-tighten the spindle assembly. (Only tighten to hold pressure.)
Your fryer will need periodic maintenance and servicing. We strongly suggest that you
use only a service company that is authorized by BKI to do this work.
The restraining device must always be connected when the appliance is in service.
Disconnect for movement, such as servicing or cleaning. Reconnect the restraint when
fryer has been returned to its normal position.
Scheduled Maintenance
Use the following table to help manage scheduled maintenance activities.
FREQUENCY PERFORMED BY PART ACTIVITY
Each Fry Cycle
Daily
Weekly
Every 6 Months
User Pressure Gauge Check for proper display of cooking vat
pressure. Contact authorized BKI service
agent if adjustment or replacement is
required.
User Lid Gasket Check for unusual wear such as cracks
and deformation, and pressure leaks.
Contact authorized BKI service agent if
adjustment or replacement is required.
User Dead Weight
Assembly
User Filter Pad Replace filter pad. Refer to the procedure
User Condensation Pan Remove and drain.
User Filter system Filter the shortening using the procedure
User Safety Pop Valve Check for release of pressure and proper
User Fryer Pot Perform the boil-out procedure in this
Authorized BKI
service agent
Acme Screw and
Nut
Clean weight and orifices daily and check
for wear.
in this manual.
in this manual.
seal. Refer to the procedure in this
manual.
manual.
Check for wear on the threads.
Authorized BKI
service agent
Authorized BKI
service agent
Authorized BKI
service agent
Authorized BKI
service agent
Solenoid Valve Check that the valve is holding and
releasing pressure when the timer or
computer activates it.
Hook, Catch, Spring Check for wear and ease of operation.
Connections,
Fittings
Fryer Pot
Fittings/Connections
33
Check for leakage while oil is pumping.
Check for leakage around fry pot top deck
and fittings (heaters, hi-limit, thermostat,
etc.).
Page 35
Gas Pressure Fryer Maintenance
Safety Pop Valve Procedure
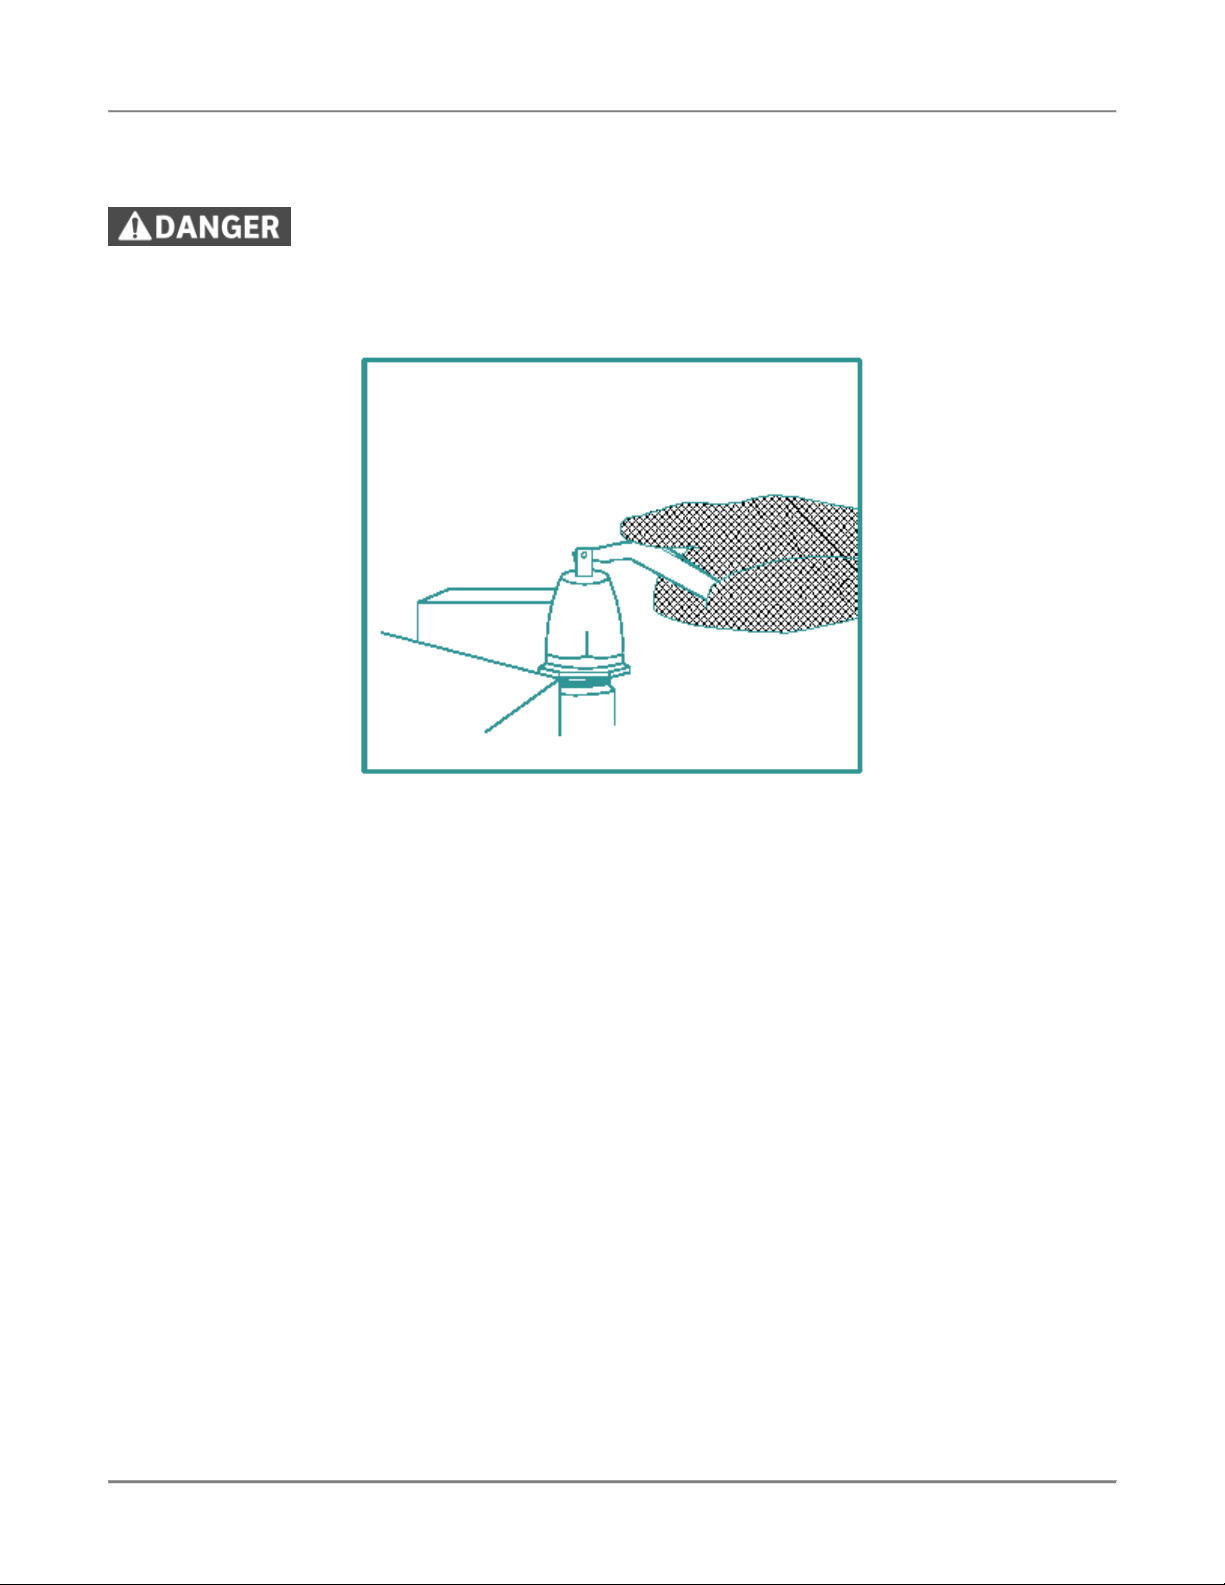
The safety pop valve should be blown under pressure periodically to prevent the seat from sticking.
Failure to use the insulated mitts will result in injury. Always use the insulated mitts when
handling the arm on the safety valve.
1. After the pressure is up during a cooking cycle, use the insulated glove to lift the arm on the edge of the
safety valve and let some steam escape. This will clean the valve.
2. Release the lever on the valve, and let it slam shut to seal the valve.
34
Page 36
Gas Pressure Fryer Maintenance
Filtering Procedure
Breaded foods require frequent filtering. An excess amount of breading left in the fryer pot will reduce the life of
the shortening. We recommend the shortening be filtered after every three frying cycle loads. When the
shortening starts to show signs of foaming and has a bad taste, do not use it. The fryer pot should be cleaned
before refilling with new shortening. Best results for filtering are obtained while the shortening is hot. You should
filter at the end of every business day. You should also remove and drain the condensation pan daily.
Always wear appropriate personal protection equipment during the filtering process to
guard against possible injury from hot oil.
If the pump motor automatically shuts off while filtering, place the FILTER/OFF/FRY
switch in the OFF position, wait 15 minutes, press the pump motor reset button, then
follow the appropriate refill procedure below.
FKG-F and FKG-FC
1. Set the FILTER/OFF/FRY switch to OFF.
2. Remove the fryer basket.
3. Make certain that the filter pad is clean and not torn.
IMPORTANT: Make certain the vat cover is properly positioned underneath the drain valve. Also
make certain the filter vat and filter screen is under the main drain valve before starting the filtering
process.
4. Move the DRAIN handle slowly to the OPEN position so that the shortening starts to flow evenly. This
is to prevent excessive splashing of hot shortening.
5. When the pot is empty, place the DRAIN handle in the CLOSED position.
To refill the pot automatically, use the steps below:
Hot shortening may splash out of the pot causing severe injury when filling the pot if the
lid is not closed. To prevent shortening splashes, close the lid before filling.
• Close the lid to prevent shortening splashes.
• Place the FILL handle to the THRU POT position.
• Position the FILTER/OFF/FRY switch to FILTER and shortening will automatically pump into the
pot.
• After 1 minute carefully open the lid to check the level of the shortening.
• Let the filter continue to pump the shortening until the fill mark in the fryer pot is reached or until
air starts bubbling through the shortening.
• As soon as air is seen in the shortening, first place the FILL handle to the THRU HOSE position
then position the FILTER/OFF/FRY switch to OFF to prevent shortening degradation and prevent
the filter pump and lines from filling up with shortening.
• Add new shortening if the fill mark has not been reached.
35
Page 37
Gas Pressure Fryer Maintenance
To refill the pot through the rinse hose, use the steps below:
• Make certain that the rinse hose is connected to rinse hose connector.
• Holding the hose by the handle, place hose nozzle inside the pot.
Hot shortening may splash out of the pot causing severe injury when filling the pot if the
lid is not held down over the hose nozzle. To prevent shortening splashes, hold the lid
down over the hose nozzle.
• Hold the lid down over the hose nozzle to prevent shortening splashes.
• Position the FILL lever in the THRU HOSE position.
• Position the FILTER/OFF/FRY switch to FILTER and shortening will automatically pump into the
pot.
• After 1 minute, hold the hose by the handle and carefully raise the lid to check the level of the
shortening.
• Let the filter continue to pump the shortening until the fill mark in the fryer pot is reached or until
air starts bubbling through the shortening.
• As soon as air is seen in the shortening, position the FILTER/OFF/FRY switch to OFF to prevent
shortening degradation.
• Add new shortening if the fill mark has not been reached.
FKG
1. Set the FILTER/OFF/FRY switch to OFF.
2. Remove the fryer basket.
3. Make certain that the FKF filter unit or portable filter unit filter pad is clean and not torn.
4. Position the FKF filter unit or portable filter unit under the main drain valve and make sure it’s filter
screen is in place.
5. Ensure that the FKF filter unit or portable filter unit is powered.
6. Move the DRAIN handle slowly to the OPEN position until the shortening starts to flow evenly. This
will prevent excessive splashing of hot shortening.
7. When the pot is empty, place the DRAIN handle in the CLOSED position.
To refill the pot through the drain valve, use the steps below:
• Make certain that the braided hose (located on the drain valve) is connected to it’s mating part on
the FKF filter unit or portable filter unit.
Hot shortening may splash out of the pot causing severe injury when filling the pot if the
lid is not closed. To prevent shortening splashes, close the lid before filling.
• Close the lid to prevent shortening splashes.
36
Page 38
Gas Pressure Fryer Maintenance
• Position the FILTER/OFF/FRY switch to FILTER and shortening will automatically pump into the
pot.
• After 1 minute carefully open the lid to check the level of the shortening.
• Let the filter continue to pump the shortening until the fill mark in the fryer pot is reached or until
air starts bubbling through the shortening.
• As soon as air is seen in the shortening, position the FILTER/OFF/FRY switch to OFF to prevent
shortening degradation and prevent the filter pump and lines from filling up with shortening.
• Add new shortening if the fill mark has not been reached.
To refill the pot through the rinse hose, use the steps below:
• Make certain that the rinse hose is connected to it’s mating part on the FKF filter unit or portable
filter unit.
• Holding the hose by the handle, place hose nozzle inside the pot.
Hot shortening may splash out of the pot causing severe injury when filling the pot if the
lid is not held down over the hose nozzle. To prevent shortening splashes, hold the lid
down over the hose nozzle.
• Hold the lid down over the hose nozzle to prevent shortening splashes.
• Position the FILTER/OFF/FRY switch to FILTER and shortening will automatically pump into the
pot.
• After 1 minute, hold the hose by the handle and carefully raise the lid to check the level of the
shortening.
• Let the filter continue to pump the shortening until the fill mark in the fryer pot is reached or until
air starts bubbling through the shortening.
• As soon as air is seen in the shortening, position the FILTER/OFF/FRY switch to OFF to prevent
shortening degradation.
• Add new shortening if the fill mark has not been reached.
Boil-Out Procedure
Boil-outs remove microscopic particles of carbon that build up on the walls of the fryer pot. To avoid eventual
carbon build-up, off flavors, and shortening breakdown, boil-outs should be done once a week on each fryer
following these procedures.
Always wear appropriate personal protection equipment during the boil-out process to
guard against possible injury from hot cleaning solution.
1. Position the FILTER/OFF/FRY switch to OFF.
2. Drain the clean shortening into an adequate storage container. (Allow the shortening to cool to room
temperature before attempting storage.)
37
Page 39
Gas Pressure Fryer Maintenance
3. CLOSE the drain and fill the fryer pot with HOT water to the shortening level fill mark. Do not overfill by
allowing the water level higher than the fill mark.
4. Add ½ cup (4 ounces) of BKI cleaner.
5. Wash down the inside of the pot and lid with the pot brush to loosen the sediment.
6. Set the temperature of the solution as follows:
• For an FKG or FKG-F – Place the FILTER/OFF/FRY switch to the FRY position. Press the
START/STOP button on the digital timer to cancel the STIR OIL function unless the STIR OIL
function is operating in the –OFF mode. Set the thermostat to a temperature of 190º F.
• For an FKG-FC – Position the FILTER/OFF/FRY switch to ON. Press PROG (program), type 1733,
and press ENTER. The fryer pot will heat to a temperature of 190º F during the CLEAN cycle to allow
the CLEAN function to be performed. NOTE: The fryer pot must be below 255º F to enter the CLEAN
mode.
7. Bring the cleaning solution to a rolling boil and maintain the boil for 5 minutes.
8. Place the FILTER/OFF/FRY switch to OFF.
9. Scrub the inside of the fryer pot and inside of the lid again.
10. Before draining the cleaning solution, remove the filter bag, screen and pipe connections from the filter
vat. This must be done before draining the cleaning solution. NEVER pump water or detergent through
the filter system.
11. After 15 minutes, slowly open the drain valve. Drain the solution into the filter vat and discard.
12. Rinse the pot with hot water, using the pot brush to remove remaining sediment, drain and discard.
13. Close the drain and refill the fryer pot with hot water to the proper level.
14. Add approximately 4 to 6 ounces of distilled (white) vinegar to develop a neutralizing solution. Stir the
solution briefly. Leave in the pot for three to five minutes and discard. NOTE: Foaming of shortening
after boil-outs is caused by failure to follow proper neutralizing procedures.
15. Repeat steps 12 through 14 as needed to remove all traces of cleaning solution.
16. Rinse the pot again with Cool water, drain and discard.
Damage to the fryer could result if the fryer pot is not completely dry before filling with
shortening. Refill the fryer pot with shortening ONLY when it is completely dry.
17. Dry the fryer pot, lid, and filter vat COMPLETELY.
18. Close the main drain and fill with new shortening to the proper level.
38
Page 40
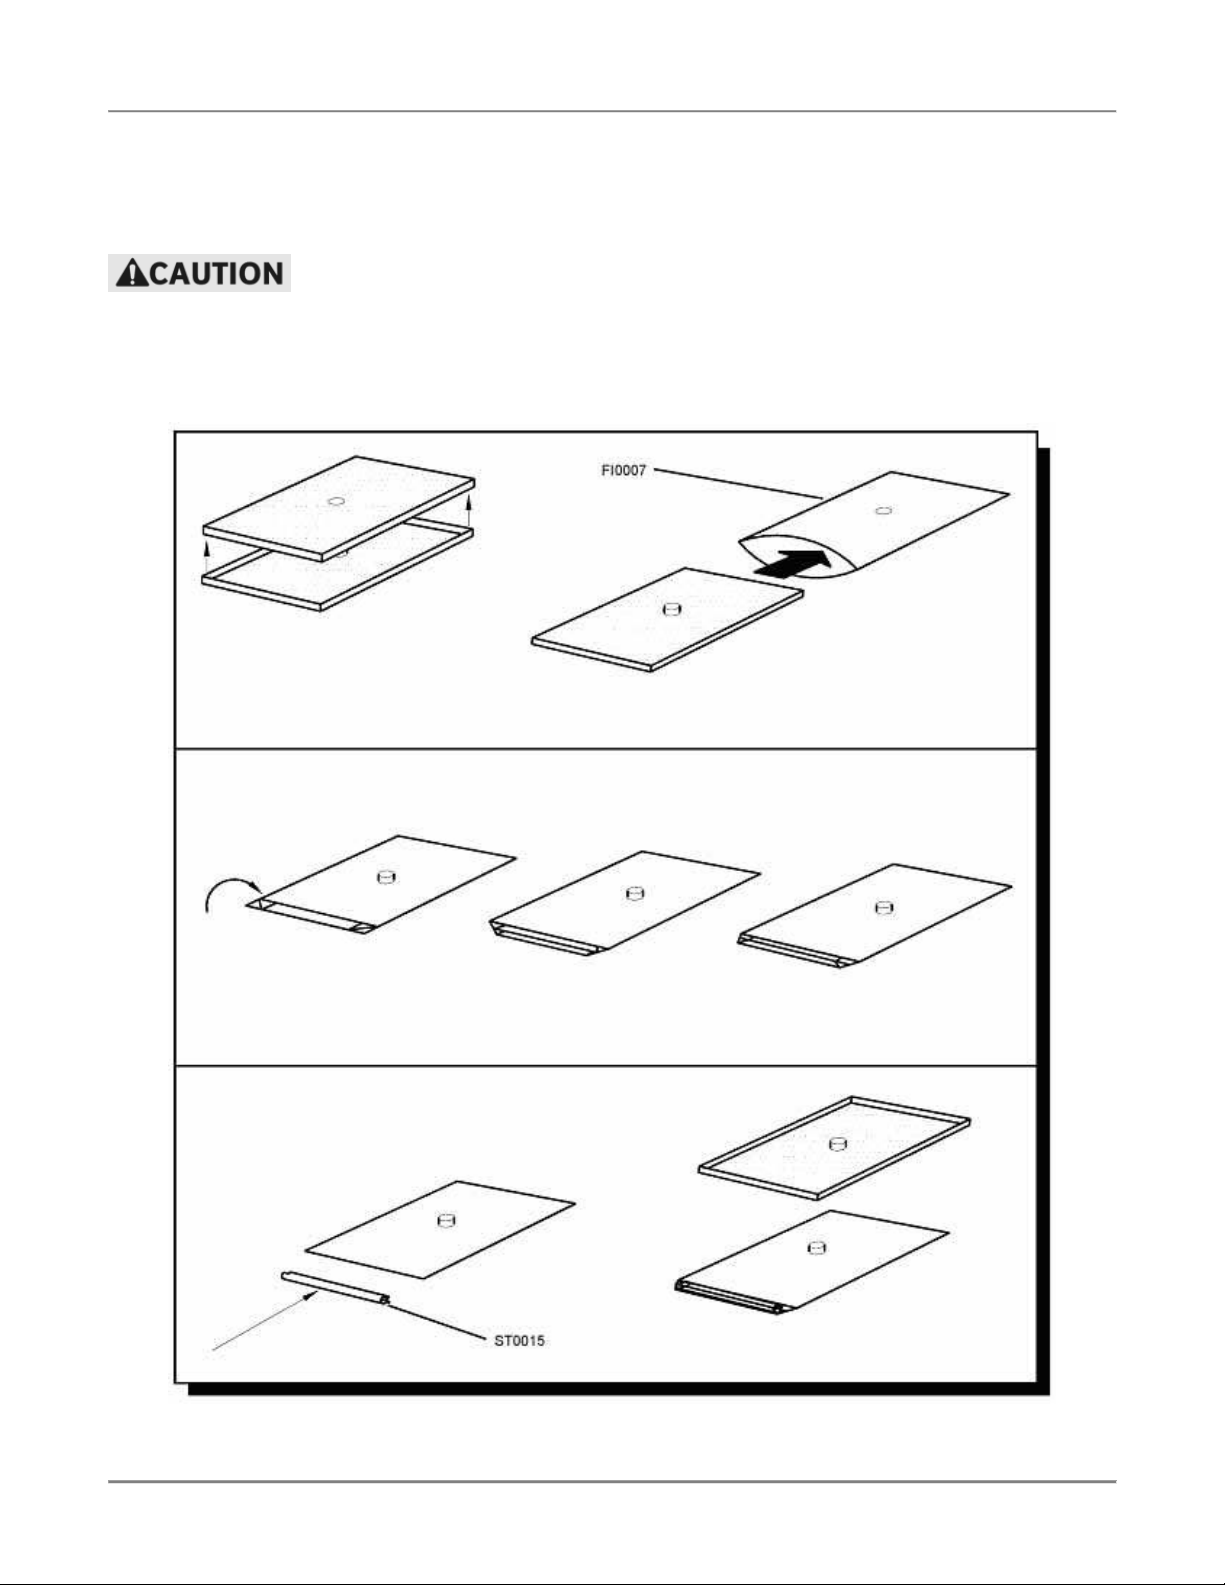
Gas Pressure Fryer Maintenance
Filter Pad Replacement
The filter pad must be replaced daily. If the shortening has a milky color when it is pumped into the pot, the filter
pad should be replaced immediately.
If the filter pad is not properly closed, breading crumbs will get through the pad opening
and clog the pump. Ensure that the filter pad is properly closed upon replacement.
1. Place the filter screen inside the filter pad.
2. Fold the end of the pad and seal with the bag clip.
39
Page 41
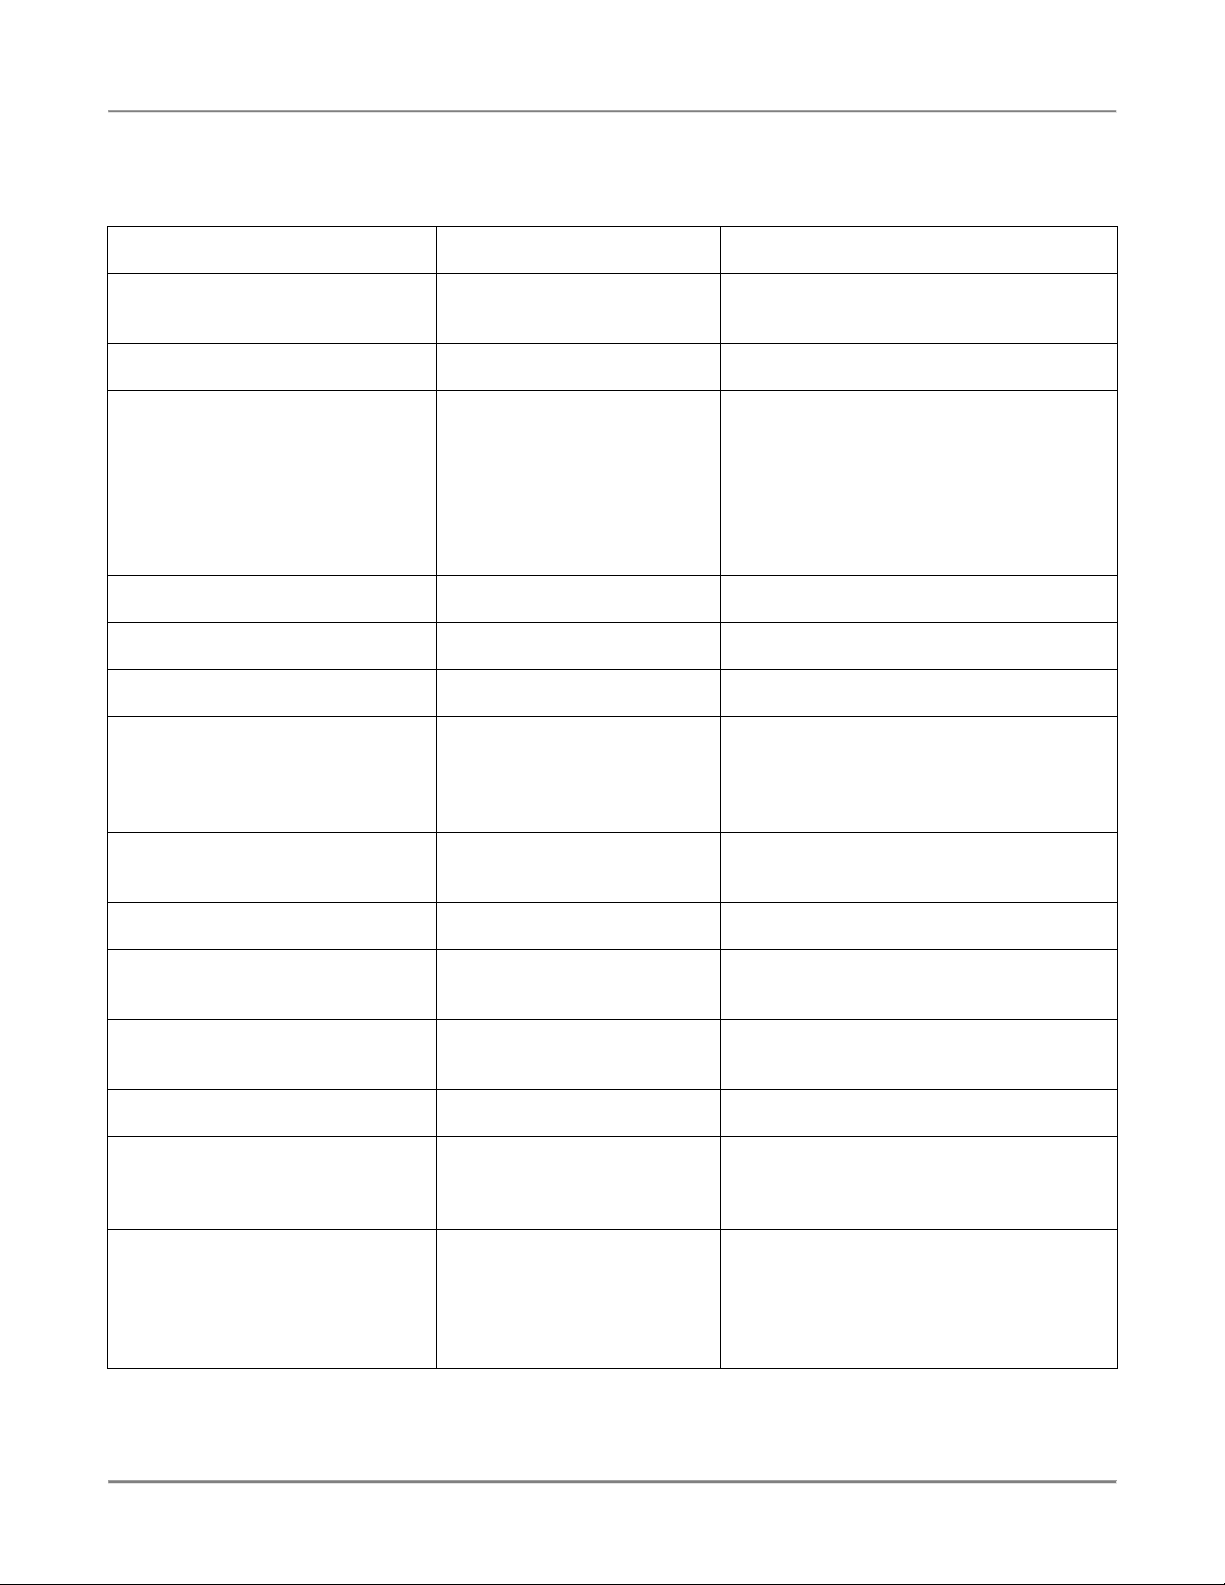
Gas Pressure Fryer Maintenance
Troubleshooting
Refer to the table below for troubleshooting information.
Problem Cause Possible Solution
Pressure Loss or Not Releasing
Pressure
Shortening Heating Too Slowly
Bad thermostat or loose
Filter System Not Working
Connections not tight Tighten the connections. If problems
Filter valve not open Contact an authorized BKI service agent
Filter paper on screen
Motor hums, but does not
Motor and pump coupling
No power to control panel Make sure drain valve is completely
Computer Hangs
Dead Weight Valve Leaking Clean the weight and orifice. If problems
persist, contact an authorized BKI service
agent for corrective action.
Lid Gasket Leaking Contact an authorized BKI service agent
for corrective action.
Solenoid Valve Leaking or
Stuck
Safety Valve not seating Contact an authorized BKI service agent
Gas pressure is low or isn’t
adjusted properly
wires
Uncertain Press the reset button on end of pump
clogged with crumbs
pump
worn
Computer malfunction. Press and hold the Toggle/Clear button
After a period of time, it is possible that
the valve seat and/or plunger may stick or
wear. Activate the valve by starting a cook
cycle. You should hear a solid metallic
CLICK sound from the solenoid valve. If
you should hear no sound (or a slow
BUZZING CLICK), contact an authorized
BKI service agent for corrective action.
for corrective action.
Contact an authorized BKI service agent
for corrective action.
Contact an authorized BKI service agent
for corrective action.
and hi-limit reset button under control
panel. If problems persist, contact an
authorized BKI service agent for
corrective action.
persist, contact an authorized BKI service
agent for corrective action.
for corrective action.
Change filter paper. If problems persist,
contact an authorized BKI service agent
for corrective action.
Check for clogged pump. If problems
persist, contact an authorized BKI service
agent for corrective action.
Contact an authorized BKI service agent
for corrective action.
closed. If problems persist, contact an
authorized BKI service agent for
corrective action.
while moving the FRY/OFF/FILTER
switch from FRY to OFF and back to
FRY. If problems persist, contact an
authorized BKI service agent for
corrective action.
40
Page 42

Gas Pressure Fryer Appendix A
Appendix A
Gas Control Valve Instructions
41
Page 43

2812 Grandview Dr., Simpsonville, S.C. 29680, USA
http://www.bkideas.com
Made and printed in the U.S.A
SS-OM-048 Revised 10/1/2013
Page 44
Gas Pressure Fryer Appendix A
REVISION HISTORY
REVISION
DATE REVISED BY DESCRIPTION
01 10/1/2013 MSS Initial Release-Supersedes all previous
releases
2
 Loading...