

Page 1
CVP-13
Liquid Cooling Hardware
Quick Start Guide
Page 2
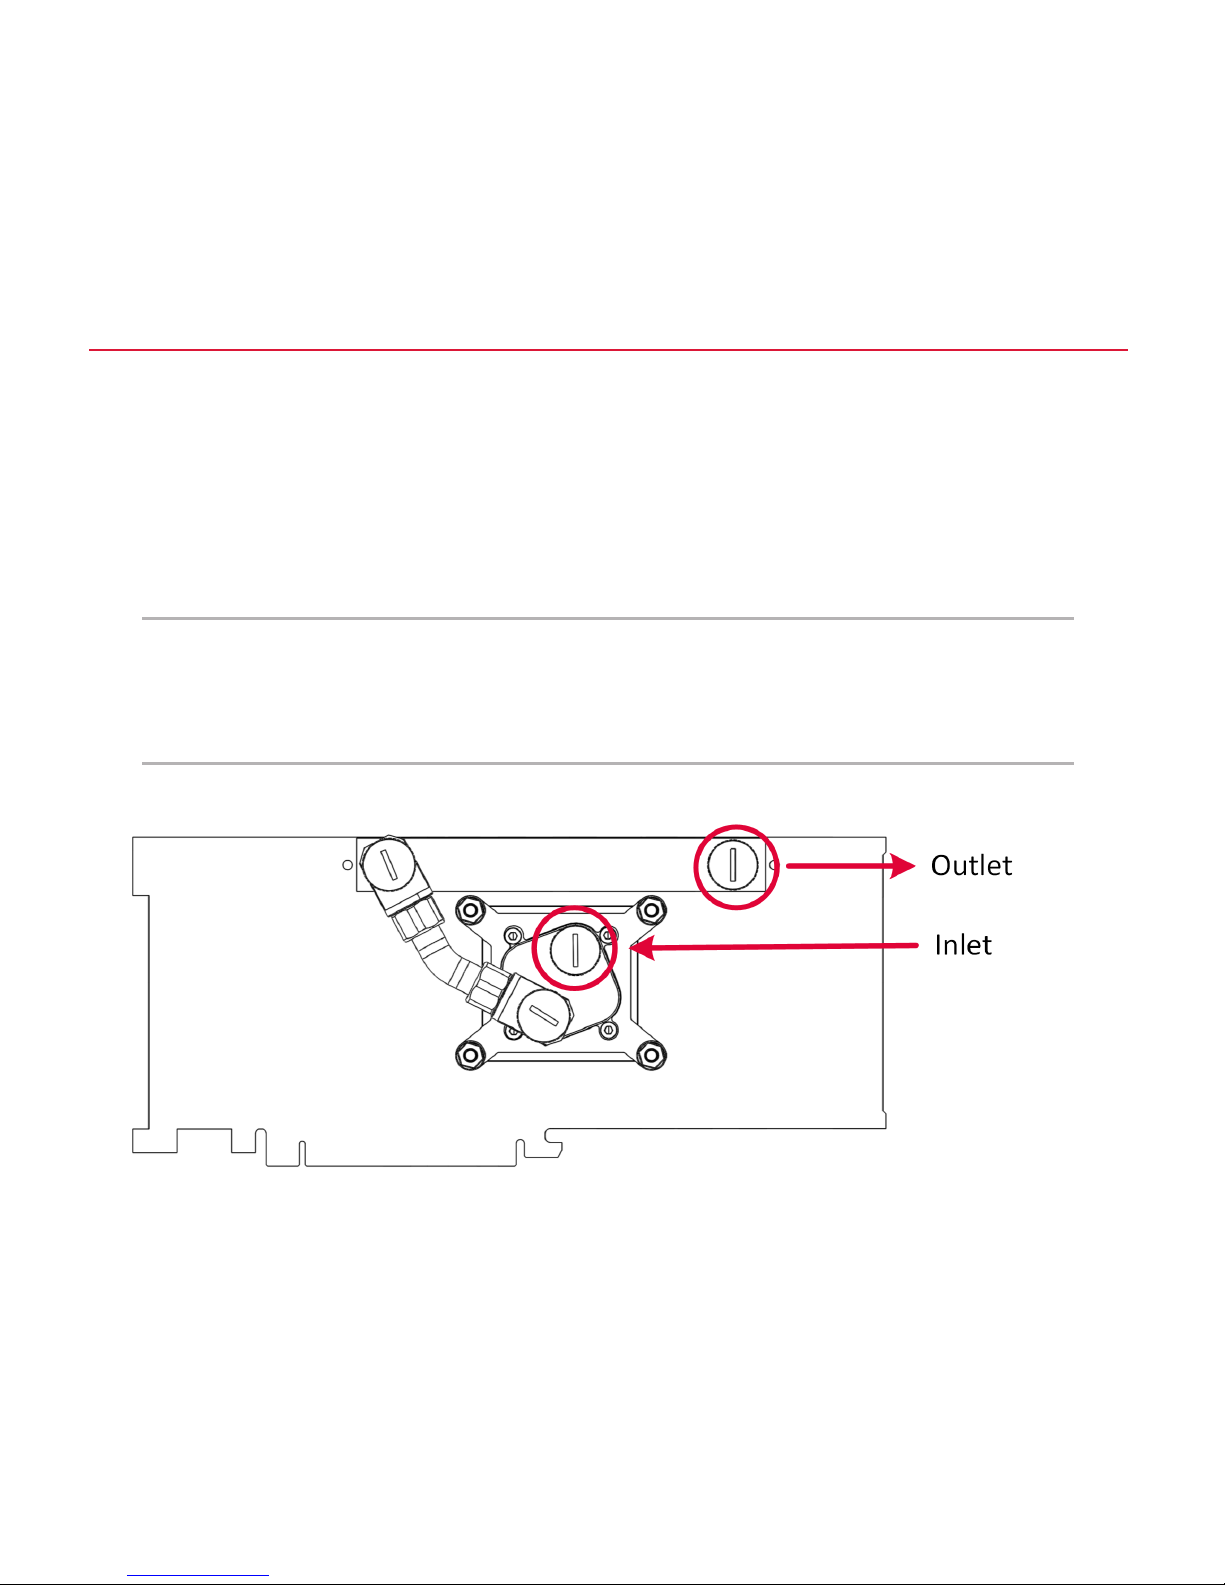
Locate the Inlet and Outlet
BittWare supplies a length of tubing to attach to the inlet and outlet of the CVP-13.
You can adapt this tubing to your liquid cooling infrastructure or use your own. This
guide illustrates how to attach the tube and provides key information on fitting to our
liquid cooling hardware.
The figure below identifies the inlet and outlet of the liquid cooling hardware.
Note: Switching the inlet and outlet will reduce your board's thermal
performance. BittWare highly recommends attaching your systems as
illustrated below.
Page 3
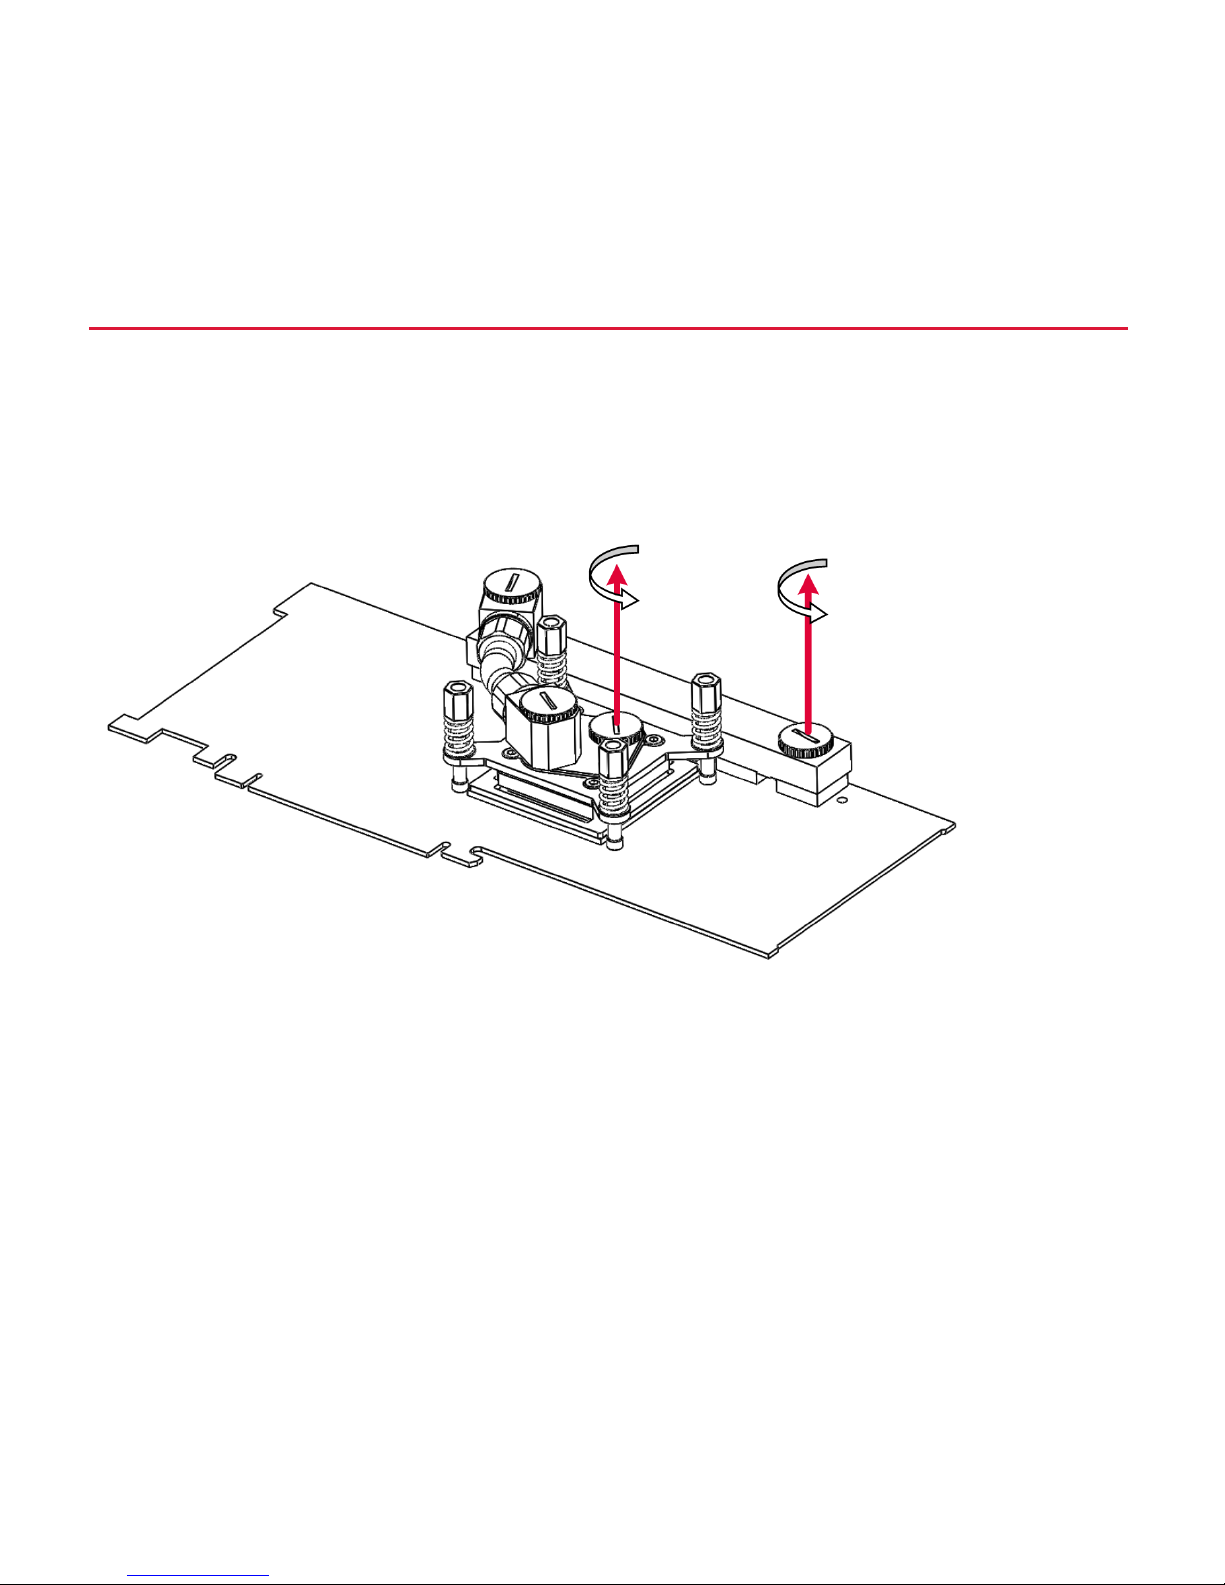
Remove the Debris Cover
The CVP-13 ships with the inlet and outlet plugged with a nickel-plated brass piece
to prevent debris from entering the cold plates. To remove the debris cover, use a
flathead screwdriver or small coin to remove the plug. Allliquid fittings are tapped for
a G1/4 BSPP thread.
Page 4
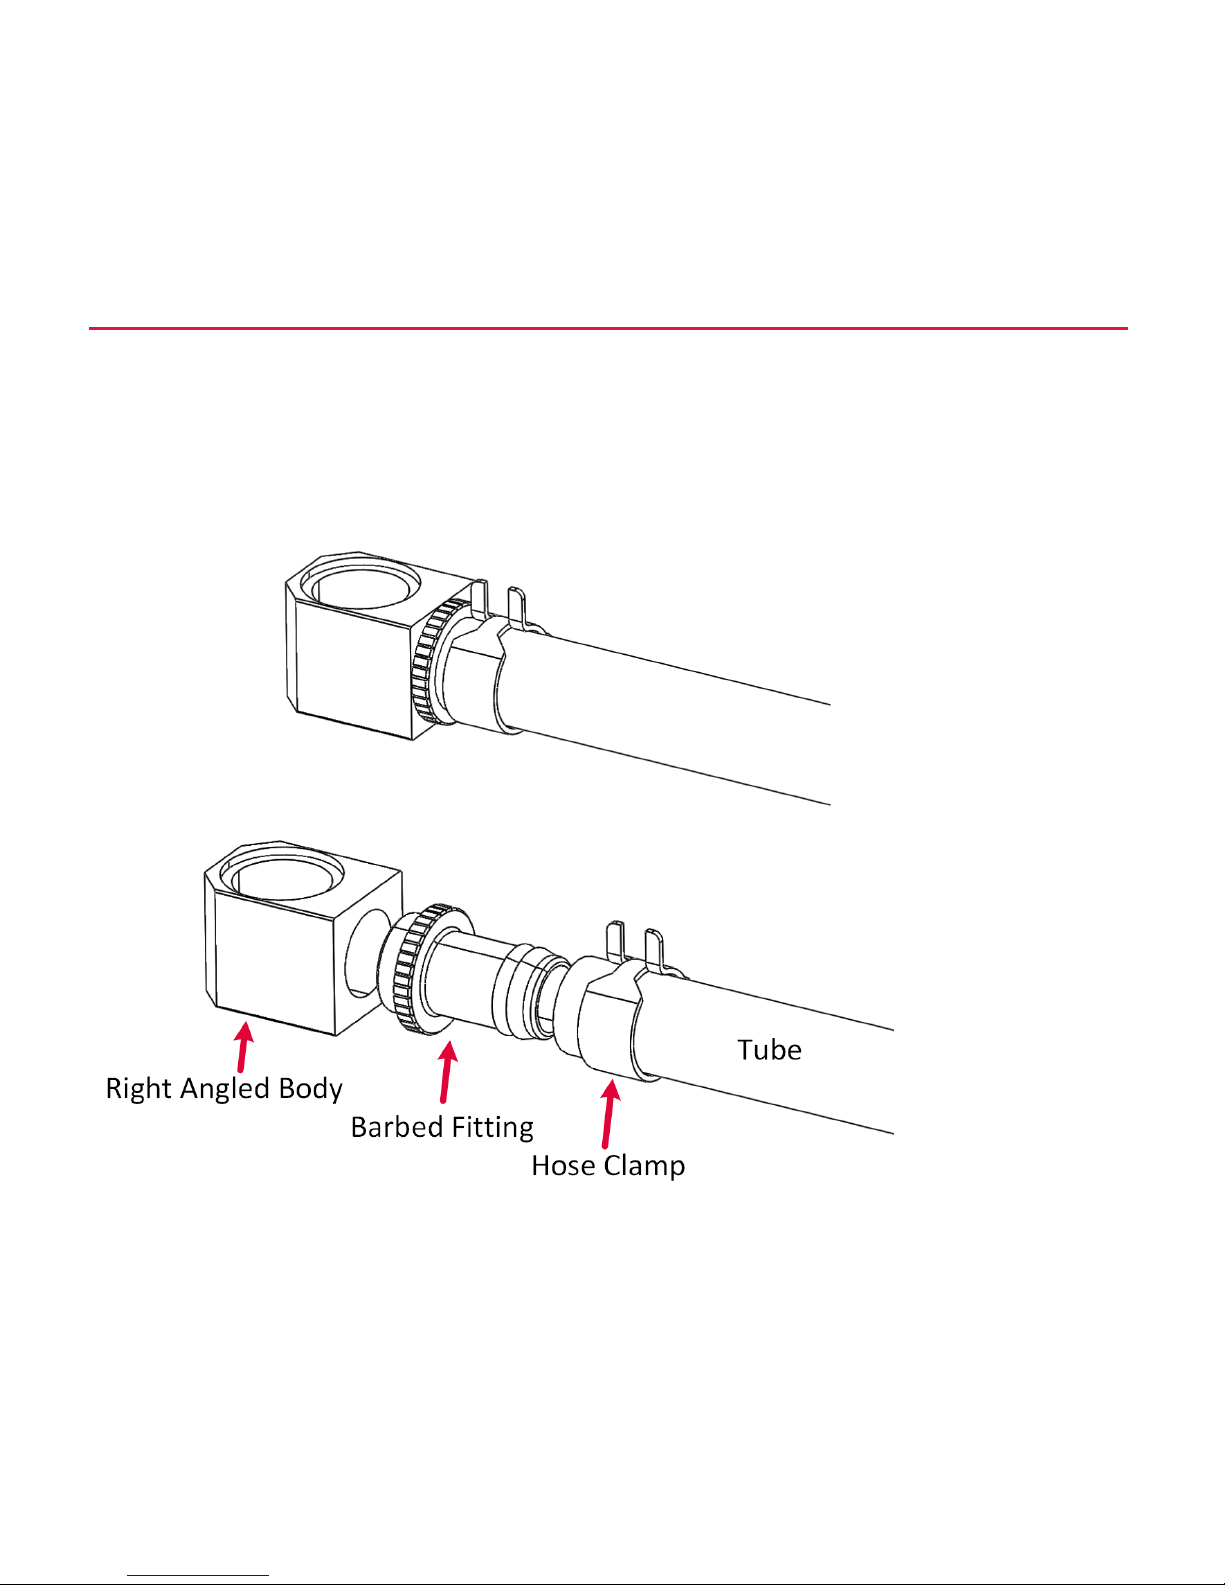
Assemble the Tube and Fittings
BittWare ships two pre-cut lengths of tube with partially assembled fittings. Although
they are pre-assembled, make sure the barbed fitting is properlytightened to the
right angled body to prevent leaks. The diagram below shows an assembled and
exploded view of these components.
Page 5
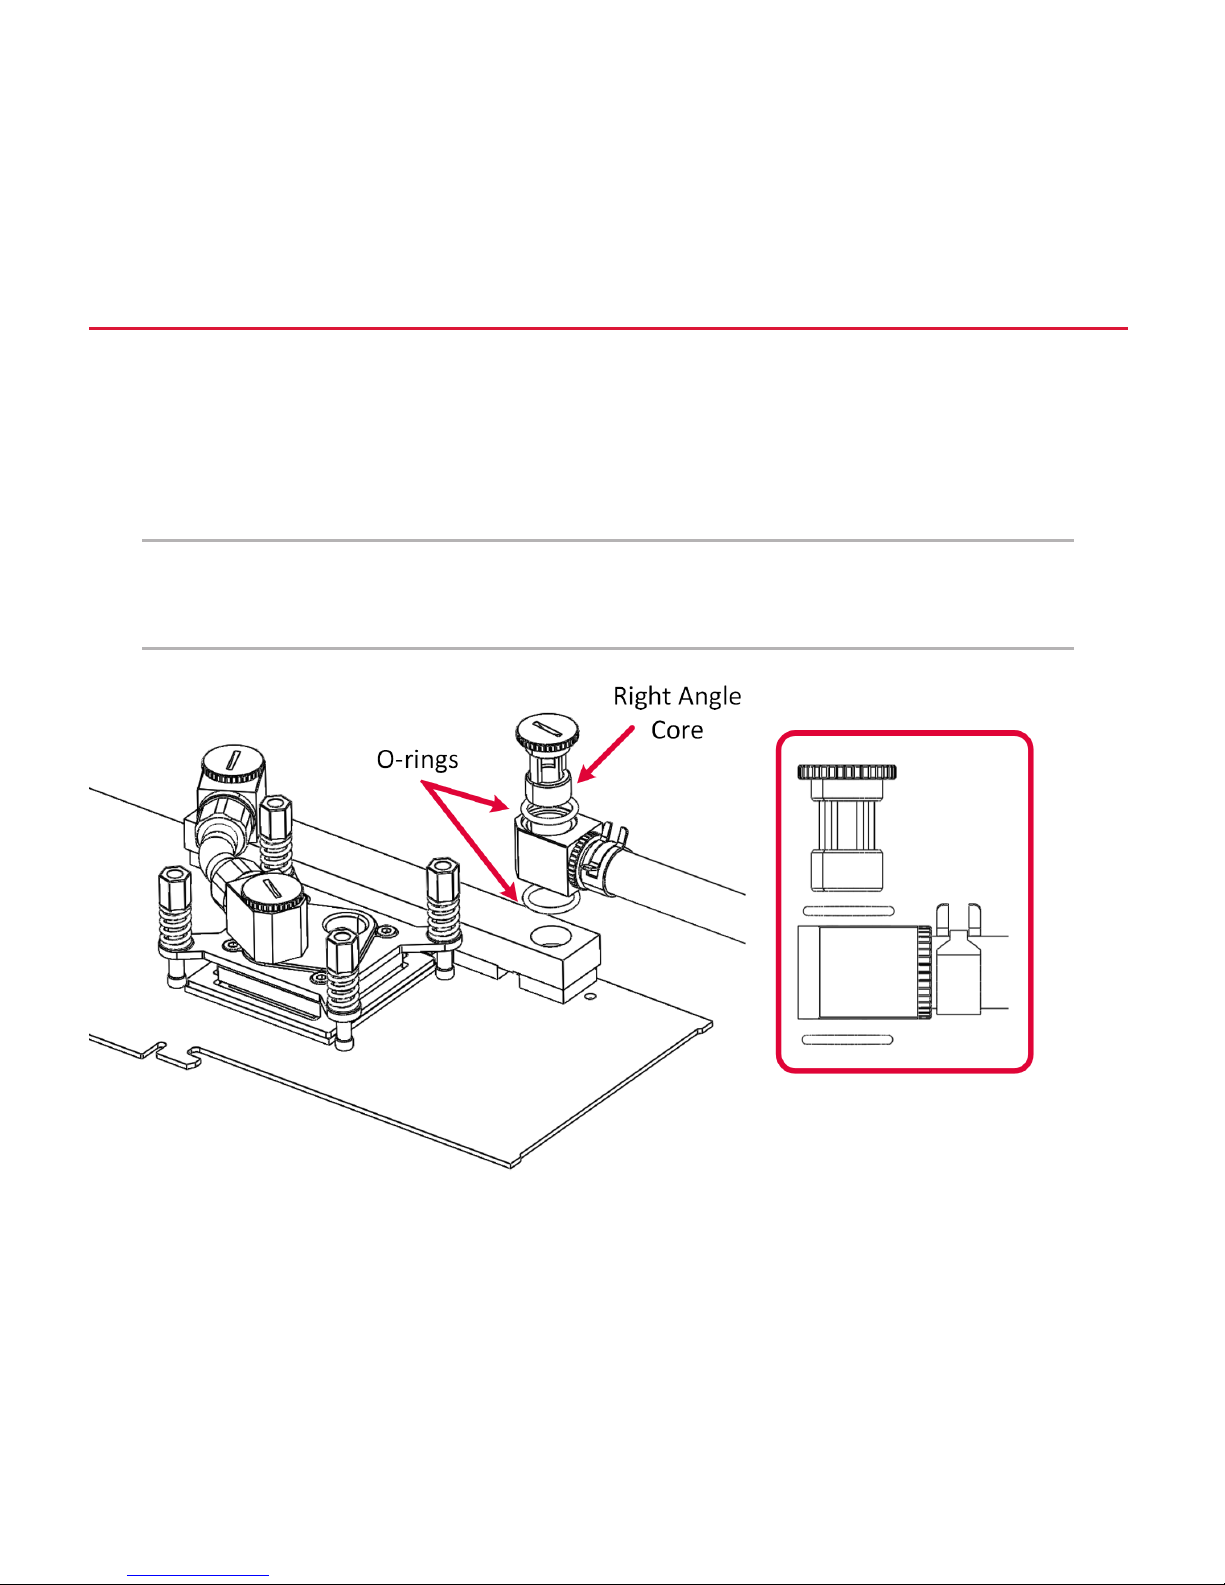
Assemble the Right Angled Fittings
The right angled fittings are made up of a body and core piece. Assemble these
fittings onto the inlet and outlet of the card, threading the core piece and tightening it
with a flathead torque driver to at least 8.7 in-lb [98 N-cm]. Repeat for both inlet and
outlet.
Note: This assemblyhas two o-rings that seal connections. Be sure to
install both o-rings, or the assemblywill leak.
Page 6
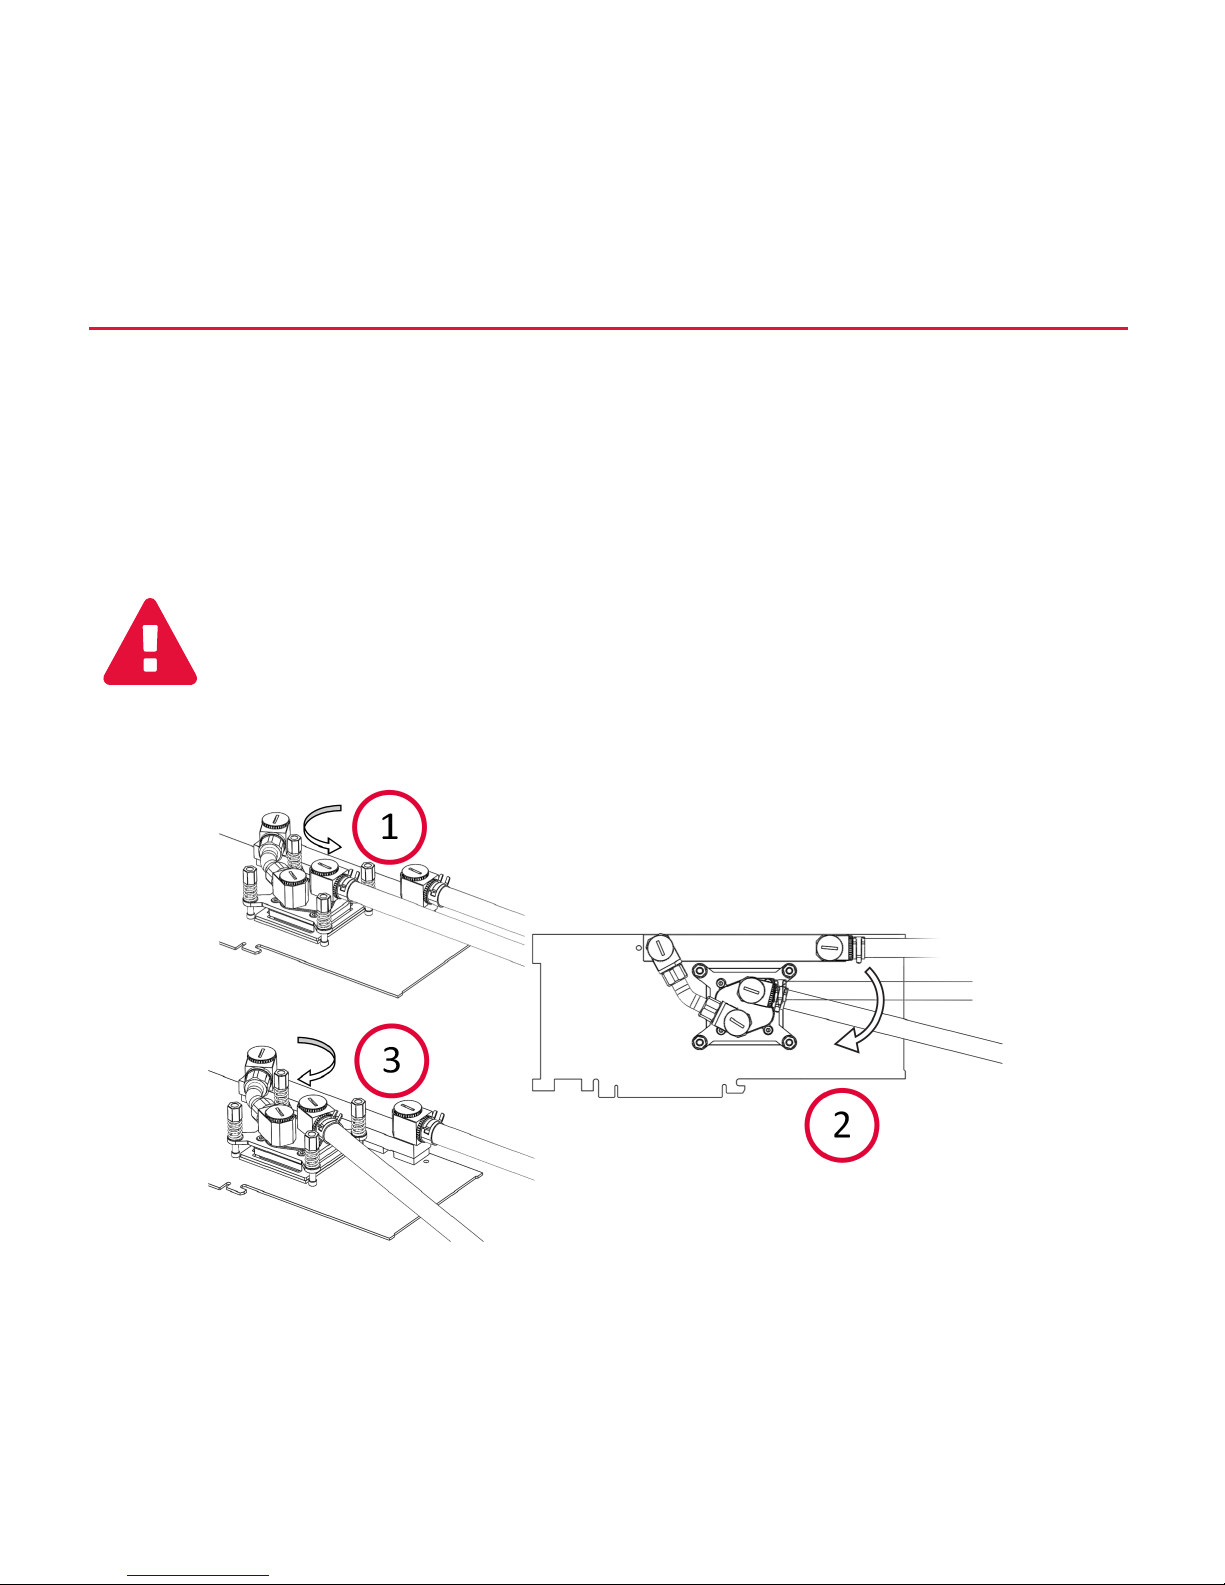
Adjust the Tube Direction
Using the provided fittings, you can adjust the tube direction to accommodate
various systems. However, do not move a fitting once you have tightened it down;
rotating the tubes once they have been tightened can loosen the leak-tight seal. If
you need to change the direction of the tube, (1) loosen the core piece, (2) set the
angle, and (3) tighten the core piece back to 8.7in-lb [98 N-cm].
Do not make changes to the liquid hardware when the card is
filled with fluid. This could permanently damage your board.
Page 7
Specifications
BittWare cooling hardware is made of nickel-plated copper and brass pieces.
Note: Using un-plated, dissimilar metals in your cooling hardware
increases corrosion and is not recommended.
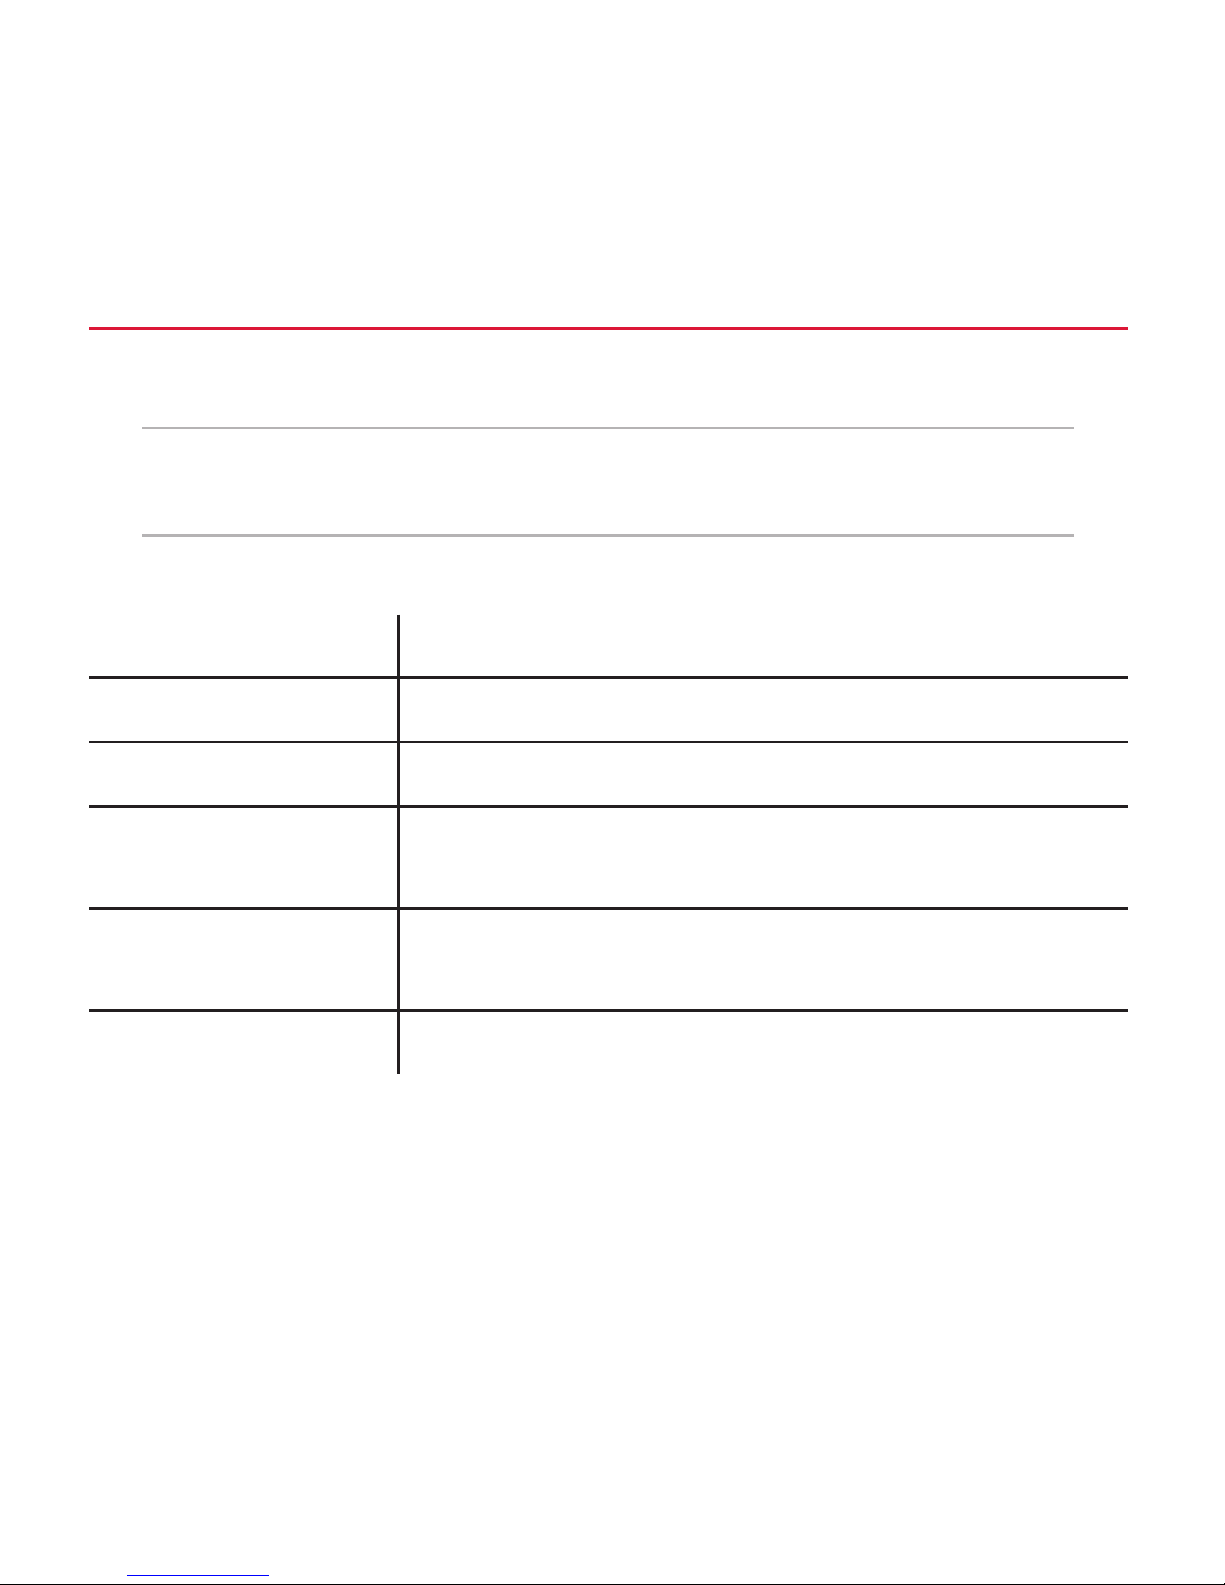
The table below is a full list of temperature, pressure, and hardware specifications:
Max Temperature 176°F [80°C]
Max Pressure 21psi [145kPa]
Coolant Water propylene glycol solution
Wetted Materials
Nickel-plated copper, nickel-plated brass, polyurethane
tubing, EPDM rubber o-rings
Torque spec for liquid
connections
8.7in-lb [98 N-cm]
Fitting threads G1/4 BSPP
Page 8

© BittWare 2018
11/27/2018 Edition
BittWare assumes no responsibility for any inaccuracies, errors, or omissions in this manual.
In no event will BittWare be liable for direct, indirect, special, incidental, or consequential
damages resulting from any defect or omission in this manual.
 Loading...