

Page 1
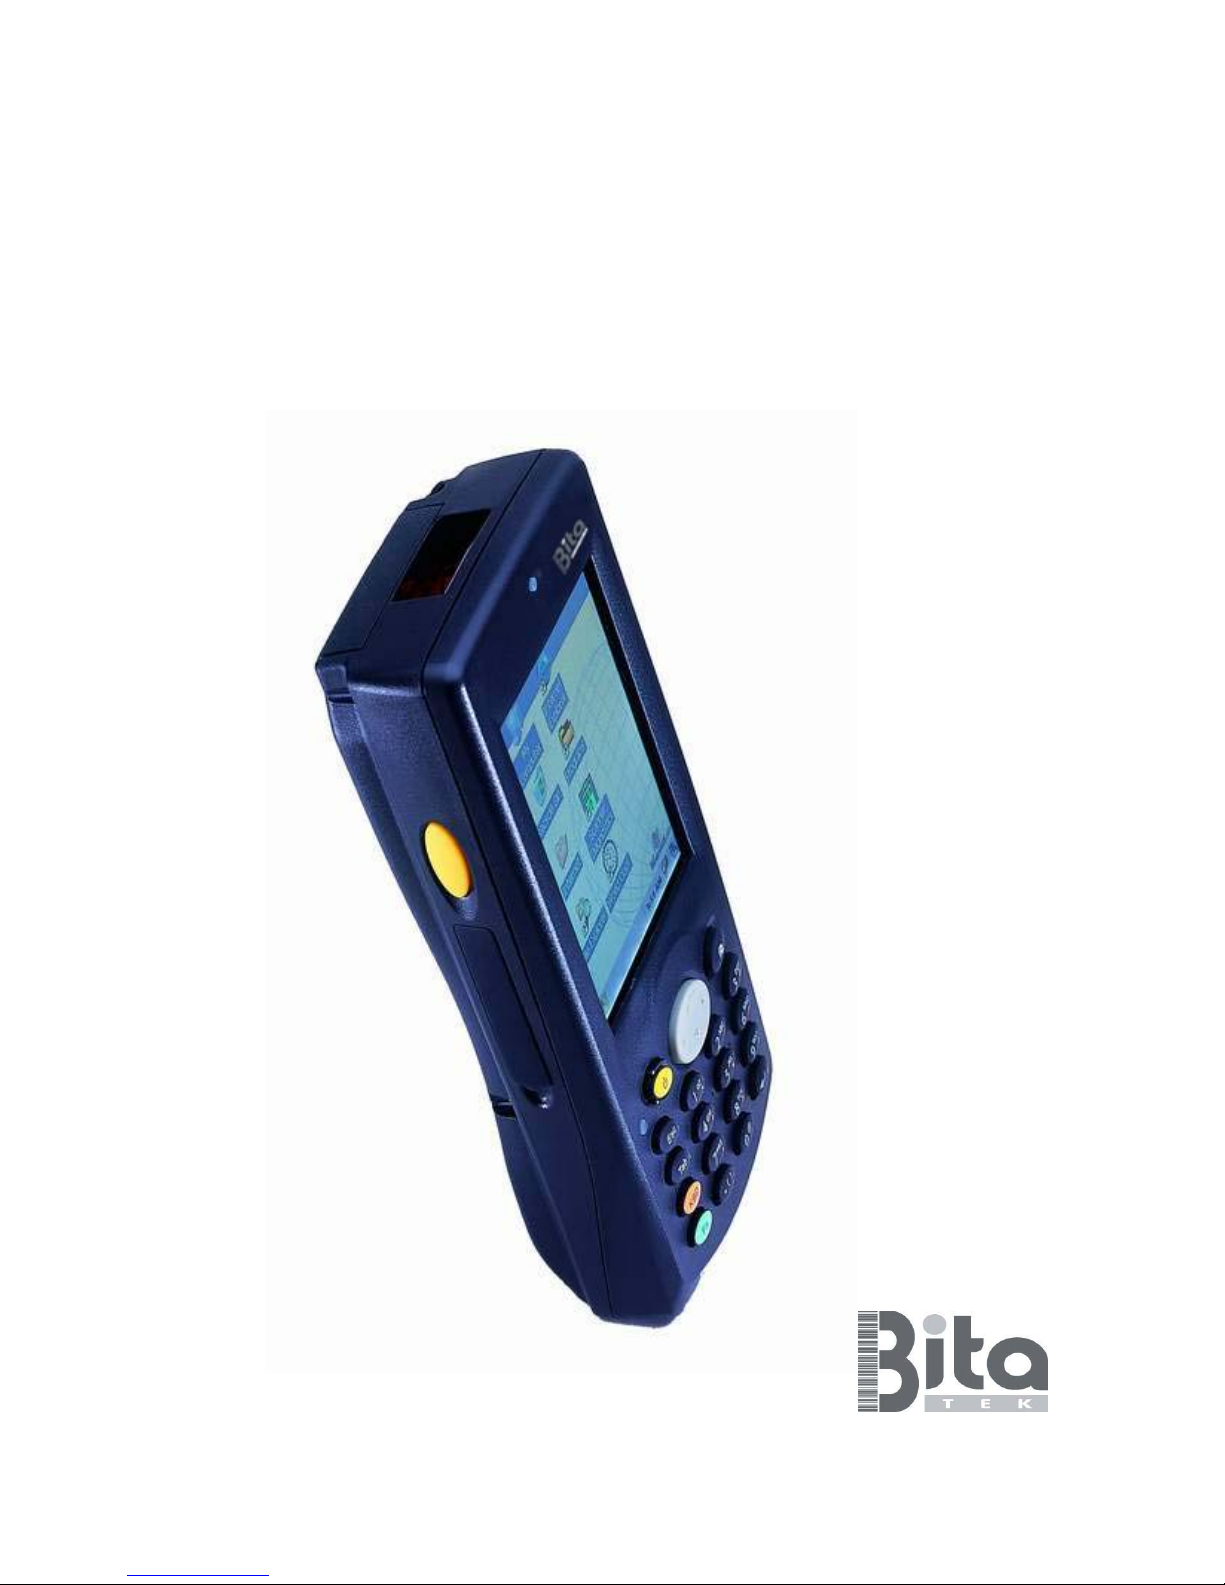
IT-6000 Series
User’s Manual
Page 2

Page 3

3
IT-6000 Series
Product Reference Guide
Page 4

BITATEK CO., LTD.
6F, 190-1, Ta -Tung Road, Sec. 3,Hsichih,
Taipei Hsien, Taiwan
TEL:+886 2 8647 1299 FAX:+886-2 8647 1542
Copyright ©2003 BITATEK CO., LTD. An Unpublished Work - All
rights reserved. No part of the contents of this documentation or
the procedures described therein may be reproduced or
transmitted in any form or by any means without prior written
permission of BITATEK CO., LTD. or its wholly owned
subsidiaries ("BITATEK"). Owners of BITATEK products are
hereby granted a non-exclusive, revocable license to reproduce and
transmit this documentation for the purchaser's own internal
business purposes. Purchaser shall not remove or alter any
proprietary notices, including copyright notices, contained in this
documentation and shall ensure that all notices appear on any
reproductions of the documentation.
Should future revisions of this manual be published, you can
acquire printed versions by contacting BITATEK Customer
Administration. Electronic versions may either be downloadable
from the BITATEK web site (www.bitatek.com.tw) or provided on
appropriate media. If you visit our web site and would like to
make comments or suggestions about this or other BITATEK
publications, please let us know via the “Contact” page.
Disclaimer
Reasonable measures have been taken to ensure that the
information included in this manual is complete and accurate.
However, BITATEK reserves the right to change any specification
at any time without prior notice.
All trademarks and trade names referred to herein are property of
their respective owners. ScanPro
® is a registered trademark of
BITATEK CO., LTD. and of its wholly owned subsidiaries.
Microsoft Windows
®, Windows® 2000, Windows®CE .Net,
Windows
® NT, and Windows® XP are registered trademarks of
Microsoft Corporation.
Page 5

5
Contents
Chapter 0
Before Getting Started
Introduction
Check the Package
Parts information
Charging the Battery
Installing Batteries
Charging battery with adapter
Charging battery with Docking Cradle
Chapter 1
Getting Started
Introduction
Setting Up
Starting
Calibrating the Touch Screen
Adjusting Brightness
Adjusting Volume
Scanning
Running Scanner Diagnostics
Scanning
Chapter 2
Using
Introduction
Using the Stylus
Using the Keypad
Using the Ear/Microphone
Using the Handstrap
Using Applications
Selecting Application
Page 6

Scanning
Scanning Bar Codes
Chapter 3
Powering
Overview
Suspend Mode
Suspending
Resuming
Backlight
Turn On Backlight
Turn Off Backlight
Batteries
Checking Battery Power
Installing the Main Battery Pack
Charging the Battery
Using the Power Adapter
Using the Docking Cradle
Backup Battery
Battery Life
Battery Disposal
Resetting
Warm Reset
Reasons to Warm Reset
Procedure to Warm Reset
After Warm Reset
Cold Reset
After Cold Reset
Chapter 4
Software Applications
Overview
Firmware Update Utility
Retrieving a Firmware Image Update
Extract Firmware Update Utility
Update IT-6000 Firmware
Flash Memory
Installing Programs
Using an Installation Wizard
Installing Programs Manually
Using File Explorer to Add to the Start Menu
Using ActiveSync to Add to the Start Menu
Page 7

7
Removing Programs
Selecting and Using Programs
Using the Task and Command Bars
Entering Data
Using the Stylus on the Touchscreen Display
Selecting Text
Entering Data with a Bar Code Scanner
Soft Keypad/Input Panel
Desktop Window
File Explorer
Inbox
Internet Explorer
WordPad
Chapter 5
Configuring
Overview
Context Sensitive Help
Calibrating the Touch screen Display
Adjusting LCD Brightness
Rotating the Screen
Adjusting Volume
Setting Application Buttons
Volume and Sounds
Setting the Date and Time
Power Configuration
Battery Tab
Power Off Tab
Memory Configuration
Memory Allocation & Usage
Network Configuration
Using Wireless LAN
Turn On/Off the Wireless LAN Module
Wireless LAN Configuration
Hardware & Firmware Version Information
Expansion Cards
Serial Number
Firmware Version
Page 8

Chapter 6
Networks, Communications, and Connections
Overview
SNMP
Installing & Setting Up the IT-6000 IrDA Dock Driver
IrDA Driver Installation
Setting up the IrDA Port
Installing & Setting Up Microsoft® ActiveSync
Microsoft® ActiveSync
Using ActiveSync
Setting up a Partnership
Transferring Files
ActiveSync File Synchronization
Networking
Setting up the Network ID
Network and Dialup Connections
RF Configuration Parameters
Network Setup: Remote ActiveSync
Page 9

9
Before Getting Started
This chapter contains hardware and software information to assist
you in making the most out of your Mobile Computer. The
components include:
z Check the Package
z Parts information
z Charging the Battery
Page 10

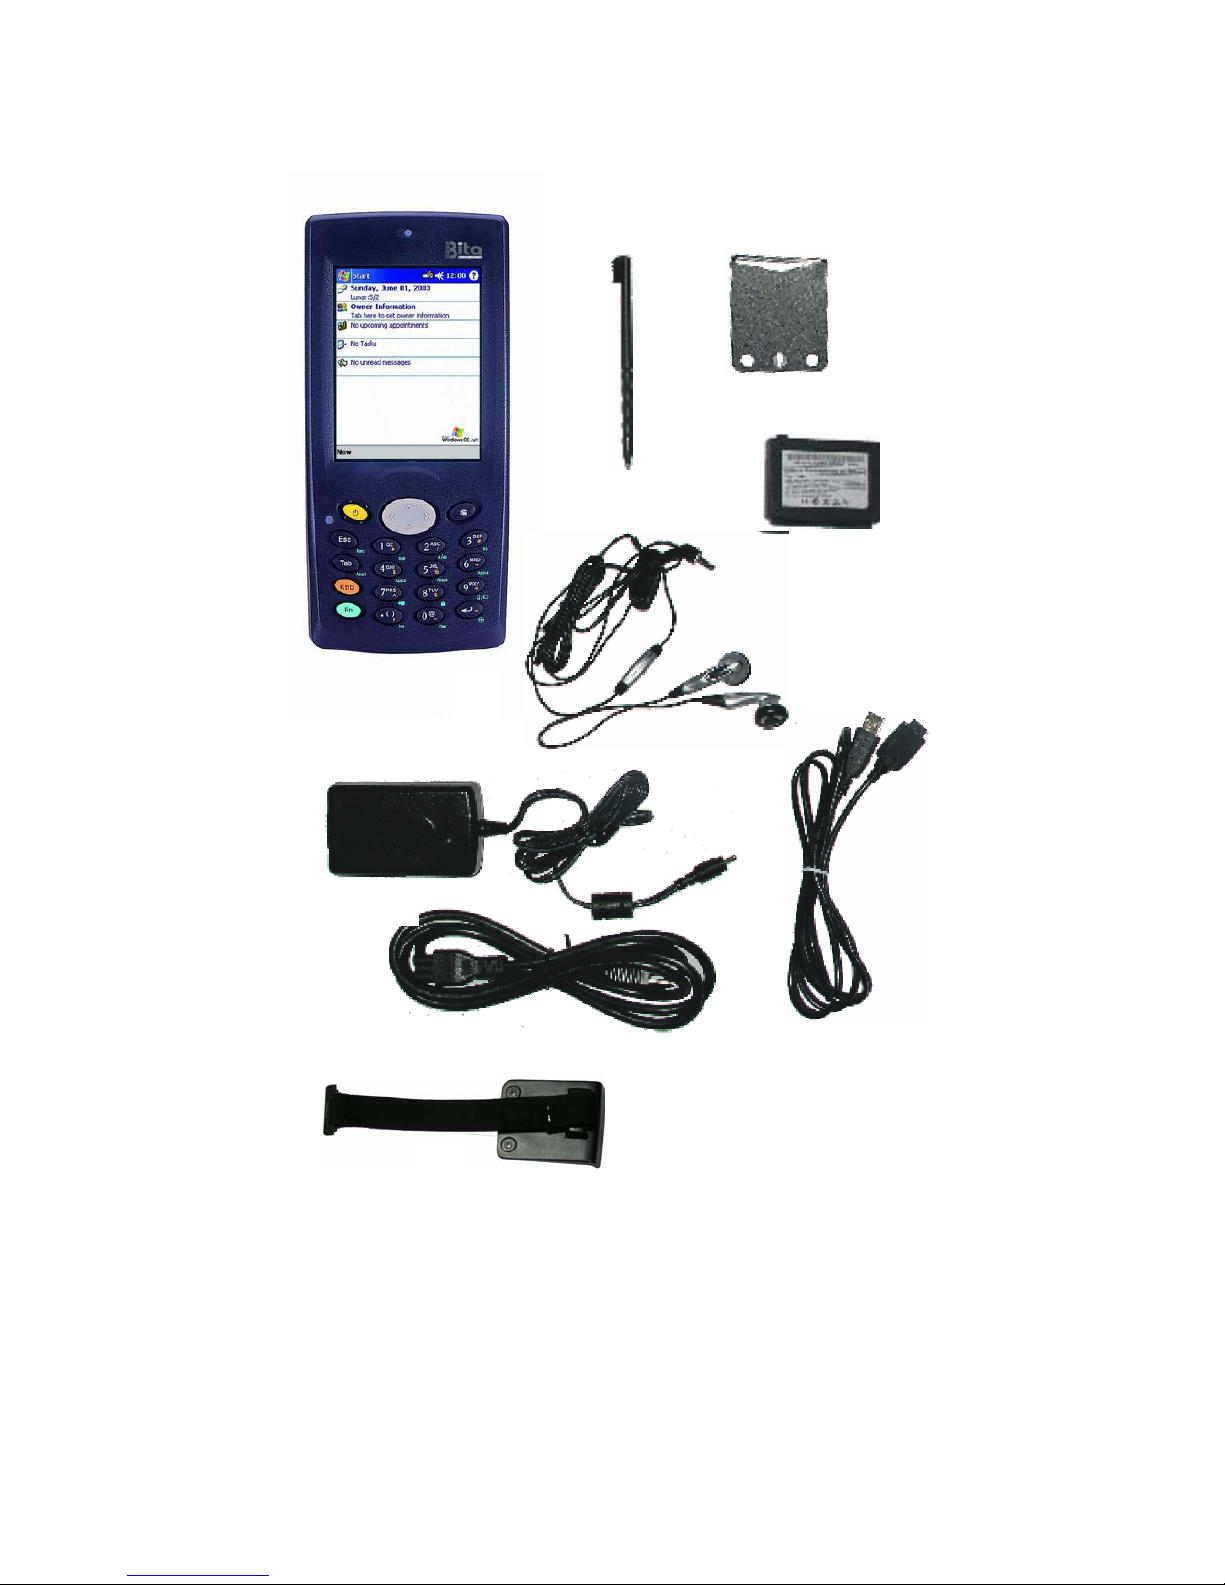
Check the Package
Carefully remove all protective materials from around the Mobile
Computer and save the shipping container for later storage and
shipping.
Verify that you received all equipment listed bellow:
z Main Unit ❶
z Stylus Pen ❷
z Open type CF Slot Cover ❸
z Standard Battery Pack ❹
z Ear/Microphone ❺
z Charging Adapter ❻
z Adapter Power Cord ❼
z Sync Cable ❽
z Handstrap ❾
z Quick Reference Guide
z Supplementary CD
Inspect the equipment for damage. If you are missing any
equipment or if you find any damaged equipment, contact the
Customer Support Center immediately.
Page 11
11
Figure 1. Contents in Package
❶
❷
❸
❹
❺
❻
❼
❽
❾
Page 12
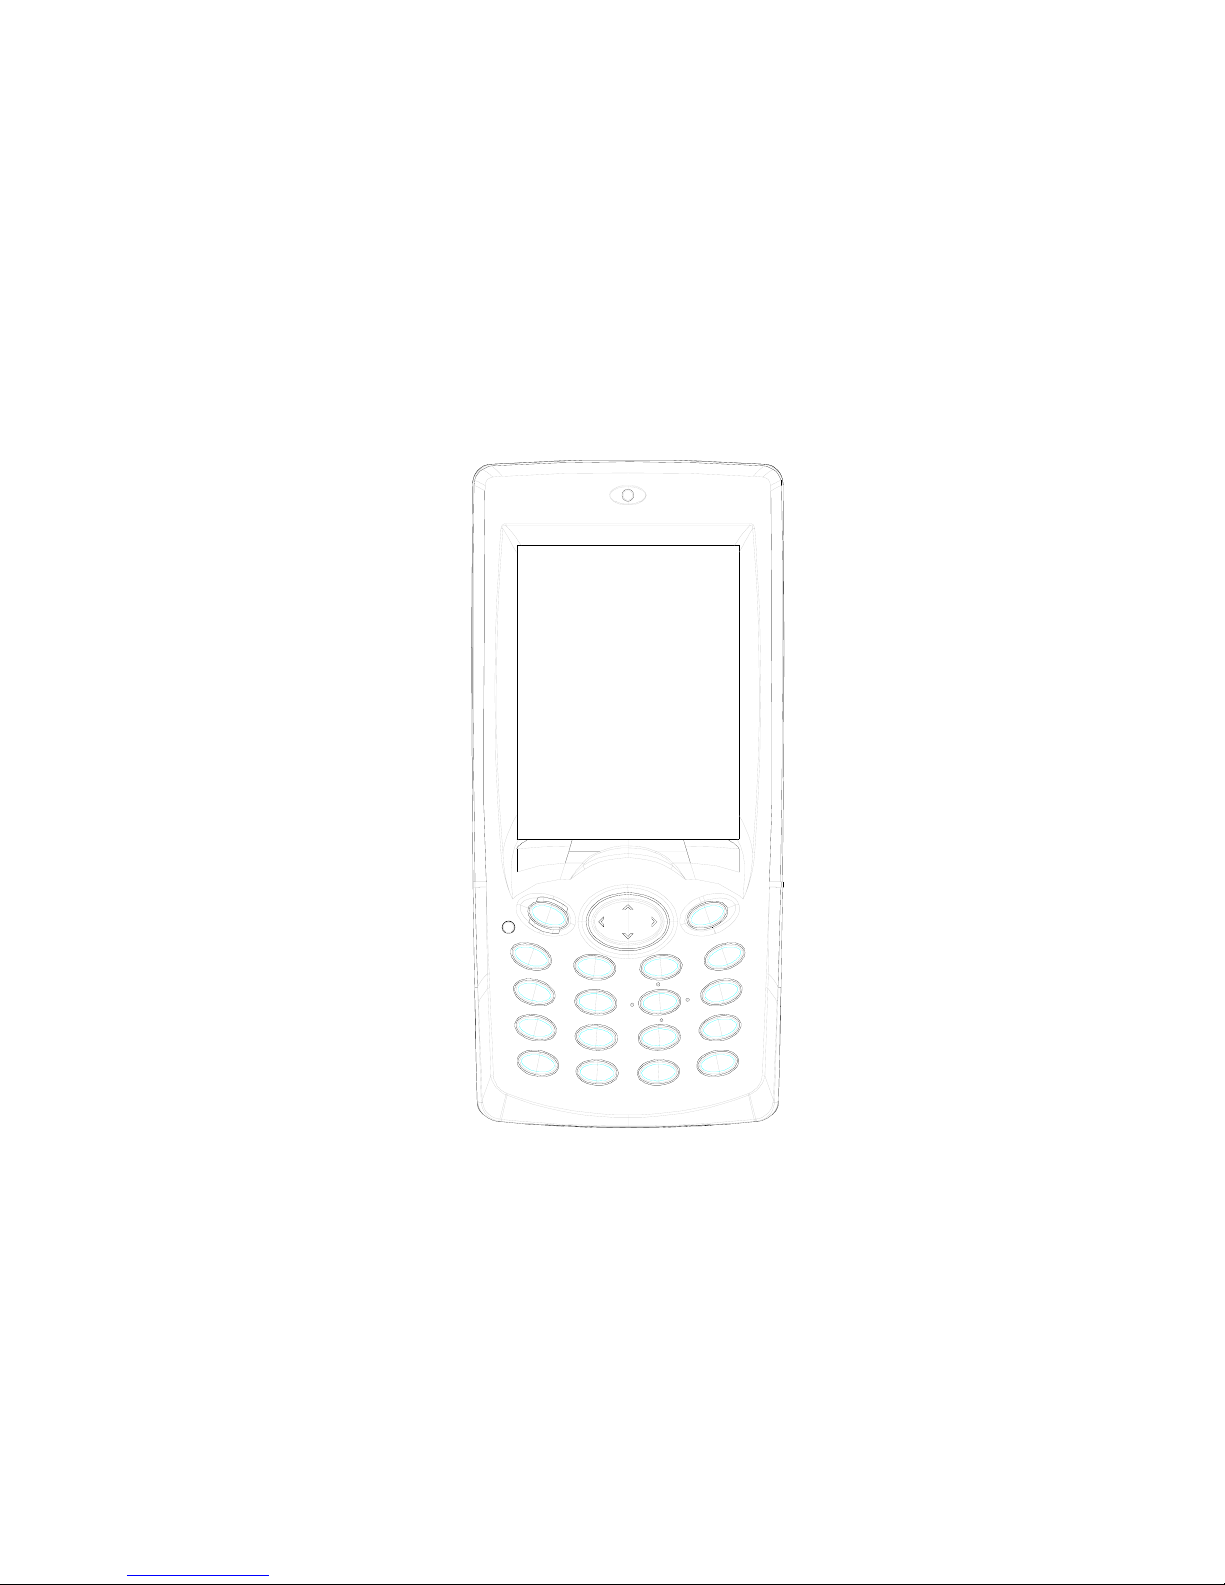
Parts information
Four perspectives of the Mobile Computer are in Figure 2 and
Figure 3. Refer to more detailed information.
Figure 2. Front View
Page 13
13
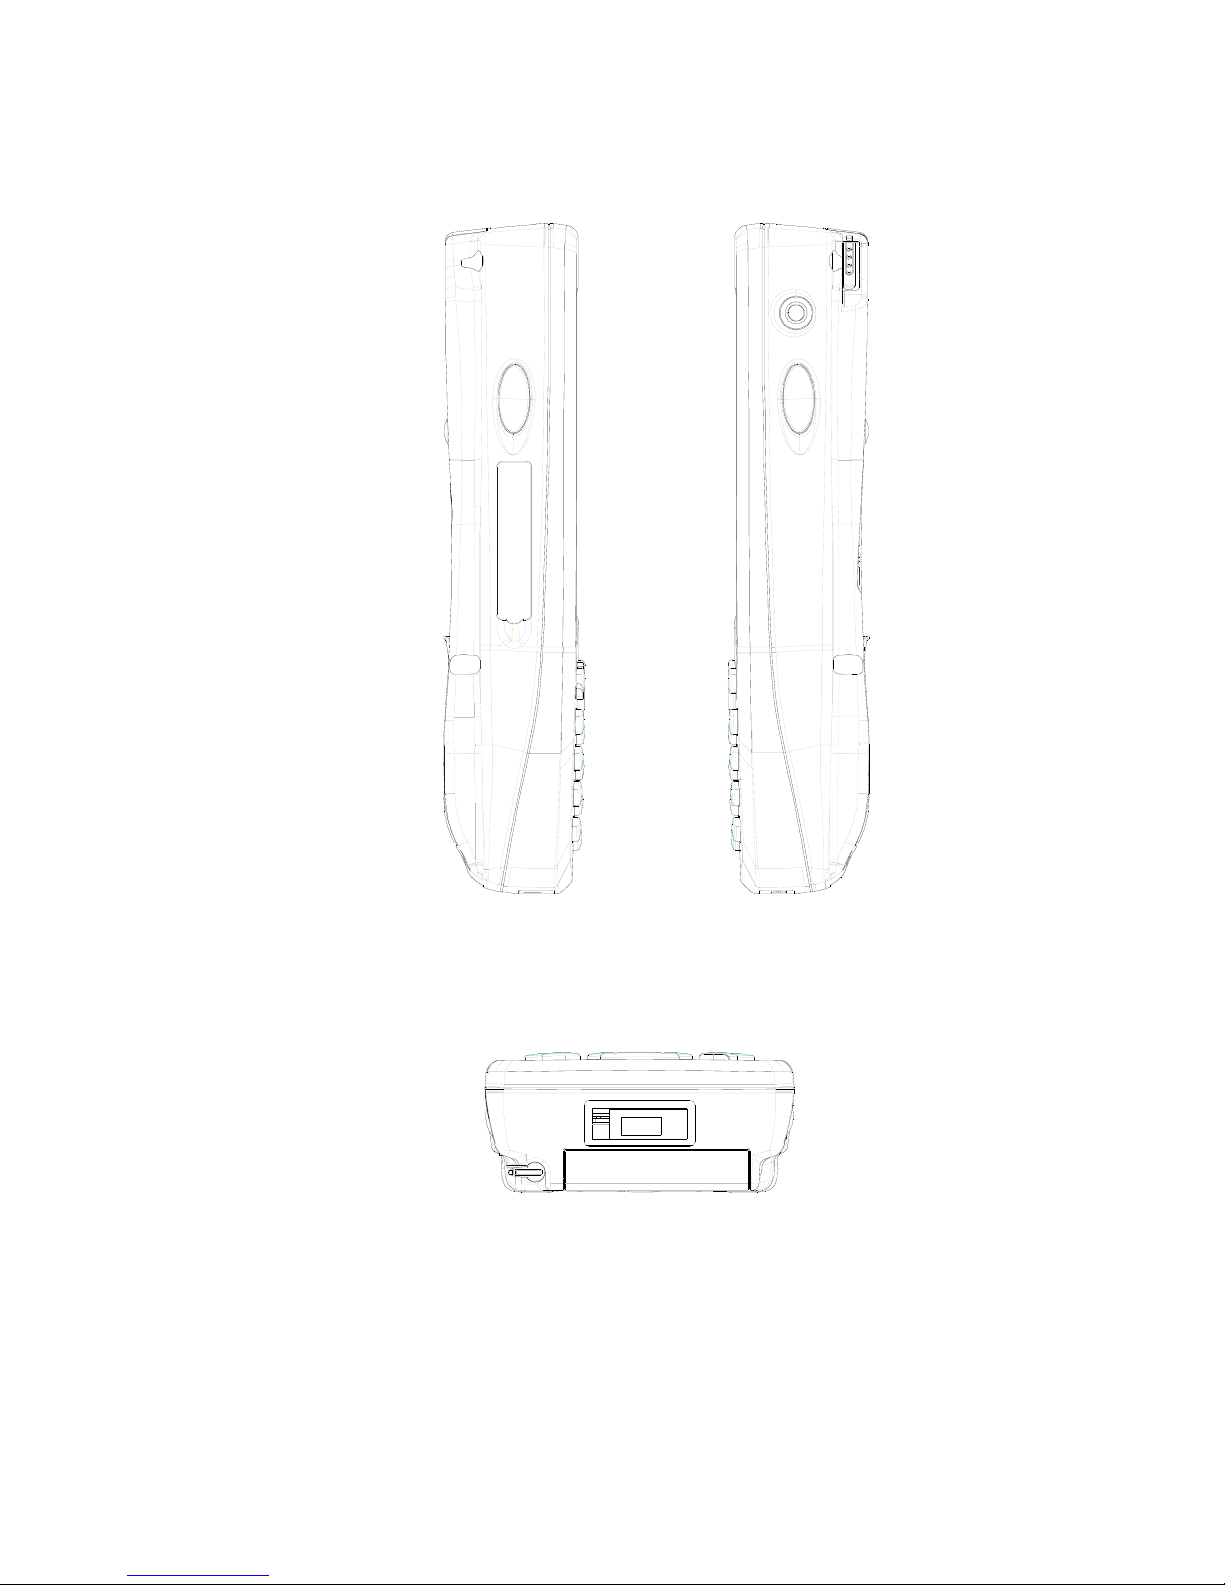
Figure 3. Left and Right View
Figure 4. Top View
Page 14
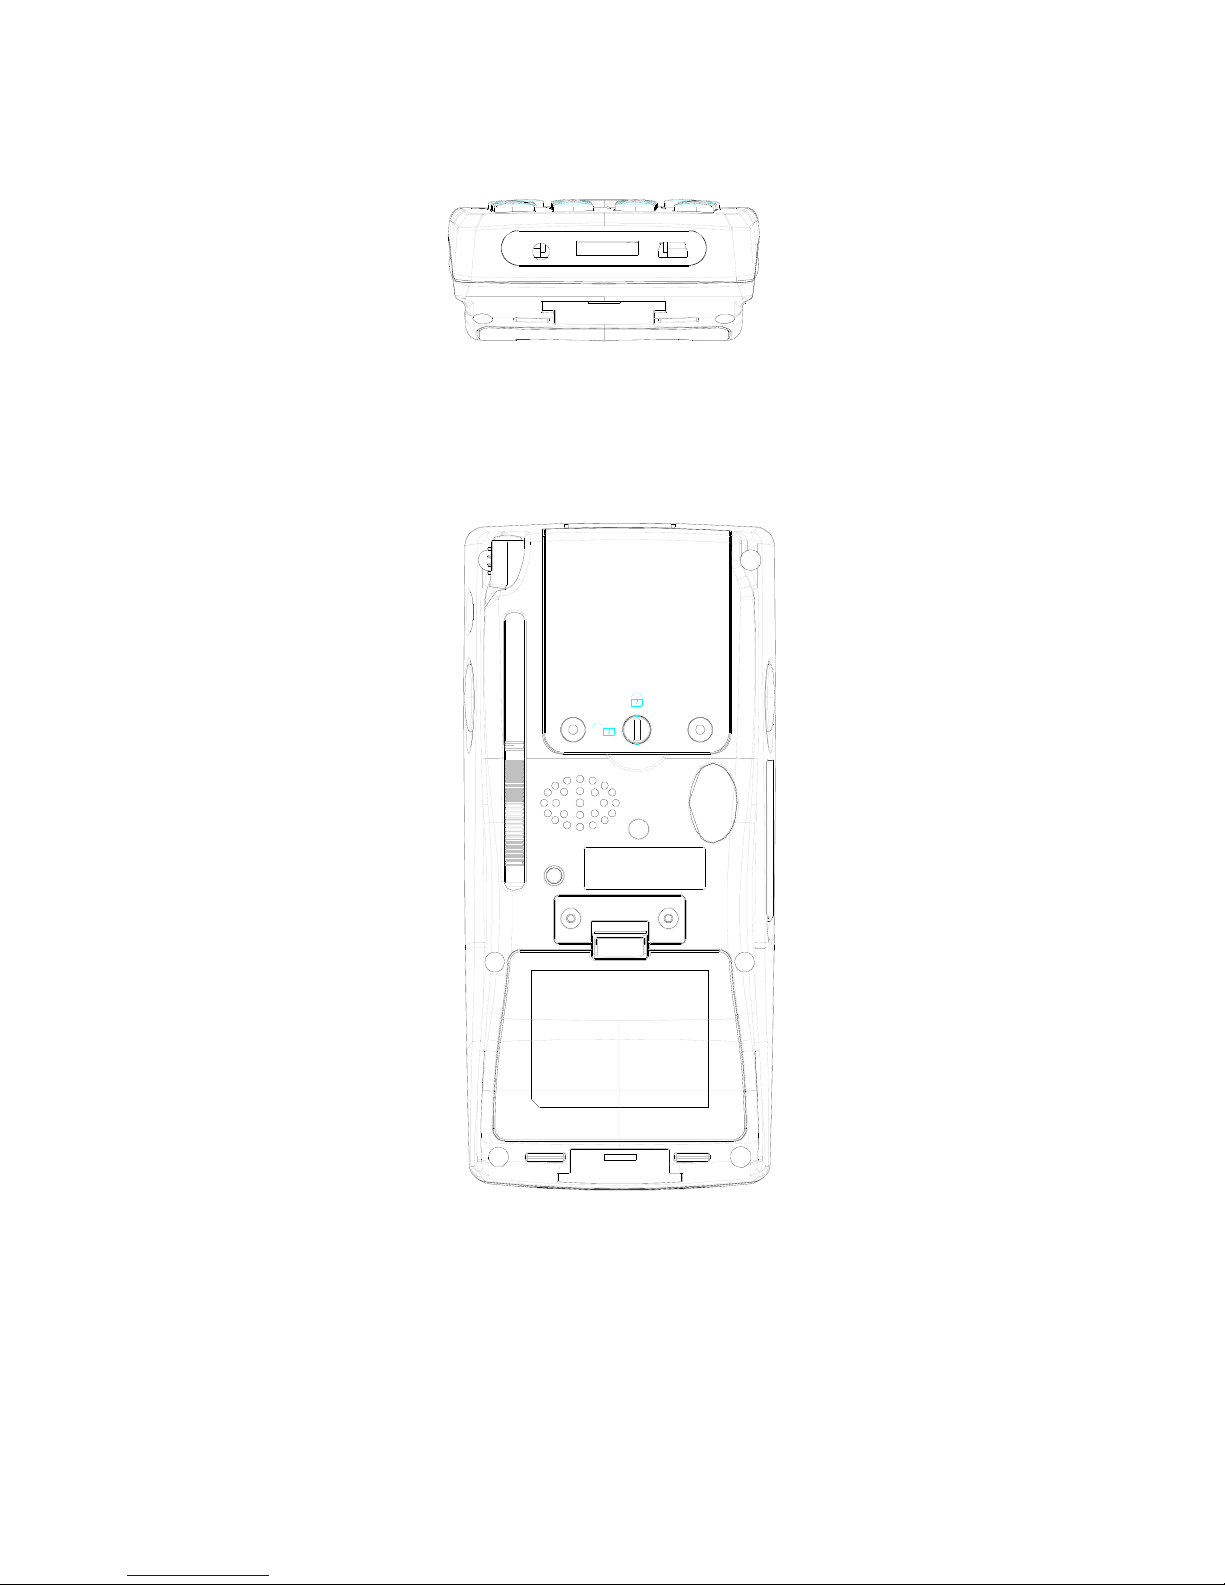
Figure 5. Bottom View
Figure 6. Back View
Page 15

15
LCD and Touch Screen
Show running applications and tap on screen with stylus pen to
interact with applications.
Scanner LED Indicator
Turn on Green or Red LED when it read barcode. If barcode
reading is successful, it’ll show Green, otherwise Red.
Scanner Button
Press to read barcode, then Barcode Scanner will start to trig. The
trigger will stop when reading finish. Release the button to stop
trigger work.
Scanner Window
When trigger work, laser beam or LED light will be through out to
this window. Aim the laser beam or LED light to the Barcode.
CF Slot
The CompactFlash card slot accepts either a storage card or the
various peripherals. If you want to use bigger CF interface as like
CF Camera or CF GPS card, you have to use Open Type CF Cover.
SD Slot
The SD card slot accepts a storage card. This slot accepts MultiMedia Card(MMC Card) also.
Note: SDIO support SD Interface card as like Camera. This kind of
interface doesn’t support.
Power LED Indicator and Alarm LED
When battery is charging, it turns on Red LED. After finishing
battery charge, it changes to Green LED.
Some application can use this LED as Alarm function. Alarm will
turn on Blue LED.
Page 16

Adapter Power Port
Connect External Power Adapter to this Port to charge the Battery.
Note : The Standard battery need to charge 4 hours. When you
open the box, charge the battery fully.
USB/Serial Sync port
Connect USB or Serial cable with Desktop and this Mobile
computer. It’ll make the connection between Desktop and mobile
computer.
Note : To make Microsoft ActiveSync connection, You have to
install Microsoft ActiveSync 3.7 or more in your desktop. You can
download that on the Microsoft Web site.
USB Host Port
The USB Host port support USB Keyboard, Mouse, Flash Memory
Disk, Ethernet. After connect with Docking cradle, you can use
standard USB host port. Connect USB peripherals here.
Note : USB Host only support low power consumption peripherals.
You can’t use
Power/Back light button
To turn on or off Mobile Computer, press power button shortly. If
you want to Turn on or off Back light then press power button over
1 second.
Navigation Button
Move the direction to Up/Down/Left/Right.
Home Button
Move to Desktop Window or Run the application that is defined by
user. Sometimes this can be used as Scanner Button.
Page 17

17
Key Pad
Input number or alphabet characters. We can run special functions
with Fn Key.
Ear/Microphone Jack
Connect Ear/Microphone to hear audio sound or record voice. It’s
useful for VoIP phone or Voice chatting.
Speaker
Play the sound effect or scanner beep sound.
Battery cover Latch
Open or lock battery cover. It’s easy to open or close cover, if pull
the latch first.
Backup Battery Switch
If this switch turned off, it will Keep backup battery status. But, it
must be turned on before using. The backup battery will keep the
memory status.
Note: Turn off the backup battery switch, when you have no plan
to use in short term. And check the backup battery status before
using. If the backup battery was exhausted, it needs almost 10 or
more hours.
Emergency notice switch
When user take out the battery or the battery cover is opened, this
switch will be released, and it will notice to Mobile Computer to
use the backup battery to keep the memory.
Battery Compartment
Insert the battery with correct direction and close the cover.
When you want to use High capacity battery pack, use the high
capacity battery cover.
Page 18

Charging the Battery
Before using Mobile Computer, Please charge the battery fully. You
can indicate with Green power LED. The battery usually charges in
4 hours to fully charge.
Installing Batteries
1. Pull the battery cover latch until the cover releases.
2. Lift the battery door away from the Mobile Computer.
3. Insert the lithium-ion battery in the battery compartment,
ensuring the battery snaps into place.
4. Replace the battery cover by inserting the bottom first.
5. Pull the battery cover latch to secure the battery cover.
Charging battery with adapter
1. Connect power code to power adapter.
2. Connect power code to the power source.
3. Insert power adapter to the power jack.
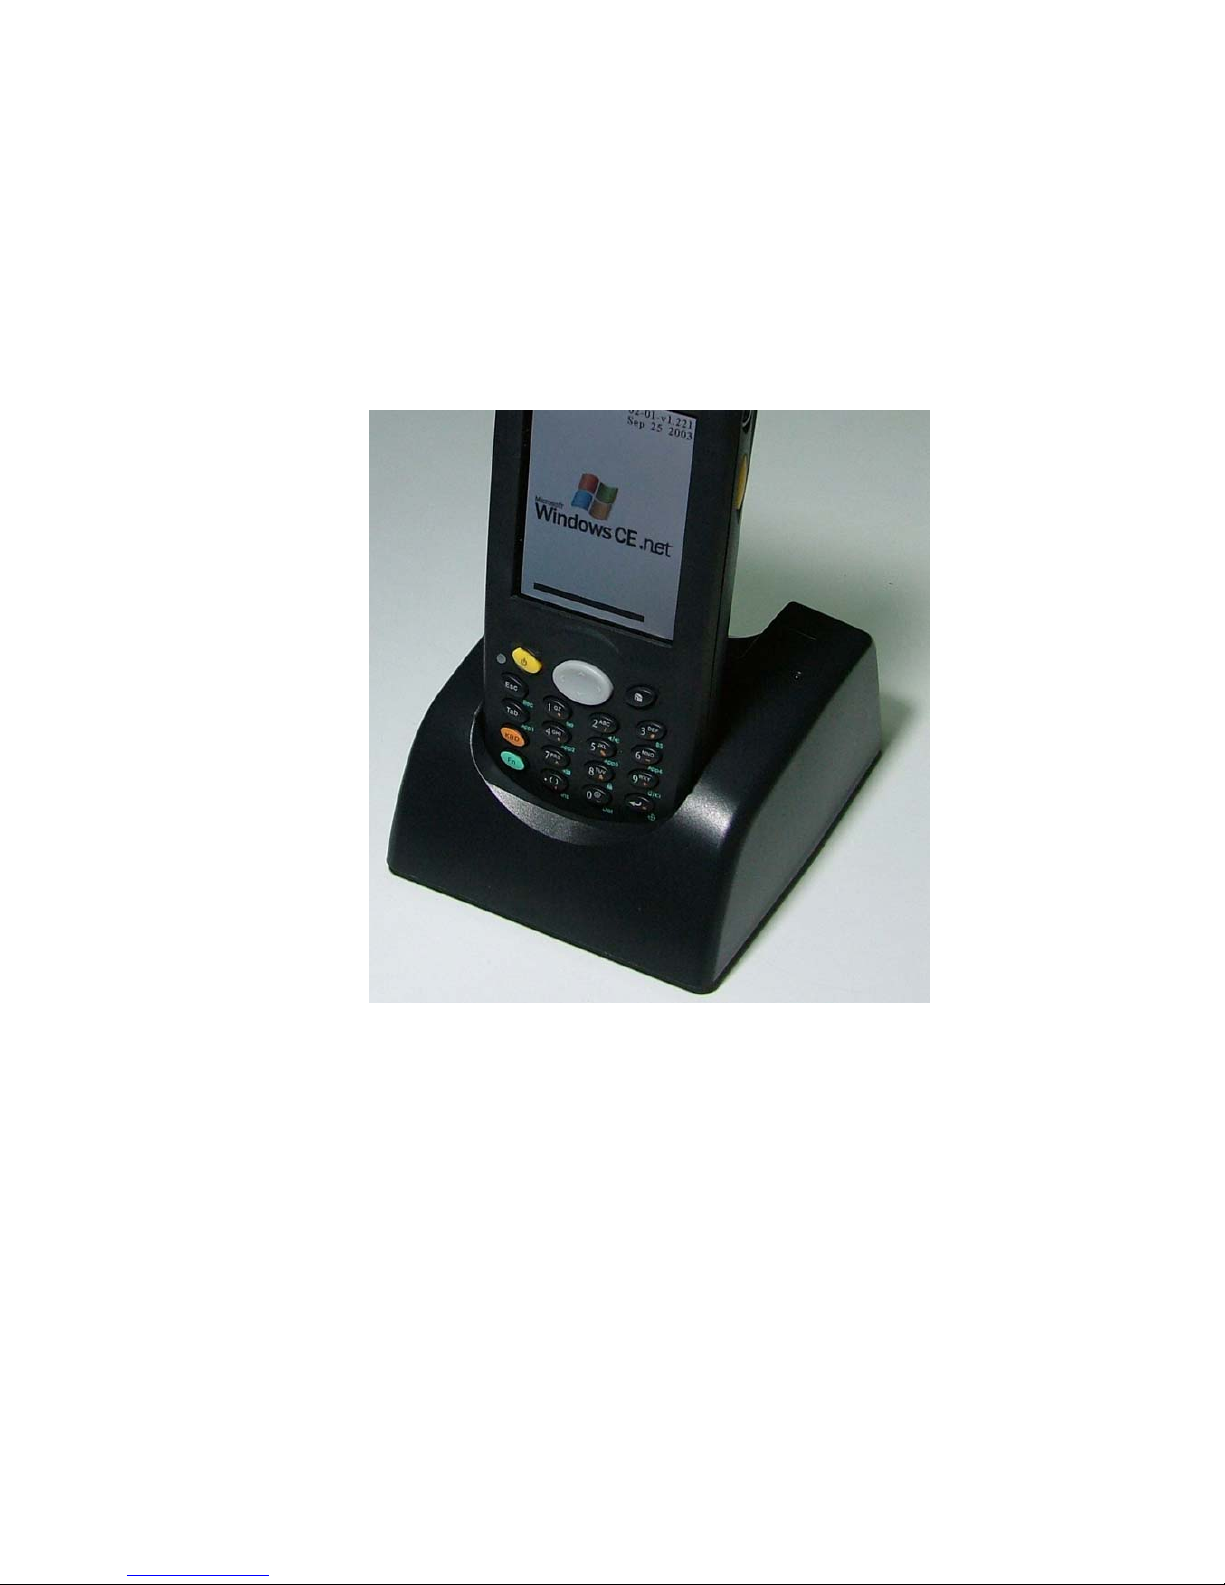
Charging battery with Docking Cradle
1. Connect power code to power adapter.
2. Connect power code to the power source.
3. Insert power adapter to the power jack of docking cradle.
4. Put Mobile Computer on the cradle.
Note:
Page 19

19
Getting Started
This section covers the most basic aspects of preparing the Mobile
Computer for use. Please refer to the appropriate sections for more
information.
z Turn On/Off
z Setting Up
Starting
Calibrating the Touch Screen
Adjusting Brightness
Adjusting Volume
z Scanning
Running Scanner Diagnostics
Scanning
Page 20

Turn On/Off
Press Power button to turn on the device. And, to turn off the
device, press Power button again. The device is not turned off
exactly. It just will make suspend. Every running application will
be kept until next turn on. And if turn on, it will show the screen
very quickly.
Setting Up
If this device is first to you, you need to set some configuration.
Because the default setting can be different depend on user.
Starting
After turning on the device, it shows Desktop Window. You can
input or select with stylus pen to tap on the screen.
Page 21

21
Figure 2. Desktop Window
Page 22

Calibrating the Touch Screen
This device was produced with calibrated screen. So, the user does
not need to modify at first. If you feel the positioning is incorrect,
you need to recalibrate.
1. Press ‘=’ key as press down Fn Key.
2. It’ll show the calibration screen.
Figure 2. Calibration Screen
3. Tap the center of the target, repeat as the target moves around
the screen.
Page 23

23
Adjusting Brightness
The Backlight factory default is maximum status. But, user can feel
uncomfortable. At this moment we can try to control the Backlight.
This will make the bright ness change.
1. Press Right or Left on the Navigation button with Fn Key.
2. You can see the brightness change.
3. Set proper value.
Adjusting Volume
The Volume factory default is maximum status. But, user can feel
uncomfortable. At this moment we can try to control the Volume.
1. Press Up or Down on the Navigation button with Fn Key.
2. You can hear the volume change.
3. Set proper value.
4. If you don’t want sound, press ‘3’ Key with ‘Fn’ key. This will
make mute or not.
Scanning
Now, you are ready to use the device. Let’s try read the barcode.
Running Scanner Diagnostics
1. Tap the Start-Programs-Scanner-Scanner Diagnostics to try to
read barcode.
Scanning
1. Press scanner button.
2. Aim the Laser beam or LED light to the barcode.
3. Check the read barcode.
Page 24

Page 25

25
Using
This chapter will show how to use Stylus pen and other accessories
include in the package.
z Using the Stylus
z Using the Keypad
z Using the Ear/Microphone
z Using the Handstrap
z Using Applications
Selecting Application
z Scanning
Scanning Bar Codes
Page 26

Using the Stylus
The stylus is located next to the CF Cover. The stylus on the device
is the equivalent of the mouse on a PC. Use the stylus to:
• Navigate the touch screen display.
• Select characters in the soft input panel (SIP).
• Select applications from the desktop or system tray.
• Select tabs, fields and text within applications and dialog boxes.
Figure 2. Using the Stylus
It is good practice to replace the stylus into the holder after use so
you don’t lose or misplace it.
Note :
Never use a pen, pencil, or other sharp object on the touch screen
display. Use only the supplied stylus or plastic-tipped pens
intended for use with a touch screen-sensitive display.
Page 27

27
Using the Keypad
Keypad is very useful input method. You can input numeric
character, alphabet character. And you can control device with
some function keys.
Numeric Character
Press numeric keys that you want to input. But, you need to make
sure which character type selected. Check the tray icon to make
sure character type.
Alphabet Character
Press alphabet character that you want to input. Press same key
shortly to input other alphabet character. If the character you want
appear, move cursor or press other key.
Symbol
Press symbol character that you want to input as press KBD key.
Symbol was printed as orange color. And that has no relation with
current input character type. So, you can input symbol at any time.
Current Input Character Type Change
When you need to change the Current Input Character Type, press
Tab key with KBD key. It’ll rotate the Current Input Character
Type. Basically, the English version is using following order.
Numeric → Alphabet Capitals → Alphabet Lower → Numeric …
Page 28

Device control using the function key
To control the device, press defined function key with Fn Key.
Following table shows device control function define.
Key Description
Left Decrease brightness
intensity
Right Increase brightness
intensity
Up Increase Volume
Down Decrease Volume
Home Go to Desktop and hide
all running applications
Esc Run Record or defined
application
1 Turn on/off Wireless
LAN
2 Sound Mute
3 Back Space
4 Run App2 or defined
application
5 Run App3 or defined
application
6 Run App4 or defined
application
7 Copy to Clipboard
8 Paste with Clipboard
9 Rotate screen
0 Insert
. Delete
Enter Calibrate Screen
Tab Run App1 or defined
application
Page 29

29
Using the Ear/Microphone
Connect Ear/Microphone to Earphone Jack. This is look like
cellular phone’s earphone. But, it support Stereo Sound. When you
are using VoIP phone function, this will be useful.
The Mobile Computer doesn’t have internal microphone. So, to
record voice, you have to use Ear/Microphone.
Figure 2. Using the Ear/Microphone
Page 30

Using the Handstrap
The Mobile Computer has a handstrap which increases comfort
when holding the device for extended periods of time. The
handstrap may be removed or replaced, if damaged.
To use the handstrap:
1. Hook the upper of the handstrap from the Scanner Window
2. Fix the upper of the Handstrap with 2 screws.
3. Hook the bottom of Handstrap from the handstrap connector.
Figure 2. Using the Handstrap
Page 31

31
Using Applications
To select and open programs, select Start > Programs to open a list
of available programs. If the program has an icon on the desktop,
tap to open it.
Using the Task Bar
The task bar at the bottom of the screen displays the active
program and current time, and allows you to select programs and
close screens.
Figure 2.
Task Bar
Page 32
Using the Command Bar
Use the command bar at the top of the screen to perform tasks in
programs. The task bar includes menu names, buttons, and the
input panel button. To create a new item in the current program,
Select File > New > View.
Figure 2.
Command Bar
Page 33

33
Scanning
Running Scanner Diagnostics
1. Tap the Start > Programs > Scanner > Scanner Diagnostics to
try to read barcode.
Scanning
1. Press scanner button.
2. Aim the Laser beam or LED light to the barcode.
3. Check the read barcode.
Page 34

Powering
This chapter explain the Mobile Computer Power System, and how
to control the power consumption, how to make reset.
z Suspend Mode
z Batteries
Checking Battery Power
Installing the Main Battery Pack
Charging the Battery
Backup Battery
Battery Life
Battery Disposal
z Resetting
Warm Reset
Cold Reset
Page 35

35
Suspend Mode
The Mobile Computer will go into a suspend mode or sleep mode
when it is idle for a period of time. This duration can be
customized using the Power control panel (refer to "Power Off
Tab". Suspend mode works and looks just like you are turned the
unit off. Press the <Power> key to suspend (put to sleep). Press the
<Power> key again to resume its previous state.
Use the Battery Power control panel to set the idle duration and
suspend mode initiation. This will save battery power when the
device is not in use.
Suspending
The following conditions will suspend (put the device to sleep):
1. Press the <Power> key.
2. The sleep timer expires, which indicates that there has been no
use for a specified period of time.
3. A dead or failed battery condition occurs.
Resuming
Use one of the following methods to resume (wake up the device):
z Press <Power> key to suspend or resume(wake up).
z Put the device into a docking cradle.
z Press the Scan Trigger to wake up the unit .
When a battery fails while the unit is in suspend mode, the device
remains suspended until the battery fail condition goes away.
Page 36

Batteries
The main battery pack in the device is a 3.7 V, 1800 mAh Lithium
Polymer battery. You will be alerted with a message dialog box
when the battery reaches a low state. A complete battery charge
takes about four hours depending on battery state.
Note:
1. Prior to using the device for the first time, you will need to
charge the main battery.
2. Always charge the battery within the temperature range of
temperature 32°–113°F (0°– 45°C).
3. Use only the correct battery, charger, and dock supplied by a
dealer. The use of other battery supplies can damage the
device and void your warranty.
Checking Battery Power
If you remove the battery or the battery fails, you have about 2
hours to swap in a new battery or charge the battery before the
backup battery fails.
Battery Power Gauge
The Power control panel applet displays a battery power gage.
Low Battery Conditions
When the battery is low, a dialog box pops up and alerts you to
charge the battery. You may close the window, but the dialog box
will pop up again before the battery reaches the Battery Dead
condition.
Battery Dead Condition
The battery sensor initiates a shutdown of all applications, and
closes the RF Network connection.
When the battery has been replaced, the device will resume as
before.
Page 37
37
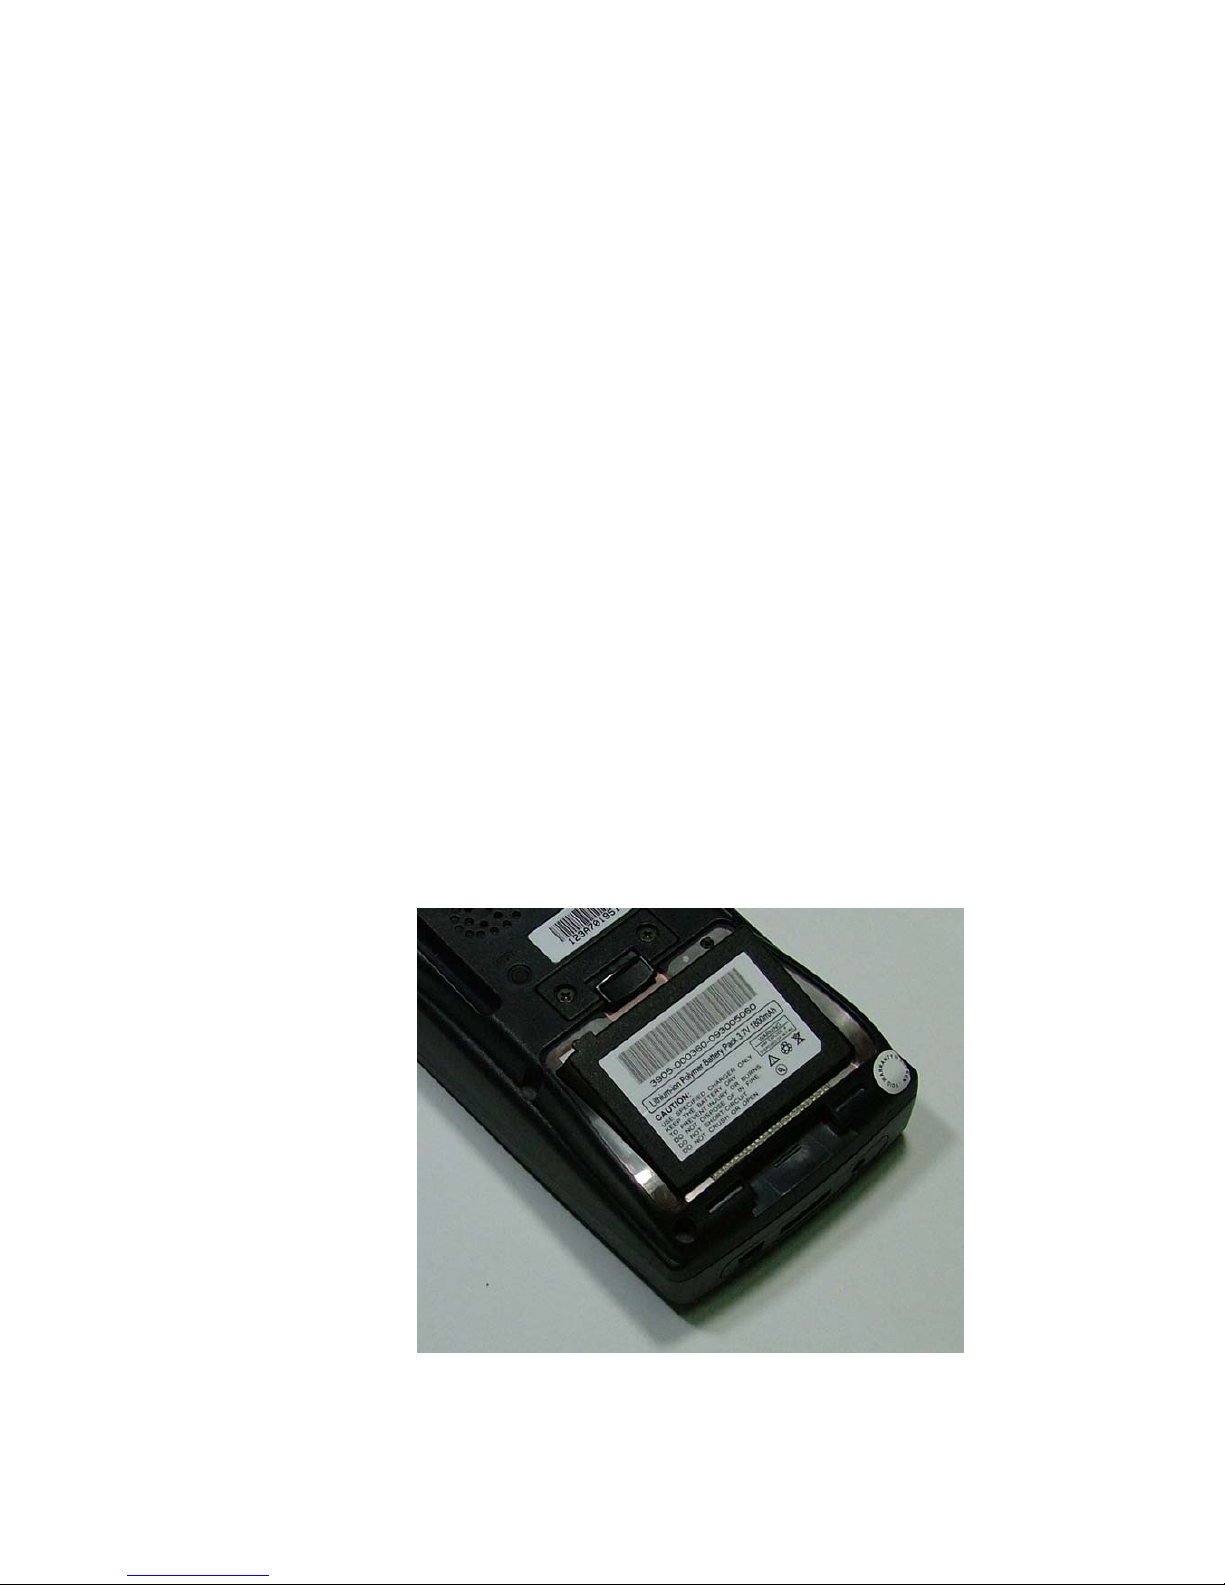
Installing the Main Battery Pack
The main battery must be installed in the device before you can
charge it in the docking cradle.
Complete the following instructions to install the battery.
1. On a device, detach the elastic handstrap by releasing its hook
from the handstrap connector at the base of the unit.
2. Pull the cover latch to unlock the battery door. Remove the
door.
3. Make sure to turn on the Backup Battery Switch.
4. Insert the battery with the pull tab on the outside and the
battery contacts aligned with the matching contacts inside the
battery compartment.
5. The main battery pack has a keying feature on one side to
prevent incorrect installation.
6. Replace the battery door by inserting the bottom tab into the
slot. If the battery is installed incorrectly, the door will not seat
properly.
7. Pull the latch on the battery compartment cover towards the
base of the unit.
8. On the device, replace the handstrap hook on the connector at
the base of the unit.
Figure 2.
Installing main battery
Page 38
Charging the Battery
When you first remove the device from the box, you will need to
charge the main battery. The battery must be inside the unit to
charge it with the dock. A complete battery charge takes about
about 4 hours depending on battery state.
After using the device, if a low battery indicator appears, the main
battery needs recharging. The device can be recharged in the
docking cradle, connecting with AC adapter directly.
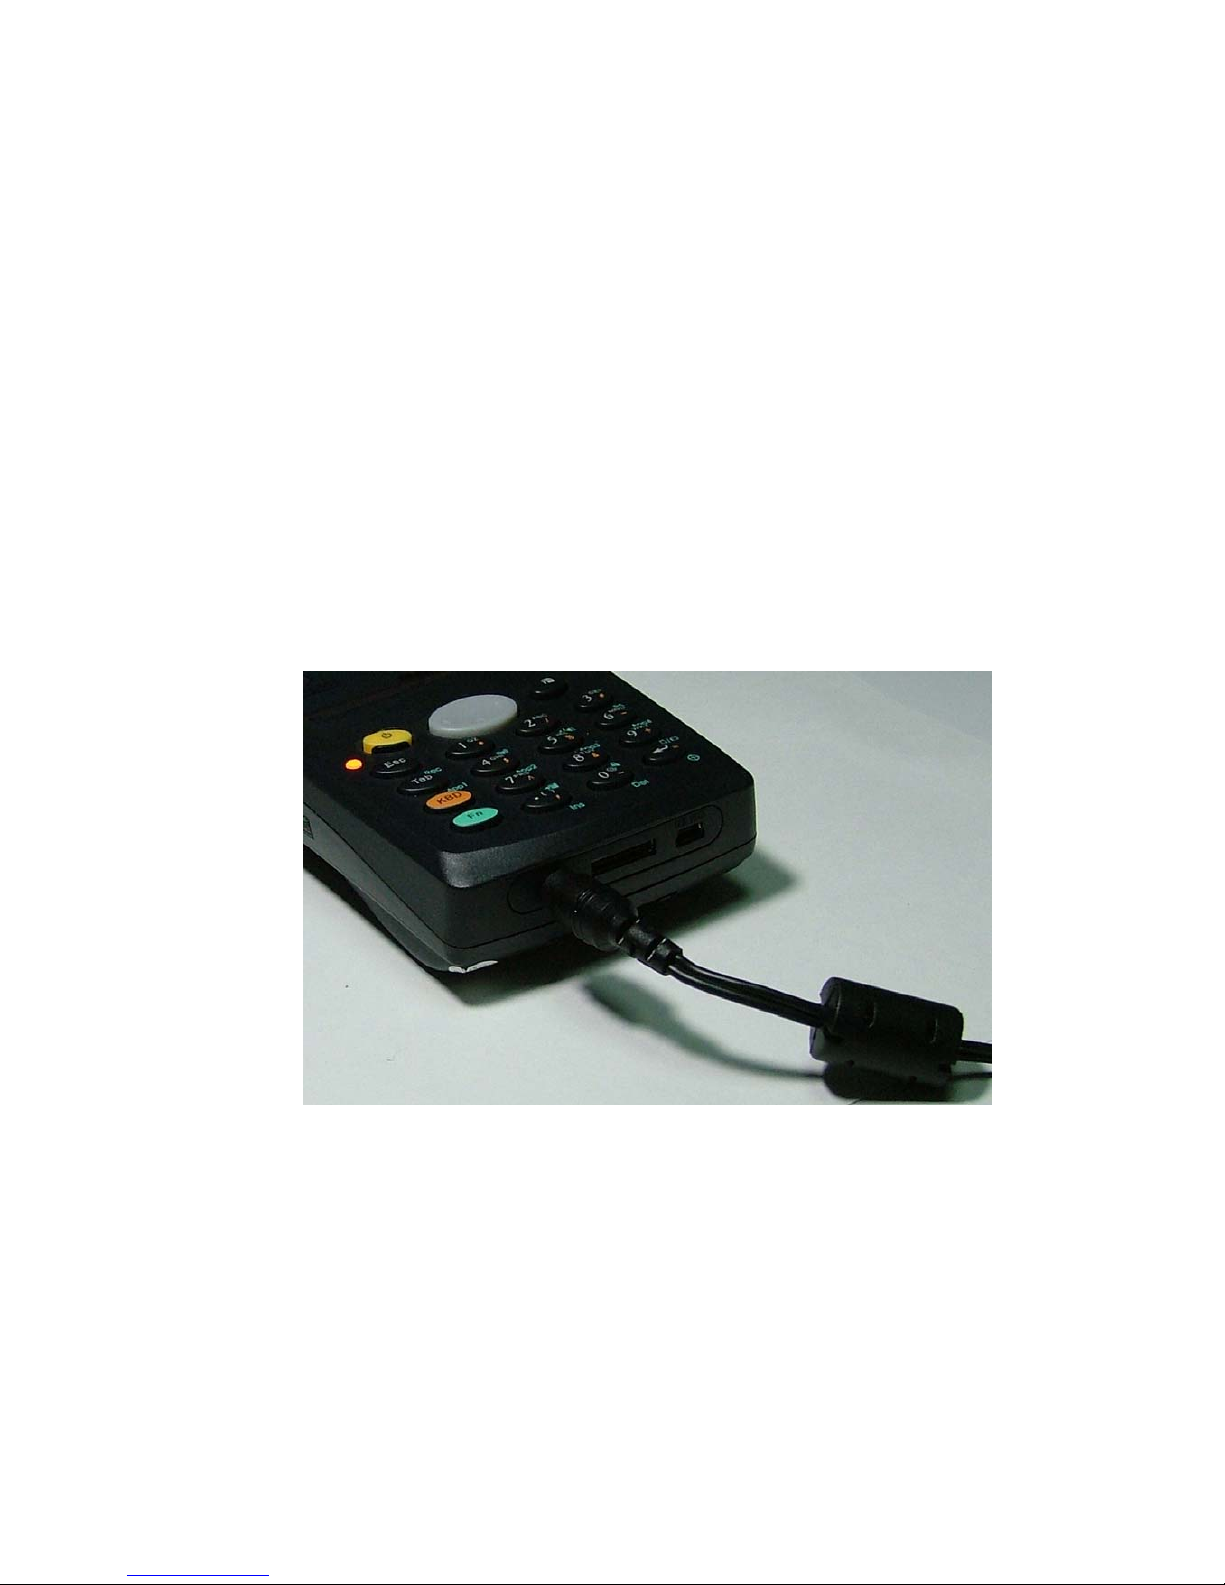
Using the Power Adapter
1. Connect power code to power adapter.
2. Connect power code to the power source.
3. Insert power adapter to the power jack.
Figure 2. Charging with the power adapter
Page 39
39
Charging battery with Docking Cradle
1. Connect power code to power adapter.
2. Connect power code to the power source.
3. Insert power adapter to the power jack of docking cradle.
\
Figure 2. Charging with the docking cradle
During charging, Main unit’s Power LED will turn on Red LED.
When battery is charged fully, it will turn on Green LED.
Docking cradle can charge extra battery. When charging extra
battery, the LED beside extra battery charge compartment will turn
on Red LED. After charging the extra battery, it will turn off.
Note
Use only the supplied battery chargers and docks with this device.
Using the wrong charger or dock will not damage the unit, charger,
or dock; they simply will not work.
Page 40

Backup Battery
The backup battery in the device is a 3.1V Lithium battery.
The backup battery is charged off the main battery pack, so it is
important to keep the main battery pack with at least a minimal
charge so the unit can maintain date, time, data, and other settings.
Battery Life
Batch units can have 6 hours to 16 hours of battery life per charge
depending upon usage, number of scans per minute, backlight
usage, and other factors that draw upon battery power.
Battery Disposal
If you must dispose of a battery pack, please follow the instructions
in the following caution:
1. Recycle Lithium-Ion Batteries.
2. Do not throw Lithium-Ion Batteries in the trash.
Page 41

41
Resetting
You always attempt a Soft (warm) reset before initiating a Hard
(cold) reset. Once you initiate a hard reset, all applications are
forcibly closed and working RAM and files are cleared.
It is a good idea to store important data in the DiskOnChip
memory for this reason.
Warm Reset
A warm (soft) reset is a transition from the on, idle, or suspend
power state that closes all applications, clears the working RAM,
but preserves the file system.
Reasons to Warm Reset
1. After entering the Net IP address on the RF network card, you
must initiate a warm boot for the address to register on the
network.
2. • If an application “hangs”, initiate a warm boot to terminate
the application only.
Procedure to Warm Reset
Whenever it needs to reset, press Reset button back of unit using
stylus pen.
After Warm Reset
1. The screen will be black screen during shortly.
2. The desktop appears with the application shortcuts on the
screen.
3. The custom settings in the registry are persistent.
4. Any RF Network PC Card connects to the network system
depend on the setting.
Page 42

Cold Reset
A cold (hard) reset is a complete reset of the device in which all
applications are forcibly closed and working RAM and files are
cleared.
Reason to Cold Reset
Press the <Reset> button with FN Key when the WindowsCE.Net
operating system (OS) locks up and the Warm reset command does
work.
Cold Reset Procedure
To perform a cold (hard) reset, press the Reset Button with FN key.
You always attempt a Soft (warm) reset before initiating (cold)
reset. Once you initiate a hard reset, all applications are forcibly
closed and working RAM and files are cleared.
After Cold Reset
When a device goes through the cold reset sequence, it clears the
working RAM and initializes the file system. You will lose any
applications and data which are not stored in persistent flash
memory “DiskOnChip”.
• The splash screen will appear shortly.
• You must recalibrate the touch screen, if you need.
• The desktop appears with the application shortcuts on the screen.
• The custom settings in the registry are persistent.
• Any RF Network PC Card connects to the network system.
Page 43

43
Software Applications
This chapter explains preinstalled applications and how to install
additional applications.
z DiskOnChip
z Installing Programs
Using an Installation Wizard
Installing Programs Manually
Using File Explorer to Add to the Start Menu
Using ActiveSync to Add to the Start Menu
z Removing Programs
z Selecting and Using Programs
Using the Task and Command Bars
Entering Data
z Pocket Inbox
z Internet Explorer
z WordPad
Page 44

DiskOnChip
In addition to the RAM-based storage standard on
WindowsCE .Net terminals, the device is also equipped with Flashbased storage area.
To access the contents of Flash Memory:
1. Double-tap the My Computer icon on the desktop.
2. Double-tap the DiskOnChip Disk icon to view DiskOnChip
Disk.
Figure 2. Using DiskOnChip
To save applications or data to the DiskOnChip, from your current
application, select File > Save As > DiskOnChip Disk.
You can store approximately 16MB of programs and data in
rewritable Flash Memory.
Page 45

45
Installing Programs
Programs pre-installed on the device are stored in ROM (read only
memory). You cannot remove, or modify this software. You may
add programs and data files to RAM (random access memory) or
into DiskOnChip. Please follow the directions provided with the
software to install it.
Using an Installation Wizard
If the file has an installer, the installation wizard begins. Follow the
directions on the screen. Once the software is installed on your
desktop computer, the installer transfers the software to your
terminal automatically.
Installing Programs Manually
If the file does not contain an installer, an error message indicates
the program is valid but is designed for a different type of
computer.
1. Install *.cab, *.exe *.zip, setup.exe files, or other files designed
for the device.
2. WindowsCE .Net applications will also work on the device.
Start by downloading the program to your desktop computer (or
insert the CD or disk that contains the program into your desktop
computer).
1. Select Start > Settings > Control Panel > System > General on
device. Make a note of the information in the Processor field.
2. Read the installation instructions, ReadMe files, or manual
that comes with the program. Many programs provide
installation instructions.
If you cannot find installation instructions for the program in the
ReadMe file or manual, use ActiveSync Explore to copy the
program file to the Program Files folder on your device.
For more information on copying files using ActiveSync, refer to
the ActiveSync online Help.
Page 46

3. Connect your terminal and desktop computer.
4. Double-click the *.exe file.
5. Once the installation is complete, you double-tap the program
icon from your desktop, or select Programs > program icon to
select it.
Using File Explorer to Add to the Start Menu
1. Select Start > Programs > File Explorer, and select the folder
where the program is stored.
2. Select Cut from the Edit > Cut from the command bar.
3. Open the Programs folder located in the Windows folder,
select Paste from the pop-up menu.
The program appears on the menu.
Using ActiveSync to Add to the Start Menu
1. Use the Explorer in ActiveSync on your desktop computer to
explore the files on your Mobile Computer and locate the
program. For more information on using ActiveSync, refer to
the ActiveSync online Help.
2. Right-click on the program, then select Create Shortcut.
3. Move the shortcut to the Programs folder in the Windows
folder.
The shortcut appears on the menu.
Page 47

47
Removing Programs
Only user installed programs can be removed.
1. To remove a program select Start > Settings > Control Panel >
Remove Programs.
2. Select the program you wish to remove from the list and press
remove.
Selecting and Using Programs
To select and open programs, select Start > Programs to open a list
of available programs. If the program has an icon on the desktop,
tap to open it.
Using the Task Bar
The task bar at the bottom of the screen displays the active
program and current time, and allows you to select programs and
close screens.
Figure 2.
Task Bar
Page 48
Using the Command Bar
Use the command bar at the top of the screen to perform tasks in
programs. The task bar includes menu names, buttons, and the
input panel button. To create a new item in the current program,
Select File > New > View.
Figure 2.
Command Bar
Page 49

49
Entering Data
Using the Stylus on the Touch Screen Display
The stylus is located next to the CF Cover. The stylus on the device
is the equivalent of the mouse on a PC. Use the stylus to:
z Navigate the touch screen display.
z Select characters in the soft input panel (SIP).
z Select applications from the desktop or system tray.
z Select tabs, fields and text within applications.
Selecting Text
Select text in the same way you select text on a PC. Use the stylus
to highlight the desired text by dragging the stylus across the
desired text, double-tapping to select one word, and triple-tapping
to select an entire line.
Entering Data with a Bar Code Scanner
You can use the scanner to read bar codes. Press the trigger or scan
button to initiate a scan. The scanned data will be entered into the
current application’s edit context.
Soft Keypad/Input Panel
In applications that accept keyed input, the soft input panel (SIP)
can be used to enter data using the stylus. The SIP is an on-screen
QWERTY keyboard.
To open the SIP. double-tap the keypad icon in the system tray,
shown in Figure or single-tap the stylus icon and select Keypad
from the pop-up menu.
Page 50
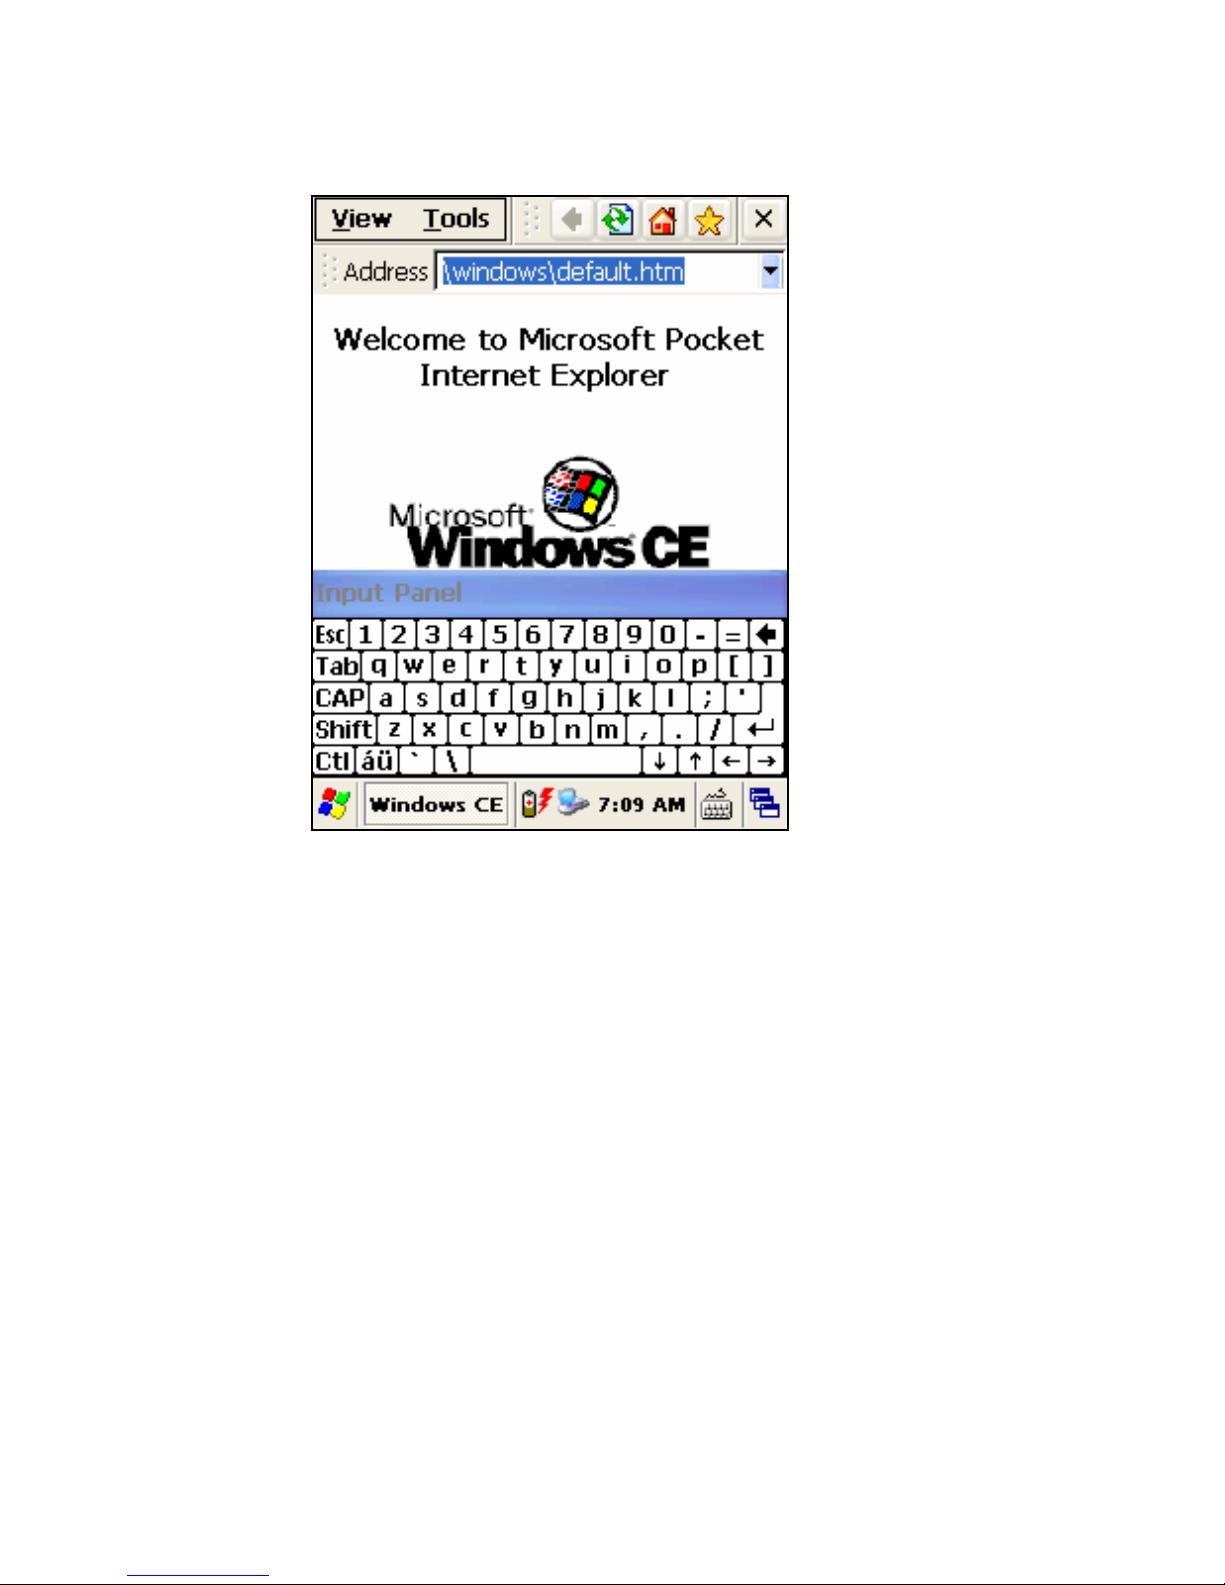
Figure 2. Entering data using SIP
Use the stylus to select letters, numbers, or symbols from the Soft
Input Panel for the current application. Tap the key to change the
keypad to show international letters.
Page 51

51
Pocket Inbox
WindowsCE .Net units come with Inbox for WindowsCE .Net
installed from the factory. Inbox is a familiar Microsoft email
interface. To setup up Inbox:
1. Open Inbox by selecting Start > Programs > Inbox.
2. Select Services > Options from the command bar to configure.
3. Select Add....
4. Select Service Type and enter in name of email service in the
Service Name field.
5. Select the type of service.
6. Enter the server and user information in the Mail Service
Definition.
7. Configure your inbox using the Mail General Preferences
dialog.
8. Configure your mail retrieval settings using the Mail Inbox
Preferences.
9. Press OK to complete the Inbox configuration.
10. Select Services > Connect from the command bar.
11. Select Services > Send/Receive Mail from the command bar to
manually retrieve mail. Any pending email appears in the
inbox after connecting.
Page 52
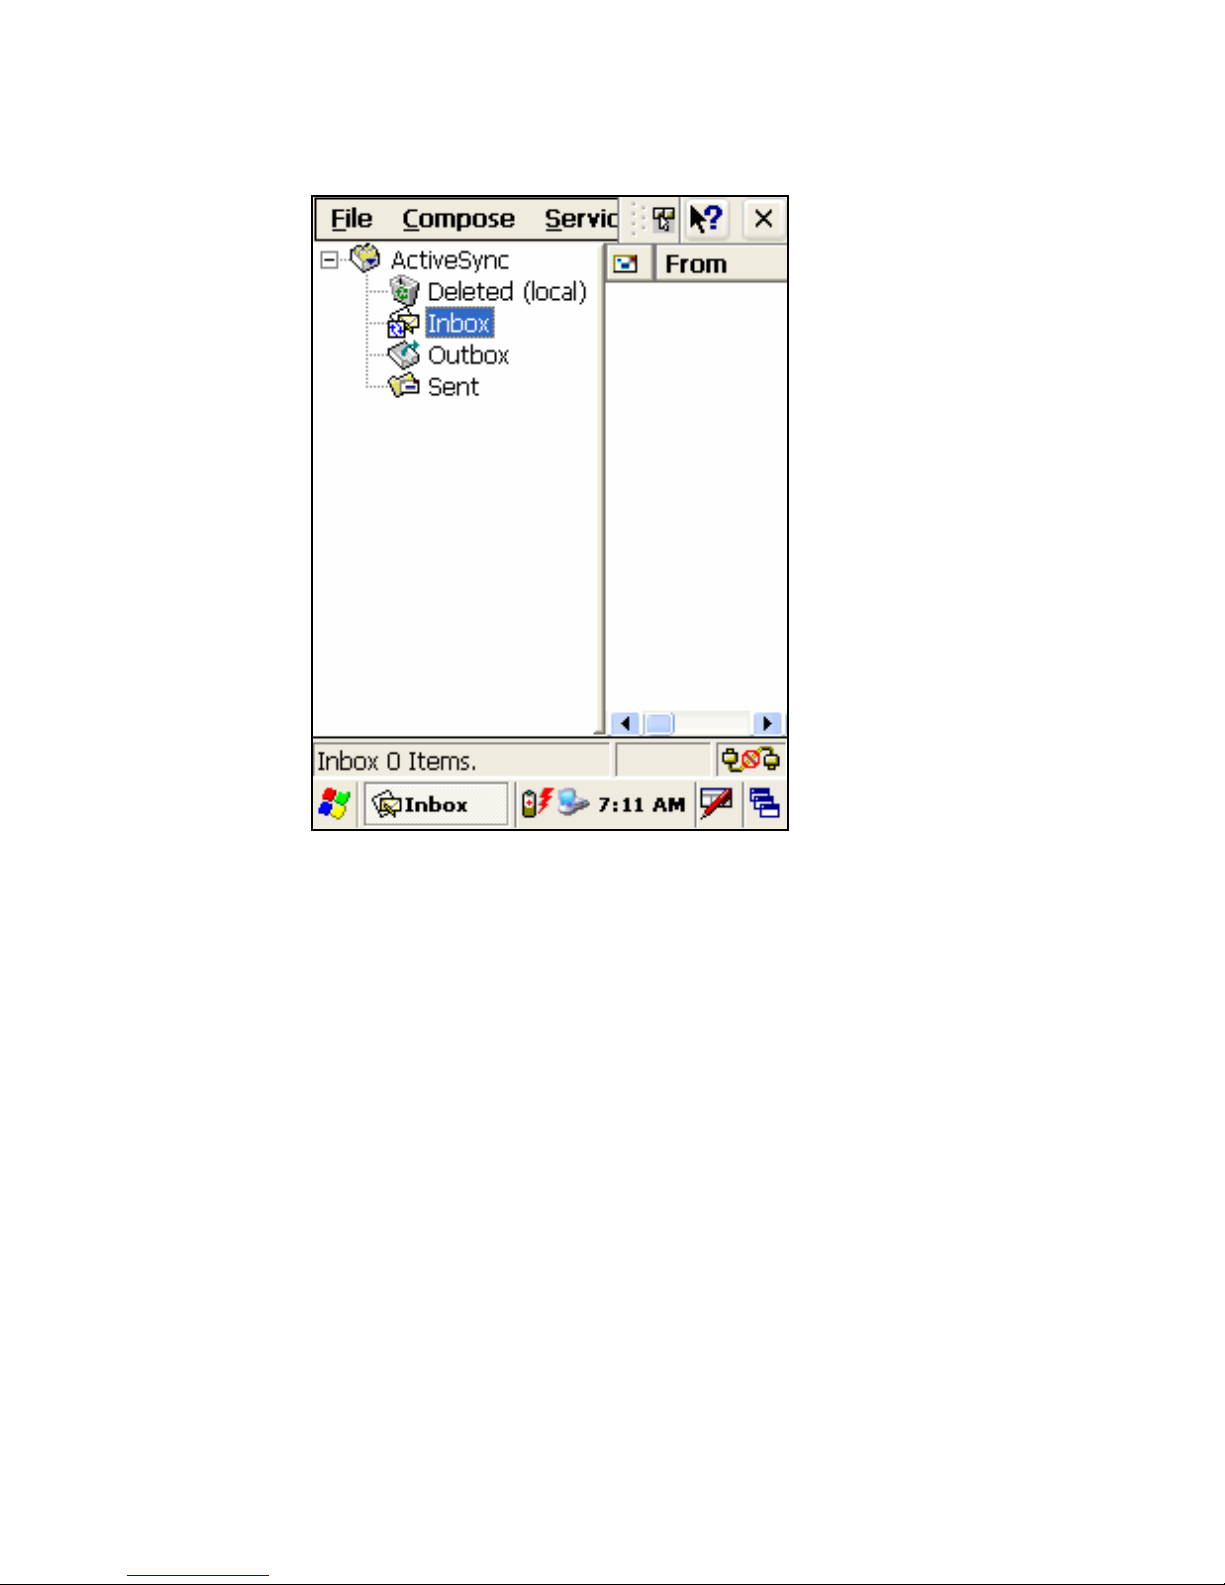
12.
Figure 2. Pocket Inbox
Page 53
53
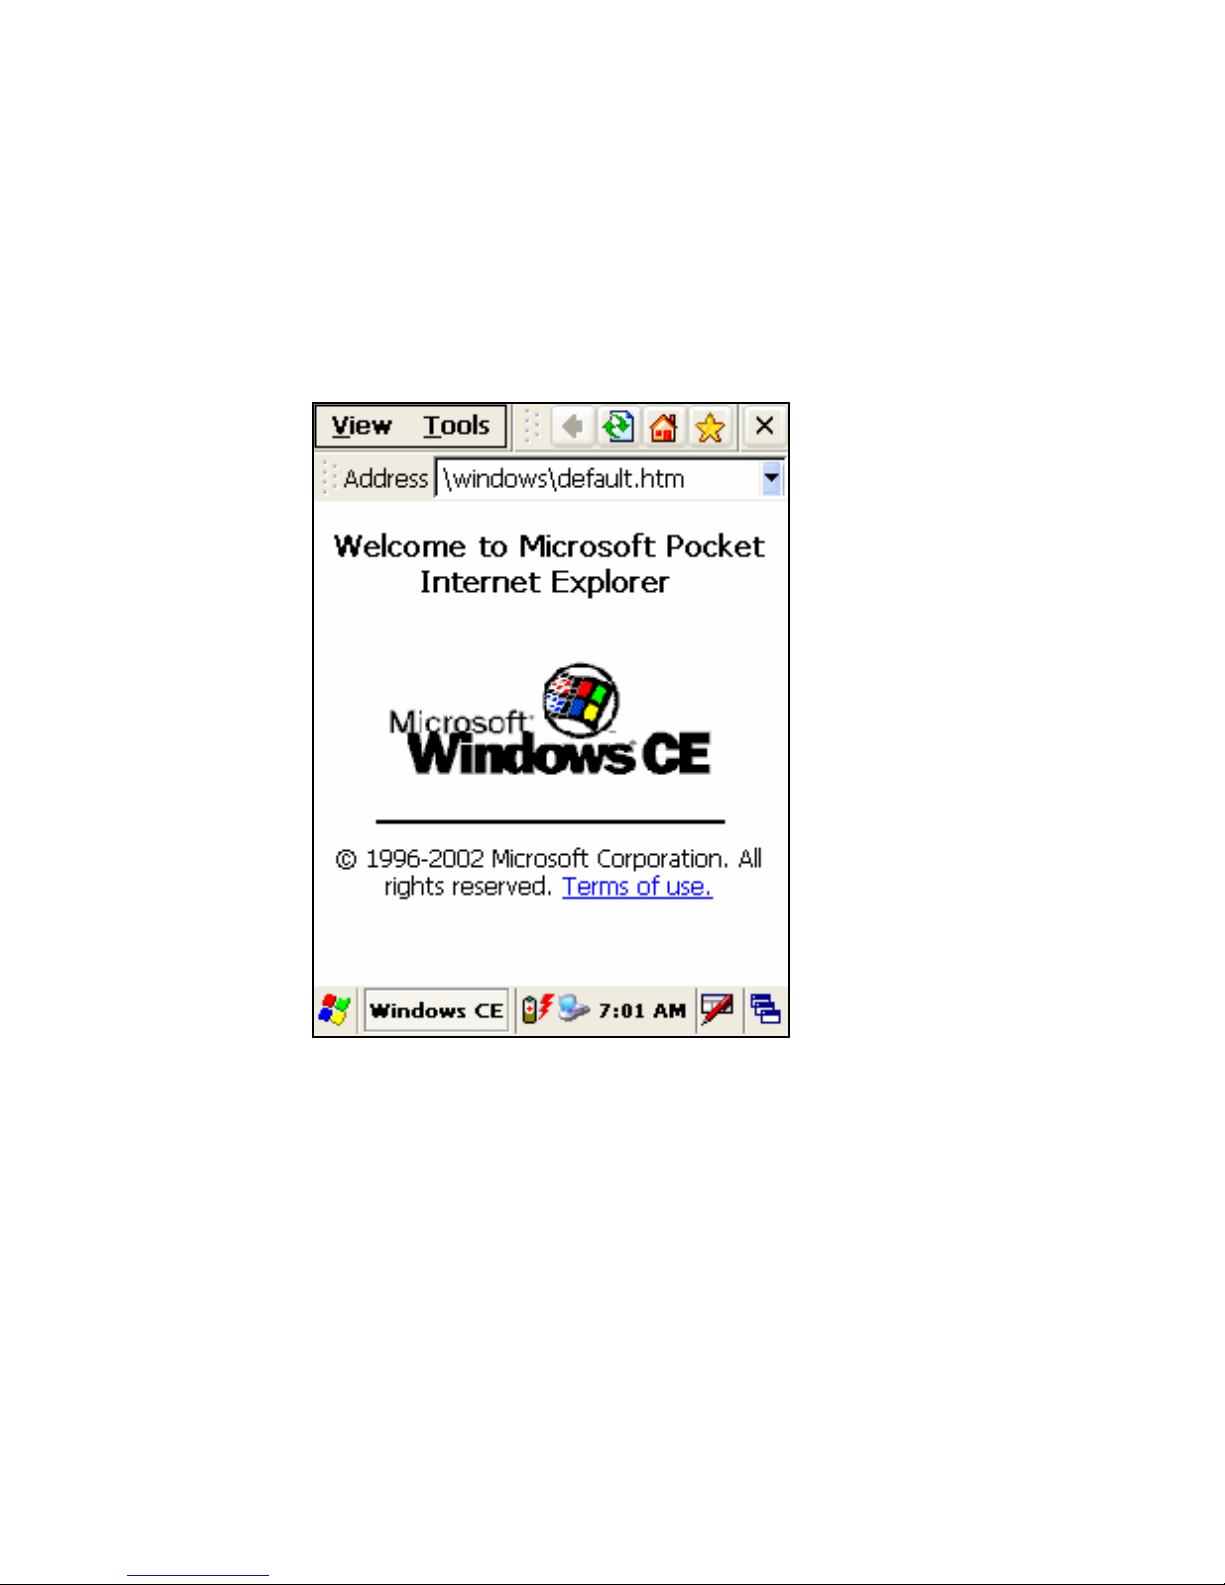
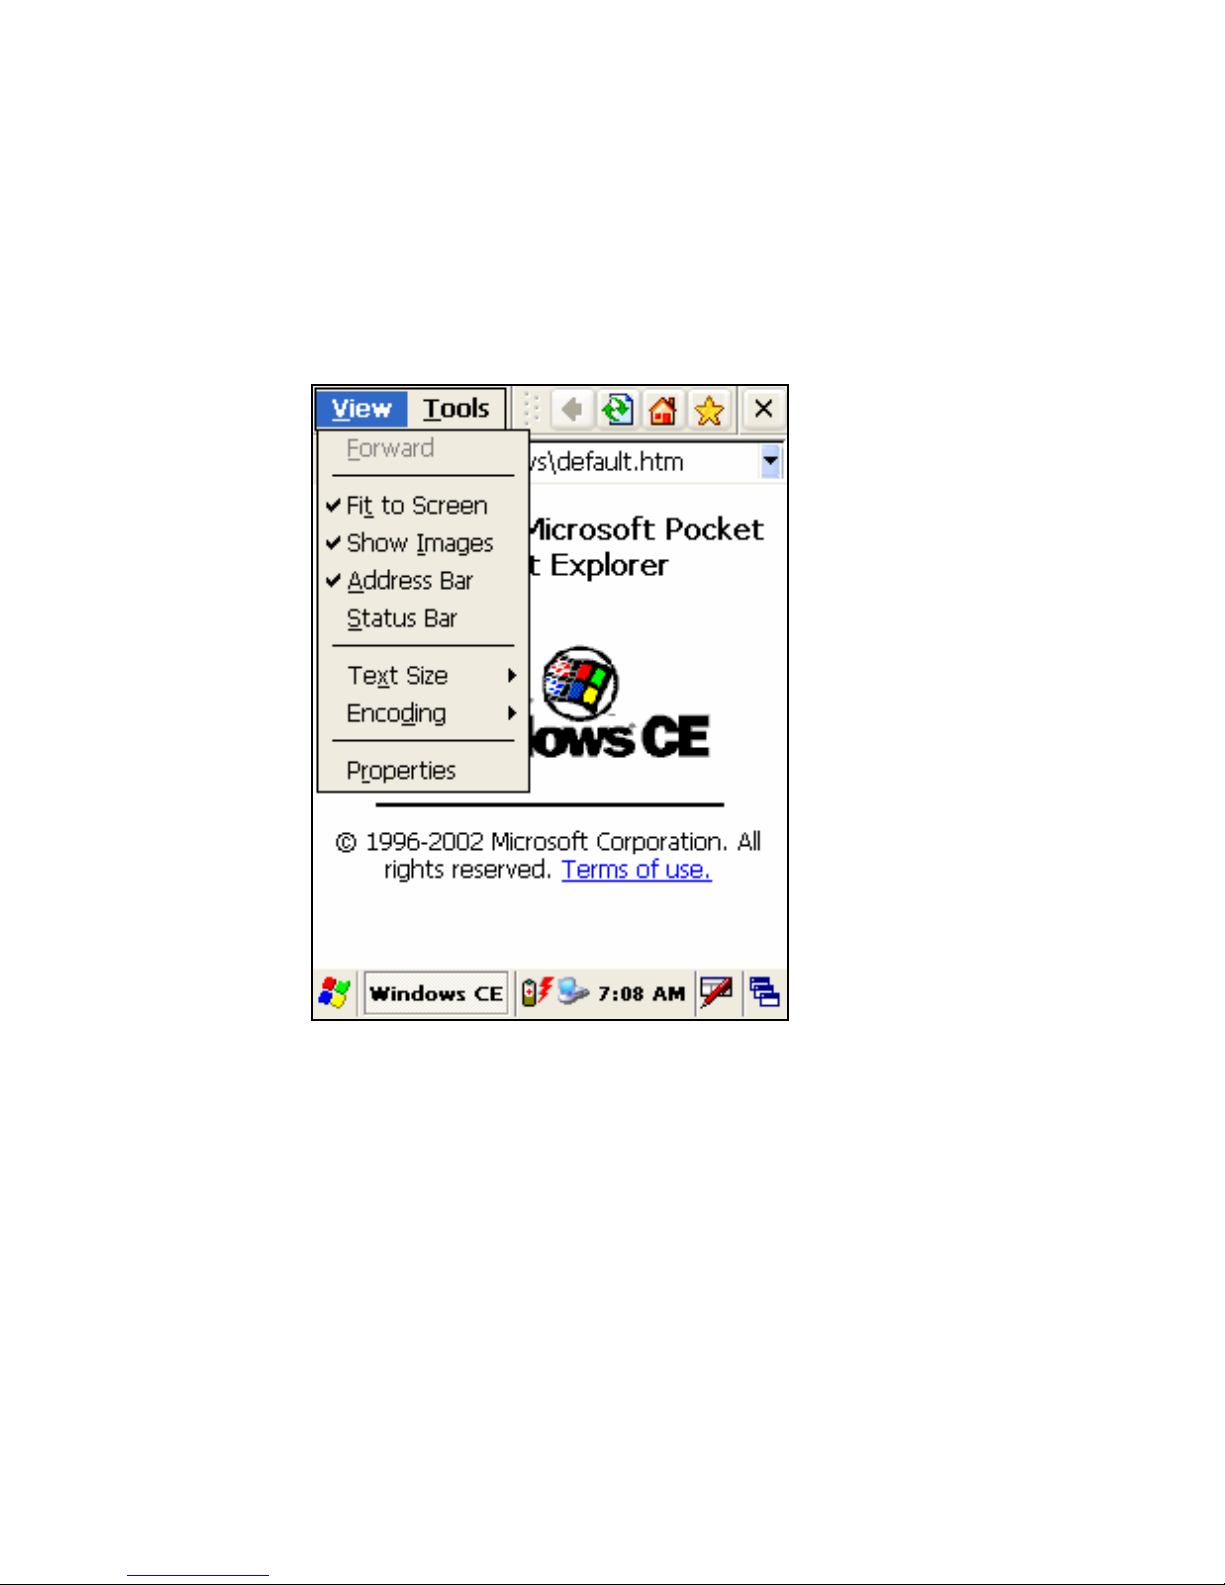
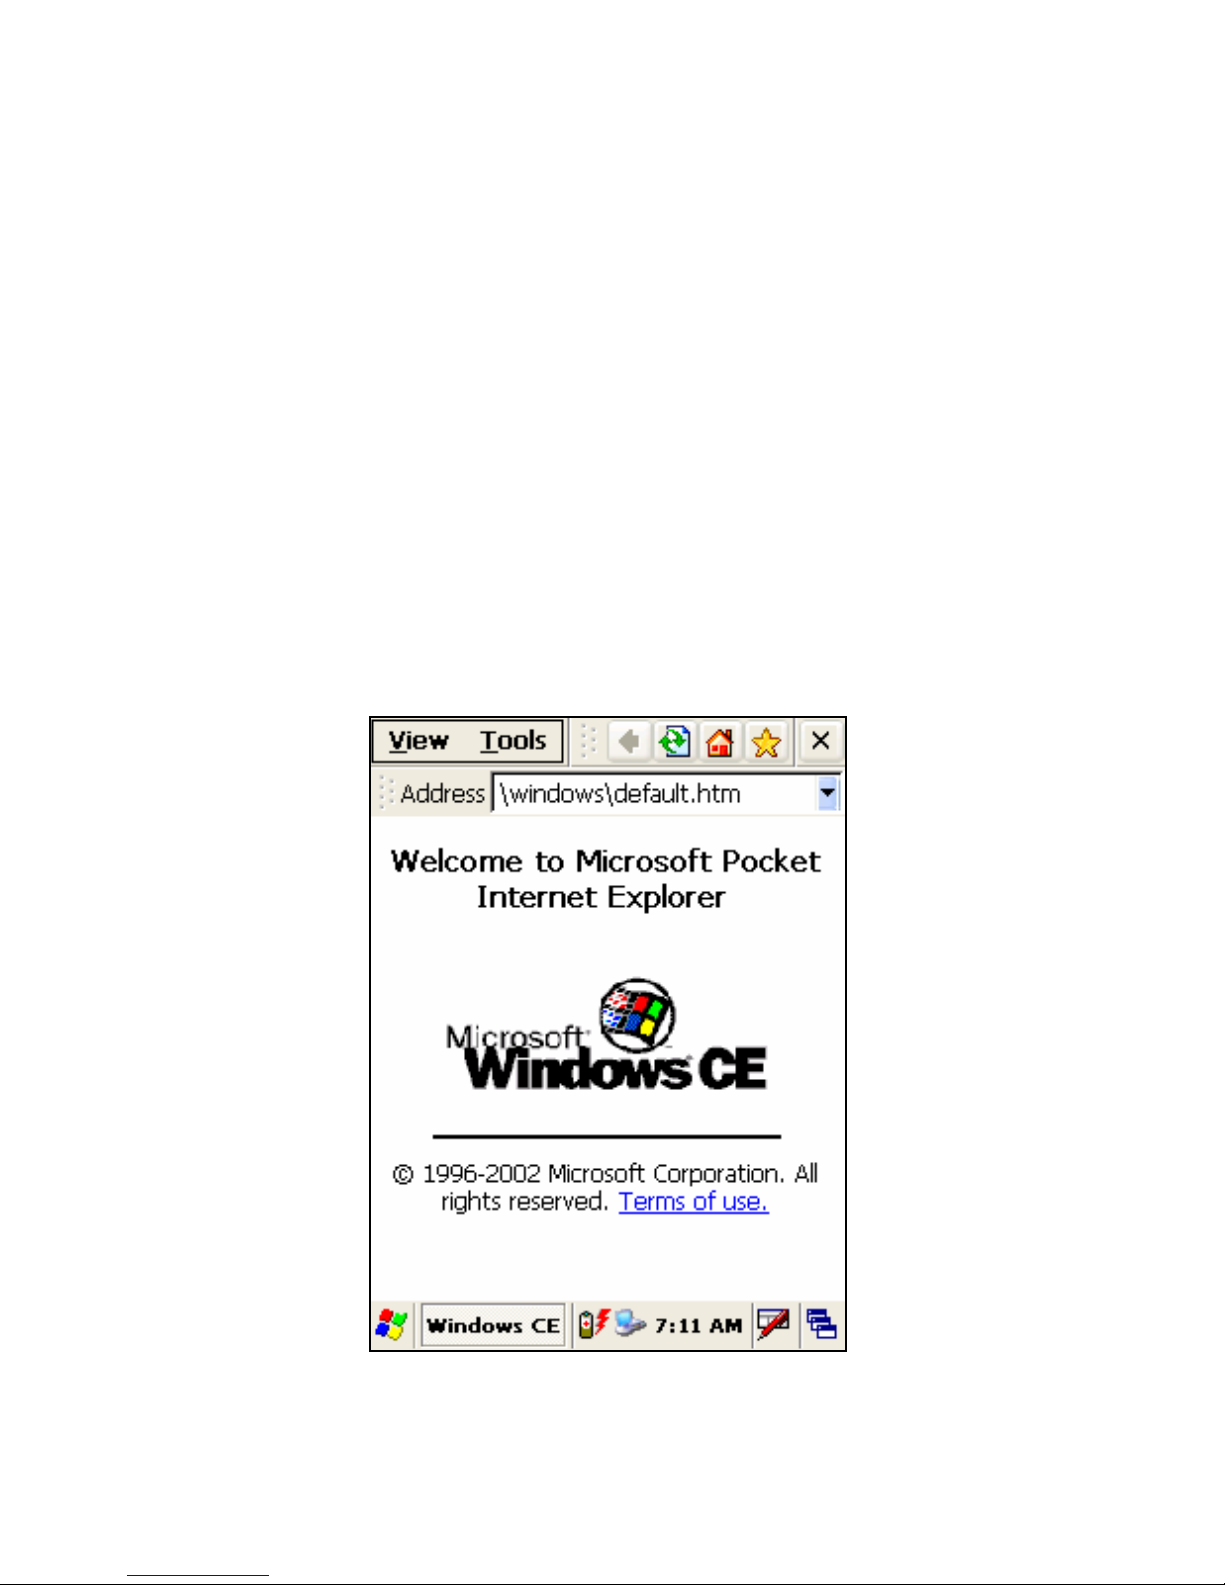
Internet Explorer
The IT-6000 comes with Internet Explorer for WindowsCE .Net
installed from the factory.
1. Open Internet Explorer by selecting Start > Programs >
Internet Explorer.
2. To set default home page, navigate to desired default web
page.
3. Select View > Internet Options from the command bar.
4. Enter the desired URL in the Start Page field.
5. Press the OK button
Internet Explorer uses sliding menus for application and
navigation control. Tap and drag the sliding menus to the left or
right to see the hidden menu items and toolbars.
Figure 2. Internet Explorer
Page 54

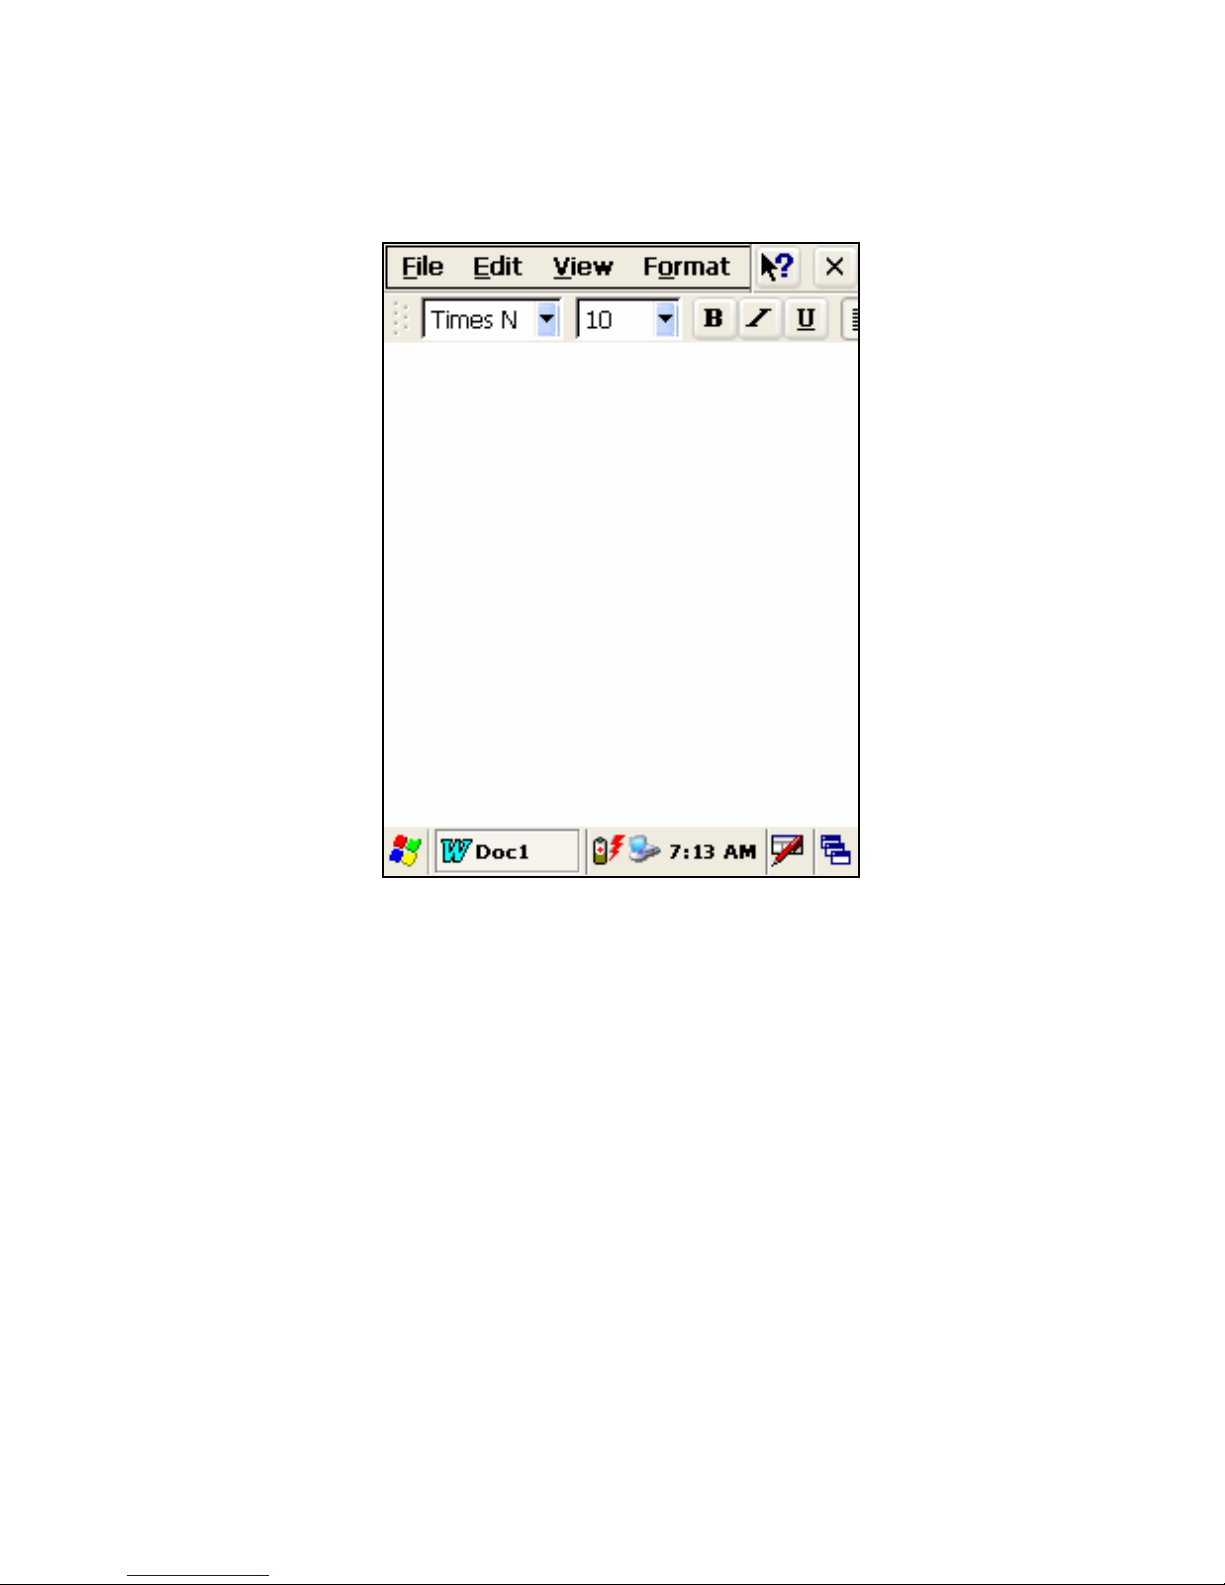
WordPad
The IT-6000 comes with Word-Pad for WindowsCE .Net installed
from the factory. The following text and document file types are
compatible with Word-Pad:
z Text (*.txt)
z Word Document (*.doc)
z Rich Text File (*.rtf)
z WordPad (*.pwd))
When file types other than *.pwd are transferred to the
WindowsCE .Net device, WindowsCE .Net translates the files into
a compressed WindowsCE .Net file type. To start Wordpad, select
Start > Programs > Microsoft WordPad.
Page 55
55
Figure 2. WordPad
Page 56

Configuring
This chapter explains to configuring the device.
z Context Sensitive Help
z Calibrating the Touch screen Display
z Adjusting LCD Brightness
z Rotating the Screen
z Adjusting Volume
z Setting Application Buttons
z Volume and Sounds
z Setting the Date and Time
z Power Configuration
Battery Tab
Power Off Tab
z Memory Configuration
Memory Allocation & Usage
z Network Configuration
z Using Wireless LAN
Turn On/Off the Wireless LAN Module
Wireless LAN Configuration
z Hardware & Firmware Version Information
Expansion Cards
Serial Number
Firmware Version
Page 57
57
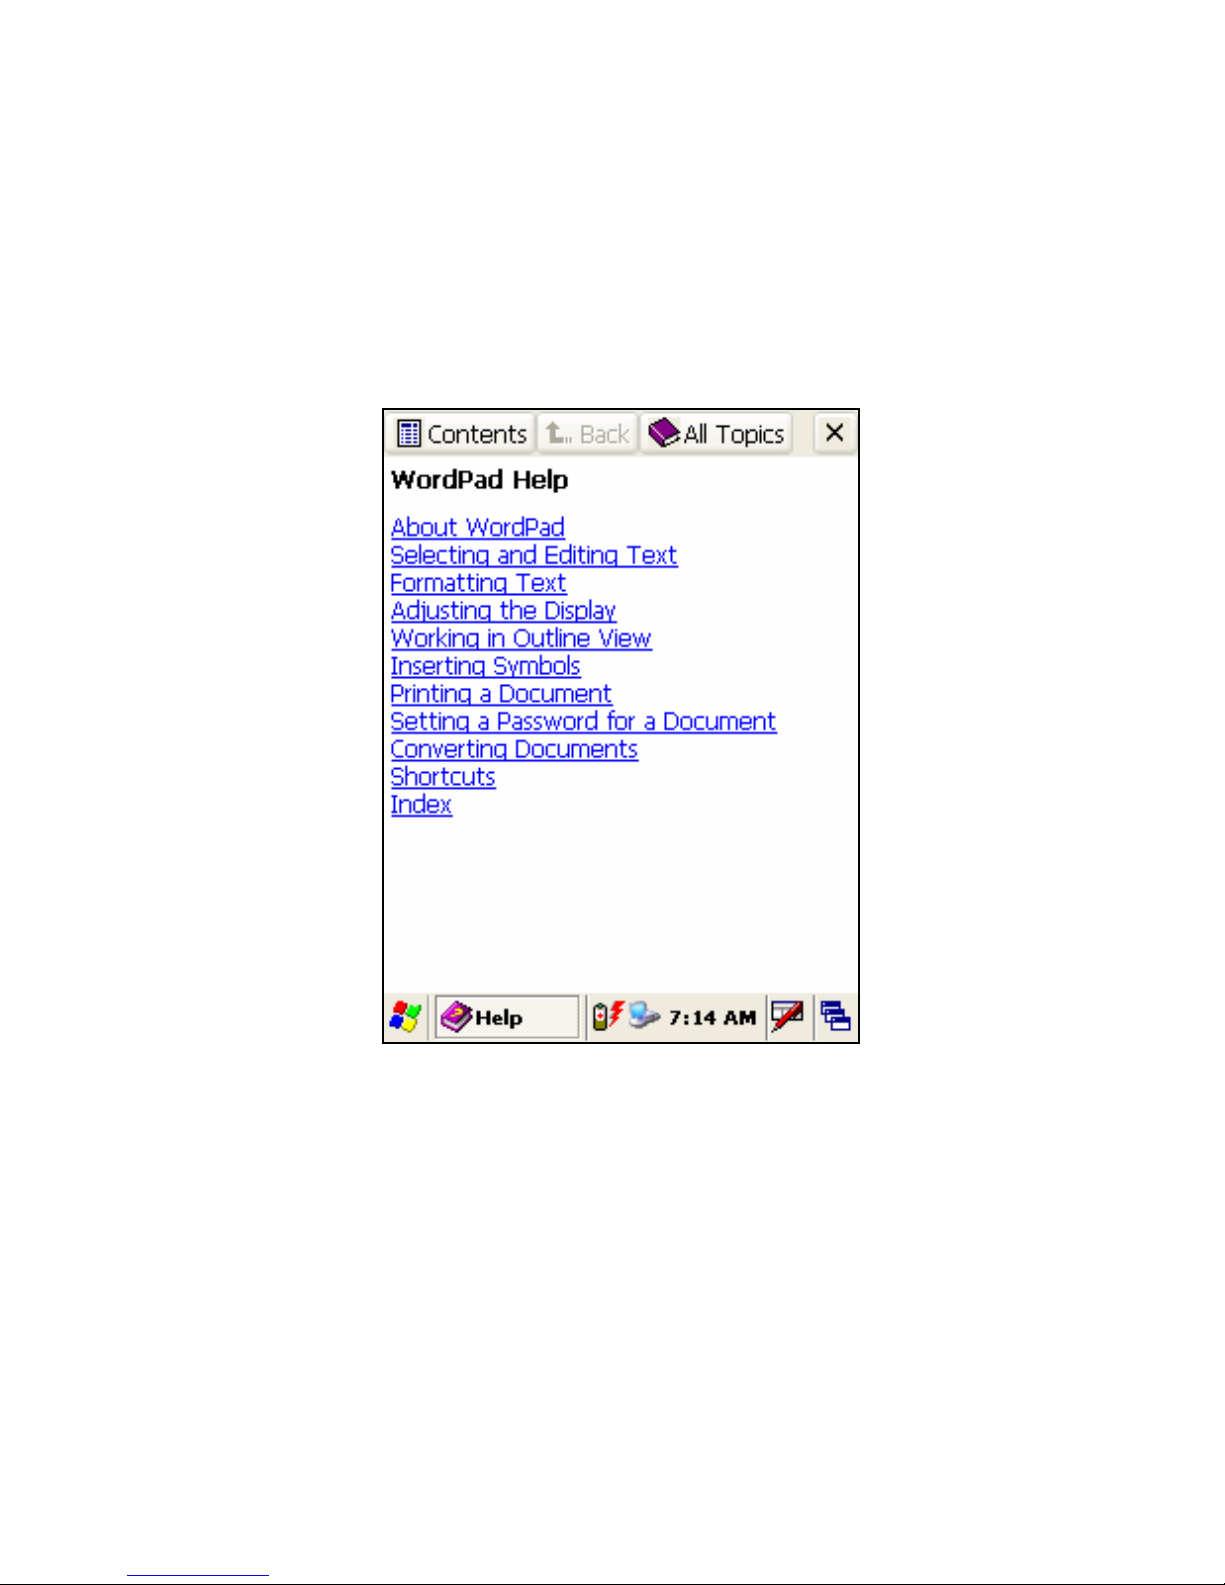
Context Sensitive Help
Microsoft WindowsCE context sensitive help is available for those
configuration applets where a “?” button appears in the upper
right hand corner of the dialog box. Press the “?” button to open
the help window.
Figure 1. Using WindowsCE. Net Context Sensitive Help
Page 58
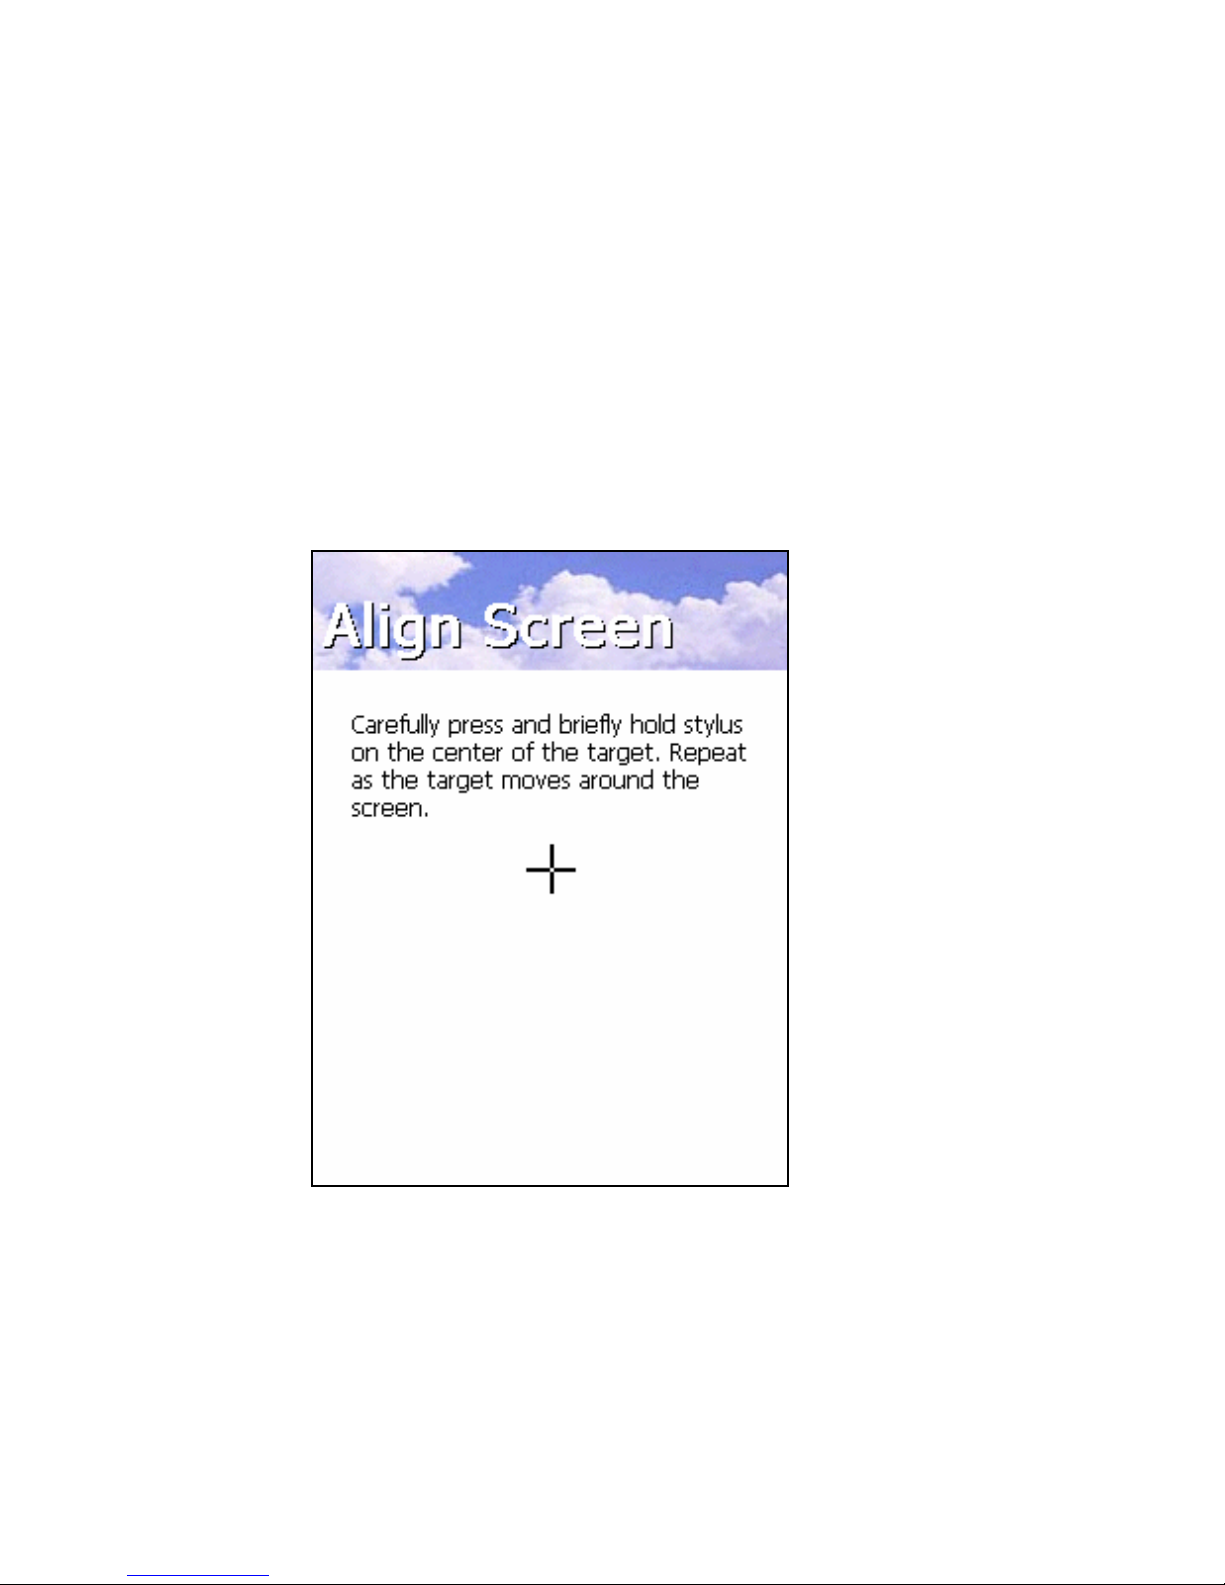
Calibrating the Touch screen Display
It is possible that you might need to recalibrate the touch screen (i.e.
when you notice that when you select one item with the stylus,
another item is selected).
To recalibrate the touch screen, complete the following steps:
1. Press Enter button with Fn Key.
2. Carefully press and briefly hold stylus on the center of the
target as the target moves around the screen.
Figure 1. Touch Screen Calibration
Page 59

59
Adjusting Brightness
The Backlight factory default is maximum status. But, user can feel
uncomfortable. At this moment we can try to control the Backlight.
This will make the bright ness change.
1. Press Right or Left on the Navigation button with Fn Key.
2. You can see the brightness change.
3. Set proper value.
Adjusting Volume
The Volume factory default is maximum status. But, user can feel
uncomfortable. At this moment we can try to control the Volume.
1. Press Up or Down on the Navigation button with Fn Key.
2. You can hear the volume change.
3. Set proper value.
If you don’t want sound, press ‘3’ Key with ‘Fn’ key. This will
make mute or not.
Rotating the Screen
The Mobile Computer has the screen rotate function. However,
before rotating screen, you need to make sure the application
support landscape also.
Press ‘9’ Key with Fn Key.
Screen will rotate whenever press rotate key.
Page 60

Volume and Sounds
1. Select the Start > Settings > Control Panel > Volume & Sounds
Properties to open the Volume settings.
2. Set the volume by adjusting the slider from Soft to Loud.
3. Enable the desired sounds for key Clicks, screen taps,
notifications, and applications.
Figure 1. Volume and Sound control
Page 61

61
Setting the Date and Time
In this control panel, you can change the year, month, date, time,
time zone, or select automatic adjust for daylight savings time. To
set or change the date and time:
1. Select Start > Settings > Control Panel > Date/Time.
2. Select the month to open a pulldown list of months or press
the arrow buttons on either side of the month to increase or
decrease the month.
3. To change the year, select the year to open a numeric dial.
Select the up arrow to increase the value; select the down
arrow to decrease the value. Or you can type a new year
value in the field.
4. To change the time, select the hour, minute, seconds, or
AM/PM and select the up arrow to increase the value;
select/tap the down arrow to decrease the value. Or you can
type a new time value in the field.
5. Select your correct time zone from the pull-down list.
6. To automatically set adjust the clock for daylights savings time,
enable the checkbox at the bottom of the screen.
7. Select Apply to make save your changes and make additional
modifications.
• Select OK to save your changes and exit.
• Select/tap the close button to exit without saving changes.
Page 62

Figure 1. Date and Time setting
Page 63

63
Power Configuration
To adjust power management settings, select Start > Settings >
Control Panel > Power. Use this control panel to check the charge
on the battery or to change the Power settings.
Battery Tab
The Battery tab provides power indicators for External power,
Main battery, and Backup battery. To save your settings, press
OK from the command bar, or press the <Enter> key on the
keypad.
Figure 1. Battery status
Page 64
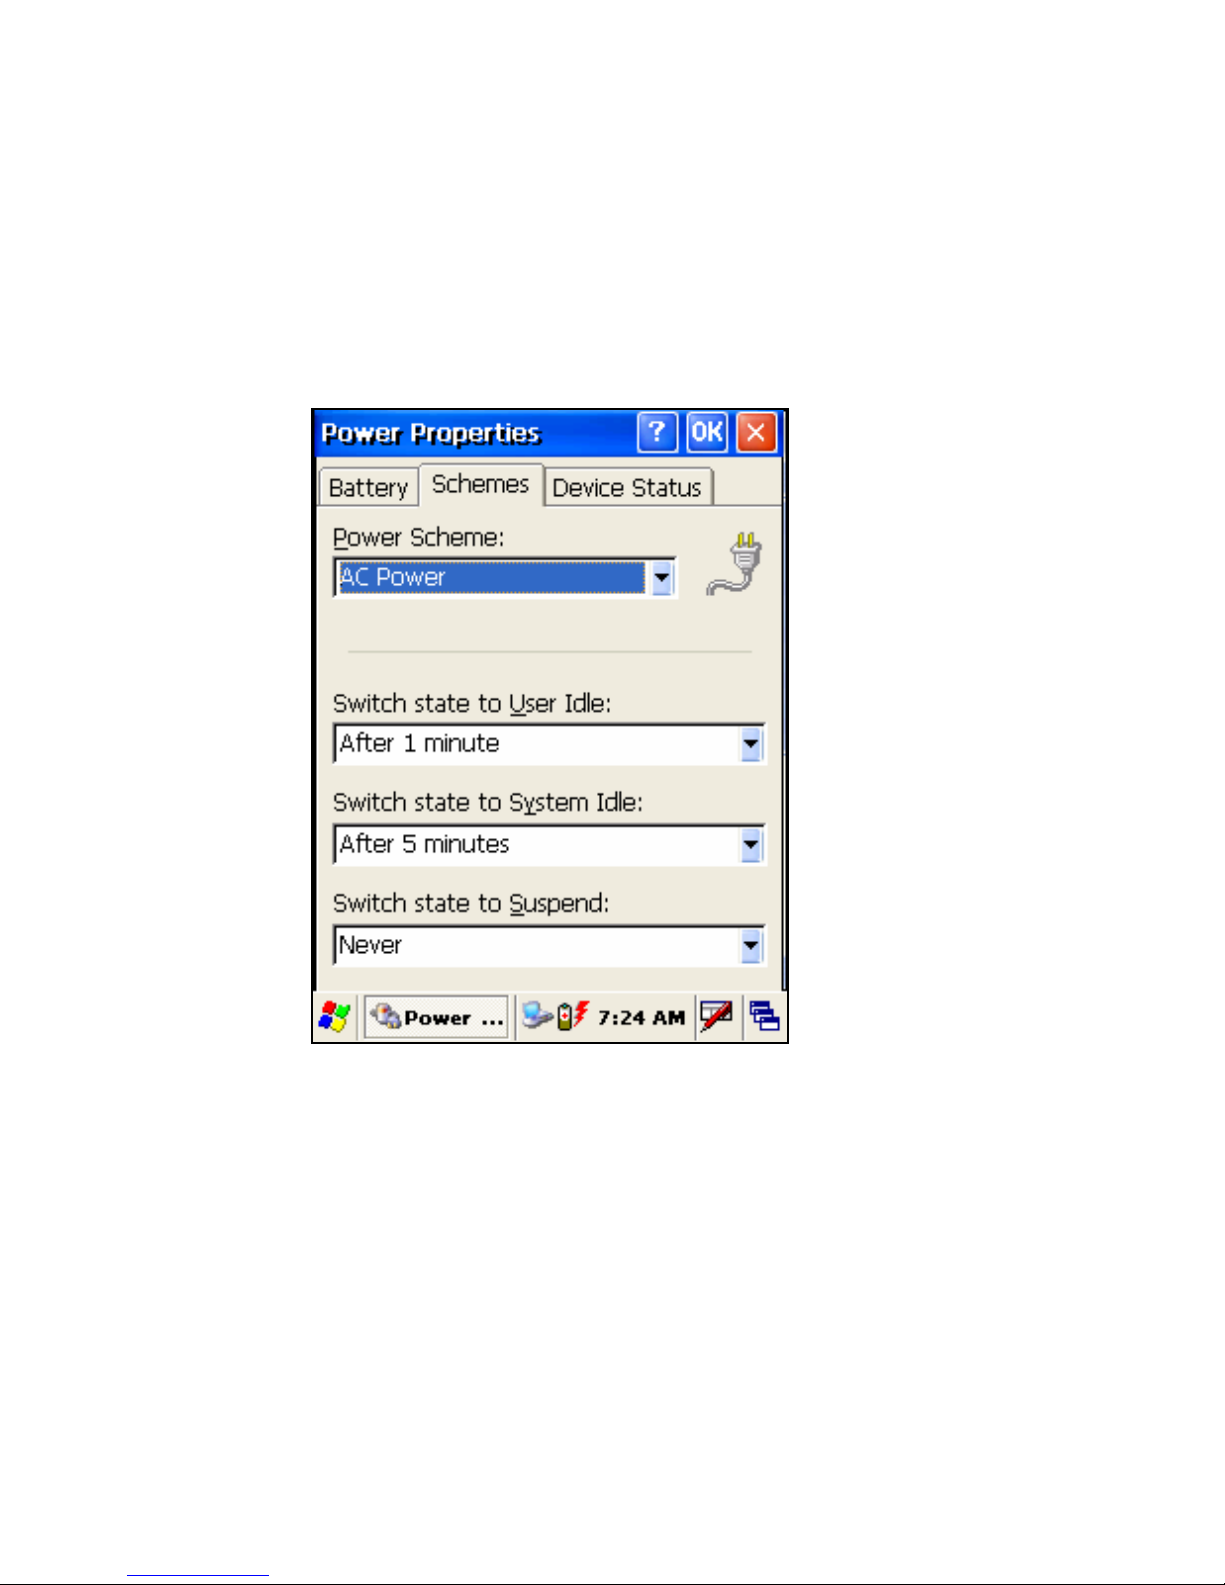
Scheme Tab
The Scheme tab allows you to determine the idle duration and
suspend mode initiation to save battery power. To save your
settings, press OK from the command bar, or press the <Enter> key
on the keypad.
Figure 1. Power Setting
Page 65
65
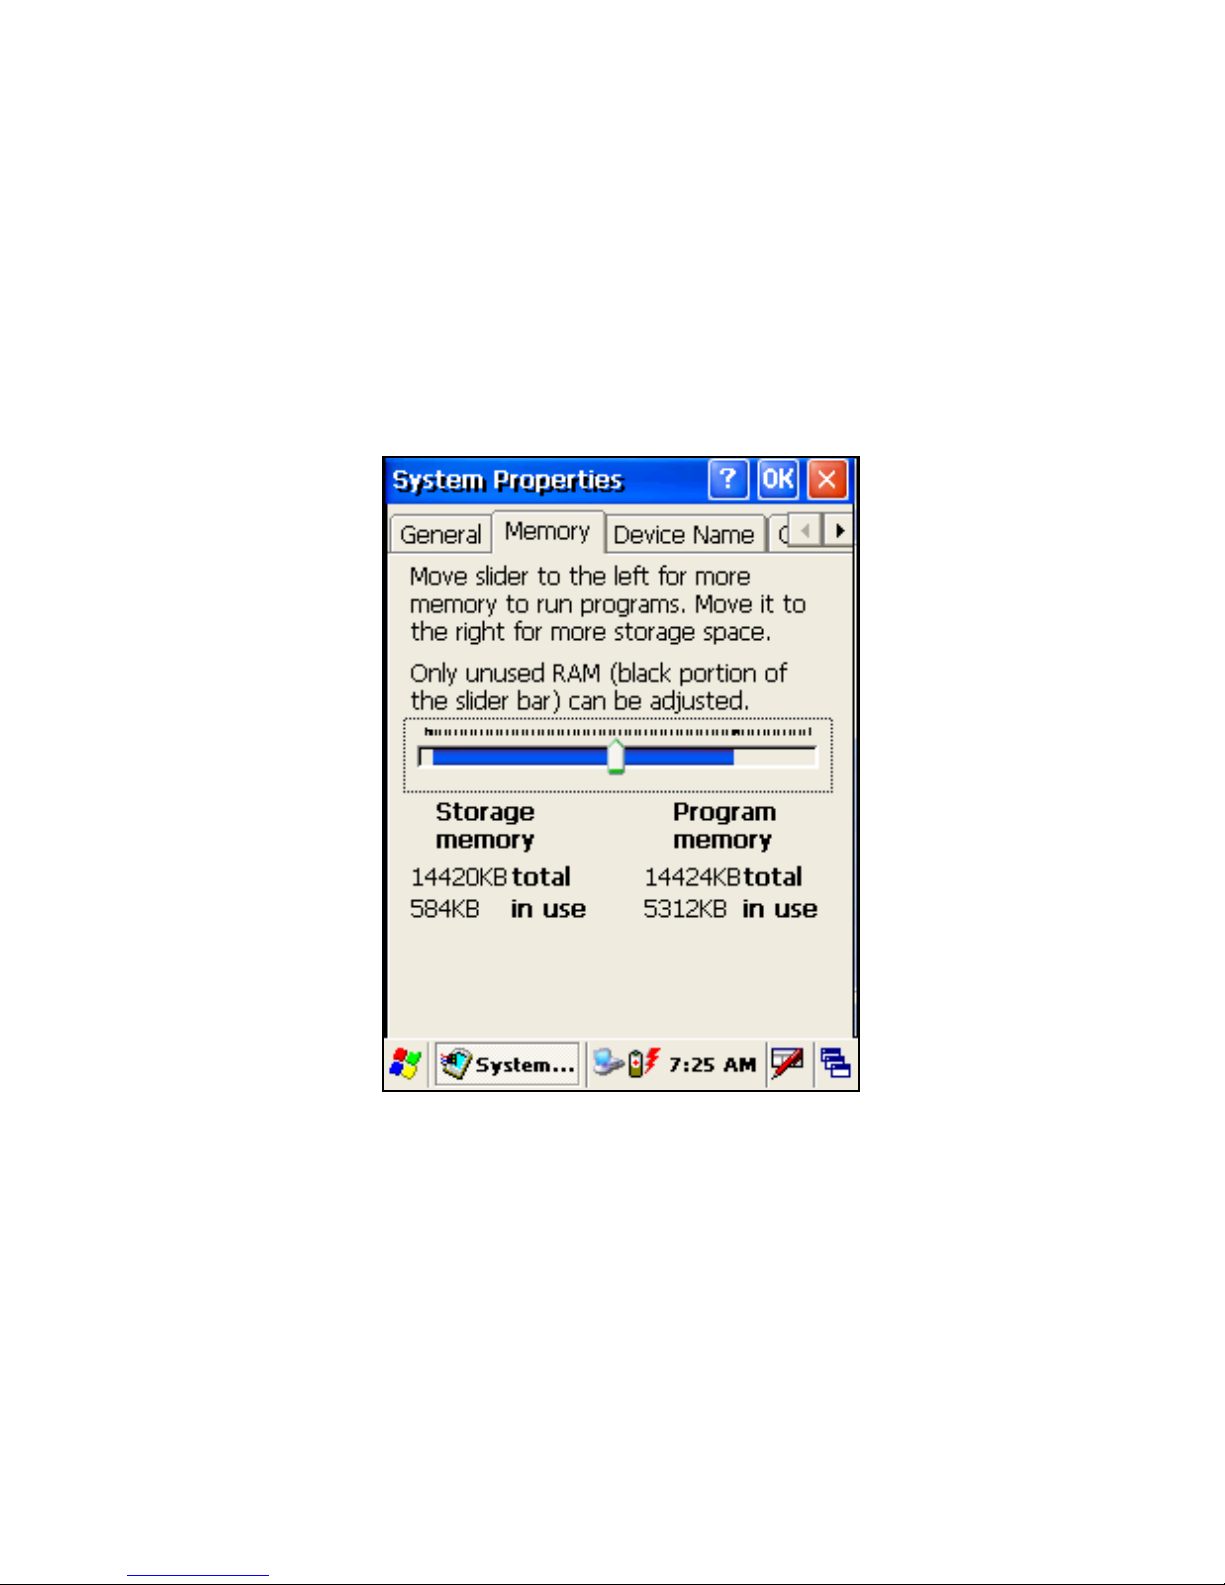
Memory Allocation & Usage
Adjust the Memory Allocation with the following steps:
1. Select Start > Settings > Control Panel > System Properties.
2. Select the Memory tab.
3. Move the slider to adjust memory allocation.
4. Press the OK button, or the <Enter> key on the IT-6000
Figure 1. Memory Setting
Page 66

Networks and Communications
This chapter explains the network and communications setting.
z SNMP
z Installing & Setting Up the IT-6000 IrDA Dock Driver
IrDA Driver Installation
Setting up the IrDA Port
z Installing & Setting Up Microsoft® ActiveSync
Microsoft® ActiveSync
z Using ActiveSync
Setting up a Partnership
Transferring Files
ActiveSync File Synchronization
z Networking
Setting up the Network ID
Network and Dialup Connections
z Network Setup: Remote ActiveSync
Page 67

67
SNMP
SNMP (Simple Network Management Protocol) is the standard
protocol for managing devices on a network. The Firmware
Management Utility (FMU) makes use of SNMP to send and
receive configuration information to the terminals. Since the
networked terminals are constantly running SNMP, this allows
FMU to interface with the terminal at any time, without requiring
user intervention on the terminal.
With SNMP running on the terminal, other SNMP based network
management tools such as HP Openview® and CastleRock
SNMPpc® may also be used to interface with the terminals. To
support this capability, We have released the Management
Information Base (MIB) for the Windows based terminals. The MIB
is used by the management tools to allow them to better support
the configuration values provided on the terminals, such as
scanner controls and terminal type information.
Installing & Setting Up Microsoft® ActiveSync
This section provides instructions on setting up the Host PC so that
the PC can communicate with the device.
Microsoft® ActiveSync
Microsoft® ActiveSync is a file transfer tool to synchronize the files
on a PC with the files on your device. The device comes from the
factory with ActiveSync loaded. If you have ActiveSync already
installed on your PC, make sure that you have v3.7 or higher.
To install Microsoft® ActiveSync, complete the following steps on
the PC:
1. Go to the Microsoft® WindowsCE .Net website and download
the most current version of ActiveSync:
http://www.microsoft.com/mobile/pocketpc/downloads/
.
2. Install the most current version of Microsoft® ActiveSync (v3.7
or higher) on the host PC.
3. Click the Next button to continue the installation. Click Cancel
Page 68

to cancel the installation of ActiveSync.
4. Once ActiveSync is installed, it will attempt to connect to the
device; allow it to fail on the first attempt.
5. Reboot your PC.
6. Open ActiveSync.
7. Select File > Connection Settings from ActiveSync’s menubar.
8. Enable the Allow serial cable or infrared connection to this
COM port check box. Verify that Infrared Port (IR) is
selected in the pull-down list below the checkbox. To close the
window, click the OK button.
9. Remove the device from the dock. Verify that the unit is
turned on.
10. Insert the device into the dock.
• The Infrared Device Indicator in the Host PC’s system tray will
appear and indicate that it has discovered a new device.
• Within a minute, the ActiveSync window should appear
attempting to connect to a new device.
11. If ActiveSync does not connect within two minutes try the
following:
• Open the ActiveSync window if not already open.
• Remove the IT-6000 from the dock and then reinsert it.
• After the Infrared Device indicator has recognized the new
device, go to the ActiveSync window.
12. Select File > Get Connected and ActiveSync looks for a mobile
device.
Page 69

69
Using ActiveSync
Use ActiveSync to transfer and synchronize files between the
device and the Host PC.
Setting up a Partnership
During the Microsoft ActiveSync installation, you were prompted
to create a partnership with your mobile device. When you set up a
partnership, you select synchronization and file conversion settings,
which are contained in a file on your desktop computer. This file
enables your desktop computer to recognize your device. Only
devices that have a partnership with a desktop computer can
synchronize information between the two computers.
Partnerships are stored in ActiveSync and have the same name as
the corresponding device. Your desktop computer can set up
partnerships with many different mobile devices, but a device can
have partnerships with only two computers. For more information
on partnerships, please refer to your Microsoft Active-Sync
documentation or help file.
Transferring Files
To transfer files, complete the following steps on the host PC:
1. Select Start > Programs > Microsoft ActiveSync.
2. Double-click on the ActiveSync icon in the System Tool Tray.
3. After you have established a connection with your Device, tap
the Explore button at the top of the ActiveSync window (or
select Explore from the File menu).
4. Navigate to the target directory on your portable and copy the
desired file by using the Copy/Paste method or dragging and
dropping the desired file(s) into the folder.
Depending on the file type, ActiveSync may convert the file into a
format appropriate for the WindowsCE .Net device.
Page 70

ActiveSync File Synchronization
ActiveSync file synchronization requires an ActiveSync
partnership between the IT-6000 and the Host PC.
1. Select the files in the synchronization configuration for the IT6000 partnership.
2. Select Tools > Options from the ActiveSync command bar to
configure the synchronization options.
3. Place the file to be synchronized in the Synchronization folder
created in your My Documents directory. Defaults to the
desktop. During the ActiveSync connection, all files in the
Synchronization folder will be synchronized to the \My
Documents directory on the IT-6000.
Networking
Setting up the Network ID
To set up your Network ID (configure the Windows user settings,
such as the user name, password, and domain), complete the
following steps on the Device:
1. Go to Start > Settings > Owner.
2. Select the Network ID tab on the Owner Properties dialog box.
Enter your User Name, Password, and Domain on the Network ID
tab.
3. Select OK from the command bar to save your network ID
information.
Access basic network connection information by double-tapping
on the Network icon in the system tray. Tap Details to show more
information.
Page 71

71
Network and Dialup Connections
1. Select Start > Settings > Network and Dialup Connections.
Double-tap on the WLAGS46B1 item (this will vary based on
installed radio manufacturer and number of connections).
2. Complete the two tabs:
• IP Address: Select DHCP or set static IP settings.
• Name Servers: If using static IP, set DNS and WINS servers.
Network Setup: Remote ActiveSync
To execute Remote ActiveSync, complete the following steps:
1. Go to Start > Settings > Network ActiveSync.
2. Verify that Network Configuration is selected from the
Method to Connect pull-down list.
3. Select the target host that you wish to ActiveSync with from
the Connect To pull-down list.
4. Press the Connect button.
5. A network ActiveSync connection will be established.
Network functions and operations work the same when using the
Dock.
Page 72

 Loading...