

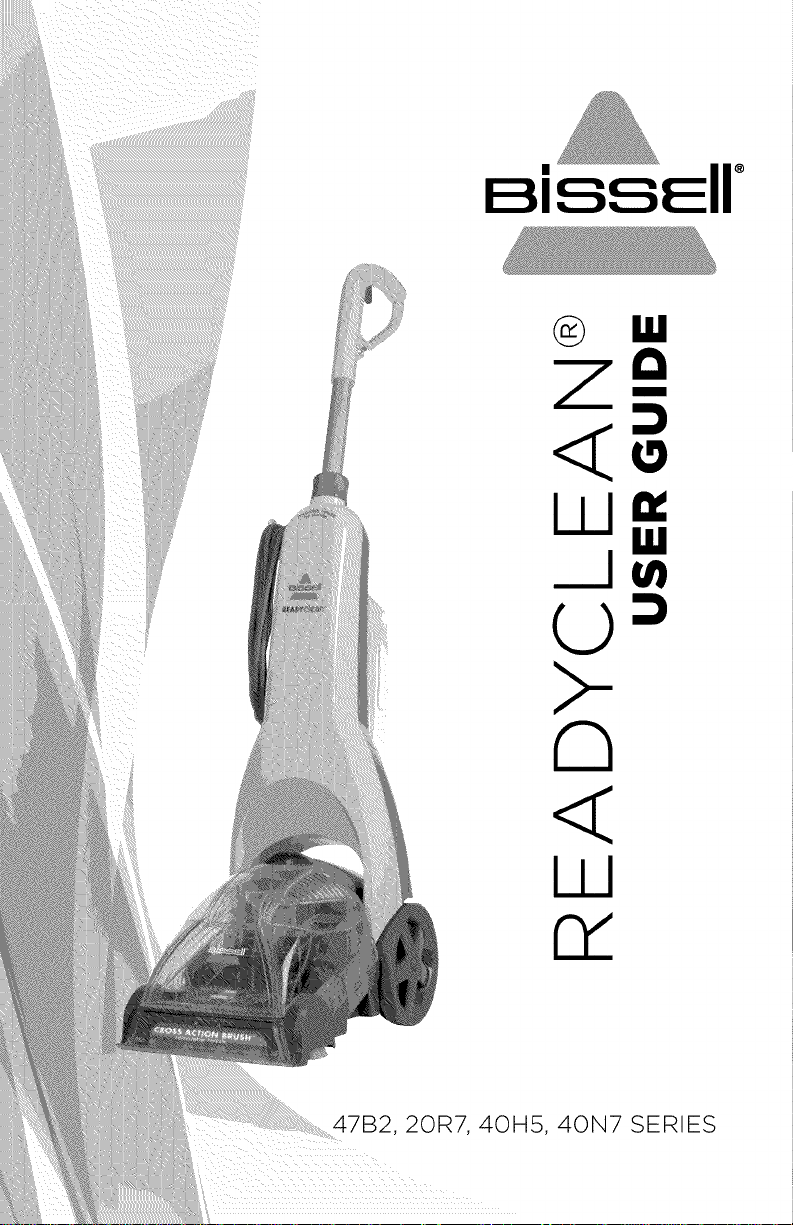
Bissell 40N7, 47B2 Owner’s Manual
<__
I_1_1•
O
>-
D
®
i11
<
III
47B2, 20R7, 40H5, 40N7 SERIES
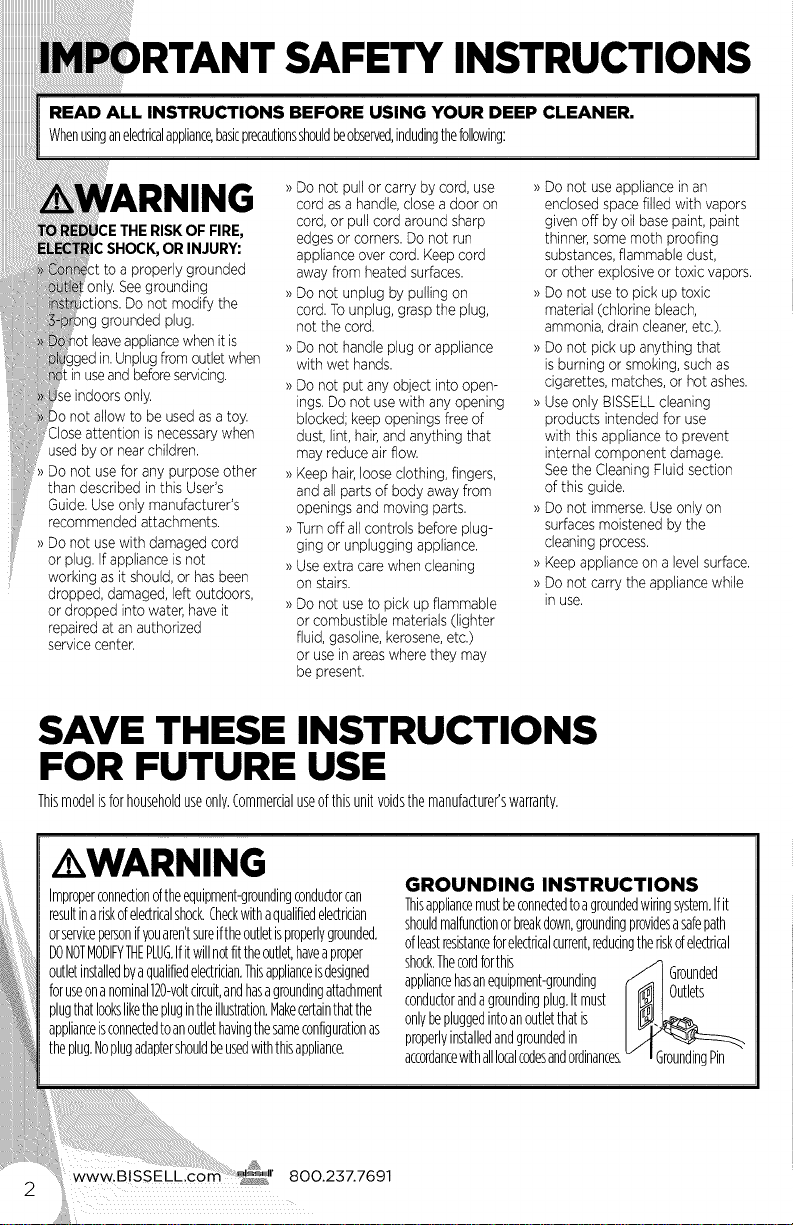
)RTANT SAFETY INSTRUCTIONS
READ ALL INSTRUCTIONS BEFORE USING YOUR DEEP CLEANER.
Whenusinganelectricalappliance,basicprecautionsshouldbeobserved,includingthefollowing:
1
RISKOF FIRE,
OR INJURY:
to a properly grounded
only.Seegrounding
ctions.Do not modify the
grounded plug.
leaveappliancewhenit is
in.Unplugfromoutlet when
:in useandbeforeservicing.
)o not allowto be usedasa toy.
3loseattention isnecessarywhen
usedby or nearchildren.
_>Do not use for any purpose other
thandescribed inthis User's
Guide.Use only manufacturer's
recommendedattachments.
>>Do not usewith damaged cord
or plug. If appliance isnot
working as it should,or hasbeen
dropped,damaged, left outdoors,
or dropped into water,haveit
repairedat anauthorized
servicecenten
Do not pullor carry by cord,use
cordas a handle,close a door on
cord,or pull cord around sharp
edgesor corners. Do not run
applianceover cord. Keepcord
awayfrom heated surfaces.
Do not unplug by pullingon
cord.Tounplug,grasp the plug,
not the cord.
Do not handleplug or appliance
with wet hands.
Do not put any object into open-
ings.Do not usewith any opening
blocked;keep openings free of
dust,lint, hair,andanything that
may reduceair flow.
Keephair,loose clothing, fingers,
andall partsof body away from
openingsand moving parts.
Turnoff all controlsbefore plug-
ging or unplugging appliance.
Useextra care when cleaning
onstairs.
Do not useto pick up flammable
or combustible materials(lighter
fluid,gasoline,kerosene,etc.)
or use in areaswherethey may
bepresent.
_ Do not useappliance in an
>_Do not useto pick up toxic
>_Do not pick up anything that
>_Useonly BISSELLcleaning
>_Do not immerse.Useonly on
_ Keepappliance on a levelsurface.
>_Do not carry the appliancewhile
SAVE THESE INSTRUCTIONS
enclosedspacefilled with vapors
givenoff by oil basepaint, paint
thinner,some moth proofing
substances,flammabledust,
or other explosiveor toxic vapors.
material(chlorine bleach,
ammonia,drain cleaner,etc.).
isburning or smoking, suchas
cigarettes,matches,or hotashes.
products intended for use
with this appliance to prevent
internal component damage.
Seethe Cleaning Fluid section
of this guide.
surfacesmoistened bythe
cleaningprocess.
in use.
FOR FUTURE USE
Thismodelisforhouseholduseonly.Commercialuseofthisunitvoidsthemanufacturer'swarranty.
AWARNING
Improperconnectionoftheequipment-groundingconductorcan
resultinariskofelectricalshock.Checkwithaqualifiedelectrician
orservicepersonifyouaren'tsureiftheoutletisproperlygrounded.
DONOTMODIFYTHEPLUG.Ifitwillnotfittheoutlet,haveaproper
outletinstalledbyaqualifiedelectrician.Thisapplianceisdesigned
foruseonanominal120-voltcircuit,andhasagroundingattachment
plugthatlooksliketheplugintheillustration.Makecertainthatthe
applianceisconnectedtoanoutlethavingthesameconfigurationas
theplug.Noplugadaptershouldbeusedwiththisappliance.
.......@
GROUNDING INSTRUCTIONS
Thisappliancemustbeconnectedtoagroundedwiringsystem.Ifit
shouldmalfunctionorbreakdown,groundingprovidesasafepath
ofleastresistanceforelectricalcurrent,reducingtheriskofelectrical
shock.Thecordforthis
appliancehasanequipment-grounding r" .._ I ....
conductorandagroundingplug.Itmust I uu ,e s
onlybepluggedintoanoutletthatis I_,-_
properlyinstalledandgroundedin I ..-'t"
accordancewithalllocalcodesandordinance_v i GroundingPin
..-q
Grounded
We're glad you purchased a BISSELL
deep cleaner. Everything we know
about floor care went into the design
and construction of this complete,
high-tech home cleaning system.
Safety Instructions ........... 2
Product View ................ 4
Assembly ................... 5
Your BISSELL deep cleaner is well
made, and we back it with a limited
one-year warranty. We also stand
behind it with a knowledgeable,
dedicated Consumer Care
department, so, should you ever
have a problem, you'll receive fast,
considerate assistance.
My great-grandfather invented
the floor sweeper in 1876. Today,
BISSELL is a global leader in the
design, manufacture, and service
of high quality homecare products
like your BISSELL deep cleaner.
Thanks again, from all of us
at BISSELL.
Mark O.gisselt
Chairman & CEO
Operations ................ 6-7
Maintenance & Care ......... S
Troubleshooting ............. 9
Replacement Parts ......... 10
Accessories ................ 10
Warranty .................... 11
Consumer Care .............. 11
Product Registration ........ 12
www.BlSSELLcom 800.237.7691
3

1 SprayTrigger
2 UpperHandle
3 RetractableHandleLock
4 Power(ord
5 UpperBody
6 SolutionTank
7 VentCover(FoamFilter)
8 CollectionTankLatch
9 RemovableNozzle
Cleanin_l fluid
Keep plenty of genuine BISSELL 2X formula on
hand so you can clean and protect whenever it
fits your schedule. Always use genuine BISSELL
deep cleaning formulas. Non-BISSELL cleaning
solutions may harm the machine and will void
the warranty,
/ WARNING
Toreducetheriskoffireandelectricshock
duetointernalcomponentdamage,use
onlyBISSELLcleaningfluidsintendedforuse
withthedeepcleaner.
Rofessional DeepClean HardFloor
DeepCleaning PetStain& Odor & Potect Allergena6snsing Deepaean+Oxv PetStainPreTreat StainPreTreat Solutions"formula
Rernovestoughpet Deepdeanscarpets Fo_usewiththe
staillsardconb_ns andprof.sfl_)m BareFloorTool
pater_edodol futurestainswith (selec[rnodels)
removaltecl,ldogy2ddgaff"R_tec_
Concentrated X X X X X X
Scotchgard"Protection X X X
*ONLY BISSELL Protects from future stains with Scotchgard T,_Protector
T_I
Scotchgardisatrademarkof3PY.
www, BISSELLcom @r 800.237.7691
4
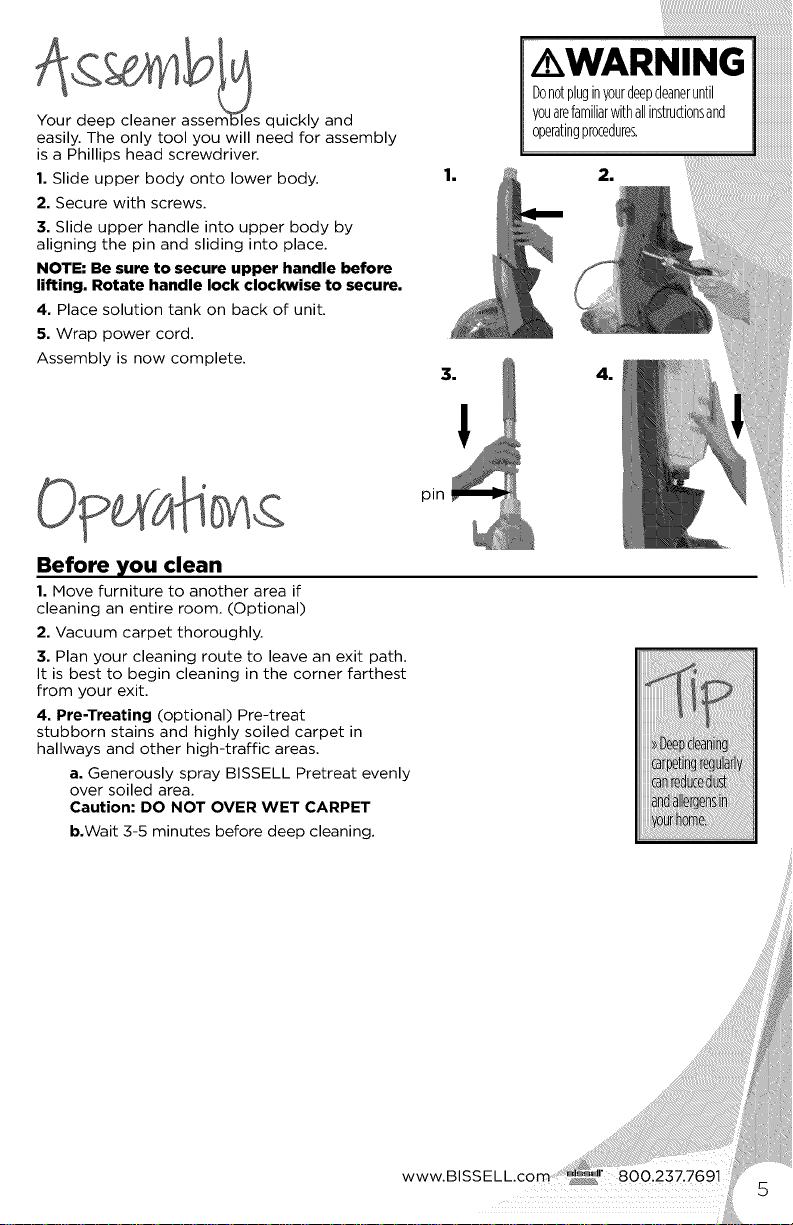
/ WARNING
easily. The only tool you will need for assembly
is a Phillips head screwdriver.
1. Slide upper body onto lower body.
2. Secure with screws.
3. Slide upper handle into upper body by
aligning the pin and sliding into place.
NOTE: Be sure to secure upper handle before
lifting. Rotate handle lock clockwise to secure.
4. Place solution tank on back of unit.
5. Wrap power cord.
Assembly is now complete.
quickly and
Before you clean
1. Move furniture to another area if
cleaning an entire room. (Optional)
2. Vacuum carpet thoroughly.
3. Plan your cleaning route to leave an exit path.
It is best to begin cleaning in the corner farthest
from your exit.
4. Pre-Treating (optional) Pre-treat
stubborn stains and highly soiled carpet in
hallways and other high-traffic areas.
a. Generously spray BISSELL Pretreat evenly
over soiled area.
Caution: DO NOT OVER WET CARPET
b.Wait 3-5 minutes before deep cleaning.
operatingprocedures,
2.
pin
www.BISSELL._
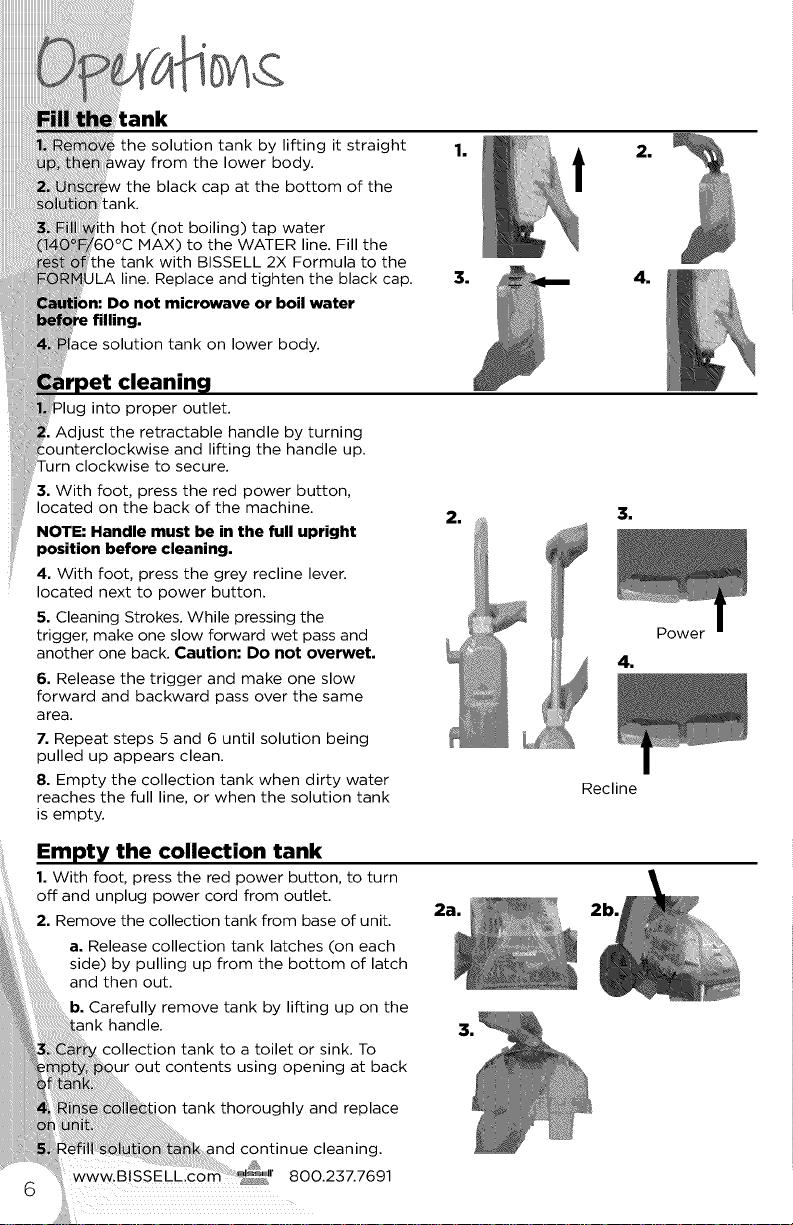
ink
the solution tank by lifting it straight
from the lower body.
black cap at the bottom of the
hnk.
th hot (not boiling) tap water
IVlAX) to the WATER line. Fill the
Lhe tank with BISSELL 2X Formula to the
JLA line. Replace and tighten the black cap.
Do not microwave or boil water
filling.
_ce solution tank on lower body.
into proper outlet.
Adjust the retractable handle by turning
)unterclockwise and lifting the handle up.
clockwise to secure.
3. With foot, press the red power button,
located on the back of the machine.
NOTE: Handle must be in the full upright
position before cleaning.
4. With foot, press the grey recline lever.
located next to power button.
5. Cleaning Strokes. While pressing the
trigger, make one slow forward wet pass and
another one back. Caution: Do not overwet.
6. Release the trigger and make one slow
forward and backward pass over the same
area.
7. Repeat steps 5 and 6 until solution being
pulled up appears clean.
8. Empty the collection tank when dirty water
reaches the full line, or when the solution tank
is empty.
11
3.
2.
41
31
Power
41
Recline
Empty the collection tank
1. With foot, press the red power button, to turn
off and unplug power cord from outlet.
2. Remove the collection tank from base of unit.
a. Release collection tank latches (on each
side) by pulling up from the bottom of latch
and then out.
b. Carefully remove tank by lifting up on the
ink handle.
collection tank to a toilet or sink. To
out contents using opening at back
tank thoroughly and replace
continue cleaning.
2a.
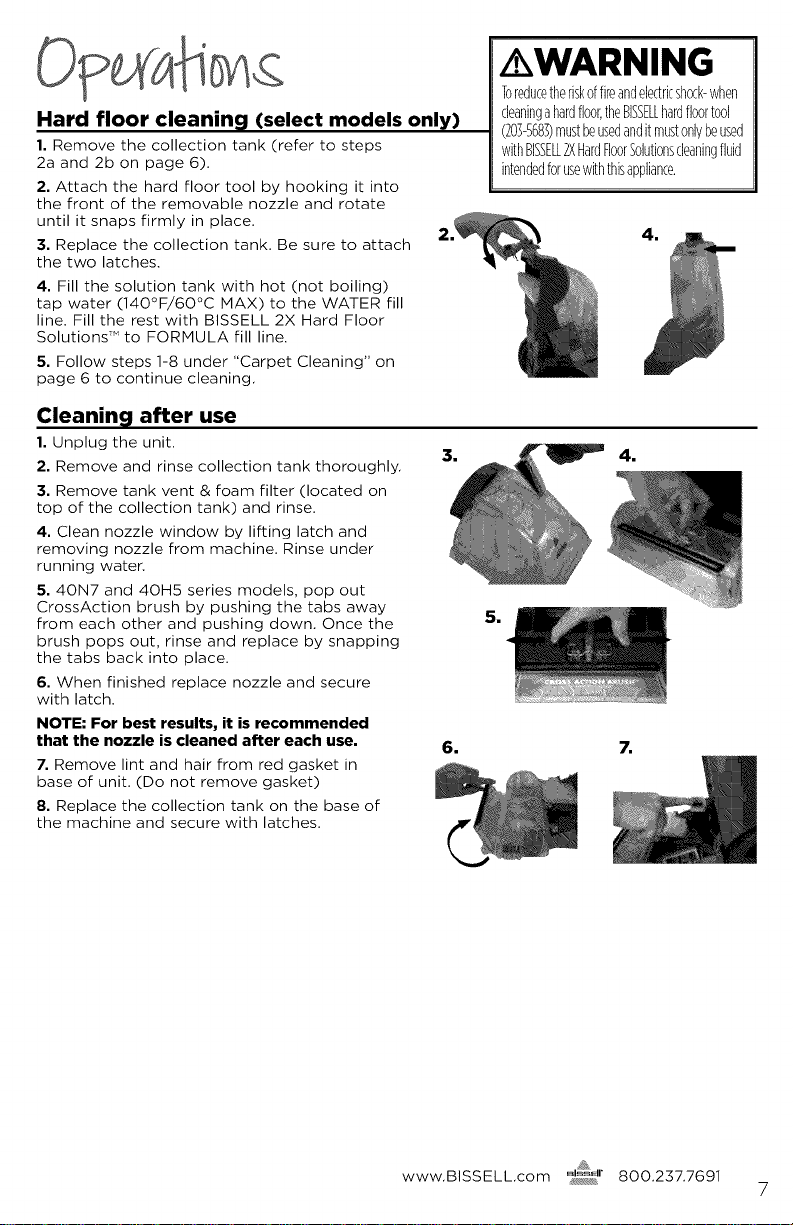
Hard floor cleanin_l (select models only)
1. Remove the collection tank (refer to steps
2a and 2b on page 6).
2, Attach the hard floor tool by hooking it into
the front of the removable nozzle and rotate
until it snaps firmly in place.
3, Replace the collection tank. Be sure to attach
the two latches.
4, Fill the solution tank with hot (not boiling)
tap water (140°F/60°C MAX) to the WATER fill
line. Fill the rest with BISSELL 2X Hard Floor
Solutions T'_to FORMULA fill line.
5, Follow steps 1-8 under "Carpet Cleaning" on
page 6 to continue cleaning.
Cleanin_l after use
1, Unplug the unit.
2, Remove and rinse collection tank thoroughly.
3, Remove tank vent & foam filter (located on
top of the collection tank) and rinse,
4, Clean nozzle window by lifting latch and
removing nozzle from machine. Rinse under
running water.
5, 40N7 and 40H5 series models, pop out
CrossAction brush by pushing the tabs away
from each other and pushing down. Once the
brush pops out, rinse and replace by snapping
the tabs back into place,
6, When finished replace nozzle and secure
with latch,
NOTE: For best results, it is recommended
that the nozzle is cleaned after each use.
7, Remove lint and hair from red gasket in
base of unit. (Do not remove gasket)
8, Replace the collection tank on the base of
the machine and secure with latches.
/ WARNING
Toreducetheriskoffireandelectricshock-when
cleaningahardfloor,theBISSELLhardfloort001
(203G683)mustbeusedanditmust0nlvbeused
withBISSELL2XHardFloorSolutionscleaningfluid
intendedforusewiththisappliance.
5.
6.
4,
7,
www.BISSELL.com 800.237.7691
7
Machine storable
For best results, a few simple steps can assure
your machine is well maintained after your
cleaning is complete.
1, Wrap power cord around Quick Release
Cord Wrap TM on side of the machine.
2, Wipe all surfaces with a soft cloth. Store
cleaner upright in a protected, dry area.
NOTE: You may have cleaning solution remain-
ing in the solution tank. You may store your
machine this way for the next cleaning task, but
never keep dirty water in the collection tank.
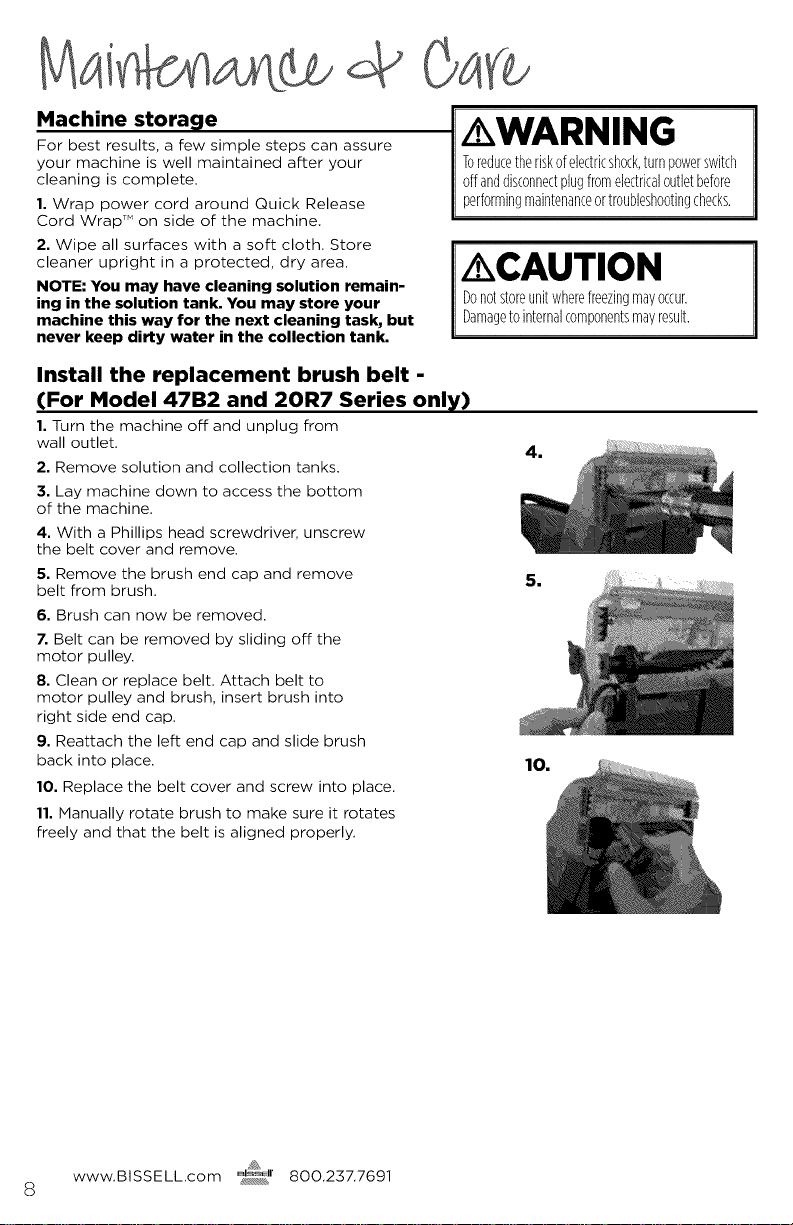
Install the replacement brush belt -
(For Model 47B2 and 20R7 Series only)
1, Turn the machine off and unplug from
wall outlet.
2, Remove solution and collection tanks.
3, Lay machine down to access the bottom
of the machine,
4, With a Phillips head screwdriver, unscrew
the belt cover and remove,
5, Remove the brush end cap and remove
belt from brush,
6, Brush can now be removed.
7, Belt can be removed by sliding off the
motor pulley.
8, Clean or replace belt, Attach belt to
motor pulley and brush, insert brush into
right side end cap.
9, Reattach the left end cap and slide brush
back into place,
10, Replace the belt cover and screw into place,
11,Manually rotate brush to make sure it rotates
freely and that the belt is aligned properly.
/ WARNING
Toreducetheriskof electricshock,turnpowerswitch
offanddisconnectplugfromelectricaloutletbefore
performingmaintenanceortroubleshootingchecks.
/ CAUTION
Donotstoreunitwherefreezingmayoccur.
Damagetointernalcomponentsmayresult.
www, BISSELL,com _r 800,237,7691
8
 Loading...