

Page 1

BISM
GRANDE
Watch Dive Computer
Operating Manual
Page 2
2
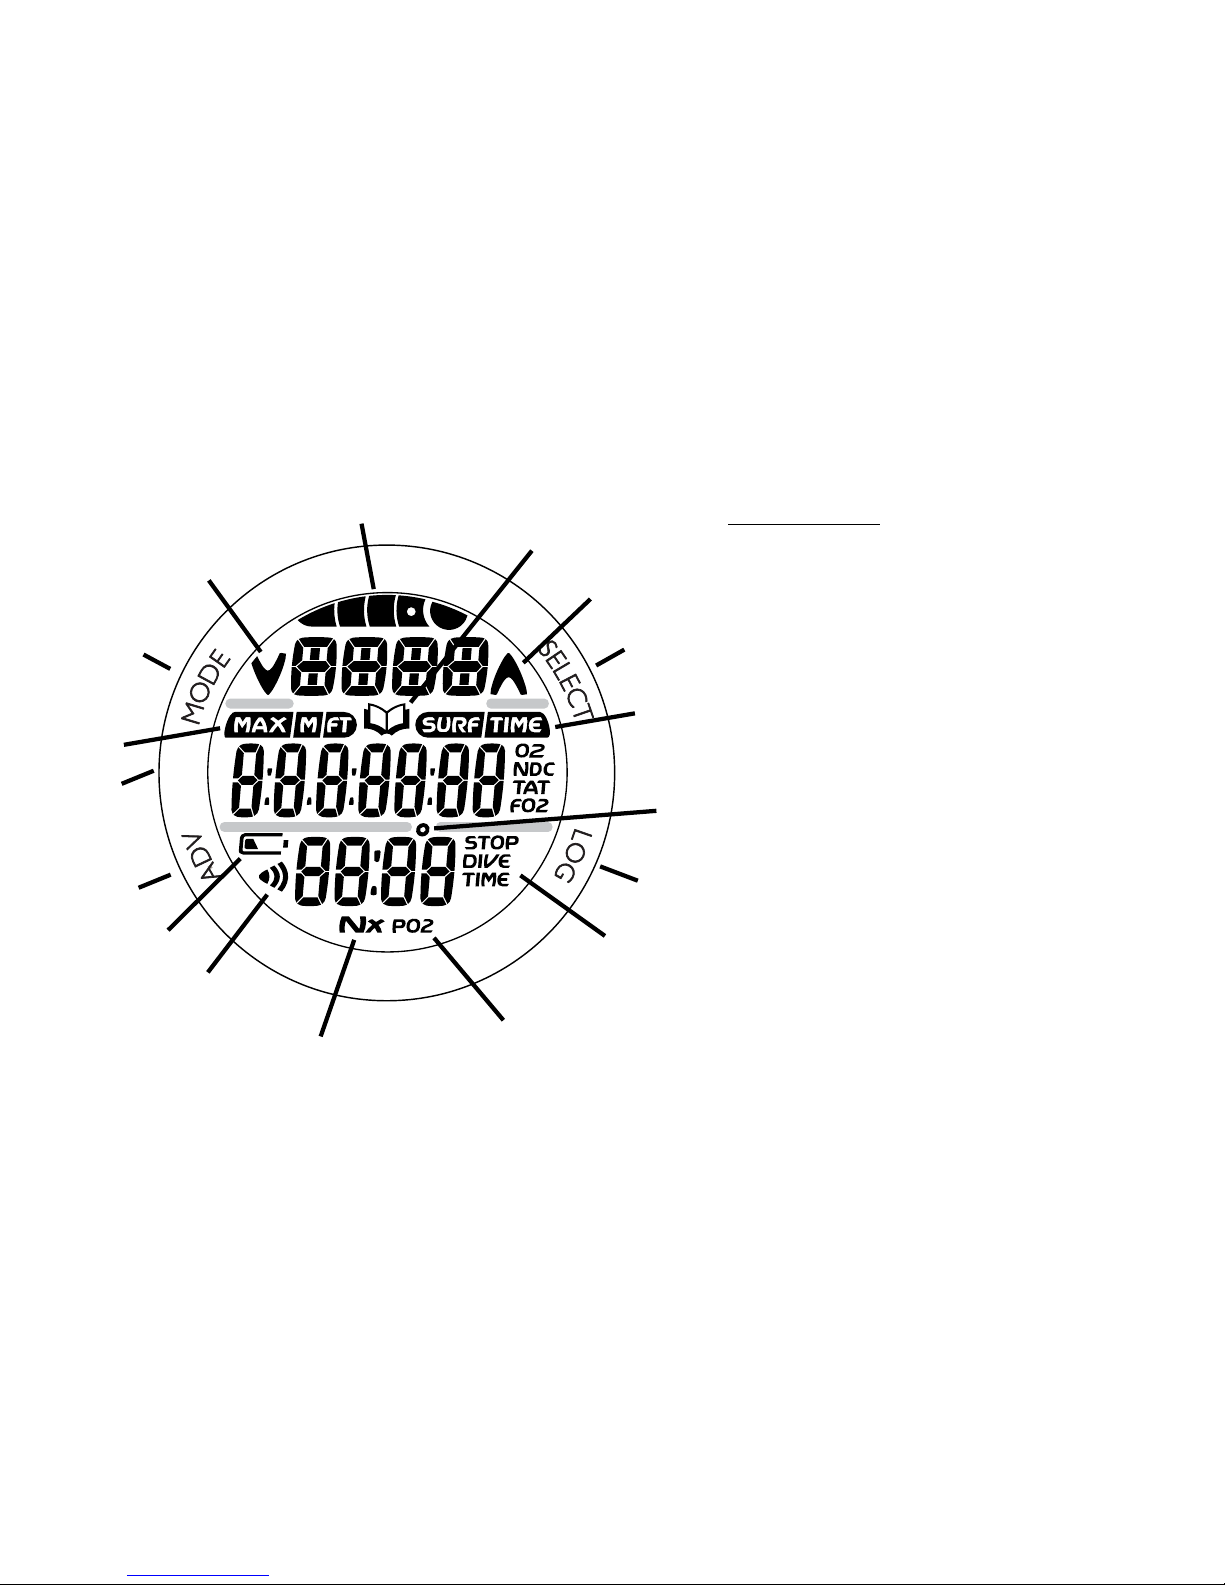
FULL LCD
Components:
a. Mode (M) Button
b. Select (S) Button
c. Light, Log (L) Button
d. Advance (A) Button
e. LED Warning Light
f. Bar Graph
g. Icon - Log Mode
h. Icon - Ascend
i. Icon - Surface Interval
O2 Time Remaining
No Deco Time Remaining
Total Ascent Time
FO2 Set Point
j. Icon - Degrees
k. Icon - Stop Time Required
Elapsed Dive Time
l. Icon - PO2
m. Icon - Nitrox
n. Icon - Daily Alarm set
o. Icon - Low Battery
p Icon - Depth/Max Depth
q. Icon - Descend
b
c
d
e
g
h
j
k
l
q
o
m
i
p
a
f
n
Page 3

3
CONTENTS
FULL LCD .................................................................................................................................................................2
NOTICES, DECOMPRESSION MODEL ................................................................................................................... 7
INITIAL ACTIVATION ................................................................................................................................................ 8
INTRODUCTION AND GENERAL FEATURES AND DISPLAYS ............................................................................ 9
INTERACTIVE CONTROL CONSOLE ............................................................................................................... 10
OPERATING MODE STRUCTURE .................................................................................................................... 11
OPERATION AS A DIVE COMPUTER ...............................................................................................................12
PC INTERFACE ..................................................................................................................................................12
SYMBOLS AND ALPHA NUMERIC GRAPHICS ...............................................................................................13
AUDIBLE ALARM ............................................................................................................................................... 13
BACKLIGHT .......................................................................................................................................................15
POWER SUPPLY ................................................................................................................................................ 16
WATCH FEATURES AND DISPLAYS ....................................................................................................................17
LOCAL DEFAULT TIME .....................................................................................................................................18
MAIN TIME .......................................................................................................................................................... 19
SET MAIN TIME ..............................................................................................................................................20
ALTERNATE TIME ..............................................................................................................................................23
SET ALTERNATE TIME ................................................................................................................................... 24
COUNTDOWN TIMER ........................................................................................................................................24
SET COUNTDOWN TIMER ............................................................................................................................25
CHRONOGRAPH ................................................................................................................................................26
DAILY ALARM ....................................................................................................................................................28
SET DAILY ALARM .........................................................................................................................................29
DIVE COMPUTER FEATURES AND DISPLAYS ................................................................................................... 31
BAR GRAPH ....................................................................................................................................................... 32
ALPHA / NUMERIC DISPLAYS ......................................................................................................................... 34
Depth Displays ................................................................................................................................................34
Time and Date Displays...................................................................................................................................34
Temperature Display ........................................................................................................................................35
Page 4

4
CONTENTS (continued)
DIVE COMPUTER SURFACE SEQUENCE AND OPERATING MODES ..............................................................37
DC OPERATING MODES ................................................................................................................................... 38
SURFACE MODE ................................................................................................................................................38
NORM Surface Mode ......................................................................................................................................40
NORM/GAUG SET MODES ................................................................................................................................42
Set F Group (FO2) ...................................................................................................................................42
Setting FO2 .....................................................................................................................................................44
Set FO2 50% Default.......................................................................................................................................45
Set A Group (Alarms) .............................................................................................................................46
Set Audible Alarm ............................................................................................................................................ 46
Set Depth Alarm ..............................................................................................................................................47
Set EDT (Elapsed Dive Time) Alarm ...............................................................................................................47
Set NIBG (Nitrogen Bar Graph) Alarm.............................................................................................................48
Set DTR (Dive Time Remaining) Alarm ........................................................................................................... 48
Set PO2 Alarm .................................................................................................................................................49
Set U Group (Utilities) ............................................................................................................................50
Set Wet Activation ...........................................................................................................................................50
Set Units .......................................................................................................................................................... 51
Set Deep Stop .................................................................................................................................................51
Set Safety Stop ................................................................................................................................................ 52
Set Conservative Factor .................................................................................................................................. 53
Set Backlight Duration ..................................................................................................................................... 53
Set Sampling Rate...........................................................................................................................................54
SERIAL NUMBER .................................................................................................................................... 54
PLAN Mode ..............................................................................................................................................55
FLY Mode ................................................................................................................................................. 57
DESAT Mode ...........................................................................................................................................58
LOG Mode ...............................................................................................................................................59
HISTORY Mode .......................................................................................................................................64
DISPLAYED SYMBOLS AND ICONS .............................................................................................................66
Page 5

5
CONTENTS (continued)
OVERVIEW OF DIVE MODE INFORMATION ........................................................................................................ 67
DIVE TIME REMAINING (DTR) ..........................................................................................................................68
No Decompression DTR (NDC) ......................................................................................................................68
O2 DTR (OTR) ................................................................................................................................................69
VARIABLE ASCENT RATE ................................................................................................................................ 70
ELAPSED DIVE TIME (EDT) .............................................................................................................................. 71
CONTROL OF DISPLAYS .................................................................................................................................. 71
WET ACTIVATION CONTACTS..........................................................................................................................72
NORM TYPE DIVE MODES ....................................................................................................................................73
NORM NO DECOMPRESSION DIVE MODE ..................................................................................................... 74
No Deco Deep Stop.........................................................................................................................................76
No Deco Safety Stop ....................................................................................................................................... 78
DECOMPRESSION DIVE MODE .......................................................................................................................79
VIOLATION MODES ........................................................................................................................................... 81
Conditional Violation ........................................................................................................................................ 81
Delayed Violation 1 .......................................................................................................................................... 82
Delayed Violation 2 .......................................................................................................................................... 82
Delayed Violation 3 .......................................................................................................................................... 83
Violation Gauge Mode ..................................................................................................................................... 83
HIGH PO2 ...........................................................................................................................................................85
HIGH OXYGEN ACCUMULATION ..................................................................................................................... 86
NORM POST DIVE MODES ...................................................................................................................................87
TRANSITION PERIOD ........................................................................................................................................ 88
AFTER THE TRANSITION PERIOD ...................................................................................................................89
SUMMARY OF WARNING AND ALARM MESSAGES ......................................................................................90
GAUGE OPERATING MODE .................................................................................................................................91
GAUGE MODE ....................................................................................................................................................92
Page 6

6
CONTENTS (continued)
FREE DIVE OPERATING MODE ............................................................................................................................95
FREE Surface Mode........................................................................................................................................96
FREE CDT (COUNTDOWN TIMER) ................................................................................................................... 98
Set FREE CDT ................................................................................................................................................99
FREE EDT (ELAPSED DIVE TIME) ALARM....................................................................................................100
Set FREE EDT Alarm ....................................................................................................................................100
FREE DEPTH ALARMS (FDA) .........................................................................................................................101
Set FDA1 ....................................................................................................................................................... 101
Set FDA2 ....................................................................................................................................................... 102
Set FDA3 ....................................................................................................................................................... 103
FREE DIVE MODE ............................................................................................................................................ 104
FREE Dive CDT ............................................................................................................................................104
FREE Dive Alarms .........................................................................................................................................105
REFERENCE ........................................................................................................................................................107
CARE AND CLEANING ....................................................................................................................................108
INSPECTIONS AND SERVICE .........................................................................................................................108
BATTERY REPLACEMENT ..............................................................................................................................109
UPLOADING SETTINGS AND DOWNLOADING DATA .................................................................................. 114
PC Compatibility Requirements..................................................................................................................... 115
ERROR (RESET DURING A DIVE) .................................................................................................................. 115
ALTITUDE SENSING AND ADJUSTMENT ...................................................................................................... 116
No Decompression Limits at Altitude ............................................................................................................. 11 7
OXYGEN EXPOSURE LIMITS ......................................................................................................................... 118
SPECIFICATIONS ............................................................................................................................................. 119
INSPECTION / SERVICE RECORD .................................................................................................................124
Pay special attention to items marked
with this Warning symbol.
Page 7

7
COPYRIGHT NOTICE
This operating manual is copyrighted, all rights are reserved. It may not, in whole or in part, be
copied, photocopied, reproduced, translated, or reduced to any electronic medium or machine
readable form without prior consent in writing from Bism/2002 Design.
Grande Operating Manual, Doc. No. 12-5308
© 2002 Design, 2012
San Leandro, CA USA 94577
TRADEMARK, TRADE NAME, AND SERVICE MARK NOTICE
Bism, the Bism logotype, Grande, the Grande logo are all trademarks, trade names, or service
marks of Bism. All rights are reserved.
PATENT NOTICE
U.S. Patents have been issued, or applied for, to protect the following design features:
Data Sensing and Processing Device (U.S. Patent no. 4,882,678), Ascent Rate Meter (U.S.
Patent no. 5,156,055), other patents pending.
DECOMPRESSION MODEL
The programs within the Grande simulate the absorption of nitrogen into the body by using a
mathematical model. This model is merely a way to apply a limited set of data to a large range
of experiences. The Grande dive computer model is based upon the latest research and experiments in decompression theory. Still, using the Grande, just as using the U.S. Navy
(or other) No Decompression Tables, is no guarantee of avoiding decompression
sickness, i.e. “the bends.” Every diver’s physiology is dierent, and can even vary from
day to day. No machine can predict how your body will react to a particular dive prole.
Page 8

8
Grande Watch/Dive Computers are placed in a Deep Sleep mode prior to being
shipped from the factory. The intent is to extend storage life of the Battery for up to
7 years, before the unit is initially placed in service.
In this mode, Date and Time are updated as they normally would be. However,
they are not displayed. Upon waking the Grande up, the correct Date and factory
Time will be displayed and it will be ready to operate with full functions.
To wake the Grande up from Deep Sleep mode, simultaneously depress the upper/
right (S) and lower/left (A) buttons for 2 to 3 seconds until the display comes full
ON displaying the MAIN TIME screen, then release them.
NOTE: Once the Grande is brought out of the Deep Sleep
mode, it can only be placed back in it by the factory.
NOTICE
STORAGE and INITIAL ACTIVATION
Page 9

9
INTRODUCTION
AND
GENERAL FEATURES AND DISPLAYS
Page 10

10
INTRODUCTION
Welcome to Bism and thank you for choosing the Grande !
It is extremely important that you read this Operating Manual in sequence and
understand it completely before attempting to use the Grande as a dive computer.
Remember that technology is no substitute for common sense, and a dive computer
only provides the person using it with data, not the knowledge to use it.
INTERACTIVE CONTROL CONSOLE
The Interactive Control Console consists of four Control Buttons that allow you to
select mode options and access specic information. They are also used to enter
Settings, access Log and History modes, activate the Backlight, and acknowledge
the Audible Alarm.
Throughout this manual they will be referred to as the M, S, L, and A buttons.
• Upper/Left - Mode (M) button
• Upper/Right - Select (S) button
• Lower/Right - Light, Log (L) button
• Lower/Left - Advance (A) button
M
A
S
L
Page 11
11
OPERATING MODE STRUCTURE
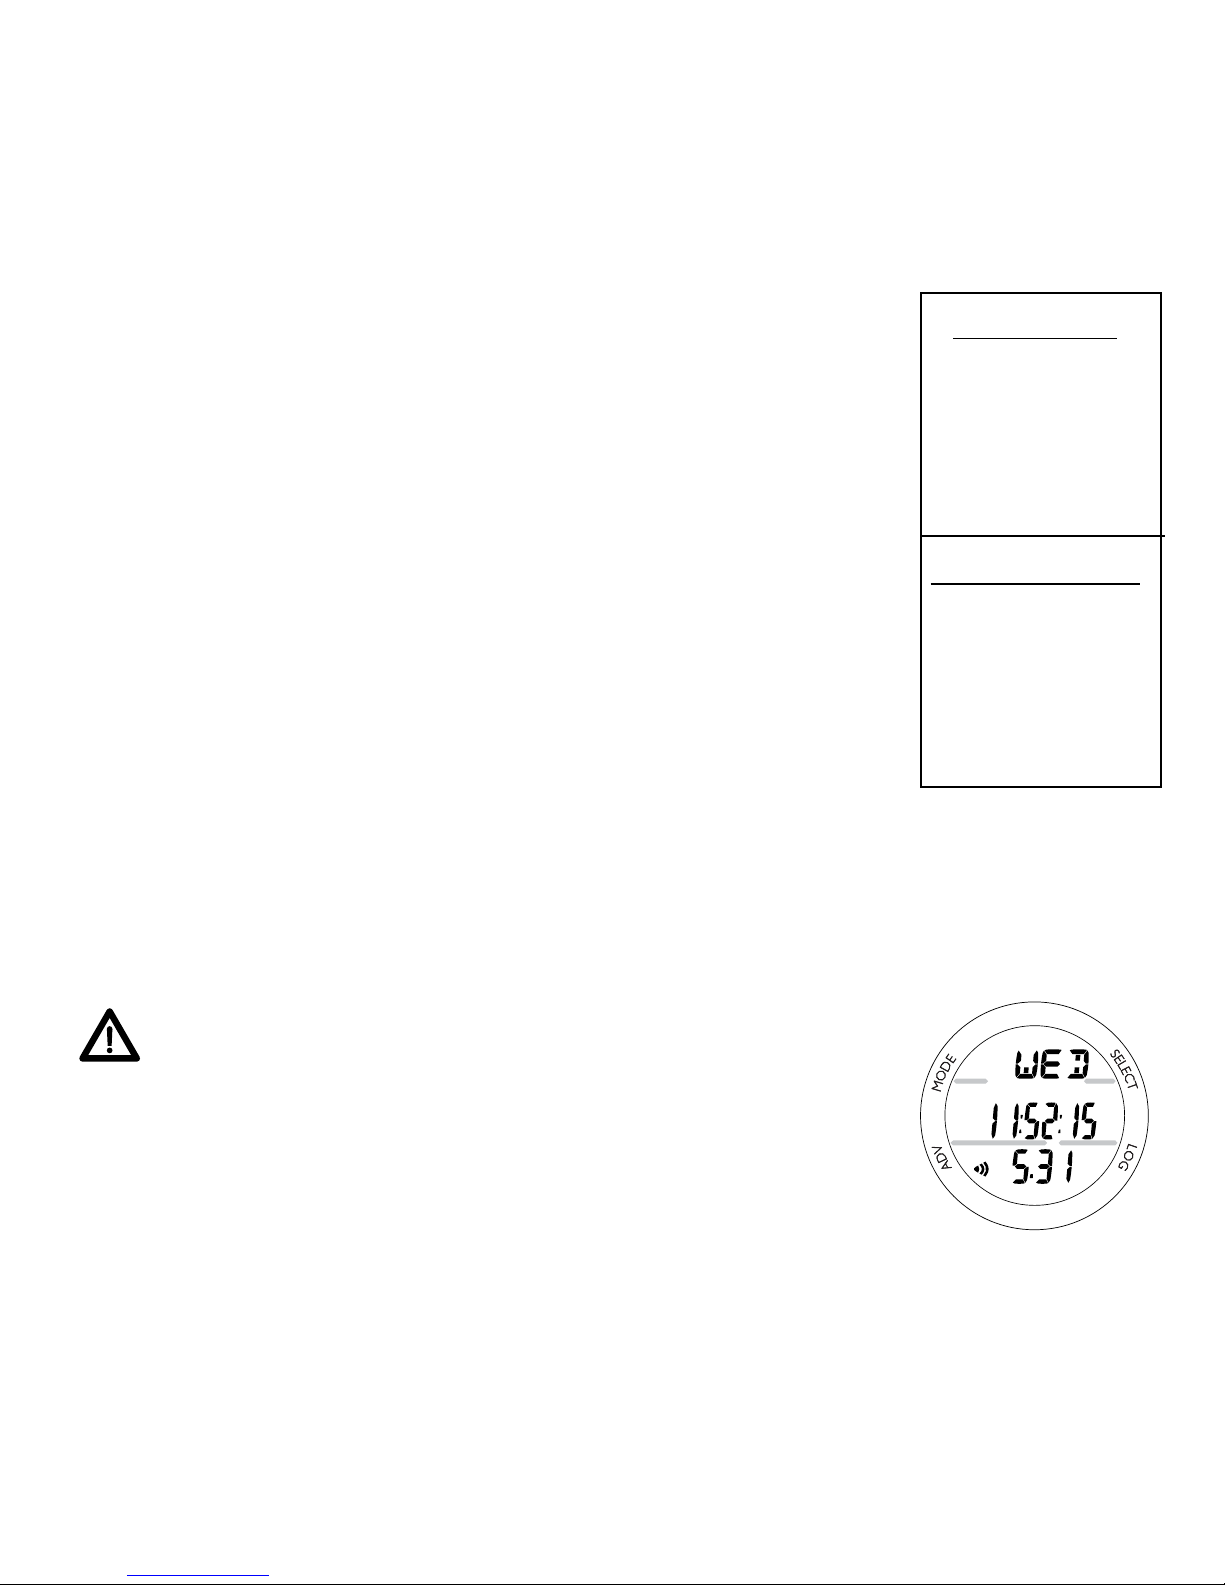
Unless it is operating in Dive Computer mode, the Grande will
be ON in the default WATCH MAIN TIME (home time) mode
(Fig. 1), like a standard WATCH, until the Mode is changed.
The M button is used to access 4 other Modes that include
Alternate Time Mode, Countdown Timer, ChronoGraph (stop
watch/lap timer), and Daily Alarm. It is also used to revert to
the Local Default Time display and access Computer Modes.
The screens of the Main Modes and Sub Modes will remain
on display until a button is pressed to access another screen
or Mode, activate a sequence, or for 2 minutes if no button is
pressed. The ChronoGraph remains on display as long as it is
running unless another Mode is accessed.
When Wet Activation is set On, the Grande will enter selected
Dive Mode upon descent to 5 FT (feet)/1.5 M (meters) for 5
seconds, regardless of what operating Mode it is in.
WARNING: When Wet Activation is set OFF,
the Grande must be in Dive Surface Mode
(NORM< GAUG, or FREE prior to the rst dive
of a new series. Commencing a dive while in
Watch modes will not activate Dive Mode unless Wet Activation is set ON.
Main Sequence
(while at home)
Main Time
Alternate Time
Countdown Timer
ChronoGraph
Daily Alarm
Alternate Sequence
(at a travel location)
Alternate Time
Main Time (home)
Countdown Timer
ChronoGraph
Daily Alarm
Fig. 1 - MAIN TIME
Page 12
12
OPERATION AS A DIVE COMPUTER
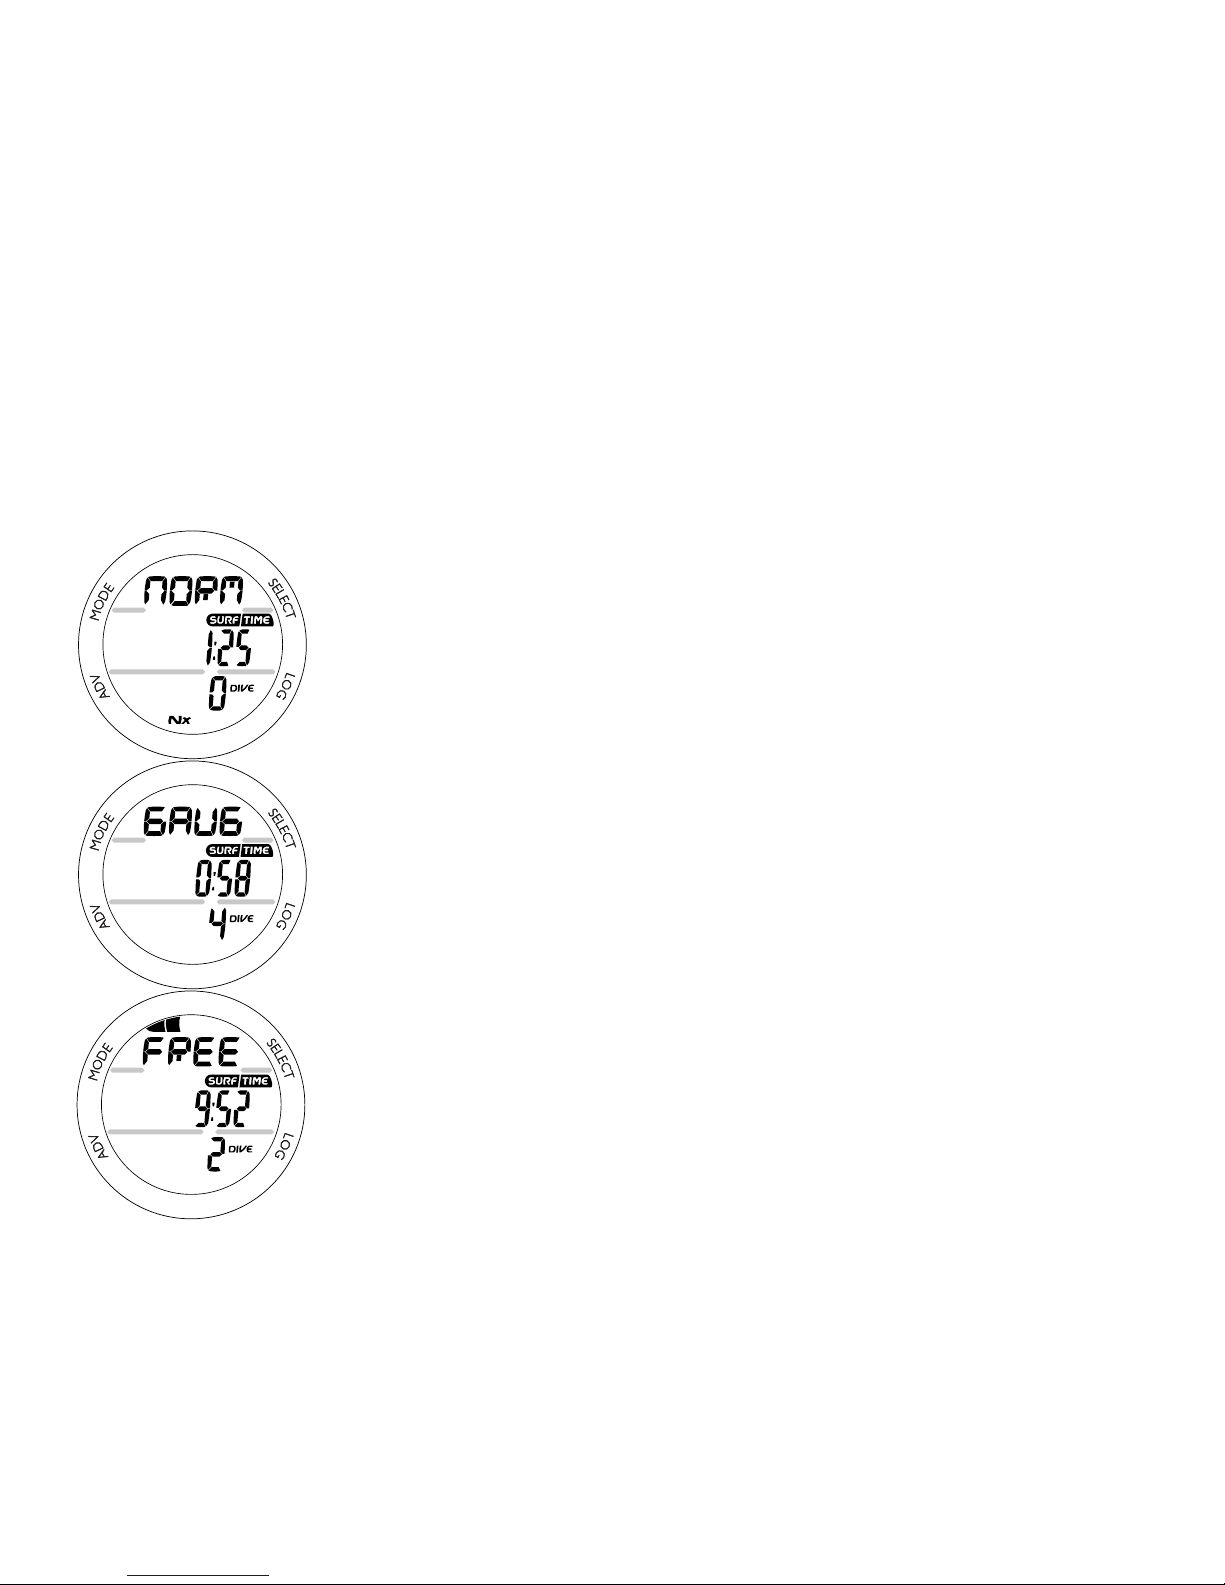
The Grande features 3 Dive Computer (DC) Operating Modes,
NORM (Fig. 2A) which is used for Air and Nitrox dives,
GAUG (Fig. 2B) used for dives in which Nitrogen-Oxygen
calculations are not performed, and FREE (Fig. 2C) used for
activities that do not use SCUBA.
Entering Settings and Plan Mode are only available in NORM
SURF Mode which also allows access to Fly, Desat, Log, and
History Modes.
GAUG Mode only allows access to Fly, Log, and History
Modes.
Once a dive is made in GAUG Operating Mode, the Grande
is locked into that Mode for 24 hours after the dive.
PC INTERFACE
Interface with a PC is accomplished by connecting the Grande
to a PC USB Port using the Bism PC Interface USB cable. The
same Cable is used for Upload and Download.
The software program is on the Bism CD, together with a USB
Driver. The program's Help serves as the user manual and can
be printed for personal use. The Settings Upload program is
used to check the Grande's existing Settings and for entering
Time, Alarm, and Dive Computer settings into the Grande.
Fig. 2 - DC MODES
A
B
C
Page 13

13
The Data Download program is used to retrieve Data that was sampled during
dives and stored in the Grande's memory.
The Grande checks for an External Access request once every second while in the
Watch Main Time. Checks are not made if the unit is wet. For a connection to
be made, the Interface Cable is clipped onto the Grande's Data Port and plugged
into a PC USB Port. To establish the connection, the PC program must be running.
When the connection is made, all segments of the LCD appear on the display until
completion of the Upload or Download operation.
• The Grande reverts to the Watch Main Time screen after completion of the
Upload or Download operation, or after 2 minutes if no PC action was taken.
SYMBOLS AND ALPHA NUMERIC GRAPHICS
The upper line of digits on the LCD screen is used to convey alpha Messages such
as Day of the Week, Operating Modes, items being Set, Altitude level, and Alarm
identication. At times, the second line is also used to display alpha numeric
Graphics such as FO2 and On/O. The PO2 values will appear in the lower
line.
AUDIBLE ALARM
Most warning situations that activate the Audible Alarm while operating in NORM
or GAUG Mode cause the Grande to emit 1 beep per second for 10 seconds, or
until the situation is corrected, or it is acknowledged by momentarily pressing and
releasing the S button (less than 2 seconds).
After being acknowledged and the situation corrected, the Alarm will sound again
upon reentry into the warning situation, or entry into another warning situation.
Page 14

14
FREE Dive Mode has its own set of Alarms which emit 3 short beeps either 1 or 3
times which cannot be acknowledged or set O.
An LED Warning Light, located on the side of the housing, is synchronized with the
Audible Alarm. It will ash as the Audible Alarm sounds. It will turn O when the
Alarm is acknowledged or the situation is corrected. The Audible and LED will not
be active if the Alarm is Set OFF (a group A setting).
Situations that will activate the NORM/GAUG 10 second Alarm include -
• Descent deeper than the Max Depth Set Point selected.
• Dive Time Remaining at the Set Point selected.
• Elapsed Dive Time at the Set Point selected.
• High PO2 at the Set Point selected.
• High O2 of 300 OTU (single or daily exposure).
• Nitrogen Bar Graph at the segment Set Point selected.
• NORM/GAUG Ascent Rate exceeds 60 FPM (18 MPM) when deeper than
60 FT (18 M), or 30 FPM (9 MPM) at 60 FT (18 M) and shallower.
• Entry into Decompression Mode (Deco).
• Conditional Violation (above a required Deco Stop Depth for less than 5
minutes).
• Delayed Violation (above a required Deco Stop Depth for more than 5
minutes).
• Delayed Violation (a Deco Stop Depth greater than 60 FT/18 M is required).
• Delayed Violation (Max Operating Depth of 330 FT/100 M is exceeded).
• Watch Daily Alarm reaches time set (disabled during Dive Modes).
• Watch Mode Countdown Timer reaches 0:00.
Page 15

15
A single short beep (which cannot be disabled) is emitted for the following -
• Upon completion of a Hot Swap battery change.
• Change from Delayed to Full Violation 5 minutes after the dive.
3 short beeps (which cannot be disabled) are emitted for the following -
• NORM/GAUG Ascent Rate is 51 to 60 FPM (15.1 to 18 MPM) when deeper
than 60 FT (18 M), or 26 to 30 FPM (7.5 to 9 MPM) at 60 FT (18 M) and
shallower.
• FREE Elapsed Dive Time Alarm (3 beeps every 30 seconds if set On).
• FREE Depth Alarms 1/2/3 (set sequentially deeper) - each 3 beeps 3 times.
• FREE NIBG Alarm (Caution zone, 4 segments) - 3 beeps 3 times.
• Entry into Deco during a FREE Dive (Permanent Violation) - 3 beeps 3 times.
• Free Dive Mode Countdown Timer reaches 0:00 - each 3 beeps 3 times.
During the following NORM Dive situations, the 10 second continuous tone will be
followed by a 5 second steady beep that will not turn o when acknowledged -
• Ascending above a required Decompression Ceiling Stop Depth for more than
5 minutes (referred to as a Delayed Violation).
• Decompression requires a Ceiling Stop Depth of 70 FT (21 M) or deeper.
• Being on the Surface for 5 minutes after a Conditional Violation (Permanent
Violation).
BACKLIGHT
To activate the Backlight - depress the L button for 2 seconds.
• The Backlight will then activate and illuminate the display for button
depression time, then upon release the added Duration time set (0, 5, or 10
additional seconds), for a maximum illumination time of 20 seconds.
• Depress the L button again to activate as desired.
Page 16
16
NOTE: Extensive use of the Backlight reduces
estimated Battery life. Also, the Backlight
does not operate during a Low Battery Condition or when the Grande is connected to a PC.
POWER SUPPLY
The Grande utilizes one 3 volt CR2430 Lithium Battery. When
used as a Dive Computer, the battery should operate normally
for 1 year or 300 dive hours if 2 dives are conducted during
each dive period. The Grande checks its battery voltage every
2 minutes during surface operation.
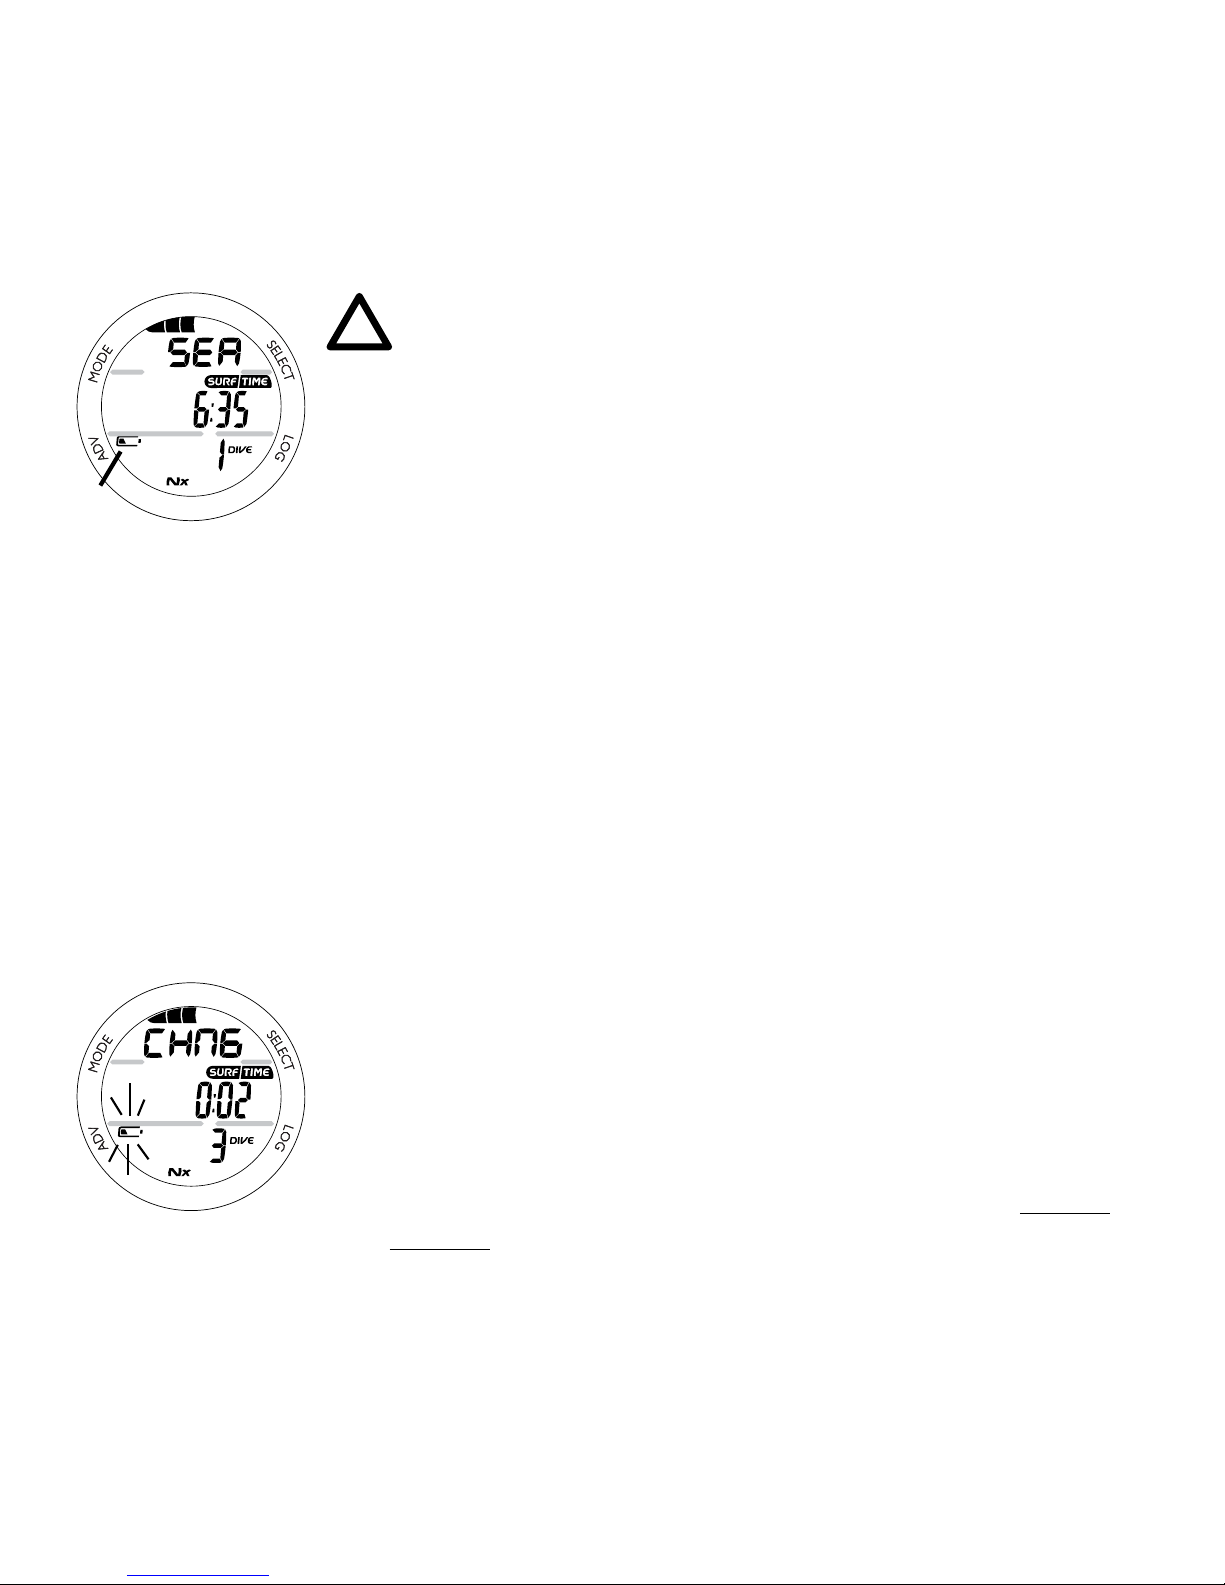
• If voltage decreases to the Warning level (2.75 volts), the
Battery icon will appear on Surface display screens (Fig.
3a) as an indication that the Battery should be changed
prior to commencing a series of dives.
• If voltage decreases to the Alarm level (2.50 volts), the
Battery icon will ash and the message CHNG > BATT
will scroll at the top of the display (Fig. 4). Operation will
automatically revert to Main Time Mode. The Grande
would then only operate in Watch modes until the Battery
becomes completely depleted.
• Low Battery Warning/Alarm conditions are not displayed
during Dive Modes.
• If a Low Battery condition was not displayed prior to
starting a dive, and a Low Battery condition occurs during
the dive, there will be sucient Battery power to maintain
operation for the remainder of that dive.
Fig. 4 - LOW BATTERY
ALARM
Fig. 3 - LOW BATTERY
WARNING
a
Page 17

17
WATCH
FEATURES AND DISPLAYS
Page 18
18
LOCAL DEFAULT TIME
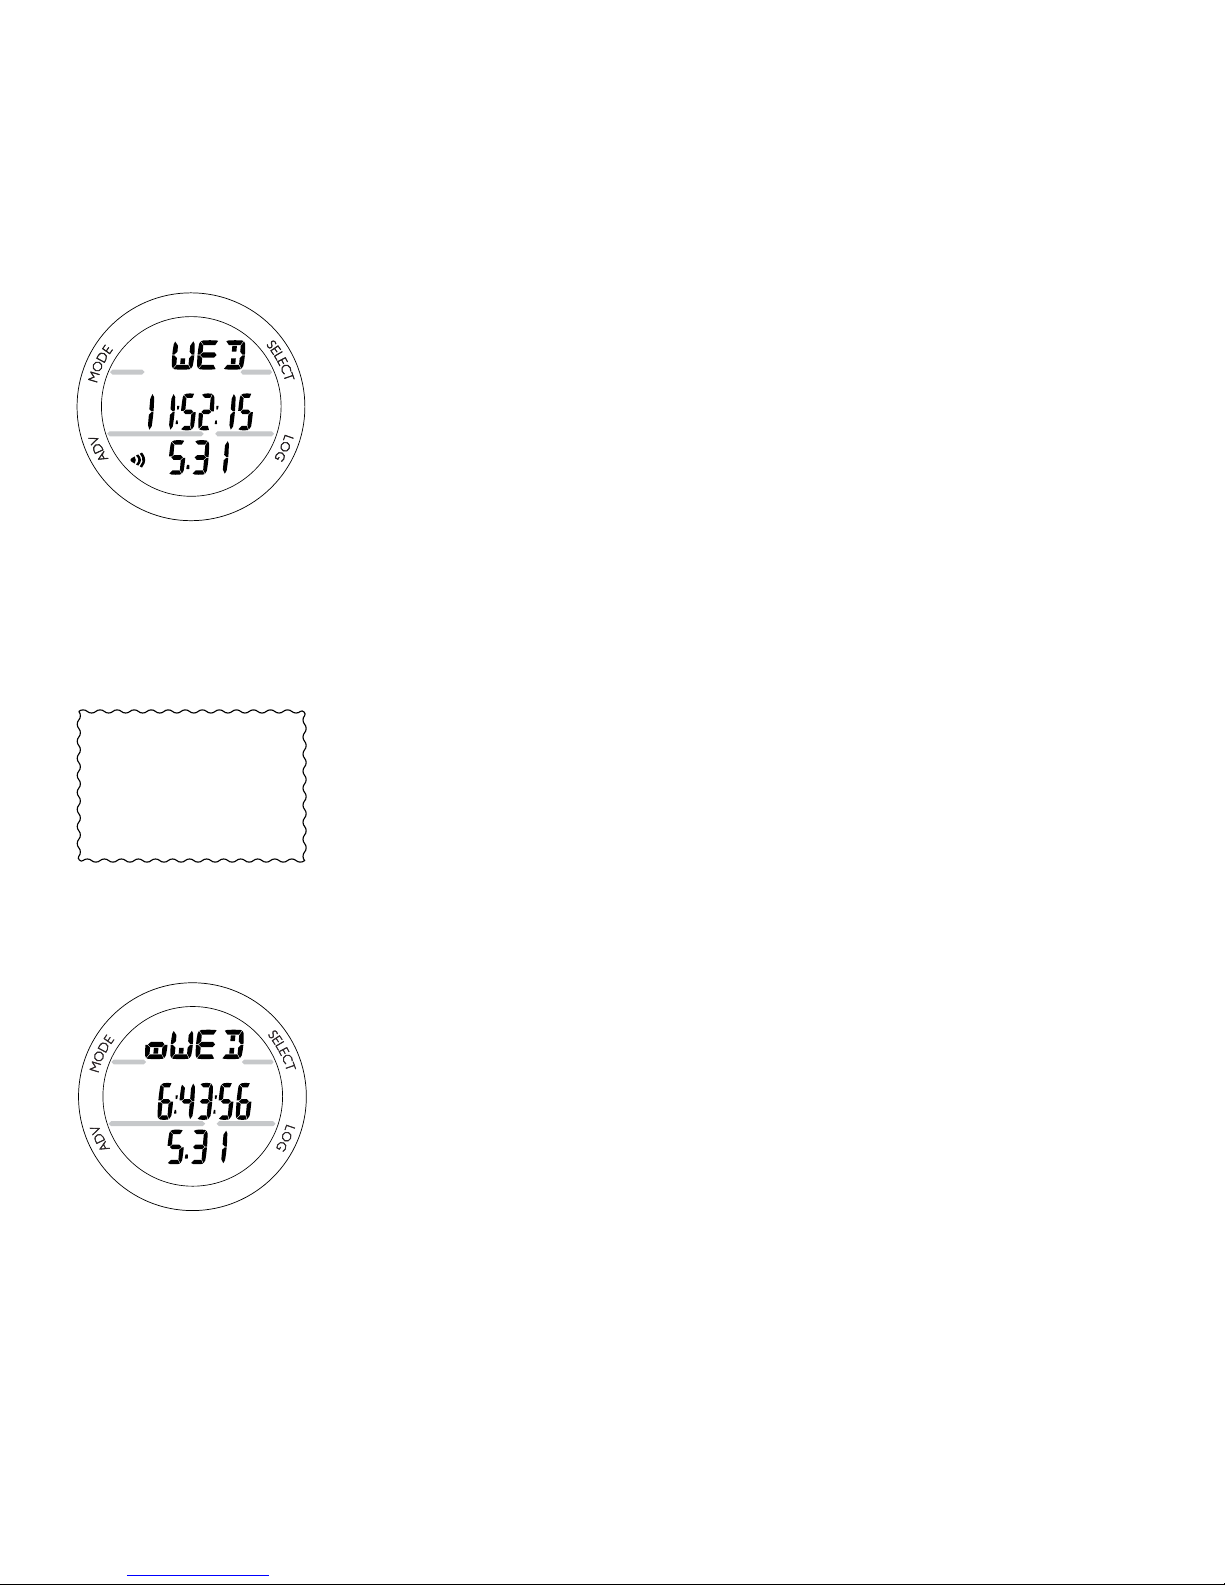
Watch Main Time (Fig. 5) is the current Time at your home
location and is normally selected as the Local Default Time.
The normal Watch screen sequence accessed with momentary
presses (less than 2 seconds each) of the M button is -
Main Time >>> Alternate Time > Countdown Timer >
ChronoGraph > Daily Alarm.
Watch Alternate Time (Fig. 6), which is set by Hour Differential, is the current Time at a remote travel location. Upon
arrival at the location, Alternate Time can be interchanged with
Main Time to make it the Local Default Time while visiting the
travel location.
The M button will then access the screens in this sequence -
Alternate Time >>> Main Time > Countdown Timer >
ChronoGraph > Daily Alarm.
While viewing Alternate Time, depressing the S button for 2
seconds will replace Main Time with Alternate Time that will
then become the Local Default Time until changed.
Fig. 5 - MAIN TIME
Fig. 6 - ALTERNATE
TIME
Time for the remote
location will display
Am (or Pm). Local
default Time will not.
Page 19

19
While viewing any of the Watch Mode displays, depressing
the M button for 2 seconds, or if no button is pressed for 2
minutes, operation will revert to the Watch Time screen selected
to be the Local Default Watch Time (Main or Alternate).
MAIN TIME, information includes (Fig. 7):
> Nitrogen Bar Graph, if any after NORM/FREE dives.
> Alarm icon, if the Daily Alarm is set On (Fig. 7a).
> Day of the Week Graphic MON (or TUE, WED, THU, FRI,
SAT, SUN), or the Graphic WET (if the unit is wet).
> Battery icon, if a Low Battery condition exists.
> Month and Day.
> Time of Day (hours, minutes, seconds) (Fig. 7b).
• Pressing M repeatedly (< 2 seconds each time) will step
through the Main Watch mode screens.
• Depressing M (2 seconds) will access the DC (dive
computer) NORM Surface Main screen.
• Pressing S (< 2 seconds) will silence and acknowledge the
Daily Alarm (if set On and it sounds).
• Pressing L (< 2 seconds) will access the Log and History
screens.
• Depressing L (2 seconds) will activate the Backlight.
• Depressing both A and S for 2 seconds will access the Set
Time screens.
• Depressing A for 2 seconds will access the Secondary
screen (Temperature, Day).
Fig. 7 - MAIN TIME
(May 31)
a
b
Page 20
20
SET MAIN TIME
This Mode allows the Date and Time of Day to be set which will
also serve as the basis for Alternate Time values.
There are 3 Time Set screens >> Set Hour Format, Set Time of
Day, and Set Date.
NOTE: Main Time must be selected as the Local
Default Time in order to set the Time and Date.
Sequence of Time/Date settings:
Hour Format > Hour > Minute > Year > Month > Day.
Day of the Week is set automatically when the Date is set.
• Depressing M (2 seconds) at any time, or if no button is
pressed during a period of 2 minutes, operation will revert
to the Watch Main Time screen.
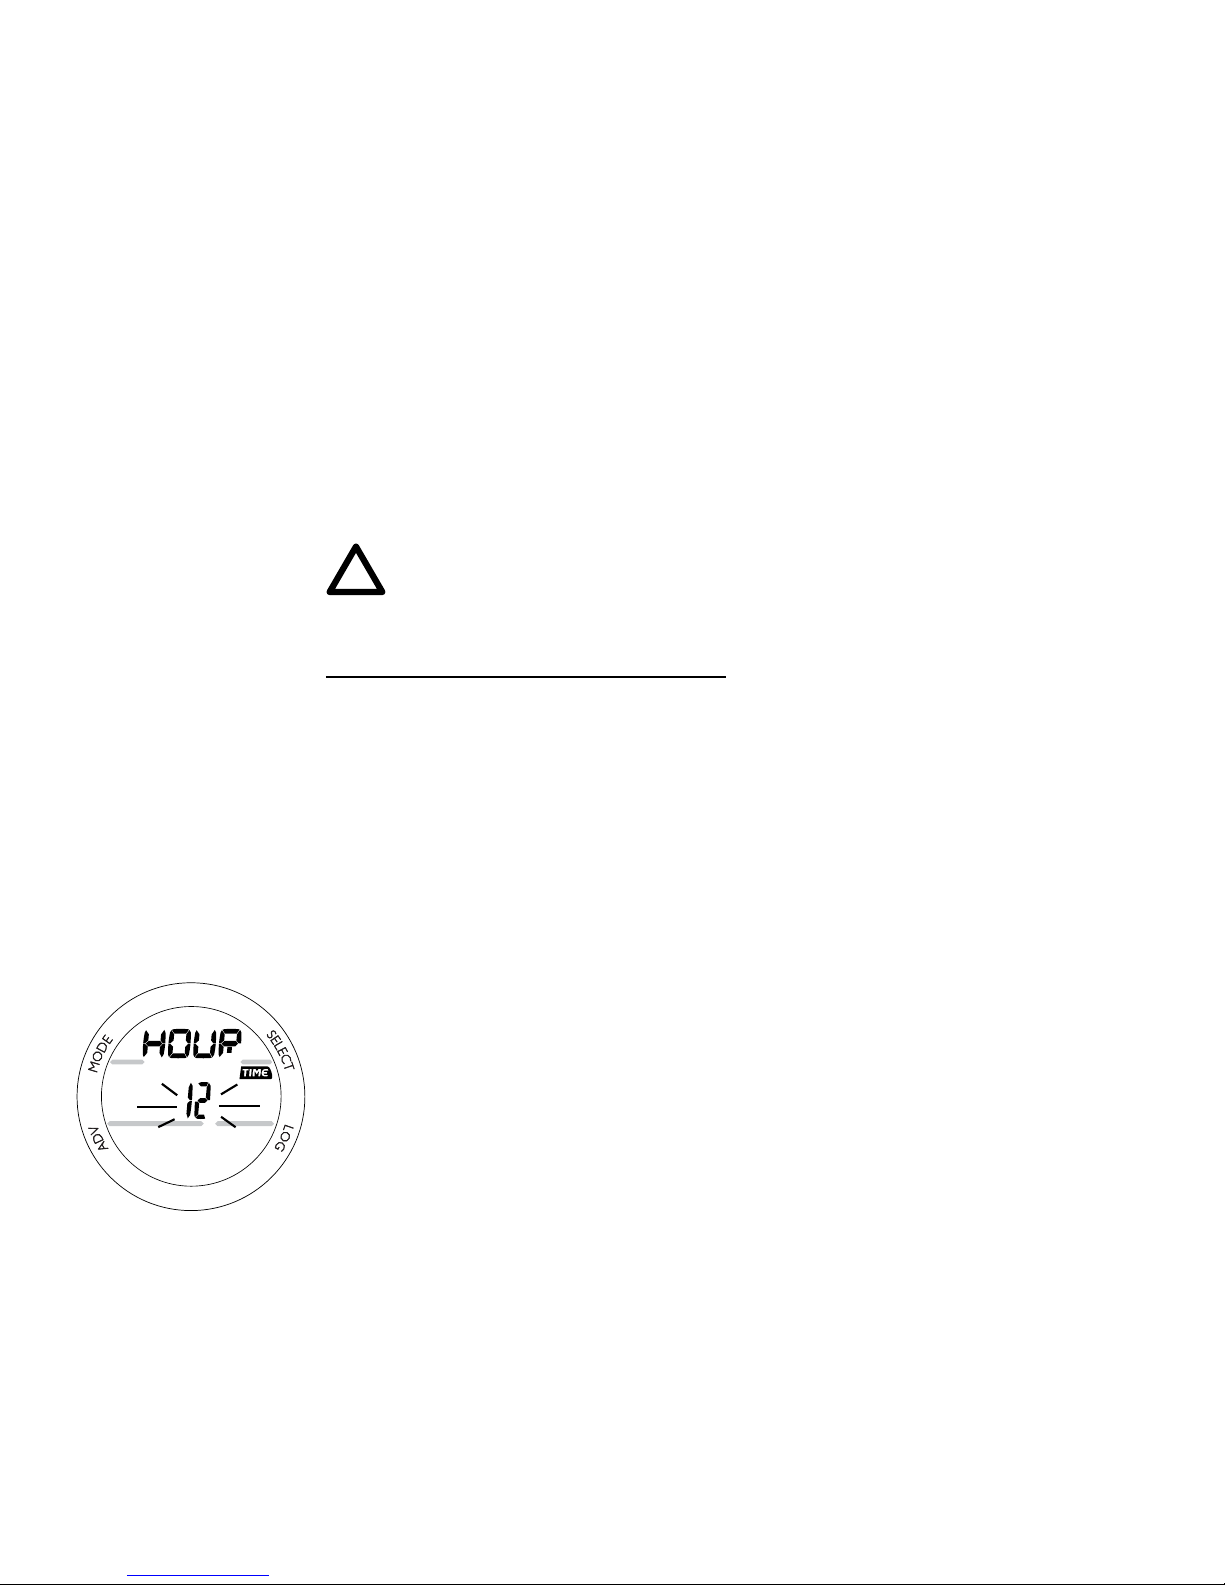
While the Main screen is being displayed, depressing A and
S (2 seconds) will access Set Hour Format with the Graphic
HOUR, symbol TIME, and the Hour Format Set Point ashing
(Fig. 8).
• Pressing S (< 2 seconds) will toggle between 12 and 24.
• Pressing A (< 2 seconds) will save the setting and access
Set Time with the Hour digits ashing.
Fig. 8 - SET HOUR
FORMAT
Page 21
21
HINT >> Pressing A repeatedly (< 2 seconds each time)
will step through the Time/Date Settings, bypassing those
that don't require setting.
Set Hour and Minute
The Graphic A (= Am) or P (= Pm) is displayed when Time is in
12 Hour Format.
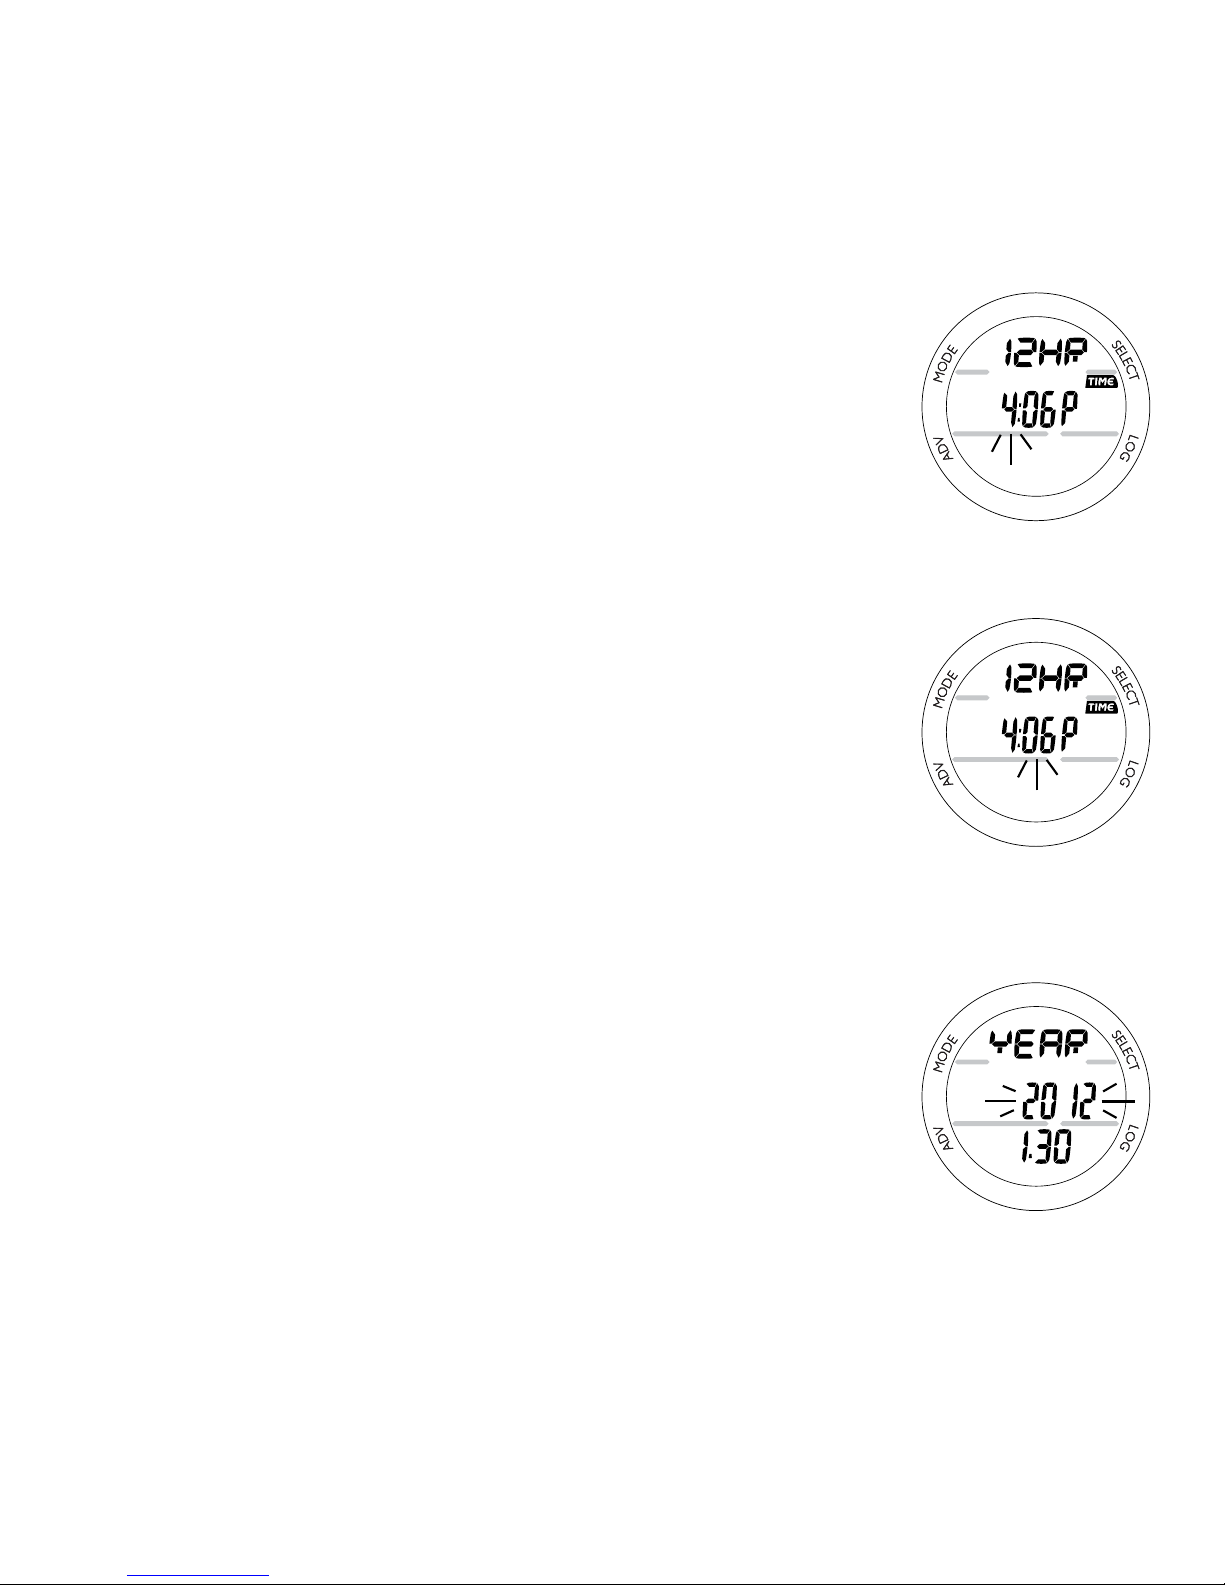
• Depressing S, while the Hour digits are ashing (Fig. 9),
will scroll through the Set Points in 1 Hour increments at a
rate of 4 per second from 12: A to 11: P (or 0: to 23: if
set for 24 Hour Format).
• Pressing A (< 2 seconds) will save the Hour setting and
ash the Minute digits (Fig. 10).
• Depressing S, while the Minute digits are ashing will
scroll through the Set Points in 1 minute increments at a
rate of 4 per second from :00 to :59.
• Pressing A (< 2 seconds) will save the Time (hr:min) setting
and access Set Date with the Year digits ashing.
Displayed on the Set Date screen will be the Graphic YEAR,
Month and Day with the Year digits ashing (Fig. 11).
• Depressing and holding the S button while the Year digits
are ashing will scroll through the Set Points in 1 year
increments at a rate of 4 per second from 2012 to 2054
(with leap year corrections).
Fig. 9 - SET HOUR
Fig. 10 - SET MINUTES
Fig. 11 - SET YEAR
Page 22
22
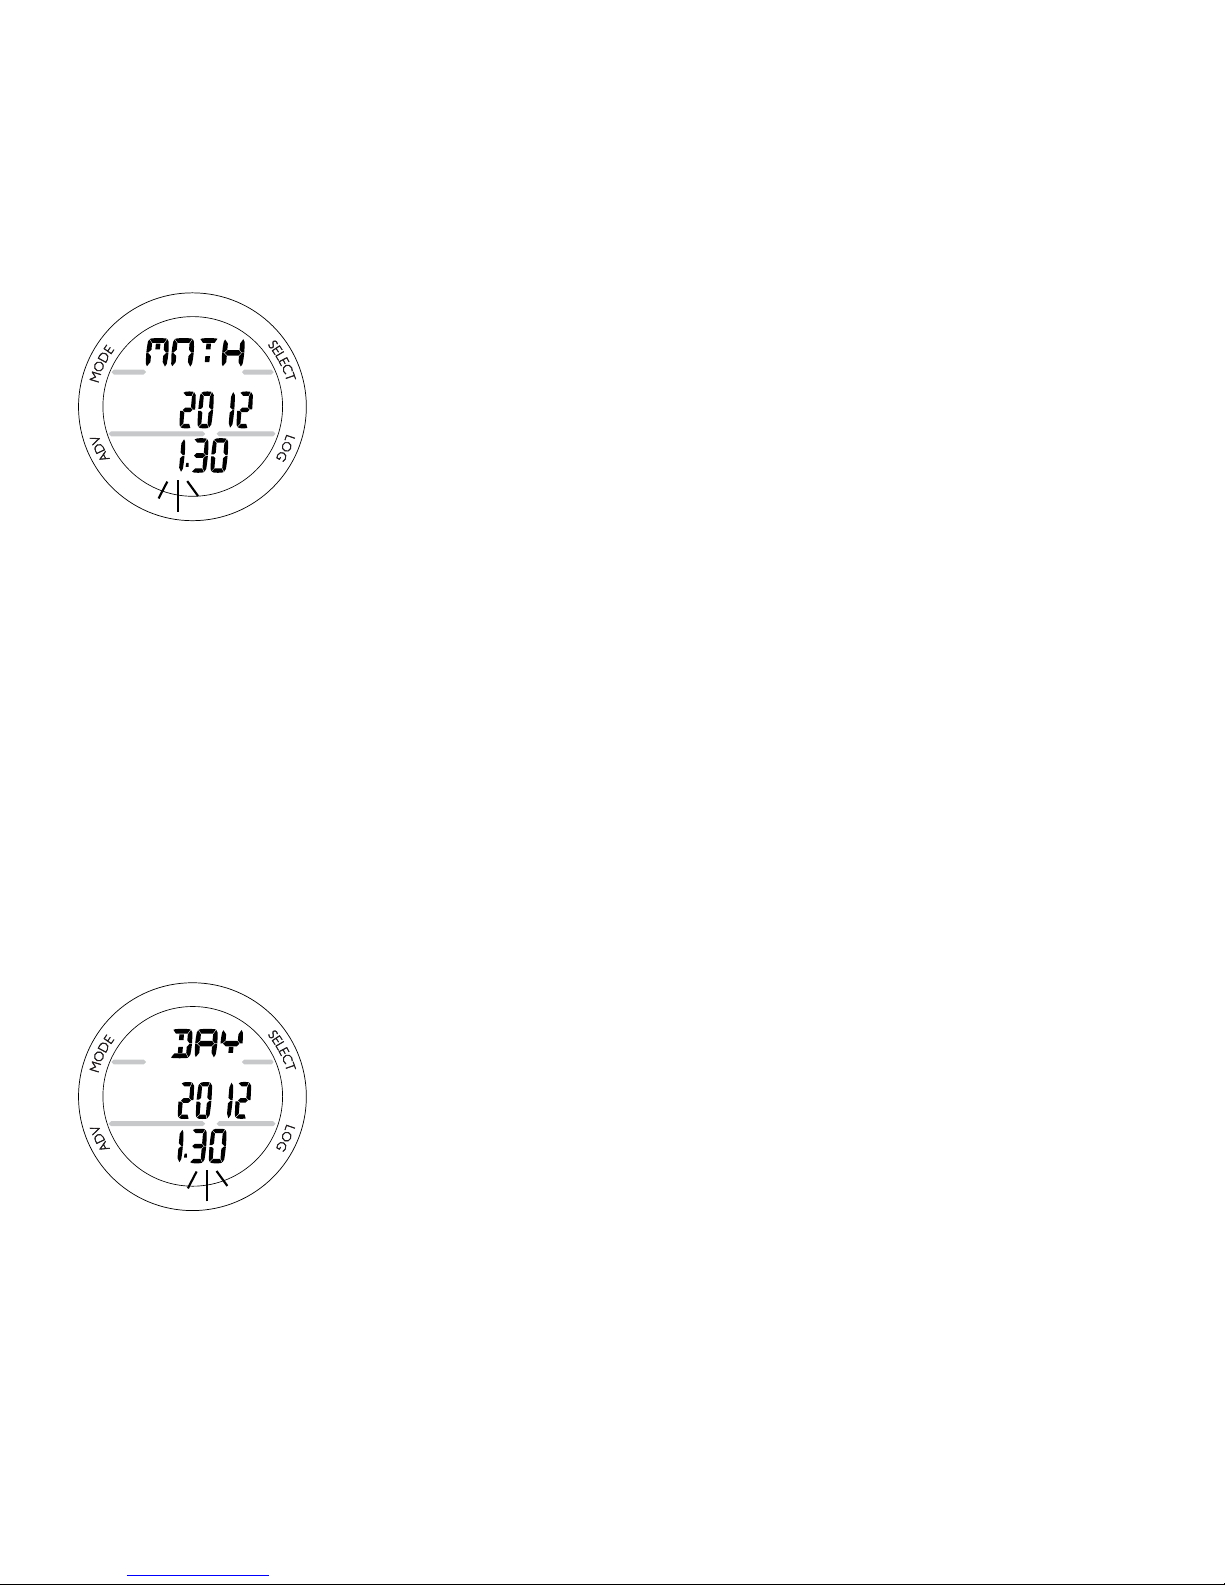
• Pressing A (< 2 sec) will save the Year setting, display the
Graphic MNTH, and ash the Month digits (Fig. 12).
The Year will not be displayed in any mode other than Set
Date. The Date will reset to 1.1 2012 when the Battery is
replaced.
• Depressing S, while the Month digits are ashing, will
scroll through the Set Points in 1 month increments at a rate
of 4 per second from 1 to 12.
• Pressing A (< 2 seconds) will save the Month setting,
display the Graphic DAY, and ash Day digits (Fig. 13).
• Depressing S, while the Day digits are ashing, will scroll
through the Set Points in one day (01) increments at a rate
of 4 per second from 1 to 31 (or the highest Day for the
Month set).
• Pressing A (< 2 seconds) will save the Date setting and
revert to the Watch Main Time screen.
Day of the Week is set automatically based upon the Date
that has been set.
Fig. 12 - SET MONTH
Fig. 13 - SET DAY
Page 23
23
ALTERNATE TIME
• Pressing M (< 2 seconds) while Watch Main Time is
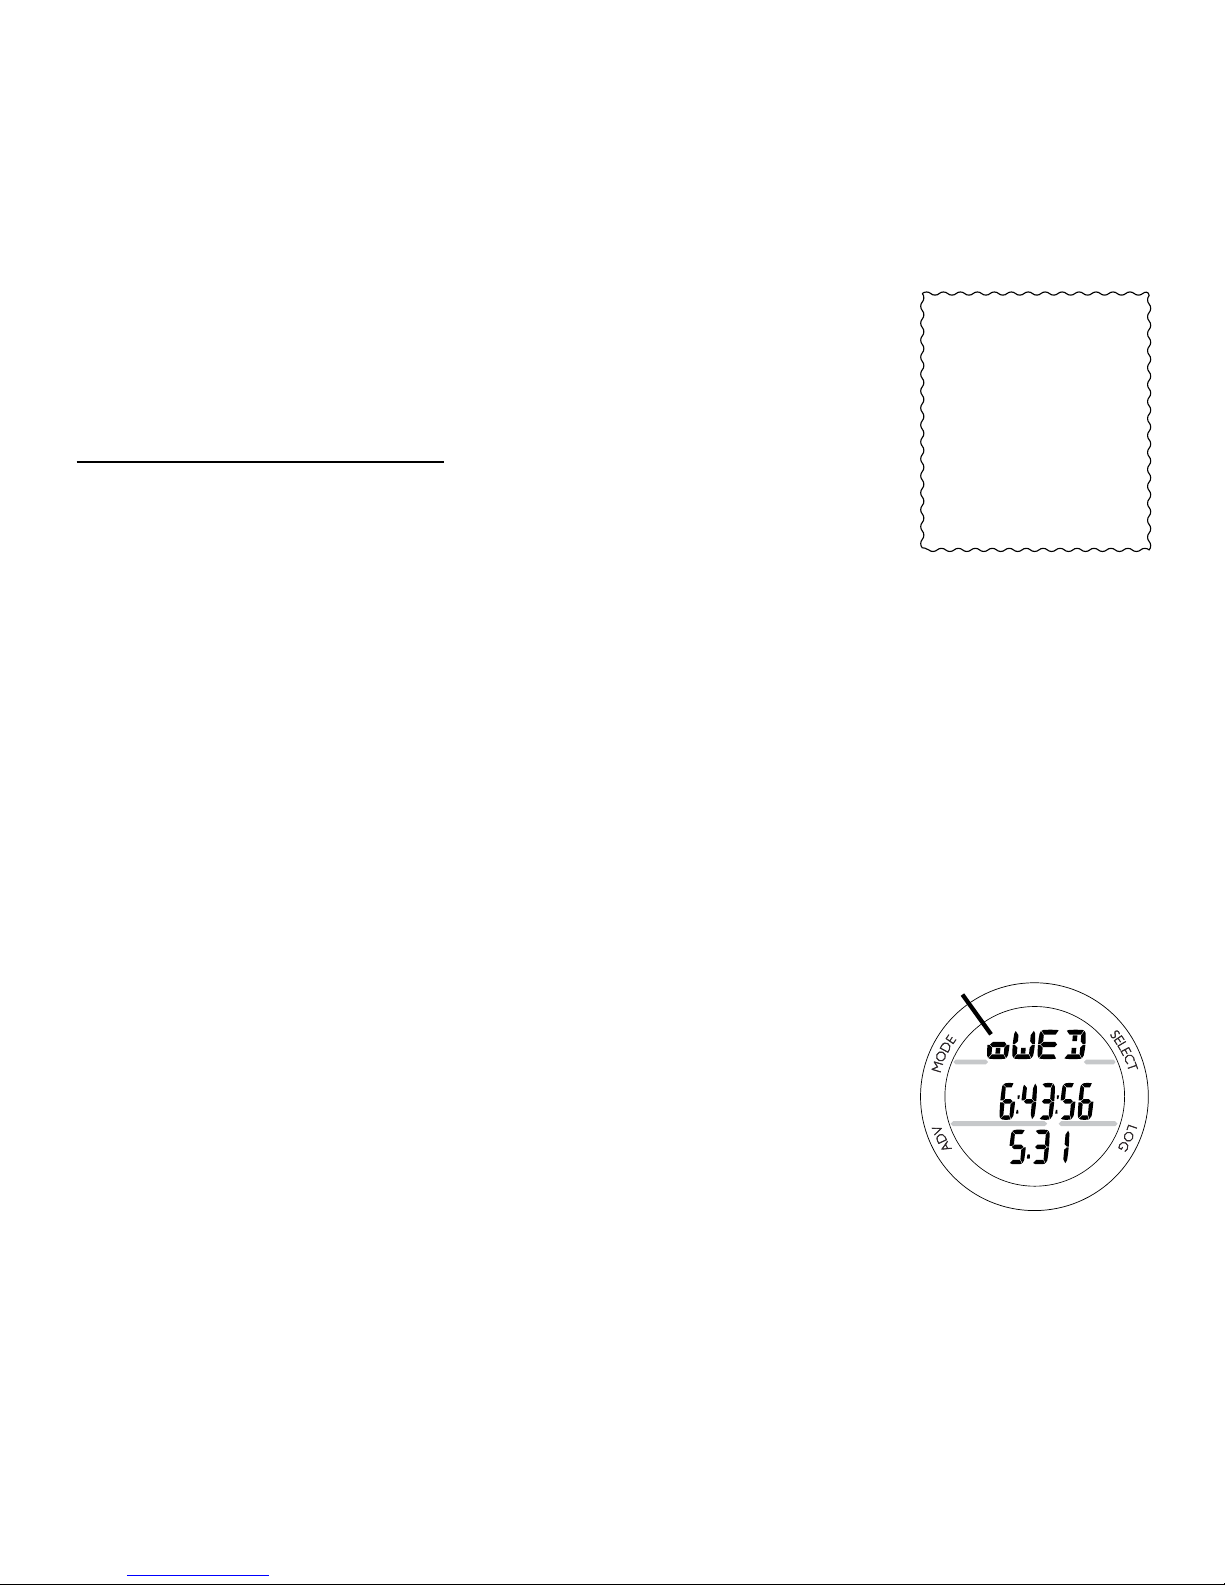
displayed will access the Alternate Time screen.
Information includes (Fig. 14):
> Nitrogen Bar Graph, if any after NORM/FREE dives.
> Alarm icon (solid), if the Daily Alarm is set On.
> Lazy 8 symbol (Fig. 14a) identies Time as Alternate Time.
> Day of the Week Graphic MON (or TUE, WED, THU, FRI,
SAT, SUN), or WET (if the unit is wet).
> Battery icon, if a Low Battery condition exists.
> Month and Day.
> Time of Day (hr:min:sec).
• Pressing M (< 2 seconds) will access Watch CDT.
• Pressing S (< 2 seconds) will silence and acknowledge the
Daily Alarm (if its set On and it sounds).
• Depressing S (2 seconds) will interchange Alternate Time
with Main Time making Alternate Time the Local Default
Time screen.
• Depressing L (2 seconds) will activate the Backlight.
• Depressing A and S (2 seconds) will access Set Alternate
Time.
• Depressing M (2 seconds) will revert to the Main Time
screen.
Fig. 14 - ALTERNATE
TIME
a
Main Time/Date can
also be set using the
PC Interface program.
Prior to shipment
from the factory, any
error of the Main Time
is determined and
corrected.
Page 24
24
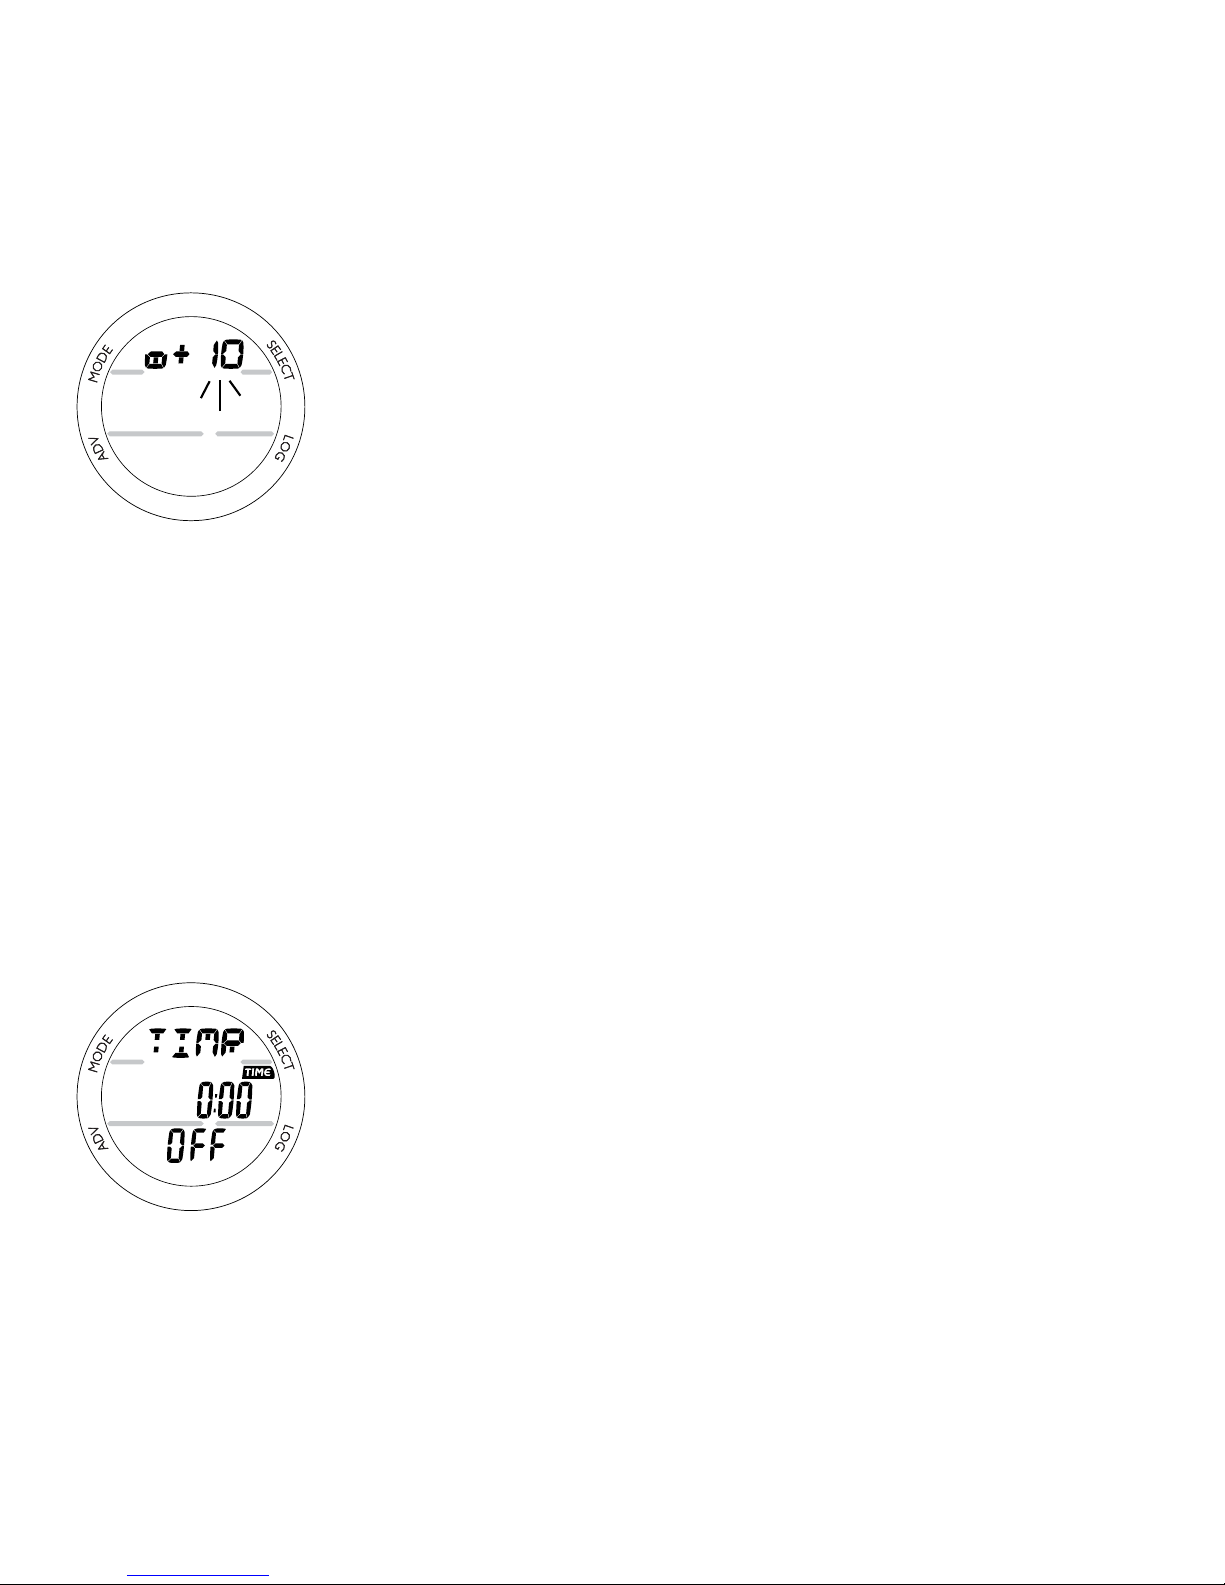
SET ALTERNATE TIME
• Alternate can be set OFF, or to an Hour based numeric
time Dierential ranging from + 1 through +23 through 23 through -1 (hours).
• Once the Dierential is selected and saved, Alternate
Time/Date values will be based upon the Main Time
setting plus (or minus) the Dierential.
Displayed will be the Lazy 8 symbol and Graphic OFF, or the
+/- numeric Hour Dierential setting ashing (Fig. 15).
• Depressing S will scroll through the Set Points in increments
of 1 Hour at a rate of 4 per second.
• Pressing A (< 2 seconds) will save the setting and revert to
the Alternate Time screen.
• Depressing M (2 seconds), or if no button is pressed during
a period of 2 minutes, operation will revert to the Main
Time screen.
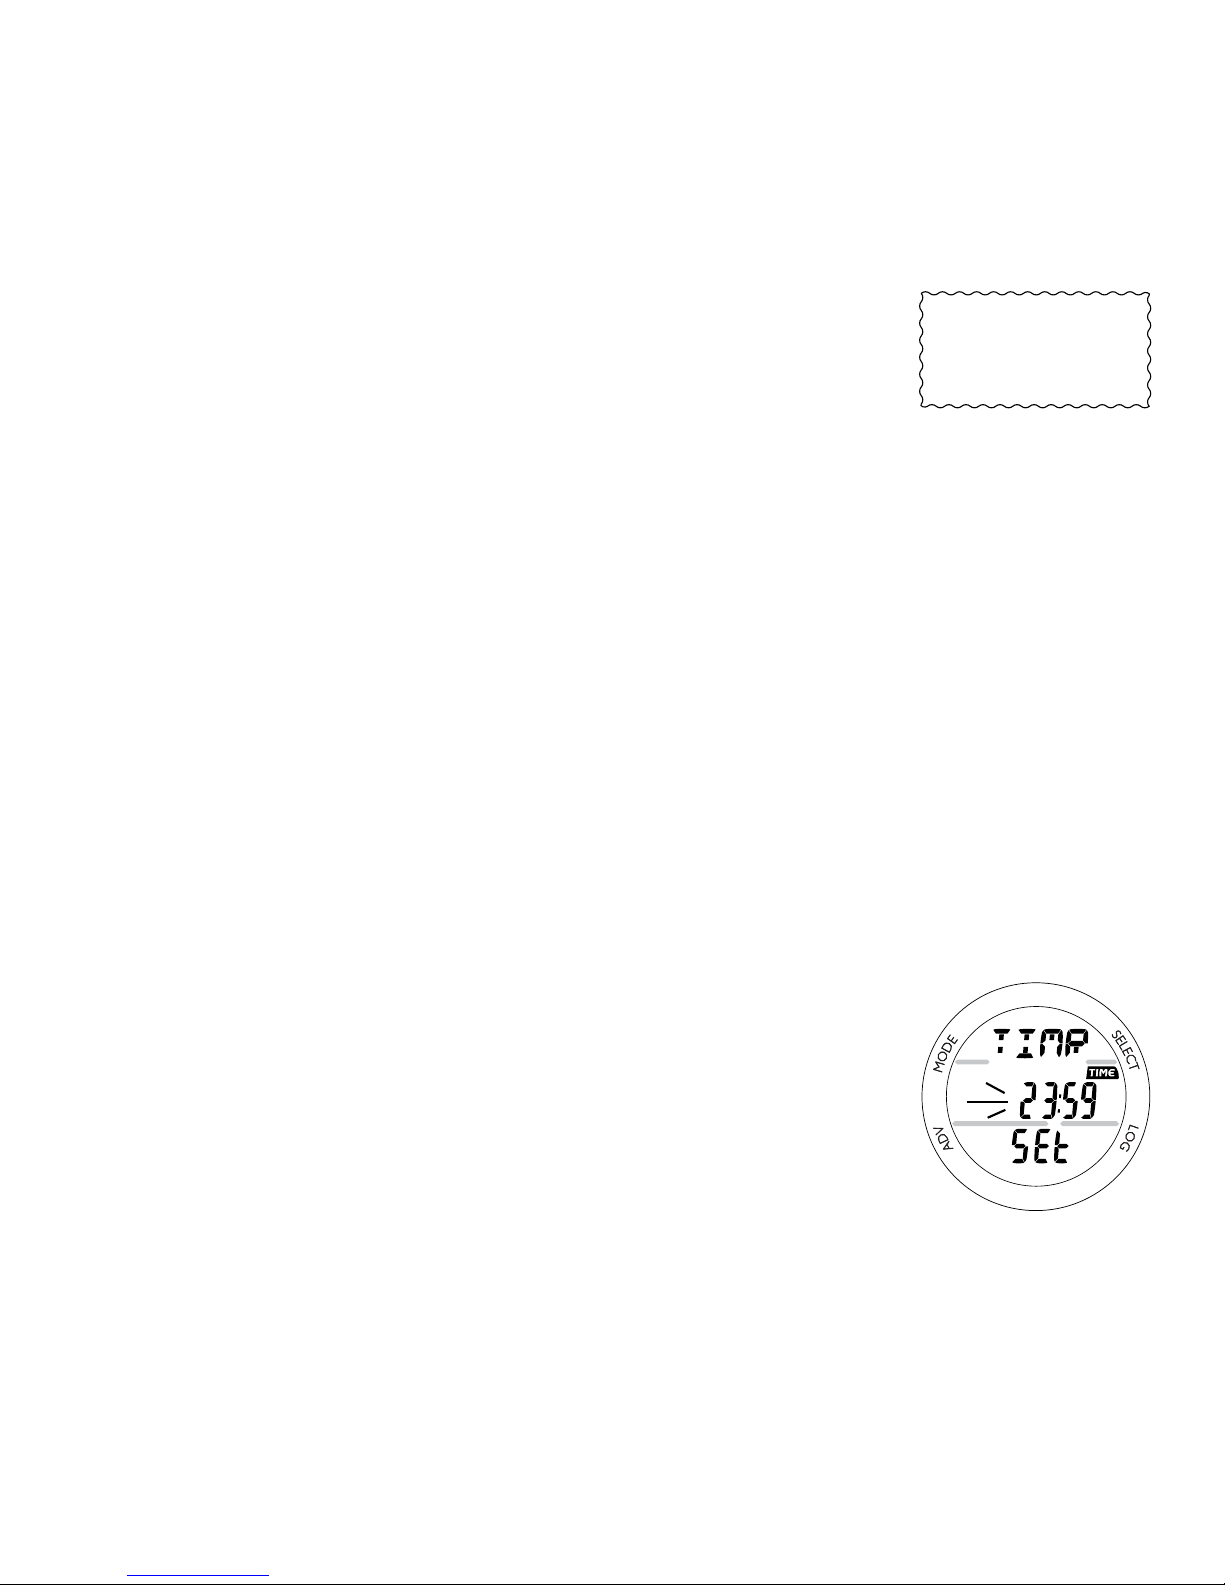
WATCH COUNTDOWN TIMER CDT
Pressing M 2 times (< 2 seconds each time), while the Watch
Default Time screen is displayed, will access the Countdown
Timer screen, displaying OFF (solid) and 0:00 if no time was
previously set (Fig. 16), or the remaining Countdown Time
(hr:min) if running, or OFF ashing and the previously set
Countdown Time if the Countdown started and has ended.
Fig. 15 - SET
ALTERNATE TIME
Fig. 16 - WATCH
COUNTDOWN TIMER
Page 25
25
Once set ON, a Countdown will run in the background until
it counts down to 0:00, or it is set OFF, or a dive is made at
which time it will default to OFF and the value previously set.
When a set Countdown Time reaches 0:00, the Audible Alarm
will beep 10 times and the LED warning light will ash.
• Pressing S (< 2 seconds) will acknowledge/silence the
Alarm.
• Pressing S (< 2 seconds) will also acknowledge/silence the
Daily Alarm (if its set and it sounds).
• Pressing L (2 seconds) will activate the Backlight.
• Pressing M (< 2 seconds) will advance to ChronoGraph.
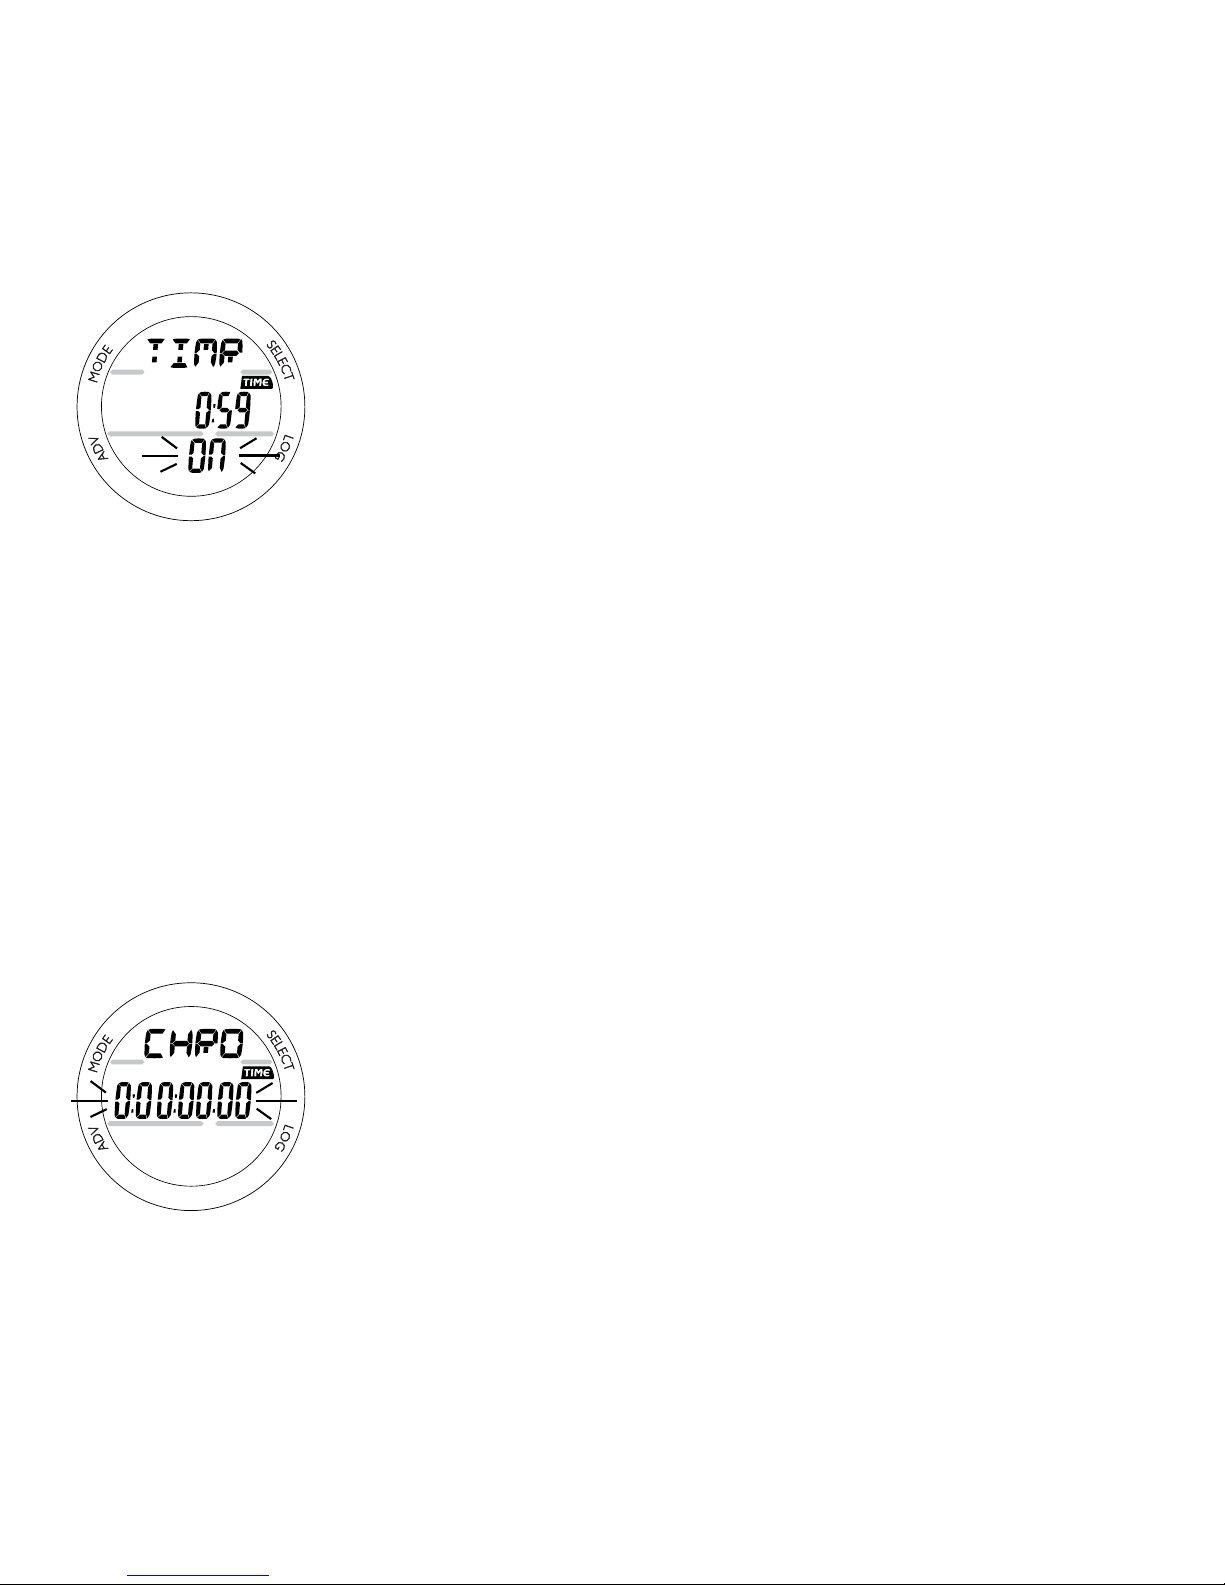
• Depressing A and S (2 seconds) will access Set Watch
CDT indicated by the Graphics TIMR and SEt, symbol
TIME, and Hour digits ashing (Fig. 17).
• Depressing M (2 seconds), or if no button is pressed
during a period of 2 minutes, operation will revert to the
Main Time screen.
• Depressing S will scroll through the Hour Set Points in 1
hour increments at a rate of 4 per second from 0: to 23:.
• Pressing A (< 2 seconds) will save the Hour setting and
ash the Minutes digits.
• Depressing S will scroll through the Minutes Set Points in
1 minute increments at a rate of 4 per second from :00
to :59.
FREE Mode has
separate Countdown
Timer.
Fig. 17 - SET WATCH
CDT (hr:min)
Page 26
26
• Pressing A (< 2 seconds) will save the CDT (hr:min) Set
Point and revert to the CDT screen indicated by the
Graphic OFF (ashing) in place of the Graphic SEt.
• Pressing S (< 2 seconds) will toggle from OFF to ON and
Start the Timer (Fig. 18).
• Depressing M (2 seconds), or if no button is pressed during
a period of 2 minutes, operation will revert to the Watch
Default Time screen.
CHRONOGRAPH (Stop Watch/Lap Timer)
• Pressing M 3 times (< 2 seconds each), while the
Watch Default Time screen is displayed, will access the
ChronoGraph displaying 0:00:00.00 (hr:min:sec.1/100th
sec) ashing (Fig. 19), or the elapsed time if previously
started.
• Pressing S (< 2 seconds) will start the Timer which will
begin counting up from 0:00:00.00 to 9:59:59.99 in
increments of .01 (1/100th sec).
During the rst 4 seconds, the 1/100th second values will
be displayed, then 2 dashes ( . - - ) will be displayed. The
1/100th values will be recorded and displayed when Laps
are frozen and when later recalled.
• Subsequent presses of S (< 2 seconds each) will freeze Lap
Times (LAP1 through LAP9). After 9 Laps are recorded,
additional Laps will replace Lap 9, shift the others to lower
Lap numbers, while discarding Lap 1.
Fig. 18 - CD TIMER
STARTED
Fig. 19 - CHRONO
Page 27

27
If the time reaches 9:59:59.99 hr:min:sec.1/100 sec,
it will stop and save that number as a LAP. Subsequent
presses of the S button will then have no eect.
• Pressing A (< 2 seconds) will stop the Timer and recall Lap
1, displaying the Graphic LAP1 (ashing) and the Lap 1
Time. Repeat presses of A will display other Laps/Times
(Fig. 20).
• Depressing A (2 seconds) will stop the Timer and reset the
Time to 0:00:00.00 (ashing).
• Depressing L (2 seconds) will activate the Backlight.
• Pressing M (< 2 seconds) will advance to Daily Alarm.
• Depressing M (2 seconds), or if no button is pressed during
a period of 2 minutes, operation will revert to the Watch
Default Time screen.
While the ChronoGraph is running, it will remain on the screen
until a button operation is performed. If another screen is accessed, it will then continue to run in the background.
Upon descending on a dive, ChronoGraph operation will be
terminated and reset to 0:00:00.00.
Fig. 20 - LAP RECALL
Page 28

28
DAILY ALARM
When set On, the Daily Alarm will sound the Audible Alarm
and ash the LED at the Time set every day.
• Pressing M 4 times (< 2 seconds each), while the Watch
Default Time screen is displayed, will access the Daily
Alarm screen.
DAILY ALARM STATUS, information includes (Fig. 21):
> Alarm icon
> Graphics ALRM, and ON (or OFF), ashing.
> Alarm Time Set Point (hr:min).
• Pressing S (< 2 seconds) will toggle between ON and OFF.
Upon being toggled to ON, the Alarm will be set to sound
every day at the Time indicated.
• Depressing A and S (2 seconds) will access Set Daily
Alarm.
• Depressing L (2 seconds) will activate the Backlight.
• Pressing M (< 2 seconds), or if no button is pressed during
a period of 2 minutes, operation will revert to the Watch
Default Time screen.
Fig. 21 - DAILY ALARM
STATUS
Page 29

29
SET DAILY ALARM, information includes (Fig. 22):
> Alarm icon
> Graphics ALRM and SEt.
> Alarm Time previously set (hr:min) with the Hour digits
ashing.
• Depressing S will scroll through the Hour Set Points in 1
hour increments at a rate of 4 per second from 12: Am to
11: Pm (or 0: to 23: if 24 hour format). The Graphic A (=
Am) or P (= Pm) will be displayed when setting Time in 12
Hour Format.
• Pressing A (< 2 seconds) will save the Hour setting and
ash the Minutes digits.
• Depressing S will scroll through the Minutes Set Points in
1 minute increments at a rate of 4 per second from :00
to :59.
• Pressing A (< 2 seconds) will save the Daily Alarm (hr:min)
setting and revert to the Daily Alarm screen indicated by
the Graphic ON (or OFF) ashing.
• Pressing M (< 2 seconds) will revert to the Watch Local
Default Time screen.
Fig. 22 - SET DAILY
ALARM
Page 30

30
R
E
S
P
O
N
S
I
B
L
E
D
I
V
E
R
(This page intentionally left blank.)
Page 31

31
DIVE COMPUTER
FEATURES AND DISPLAYS
Page 32
32
BAR GRAPH
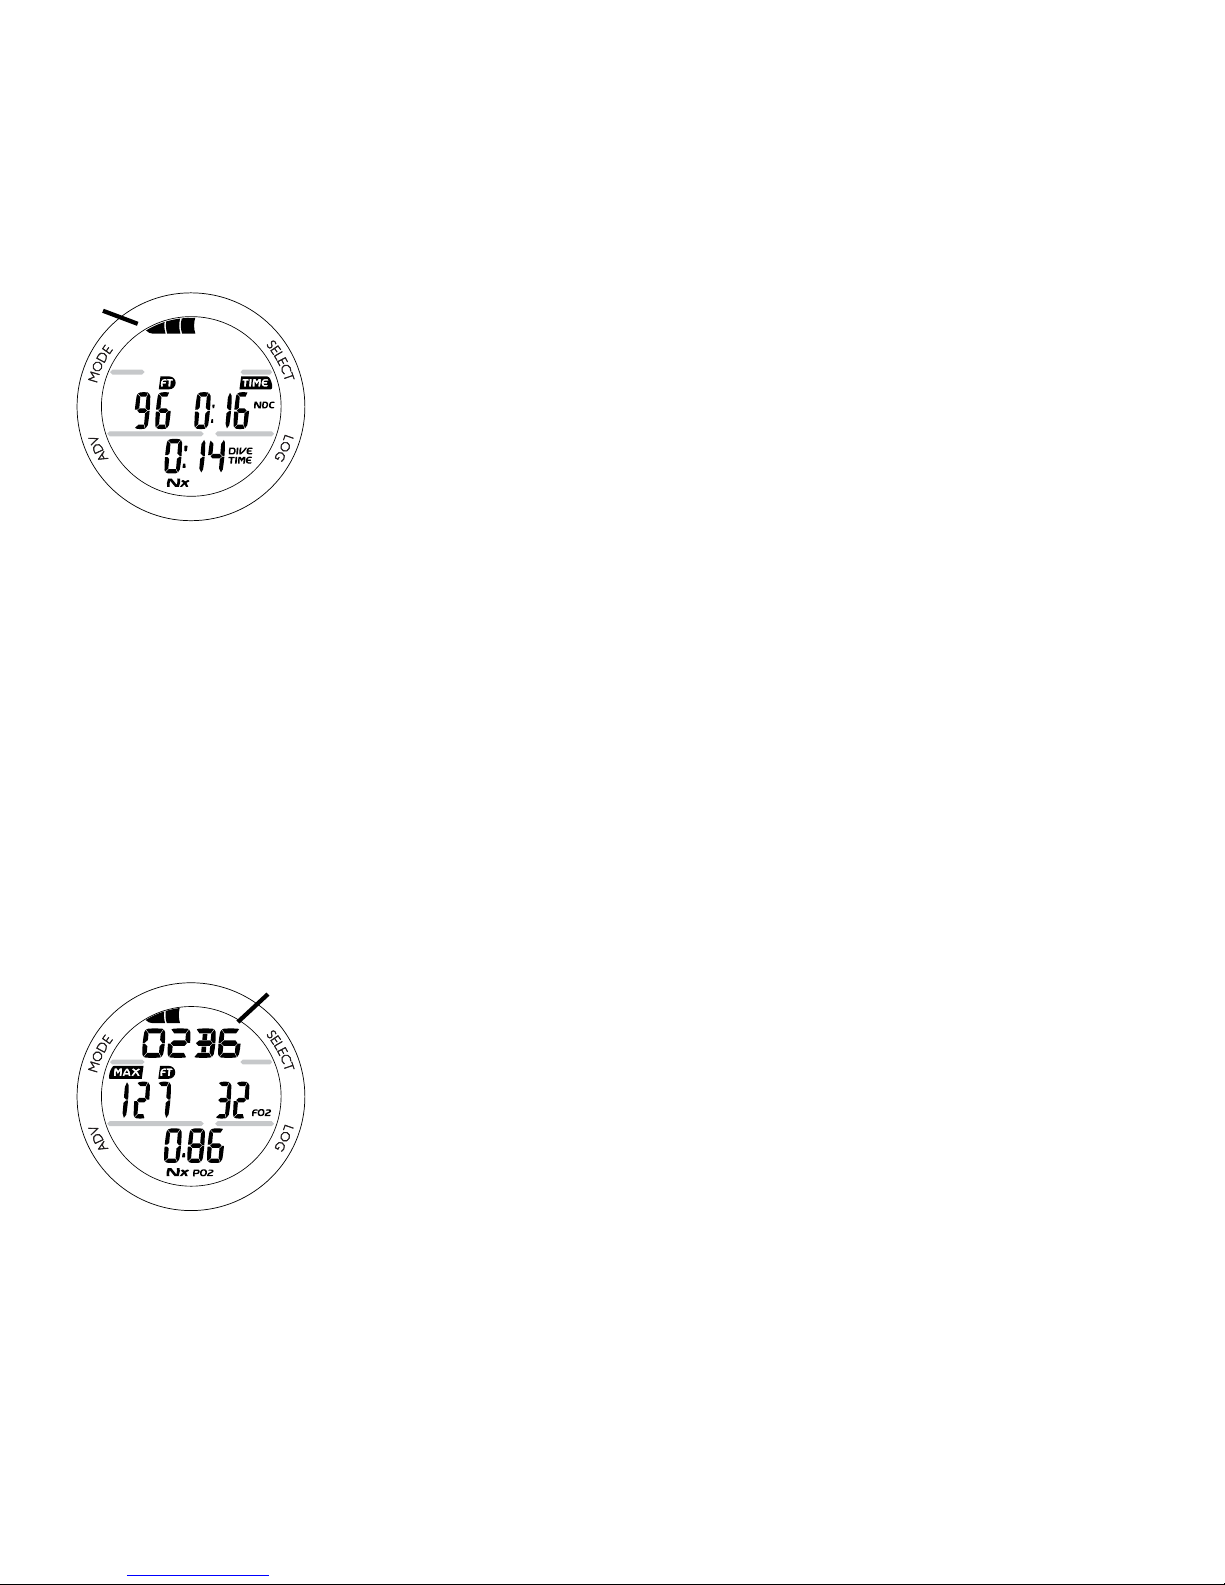
The Grande features one shared Bar Graph that represents
either nitrogen loading, or when accessed, oxygen accumulation. By default, the Bar Graph (Fig. 23a), referred to as
the Nitrogen Bar Graph (NIBG), represents your relative no
decompression or decompression status.
As your Depth and Elapsed Dive Time increase, segments will
add to the NIBG, and as you ascend to shallower depths, the
segments of the NIBG will begin to recede, indicating that additional no decompression time is allowed.
The Nitrogen Bar Graph monitors 12 dierent nitrogen compartments simultaneously and displays the one that is in control
of your dive. It consists of 5 segments, the left 4 represent
No Decompression status and the fth at the right indicates a
Decompression condition.
When the Grande is set to operate in NORM Nitrox mode, the
Bar Graph will represent oxygen accumulation when the O2
data screen (Alternate Display) is accessed temporarily. The
Graphic O2BG will appear as an indication (Fig. 24a).
Regardless of which parameter the Bar Graph is representing
at the time, nitrogen (if NORM or FREE) and oxygen (if NORM)
calculations will continue to be performed in the background.
Fig. 24 - O2BG
Fig. 23 - NIBG
a
a
Page 33

33
Displays associated with oxygen and the O2 Bar Graph will
be displayed if FO2 has been set at a value other than 'Air'
(e.g., a numerical value) and the Alternate screen that displays
oxygen related data is accessed.
When the oxygen data screen is accessed during a NORM
dive, the Bar Graph will show the maximum of either per dive
accumulated oxygen or 24 hour period accumulated oxygen.
As your oxygen exposure (accumulation) increases during a
NORM dive, segments will add to the O2 Bar Graph, and as
saturation decreases, it will begin to recede, indicating that additional exposure is allowed for that dive and 24 hour period.
The Grande will store oxygen accumulation calculations for up
to 10 dives conducted during a 24 hour period. If the maximum limit for NORM dive oxygen loading has been exceeded
for that day (24 hour period), all of the segments of the O2 Bar
Graph will be displayed ashing (Fig. 25).
Depth/Time values will not appear in Plan Mode until the O2
Bar Graph recedes into the normal zone (4 segments) indicating that your daily oxygen dosage has decreased an amount
equivalent to the amount accumulated during the latest dive
completed.
Fig. 25 - O2 ALARM
Page 34
34
While you cannot provide a guarantee against the occurrence
of decompression sickness, you may choose your own personal
zone of caution based upon age, physique, excessive weight,
etc., to reduce the statistical risk.
Within the available NORM mode parameters that can be set
(described later) are a NIBG alarm and a Conservative Factor
which if set On reduces No Decompression times allowed.
ALPHA / NUMERIC DISPLAYS
Depth Displays (all Modes)
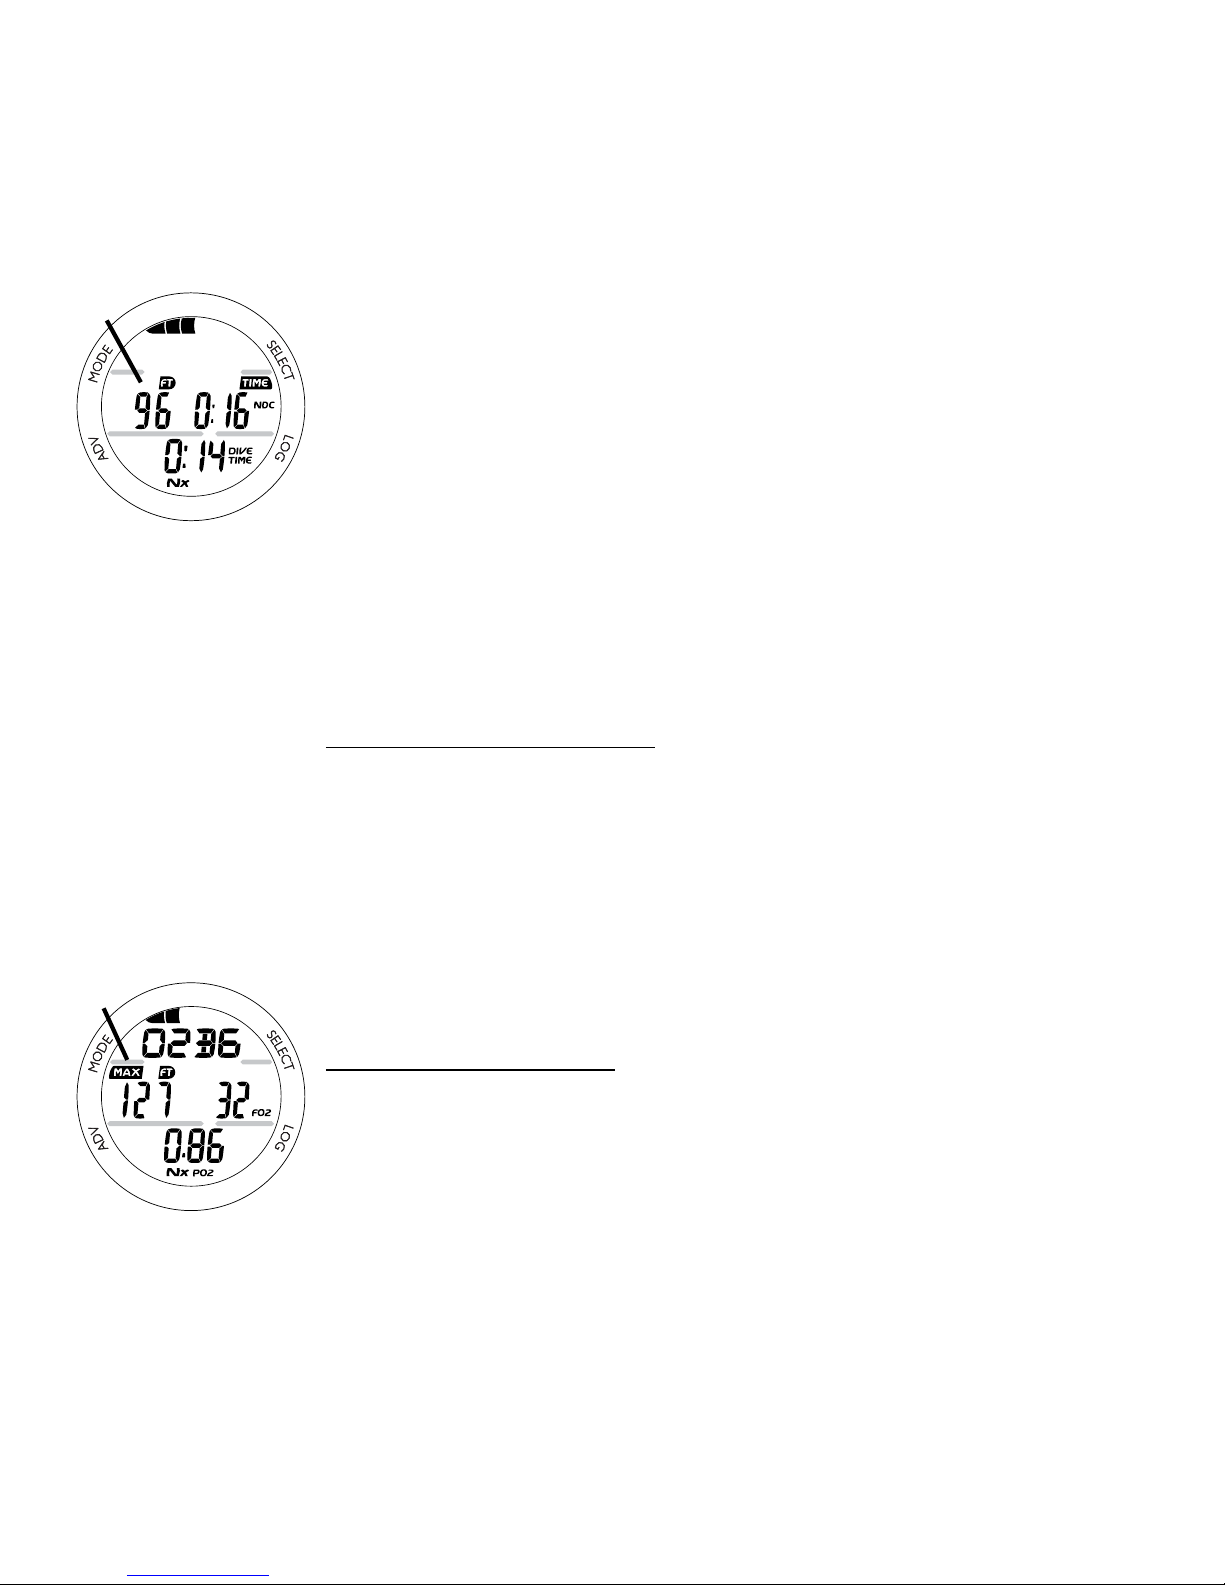
During dives, Current Depth (Fig. 26a) and Max Depth, which
is accessed as an Alternate display (Fig. 27a), indicate Depths
from 0 to 330 FT (100 M) in increments of 1 FT (0.1 M).
During a No Decompression Safety Stop, the set Stop Depth is
displayed and during Decompression, the required Stop Depth
is displayed.
Time and Date Displays
Time of Day and NORM/GAUG mode displays are shown
in hour:minute format (i.e., 1:16 represents 1 hour and 16
minutes, not 116 minutes!).
FREE Dive Mode times are shown in minute:second format.
Fig. 27 - MAX DEPTH
Fig. 26 - CURRENT
DEPTH
a
a
Page 35
35
The colon that separates hours and minutes (or minutes and
seconds) blinks once per second when the display is indicating
real time (e.g., Surface Interval, Elapsed Dive Time), and is
solid (non blinking) when times are calculated projections (e.g.,
Time to Fly, Plan).
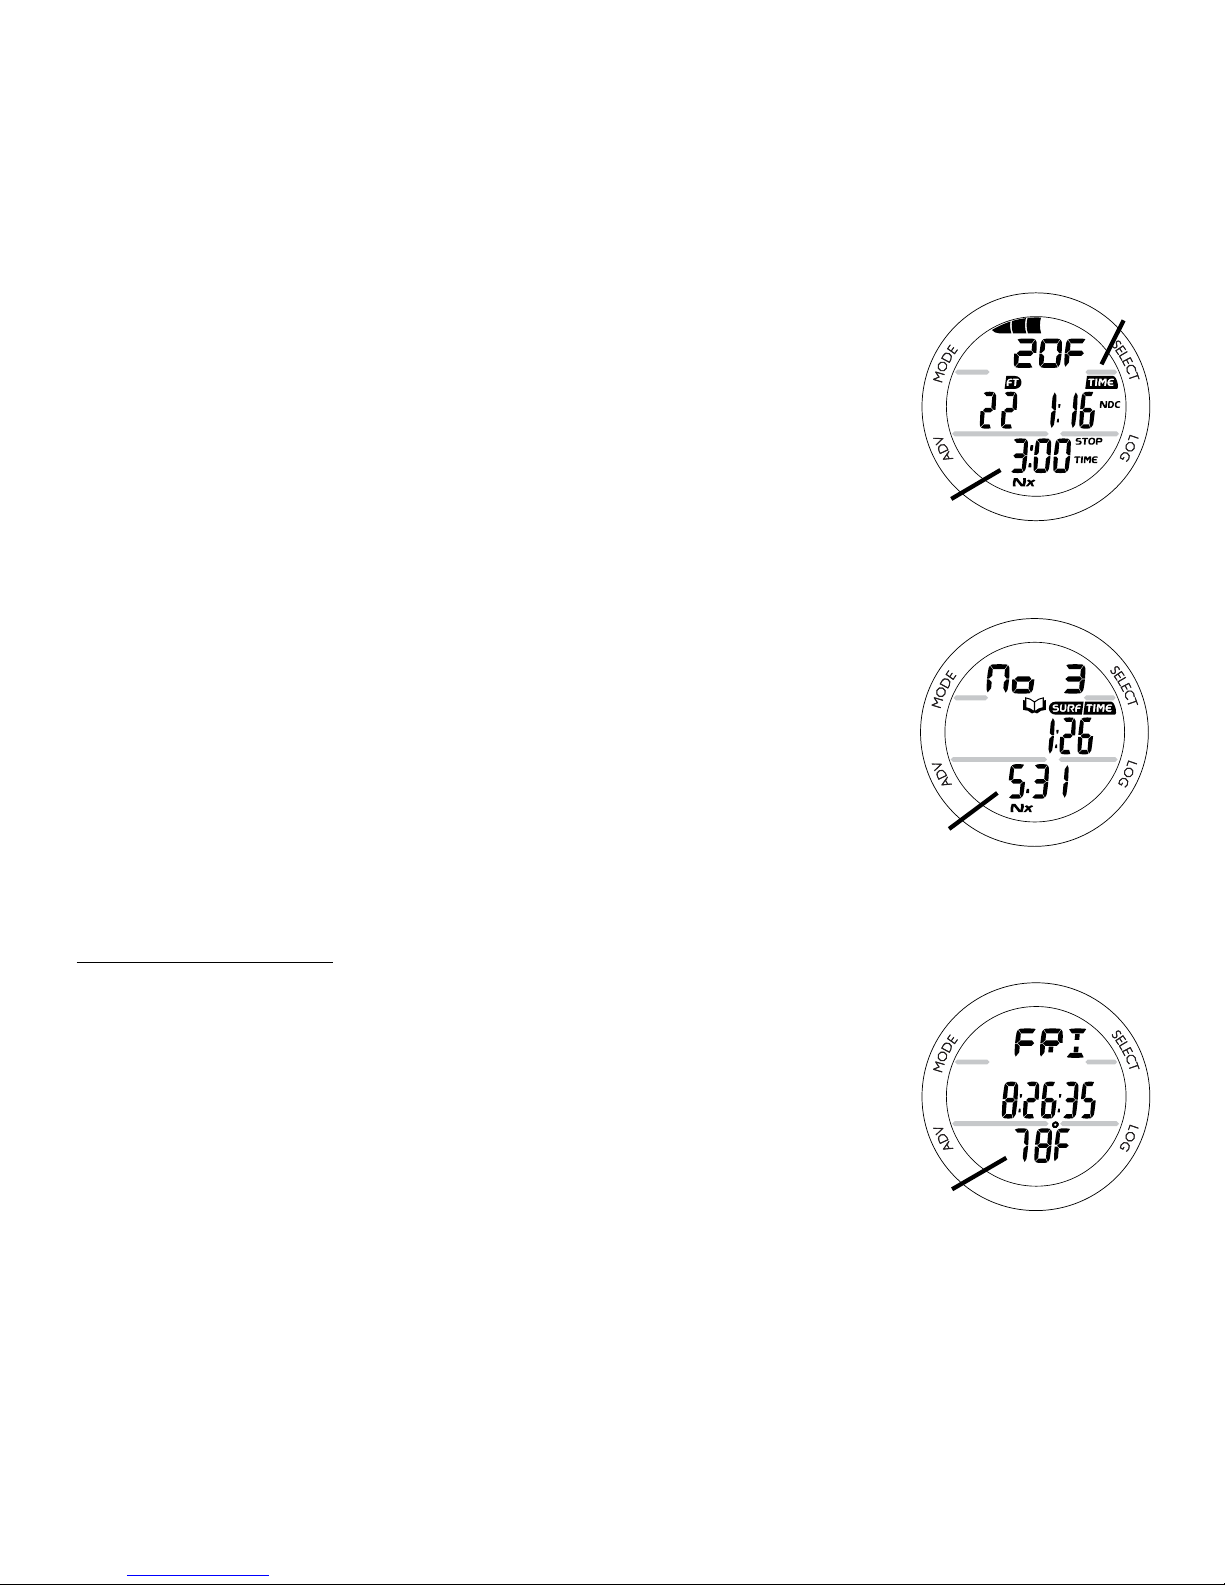
The Primary Time display is located in the middle row of the
display (Fig. 28a). Another time display (Fig. 28b) is located
in the lower row. Both displays are identied by the symbol
TIME.
When the Grande is operating in Dive Computer mode, Date is
displayed only to identify dives when they are accessed in the
Log mode.
Month appears to the left of Day (Fig. 29a) separated by a
decimal point (month.day).
Temperature Display
Ambient Temperature can be viewed on the surface and during
dives by accessing a Secondary Display (Fig. 30a).
The Average Temperature of each NORM/GAUG dive is
recorded in the Log for that dive.
Fig. 29 - DATE
b
a
Fig. 28 - TIMES
a
Fig. 30 - TEMPERATURE
a
Page 36

36
NOTE:
Each display represents unique pieces of information.
It is imperative that you understand the formats, ranges, and
values of the information represented to avoid any possible
misunderstanding that could result in error.
You must also understand the icons, symbols, and alpha/
numeric messages presented.
The informational displays are described in detail as the
various operating modes they appear in are presented
throughout this manual.
Page 37

37
DIVE COMPUTER
SURFACE SEQUENCE
AND
OPERATING MODES
Page 38

38
DIVE COMPUTER DC OPERATING MODES
The Grande features 3 selectable DC Operating Modes -
• NORM >> for normal Air or Nitrox scuba dives.
• GAUG >> for scuba dives with no nitrogen/oxygen
calculations.
Once a dive is made in GAUG Mode, dive
computer operation is locked into GAUG Mode for 24
hours after the dive.
• FREE >> for breath hold dives with no scuba.
SURFACE MODE
Depressing M (2 seconds), while the Watch Default Time is
displayed (Main or Alternate, whichever was selected as the
default) accesses the previously selected Dive Mode Surface
Main screen (NORM, GAUG, or FREE).
If no dive has been conducted within the past 24 hours, the
NORM SURF MAIN will appear as the default display indicated by the graphic NORM (Fig. 31).
• The GAUG or FREE SURF MAIN screens can be accessed
by subsequent 2 second presses of M. Upon access, their
graphics will ash indicating that they can be selected as
the operating dive mode.
• To select a mode for diving, press M (< 2 seconds) while
that graphic is ashing. When the graphic becomes
solid, that mode is then selected for the type of dives to be
conducted.
Fig. 31 - NORM SURF
MAIN
( no dive made)
Page 39

39
• The operating mode selected (NORM, GAUG, or FREE)
will remain on display for 2 hours until a dive is made or
Watch Mode is selected.
If a dive has been conducted within the past 24 hours, the
SURF MAIN screen for that operating mode (NORM, GAUG,
or FREE) will be displayed.
At any time while operating in Surface Modes, the Grande will
enter Dive Mode upon descent to 5 FT (1.5 M) for 5 seconds.
• During the 2 hour pre dive surface period, if M is pressed
to access other screens in the Watch Mode sequence,
Surface Mode must again be accessed prior to the rst
dive of a series (if Wet Activation is set O ).
• When Wet Activation is set On, the wet contacts will
activate the selected dive mode regardless of what mode
the Grande is operating in at the time of the descent.
The Grande will enter Post Dive Surface Mode following a dive
upon ascent to 2 FT (0.6 M) for 1 second. The SURF icon will
ash during the rst 10 minutes after a NORM/GAUG dive
(Fig. 32), or 1 minute after a FREE dive.
During the rst 10 minutes after a dive, the SURF MAIN screen
for the operating mode selected prior to the dive (NORM,
GAUG, or FREE) remains on display.
Fig. 32 - NORM
SURFACE MAIN
(Post Dive Wet)
Page 40
40
When the 10 minute surface time has elapsed, Watch Default
Time (Main or Alternate) will be displayed. The SURF MAIN
screen can then be accessed by depressing M (2 seconds).
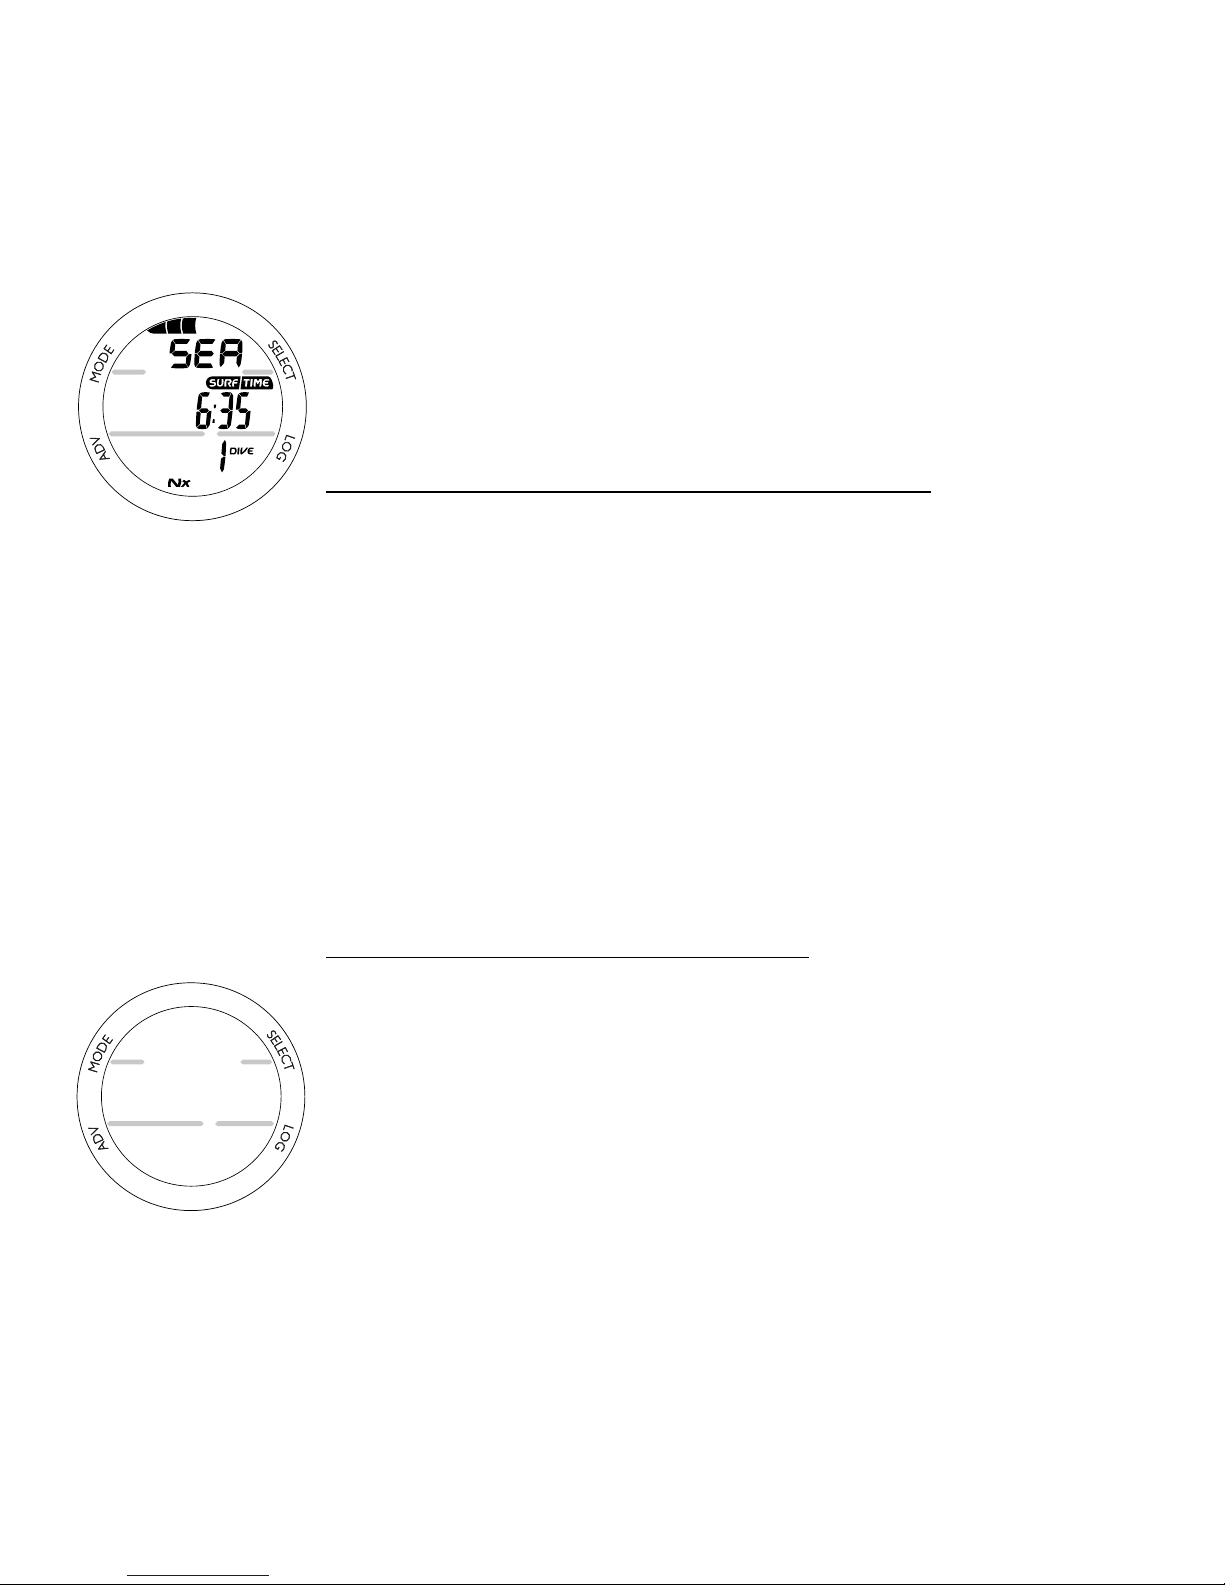
NORM SURF MAIN, information includes (Fig. 33):
> Nitrogen Bar Graph (NIBG), if any after a NORM or FREE
dive.
> Graphic NORM alternating with the Altitude Level graphic
SEA (or EL2 through EL13) and WET (if the unit is wet),
each On 3 seconds then 1/4 second blank.
> Surface Interval Time (hr:min) with SURF and TIME icons.
> Battery icon if a Low Battery Warning condition exists,
ashing if Too Low.
> Number of that dive (0 if no dive has been made yet) with
DIVE icon.
> Nx icon, if FO2 is set for a Nitrox value.
NORM SURF MAIN - Button Operations:
• Depressing M (2 seconds) will access GAUG SURF MAIN.
• Pressing M (< 2 seconds) will access Watch Default Time.
• Depressing A (2 seconds) will access NORM SURF ALT,
then pressing A (< 2 seconds) will access the Secondary.
• Pressing A (< 2 seconds, repeatedly) will access Plan, then
Fly, then Desat.
• Depressing A and S (2 seconds) will access Set Modes.
• Depressing L (2 seconds) will activate the Backlight.
• Pressing L (< 2 seconds) will access Log and History.
Fig. 33 - NORM SURF
MAIN
BUTTONS
M
A
S
L
Page 41
41
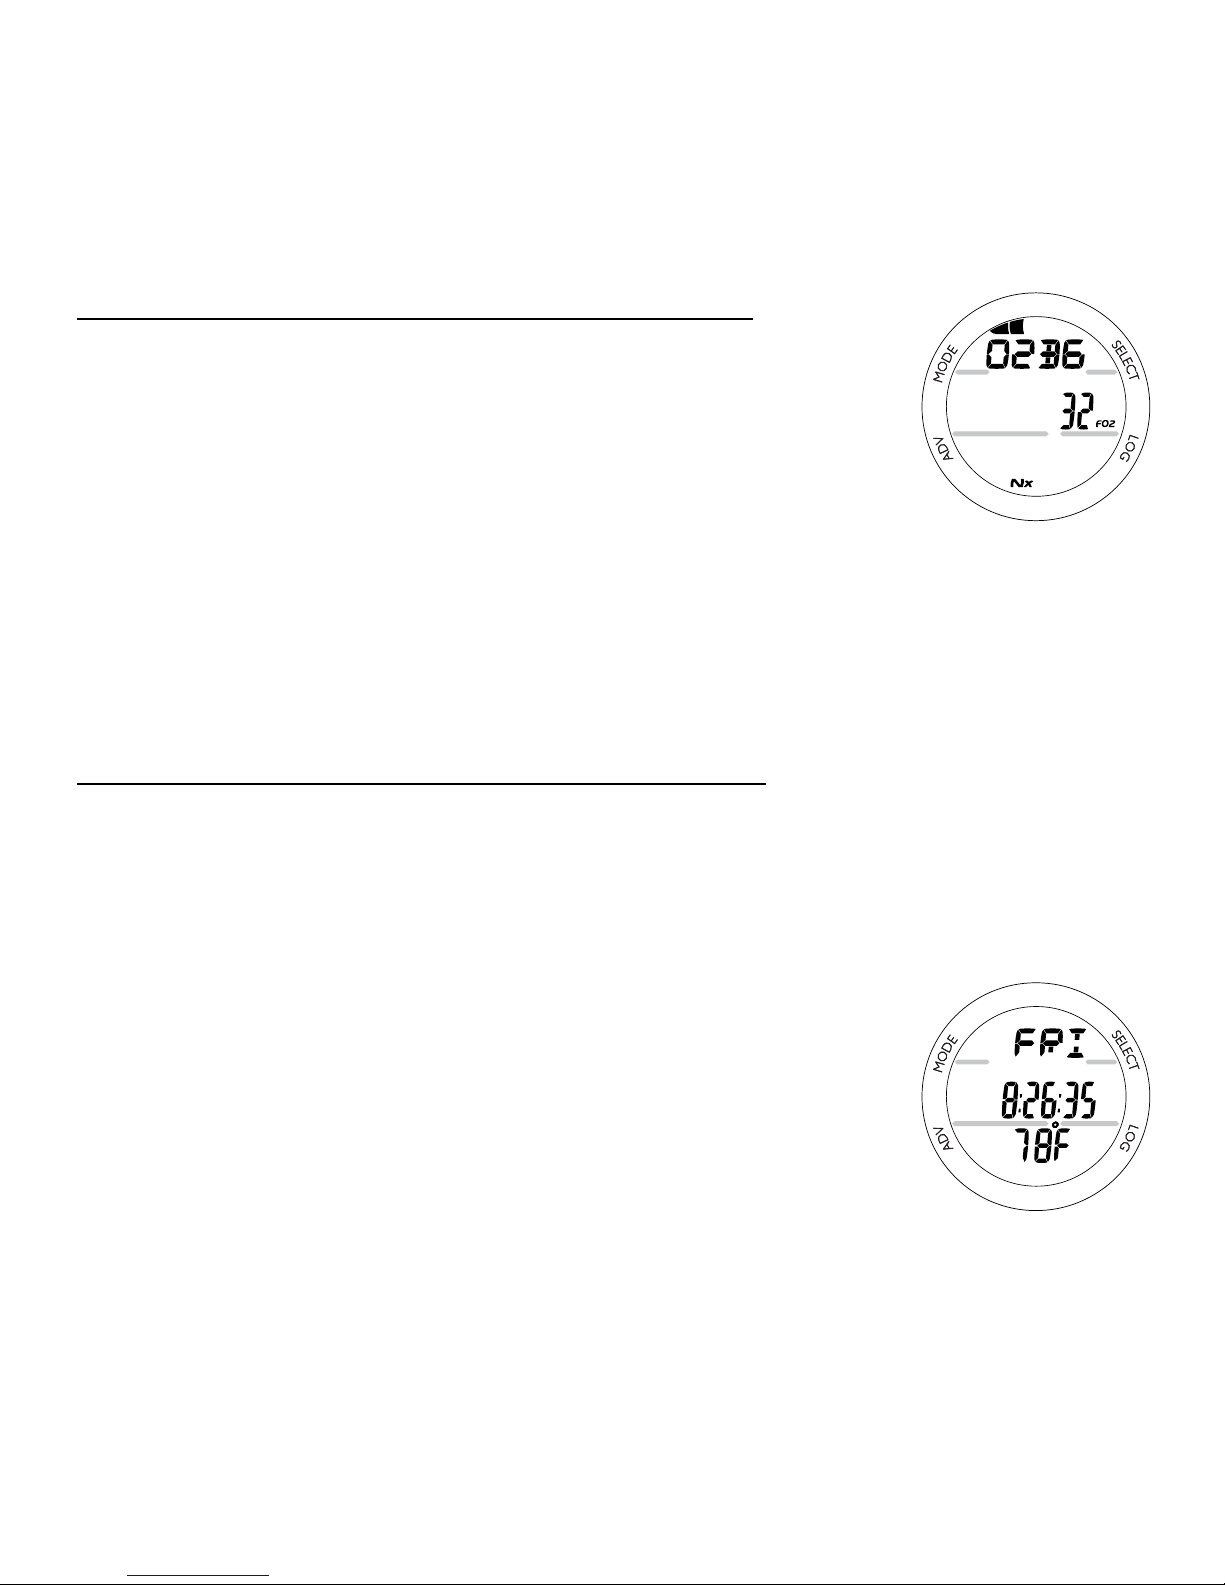
NORM SURF ALTERNATE, information includes (Fig. 34):
> Bar Graph with graphic O2BG, representing Oxygen
accumulation at the end of the dive just completed.
> FO2 Set Point with FO2 icon.
> Nx icon.
This display is bypassed if FO2 was set for Air.
• Pressing A (< 2 seconds) will access the Secondary screen.
• The display will revert to the NORM SURF MAIN after 5
seconds if A is not pressed.
• Depressing L (2 seconds) will activate the Backlight.
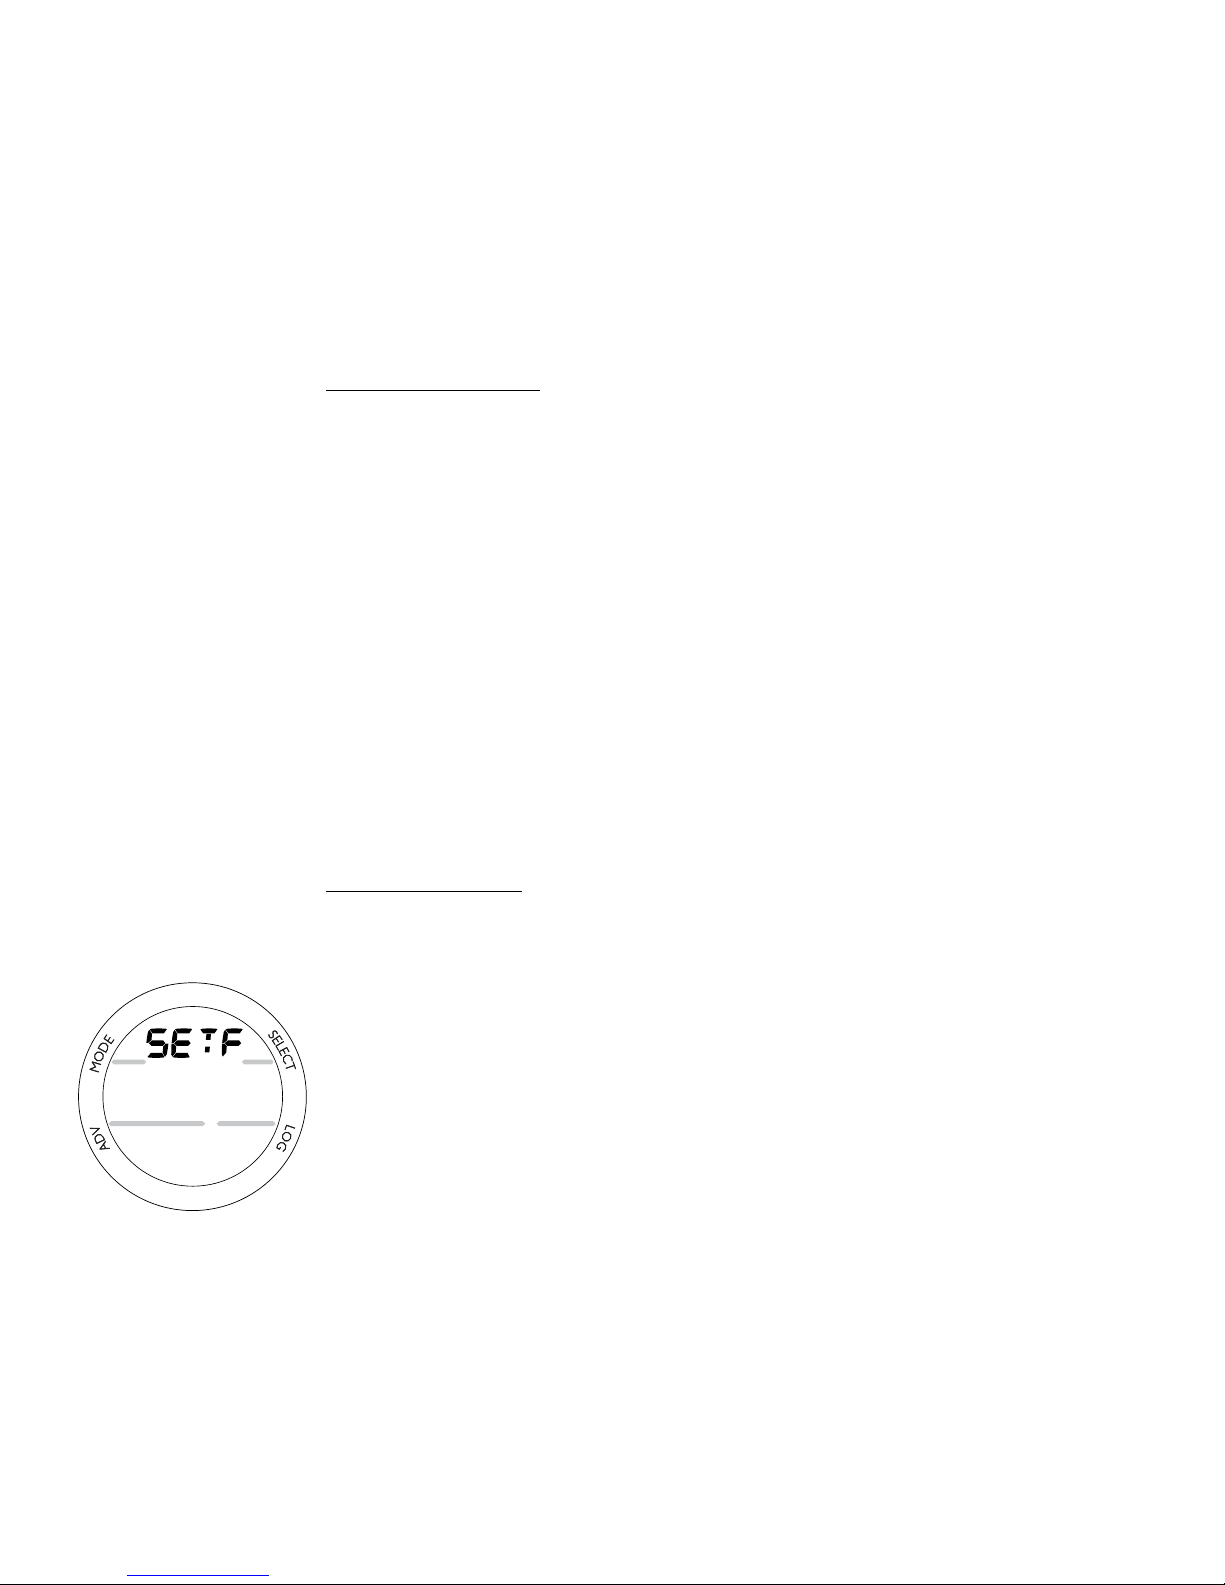
NORM SURF SECONDARY, information includes (Fig. 35):
> Day of the Week graphic (SAT, SUN, MON, TUE, WED,
THU, FRI).
> Time of Day (hr:min:sec).
> Temperature with degree icon and graphic F (or C)
• Pressing A (< 2 seconds) will revert to the NORM SURF
MAIN.
• The display will revert to the NORM SURF MAIN after 5
seconds if A is not pressed.
• Depressing L (2 seconds) will activate the Backlight.
Fig. 34 - NORM SURF
ALTERNATE
Fig. 35 - NORM SURF
SECONDARY
Page 42
42
NORM AND GAUG SET MODES
Group Sequence:
SURF MAIN >> Set F > Set A > Set U > Serial Number.
Access and step through of the sequence is gained by depressing A and S repeatedly (2 seconds each time).
Alarms (Set A) and Utilities (Set U) can also be changed using
the PC Interface program.
FO2 (Set F) entries can only be made using the push buttons.
SET F GROUP FO2
Set F Sequence:
SET F >> Set FO2 > Set FO2 50% Default.
> Depressing A and S (2 seconds), while the SURF MAIN is
displayed, will access Set F (Fig. 36).
> Pressing A (< 2 seconds) will then access Set FO2.
Fig. 36 - SET F
Page 43

43
Setting FO2:
For each value of FO2, the Maximum Operating Depth (MOD)
that can be achieved for the PO2 Alarm set will be displayed.
When the FO2 Default is set On and FO2 is set for a numerical value, 10 minutes on the surface after that dive, FO2 will
be displayed as 50 and further dives will be calculated based
on 50% O2 for oxygen calculations and 21% O2 for nitrogen
calculations (79% Nitrogen) unless FO2 is set before the dive.
FO2 continues to reset to the FO2 50% Default after subsequent repetitive dives until 24 hours elapse after the last dive,
or the FO2 50% Default is set O.
When the FO2 50% Default is set O, FO2 will remain set at
the last value selected for that series of repetitive dives.
The default FO2 setting for each new dive Period (no dive
made in 24 hours) is Air.
When FO2 is set for Air, the calculations are the same as when
it is set to an FO2 of 21%. When FO2 is set to Air, it remains
set for Air until it is set for a numerical FO2 value (21 to 50%).
When FO2 is set for Air, the O2 Bar Graph is not displayed at
any time during a dive or on the surface. PO2 values and/or
warnings will not be displayed during the dive.
Page 44
44
FREE Dive nitrogen calculations are based on Air and not affected by these FO2 Settings.
Maximum Operating Depths aected by the PO2 limit set will
not be displayed when FO2 is set for Air.
Internally, the Grande keeps track of the oxygen loading so that
if FO2 is subsequently set for a numerical value, the oxygen
accumulation for previous Air dives will be accounted for in the
next Nitrox dive (during that dive period and series of repetitive
dives).
Once FO2 is set for a numerical value (21 to 50%) and a dive
is made, the Air option is disabled until 24 hours elapse after
the last dive. The Air option will not be displayed in Set FO2
selections until a full 24 hour Surface Interval has elapsed.
If FO2 is set for 21%, it will remain set for 21% for that series
of dives until set for a higher numerical value.
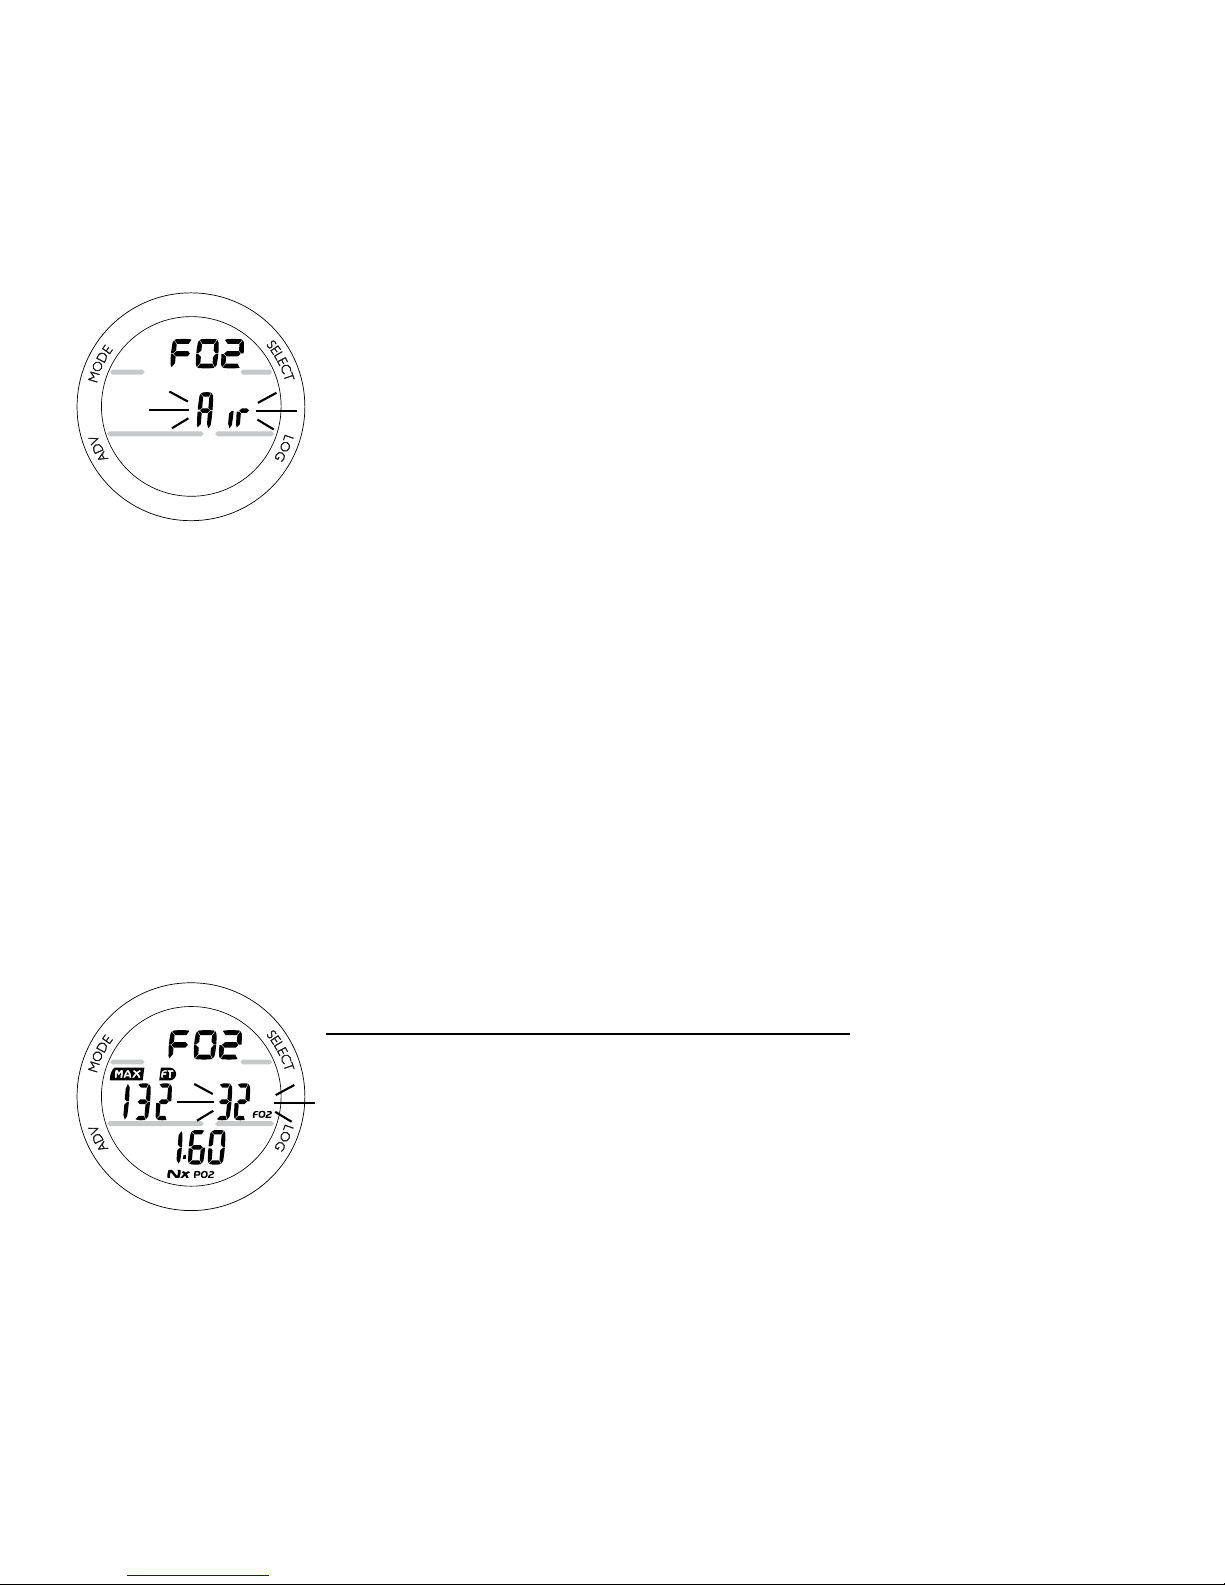
SET FO2, information includes (Fig. 37, 38):
> Graphic FO2.
> Max Depth allowed for the PO2 alarm set, blank if Air.
> Graphic Air, or Nitrox value with FO2 icon, ashing.
> PO2 Alarm set with PO2 icon, blank if Air.
> Nx icon, blank if Air.
Fig. 37 - SET FO2
(Air setting)
Fig. 38 - SET FO2
(Nitrox setting)
Page 45

45
• Depressing S will scroll through FO2 values from Air to 21
through 50% in 1% increments, at a rate of 8 per second.
> The scroll will stop when S is released, or momentarily
at 32% (even if the button is held depressed).
> Depressing S again will resume the scroll from 32
through 50%, then stop at Air (or 21%).
• Pressing S repeatedly (< 2 seconds) will step upward
through FO2 settings one at a time.
• Pressing A (< 2 seconds) will save the setting and access
Set FO2 Default.
• Depressing A and S (2 seconds) will save the setting and
revert to the Set F screen.
• Depressing M (2 seconds), or if no button is pressed for
a period of 2 minutes, operation will revert to SURF MAIN.
SET FO2 50% DEFAULT, information includes (Fig. 39):
> Graphics DFLT and 50 with FO2 icon.
> Graphic OFF (or ON) ashing.
> Nx icon.
• Pressing S (< 2 seconds) will toggle between OFF and
ON.
• Pressing A (< 2 seconds) will save the setting and revert to
the Set F screen.
• Depressing M (2 seconds) or if no button is pressed for
a period of 2 minutes, operation will revert to SURF MAIN.
Fig. 39 - SET FO2 50%
DEFAULT
Page 46
46
SET A GROUP (ALARMS)
Group Sequence:
SET A >> Audible > Depth > EDT > NIBG > DTR > PO2.
> The Set A group items can also be set/changed using the
PC Interface program.
> Settings remain at the values set until changed.
> Depressing A and S (4 seconds), while the SURF MAIN is
displayed, will access Set A (Fig. 40).
> Pressing A (< 2 seconds), while Set A is displayed, will
access Set Audible Alarm.
SET AUDIBLE ALARM
This option allows the Audible Alarms and the associated warning LED function to be disabled.
Some cautionary situations will
cause the Audible alarm to sound and the LED to ash even if
this feature is set to OFF.
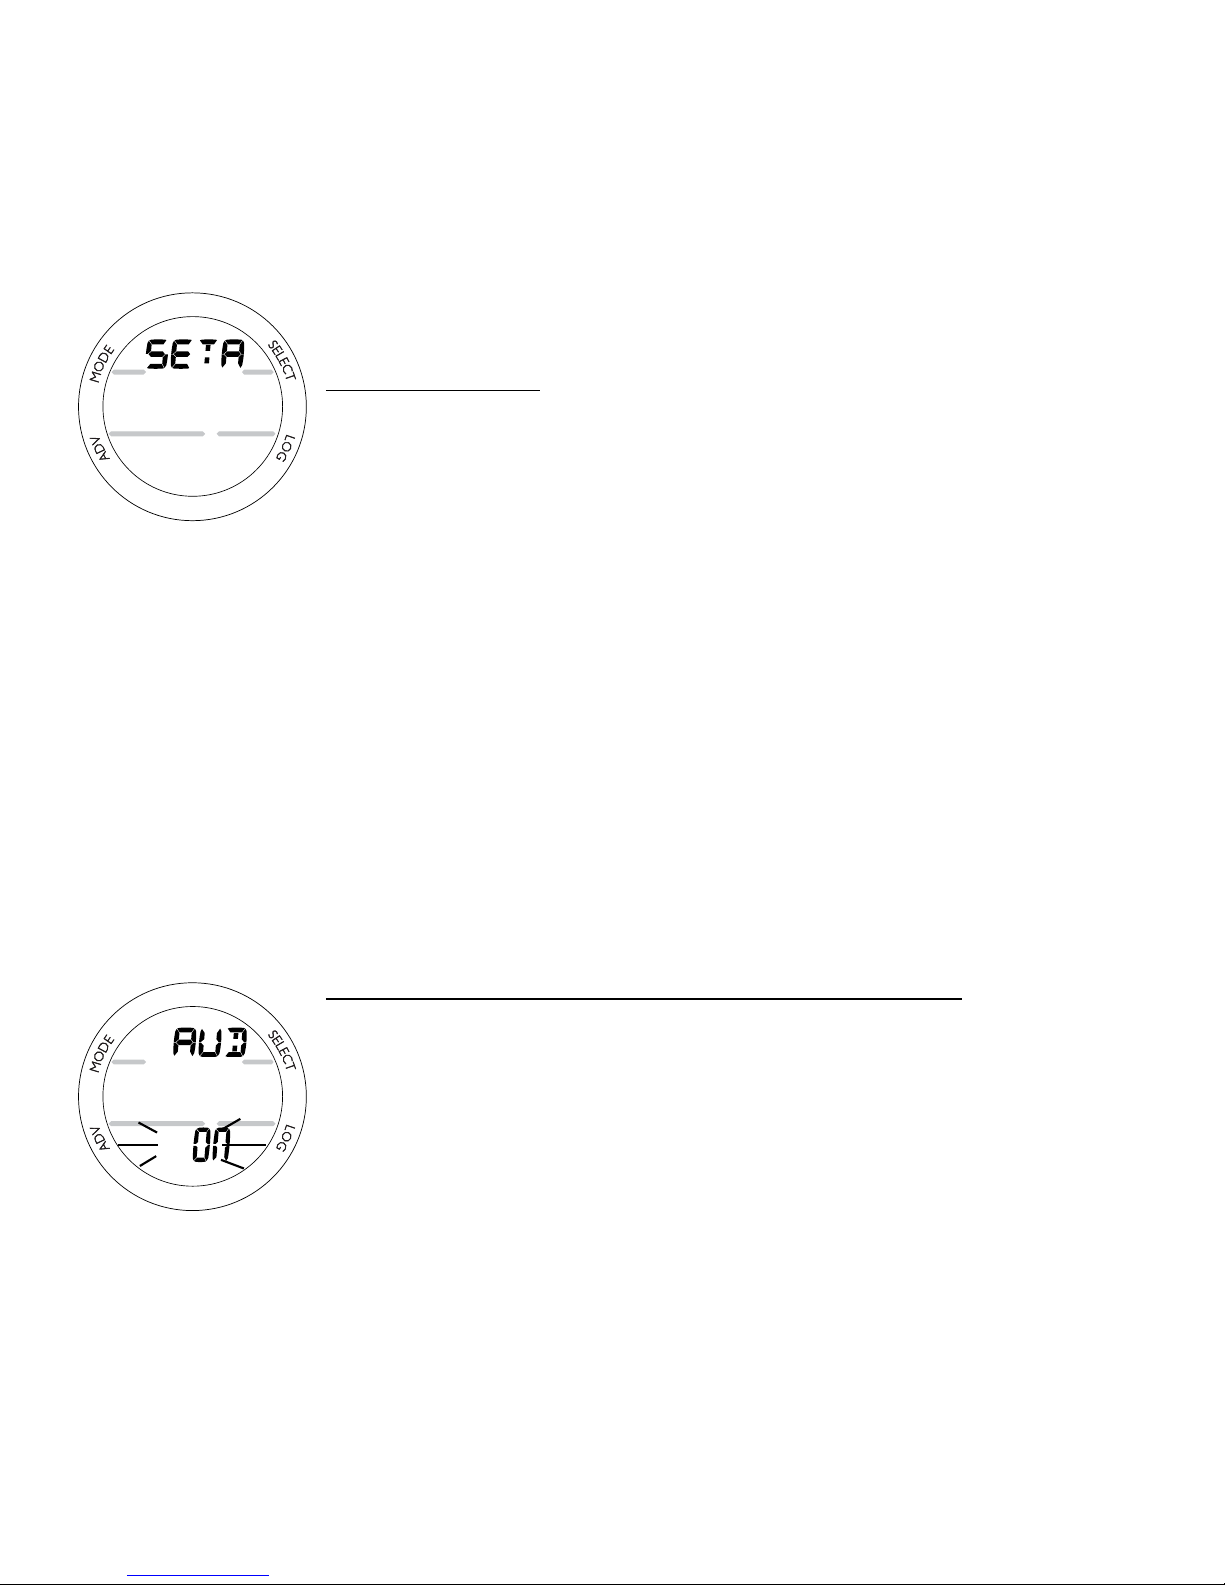
SET AUDIBLE ALARM, information includes (Fig. 41):
> Graphic AUD,
> Set Point Graphic ON (or OFF) ashing.
• Pressing S (< 2 seconds) will toggle between ON and
OFF.
• Pressing A (< 2 seconds) will save the setting and access
Set Depth Alarm.
Fig. 40 - SET A
Fig. 41 - SET AUDIBLE
Page 47
47
• Depressing A and S (2 seconds) will save the setting and
revert to the Set A screen.
• Depressing M (2 seconds), or if no button is pressed for
a period of 2 minutes, operation will revert to SURF MAIN.
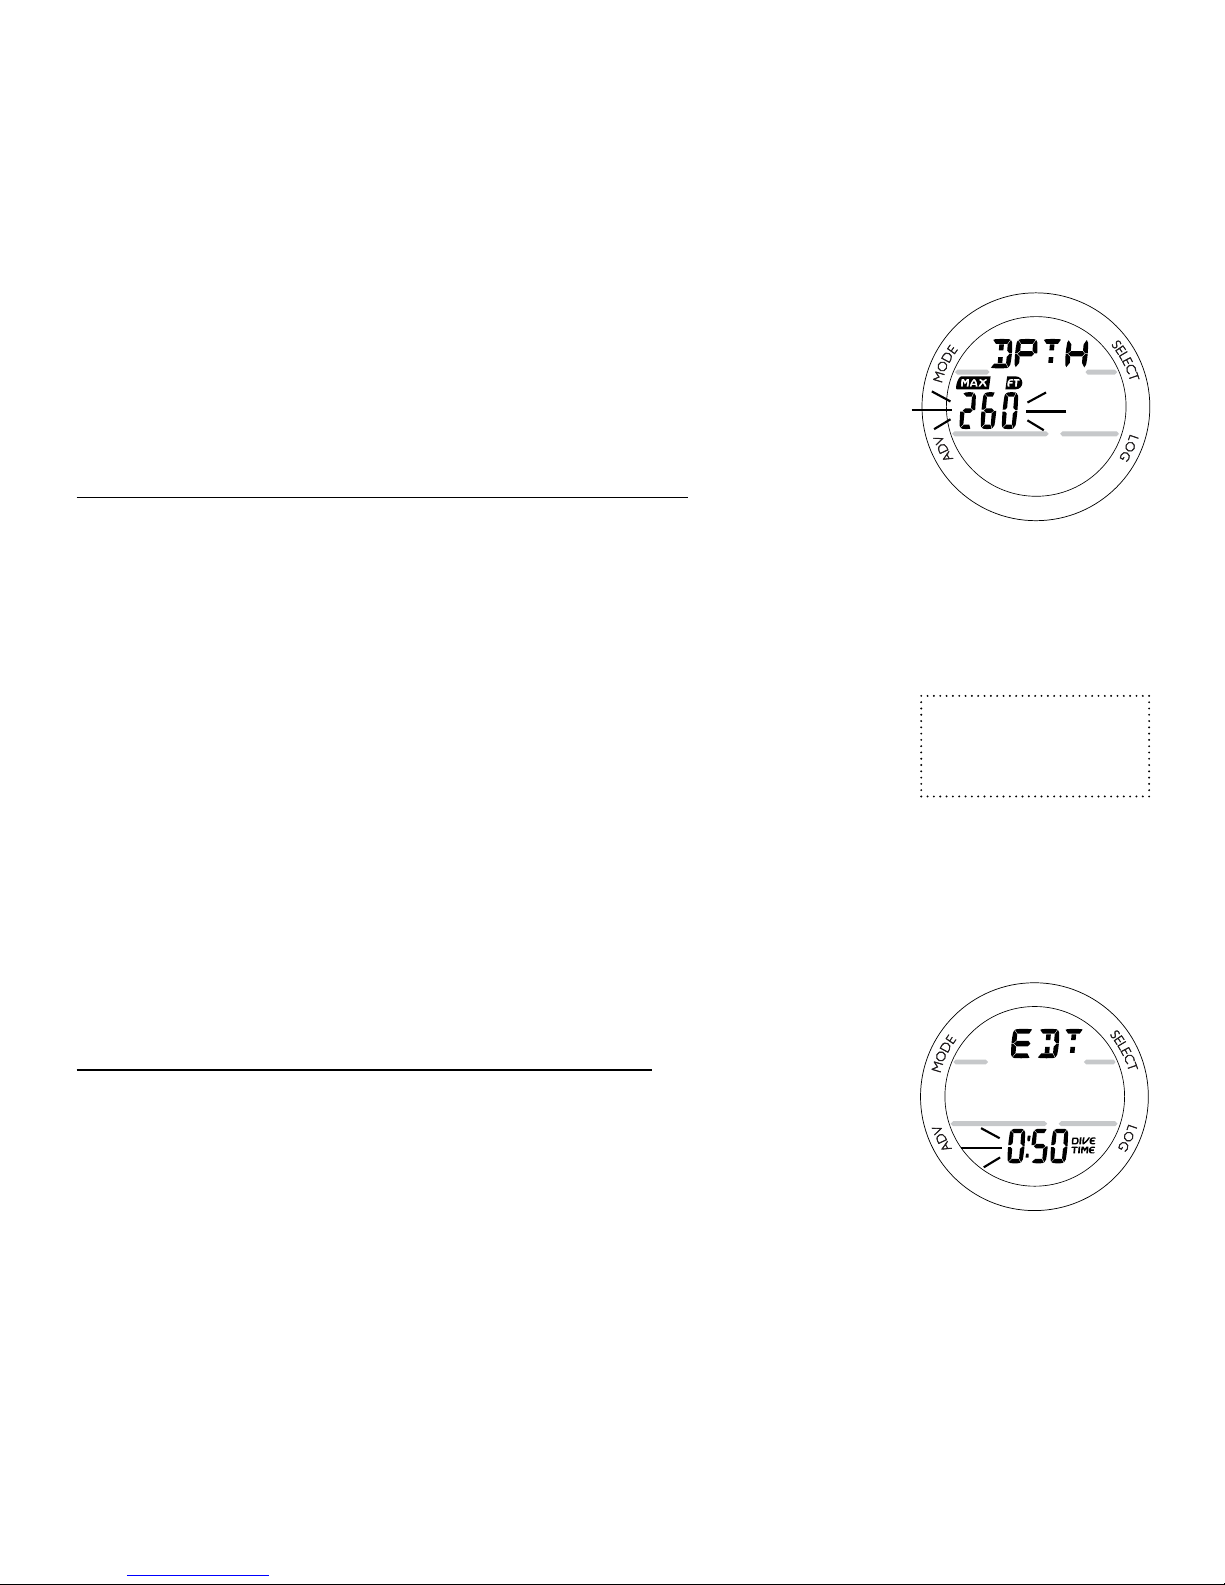
SET DEPTH ALARM, information includes (Fig. 42):
> Graphic DPTH.
> Depth value ashing, with MAX and FT (or M) icons.
• Pressing S repeatedly (< 2 seconds) will step through the
settings from 30 to 330 FT (10 to 100 M) in 10 FT (1 M)
increments one at a time.
• Depressing S will scroll through the settings at a rate of 4
per second until it is released.
• Pressing A (< 2 seconds) will save the setting and access
Set EDT Alarm.
• Pressing A and S (2 seconds) will save the setting and
revert to the Set A screen.
• Depressing M (2 seconds), or if no button is pressed for
a period of 2 minutes, operation will revert to SURF MAIN.
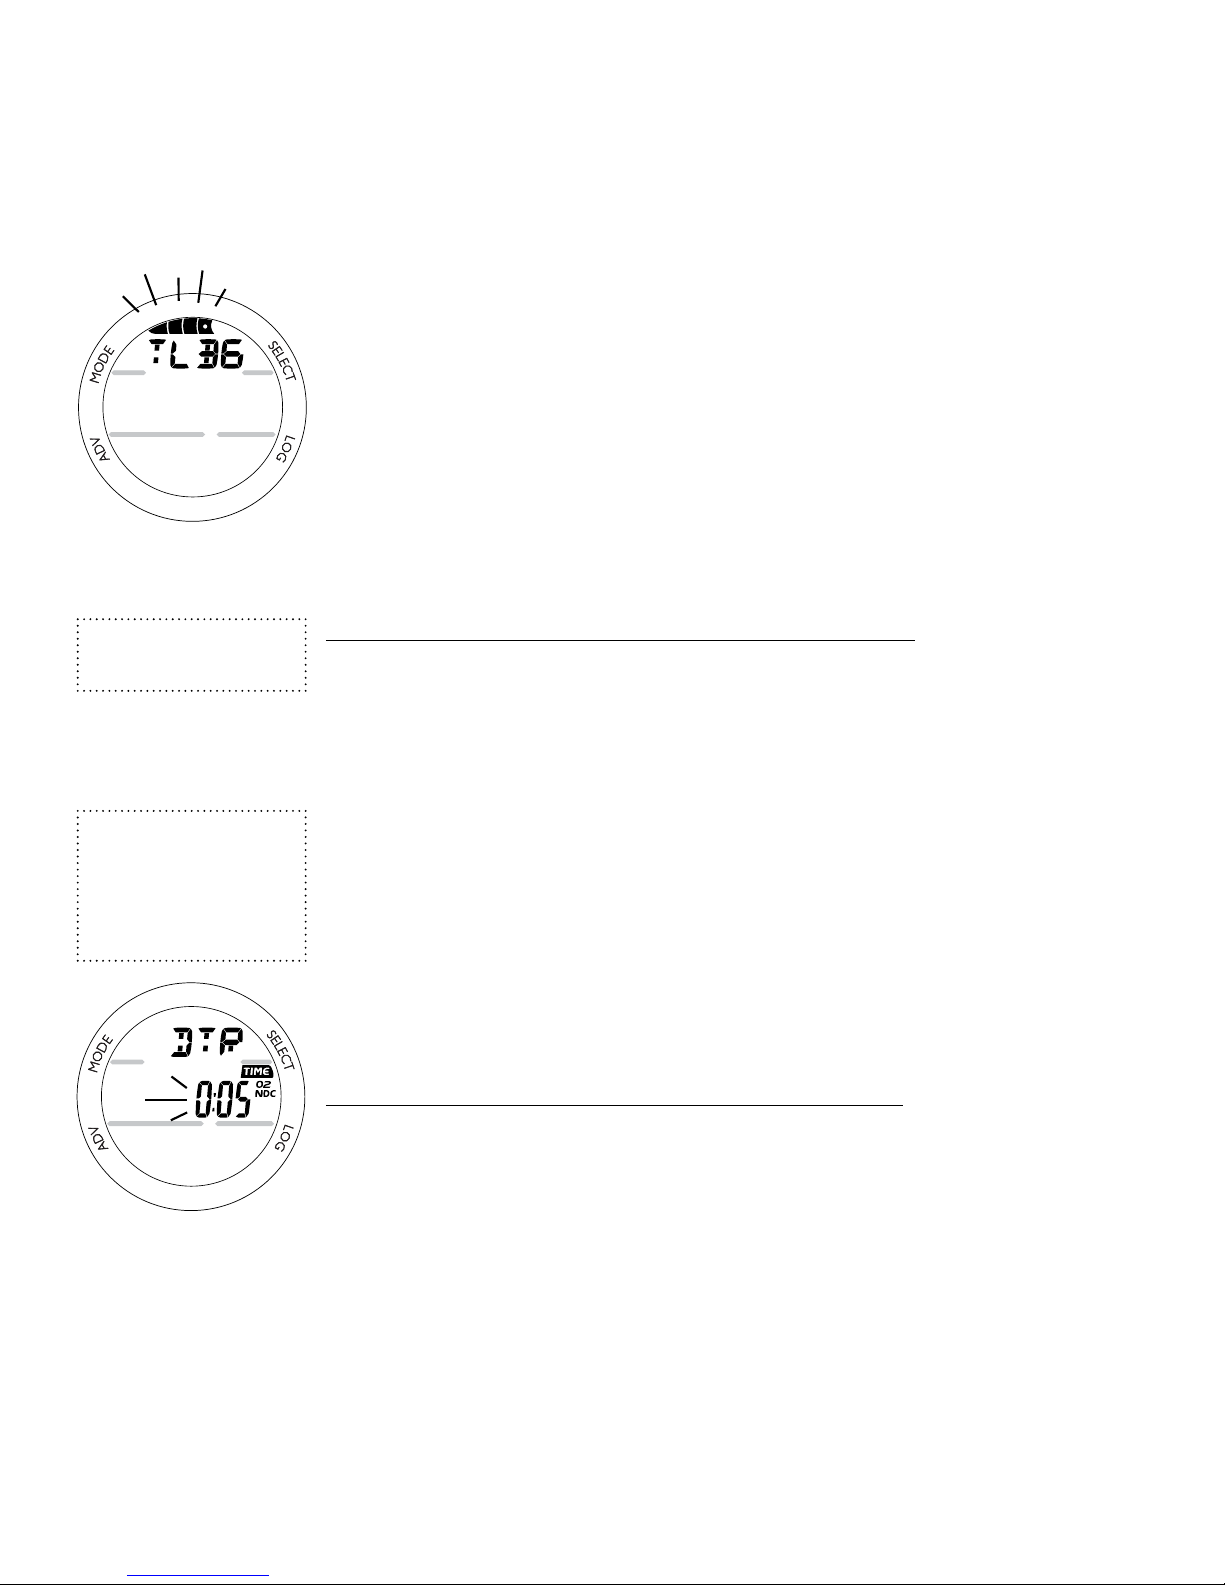
SET EDT ALARM, information includes (Fig. 43):
> Graphic EDT (Elapsed Dive Time).
> Time value (hr:min) ashing, with DIVE and TIME icons.
• Pressing S repeatedly (< 2 seconds) will step through
the settings from 0:10 to 3:00 (hr:min) in 5 minute (:05)
increments one at a time.
Fig. 42 - SET DEPTH
ALARM
FREE Mode has
separate Depth and
EDT Alarms.
Fig. 43 - SET EDT
ALARM
Page 48
48
• Depressing S will scroll through the settings at a rate of 4
per second until it is released.
• Pressing A (< 2 seconds) will save the setting and access
Set NIBG Alarm.
• Depressing A and S (2 seconds) will save the setting and
revert to the Set A screen.
• Depressing M (2 seconds), or if no button is pressed for
a period of 2 minutes, operation will revert to SURF MAIN.
SET NIBG ALARM, information includes (Fig. 44):
> Graphic NIBG (Nitrogen Bar Graph).
> Bar Graph segments ashing.
• Pressing S repeatedly (< 2 seconds) will step through the
settings displaying 1, 2, 3, 4, or 5 segments.
• Pressing A (< 2 seconds) will save the setting and access
Set DTR Alarm.
• Depressing A and S (2 seconds) will save the setting and
revert to the Set A screen.
• Depressing M (2 seconds), or if no button is pressed for
a period of 2 minutes, operation will revert to SURF MAIN.
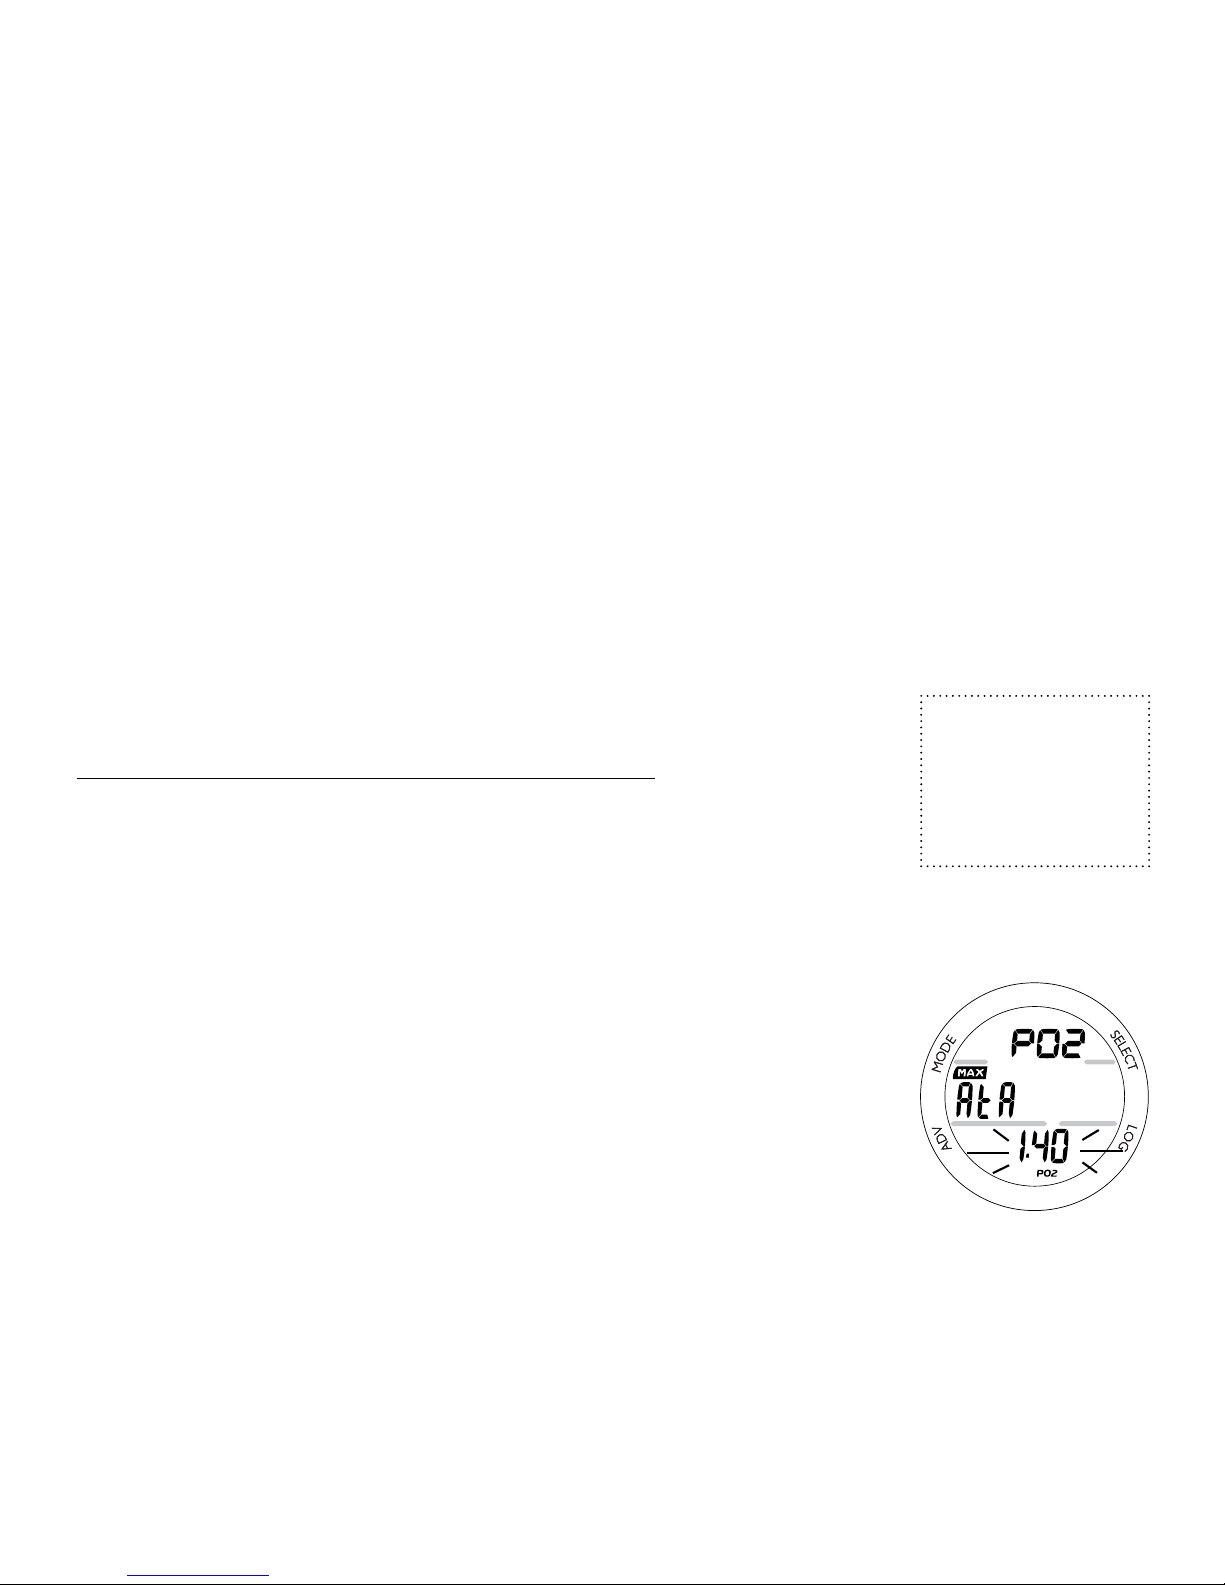
SET DTR ALARM, information includes (Fig. 45):
> Graphic DTR (Dive Time Remaining).
> Time value (hr:min) ashing, with TIME, O2, and NDC
icons.
Fig. 44 - SET NIBG
ALARM
FREE Mode has a
separate NIBG Alarm.
Fig. 45 - SET DTR
ALARM
Whichever Time
(NDC or O2)
decreases to the
Alarm Set Point will
activate the Alarm.
Page 49
49
• Pressing S repeatedly (< 2 seconds) will increase the
setting from 0:00 to 0:20 (:minutes) in 1 minute (0:01)
increments.
• Depressing S will scroll through the setting at a rate of 4
per second.
• Pressing A (< 2 seconds) will save the setting and access
Set PO2 Alarm.
• Depressing A and S (2 seconds) will save the setting and
revert to the Set A screen.
• Depressing M (2 seconds), or if no button is pressed for
a period of 2 minutes, operation will revert to SURF MAIN.
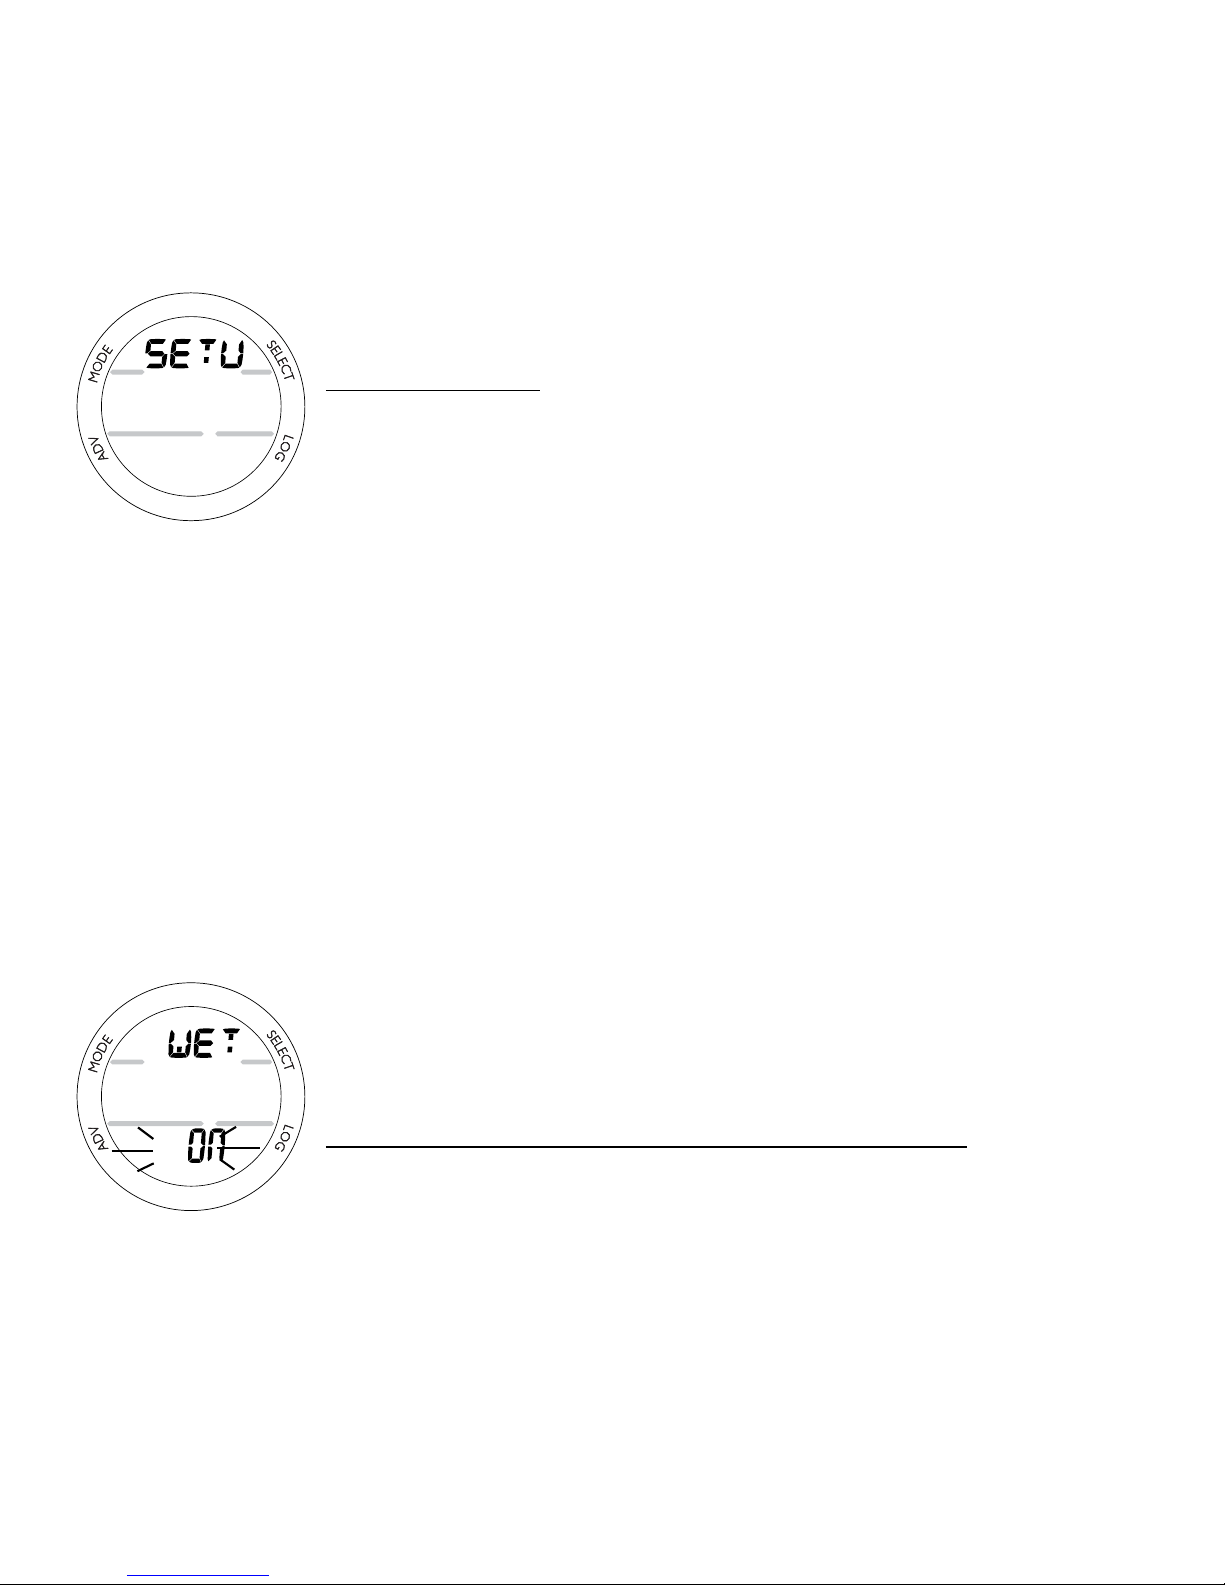
SET PO2 ALARM, information includes (Fig. 46):
> Graphics PO2 and AtA with MAX icon.
> PO2 value (x.xx ATA) ashing, with PO2 icon.
• Pressing S repeatedly (< 2 seconds) will increase the
setting from 1.20 (ATA) to 1.60 (ATA) in .10 (ATA)
increments.
• Pressing A (< 2 seconds) will save the setting and revert to
the Set A screen.
• Depressing M (2 seconds), or if no button is pressed for
a period of 2 minutes, operation will revert to SURF MAIN.
Fig. 46 - SET PO2
ALARM
Setting the PO2
Alarm to activate
before reaching the
Max allowed limit of
1.60 ATA is highly
recommended.
Page 50
50
SET U GROUP (UTILITIES)
Group Sequence:
SET U >> Wet Activation > Units > Deep Stop > Safety Stop >
Conservative Factor > Backlight Duration > Sampling Rate.
> The Set U group items can also be set/changed using the
PC Interface program.
> Settings remain at the values set until changed.
> Depressing A and S (6 seconds), while the SURF MAIN is
displayed, will access Set U (Fig. 47).
> Pressing A (< 2 seconds), while Set U is displayed, will
access Set Wet Activation.
The settings for Wet Activation, Units, Conservative Factor,
and Backlight Duration also apply to FREE Mode.
To change these settings while operating in FREE Mode,
rst access the NORM Surface Mode.
FREE Mode Sampling Rate is xed at a 1 second interval
and is not aected by the Set U setting.
SET WET ACTIVATION, information includes (Fig. 48):
> Graphic WET.
> ON (or OFF) ashing.
• Pressing S (< 2 seconds) will toggle between ON and OFF.
Fig. 47 - SET U
Fig. 47 - SET WET
ACTIVATION
Page 51
51
• Pressing A (< 2 seconds) will save the setting and access
Set Units.
• Depressing A and S (2 seconds) will save the setting and
revert to the Set U screen.
• Depressing M (2 seconds), or if no button is pressed for
a period of 2 minutes, operation will revert to SURF MAIN.
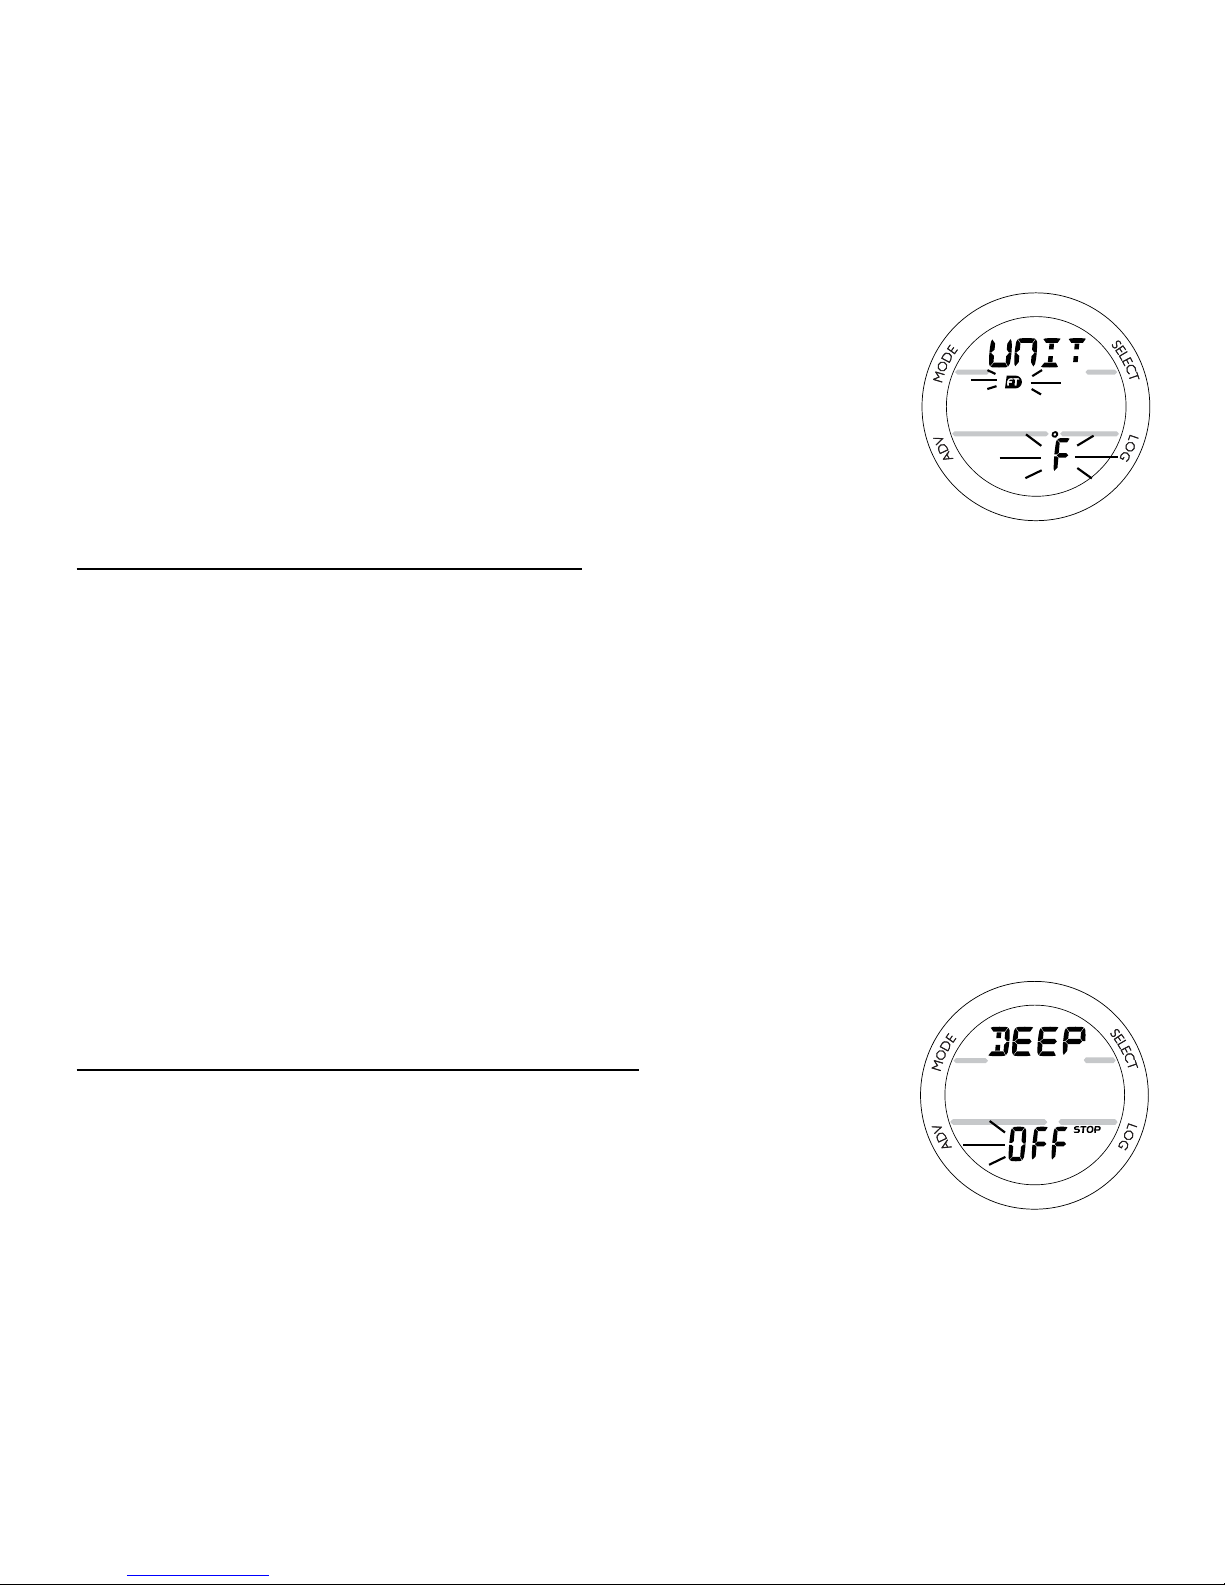
SET UNITS, information includes (Fig. 48):
> Graphic UNIT.
> FT icon and graphic F (or M icon and graphic C) ashing,
with degrees icon.
• Pressing S (< 2 seconds) will toggle between Imperial (FT,
F) and Metric (M, C).
• Pressing A (< 2 seconds) will save the setting and access
Set Deep Stop.
• Depressing A and S (2 seconds) will save the setting and
revert to the Set U screen.
• Depressing M (2 seconds), or if no button is pressed for
a period of 2 minutes, operation will revert to SURF MAIN.
SET DEEP STOP, information includes (Fig. 49):
> Graphic DEEP with STOP icon.
> ON (or OFF) ashing.
• Pressing S (< 2 seconds) will toggle between ON and OFF.
• Pressing A (< 2 seconds) will save the setting and access
Set Safety Stop.
Fig. 48 - SET UNITS
Fig. 49 - SET DEEP
STOP
Page 52

52
• Depressing A and S (2 seconds) will save the setting and
revert to the Set U screen.
• Depressing M (2 seconds), or if no button is pressed for
a period of 2 minutes, operation will revert to SURF MAIN.
SET SAFETY STOP, information includes (Fig. 50):
> Graphic SAFE.
> Stop Depth with FT (or M) icon.
> Stop Time (min:sec) ashing, with STOP and TIME icons.
• Pressing S (< 2 seconds each time) will step through the
Stop Time settings of OFF, 3:00, and 5:00 (min:sec).
• Pressing A (< 2 seconds) will save the Stop Time setting
and ash the Depth digits, or if OFF is selected access Set
Conservative Factor.
• Pressing S (< 2 seconds each time) will step through the
Stop Depth settings of 10, 15, and 20 FT (or 3, 4, 5, and
6 M).
• Pressing A (< 2 seconds) will save the Safety Stop settings
and access Set Conservative Factor.
• Depressing A and S (2 seconds) will save the setting and
revert to the Set U screen.
• Depressing M (2 seconds), or if no button is pressed for
a period of 2 minutes, operation will revert to SURF MAIN.
Fig. 50 - SET SAFETY
STOP
Page 53
53
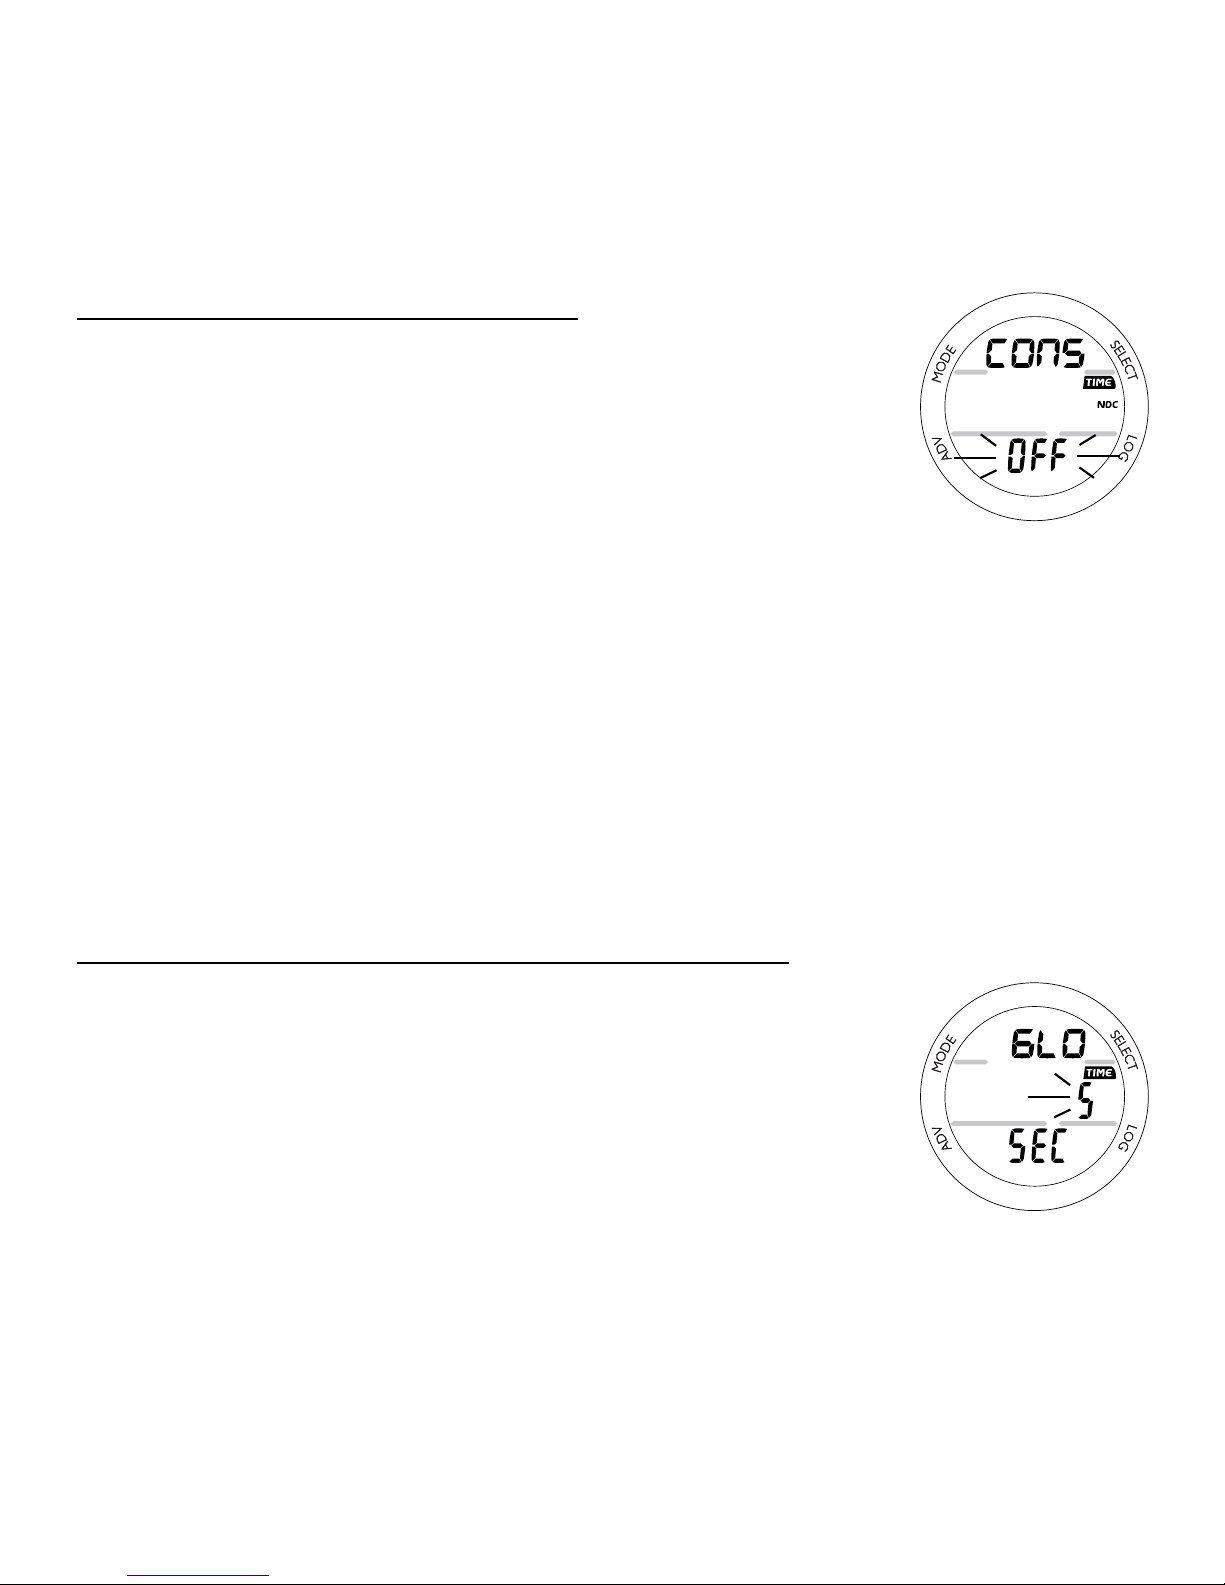
SET CONS, information includes (Fig. 51):
> Graphic CONS (Conservative Factor).
> TIME and NDC icons.
> Graphic ON (or OFF) ashing.
• Pressing S (< 2 seconds) will toggle between ON and OFF.
• Pressing A (< 2 seconds) will save the setting and access
Set Backlight Duration.
• Depressing A and S (2 seconds) will save the setting and
revert to the Set U screen.
• Depressing M (2 seconds), or if no button is pressed for
a period of 2 minutes, operation will revert to SURF MAIN.
When the Conservative Factor is set ON, No Deco Limit
times are reduced to values equivalent to those that would
be available at the next higher 3000 foot (915 meter)
Altitude. Refer to the tables at the back.
SET BACKLIGHT DURATION, information includes (Fig. 52):
> Graphics GLO (meaning Backlight) and SEC.
> Duration Time (seconds), ashing, with TIME icon.
• Pressing S (< 2 seconds each time) will step through the
settings of 0, 5, and 10 (seconds).
• Pressing A (< 2 seconds) will save the setting and access
Set Sampling Rate.
• Depressing A and S (2 seconds) will save the setting and
revert to the Set U screen.
Fig. 51 - SET CONSER-
VATIVE FACTOR
Fig. 52 - SET BACK-
LIGHT DURATION
Page 54
54
• Depressing M (2 seconds), or if no button is pressed for
a period of 2 minutes, operation will revert to SURF MAIN.
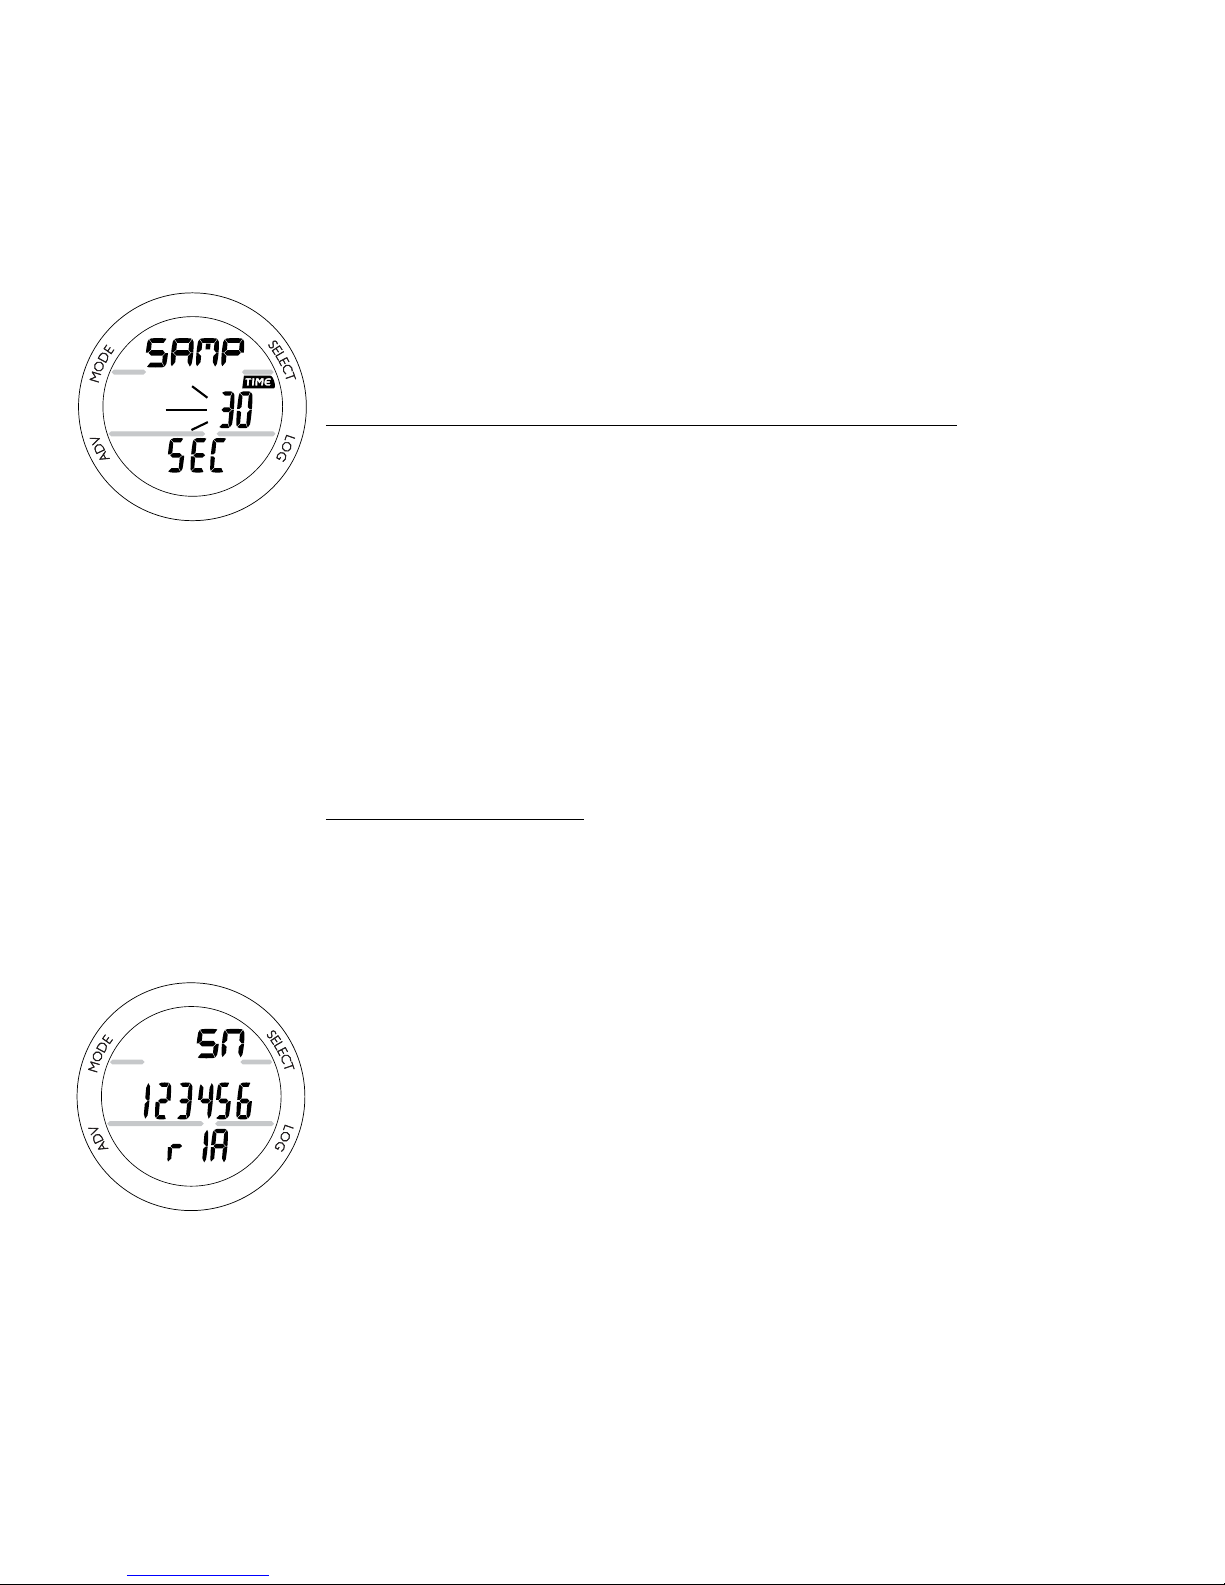
SET SAMPLING RATE, information includes (Fig. 53):
> Graphics SAMP and SEC (meaning Sampling Seconds).
> Sampling Time (seconds), ashing, with TIME icon.
• Pressing S (< 2 seconds) will step through the settings of 2,
15, 30, 60 (seconds).
• Pressing A (< 2 seconds) will save the setting and revert to
the Set U screen.
• Depressing M (2 seconds), or if no button is pressed for
a period of 2 minutes, operation will revert to SURF MAIN.
SERIAL NUMBER (SN)
• Depressing A and S (8 seconds), while viewing the SURF
MAIN will access the SN screen (Fig. 54):
> Graphic SN.
> Factory programmed Serial Number of the Grande.
> Firmware revision number (e.g., Graphic r1A).
• Depressing A and S (2 seconds) will revert to the SURF
MAIN screen.
• Depressing M (2 seconds), or if no button is pressed for
a period of 2 minutes, operation will revert to SURF MAIN.
Fig. 53 - SET
SAMPLING RATE
Fig. 54 - SERIAL
NUMBER
Page 55

55
NORM PLAN MODE
Bism strongly recommends that you review the PDPS (Pre Dive Planning Sequence)
prior to every NORM dive to help you Plan your dive as required to avoid exceeding no decompression or oxygen exposure limits.
This is especially important for
repetitive dives when the PDPS indicates adjusted dive times that are available for
the next dive, based on residual nitrogen or oxygen accumulation (whichever is in
control) following the last dive and surface interval.
Calculated no decompression dive times in Plan Mode are based on the FO2
setting selected.
• Pressing A (< 2 seconds), while viewing the NORM SURF MAIN will access
the Plan Mode Lead-in screen.
• Pressing S repeatedly (< 2 seconds each time) will step through the Planned
Depths from 30 to 190 FT (9 to 57 M) in increments of 10 FT (3 M),
displaying the allowable no decompression dive times (NDLs).
The PDPS will stop at the Maximum Depth that will allow theoretical no
decompression dive time of at least 1 minute based upon the previous dive
proles in a series of repetitive dives and taking into account descent and
ascent rates of 60 FPM (18 MPM).
When the Conservative Factor is set On, no decompression dive times are
reduced to the values of the next 3000 foot (915 meter) higher Altitude.
• Pressing A (< 2 seconds) before a dive will revert to the NORM SURF Main,
or after a dive access Fly Time.
Page 56
56
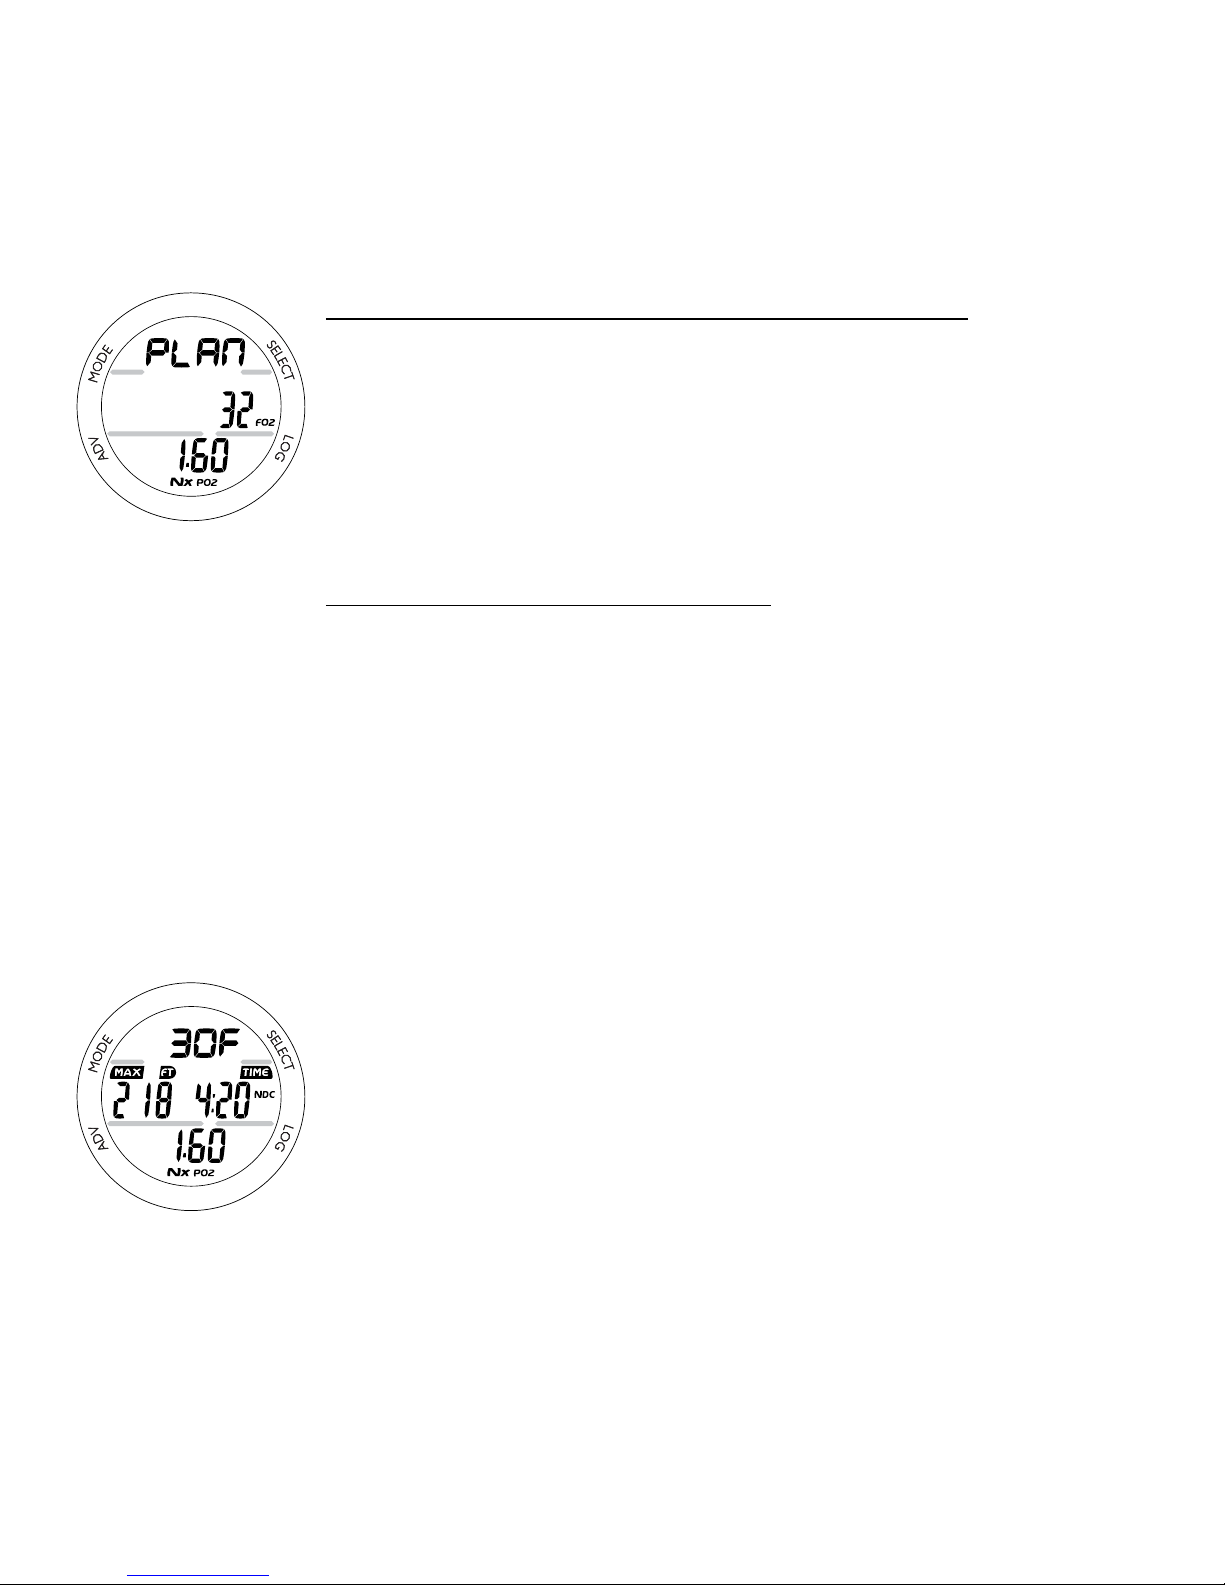
PLAN MODE LEAD-IN, information includes (Fig. 55):
> Graphic PLAN.
> FO2 setting with FO2 icon
> PO2 Alarm setting with Nx and PO2 icons, blank if Air.
• Pressing S (< 2 seconds) will access the rst screen (30
FT/9 M) of the PDPS.
PDPS, information includes (Fig. 56):
> Plan Depth value with graphic F (= feet) or M (= meters).
> Max Depth allowed for the PO2 Alarm value set with MAX
and FT (or M) icons, blank if Air.
> Dive Time allowed (hr:min) with TIME and NDC (or O2 if
Oxygen controlled) icons.
> PO2 Alarm setting with Nx and PO2 icons, blank if Air.
• Pressing S repeatedly (< 2 seconds each time) will step
through the Planned Depths in increments of 10 FT (3 M),
displaying the information one screen at a time.
• Depressing M (2 seconds) will exit the PDPS and revert to
the NORM SURF MAIN screen.
Fig. 55 - PLAN LEAD-IN
Fig. 56 - PDPS
Page 57

57
FLY MODE
Time to Fly is a counter that begins counting down 10 minutes
after surfacing from a dive from 23:50 to 0:00 (hr:min).
Ten minutes after surfacing from a NORM, GAUG, or FREE
dive, operation reverts to the Watch Default Time screen with
the Time to Fly Countdown running in the background.
Access to the FLY screen can then be gained by rst accessing
the NORM (or GAUG) SURF MAIN screen.
• Pressing A 2 times (< 2 seconds each time), while the
NORM SURF MAIN is displayed, will access Fly Mode.
• Pressing A 1 time (< 2 seconds), while the GAUG SURF
MAIN is displayed, will access Fly Mode.
• After a FREE Dive, access is gained by rst accessing
NORM SURF MAIN.
TIME TO FLY, information includes (Fig. 57):
> Graphic FLY.
> Countdown Time (hr:min) with TIME icon.
> Battery icon if a Low Battery Warning condition exists,
ashing if Too Low.
• Pressing A (< 2 seconds) will access Desat Mode after a
NORM dive or revert to SURF Main after a GAUG dive.
• Depressing M (2 seconds), or if no button is pressed for
a period of 2 minutes, operation will revert to SURF MAIN.
Fig. 57 - TIME TO FLY
Page 58

58
• Depressing L (2 seconds) will activate the Backlight.
DESAT MODE
The Time to Desaturate counter provides calculated time for
tissue desaturation at sea level taking into consideration the
Conservation Factor setting. It begins counting down 10
minutes after surfacing from a NORM (or FREE) dive, counting
down from 23:50 max to 0:00 (hr:min).
When the countdown reaches 0:00, which will generally occur
prior to the Fly countdown reaching 0:00, the Desat screen
remains in the sequence of accessible screens displaying 0:00
until the Fly counter shuts the Dive Computer operations O 24
hours after a last dive.
> The Desat screen is not displayed after a Violation Dive.
> Desat Times greater than 24 hours will be displayed as
23: - -
> In the event that Desat Time still remains at the end of the
24 hours countdown, the added time will be zeroed.
> Ten minutes after surfacing from a dive, operation reverts
to the Watch Default Time screen at which time the Desat
countdown continues in the background. Access to the
Desat screen can then be gained by rst accessing the
NORM SURF MAIN screen.
• Pressing A 3 times (< 2 seconds each time) while viewing
the NORM SURF MAIN will access Desat Mode.
Page 59
59
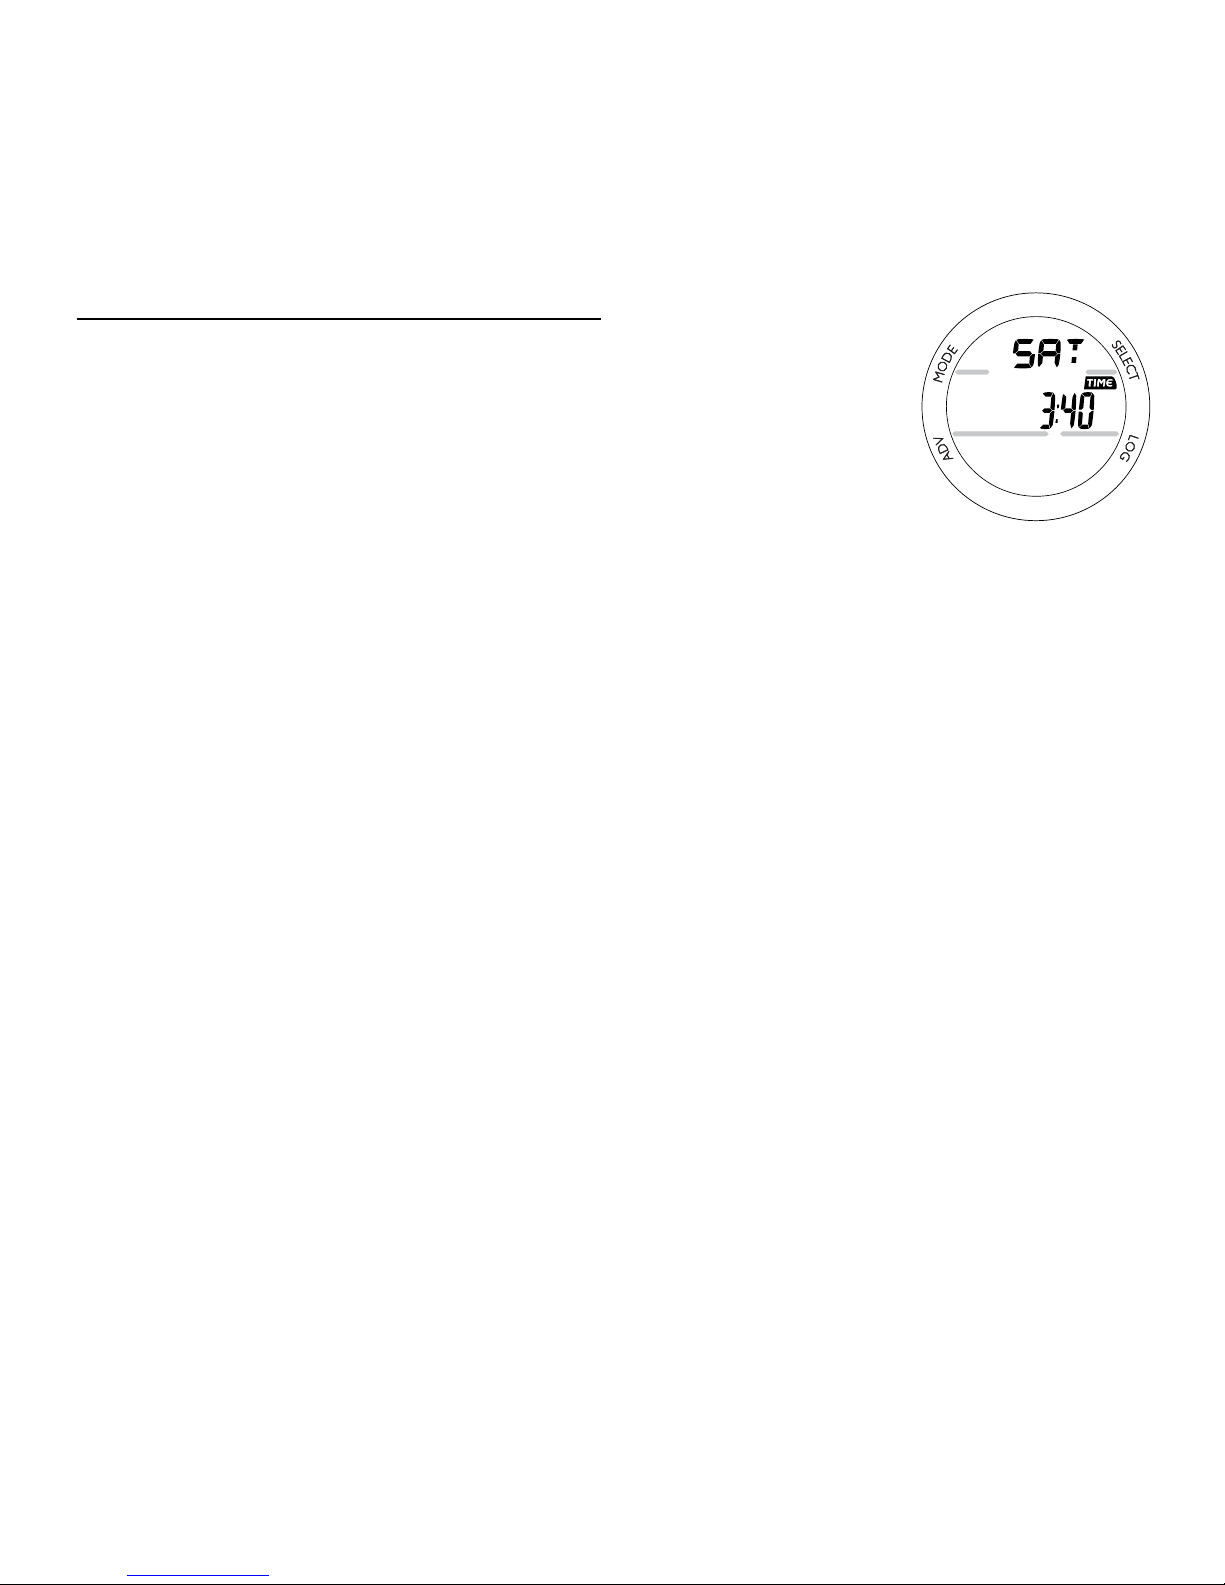
DESAT TIME, information includes (Fig. 58):
> Graphic SAT.
> Countdown Time (hr:min) with TIME icon.
> Battery icon, if a Low Battery Warning condition exists,
ashing if Too Low
• Pressing A (< 2 seconds) will revert to NORM SURF Main.
• If no button is pressed during a 2 minute period, operation
will revert to NORM SURF Main.
• Depressing L (2 seconds) will activate the Backlight.
NORM/GAUG LOG MODE
Log Mode records information from the latest 24 NORM/
GAUG dives and displays it sequentially in reverse order (the
most recent rst). Log information is retained until overwritten
by another dive. Battery removal will not aect the Log data
stored for viewing.
After exceeding 24 dives, the most recent Dive completed will
be added to the Log and the oldest deleted.
Dives are numbered 1 to 24 starting at #1 each time a new
series of dives begins. After it shuts O 24 hours after a dive,
the rst dive of the next new series will be #1.
Fig. 58 - DESAT TIME
Page 60
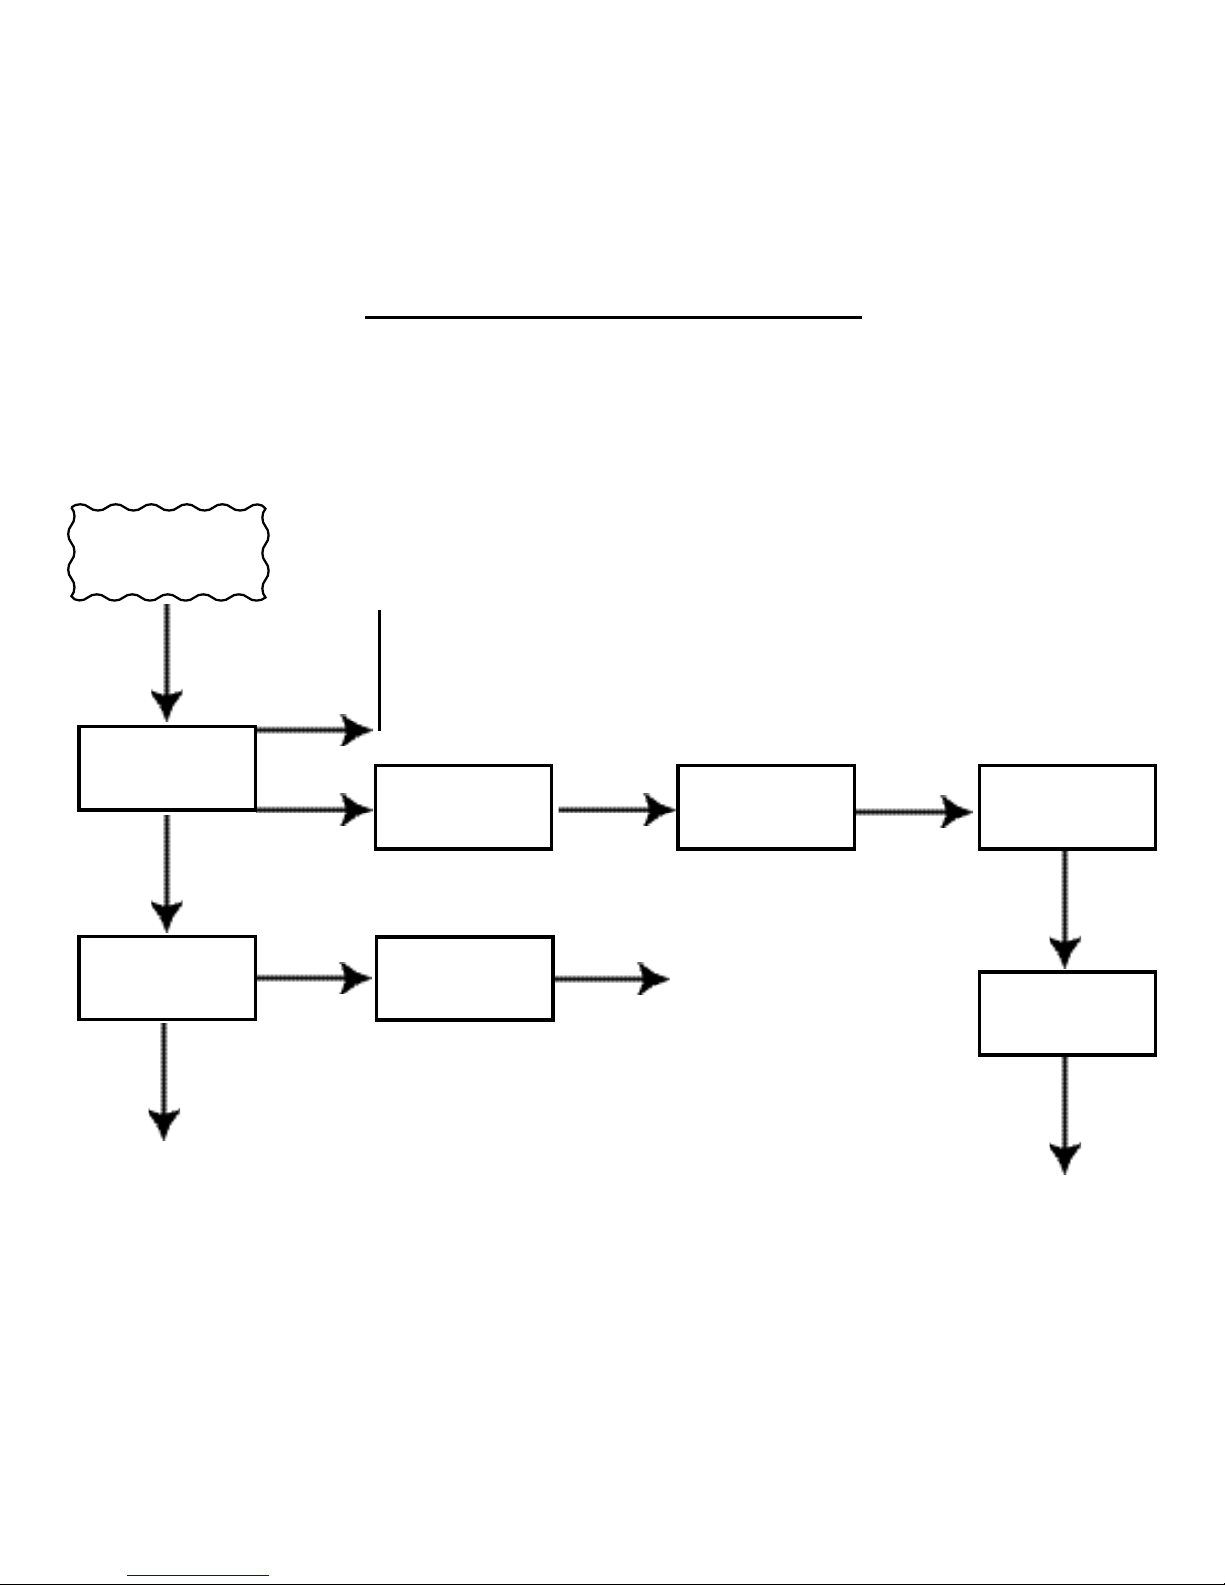
60
• Pressing L (< 2 seconds), at any time while on the surface,
will access Log Mode displaying the rst Preview screen.
• Pressing L (< 2 seconds), again, will access History Mode.
LOG
PREVIEW
HIST 1
A (< 2 sec) to step forward through Preview screens*.
A (hold) to scroll forward through Preview screens*.
M (< 2 sec) to step back through Preview screens*.
. . . *
Back to Watch or Surface Main after last Preview screen.
To previous dive’s
Log Preview, revert
to Main after last
Log 4 screen.
LOG 1
S
< 2 sec
S
< 2 sec
L
< 2 sec
Any time while
on Surface.
S
< 2 sec
L
< 2 sec
S
< 2 sec
S
< 2 sec
LOG 2 LOG 3
HIST 2
S
< 2 sec
S
< 2 sec
LOG 4
L
< 2 sec
revert to
Watch or
Surface Main
LOG & HISTORY SCREEN ACCESS
revert to Watch
or Surface Main
Page 61
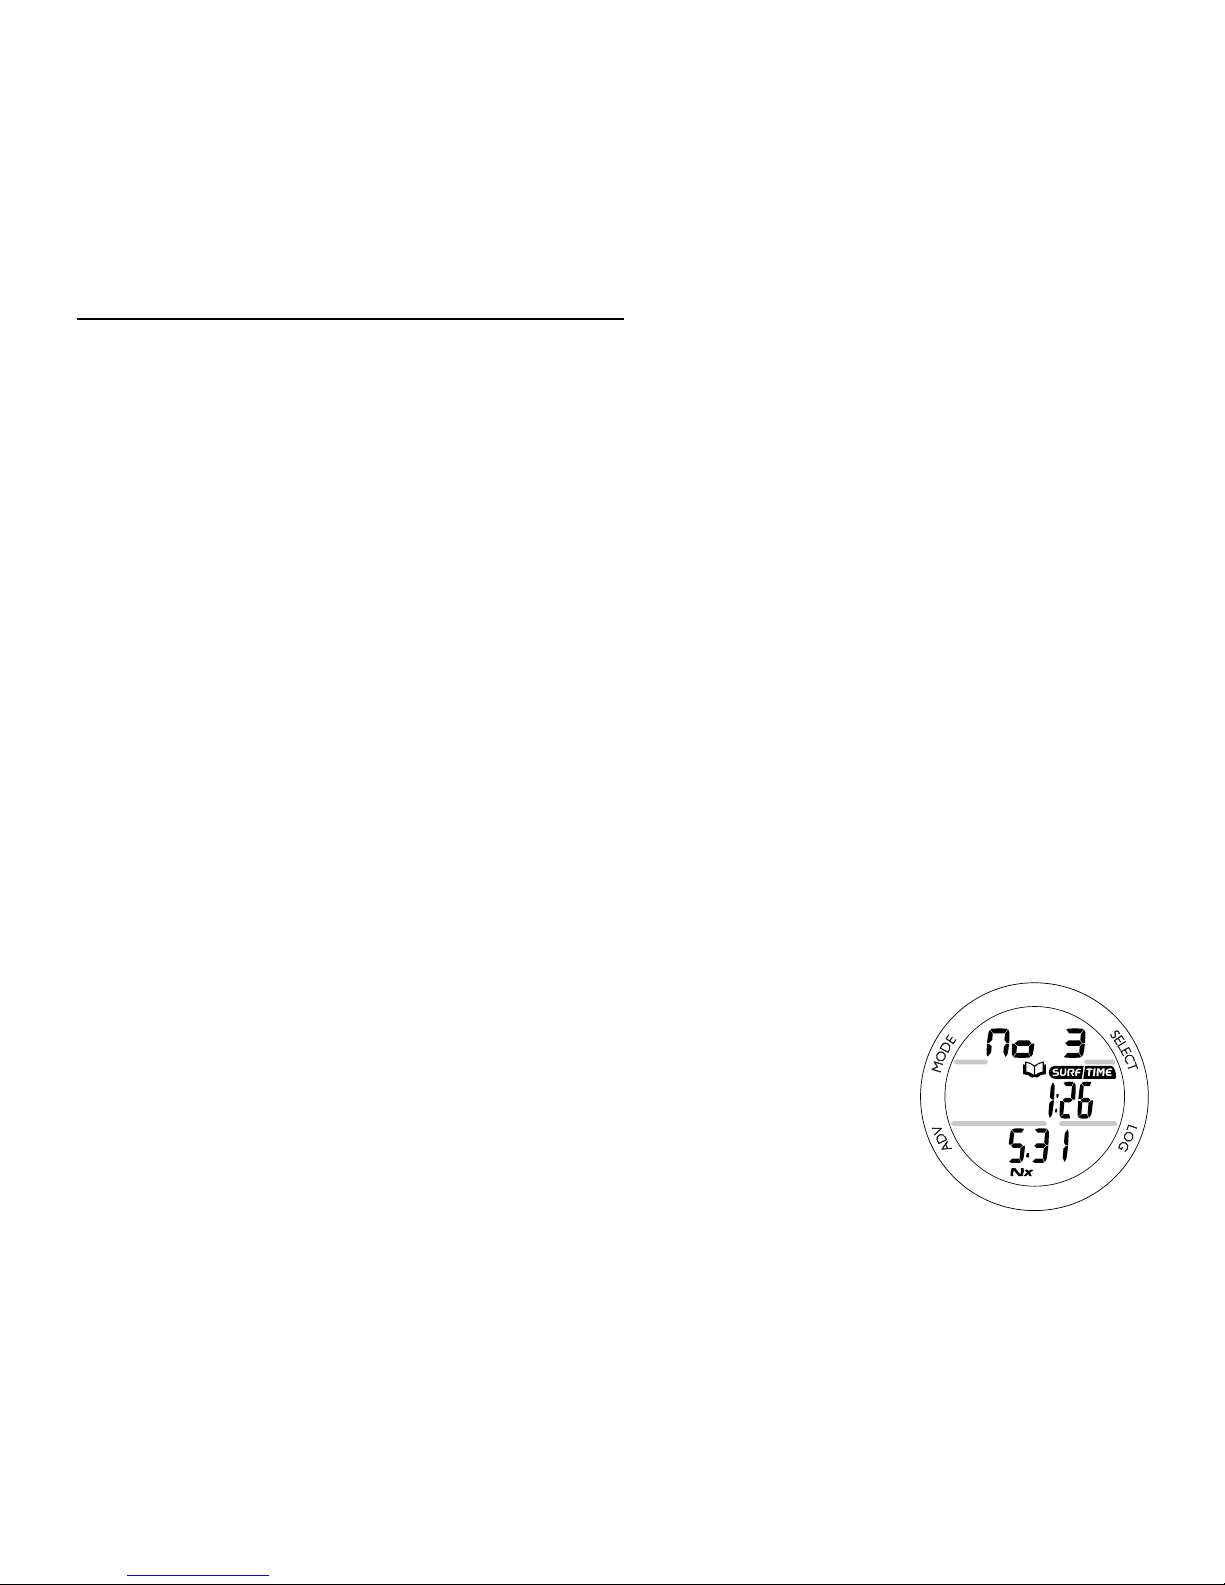
61
LOG PREVIEW, information includes (Fig. 59):
> Graphic No with the dive number (1 to 24) for that series.
> Log icon.
> Pre dive surface interval time (hr:min) with SURF and TIME
icons.
> Date the dive was started (month.day).
> Nx icon, if it was a NORM Nitrox dive.
• Pressing A repeatedly (< 2 seconds) will step through the
Preview screens, most recent to oldest recorded.
• Depressing A will scroll through the Preview screens at a
rate of 4 per second.
• Pressing M repeatedly (< 2 seconds) will step back through
the Preview screens one at a time.
• Pressing L (< 2 seconds), while viewing the rst Preview
screen, will advance to the History 1 screen.
• Pressing S (< 2 seconds), while viewing a Preview screen,
will display that dive’s Log Data 1 screen.
• Depressing M (2 seconds), or if no button is pressed for
a period of 2 minutes, operation will revert to SURF MAIN.
• Depressing L (2 seconds) will activate the Backlight.
Fig. 59 - LOG
PREVIEW
Page 62
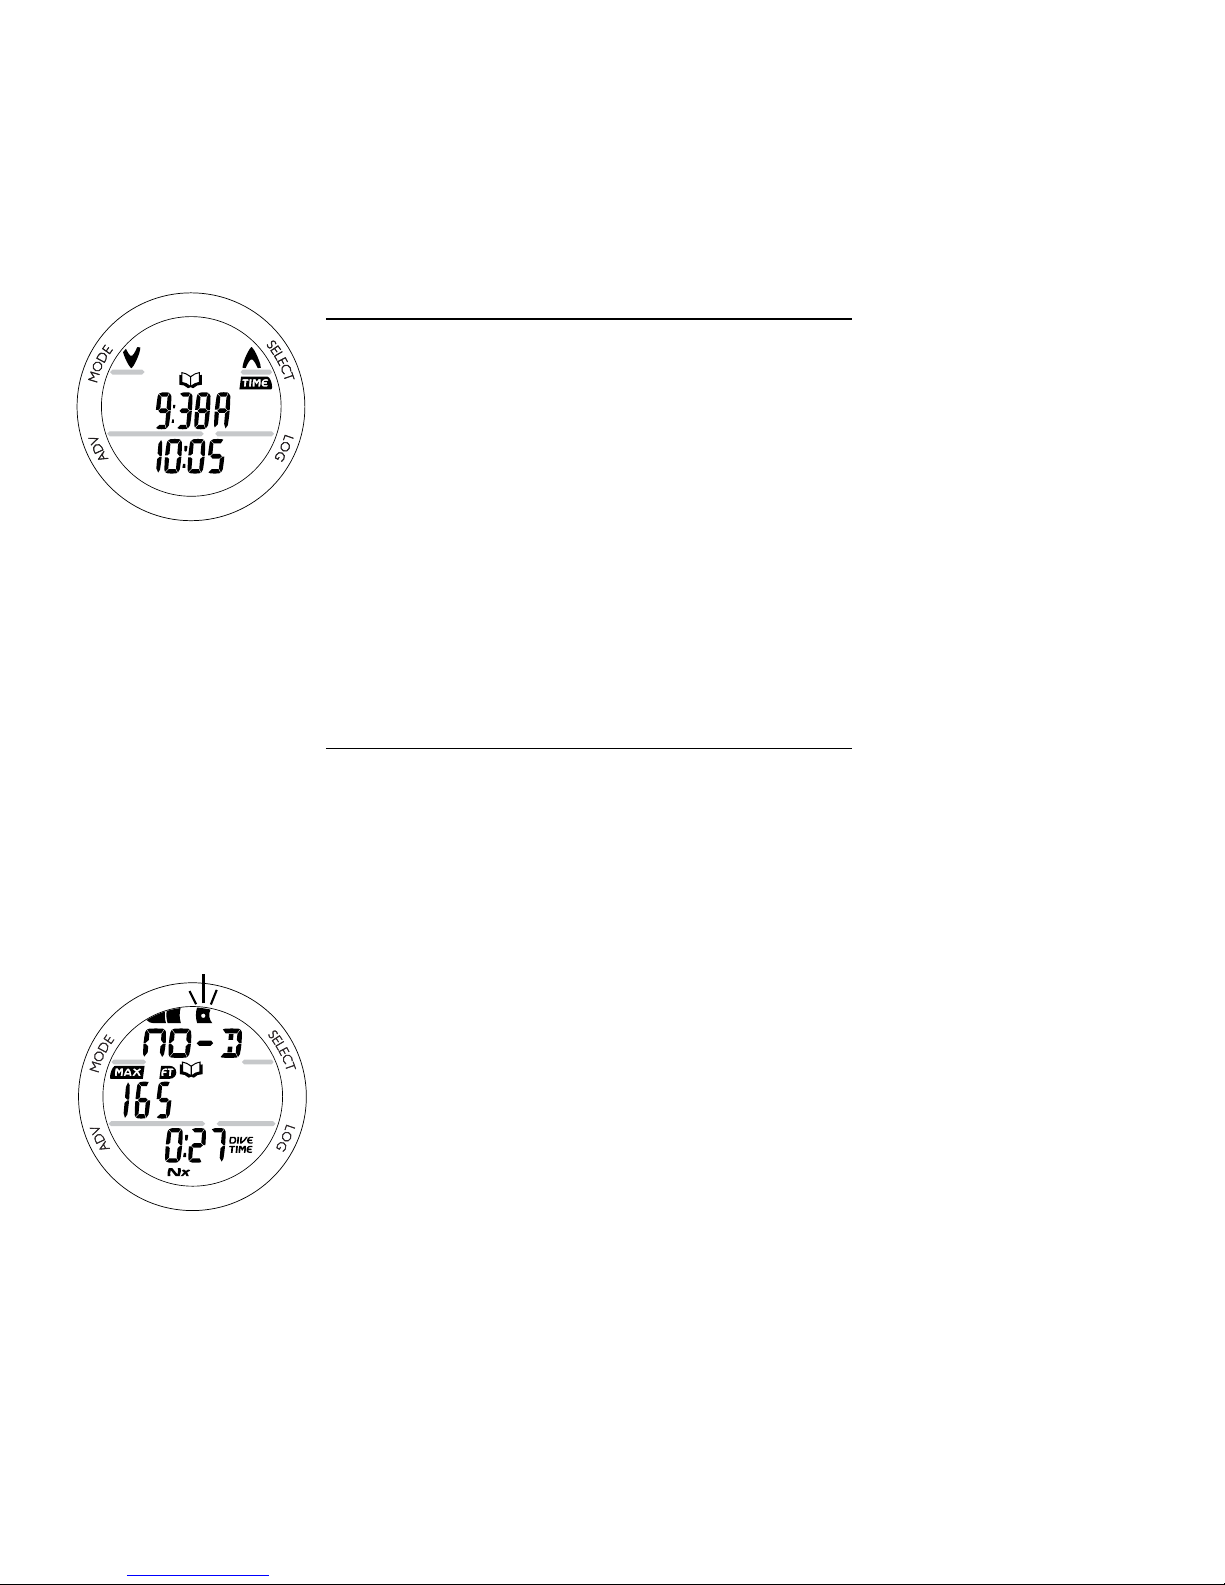
62
LOG DATA 1, information includes (Fig. 60):
> Down and Up arrow icons, indicating that the times
displayed represent the start and end of the dive.
> Log and TIME icons.
> Start time (hr:min) with graphic A (Am) or P (Pm).
> End time (hr:min).
• Pressing S (< 2 seconds) will access Log Data 2.
• Depressing M (2 seconds), or if no button is pressed for a
period of 2 minutes, operation will revert to SURF MAIN.
• Depressing L (2 seconds) will activate the Backlight.
LOG DATA 2, information includes (Fig. 61):
> NIBG with the maximum accumulation segment ashing,
others xed up to end of dive accumulation. All segments
ashing if a Violation occurred.
> Graphic NO-D, DECO, GAUG, or VIOL indicating the
type of dive when completed.
> Log icon.
> Maximum Depth achieved with MAX and FT (or M) icons.
> Elapsed Dive Time (hr:min) with DIVE and TIME icons.
> Nx icon, if a Nitrox dive.
• Pressing S (< 2 seconds) will access Log Data 3.
• Depressing M (2 seconds), or if no button is pressed for a
period of 2 minutes, operation will revert to SURF MAIN.
• Depressing L (2 seconds) will activate the Backlight.
Fig. 60 - LOG DATA 1
Fig. 61 - LOG DATA 2
Page 63
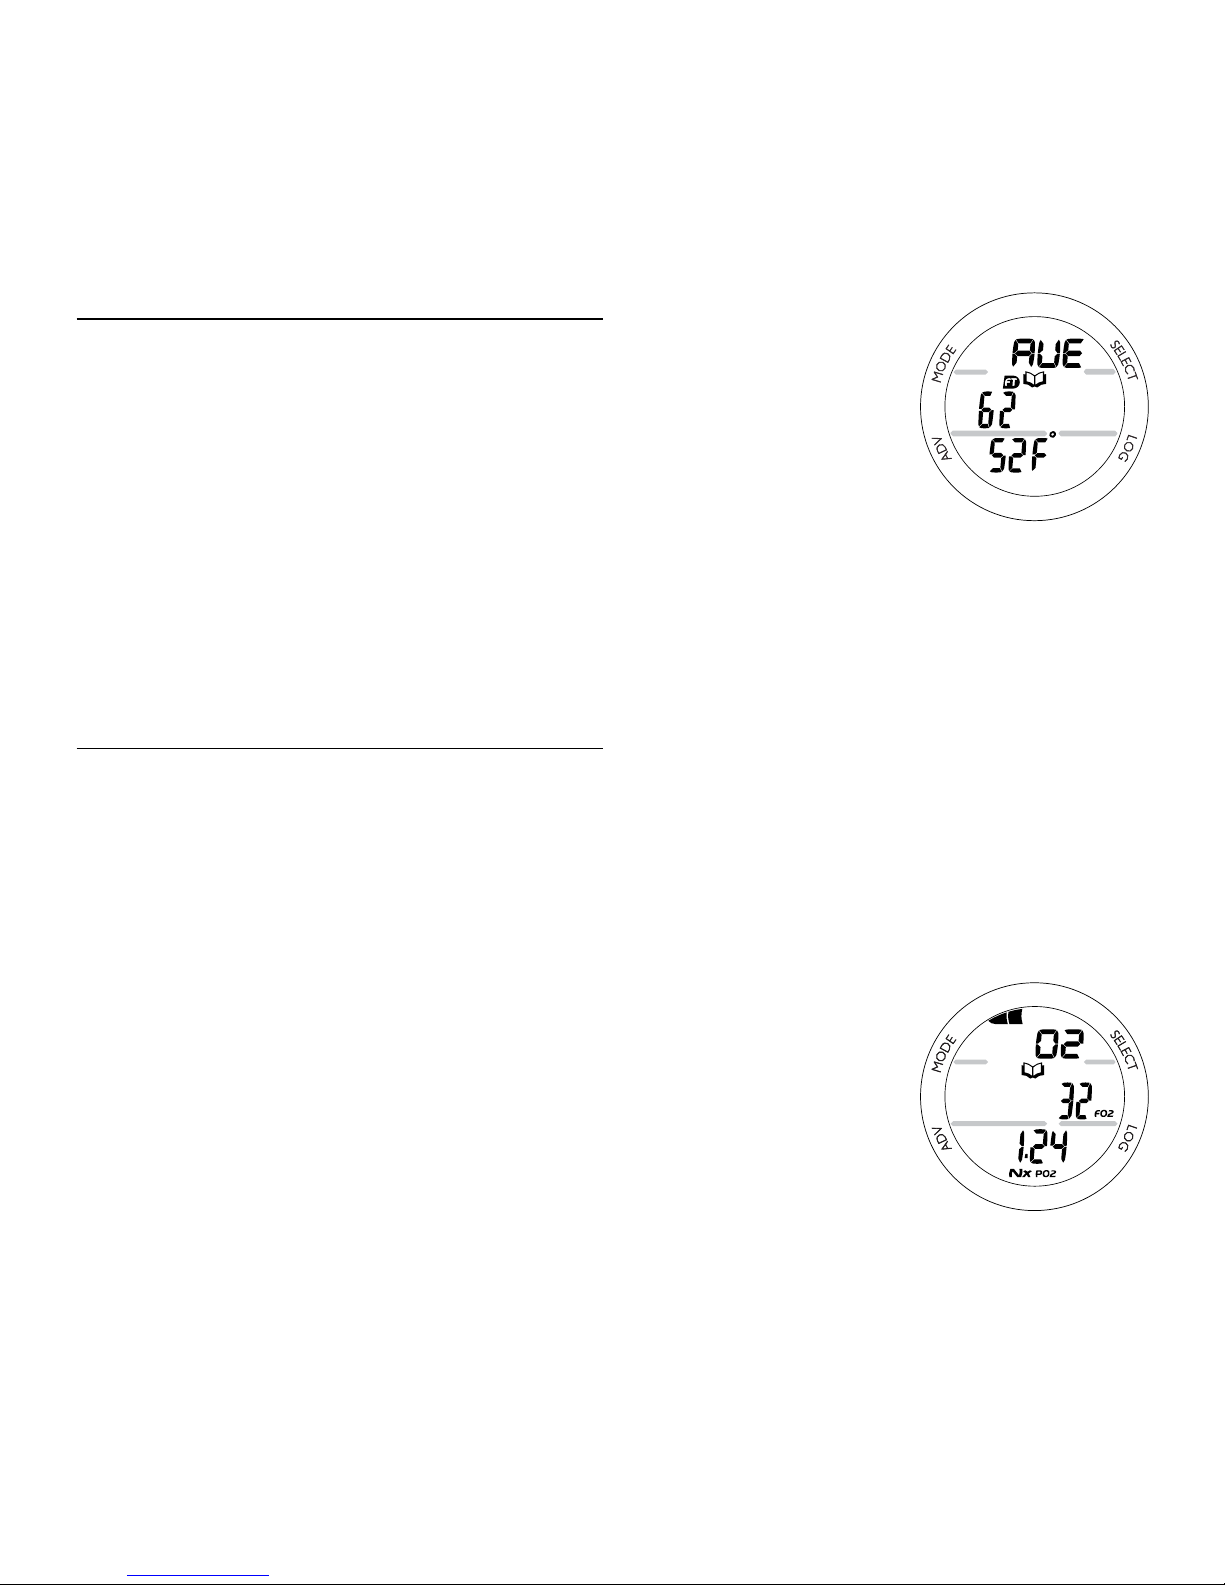
63
LOG DATA 3, information includes (Fig. 62):
> Graphic AVE (average).
> Log icon.
> Average Depth of the dive with FT (or M) icon.
> Average Temperature of the dive with degrees icon and
Graphic F (or C).
• Pressing S (< 2 seconds) will access Log Data 4.
• Depressing M (2 seconds), or if no button is pressed for
a period of 2 minutes, operation will revert to SURF MAIN.
• Depressing L (2 seconds) will activate the Backlight.
LOG DATA 4, information includes (Fig. 63):
This screen will only be displayed for NORM Nitrox dives, and
bypassed for AIR, GAUG, and Violation dives.
> O2BG, segments representing oxygen accumulated at the
end of the dive with graphic O2.
> Log icon.
> FO2 (%) set for that dive with FO2 icon.
> Max PO2 achieved (x.xx ATA) with PO2 icon.
> Nx icon.
• Pressing S (< 2 seconds) will access to the previous dive's
Log Preview screen, or revert to the Main after the last one.
• Depressing M (2 seconds), or if no button is pressed for
a period of 2 minutes, operation will revert to SURF MAIN.
• Depressing L (2 seconds) will activate the Backlight.
Fig. 62 - LOG DATA 3
Fig. 63 - LOG DATA 4
Page 64
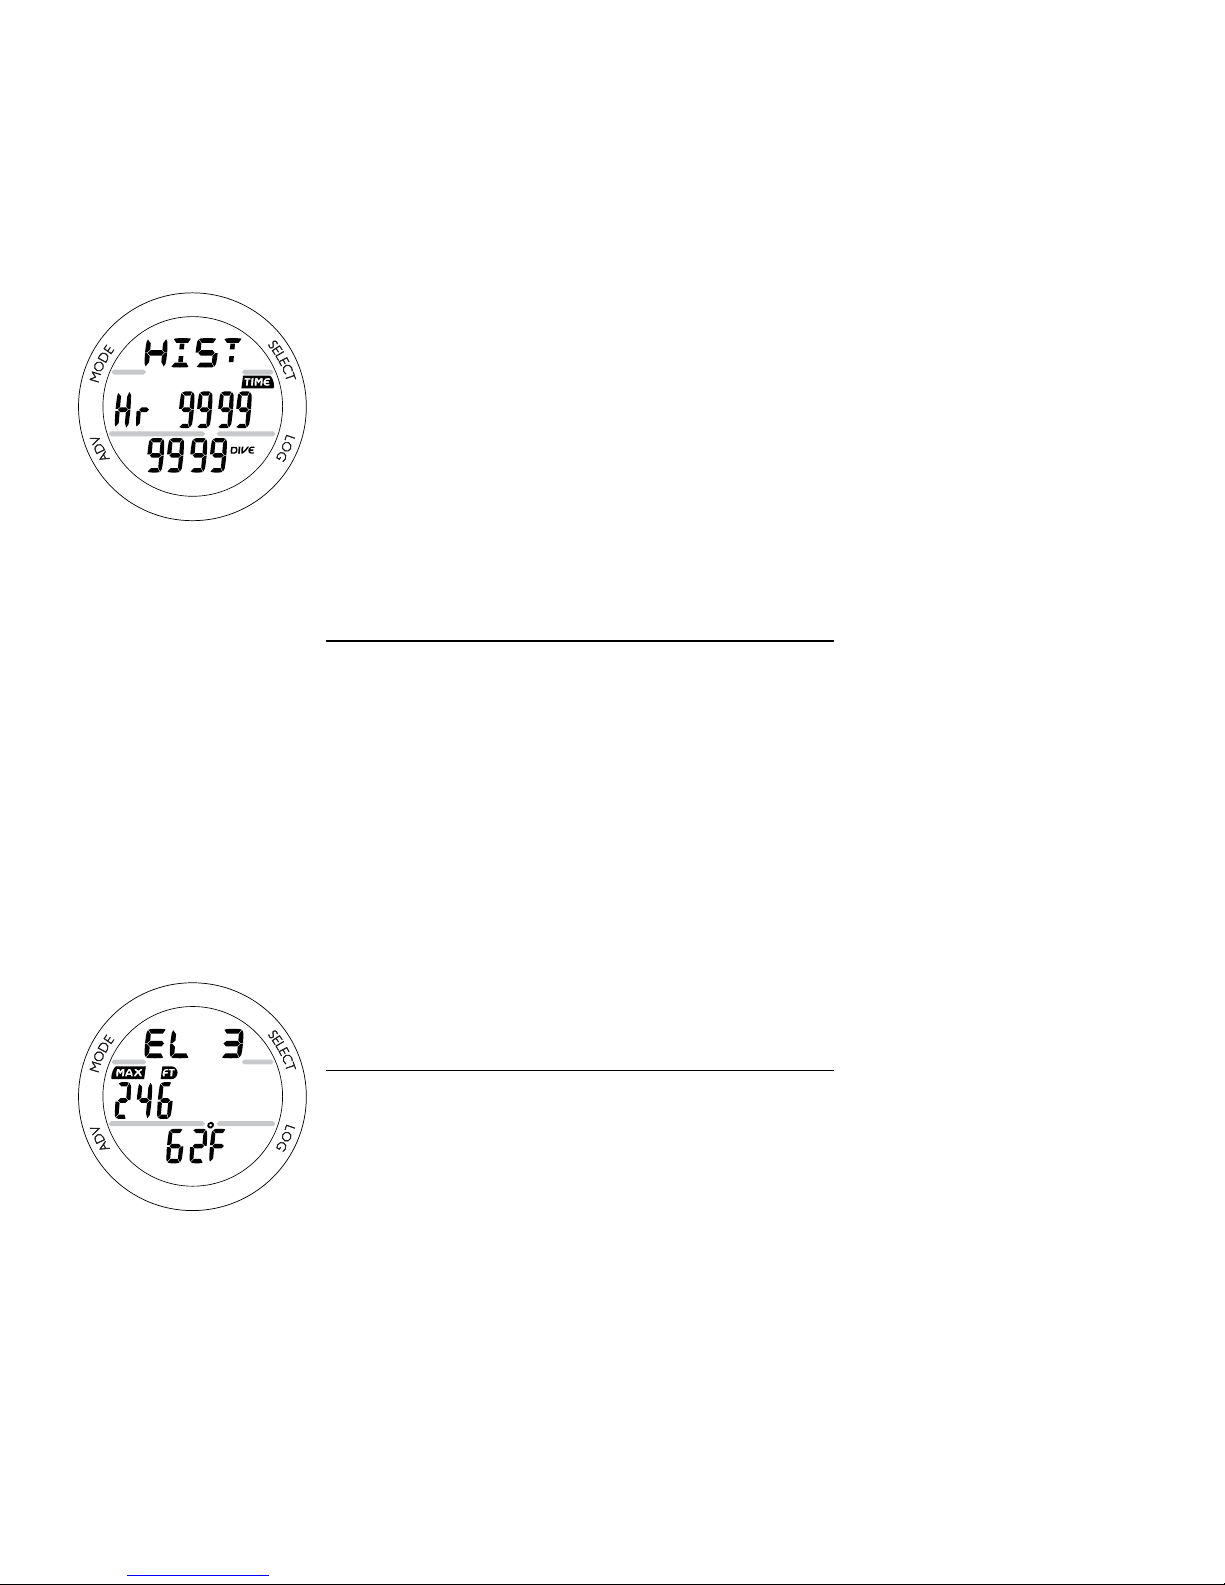
64
NORM/GAUG HISTORY MODE
HISTORY Mode displays accumulative information for up
to 9999 Dives, 9999 Dive Hours, and the Maximum Depth
achieved. HISTORY information is retained indenitely.
Battery removal will not aect the HISTORY data stored for
viewing.
• Refer to page 60 for access.
HISTORY 1, information includes (Fig. 64):
> Graphic HIST.
> Total Hours of Elapsed Dive Time (up to 9999) with TIME
icon and graphic Hr.
> Total number of dives recorded (up to 9999) with DIVE
icon. Includes No Deco, Deco, GAUG, and VIOL dives.
• Pressing S (< 2 seconds) will access History 2.
• Depressing M (2 seconds), or if no button is pressed for
a period of 2 minutes, operation will revert to SURF MAIN.
• Depressing L (2 seconds) will activate the Backlight.
HISTORY 2, information includes (Fig. 65):
> Graphic SEA (or EL 2 through EL 13), representing the
maximum Altitude at which a dive was conducted.
> Maximum Depth achieved during all dives with MAX and
FT (or M) icons.
> Temperature (lowest recorded of all dives) with degrees
icon and graphic F (or C).
Fig. 64 - HISTORY 1
Fig. 65 - HISTORY 2
Page 65

65
• Pressing S (< 2 seconds), or if no button is pressed for
a period of 2 minutes, operation will revert to SURF MAIN.
• Depressing L (2 seconds) will activate the Backlight.
Page 66
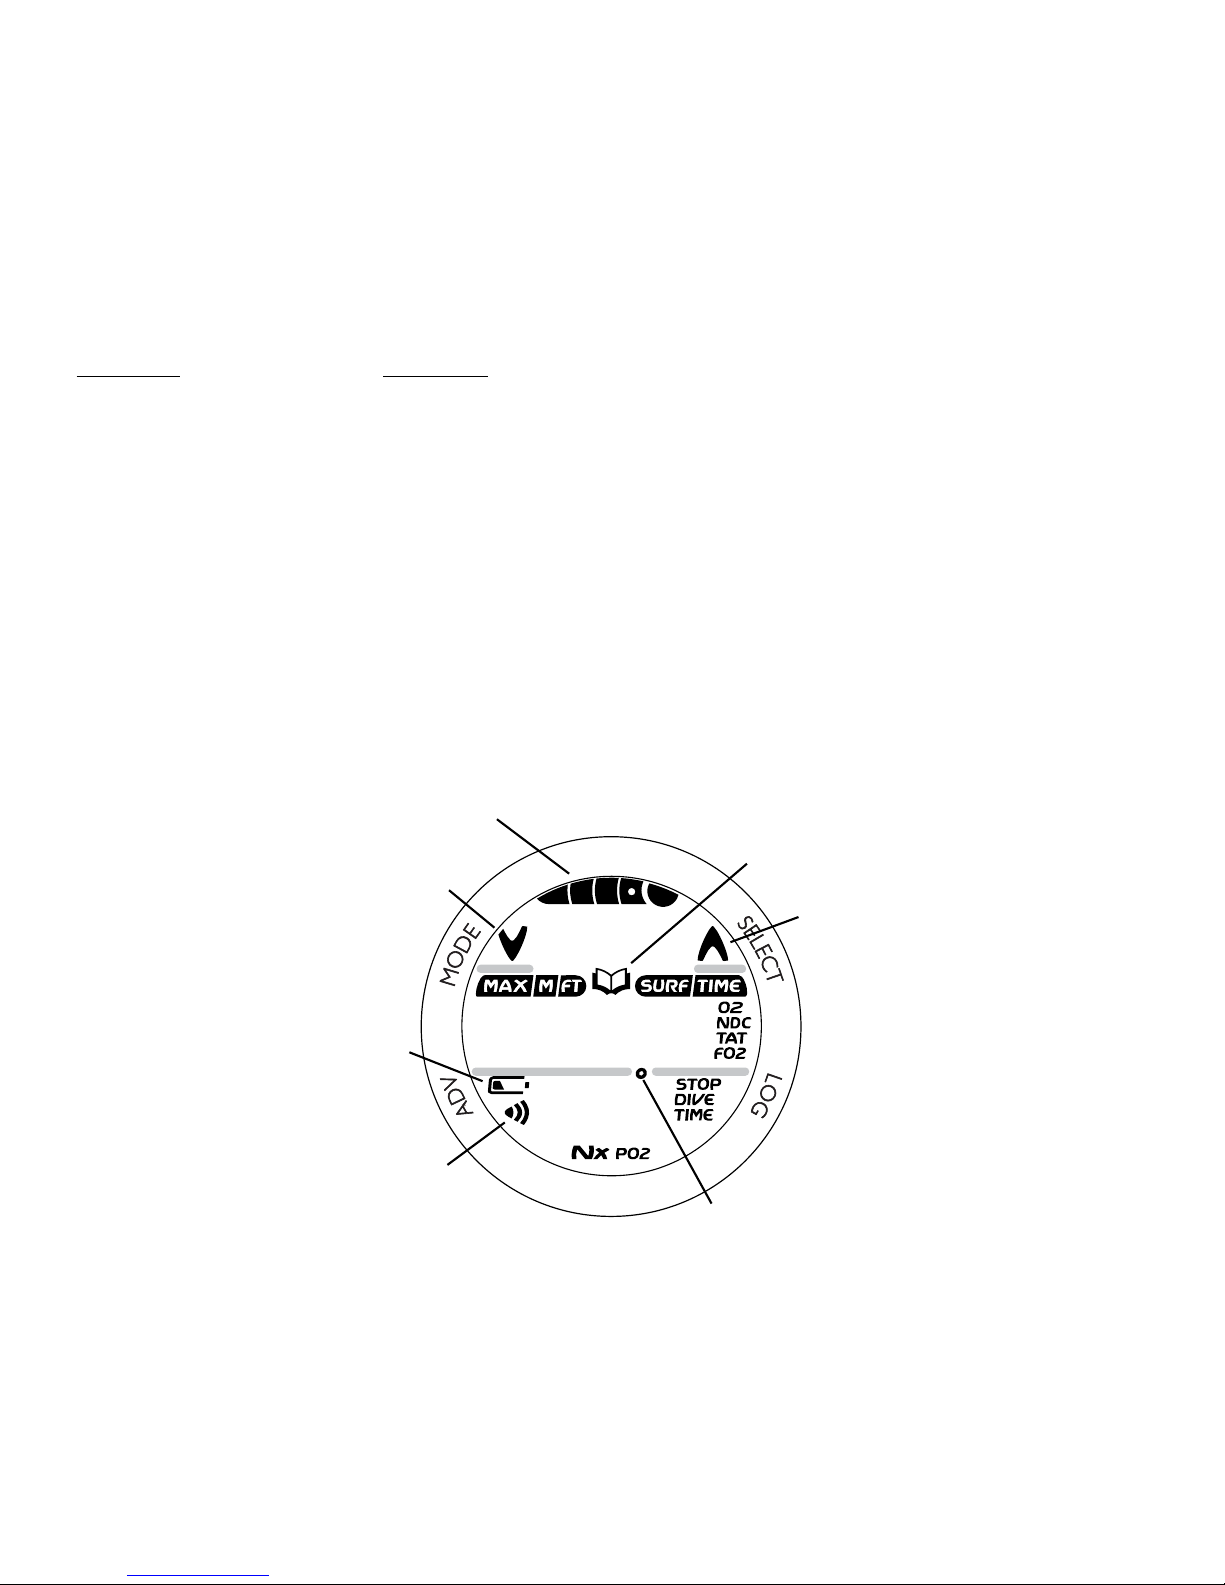
66
DISPLAYED SYMBOLS AND ICONS
SYMBOLS MEANING
MAX Maximum Depth (or PO2)
FT (or M) Depth Units (Feet or Meters)
SURF TIME Surface Interval Time, NORM/GAUG (hr:min) or FREE (hr:min:sec)
TIME O2 O2 Dive Time Remaining (hr:min)
TIME NDC No Decompression Dive Time Remaining (hr:min)
TIME TAT Total Ascent Time Deco Stops plus vertical ascent Times (hr:min)
FO2 FO2 Set Point
STOP TIME Deco Stop Time (hr:min) or safety Stop Time (min:sec)
DIVE TIME Elapsed Dive Time, NORM/GAUG (hr:min) or FREE (min:sec)
Nx FO2 is set at a numerical value (21 to 50%)
Daily Alarm set
Battery Low
Ascend
Degrees
(F or C)
Descend
NIBG (or O2BG)
Log Mode
Page 67

67
OVERVIEW OF DIVE MODE
INFORMATION
Page 68

68
DIVE TIME REMAINING DTR
One of the most important pieces of information on Bism dive computers is the
Dive Time Remaining numeric display.
The Grande constantly monitors decompression status and oxygen accumulation.
The Dive Time Remaining display will indicate the No Deco Time or O2 Time,
whichever Time is the least amount available.
No Decompression Dive Time Remaining (NDC)
NDC is the maximum amount of time that you can stay at your present Depth
before entering a Decompression situation. It is calculated based on the amount
of nitrogen absorbed by hypothetical tissue compartments. The rates each of
these compartments absorb and release nitrogen is mathematically modeled and
compared against a maximum allowable nitrogen level. Whichever one is closest
to this maximum level is the controlling compartment for that depth. Its resulting
value will be displayed numerically along with the TIME and NDC icons (Fig. 66a)
and graphically as the NIBG (Fig. 66b).
As you ascend from depth following a dive that has
approached the No Decompression limit, the NIBG segments
will recede as control shifts to slower compartments.
This is a feature of the decompression model that is the basis
for multilevel diving, one of the most important features that
Bism dive computers oer.
b
a
Fig. 66 - NO DECO
DIVE TIME
REMAINING
Page 69
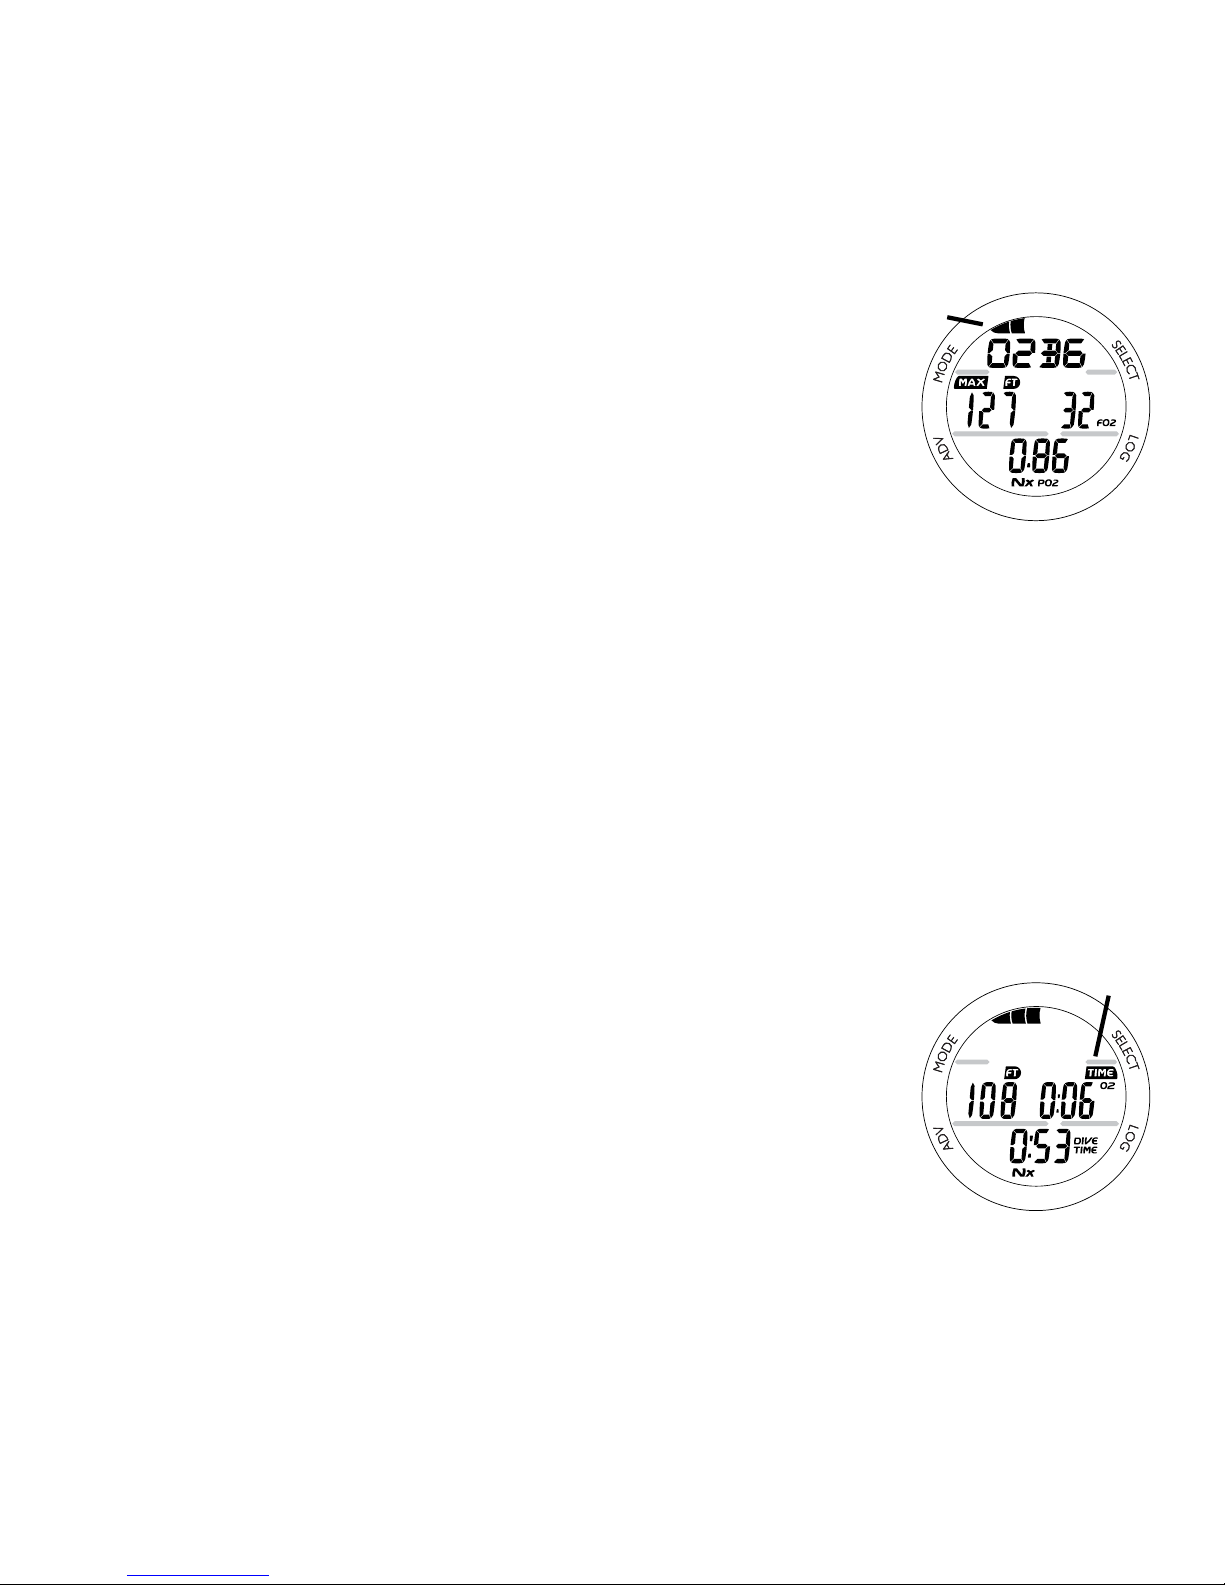
69
The algorithm used is based upon Haldane’s theory using maximum allowable nitrogen levels developed by Merrill Spencer.
Repetitive diving control is based upon experiments designed
and conducted by Dr. Ray Rogers and Dr. Michael Powell in
1987. Diving Science and Technology® (DSAT), a corporate
aliate of PADI®, commissioned these experiments.
Oxygen Accumulation Time Remaining (OTR)
When FO2 is set for Nitrox, oxygen accumulation (saturation
or exposure) during a dive, or 24 hour period, appears graphically as the O2BG (Fig. 67a) when the Alternate (O2) screen
is accessed.
As time remaining before reaching the oxygen exposure Limit
decreases, segments are added to the O2BG.
When the amount of time remaining before reaching the O2
limit becomes less than NDC (No Deco Dive Time Remaining),
calculations for that depth will be controlled by O2. O2 Time
Remaining will then appear as Dive Time Remaining (Fig. 68a)
identied by the TIME and O2 icons.
As oxygen accumulation continues to increase, segments will
add to the O2BG.
Fig. 67 - O2BG
Fig. 68 - O2 DIVE TIME
REMAINING
a
a
Page 70
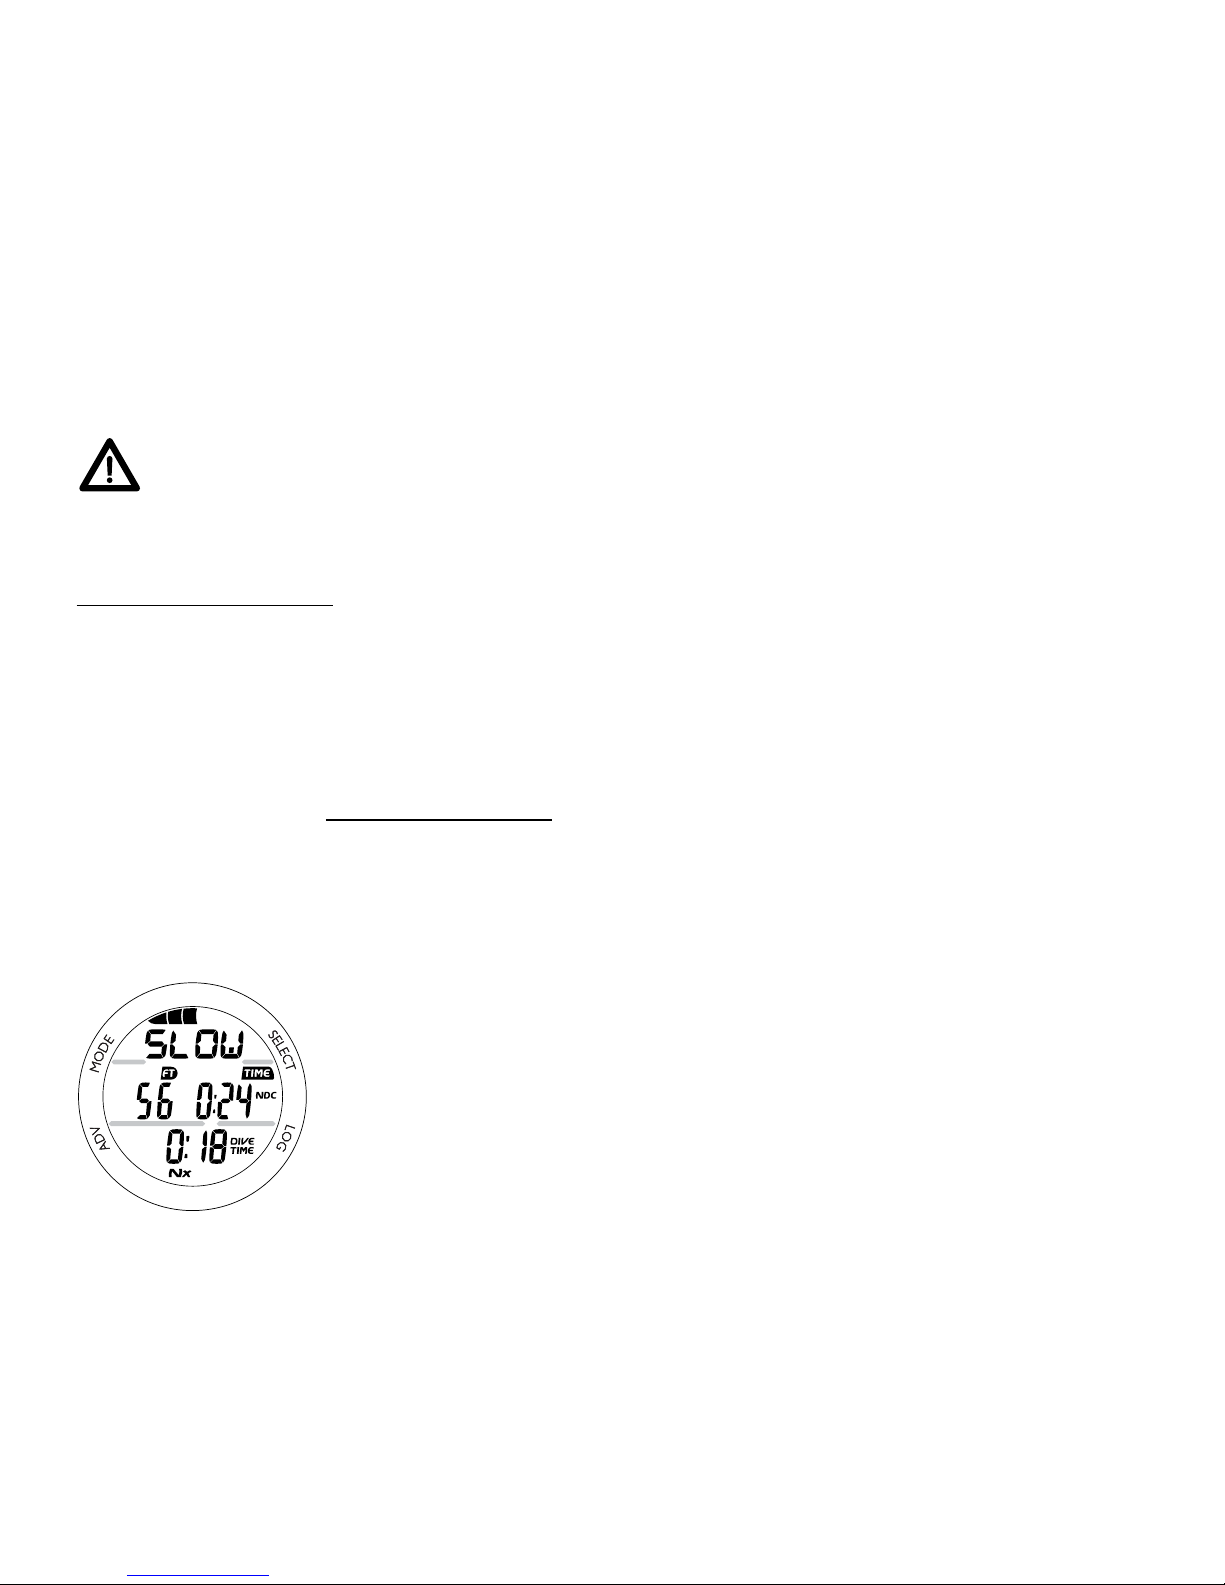
70
VARIABLE ASCENT RATE
Alerts associated with Ascent Rate are based upon 2 sets of speeds which change
at a reference depth of 60 FT (18 M).
WARNING: At depths greater than 60 FT (18 M), Ascent Rates
should not exceed 60 FPM (18 MPM). At depths of 60 FT (18
M) and shallower, rates should not exceed 30 FPM (9 MPM).
Ascent Rate Warning
At depths deeper than 60 FT (18 M), a warning (Fig. 69) will be given when
Ascent Rates exceed 50 FPM (15 MPM). The message SLOW > SLOW will scroll
until the Ascent is slowed. At 60 FT (18 M) and shallower, the warning will be
given when Ascent Rates exceed 25 FPM (7.5 MPM).
Ascent Rate Alarm
At depths deeper than 60 FT (18 M), an alarm will sound when
Ascent Rates exceed 60 FPM (20 MPM).
At 60 FT (18 M) and shallower, the alarm will sound when
Ascent Rates exceed 30 FPM (10 MPM).
The Audible will sound, the LED will ash, and the message
SLOW > SLOW will scroll on/o at the top of the screen. The
Audible and LED will stop when acknowledged with the S
button or when the Ascent is slowed. After acknowledged, the
message SLOW > SLOW will continue to scroll until the Ascent
is slowed below the alarm rate.
Fig. 69 - ASCENT
WARNING/ALARM
Page 71

71
ELAPSED DIVE TIME
The maximum duration that Elapsed Dive Time will be displayed is 9 hours and 59
minutes (9:59). In the event that the Grande is at depth for a greater time, it will
cease operation as a Dive Computer and revert to operation as a Watch, displaying the Main Time screen.
CONTROL OF DISPLAYS
During dive modes, there is a Main (default) display of important information
relevant to the specic mode that the Grande is operating in (No Deco, Deco,
GAUG, FREE, etc.).
• Pressing A (< 2 seconds) will access Alternate and Secondary displays.
• Depressing A (2 seconds) will access Deep Stop Preview (if triggered).
• Pressing S (< 2 seconds) will acknowledge/silence Alarms.
• Depressing L (2 seconds) will activate the Backlight.
> The display will be illuminated while L is depressed,
then after it is released for the Backlight Duration time
set (0, 5, or 10 seconds) for a maximum of 20 seconds.
> The Backlight will not activate during a Low Battery
condition.
A
S
L
M
Page 72
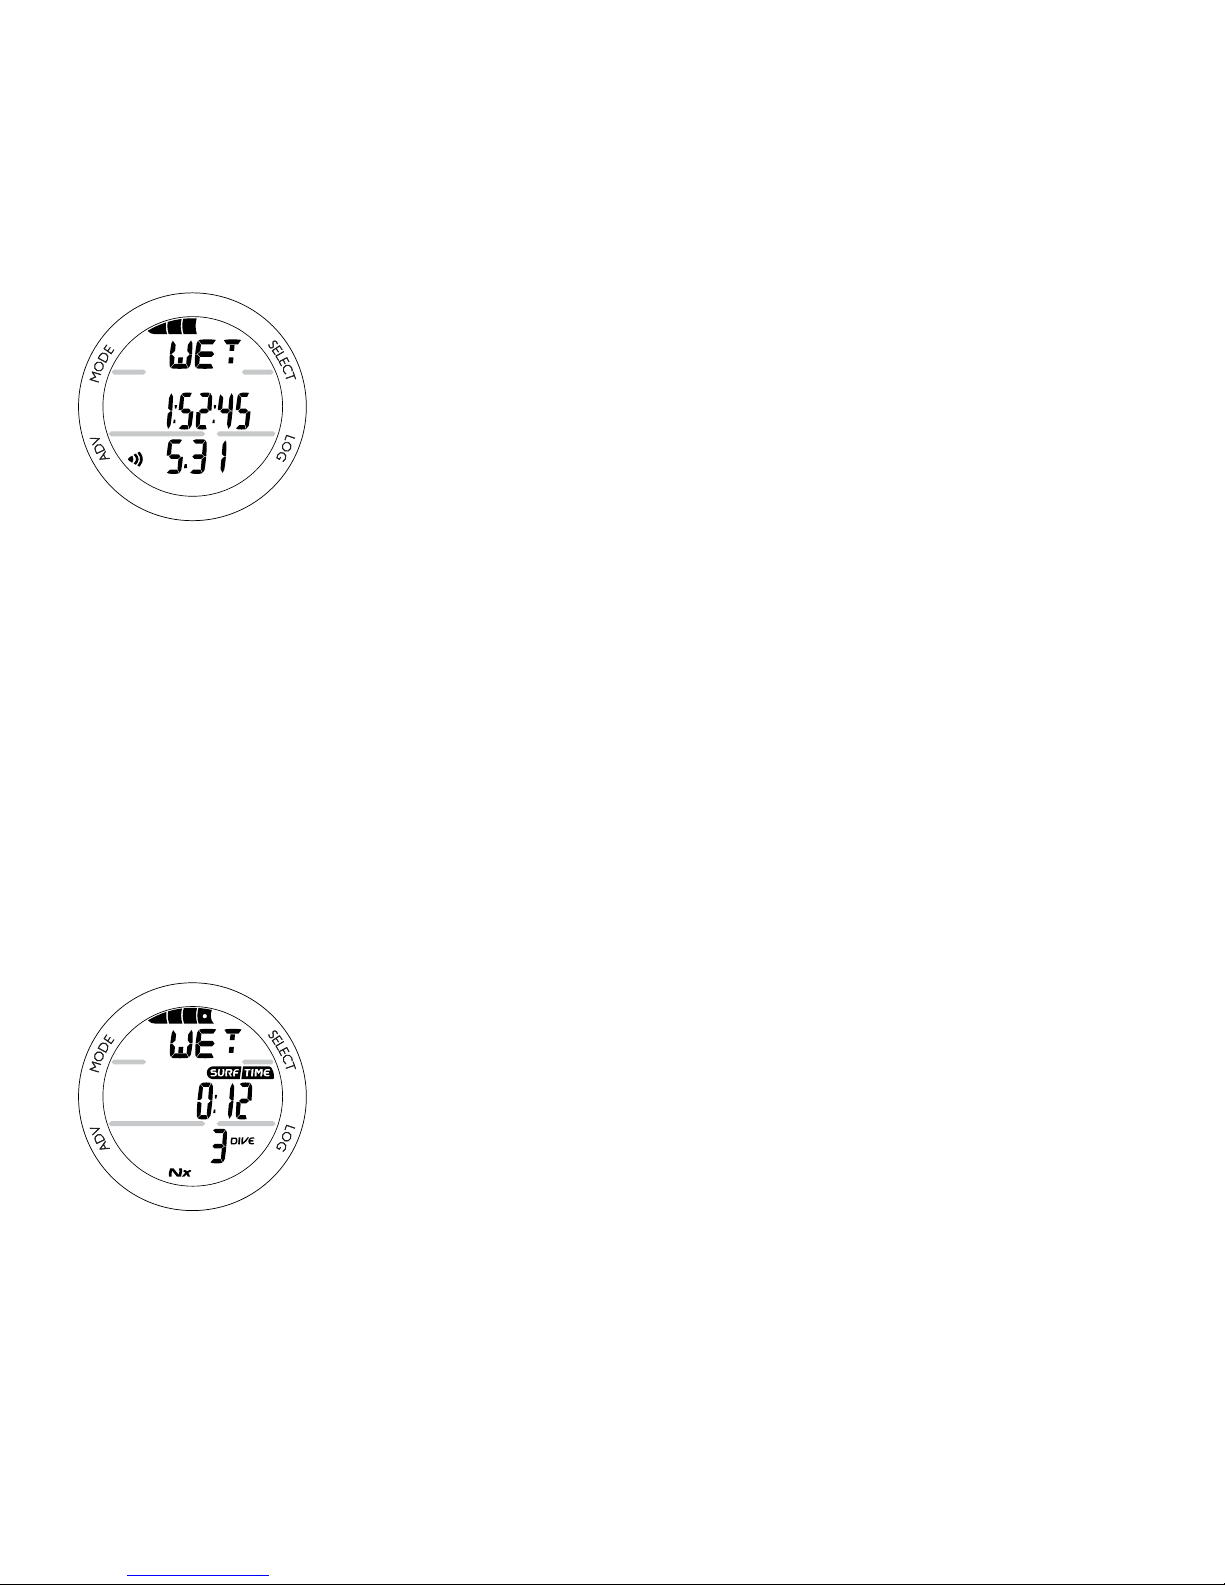
72
WET ACTIVATION CONTACTS
The Dive mode Wet Activation feature is active any time Wet
Activation is set On.
The Grande is congured with contacts that will automatically
activate Dive mode when the space between the contacts is
bridged by a conductive material (immersed in water) and it
senses a depth of 5 FT (1.5 M) for 5 seconds.
The contacts are the pins of the PC Interface Data Port and the
stems of the push buttons.
As long as the contacts are bridged on the surface, the graphic
WET will alternate with the Day of Week graphic (MON, etc.)
on the Watch Time screens (Fig. 70), and the graphics NORM
and SEA (or EL2 to EL13) on the NORM, GAUG, and FREE
Surface Main screens (Fig. 71).
Upon removing the bridge between the contacts (drying the
Grande), the graphic WET will no longer be displayed.
The Grande will continue checking for depth, until a dive is
made or it reverts to the Watch Time screen after 2 hours.
Fig. 70 - WATCH
MAIN TIME
Fig. 71 - NORM SURF
MAIN
Page 73

73
NORM TYPE DIVE MODES
Page 74
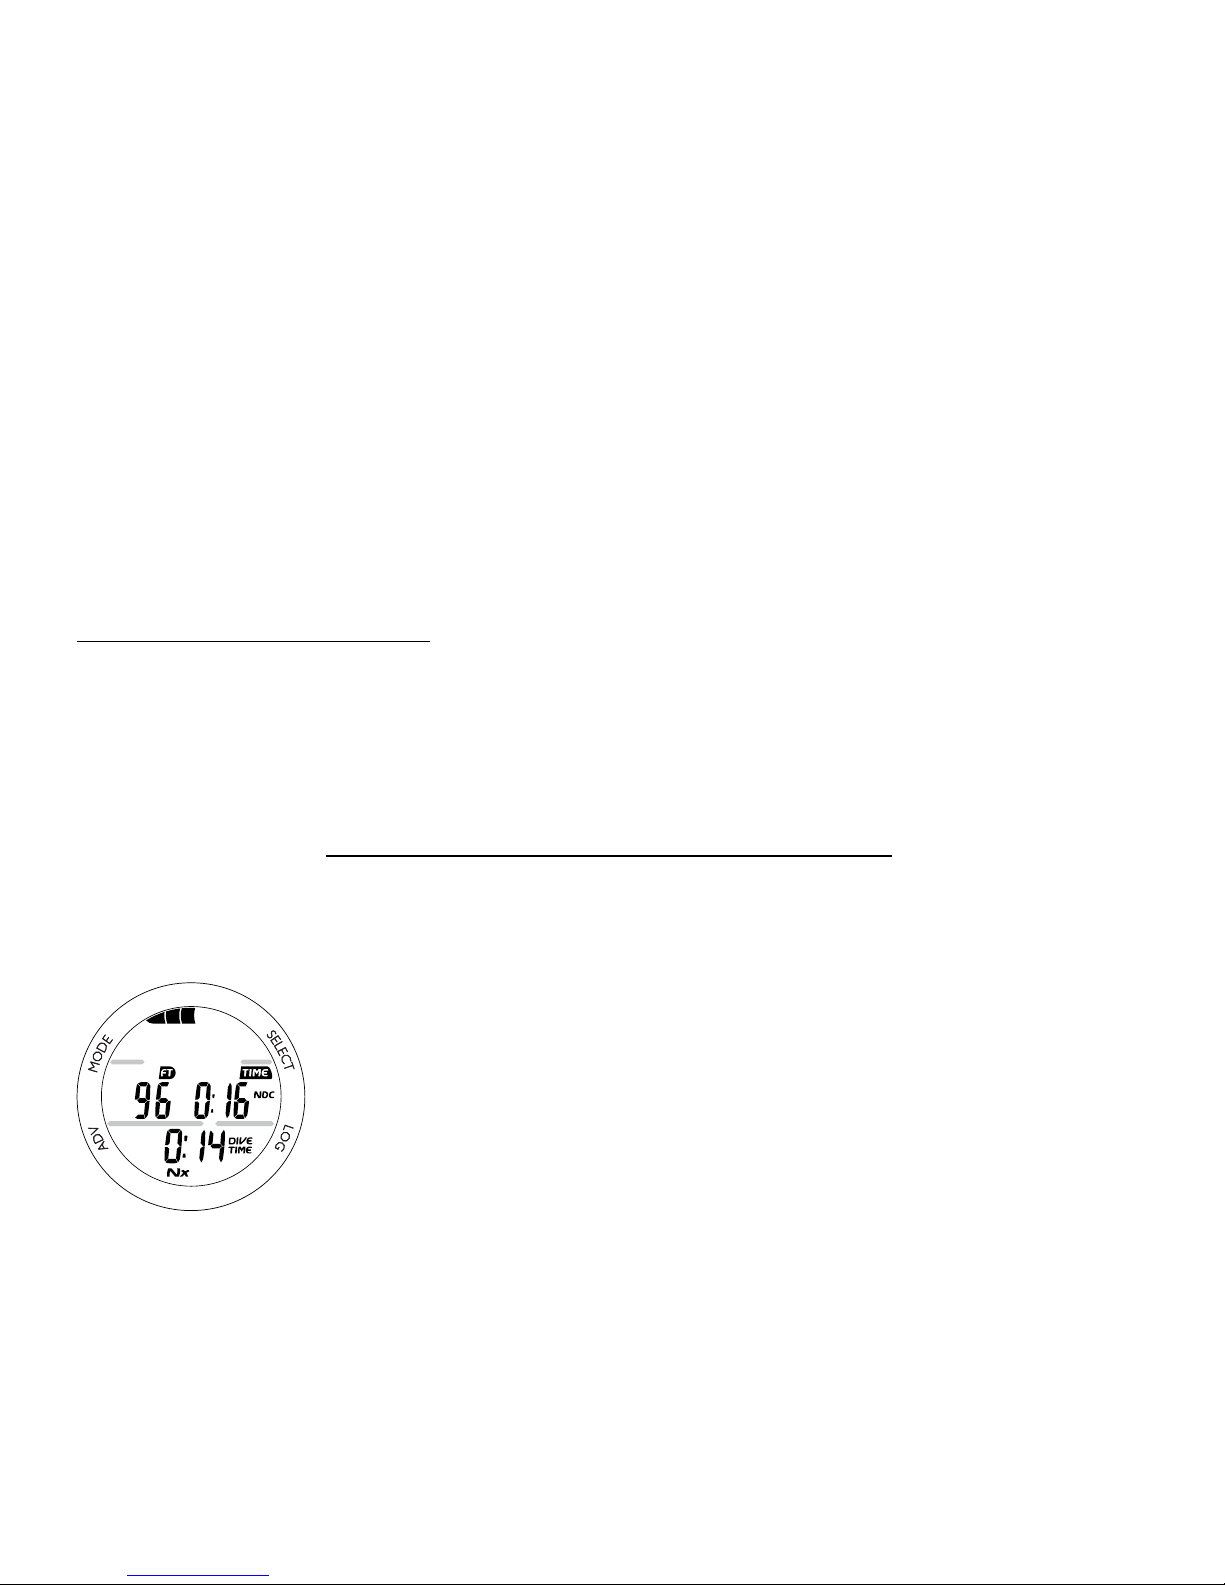
74
NORM NO DECOMPRESSION DIVE MODE
When the Wet Activation feature is set ON, the Grande will enter the NORM
No Decompression Dive Mode any time a descent is made to 5 FT (1.5 M) for 5
seconds.
When the Wet Activation feature is set OFF, the Grande will not enter Dive Mode
upon descent unless it is operating in one of the NORM Dive Computer modes
(menus) at that time. Modes such as Surface Mode, Plan, Fly, etc.
At any time during the dive -
• Depress L (2 seconds) to activate the Backlight.
• Press S (< 2 seconds) to acknowledge/silence Alarms.
NO DECO MAIN, information includes (Fig. 72) -
> NIBG, loaded segments representing Nitrogen loading.
> Current Depth with FT (or M) icon.
> Dive Time Remaining (hr:min) with TIME and NDC (or O2)
icons.
> Elapsed Dive Time (hr:min) with DIVE and TIME icons.
> Nx icon, if FO2 is set for Nitrox.
• Press A (< 2 sec) to view the Alternate (ALT) display.
• Depress A (2 seconds) to view the Deep Stop Preview.
Fig. 72 - NORM NO
DECO MAIN
Page 75
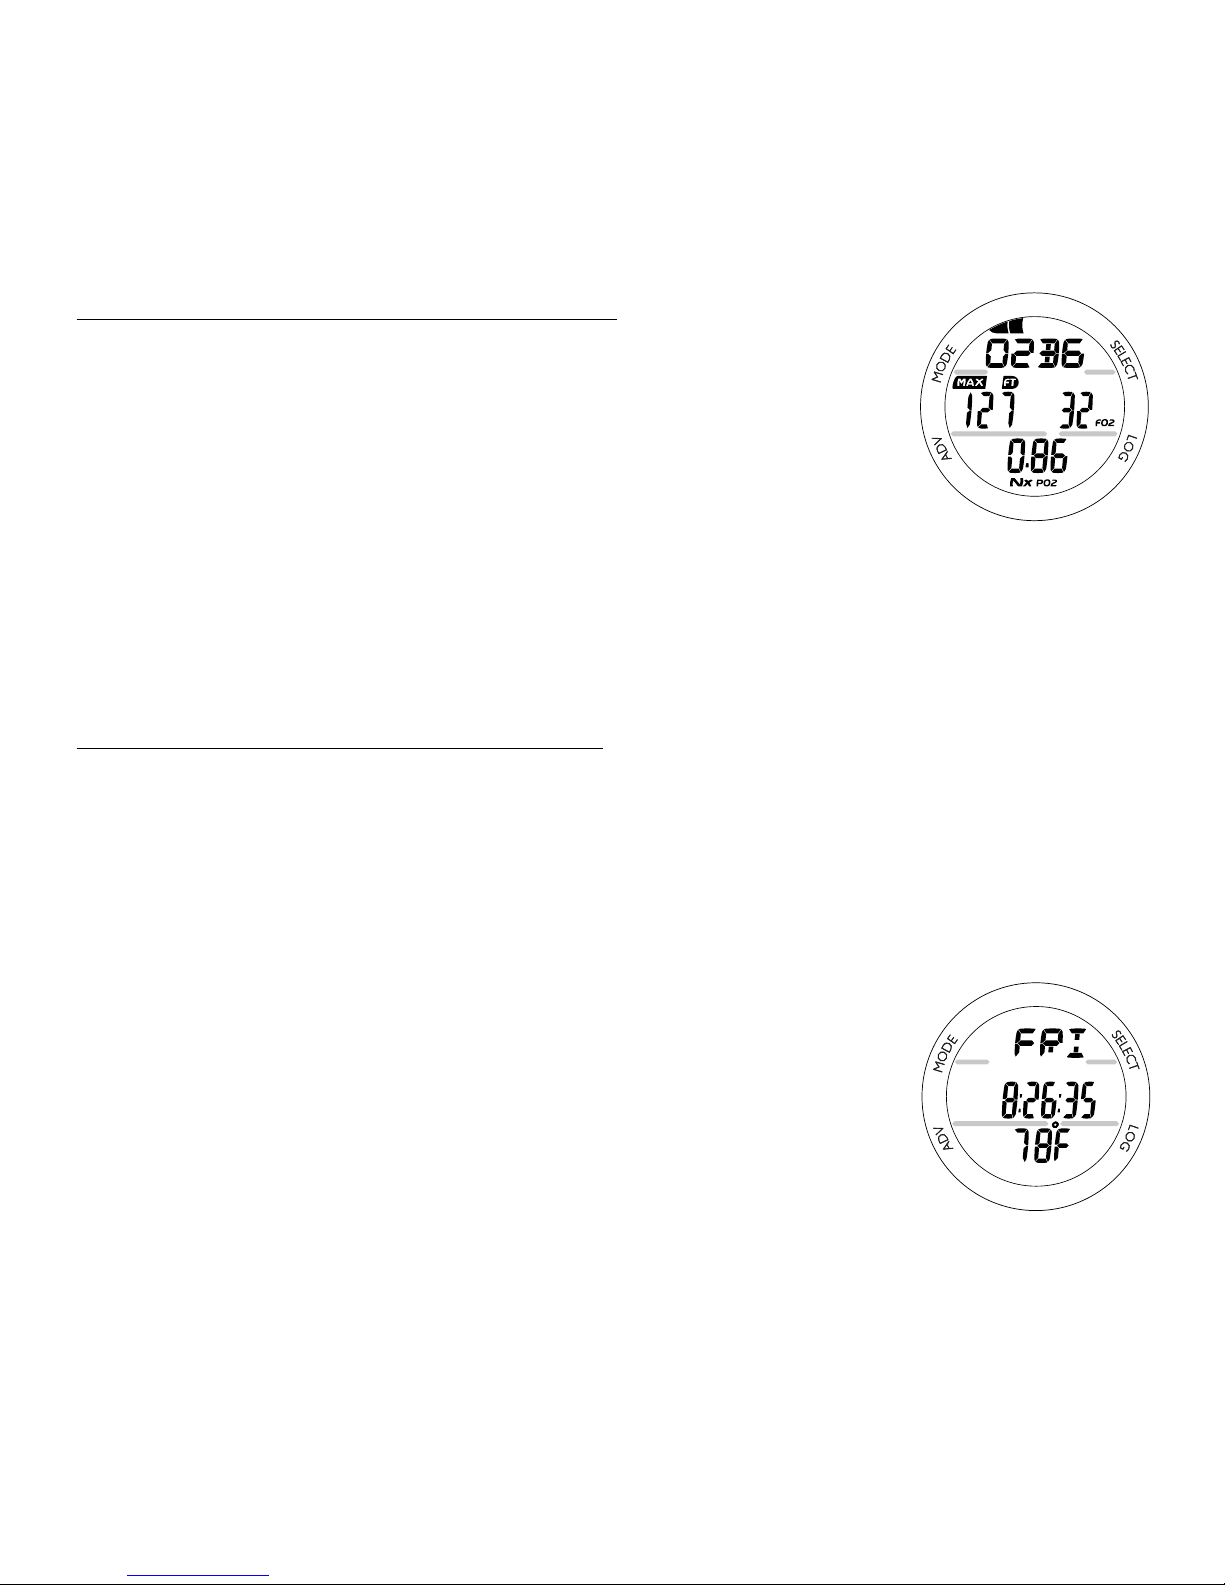
75
NO DECO ALT, information includes (Fig. 73) -
> Bar Graph representing O2 accumulated with graphic
O2BG, if set for Nitrox.
> Max Depth with MAX and FT (or M) icons.
> FO2 setting with FO2 icon, if set for Nitrox.
> PO2 with PO2 icon, if set for Nitrox.
> Nx icon, if set for Nitrox.
• Press A (< 2 seconds) to view the Secondary display.
• The display will revert to the Main after 5 seconds if A is
not pressed.
SECONDARY, information includes (Fig. 74) The Secondary display shown here is common to all modes
during dives. Its description will not be repeated, although
access to it will be described.
> Day of the Week Graphic (MON, TUE, etc.)
> Time of Day (hr:min:sec). This is the Watch Default Time
selected (Main or Alternate).
> Temperature with degrees icon and graphic F (or C)
• The display will revert to the Main after 60 seconds* or if
A is pressed (< 2 seconds).
*During other conditions, such as when at a Stop, the
Secondary will revert to the Main after 5 seconds.
Fig. 73 - NORM NO
DECO ALT
Fig. 74 - SECONDARY
Page 76
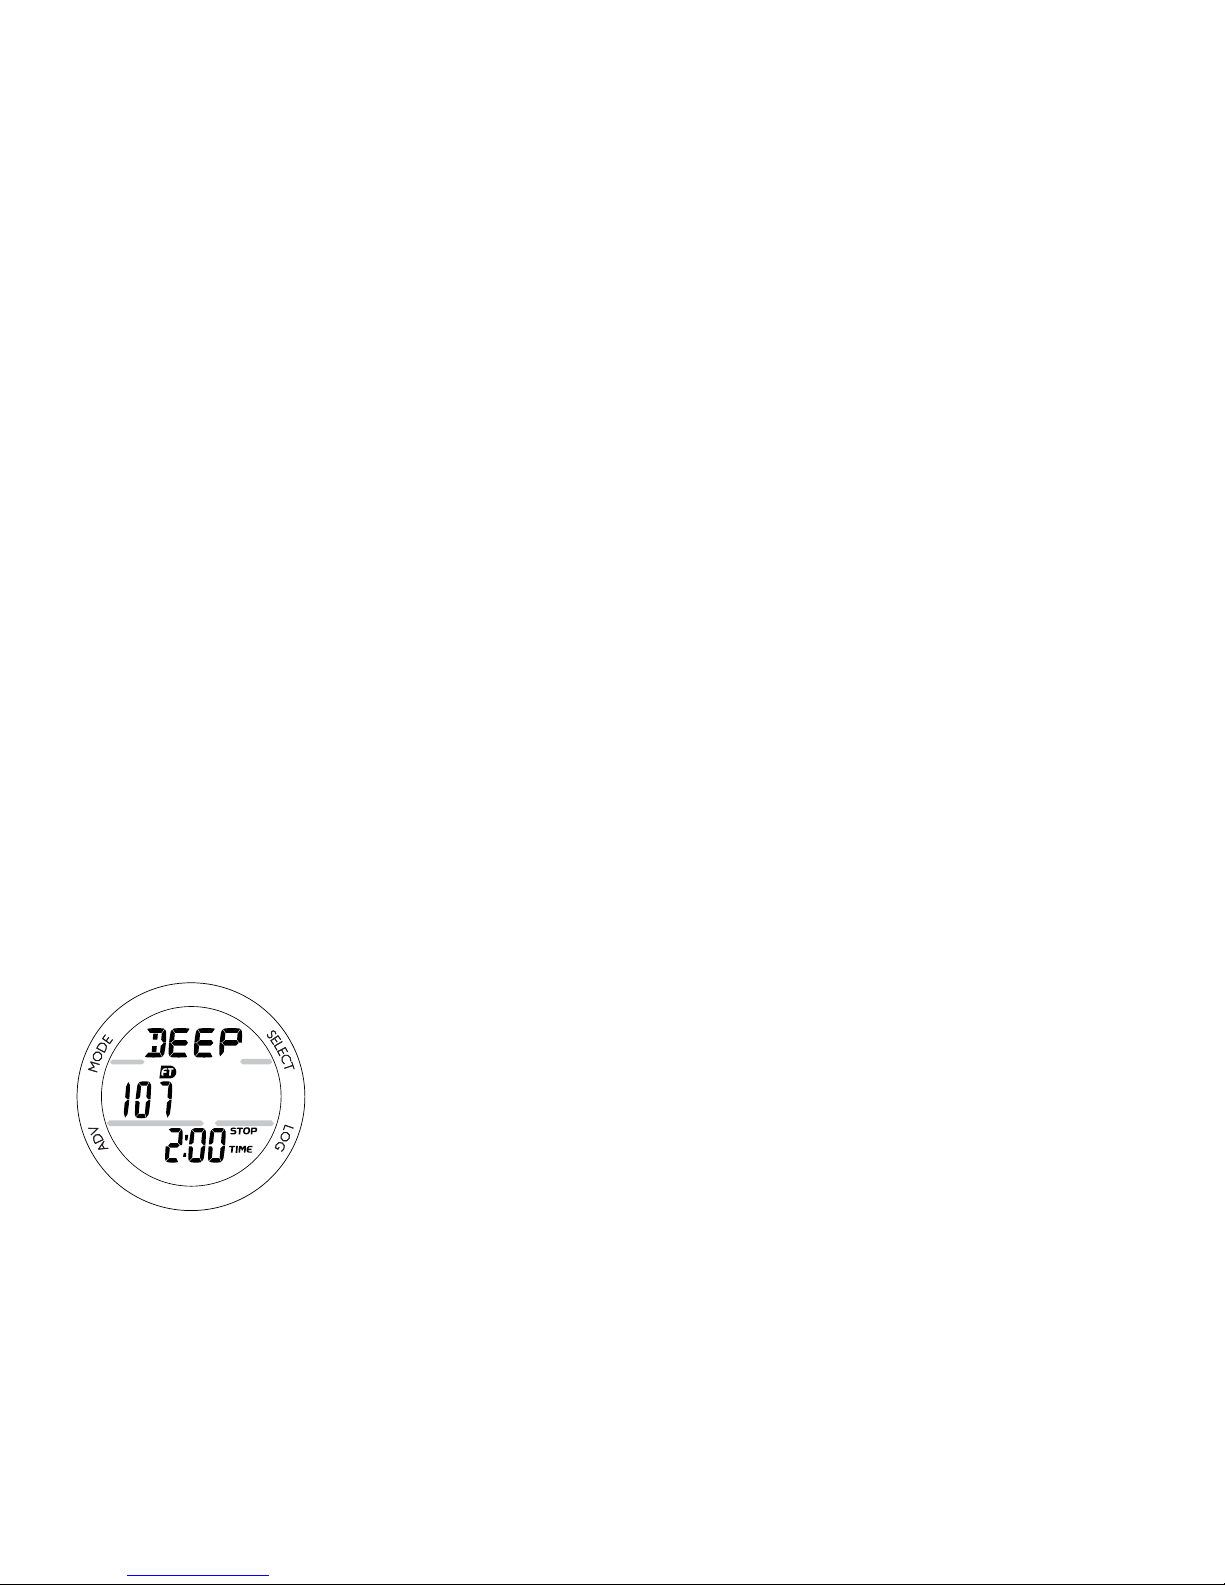
76
NO DECO DEEP STOP
When the Deep Stop selection is set On, it will trigger during
NORM No Deco dives when you descend to 80 FT (24 M),
then calculate (and continually update) a Stop Depth equal to
1/2 the Max Depth.
While 10 FT (3 M) deeper than the calculated Stop depth,
you will be able to access a Preview screen that will display
the graphics DEEP >> STOP >> xxF (xxM) scrolling with the
Cuurent Depth and Stop Time (Fig. 75).
Upon initial ascent to within 10 FT (3 M) below the calculated
Stop Depth, a Stop screen displaying a Stop Depth at 1/2 the
Max Depth will appear with a Countdown Timer beginning at
2:00 (min:sec) and counting down to 0:00.
> If you descend 10 FT (3 M) below, or ascend 10 FT (3 M)
above, the calculated Stop Depth for 10 seconds during
the countdown, the No Deco Main will replace the Deep
Stop Main and the Deep Stop feature will be disabled for
the remainder of that dive. There is no Penalty if the Deep
Stop is ignored.
> In the event that you enter Deco, exceed 190 FT (57 M),
or a High O2 condition (=> 80%) occurs, the Deep Stop
will be disabled for the remainder of that dive.
> The Deep Stop is disabled during a High PO2 Alarm
condition (=> Alarm setting).
Fig. 75 - DEEP STOP
PREVIEW
Page 77
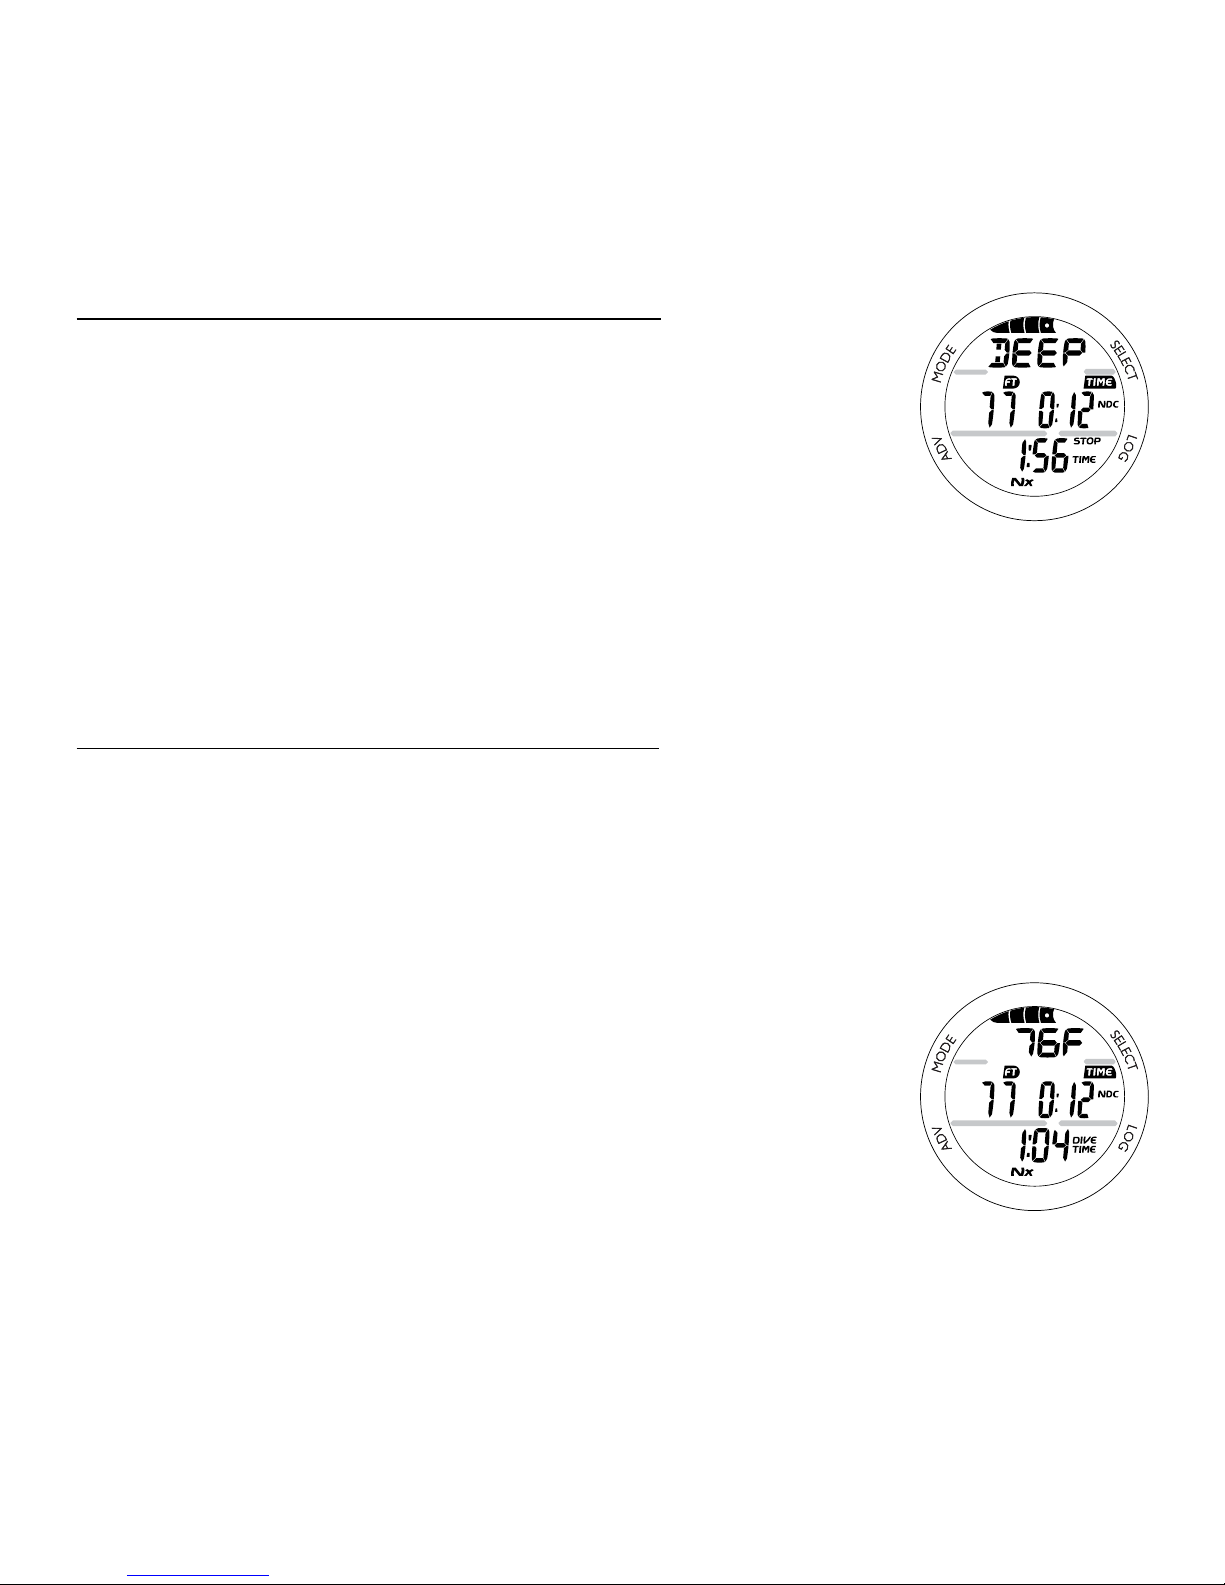
77
DEEP STOP MAIN, information includes (Fig. 76)
> NIBG.
> Graphics DEEP, STOP, and xxF (or xxM), scrolling.
> Current Depth with FT (or M) icon.
> Dive Time Remaining (hr:min) with TIME and NDC (or O2)
icons.
> Stop Countdown Time remaining (min:sec) with STOP and
TIME icons.
> Nx icon, if FO2 is set for Nitrox.
• Press A (< 2 seconds) to view the ALT 1 display.
DEEP STOP ALT 1, information includes (Fig. 77)
> NIBG.
> Graphics DEEP, STOP, and xxF (or xxM), scrolling.
> Current Depth with FT (or M) icon.
> Dive Time Remaining (hr:min) with TIME and NDC (or O2)
icons.
> Elapsed Dive Time (hr:min) with DIVE and TIME icons.
> Nx icon, if FO2 is set for Nitrox.
• Press A (< 2 seconds) to view the ALT 2 display, then the
Secondary.
• The display will revert to the Main after 5 seconds if A is
not pressed.
The ALT 2 and Secondary displays are similar to the
NORM Dive ALT and Secondary displays.
Fig. 76 - DEEP STOP
MAIN
Fig. 77 - DEEP STOP
ALT 1
Page 78

78
NO DECO SAFETY STOP
Upon ascending to 5 FT (1.5 M) below the Safety Stop Depth
set on any No Decompression dive in which depth exceeded
30 FT (9 M), a short beep will be emitted and a Safety Stop at
the depth set will appear on the display with a countdown timer
that begins at the Safety Stop Time set.
The Safety Stop will be displayed until the countdown times out
(0:00 min:sec), or you descend below 30 FT (10 M), or you
breach the surface. There is no Penalty if you surface prior to
completing the Safety Stop.
If the Safety Stop was set to OFF, the screen will not appear
during the ascent.
SAFETY STOP MAIN, information includes (Fig. 78)
> NIBG representing Nitrogen loading.
> Graphics SAFE, STOP, and xxF (or xxM), scrolling,
indicating the Stop Depth set.
> Current Depth with FT (or M) icon.
> Dive Time Remaining (hr:min) with TIME and NDC (or O2)
icons.
> Safety Stop Countdown Time set/remaining (min:sec) with
STOP and TIME icons.
> Nx icon, if set for Nitrox.
• Press A (< 2 seconds) to view the ALT 1 display, then the
ALT 2, and Secondary.
Similar to the Deep Stop screens.
Fig. 78 - SAFETY STOP
MAIN
Page 79
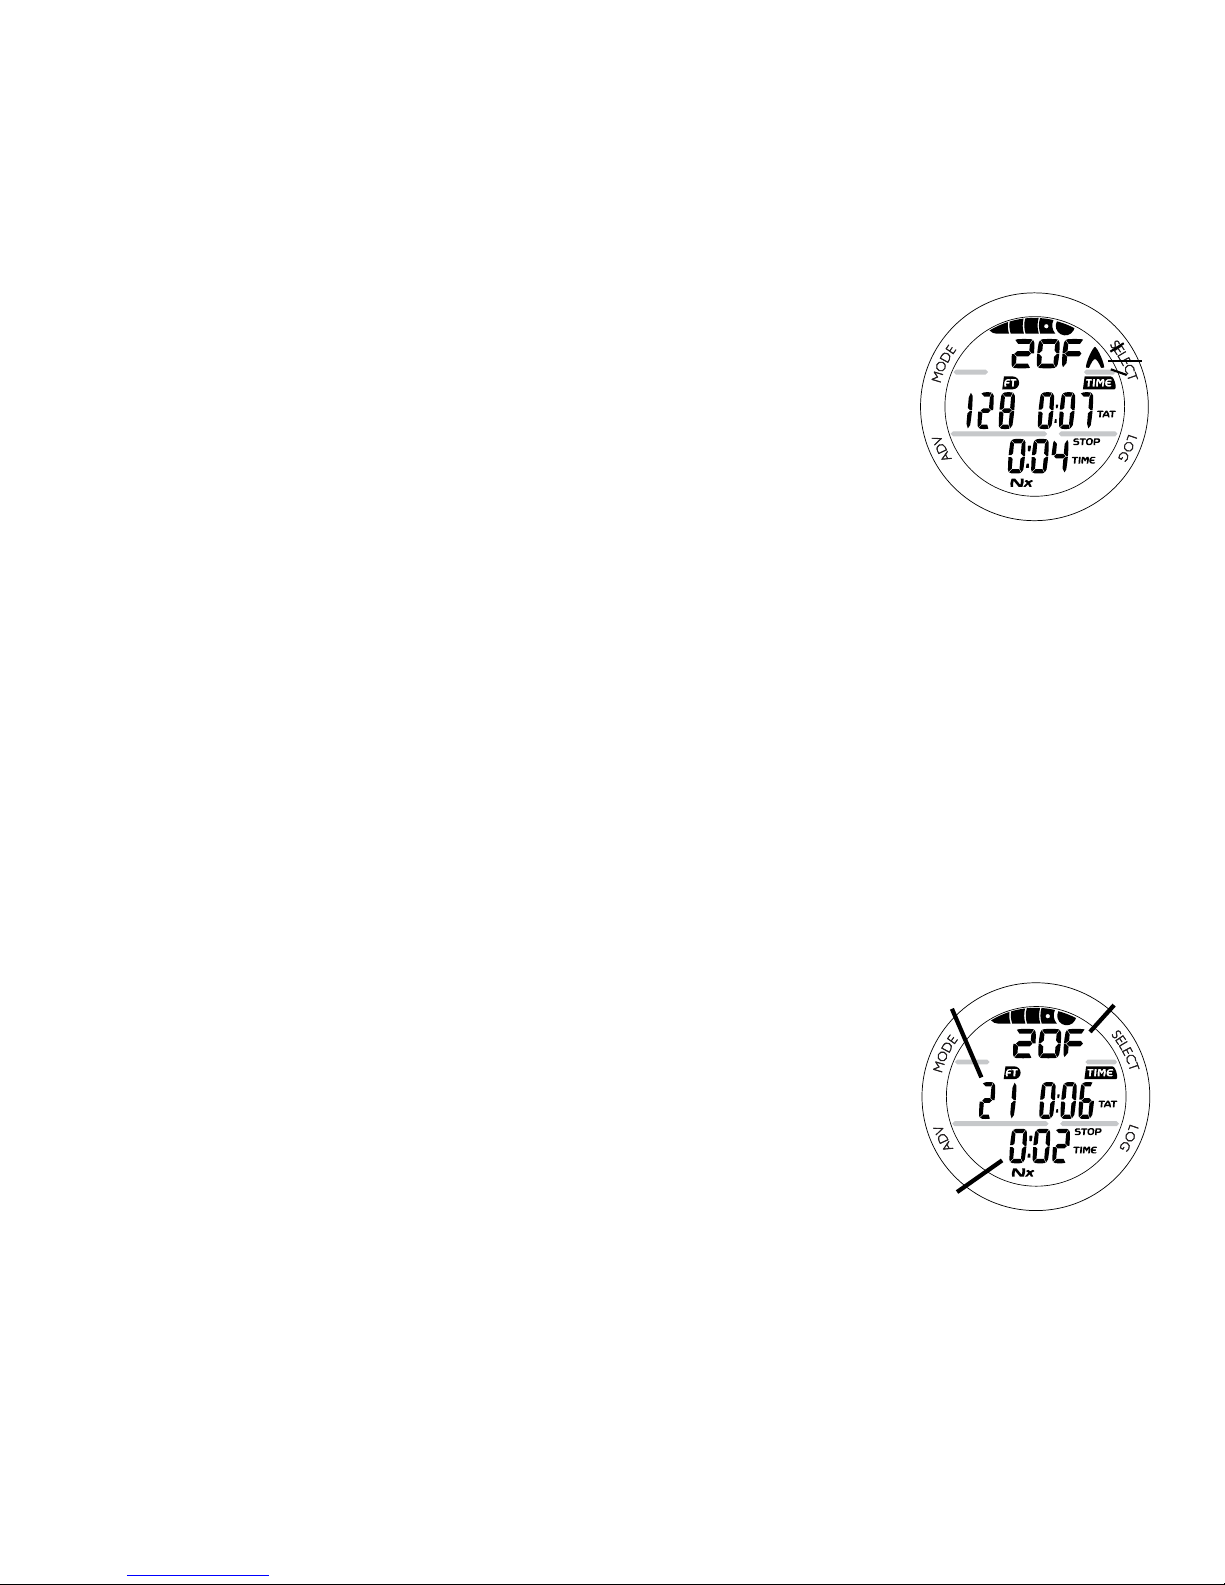
79
DECOMPRESSION
The Grande is designed to help you by providing a representation of how close you are to entering Decompression.
Decompression mode activates when the theoretical No Decompression time and depth limits are exceeded.
Upon entry into Deco, the Audible will sound, the LED warning
light will ash, and the graphic message DECO >> STOP will
scroll each 3/4 second On and 1/4 second O, until acknowledged or for 10 seconds.
Once silenced, the graphics DECO >> STOP >> xxF (or xxM)
will scroll each 2 seconds On 2 seconds blank.
• Pressing S (< 2 seconds) will acknowledge/silence the
Audible (unless it was set O).
• The Up Arrow icon will ash (Fig. 79) if you are greater
than 10 FT (3 M) deeper than the required Stop Depth.
• Once you are within 10 FT (3 M) of, and below, the
required Stop Depth, the Up Arrow will be removed.
Managing Decompression Stops
To fulll your decompression obligation, you should make a
safe controlled Ascent to a depth slightly deeper than (Fig.
80a), or equal to, the required Stop Depth indicated (Fig. 80b)
and decompress for the Stop Time indicated (Fig. 80c).
Fig. 79 - DECO ENTRY
Fig. 80 - DECO STOP
a
b
c
Page 80
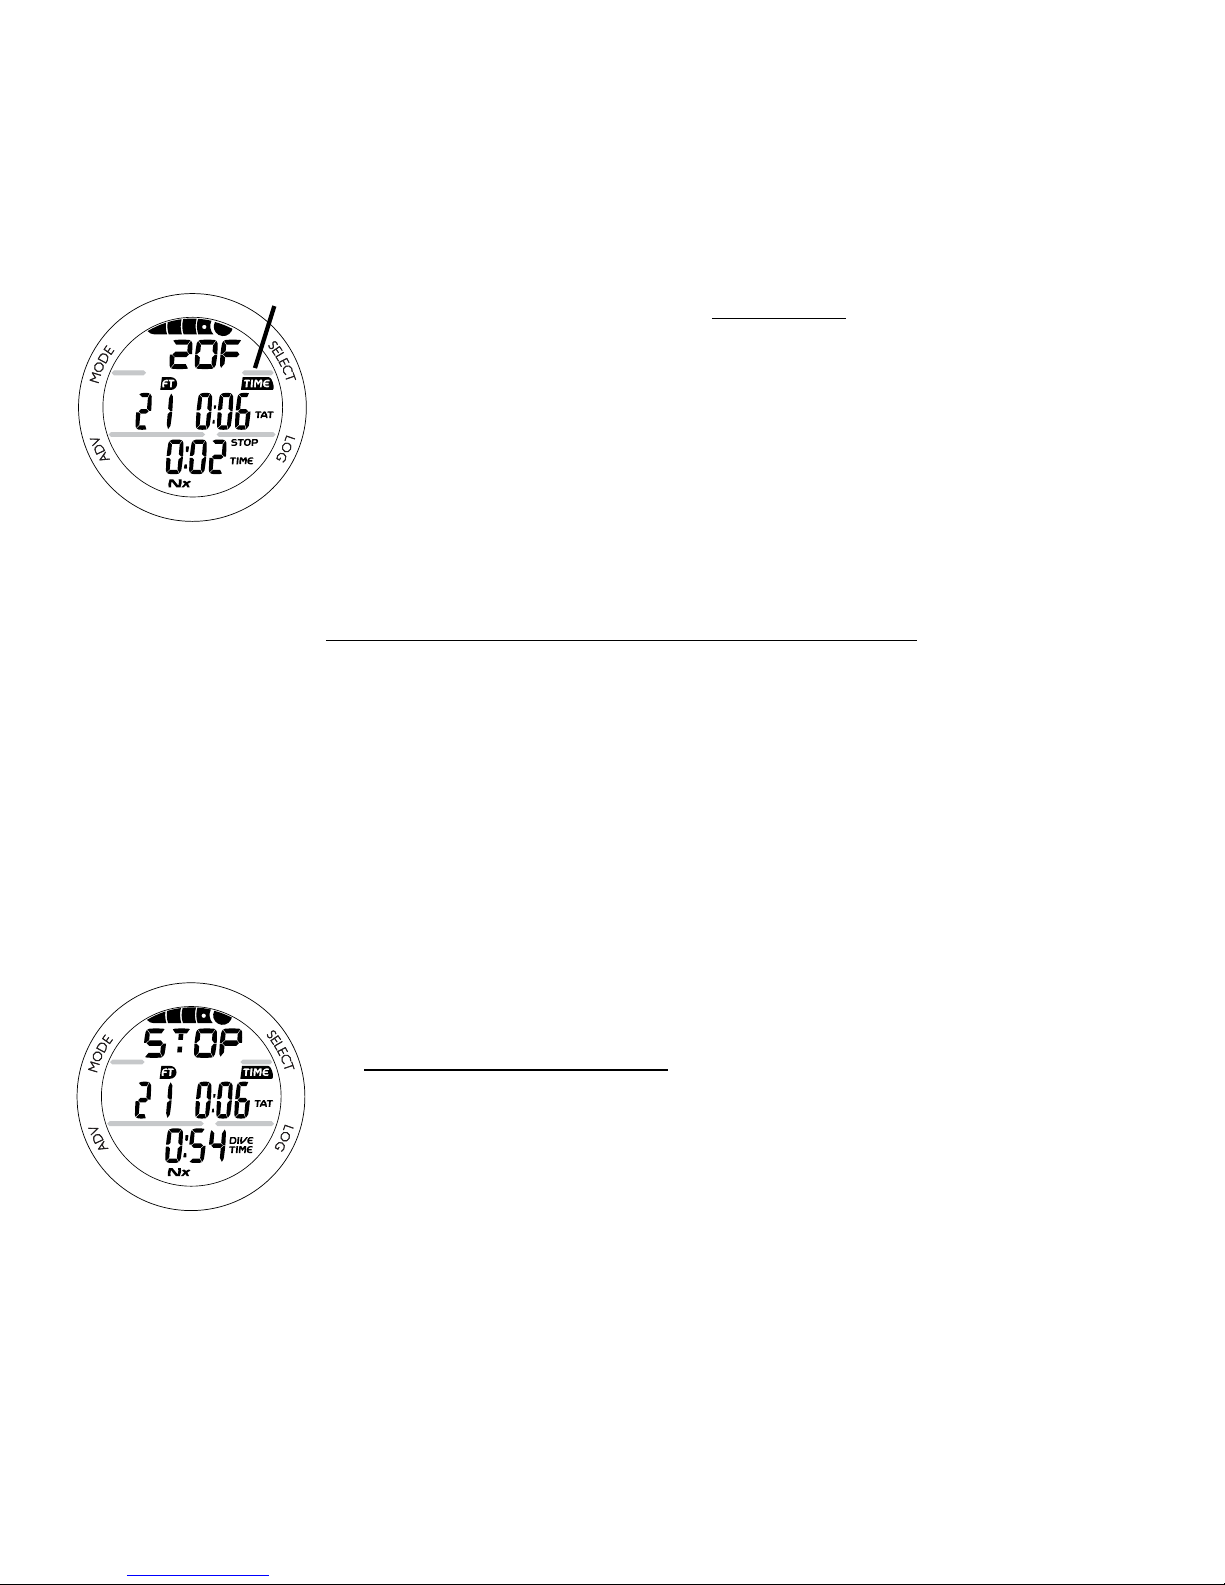
80
The amount of decompression credit time that you receive is
dependent on depth, with slightly less credit given the deeper
you are below the Stop Depth indicated.
You should stay slightly deeper than the required Stop Depth
indicated until the next shallower Stop Depth appears. Then,
you can slowly ascend to, but not shallower than that indicated
Stop Depth.
DECO STOP MAIN, information includes (Fig. 81) -
> NIBG, all 5 segments indicating Deco.
> Graphics DECO >> STOP >> xxF (or xxM), scrolling.
> Current Depth with FT (or M) icon.
> Total Ascent Time* (hr:min) with TIME and TAT icons.
> Stop Time (hr:min) required with STOP and TIME icons.
> Nx icon, if FO2 is set for Nitrox.
• Pressing A (< 2 seconds) will access ALT 1 (Fig. 82); then
ALT 2 and Secondary,
similar to the Deep and Safety Stop
screens.
*TAT (Total Ascent Time):
TAT (Fig. 81a) includes Stop Times required at all calculated
Deco Stop Depths plus vertical Ascent Time calculated at 60
FPM (18 MPM) for depths deeper than 60 FT (18 M), and
30 FPM (9 MPM) for depths of 60 FT (18 M) and shallower.
Fig. 82 - DECO STOP
ALT 1
Fig. 81 - DECO STOP
MAIN
a
Page 81

81
VIOLATION MODES
While in Violation modes, the Alternate and Secondary displays previously described can be accessed using the A button,
the Backlight can be activated using the L button, and Alarms
can be acknowledged/silenced with the S button.
CONDITIONAL VIOLATION
If you ascend shallower (Fig. 83a) than a required Decompression Stop Depth (Fig. 83b), the Audible will sound, and the LED
and Down Arrow icon will ash until you descend below the
required Stop Depth.
The graphic DOWN >> DOWN will scroll until the Alarm is
acknowledged/silenced, then the graphics DOWN >> TO >>
xxF (or xxM) will scroll.
If you descend below the required Stop Depth before 5 minutes
have elapsed, the operation will continue in Decompression.
No o gassing credit will be given while above a required
Stop Depth, and for each minute above it 11/2 minutes of
Penalty Time will be added to required Stop Time and TAT (Total
Ascent Time).
The added Penalty (decompression) Time will have to be
worked o rst, before o gassing credit will be given.
Fig. 83 - CONDITIONAL
VIOLATION
a
b
Page 82
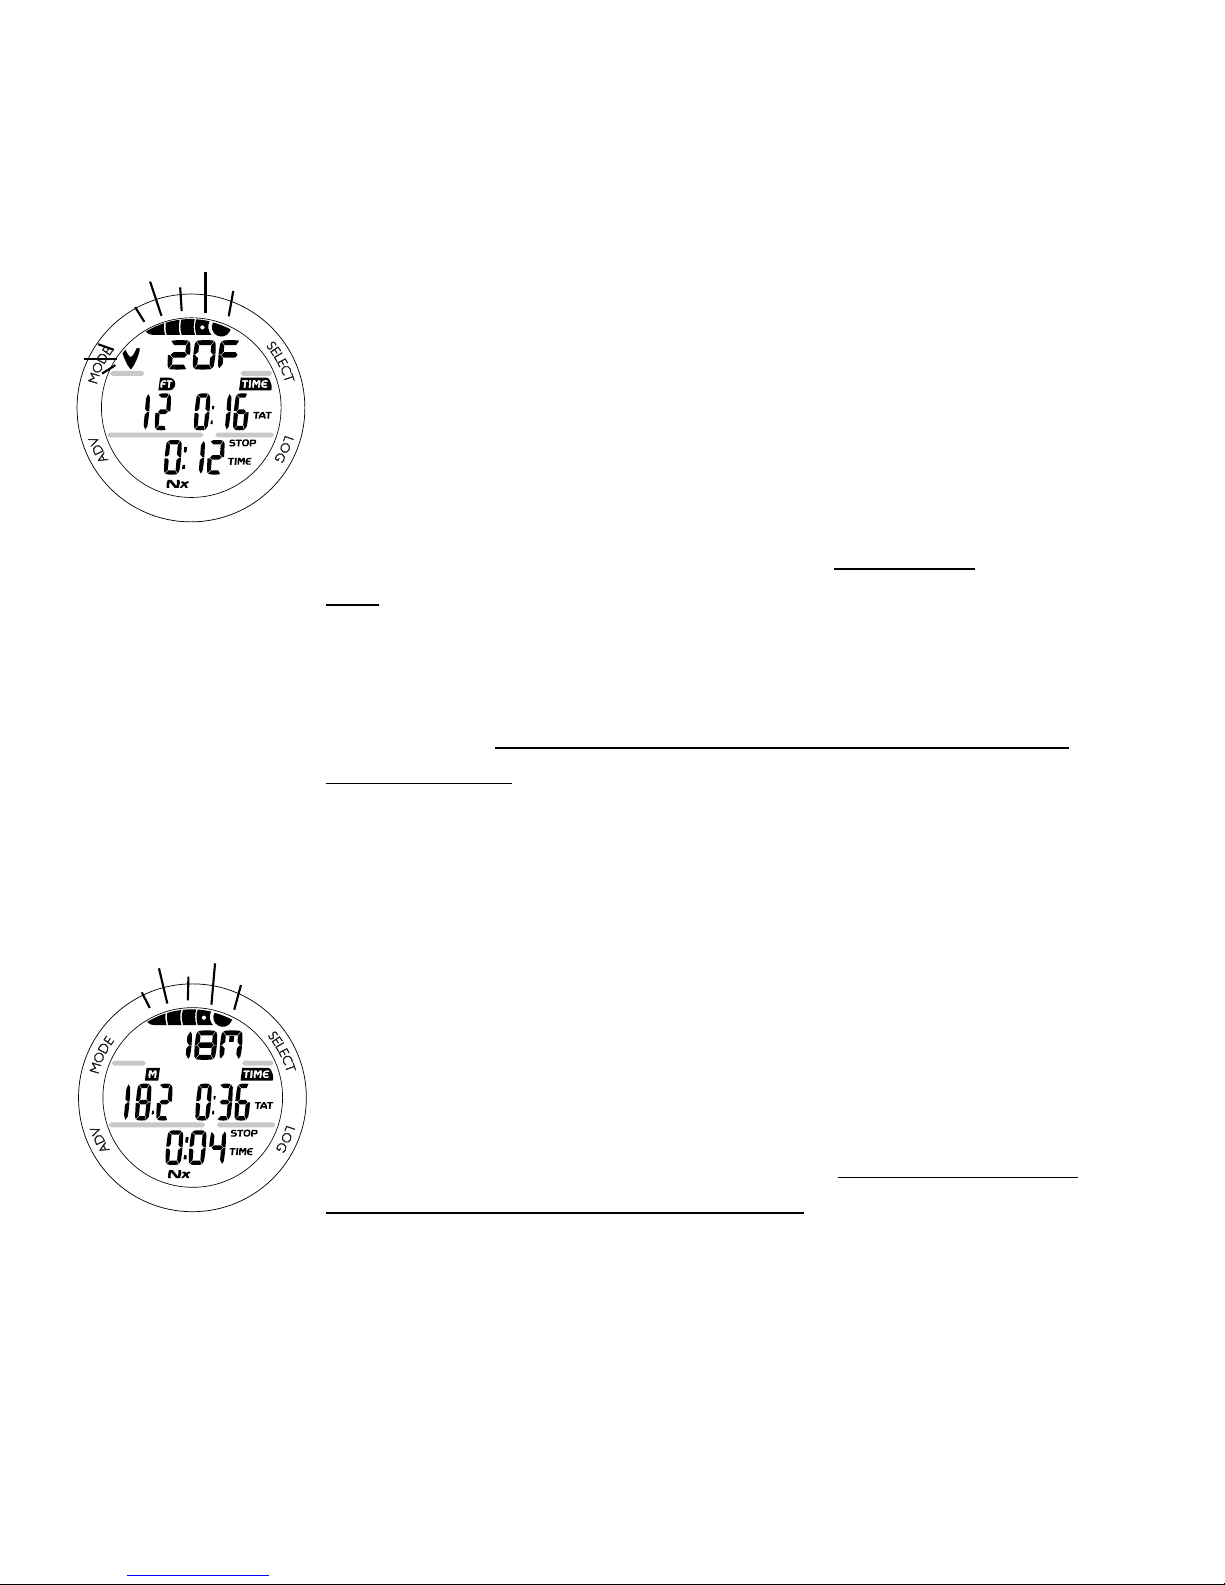
82
Once the Penalty Time is worked o, and o gassing credit
begins, required Deco Stop Depths and Time will decrease
toward zero. The NIBG will recede into the No Deco zone
and the operation will revert to the No Deco dive mode.
Upon entry into the following Violation modes, the
Audible will sound and the LED will ash even if Set
OFF. When these events occur, the Alarm cannot be
acknowledged/silenced by pressing the S button.
DELAYED VIOLATION 1 (Fig. 84)
If you remain above the required Deco Stop Depth for more
than 5 minutes, the full NIBG and Down Arrow icon will ash
until you descend below the required Stop Depth. The graphics
DOWN >> TO >> xxF (or xxM) will continue to scroll. This is a
continuation of a Conditional Violation.
DELAYED VIOLATION 2 (Fig. 85)
The Grande cannot calculate Decompression times for Stop
Depths much greater than 60 FT (18 M) and oers no indication of how much time spent underwater would result in the
need for a greater Stop Depth.
If the Decompression obligation requires a Deco Stop Depth
between 60 FT (18 M) and 70 FT (21 M), the NIBG will ash
and the graphics DECO >> STOP >> 60F (18M) will scroll.
Fig. 84 - DELAYED
VIOLATION 1
Fig. 85 - DELAYED
VIOLATION 2
Page 83

83
When this occurs, you must make a controlled Ascent to just
deeper than, and stay as close as possible to, 60 FT (18 M)
without causing the NIBG to ash.
When the required Stop Depth indicates 50 FT/15 M, etc., you
can ascend to those Stop Depths and continue decompressing.
DELAYED VIOLATION 3 (Fig. 86)
If you descend deeper than the MOD (Maximum Operating
Depth) of 330 FT (100 M), the Up Arrow icon will ash, and
the Current Depth and Max Depth displays will only indicate 3
dashes ( - - - ) signifying that you are Out of Range.
The graphics TOO >> DEEP will scroll until Ascent is made
above 330 FT (100 M).
Upon ascending above 330 FT (100 M), the Current Depth
display will be restored, however Max Depth will only display
3 dashes for the remainder of that dive. Also, the Log for that
dive will display 3 dashes as the Max Depth achieved.
VIOLATION GAUGE MODE
If a Decompression Stop Depth much greater than 60 FT (18
M) is required, an Immediate Violation Mode will be entered.
This would be preceded by entering Delayed Violation 2.
The Grande would then operate in Violation Gauge Mode during the remainder of that dive and for 24 hours after surfacing.
Fig. 86 - DELAYED
VIOLATION 3
Page 84

84
Violation Gauge Mode turns the Grande into a digital instrument without any decompression or oxygen monitoring
functions.
VIOLATION GAUGE MAIN, information includes (Fig. 87) -
> Full NIBG and Up Arrow icon, ashing.
> Graphics UP >> VIOL, scrolling.
> Current Depth with FT (or M) icon.
> Dive Time Remaining as 0:00 (hr:min) with TIME and NDC
icons.
> Elapsed Dive Time (hr:min) with DIVE and TIME icons.
> Nx icon, if set for Nitrox.
Operation will also enter Violation Gauge Mode 5 minutes
after surfacing from a dive in which a Delayed Violation occurred.
Violation Gauge Mode on the Surface does not allow
access to the Set F, Plan, and Desat features/screens.
The countdown timer that appears when you access Time to Fly
does not represent Time to Fly. It is only provided to inform you
of the time remaining before normal Dive Computer operation
can resume with full features and functions.
In the event that a dive is made during the 24 hour period after
such a dive, a full 24 hour surface interval must then be served
before all functions are restored.
Fig. 87 - VIOLATION
GAUGE MAIN
Page 85
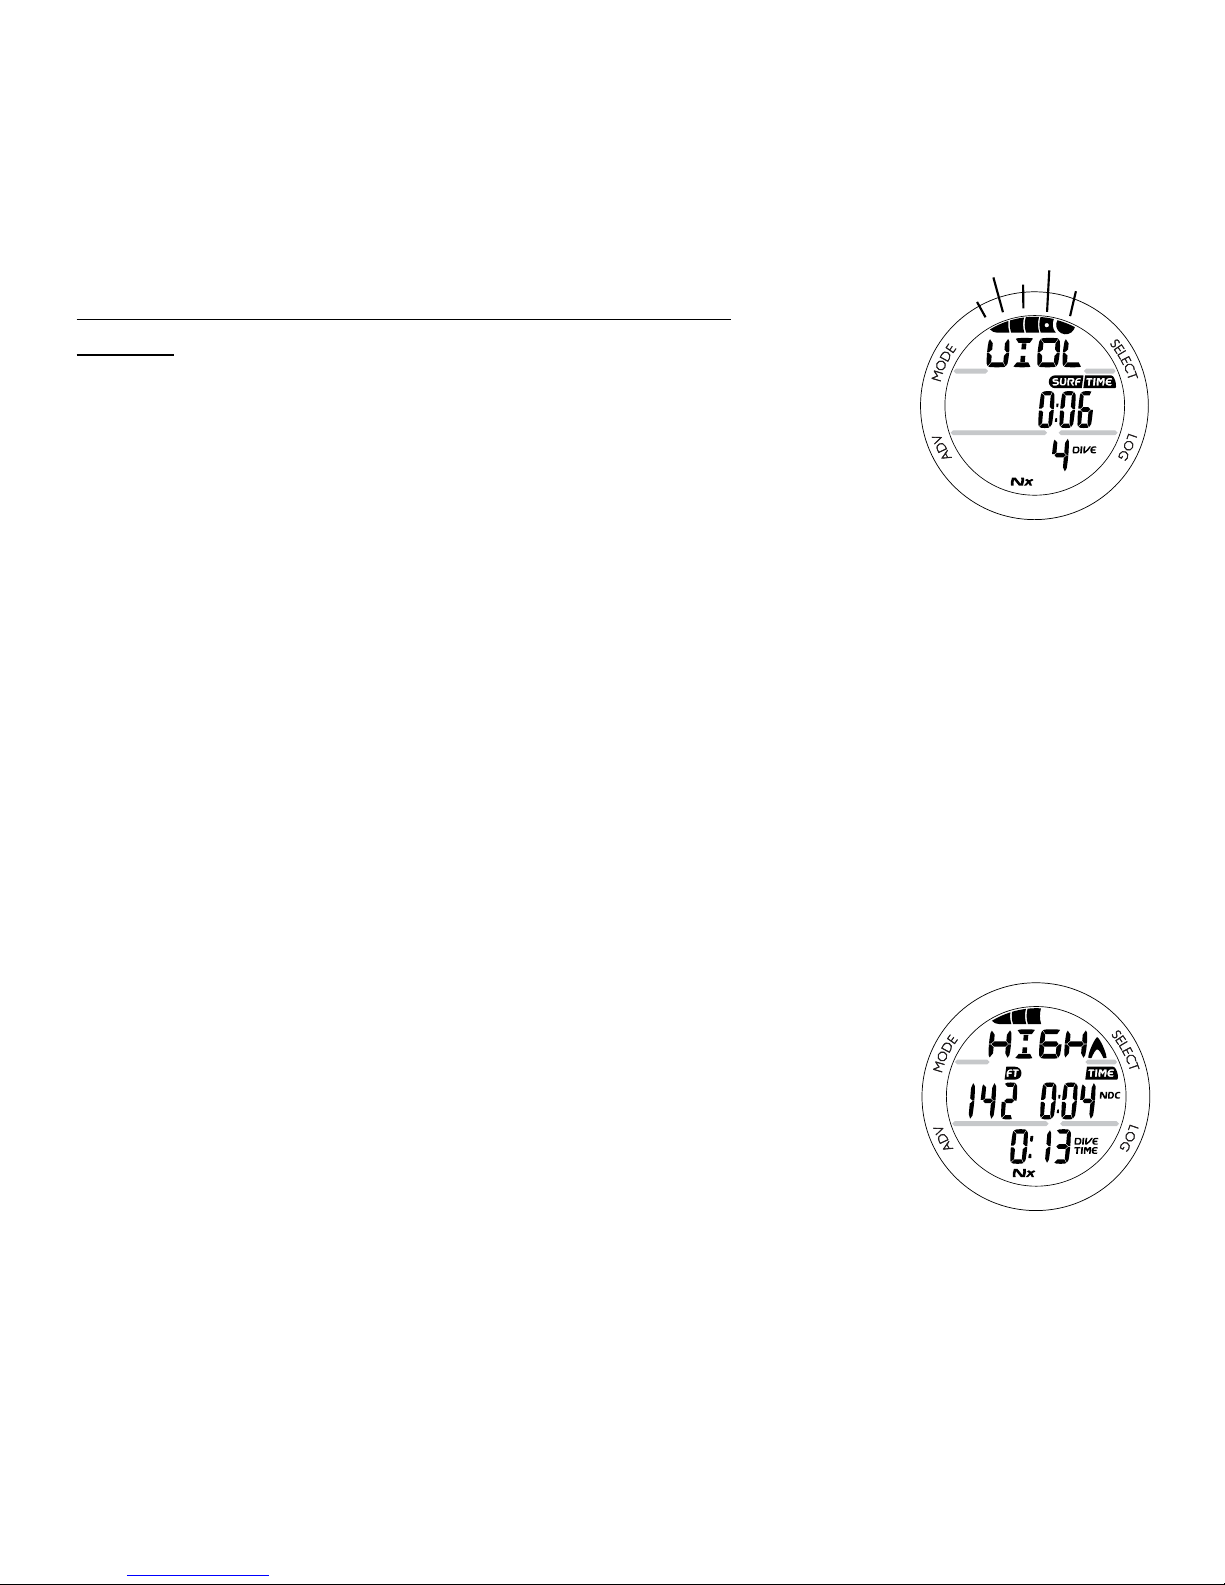
85
VIOLATION GAUGE SURF MAIN, information includes
(Fig. 88) -
> Full NIBG, ashing
> Graphic VIOL alternating with the graphics NORM, SEA
(or EL2 - EL13), and WET (if wet).
> Surface Interval Time (hr:min) with SURF and TIME icons.
> Dive Number with DIVE icon.
> Nx icon, if set for Nitrox.
HIGH PO2
When partial pressure of oxygen (PO2) becomes equal to, or
greater than, 0.20 ATA less than the PO2 Alarm value set; the
Audible will sound, the LED warning light will ash, and the
graphics HIGH >> PO2 will scroll until the alarm is acknowledged/silenced.
• The graphic PO2 and Up Arrow icon will appear solid on
the Main (Fig. 89) as a warning until PO2 decreases.
• After the alarm is silenced, the graphics UP >> HIGH >>
PO2 will scroll.
If PO2 continues to increase, the value displayed will increase
toward a maximum value of 5.00 ATA in increments of 0.01.
When PO2 reaches the PO2 Alarm value set, the LED warning
light will ash and the Audible will sound again.
Fig. 88 - VIOLATION
GAUGE SURFACE
Fig. 89 - HIGH PO2
MAIN
Page 86

86
> The graphic PO2 and Up Arrow icon will ash as a warning until PO2
decreases below the Alarm setting.
> The graphics UP >> HIGH >> PO2 will continue to scroll.
• To view the PO2 value, press A (< 2 seconds) to access the ALT screen which
reverts to the Main after 5 seconds.
HIGH OXYGEN ACCUMULATION
The O2BG displays either oxygen accumulated during that nitrox dive, or during
the repetitive nitrox dives you conduct during that 24 hour period, whichever of the
two is greater at that time. The O2BG allows you to monitor how close you are
coming to the limits of oxygen exposure.
If the theoretical amount of oxygen accumulated equals, or exceeds, the limit for a
single exposure, or the exposure limit for a 24 hour period (300 OTU), O2 Dive
Time Remaining becomes 0:00 (hr:min), the graphic O2BG appears and the full
Bar Graph and Up Arrow icon will ash (Fig. 90).
The Audible will sound, the LED will ash, and the graphics
HIGH >> O2 will scroll. When the Alarm is acknowledged/
silenced, the graphics UP >> HIGH >> O2 will scroll until the
level of O2 decreases below the limit.
• Pressing A (< 2 seconds) will access the Alternate and
Secondary screens similar to No Deco.
Upon surfacing, operation will lock in to NORM Mode until
the O2BG recedes to 4 segments. Access to Watch Mode is
allowed but access to GAUG and FREE is blocked.
Fig. 90 - HIGH O2 MAIN
Page 87

87
NORM POST DIVE MODES
Page 88

88
POST DIVE SURFACE MODE
When you ascend to 2 FT (0.6 M), operation will enter Surface
Mode and begin counting your Surface Interval.
TRANSITION PERIOD
If you descend the rst 10 minutes after surfacing (referred to
as the Transition Period), time underwater will be considered a
continuation of that dive. The time at the surface (if less than
10 minutes) will not be added as Dive Time.
Transition Period information on the surface includes (Fig. 91):
> NIBG.
> Graphic NORM alternating with the graphics SEA (or EL2
through EL13) and WET (if wet). If a Low Battery condition
occurs during a dive, the message CHNG > BATT will
scroll upon surfacing.
> Battery icon if a Low Battery Warning condition exists,
ashing if Too Low.
> Surface Interval Time (hr:min) with SURF and TIME icons.
> Dive Number with DIVE icon.
> Nx icon, if set for Nitrox.
During the Transition Period, Alternate displays and the Log can
be accessed. Other modes (e.g., Plan, Fly, Sat, Set) will be
accessible after 10 minutes on the surface.
Log Data will not be stored in the unit's memory until the 10
minute Transition Period on the surface is completed.
Fig. 91 - TRANSITION
PERIOD
Page 89
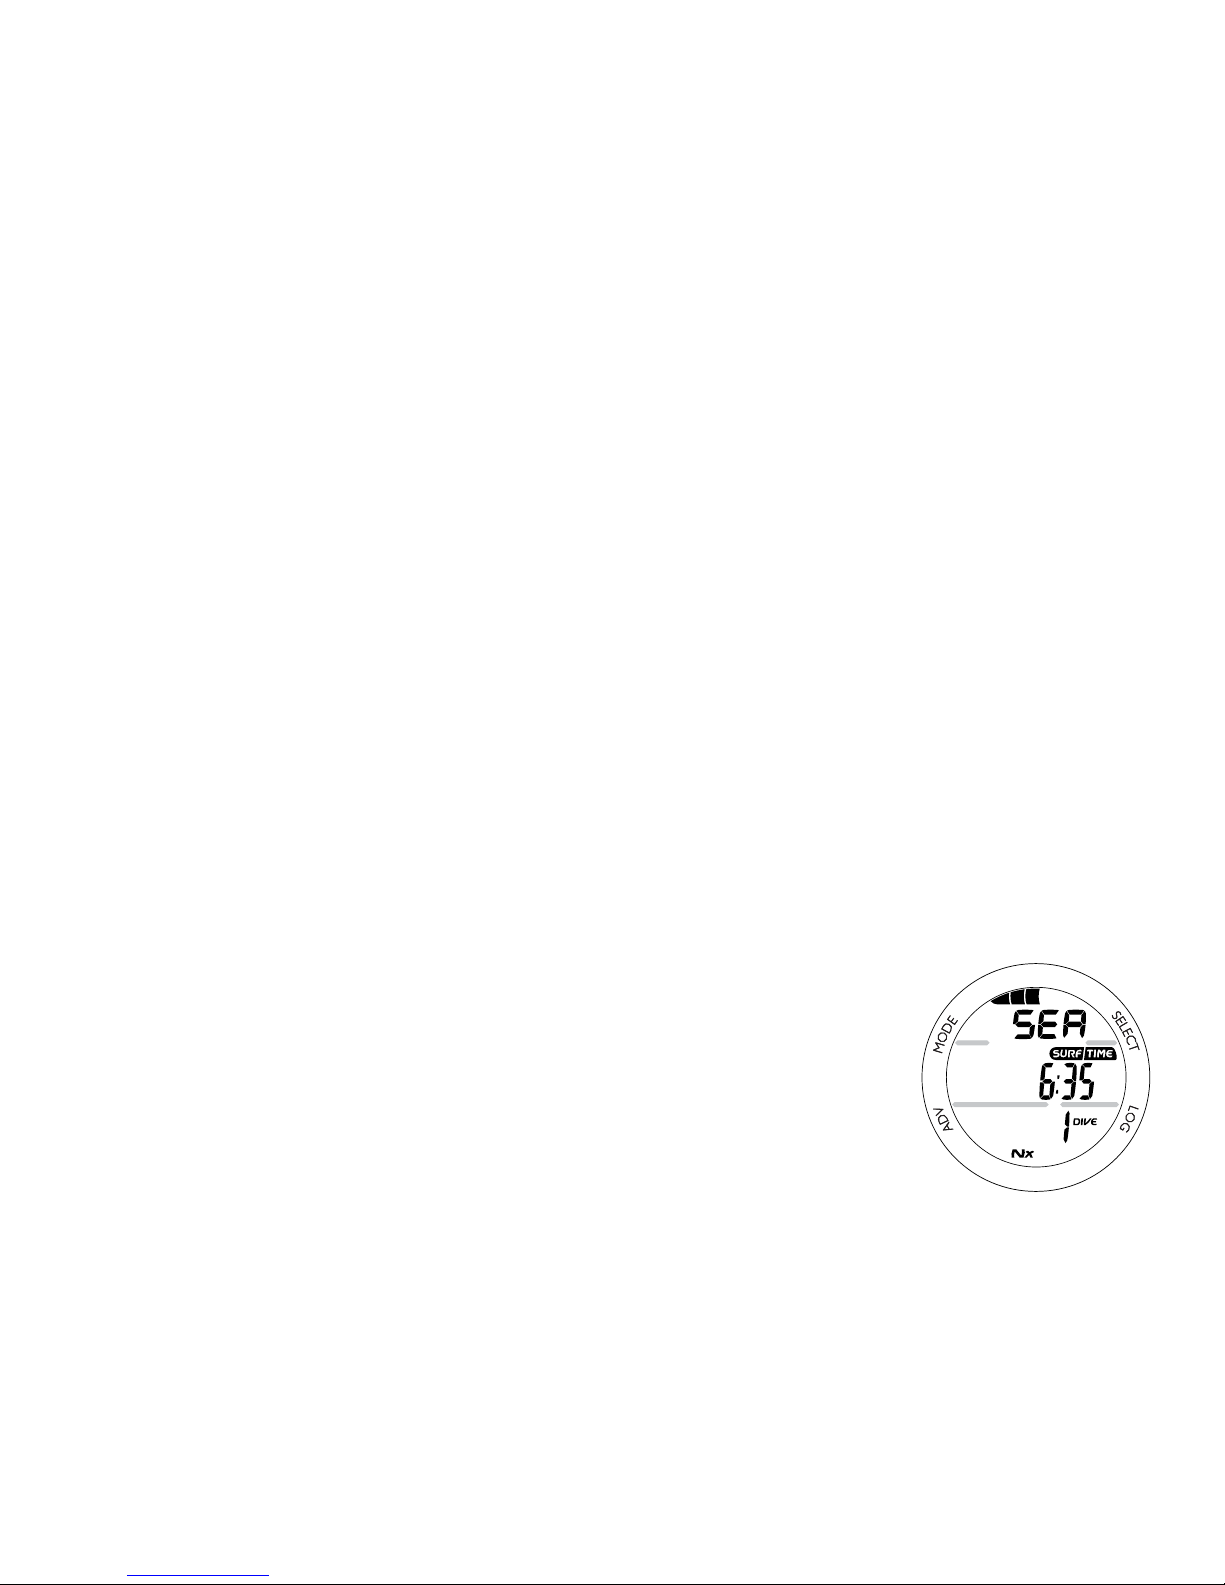
89
AFTER THE TRANSITION PERIOD
Once 10 minutes have elapsed, the SURF icon will stop ashing indicating that the Dive and Transition Period are completed, and a subsequent descent will be considered a new dive.
Operation will then revert to Watch Default Time. NORM
SURF Main (Fig. 92) can be accessed from Watch Default Time
screen by pressing M (2 seconds). You will then have full access to other NORM surface modes and displays.
• Press L (< 2 seconds) to access Log and History.
• Depress L (2 seconds) to activate the Backlight.
• Press A (< 2 seconds) to access Plan, Fly, and Desat.
• Depress A (2 seconds) to access ALT and Secondary.
• Depress A & S (2 seconds) to access Set Modes.
• Press M (< 2 seconds) to access Watch Default Time.
Fig. 92 - NORM SURF
MAIN
(after Transition Period)
Page 90

90
SUMMARY OF NORM/GAUG WARNING AND ALARM MESSAGES
MESSAGE MEANING
DECO > STOP > xxF (M) Entry into Decompression Mode.
DOWN > TO > xxF (M) Above a Required Decompression Stop Depth.
DECO > STOP > 60F (18M) Deco Stop greater than 60 FT (18 M) required.
UP > HIGH > PO2 High PO2 alarm while in No Deco Mode.
HIGH > PO2 High PO2 alarm while in Deco Mode.
UP > HIGH > O2 High O2 alarm.
TOO > DEEP Depth alarm.
UP > VIOL Deco Stop greater than 70 FT (21 M) required.
SLOW > SLOW Ascent Rate Too Fast alarm.
LOW > DIVE > TIME Dive Time Remaining alarm.
TIME > TOO > LONG Elapsed Dive Time alarm.
UP > HIGH > NI NIBG alarm.
Page 91

91
GAUGE OPERATING MODE
Page 92

92
GAUGE MODE GAUG
When GAUG is selected as the operating mode, the Grande
will operate as a digital depth gauge/timer without performing
nitrogen and oxygen calculations.
• To access GAUG mode, while the NORM SURF Main is
displayed, depress M (2 seconds).
• The graphic GAUG will ash during which a press of M (<
2 seconds) will select GAUG as the operating dive mode.
GAUG will stop ashing.
• If no GAUG dive has been conducted, depress M (2
seconds) to access FREE SURF Main.
GAUG SURF MAIN, (Fig. 93) -
> Graphic GAUG alternating with the Altitude Level graphic
SEA (or EL2 through EL13) and WET (if wet).
> Surface Interval Time (hr:min) with SURF and TIME icons.
> Battery icon if a Low Battery Warning condition exists,
ashing if Too Low.
> Dive Number with DIVE icon.
• Depressing M (2 seconds) will access FREE SURF MAIN.
• Pressing M (< 2 seconds) will access Watch Default Time.
• Depressing A (2 seconds) will access the Secondary.
• Pressing A (< 2 seconds) will access Fly.
• Depressing A and S (2 seconds) will access Set Modes.
• Depressing L (2 seconds) will activate the Backlight.
• Pressing L (< 2 seconds) will access Log and History.
Fig. 93 - GAUG SURF
MAIN
Page 93
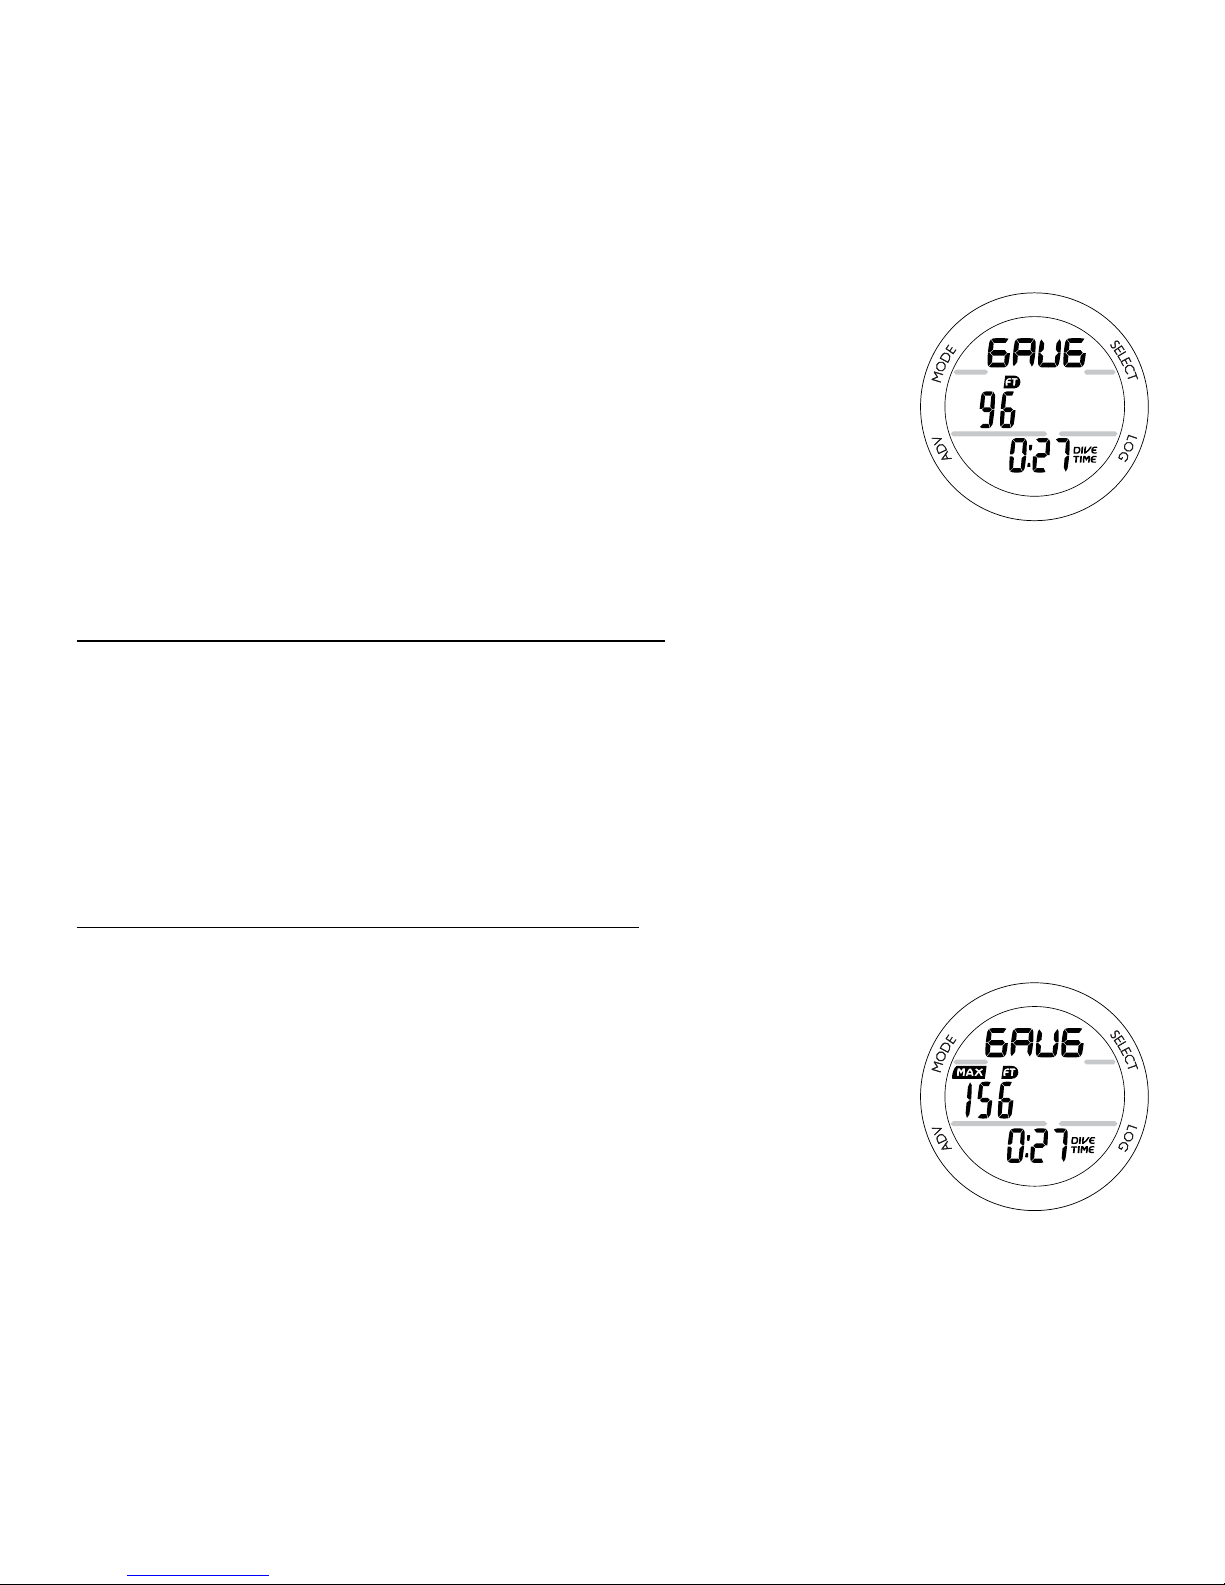
93
Upon descending to 5 FT (1.5 M) for 5 seconds,
operation will enter GAUG Dive Mode.
Once a dive is made in GAUG mode, you must wait 24 hours
after surfacing before the Grande will operate in NORM mode
or FREE Dive mode.
GAUG DIVE MAIN, information includes (Fig. 94) -
> Graphic GAUG.
> Current Depth with FT (or M) icon.
> Elapsed Dive Time (hr:min) with DIVE and TIME icons.
• Pressing A (< 2 seconds) will access the ALT screen.
• Depressing L (2 seconds) will activate the Backlight.
GAUG DIVE ALT, information includes (Fig. 95) -
> Graphic GAUG.
> Max Depth with MAX and FT (or M) icons.
> Elapsed Dive Time (hr:min) with DIVE and TIME icons.
• Pressing A (< 2 seconds) will access the Secondary screen.
• Depressing L (2 seconds) will activate the Backlight.
• Operation will revert to the Main after 5 seconds if A is
not pressed.
Fig. 94 - GAUG DIVE
MAIN
Fig. 95 - GAUG DIVE
ALT
Page 94
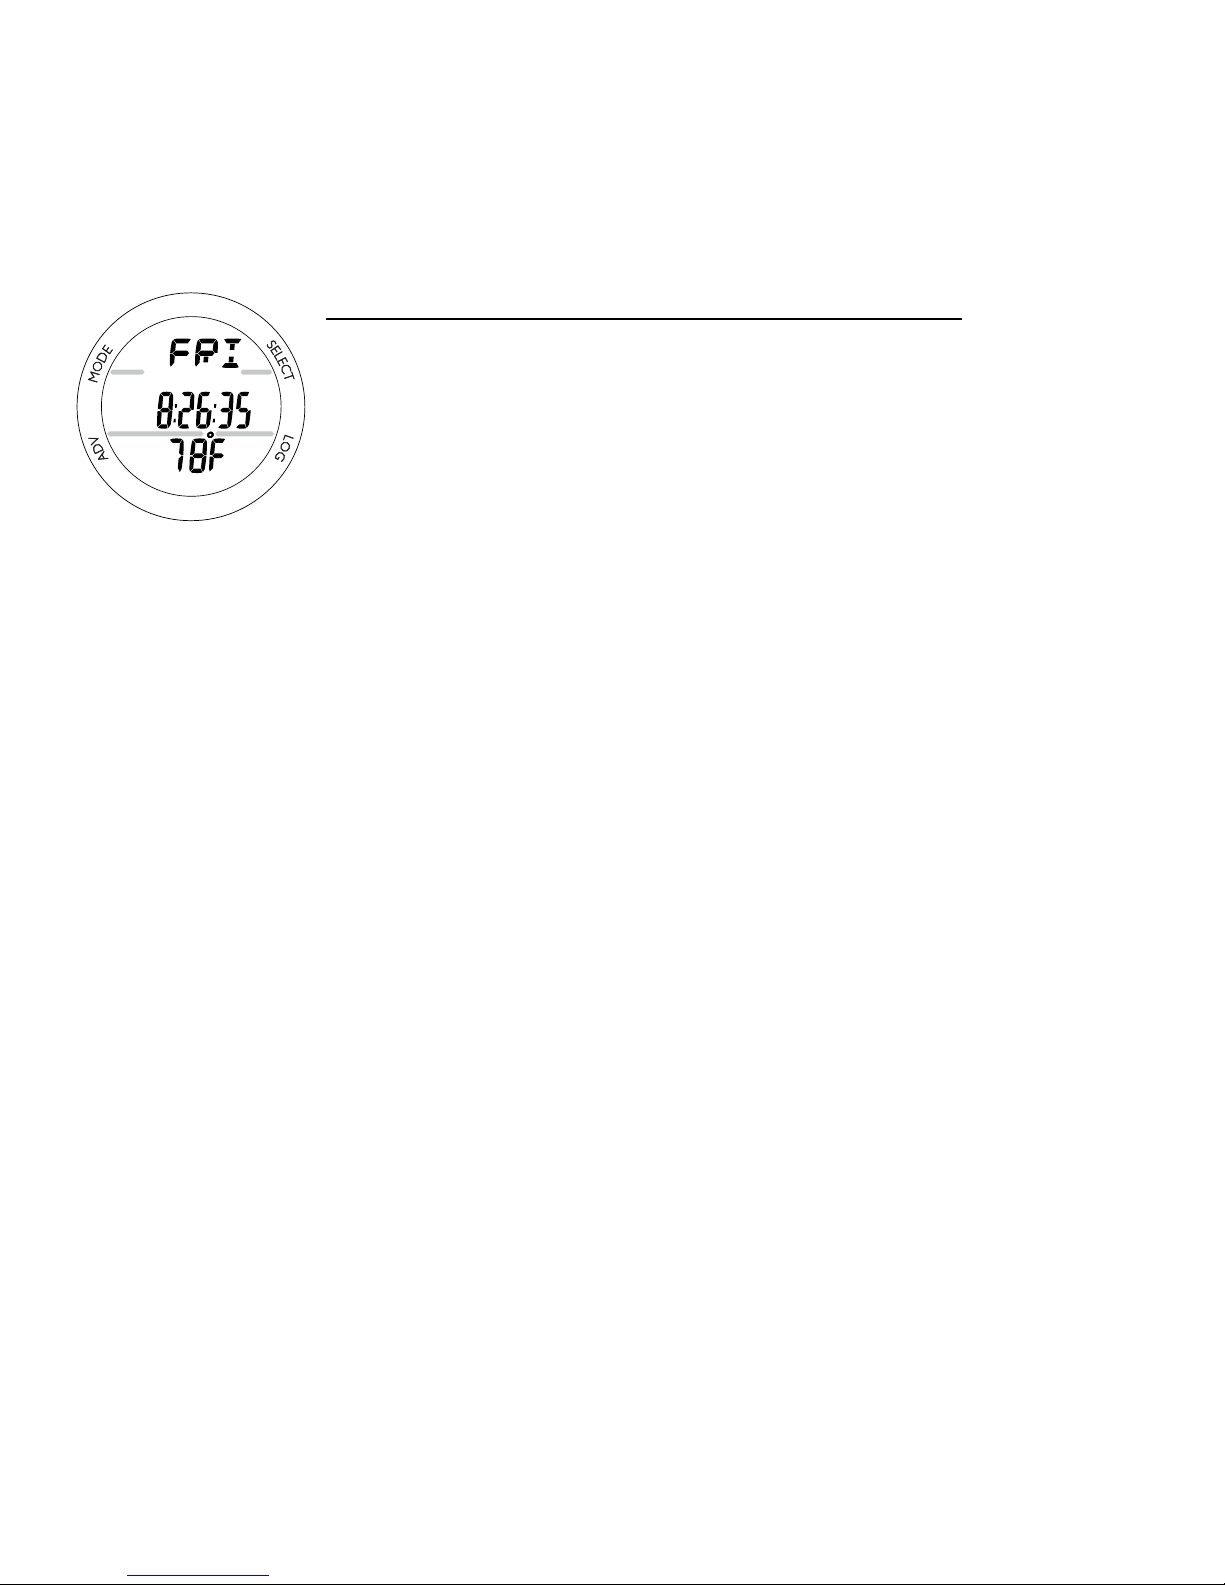
94
SECONDARY DISPLAY, information includes (Fig. 96) -
> Day of the Week Graphic (MON, TUE, etc.).
> Time of Day (hr:min).
This will be the Watch Time selected
(Main or Alternate).
> Temperature with degrees icon and Graphic F (or C).
• Operation will revert to the Main after 5 seconds or if A is
pressed (< 2 seconds).
• Depressing L (2 seconds) will activate the Backlight.
Fig. 96 - SECONDARY
Page 95

95
FREE DIVE OPERATING MODE
Page 96

96
FREE DIVE MODE FREE
When FREE is selected as the operating mode, the Grande will operate as a
digital depth gauge with select features. Nitrogen calculations are based upon
a default FO2 of Air and the amount remaining during 24 hours is carried over
between FREE and NORM modes.
• To access FREE mode, while the GAUG SURF Main is displayed (and no
GAUG dive was made), depress M (2 seconds).
• Press M (< 2 seconds), while FREE is ashing, to select FREE mode for the type
of dives to be conducted.
FREE SURF MAIN, information includes (Fig. 97) -
> NIBG, if any after FREE or NORM dives.
> Graphic FREE alternating with the Altitude graphic SEA
(or EL 2 through EL13) and graphic WET (if wet), each 3
seconds On then 1/4 second O.
> Surface Interval Time (min:sec up to 59:59, then hr:min)
with SURF and TIME icons.
> Battery icon if a Low Battery Warning condition exists.
> Total number of repetitive FREE Dives conducted in that
series with DIVE icon.
• Depressing M (2 seconds) will access NORM SURF MAIN.
• Pressing M (< 2 seconds) will access Watch Default Time.
• Depressing A (2 seconds) will access the ALT screen.
• Pressing A (< 2 seconds) will access FREE CDT.
• Depressing A and S (2 seconds) will access Set Alarms.
• Depressing L (2 seconds) will activate the Backlight.
Fig. 97 - FREE SURF
MAIN
Page 97
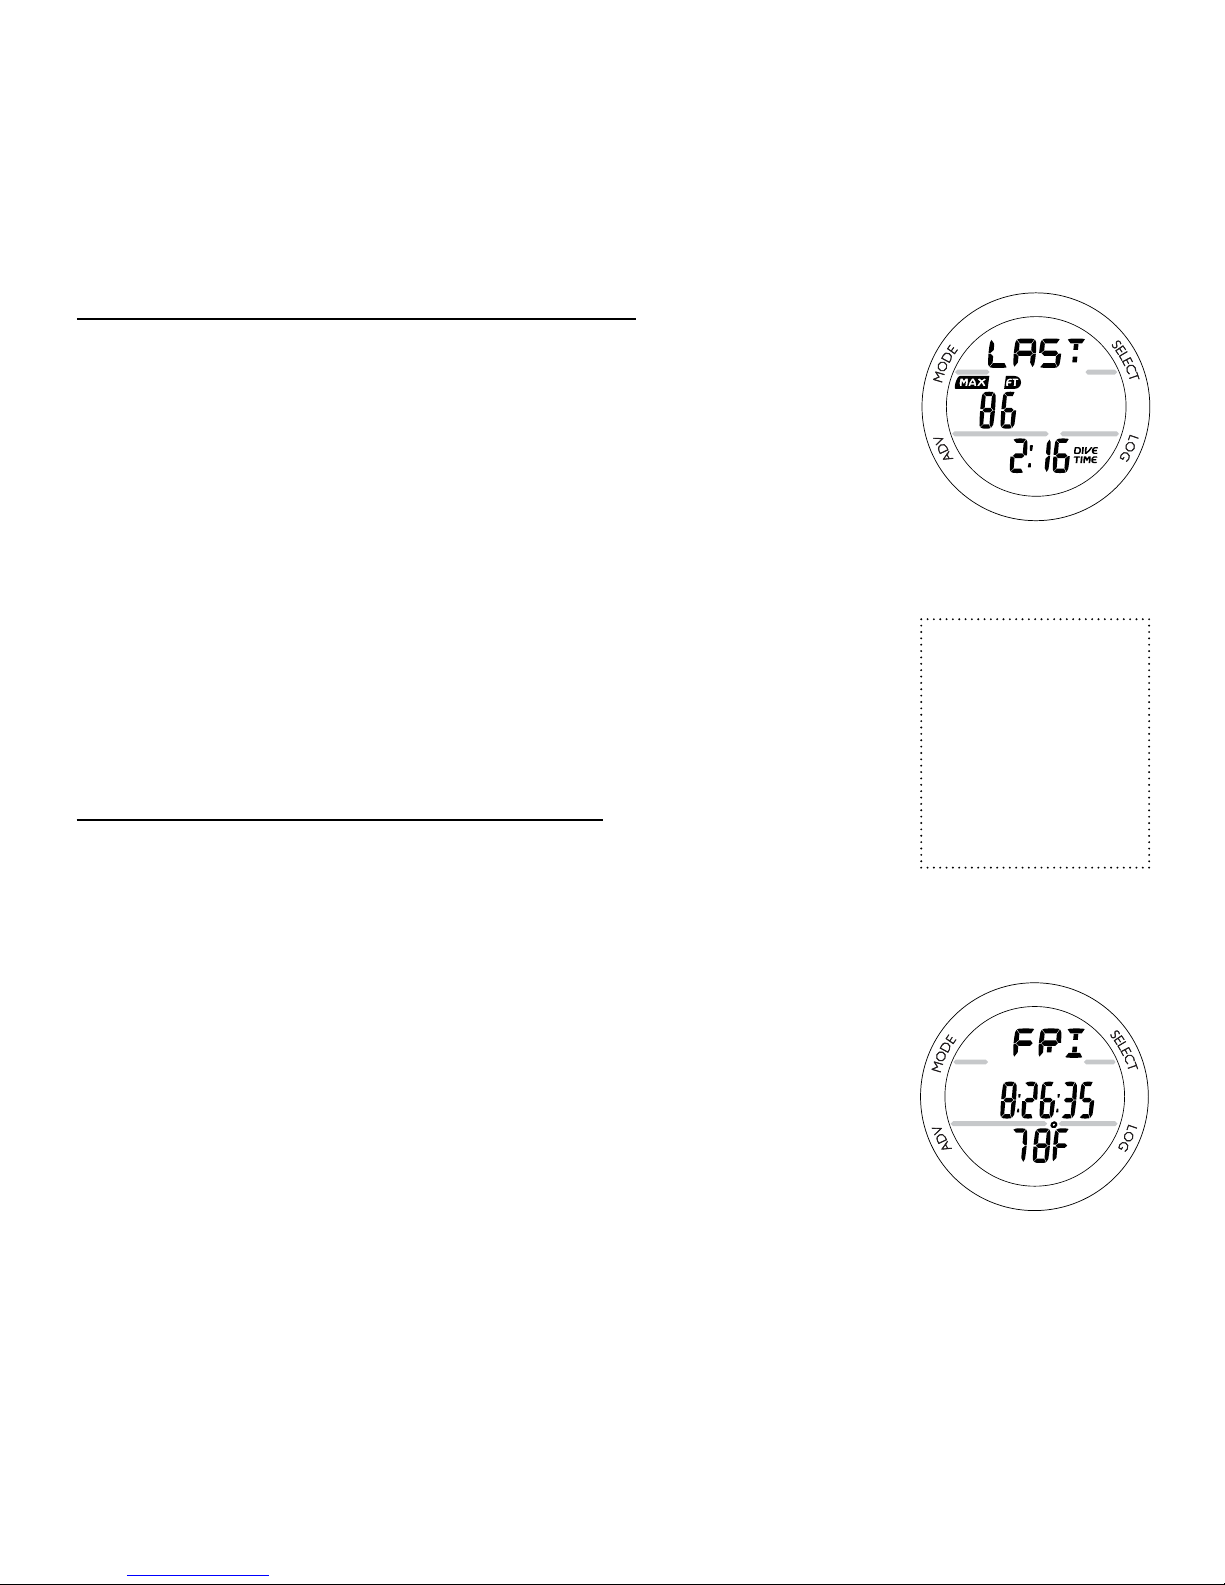
97
FREE SURF ALT, information includes (Fig. 98) -
> Graphic LAST, indicating that information relates to the last
FREE dive conducted.
> Maximum Depth of the dive previously made while still in
FREE mode with MAX and FT (or M) icons.
> Elapsed Dive Time (min:sec) of the dive previously made
while still in FREE mode with DIVE and TIME icons.
Resets
to 0:00 after 24 hours.
• Pressing A (< 2 seconds) will access the Secondary.
• Depressing L (2 seconds) will activate the Backlight.
• Operation will revert to the Main after 5 seconds if A is
not pressed.
SECONDARY, information includes (Fig. 99) -
> Day of the Week Graphic (MON, TUE, etc.)
> Time of Day (hr:min). This will be the Watch Default Time
selected (Main or Alternate).
> Temperature with degrees icon and Graphic F (or C).
• Operation will revert to the Main after 5 seconds or if A is
pressed (< 2 seconds).
FREE Mode uses
the NORM/GAUG
settings for -
>> Time/Date
>> Wet Activation
>> Units
>> Conservative
Factor
Fig. 98 - FREE SURF
ALT
Fig. 99 - SECONDARY
Page 98
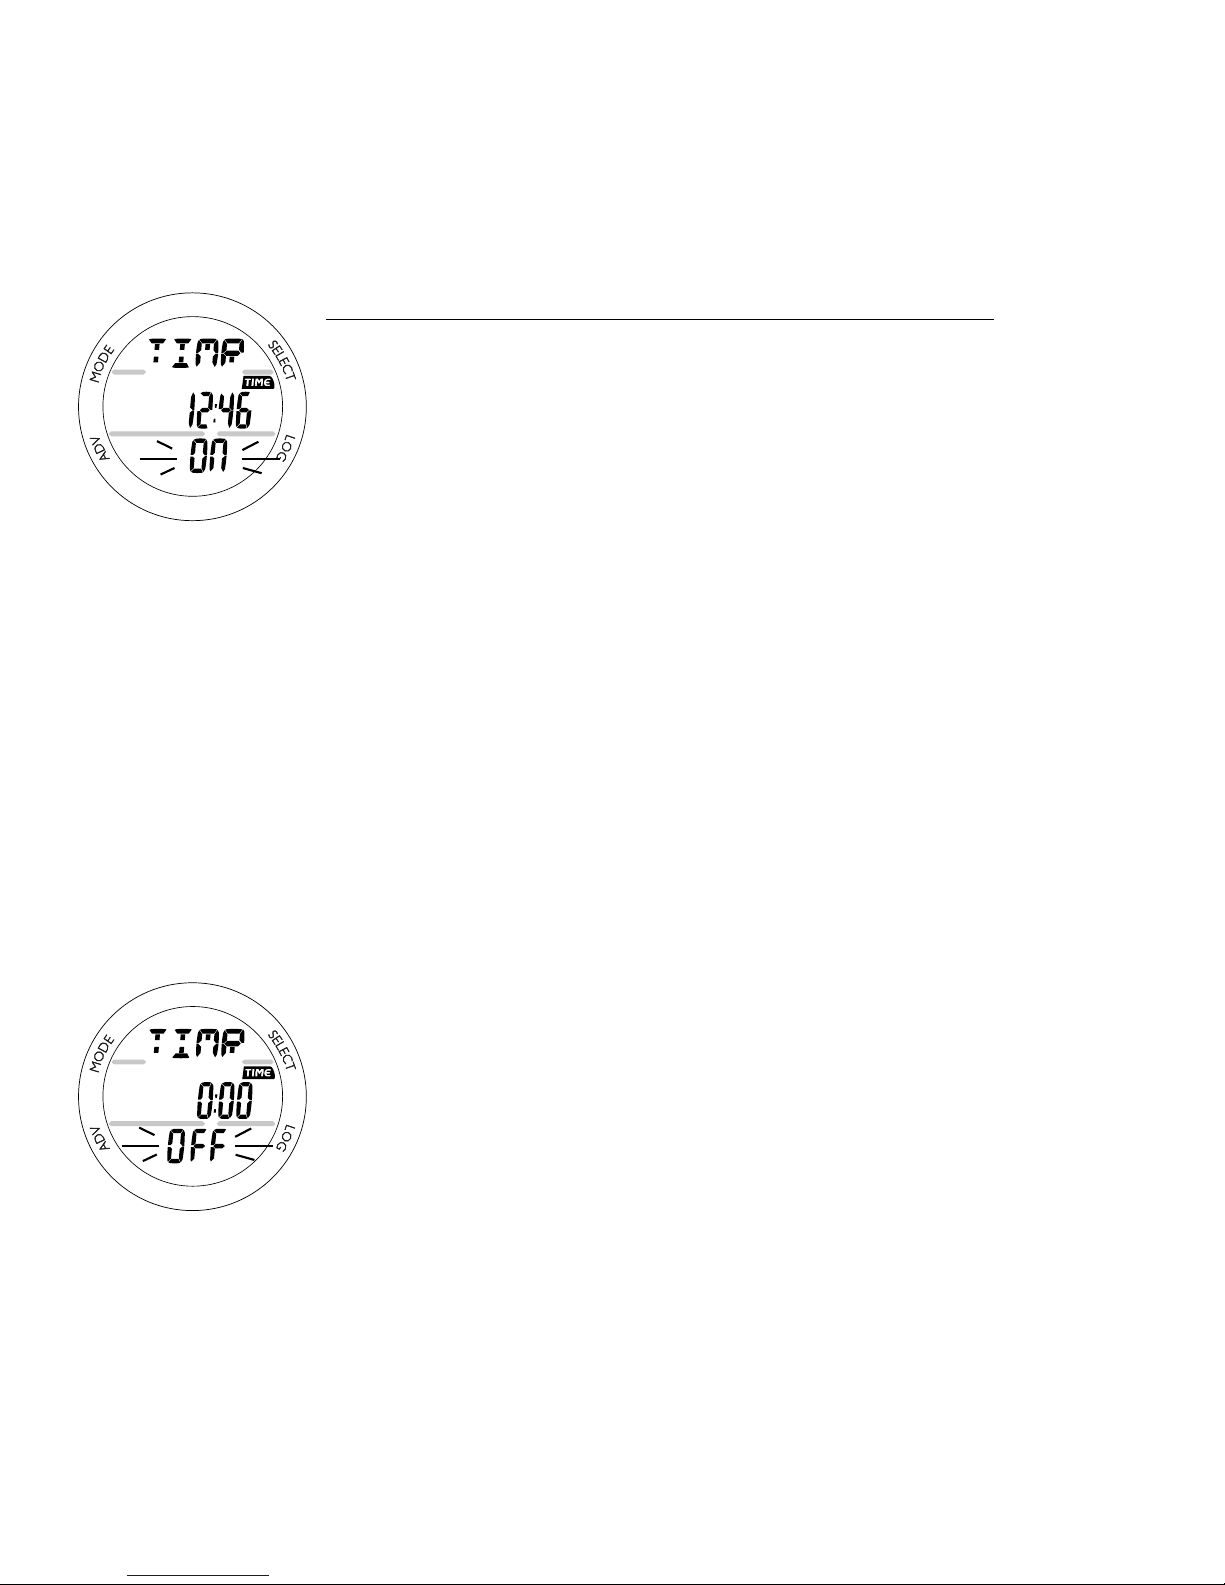
98
FREE CDT STATUS, information includes (Fig. 100/101) -
> Graphic TIMR.
> Remaining Countdown time (min:sec) with the colon
ashing and the TIME icon, if ON and a CD is in
progress.
> 0:00 will be displayed, if the CD Timer is ON and no time
is remaining.
> If the CD Timer is OFF, the CD Time (min:sec) previously set
will be displayed.
> Graphic OFF (or ON), ashing.
• Pressing S (< 2 seconds) will toggle between ON and OFF.
> If a Time has been set, a toggle from OFF to ON will Start
the CD Timer indicated by the colon ashing.
> An ON/OFF toggle is prevented when S is operated to
acknowledge/silence the Watch Daily Alarm.
• Pressing A (< 2 seconds), or if no button is pressed during
a period of 2 minutes, operation will revert to the Main.
• Depressing A and S (2 seconds), when the CD Timer is
OFF, will access Set CDT.
Once the CD TIMER has been set and started (by selecting
ON), it will continue to run in the background while on the
surface until turned OFF (stopped) or the Time reaches 0:00 at
which time the alarm will strike (3 short beeps 3 times), the message TIMR will be displayed, and the CDT will revert to OFF.
Fig. 101 - CDT OFF
Fig. 100 - CDT ON/
RUNNING
Page 99
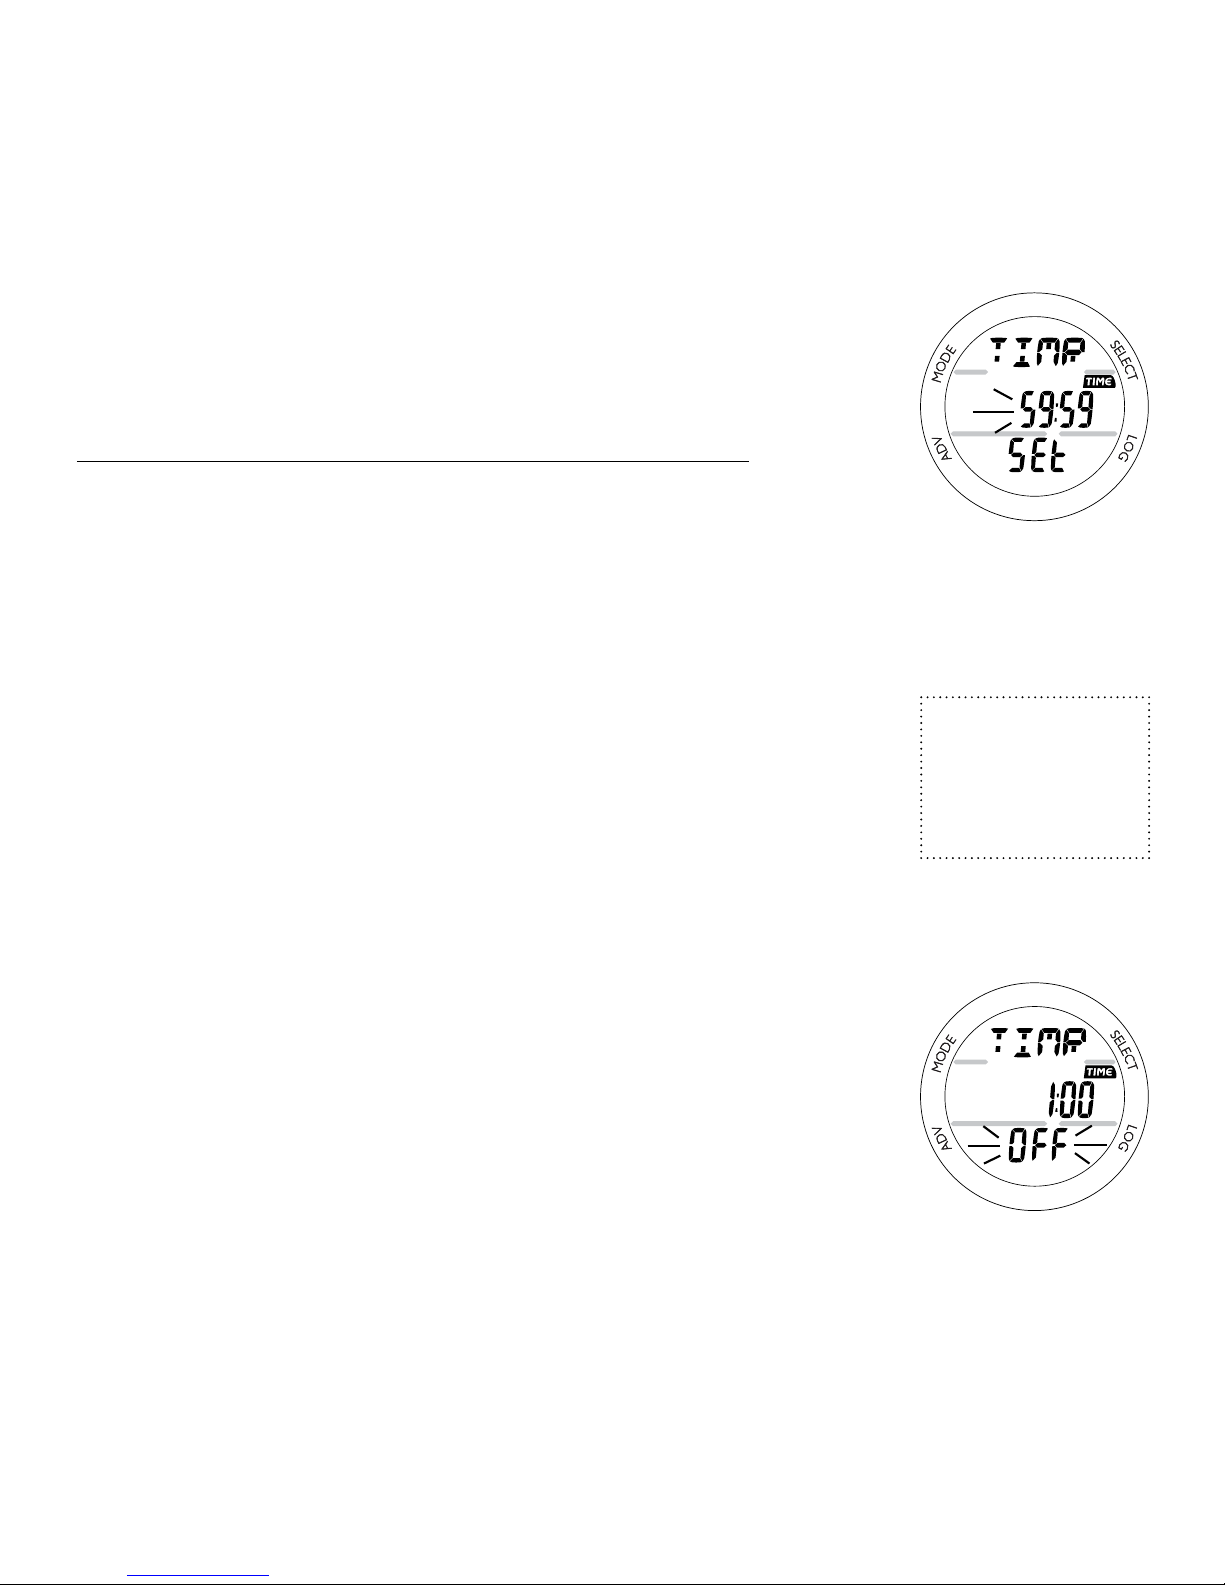
99
Upon entering FREE Dive Mode, CDT operation will continue,
if in progress. During a dive, the CDT can be turned O
(stopped) and On (started), but not Set.
SET CDT Surface only, information includes (Fig. 102) -
> Graphic TIMR, solid.
> Timer setting (min:sec) with the TIME icon, colon solid,
Minute digits ashing.
> Graphic SEt, solid.
• Depressing S will scroll through the Minaute settings at
a rate of 4 per second from 0: to 59: in 1 Minute (1:)
increments.
• Pressing S repeatedly (< 2 seconds each time) will step
through the settings one at a time.
• Pressing A (< 2 seconds) will save the Minute setting and
ash the Seconds digits.
• Depressing S will scroll through the Seconds settings at a
rate of 4 per second from :00 to :59 in 1 Second (:01)
increments.
• Pressing S repeatedly (< 2 seconds each time) will step
through the settings one at a time.
• Pressing A (< 2 seconds) will save the CDT (min:sec)
setting indicated by the graphic OFF ashing in place of
the Graphic SEt (Fig. 102).
• Pressing S (< 2 seconds) will toggle to ON and Start the
CDT.
The Set Point for
the Watch CDT
does not aect
the FREE CDT.
Fig. 101 - SET FREE
CDT
Fig. 102 - FREE CDT
SET/READY
Page 100
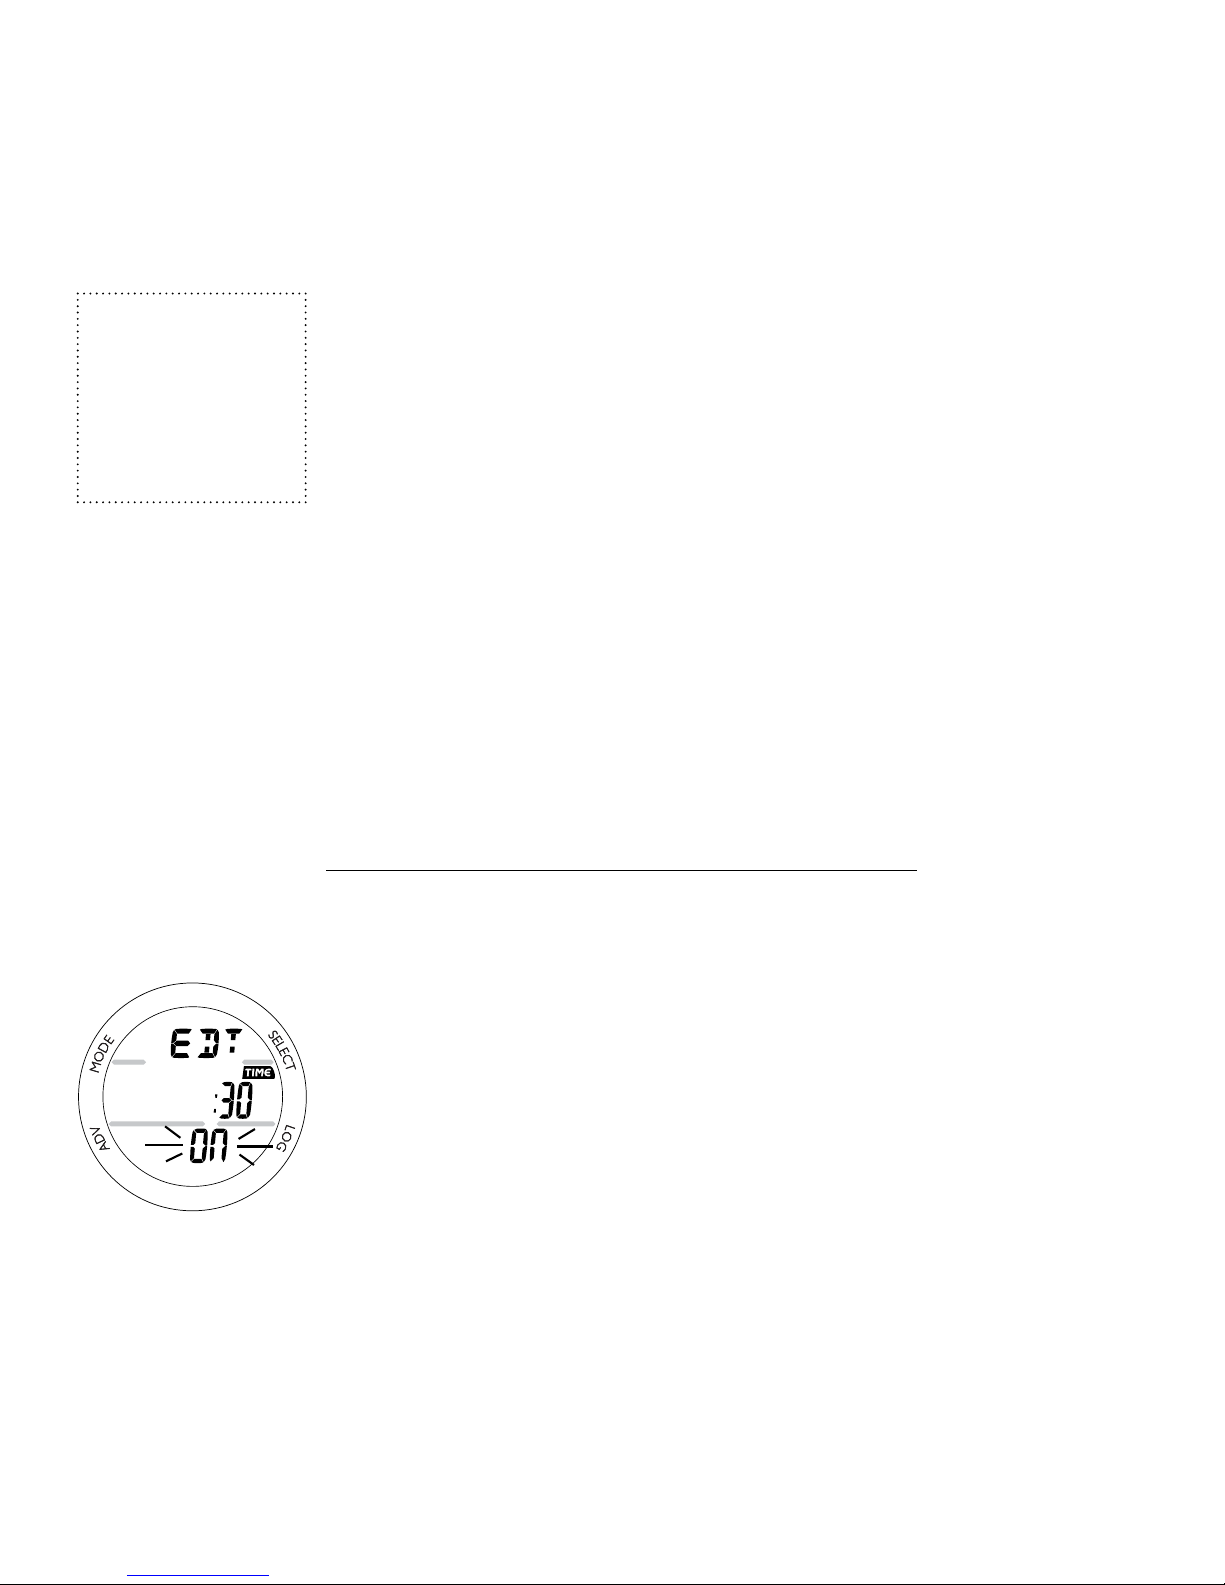
100
• Pressing A (< 2 seconds), or if no button is pressed during
a period of 2 minutes, operation will revert to the Main.
FREE EDT ELAPSED DIVE TIME ALARM
The FREE EDT Alarm is factory set for 30 seconds. When set
ON, the Alarm will sound 3 short beeps and the graphic TIME
will be displayed momentarily every 30 seconds while operating underwater in FREE Dive Mode.
• Depressing A and S (2 seconds), while the FREE SURF
Main is displayed, will access Set EDT Alarm.
The FREE EDT Alarm can only be Set (turned OFF or ON) while
on the Surface and cannot be changed during a Dive.
SET EDT ALARM, information includes (Fig. 103) -
> Graphic EDT.
> Pre set interval :30 (:sec) with TIME icon.
> Graphic OFF or ON, ashing.
• Pressing S (< 2 seconds) will toggle between OFF and
ON.
• Pressing A (< 2 seconds) will save the setting and access
Set Depth Alarm 1.
• Depressing M (2 seconds), or if no button is pressed during
a period of 2 minutes, operation will revert to the Main.
The Set Point
for the NORM/
GAUG EDT
Alarm does not
aect the FREE
EDT Alarm.
Fig. 103 - SET FREE
EDT ALARM
 Loading...