

Page 1

Setup Guide
Page 2

Setup Guide
Page 3

CONTENTS
Introducing Biscotti ............................................................................ 1
Setup .........................................................................................................5
Using Biscotti .......................................................................................13
Troubleshooting .................................................................................21
Page 4

Introducing Biscotti
Page 5

2
KEY FEATURES
• Tiny, elegant design
• Connects to your HDTV
• Calls through Wi-Fi
• Full screen HD calls
• Whole room view
• Call notices overlaid on live TV
• Time-lapse videos
• Google interoperability
• Works with cable and satellite boxes
• Auto TV On for incoming calls*
• Auto Answer for select contacts
• Automatic software upgrades
• Easy setup for home and office
• Video monitoring mode
• Encrypted call mode
• No computer required
• No subscription fees
* Biscotti Auto TV On technology requires a TV that is CEC-
compatible. For more information see page 19 .
WHAT’S INCLUDED
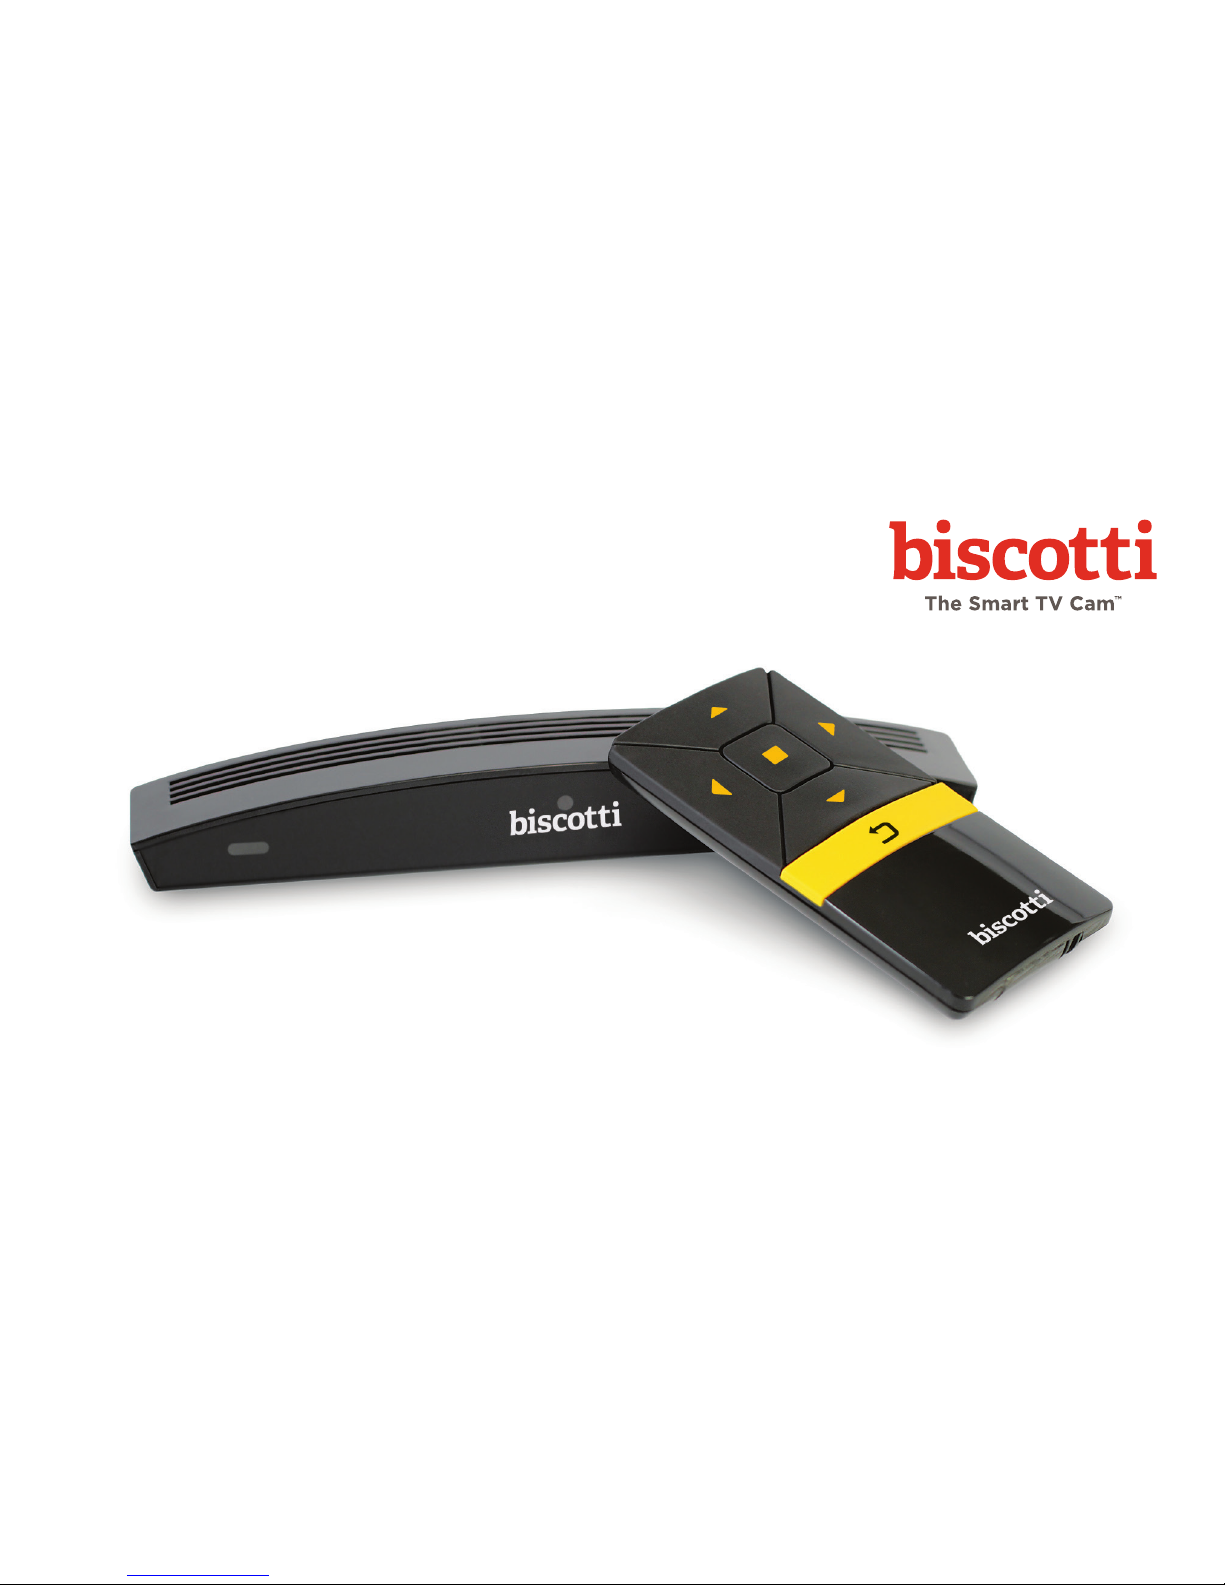
• Biscotti
• Biscotti remote control
• HDMI cable
• Power adapter
• Mount kit
• Setup Guide
WHAT ELSE YOU’LL NEED
• TV with an HDMI port
• Your Wi-Fi network name (SSID)
• Your Wi-Fi network password
(if security is turned on)
Record your network name here
Record your password here
Page 6
3
Page 7

Setup
Page 8

5
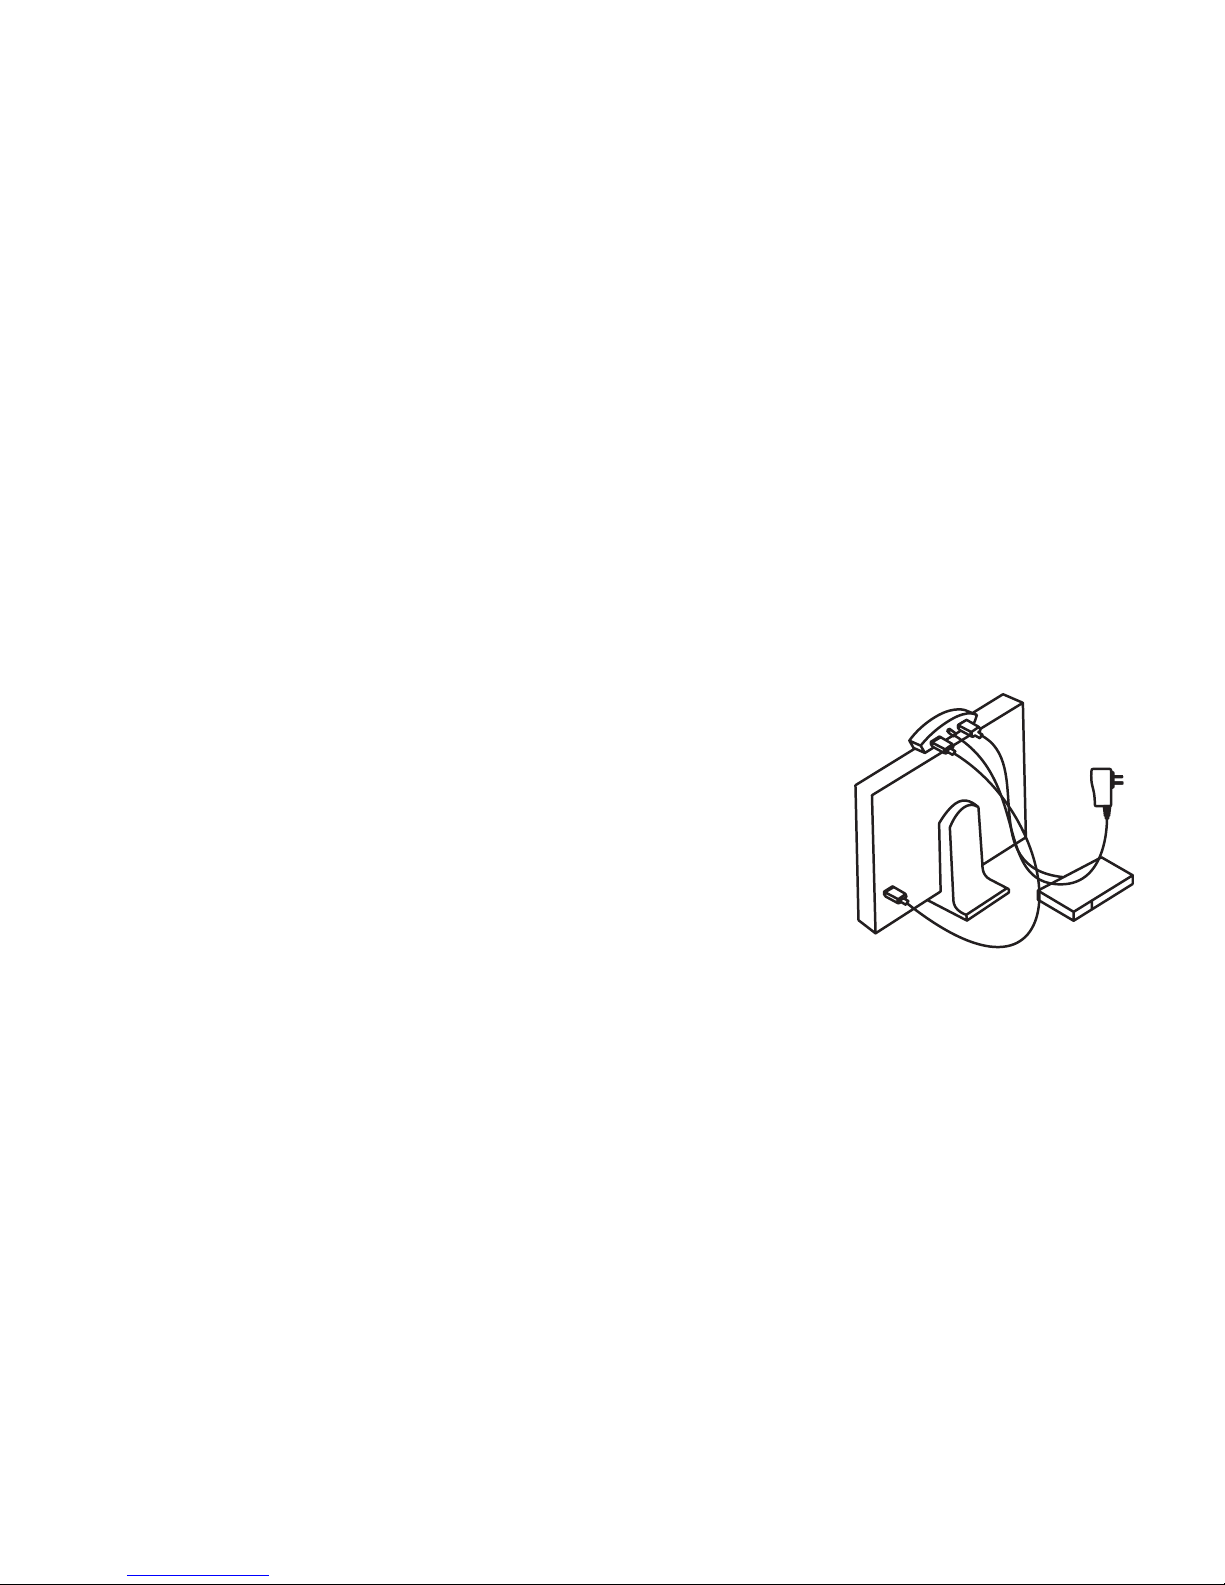
1. CONNECT BISCOTTI TO TV
The first setup step is connecting Biscotti to your TV. As
part of this step do not mount Biscotti to the top of your
TV. You will mount Biscotti to the TV later, when it is
powered on and you can use Biscotti’s camera to point
it where you like best.
Select the option below that applies to you:
Option 1 - Preferred
If your cable or satellite box connects to your TV using an
HDMI cable:
a) On the back of your TV, find the HDMI cable coming
from your cable or satellite box. Remember the connector location on the back of your TV, as it will be used
again in step b. Unplug the HDMI cable coming from
your cable or satellite box from the back of the TV and
plug it into Biscotti’s port marked “HDMI IN”.
b) Using the HDMI cable that came with Biscotti, plug one
end of the cable into the HDMI port on the back of the
TV that was originally connected to your cable or satellite box. Plug the other end of the cable into Biscotti’s
port marked “HDMI OUT”.
Tip: This option allows Biscotti to overlay incoming calls
and other messages over live TV.
c) Connect the power adapter to Biscotti and plug it into
a power outlet.
Option 2
If your cable or satellite box does not connect to your TV
using an HDMI cable:
a) Using the supplied HDMI cable, connect “HDMI OUT”
on Biscotti to the an available HDMI port on your TV.
b) Connect the power adapter to Biscotti and plug it into
a power outlet.
Tip: If you followed Option 2, you will need to use the TV
remote control to switch between the TV and Biscotti
when you want to make or receive a video calls.
Page 9
6
2. TV POWER AND INPUT
a) Turn on your TV.
b) Make sure the TV input is set to the HDMI port that
Biscotti is connected to.
3. TERMS AND CONDITIONS
When prompted, review and accept the Terms and
Conditions.
4. LANGUAGE
Select your preferred language.
5. MOUNT BISCOTTI ON YOUR TV
a) Place Biscotti on your TV.
b) Use the Zoom and Pan options to adjust the camera
so that it captures the view you want.
c) Apply two sticky pads from the Mount Kit to the
bottom of Biscotti. Then, secure Biscotti to the top of
your TV.
Tip: Clean the top of
your TV so that is dry
and dust-free before
applying the sticky
pads.
d) Using the clip
straps included
in the Mount Kit,
secure all cables
to the back of
the TV to support
Biscotti.
e) Press Done to continue.
Page 10
7
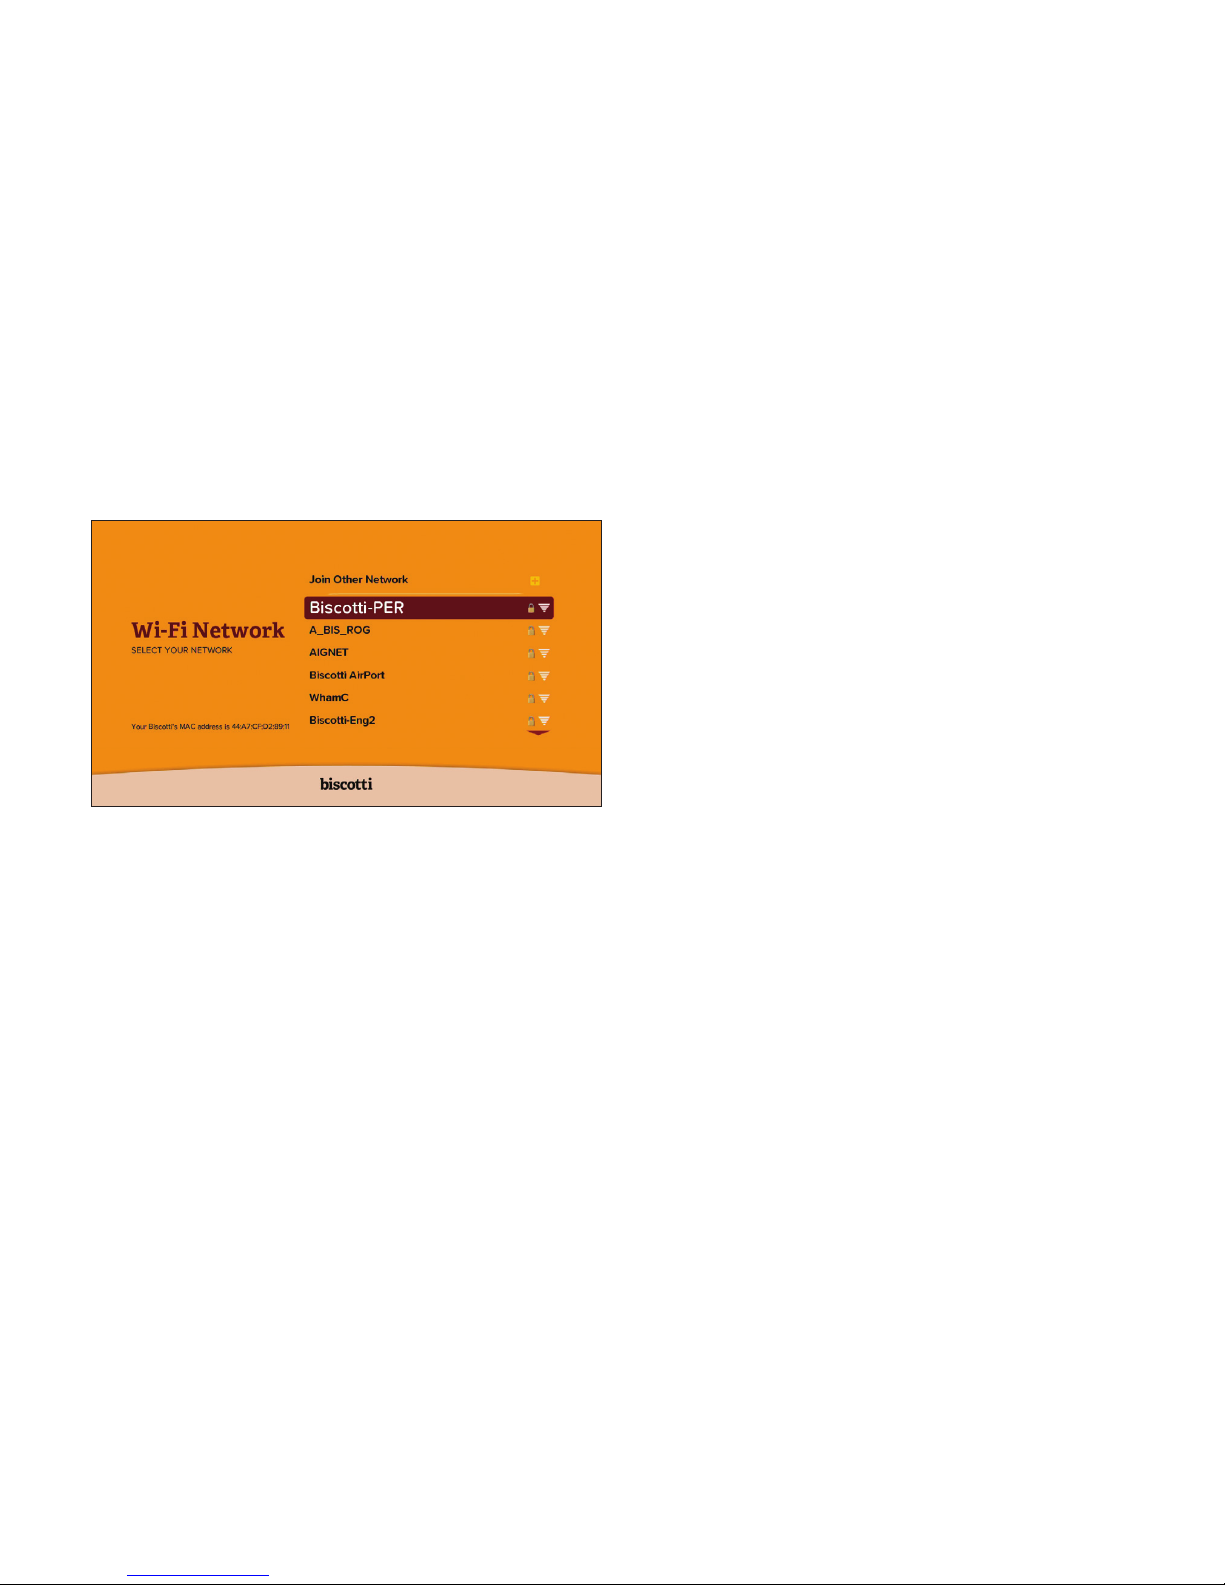
6. WI-FI CONNECTION
a) Biscotti will search for Wi-Fi networks. Select your Wi-Fi
network from the list displayed.
If your Wi-Fi network name is not displayed, see Troubleshooting on Page 21 or visit www.biscotti.com/support.
b) If prompted, enter your Wi-Fi password and click Done.
c) Biscotti will connect to your Wi-Fi network, check the
bandwidth, analyze the link quality and report the results.
Click Done when you have reviewed the results.
If Biscotti reports an error, see the Troubleshooting section
or visit www.biscotti.com/support.
Page 11
8
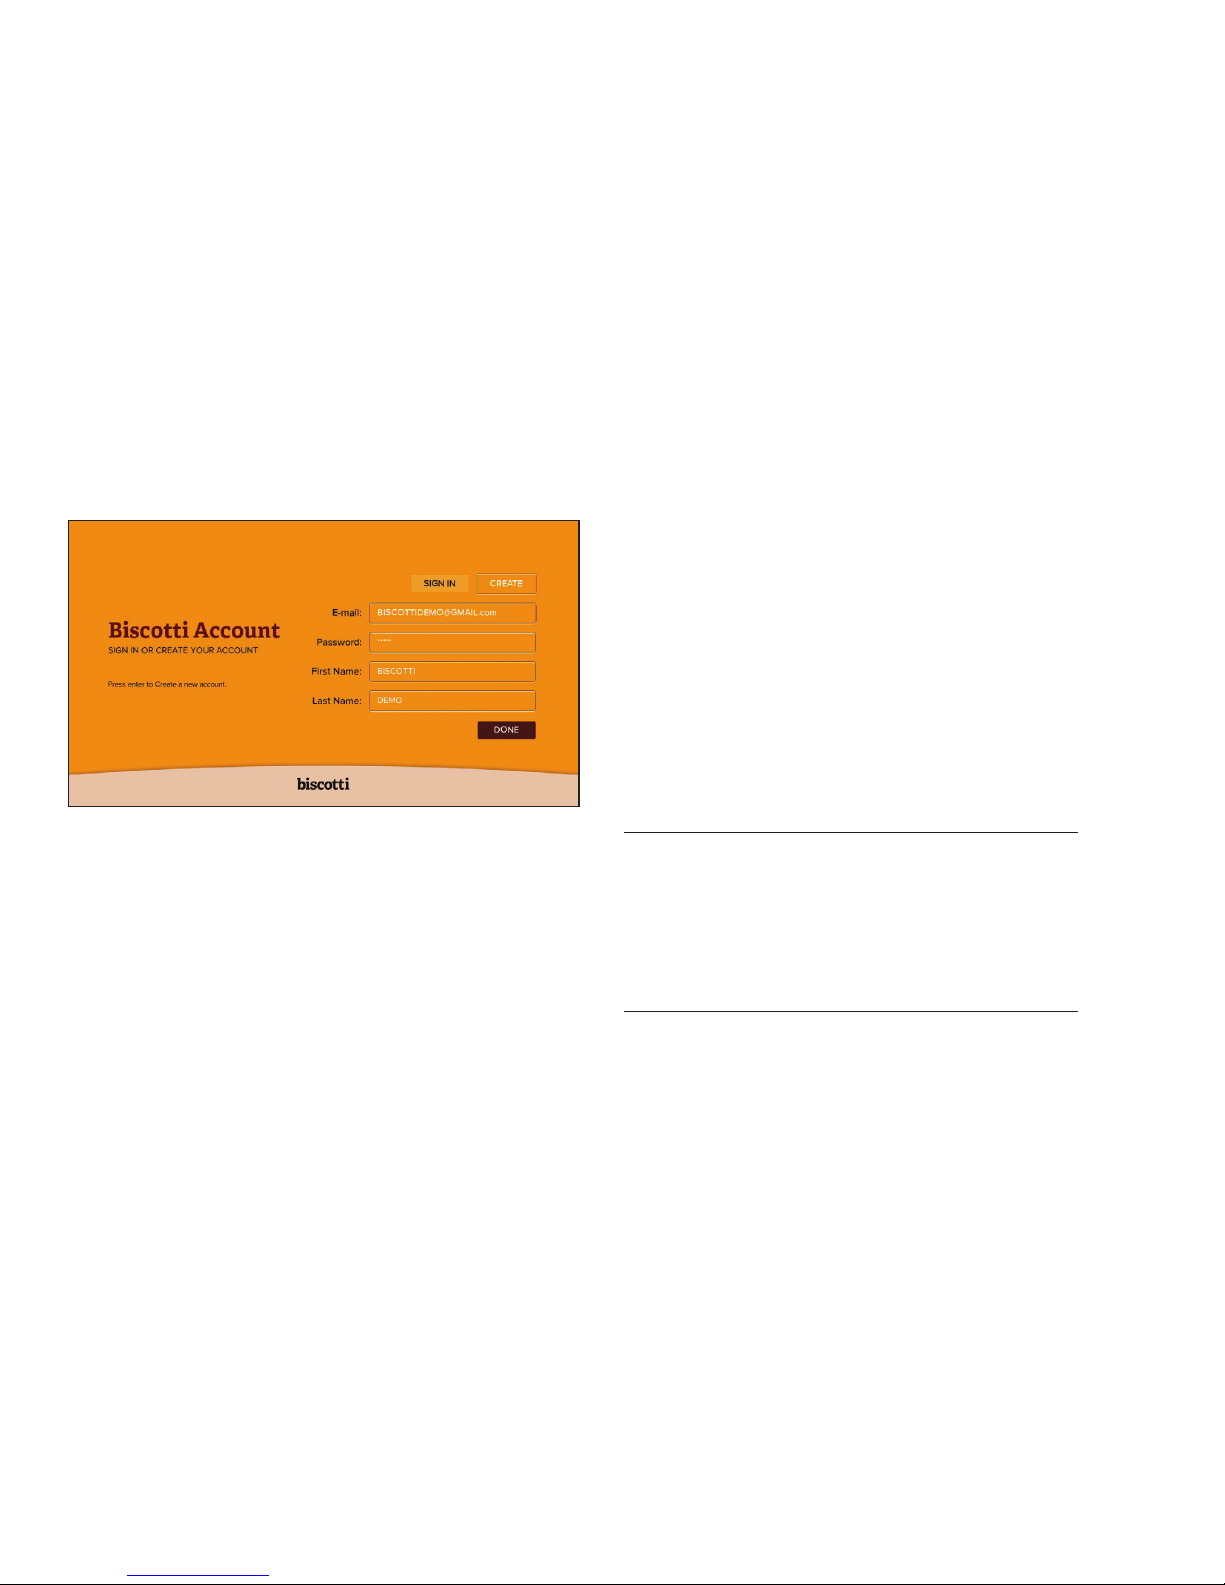
7. BISCOTTI ACCOUNT
Select the option that applies to you:
Option 1 - Create a New Biscotti Account
To create a new Biscotti ID:
a) Select Create
b) Enter your e-mail address. This will be used as your
Biscotti Account. Click Done when finished.
Tip: The Biscotti Account can be any valid e-mail address.
c) Pick or create your Biscotti Account password.
Click Done when finished.
Tip: Make sure you record your Biscotti Account and password in a safe place.
Record your Biscotti Account here
Record your password here
Page 12
9
Option 2 - Enter Existing Biscotti Account
If you already have a Biscotti Account, follow these
steps:
a) Select Sign In.
b) Enter your Biscotti Account and password.
c) Click Done when finished.
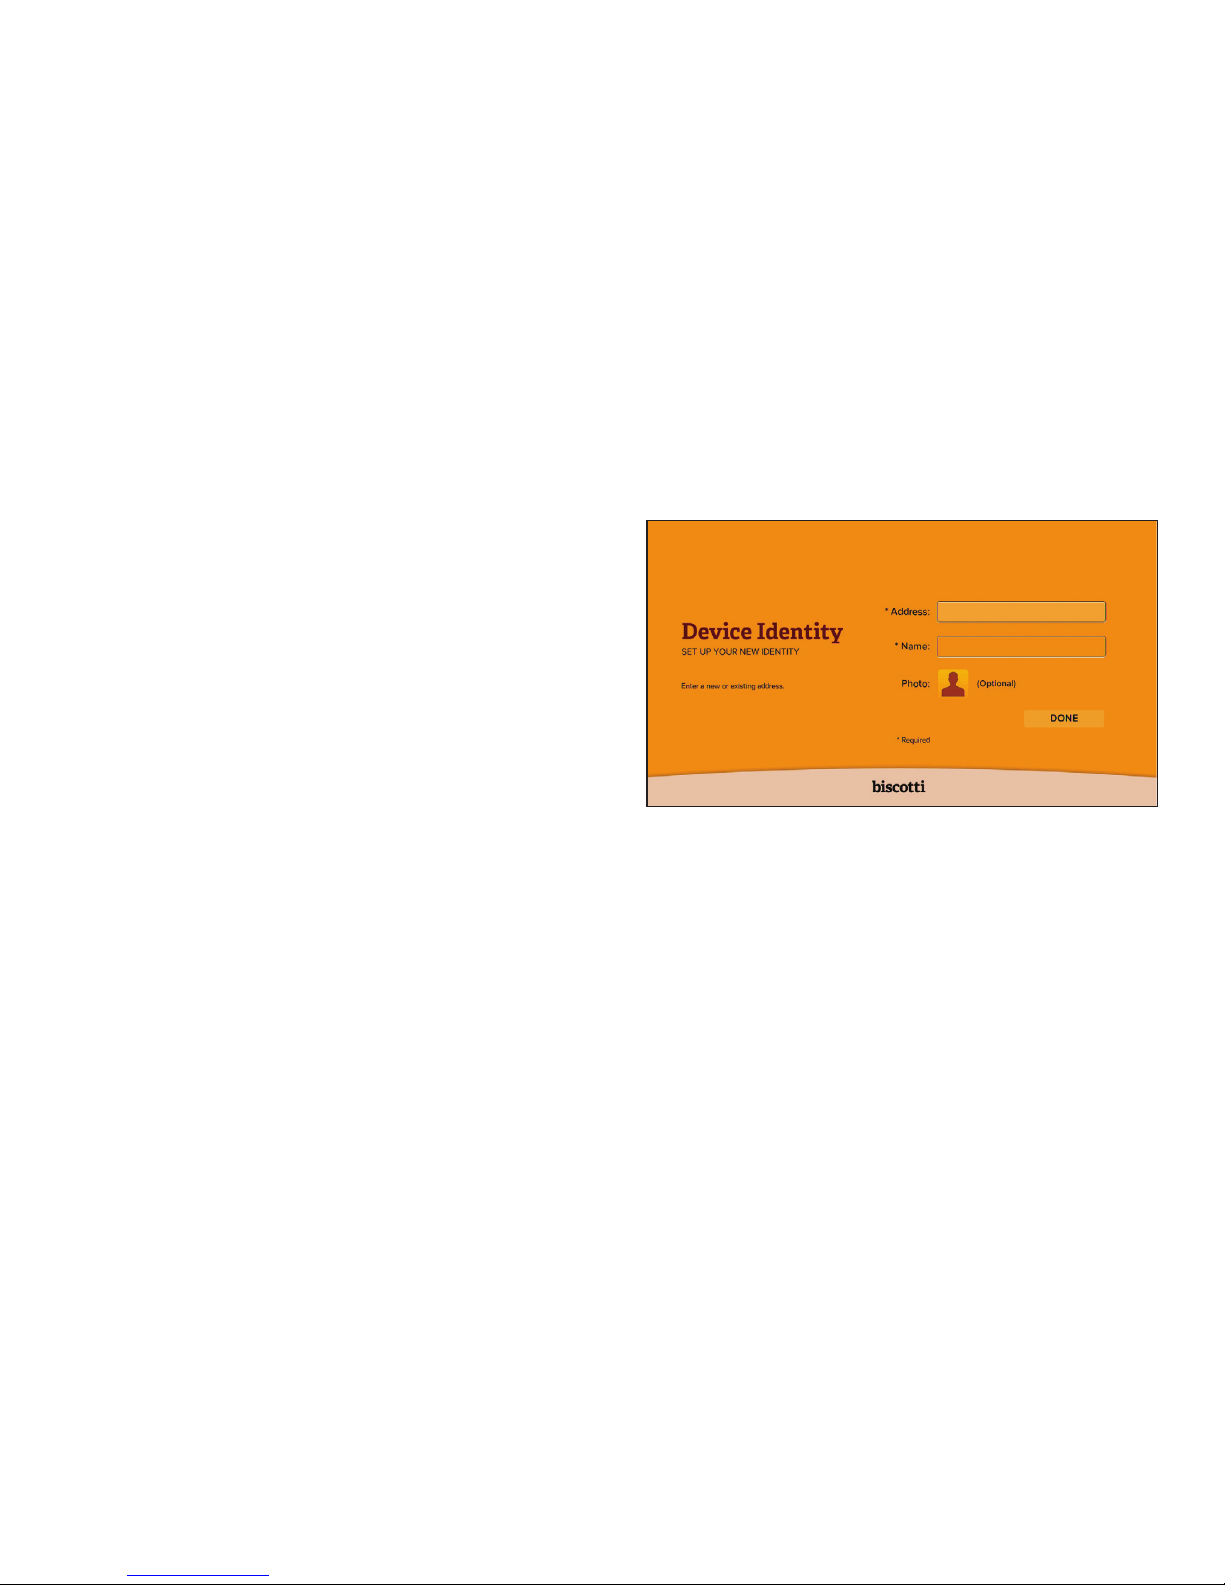
8. DEVICE IDENTITY
Set the identity of this Biscotti, follow these steps:.
a) Enter the desired Device Address.
Tip: The Device Address is the unique address used by
others to call this Biscotti.
b) Enter the Name of this Biscotti..
Tip: The Name is not unique. It is used to identity this
Biscotti easily. Example names are “Smith’s Living Room”
or “Jack Williams.”
c) Set the Photo for this Biscotti.
Tip: The Photo will be seen by others and will allow them to easily
identify this Biscotti.
Page 13

10
9. MyBiscotti Cloud Services
Your Biscotti works with the cloud:
a) Set Cloud Services to your preferred settings.
b) Click Done when finished.
Tip: to access MyBiscotti Cloud Services, go to www.biscotti.com
and click MyBiscotti.
10. MAKE A TEST CALL
Biscotti is now fully configured and ready to use.
Follow these steps to place a test call:
a) Review the description of Biscotti’s main menu
on the next page.
b) Select Contacts from the menu and press Enter.
c) Select Biscotti test call and then click Enter to
place a call. Biscotti will place a call to the Biscotti
test call service. The call will end automatically
after about one minute.
Tip: During a call, click any button on the remote
control to see the menu of call options, which include
End Call, Mute, Inset, Zoom, Pan and Call Info.
If Biscotti does not make the call, see Troubleshooting
on page 21 or visit www.biscotti.com/support.
Biscotti is now ready to make and receive
video calls.
Page 14
11
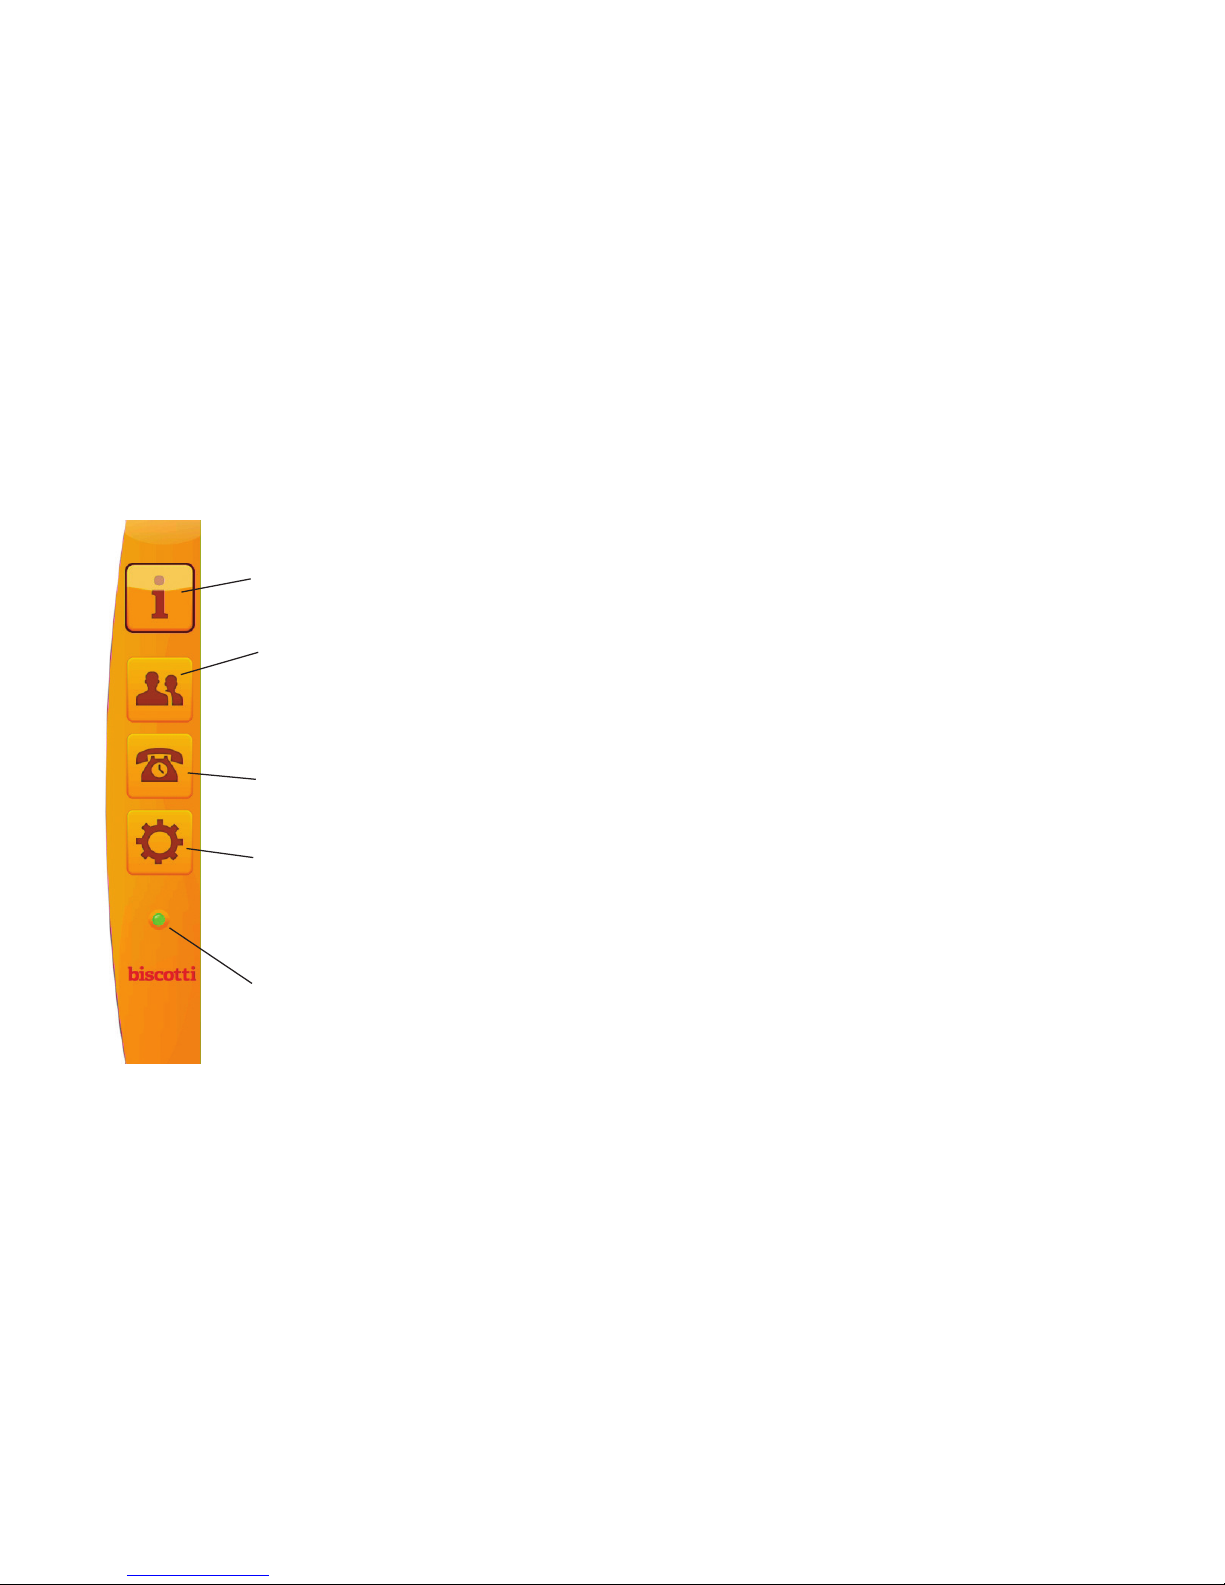
MAIN MENU
Info
Information about this Biscotti.
Contacts
Access your contacts to place calls. Add,
delete and import contacts. Configure
features such as auto answer and favorites.
Call History
See the calls you missed and easily return calls.
Settings
Manage settings such as camera pan/zoom,
Wi-Fi network connection, Language and other
general Biscotti settings.
Network Status
Provides easy access visual indication of
the network status. Select the icon for
detailed description.
Page 15

Using Your Biscotti
Page 16

13
ADDING CONTACTS
Biscotti can call another Biscotti as well as Google
contacts.
1. From Biscotti’s main menu, select the Contacts icon.
2. Select +Add New Contact.
3. Enter the Biscotti ID or the Google e-mail
address for your new contact. For example:
[email protected] or [email protected].
4. Biscotti will automatically send an invitation to your
new contact.
5. When the Contact Invitation has been accepted,
you will receive a notification.
Page 17
14
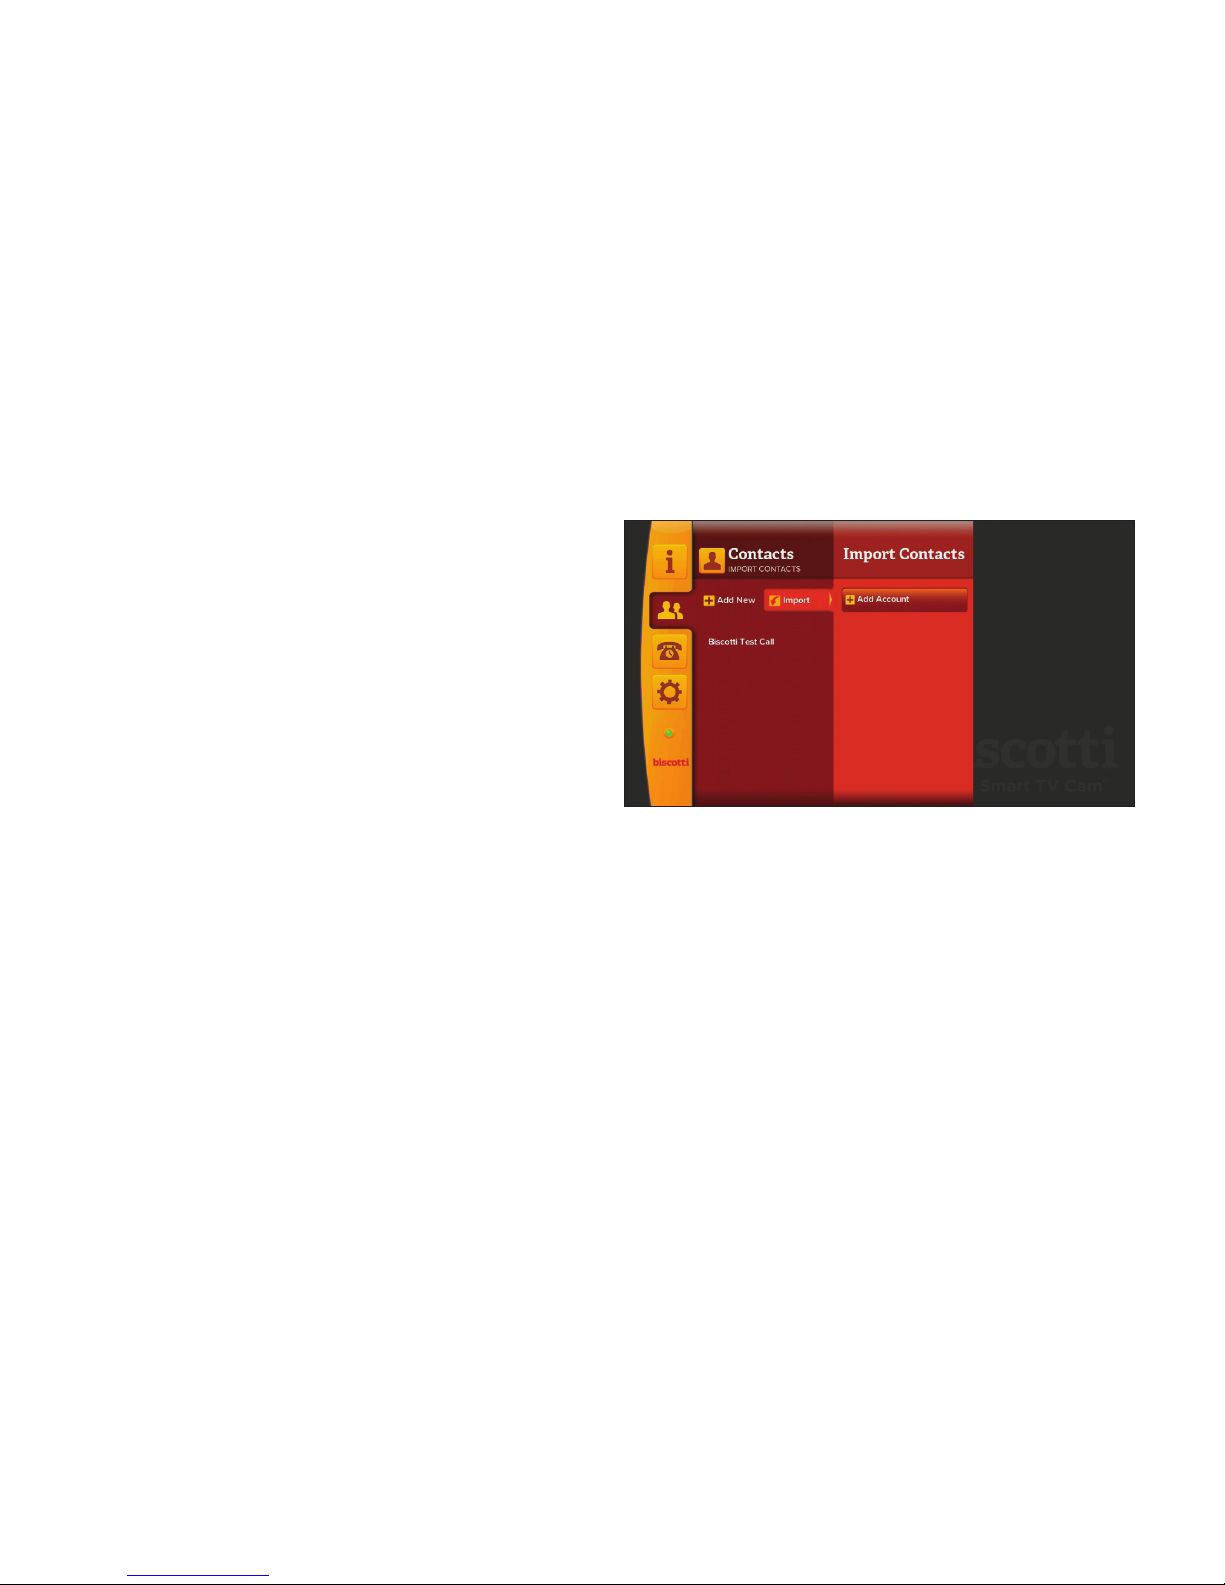
IMPORTING CONTACTS
Biscotti can import contacts from the address book in
your Google account.
1. From Biscotti’s main menu, select the Contacts icon.
2. Select Import.
3. Select +Add Account.
4. Enter your Google account information.
5. Biscotti will import your contacts.
6. To send invitations to your contacts to allow them to
call you, select Invite Them. If you prefer to invite your
contacts individually, select Skip.
7. Your imported contacts may now be accessed from
the Contacts menu.
8. If you choose Skip in step 6, you may send
individual invitations from the Contacts menu by
selecting the contact, pressing the Right button
and pressing Invite.
Page 18
15
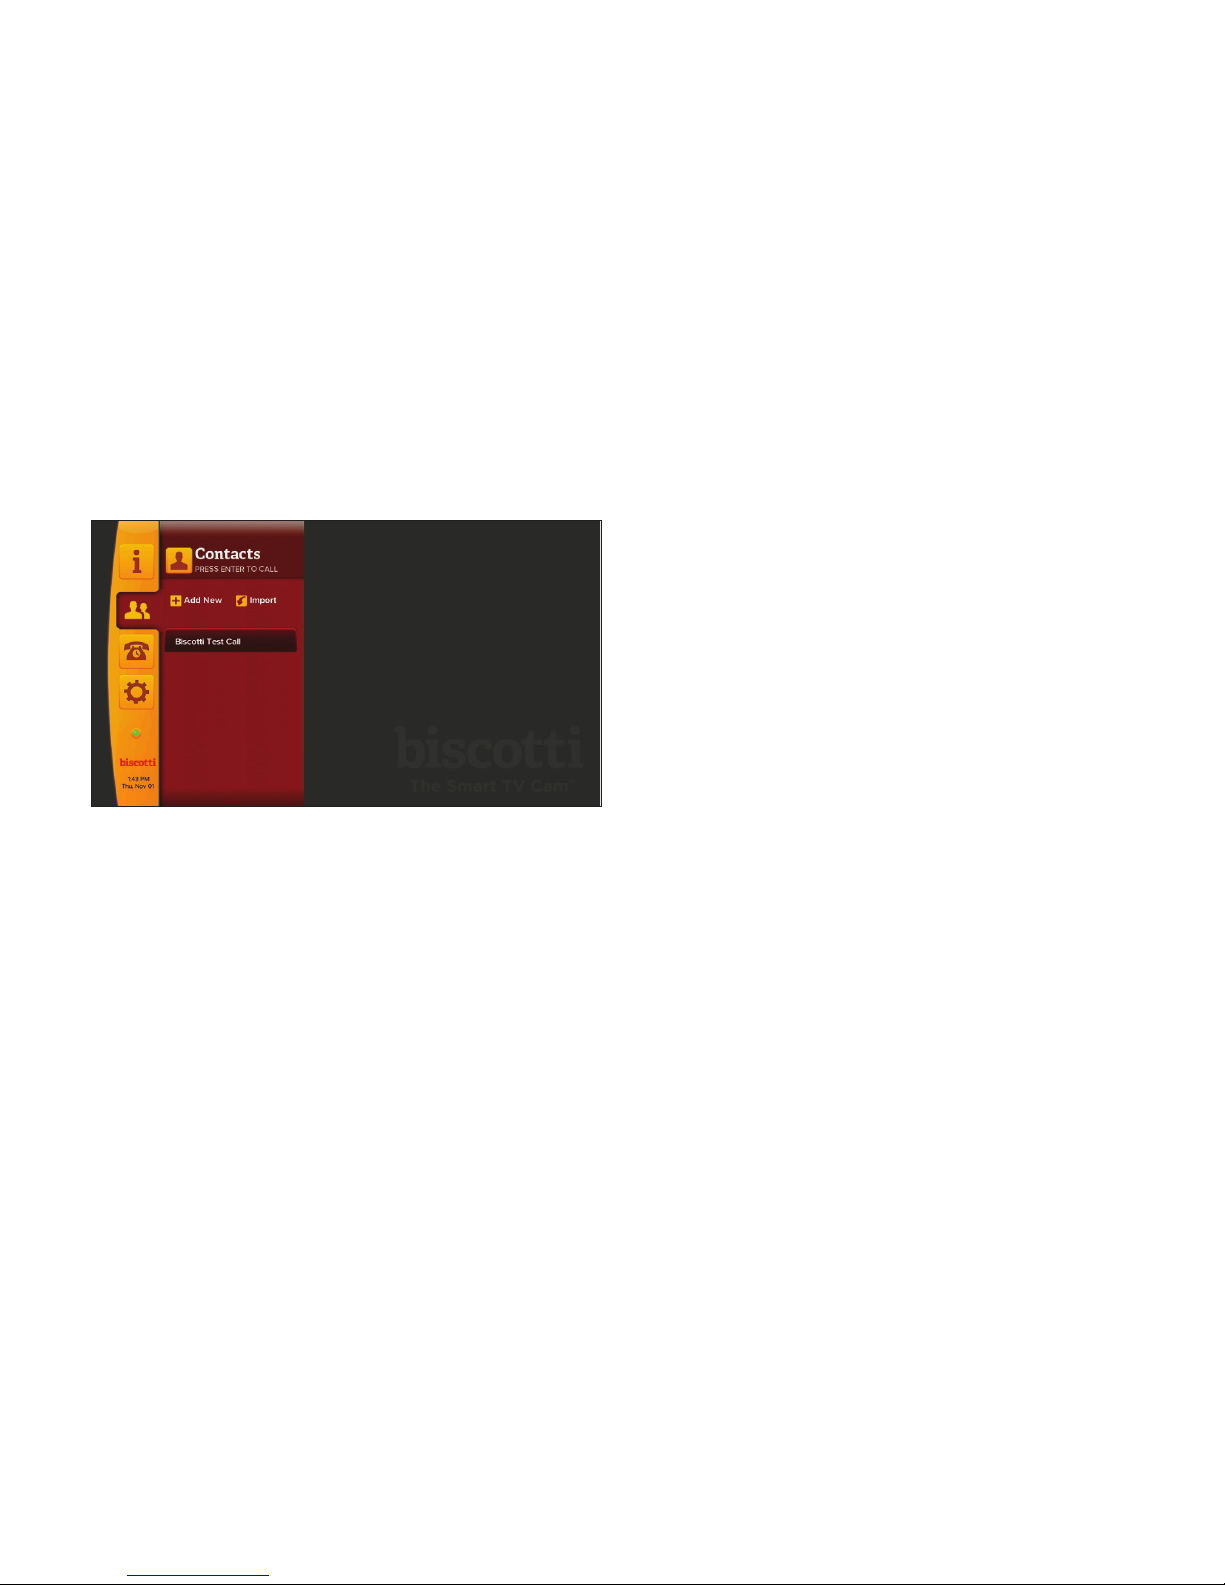
MAKING CALLS
Biscotti is always powered on and ready to make or
receive calls—just turn on your TV when you want to
use Biscotti.
1. From Biscotti’s main menu, select the Contacts icon
and press Enter.
2. Use the arrow keys to scroll to your contact.
3. Click Enter to call.
4. Biscotti will display the call status.
Page 19
16
TAKING CALLS
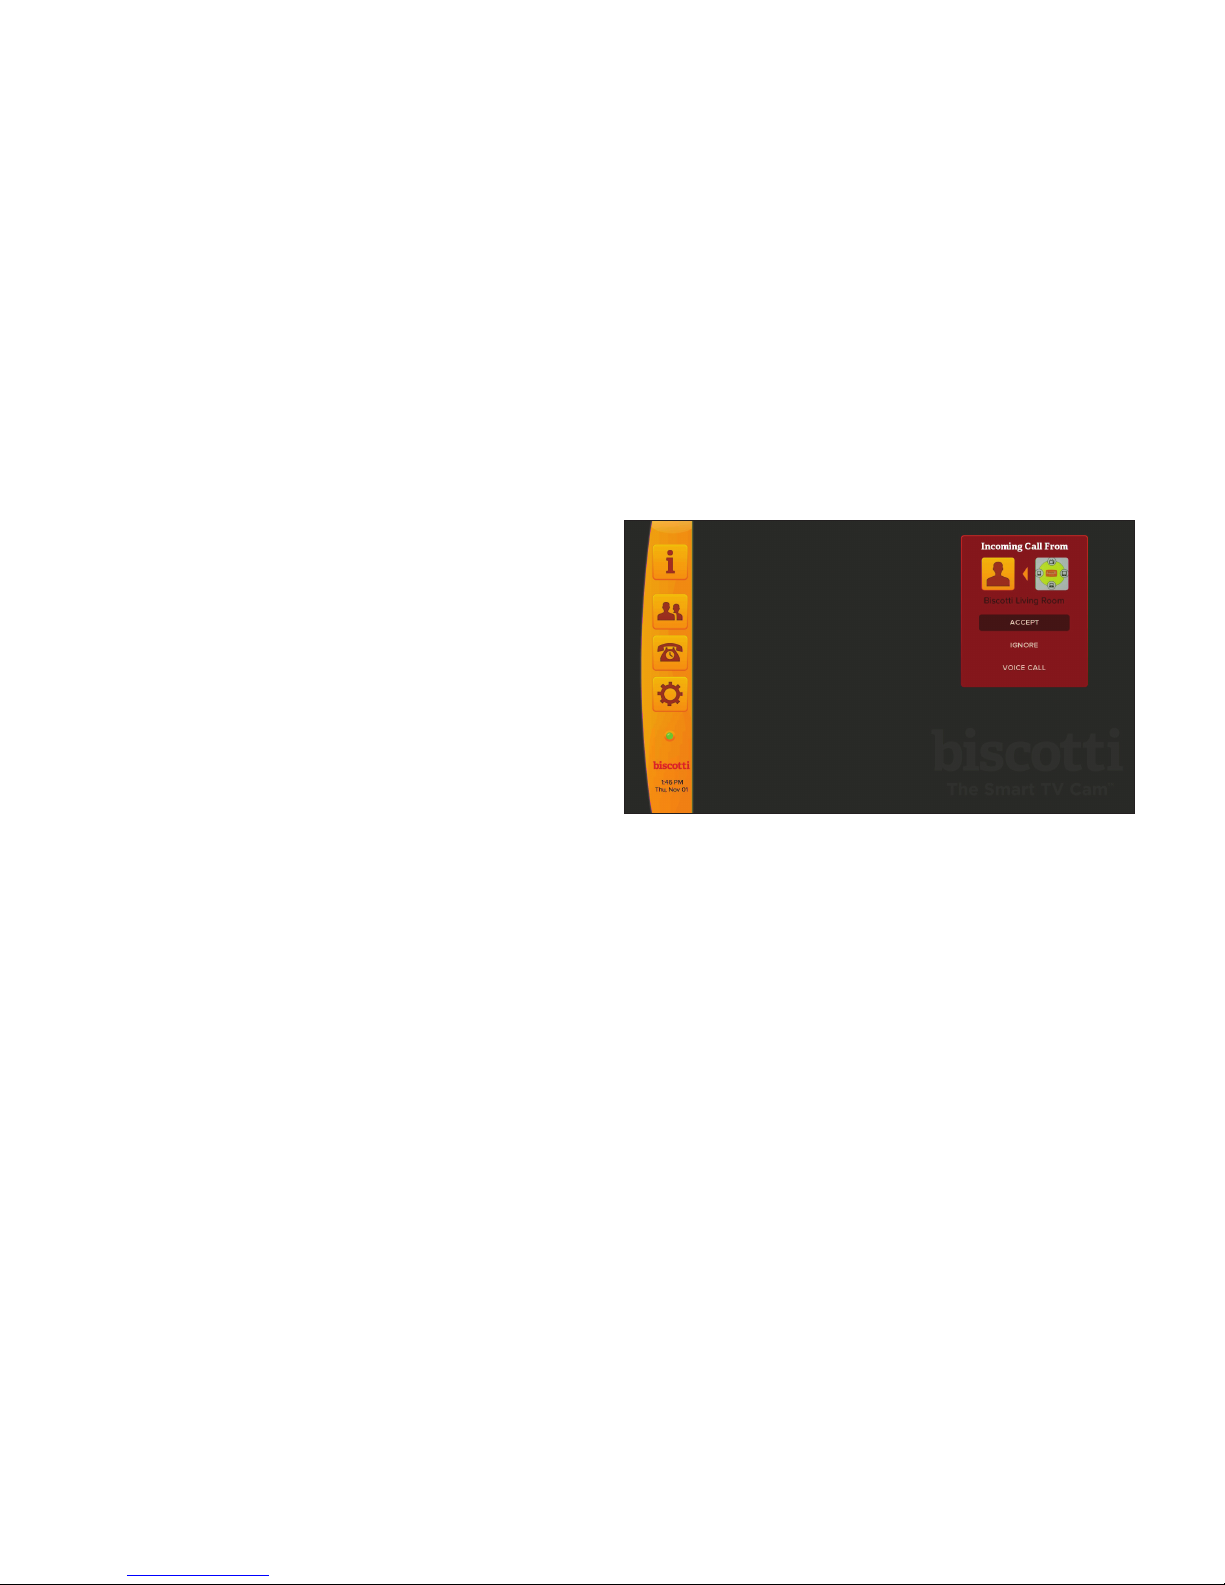
1. When Biscotti receives a call, it will notify you on the
screen and with an audible ring.
2. Use the remote to select Accept and press Enter.
Tip: Missed calls are displayed under Call History on the
main menu.
Page 20
17
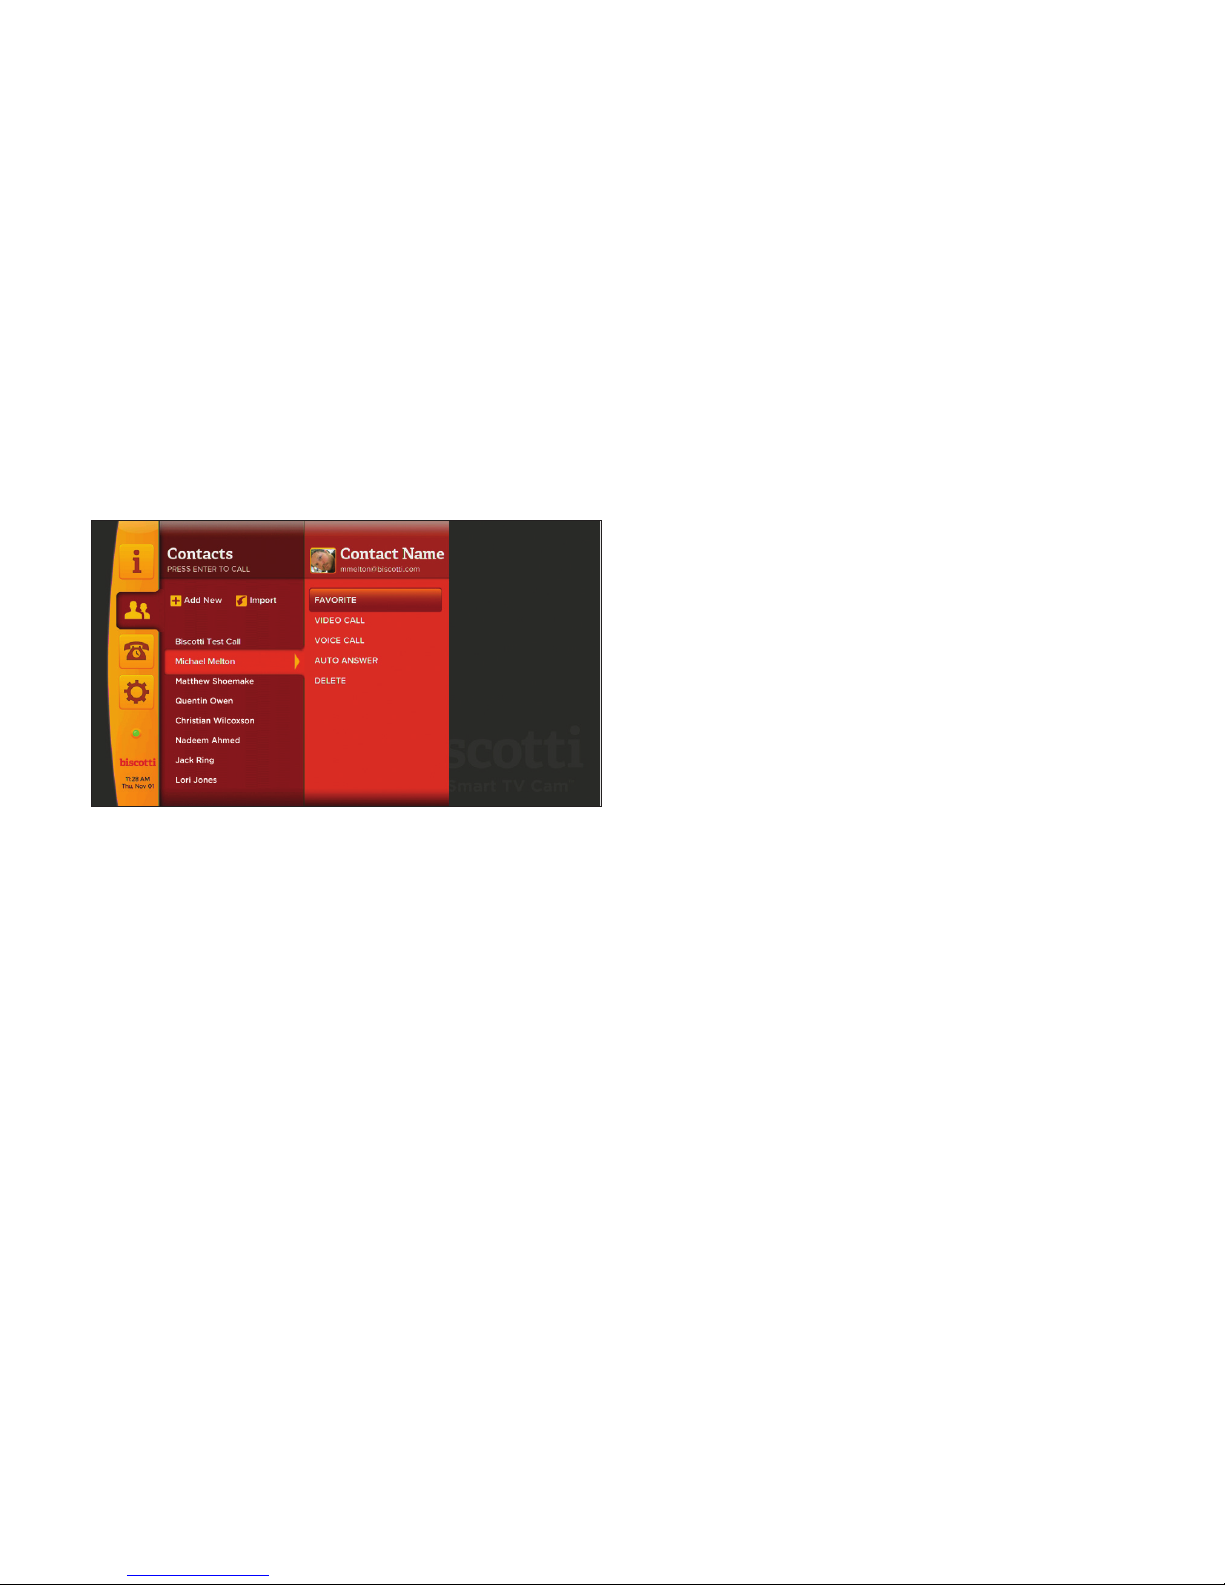
3. Select Favorite for the contact and press Enter.
AUTO ANSWER
You can set Biscotti to automatically answer the call
from selected contacts.
1. From Biscotti’s main menu, select Contacts and
press Enter.
2. Select the contact that you want to enable Auto
Answer for and press the Right button on the
remote control.
3. Select Auto Answer for the contact and press
Enter.
FAVORITES
Favoriting your contacts individually will bring them to
the top of your contacts list.
1. From Biscotti’s main menu, select Contacts and
press Enter.
2. Select the contact that you want to Favorite and
press the Right button on the remote control.
Page 21

18
• HDAVI Control EZ-Sync VIERA Link (Panasonic)
• EasyLink (Philips)
• NetCommand for HDMI (Mitsubishi).
VIDEO MONITORING MODE
Your Biscotti can be used as a video monitor for
applications such as child monitoring, security monitoring,
storefront monitoring and home monitoring. Biscotti
has been designed to accept calls even when it is not
connected to a TV. Additionally, when Biscotti powers on,
it will automatically connected the Wi-Fi access point that
it was last connected to.
To use Biscotti as a video monitoring system:
a) Setup the Biscotti as normal
b) Set Auto Answer for the specific contacts that
Biscotti should automatically answer calls from
AUTO TV ON
If your TV is CEC-compatible*, Biscotti can automatically wake-up or power-on the TV. This feature may be
turned on and off under the Settings menu.
If Auto TV On does not work properly, make sure your
TV is set to allow automatic TV turn on. Go to your TVs
menu system and look for Auto TV On or similar and
make sure it is enabled. TV manufacturers use various
trade names to refer to the CEC compatibility, which is
used for Auto TV On. Here’s a list for your convenience:
• Anynet+ (Samsung)
• Aquos Link (Sharp)
• BRAVIA Link and BRAVIA Sync (Sony)
• HDMI-CEC (Hitachi)
• E-link (AOC)
• Kuro Link (Pioneer)
• CE-Link and Regza Link (Toshiba)
• RIHD (Remote Interactive over HDMI) (Onkyo)
• SimpLink (LG™)
Page 22

19
c) Disconnect Biscotti from the TV and power
d) Move Biscotti to the location that you’d like to monitor,
making sure you are within range of your Wi-Fi network
e) Plug Biscotti into wall power. Wait about 90 seconds
for Biscotti to start and connect to the network.
f) Position Biscotti for the desired picture
g) From another Biscotti or interoperable device, call
Biscotti using one of the accounts you set for
Auto Answer
h) Biscotti will automatically answer the call, even though
it’s not connected to a TV. You will be able to see and
hear the audio and video coming from Biscotti
SOFTWARE UPDATE
Software updates are automatically downloaded to
Biscotti. To ensure that Biscotti is regularly updated
with feature and performance enhancements keep
Biscotti connected to your Wi-Fi network. When an
update has been downloaded you will be prompted to
accept the update.
Tip: To check the status of Biscotti’s software anytime,
select Settings | Software Update.
TIPS FOR USING BISCOTTI
• Adjust the camera position by using the Zoom and
Pan features in the Settings | Camera menu.
• For best video results balance the light in your room
so it is distributed consistently.
• Use the Network Test feature in the Settings |
Network menu to check bandwidth on your Wi-Fi
network.
* Biscotti Auto TV On technology requires a TV that is
CEC-compatible.
Page 23

20
Troubleshooting
Page 24

21
Blinking Orange
• 1 blink - Biscotti is having a problem starting.
• 2 blinks - Your Wi-Fi did not start properly.
• 3 blinks - Biscotti is not able to look for your wireless
networks.
If your Wi-Fi network name is not displayed.
• Toggle throughout the list of networks available
• Restart Biscotti by going to Settings | Restart.
• The Network Name (SSID) may be hidden. If this is
the case, manually type in the Network Name on
Biscotti by selecting + Join Other Network.
If Biscotti reports that the Wi-Fi Strength is weak
• Move Biscotti and your wireless router closer together.
Biscotti Status Light
There is a status light near the bottom of Biscotti main menu.
The color of this light will allow you to better understand the
connection status of Biscotti.
Steady Light
• Green - Biscotti is connected and ready to make a call
• Yellow - Biscotti is connecting to the Internet.
• Orange - Biscotti is starting Wi-Fi.
Blinking Yellow
• 1 blink - Biscotti is having difficulty associating with
your Wi-Fi network.
• 2 blinks - Biscotti has not been able to get an IP
address.
• 3 blinks - Biscotti is not able to talk to device on the
Internet.
• 4 blinks - Biscotti is not able to connect to Biscotti
servers.
Page 25

22
If Biscotti reports that the internet speed is low
• Contact your network provide or IT contact about
having your internet speed increased. For the best
performance have your uplink and downlink speed
increased to at least 1 Mbps.
If Biscotti does not make a call
• Check the Status Light in the Main Menu and make
sure it is green. Biscotti can not make calls if the
Status Light is not green. If the Status Light is not
green check the indicator light codes. (See page 22)
• If the Status Light is green, run Network Test from
Settings | Network menu to ensure you have a good
internet connection.
• Try to place a call to Biscotti test call from the
Contacts menu.
• If none of these steps work, please contact Biscotti
Customer Support.
Page 26

BISCOTTI SUPPORT
www.Biscotti.com/support
(888) 551-0215
© 2012 Biscotti, Inc. All rights reserved. Biscotti and the Biscotti logo are the property of Biscotti, Inc.
All other trademarks are the property of their respective owners.
770-00007 REV D 09.2012
 Loading...