

Page 1
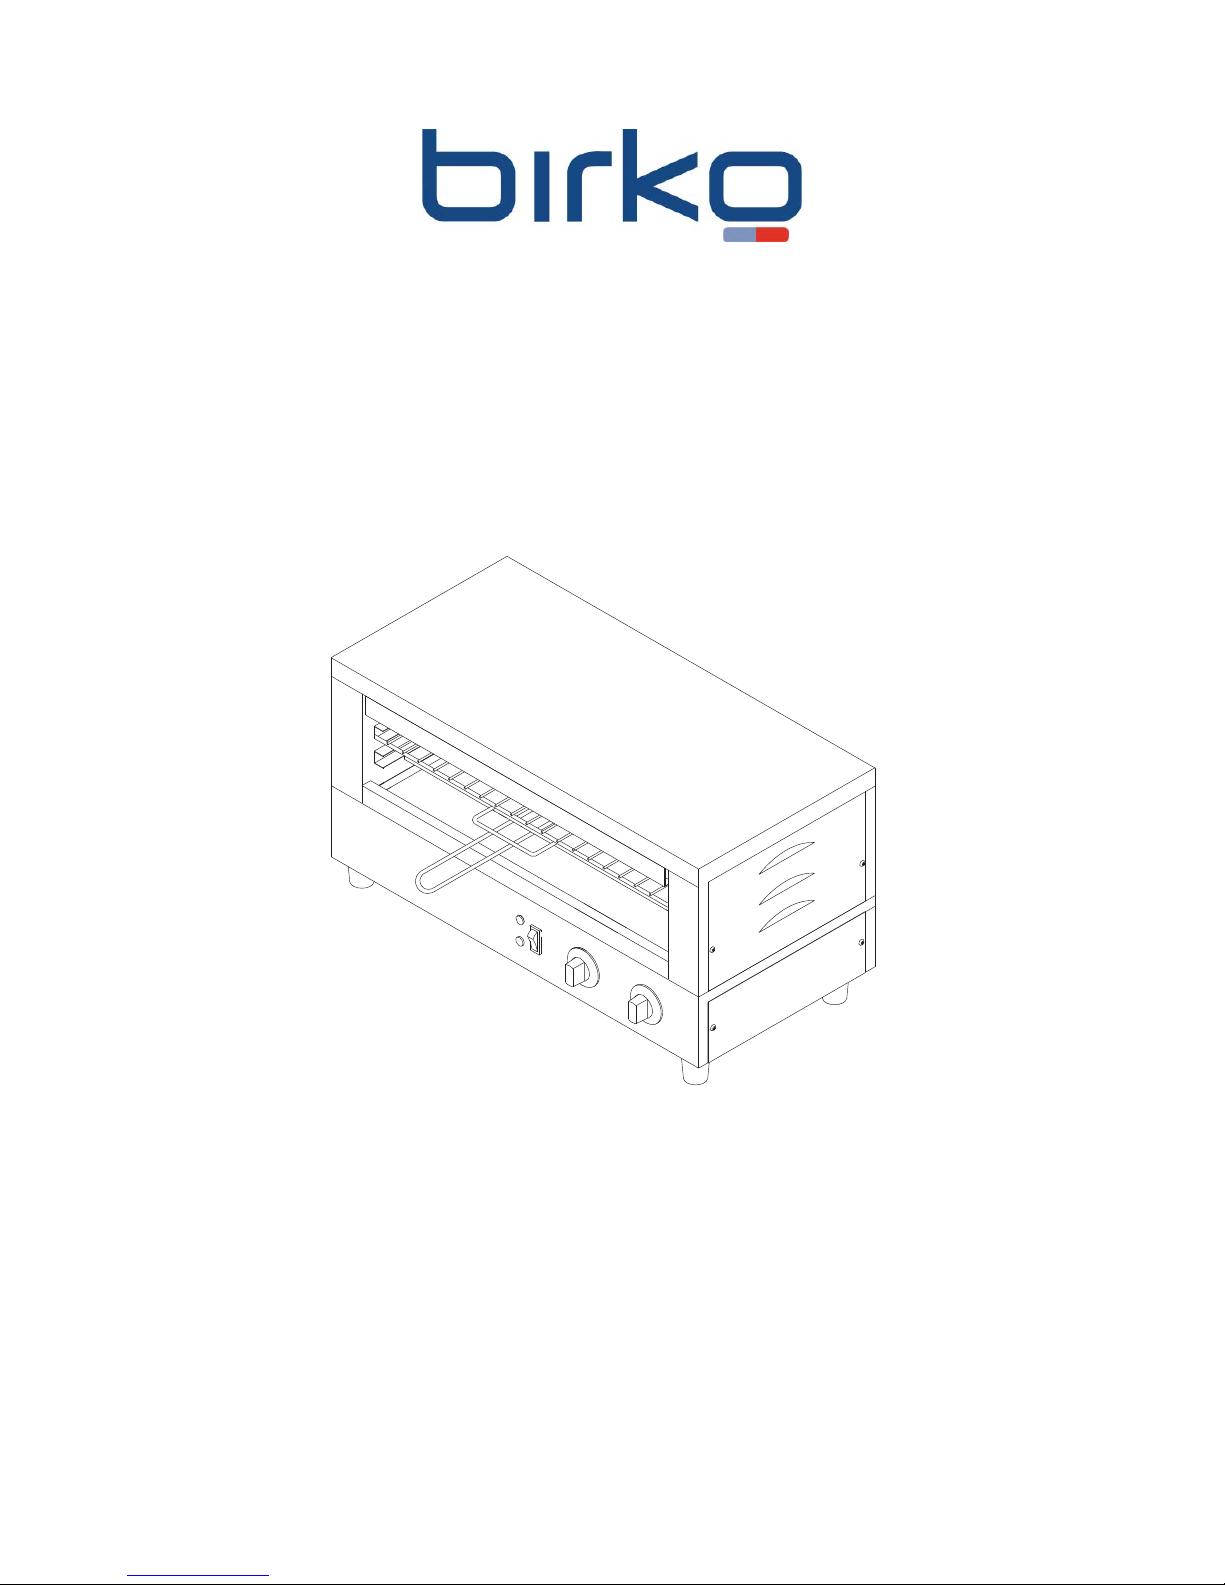
ELECTRIC COUNTER TOP TOASTER GRILLER
OPERATION MANUAL
Page 2

1
Contents
Introduction 2
Packaging 2
Installation 2
Operation 3
Cleaning, Care and Maintenance 3
Safety 4
Trouble Shooting 5
Compliance 6
Specifi cation 6
Electrical Diagram 7
Explosion View 8
Spare Part List 9
Contact Details 10
Page 3

Introduction
Congratulations on the purchase of your Birko machine. Please take time to carefully read through this
manual to ensure the machine is operated and maintained properly to ensure the best, possible performance
from the product for many years.
Birko will not accept liability for product failures in the event that:
* The instructions in this manual have not been followed correctly.
* Un-qualified or non-authorised personnel have tampered with the machine.
* Non-original spare parts are used.
* The machine has not been handled and cleaned correctly.
* There is any use damage to the unit.
Packaging
Birko prides itself on quality and service, ensuring that at the time of packing, all products are supplied fully
functional and free of damage.
Provided in this package are the following:
*Toaster Griller
*Crumb Tray
*Manual
Should you find any damage as a result of freight, please contact your Birko dealer immediately.
Installation
Remove the Birko Toaster Griller from the packaging, be certain that all protective plastics and residues are
thoroughly cleaned from its surface.
Locate the Birko Toaster Griller on a firm level surface.
International standards and regulations should be consulted in order to abide by standards set in relation to
positioning, spacing and ventilation of the product. Oils used in these units are very dangerous. Take care
when in use to avoid oil spilling on to open flames or mixing with other liquids, such as water, to avoid harmful
damage.
Once the Toaster Griller has been placed in position ensure the upper and lower stainless steel trays are
positioned correctly.
Supply the appropriate power and connect to mains. The toaster griller is now ready to turn on and operate.
(For power supply please see technical specification sheet, page 6).
2
Page 4

3
Operation
The Birko Toaster Griller has upper and lower elements which can be used together or alternatively, the top
element can be used on its own. This can provide flexibility when toasting and grilling.
The Toaster Griller is also fitted with a timer and an energy regulator which allows cooking continuously or
by time, please see below for further details.
Cooking by Time
Select the style of toasting/grilling by selecting both elements or alternatively select the upper element by
pressing the element control switch. Adjust the timer dial to the desired time of cooking. When the time is
selected the elements will automatically be activated at full power, when time has lapsed the elements will
automatically switch off. For this cooking method ensure the energy regulator is turned to “OFF”.
*Note: If the elements are not required to turn off completely, adjust the energy regulator dial to low, this will
keep the elements on after the time has lapsed. This will help to keep the product warm and will also allow
for faster reheat when required.
Continuous Cooking
Select the style of toasting/grilling by selecting both elements or alternatively select the upper element by
pressing the element control switch.
When cooking continuously be sure the timer dial is turned to the ‘OFF’ position. Using the energy regulator
dial select the desired temperature. When selected the elements will automatically switch on, when finished
turn the energy regulator dial back to the off position. The timer will over ride the energy regulator if it is not
in the ‘OFF’ position.
*Summary: time control-provides full power to elements for the selected period of time.
The energy regulator control provides the desired heat control setting for continuous operation when the timer
is off.
*Note: When in operation the Toaster Griller will be hot, part of unit is the grilling rack which is handled
regularly. This rack is made from steel and will hold heat, therefore gloves must be worn for protection when
handling.
Cleaning, Care and Maintenance
Switch off the power and disconnect from the mains.
The Toaster Griller should be cleaned after each day’s operation, however, the unit may require to be cleaned
more often depending on the volume of production.
Also the Toaster Griller to cool before cleaning. Remove upper and lower trays and wash them in warm soapy
water, be sure to dry before returning them to the unit.
The remainder of the Toaster-Griller can be cleaned with a damp cloth using hot, soapy water.
Page 5

Do not immerse completely in water or use water jets to clean.
Warm soapy water is recommended for cleaning, cleaning agents after prolonged use can damage stainless
steel.
Safety
Switch off power to and disconnect from the mains whilst cleaning.
Do not immerse unit in water or use water jets to clean.
If the power cord is damaged, it must be replaced by a Birko Service agent or Recommended Qualified
Technician in order to avoid a hazard.
The Birko Toaster-Griller does not contain any user-serviceable parts. Birko dealers or Recommended
Qualified Technicians should carry out repairs if necessary. Do not remove any components or service panels
on this product.
Birko takes every care to ensure that all products are safe. Steel cutting procedures used to manufacture
these items may result in sharp edges. These sharp edges are removed to the best of our ability, however
we insist the operator takes care when in contact with metal edges.
Allow the Toaster-Griller to cool down after use before dismantling for cleaning, the unit will still be too hot
to handle immediately after use.
This appliance is not intended for use by persons (Including Children) with reduced physical, sensory or
mental capabilities, or lack of experience and knowledge, unless they have been given supervision or
instruction concerning use of the appliance by a person responsible for their safety.
Children should be supervised to ensure they do not play with the appliance.
4
Page 6
5
Toaster
Griller
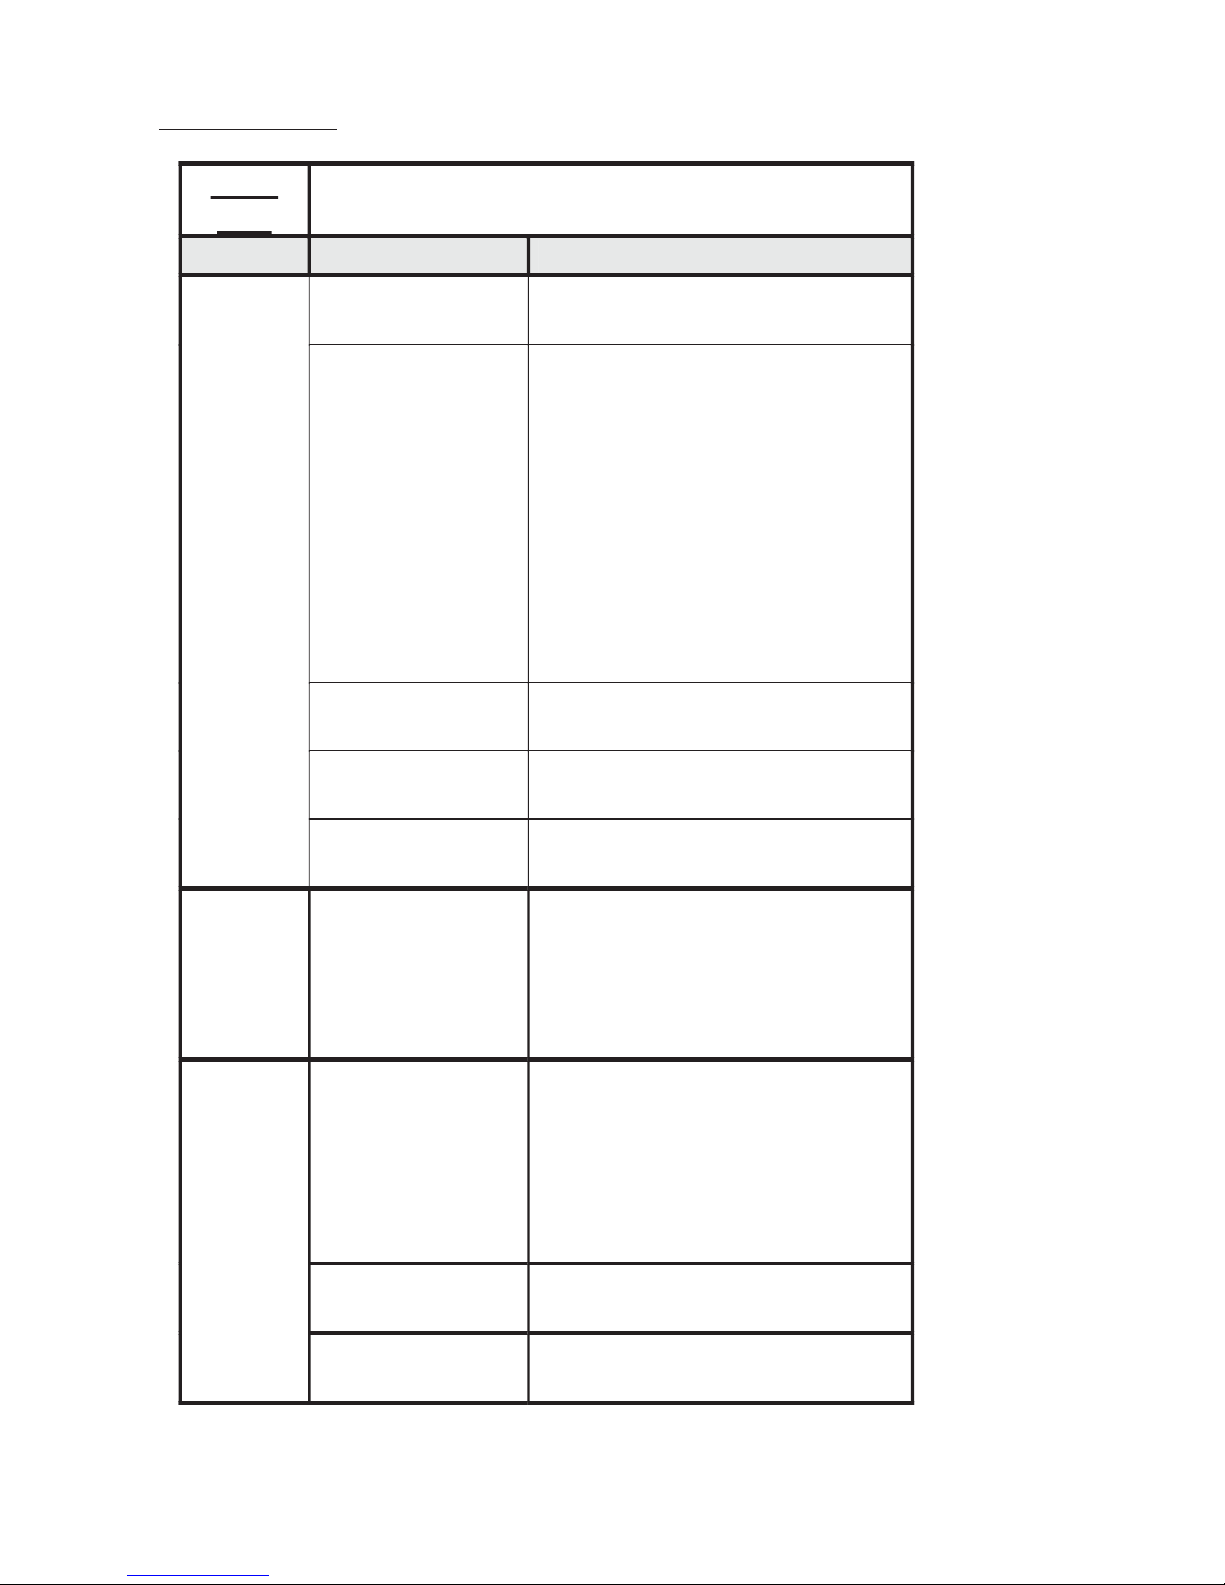
1002001; 1002002
Problem
Cause
Remedy
1. Mains power
supply
1. Check mains power supply
2. Unit is not switched
on
2. Check that the unit is correctly plugged
in and turned on; ensure you have read
the manual for both methods of
operation:
Timer Control: provides full p ower
to the elements for the period of time
selected
Dial Control: provides desired heat
for continued operation when the timer
is off
3. Dial Control or
Timer are faulty
3. Call service agent or qualified
technician
4. Plug and lead are
damaged
4. Call service agent or qualified
technician
The unit is
not working,
the indicator
light is not
on.
5. Internal wiring fault
5. Call service agent or qualified
technician
The unit is
heating but
the indicator
lights are
not on
1. The indicator light
is faulty
1. Call service agent or qualified
technician
1. Incorrect operation
1. Ensure that you have clearly read the
manual, fully taking into account
whether the unit has been selected for
Timer Control or for Dial Control and
also whether single or double element
heating has been selected
2. Elements are faulty
2. Call service agent or qualified
technician
Slow heat
up or no
heat up,
power is on
3. Power dial is faulty
3. Call service agent or qualified
technician
Trouble Shooting
Page 7
Compliance
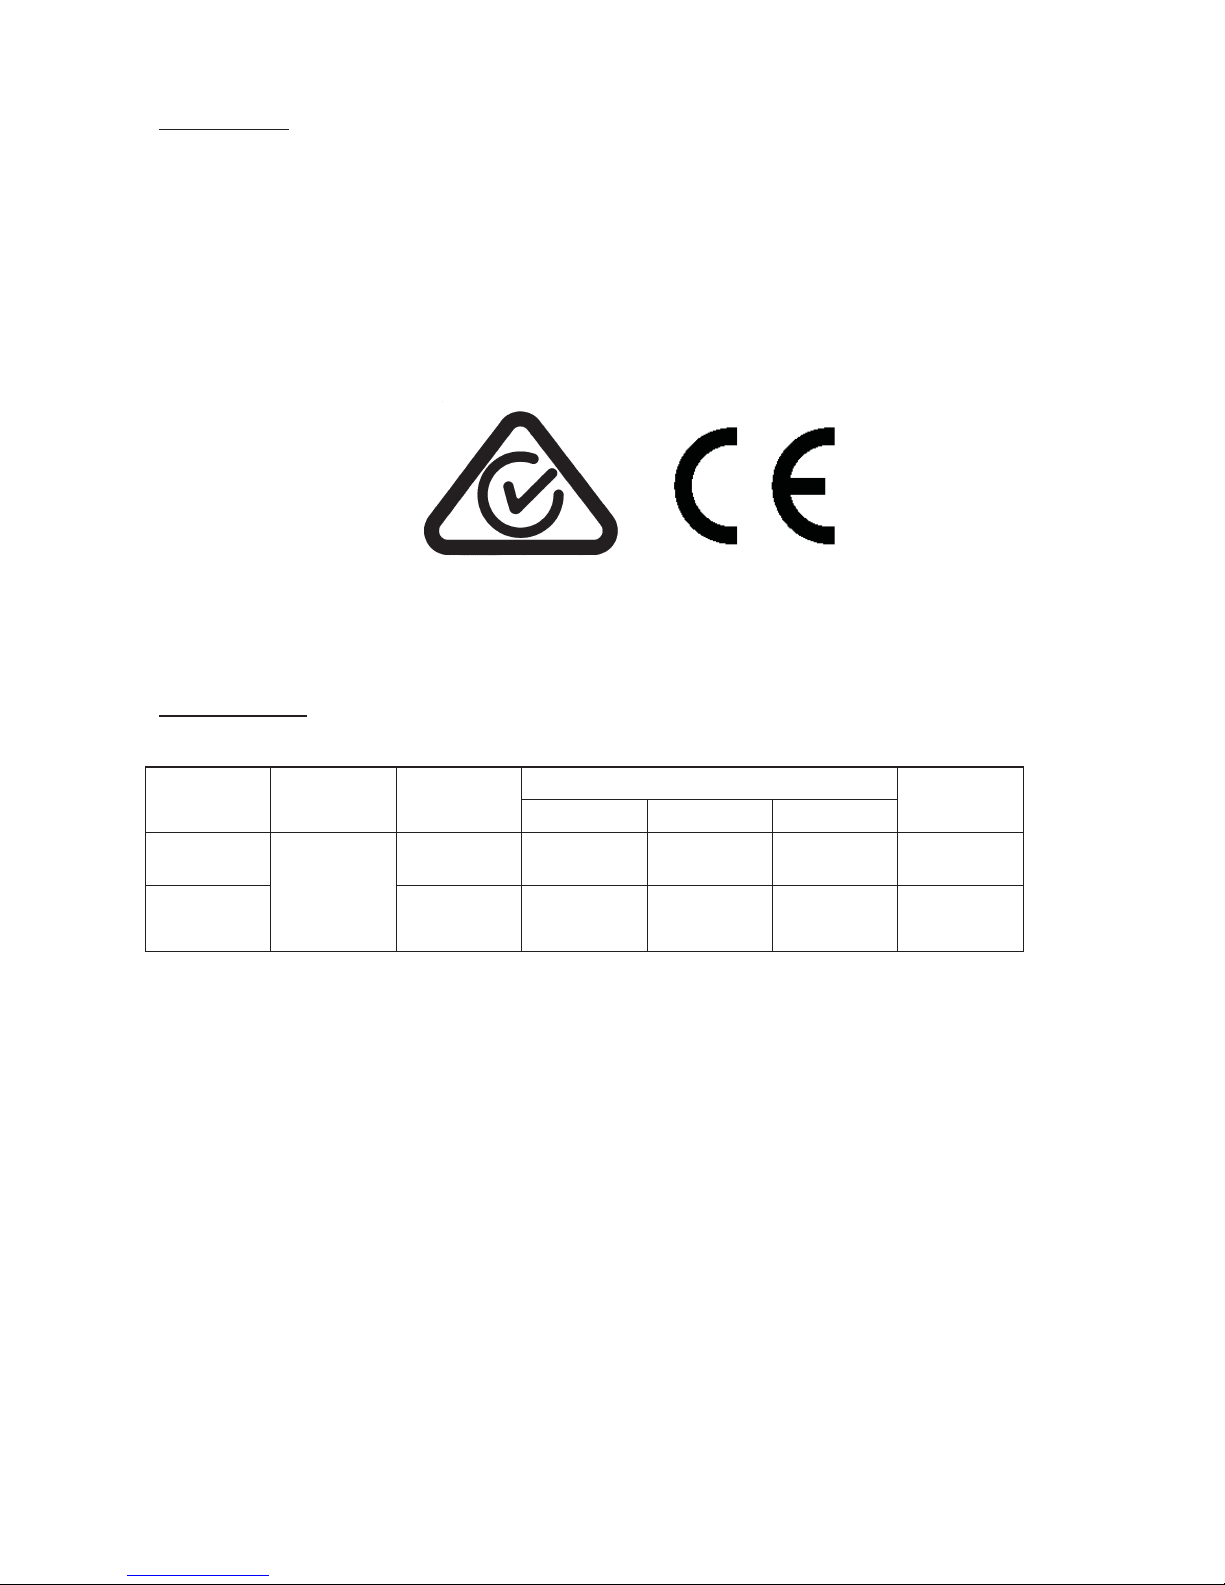
Birko products have undergone strict product testing in order to comply with regulatory standards and
specifications set by international independent, commonwealth and federal authorities.
As testimony to such compliance Birko products carry the following marks/symbols:
6
Specifications
MODEL VOLTAGE POWER DIMENSIONS (MM) ELEMENT
WIDTH DEPTH HEIGHT
1002001 220-240V
~
50HZ
2200W 600 290 315 QUARTZ
1002002 3200W 600 290 315 QUARTZ
Page 8
7
indicator
light
indicator
light
bottom elements
top elements
N
selector
switch
top
2
P1EGO
4
pilot
P2
E
timer
L
energy
regulator
220-240V
¡×
indicator
light
indicator
light
bottom elements
top elements
N
selector
switch
E
energy
regulator
INVENSYS
(PILOT)
(LOAD)
(PHASE)
(N)
L
timer
220-240V ¡ ×
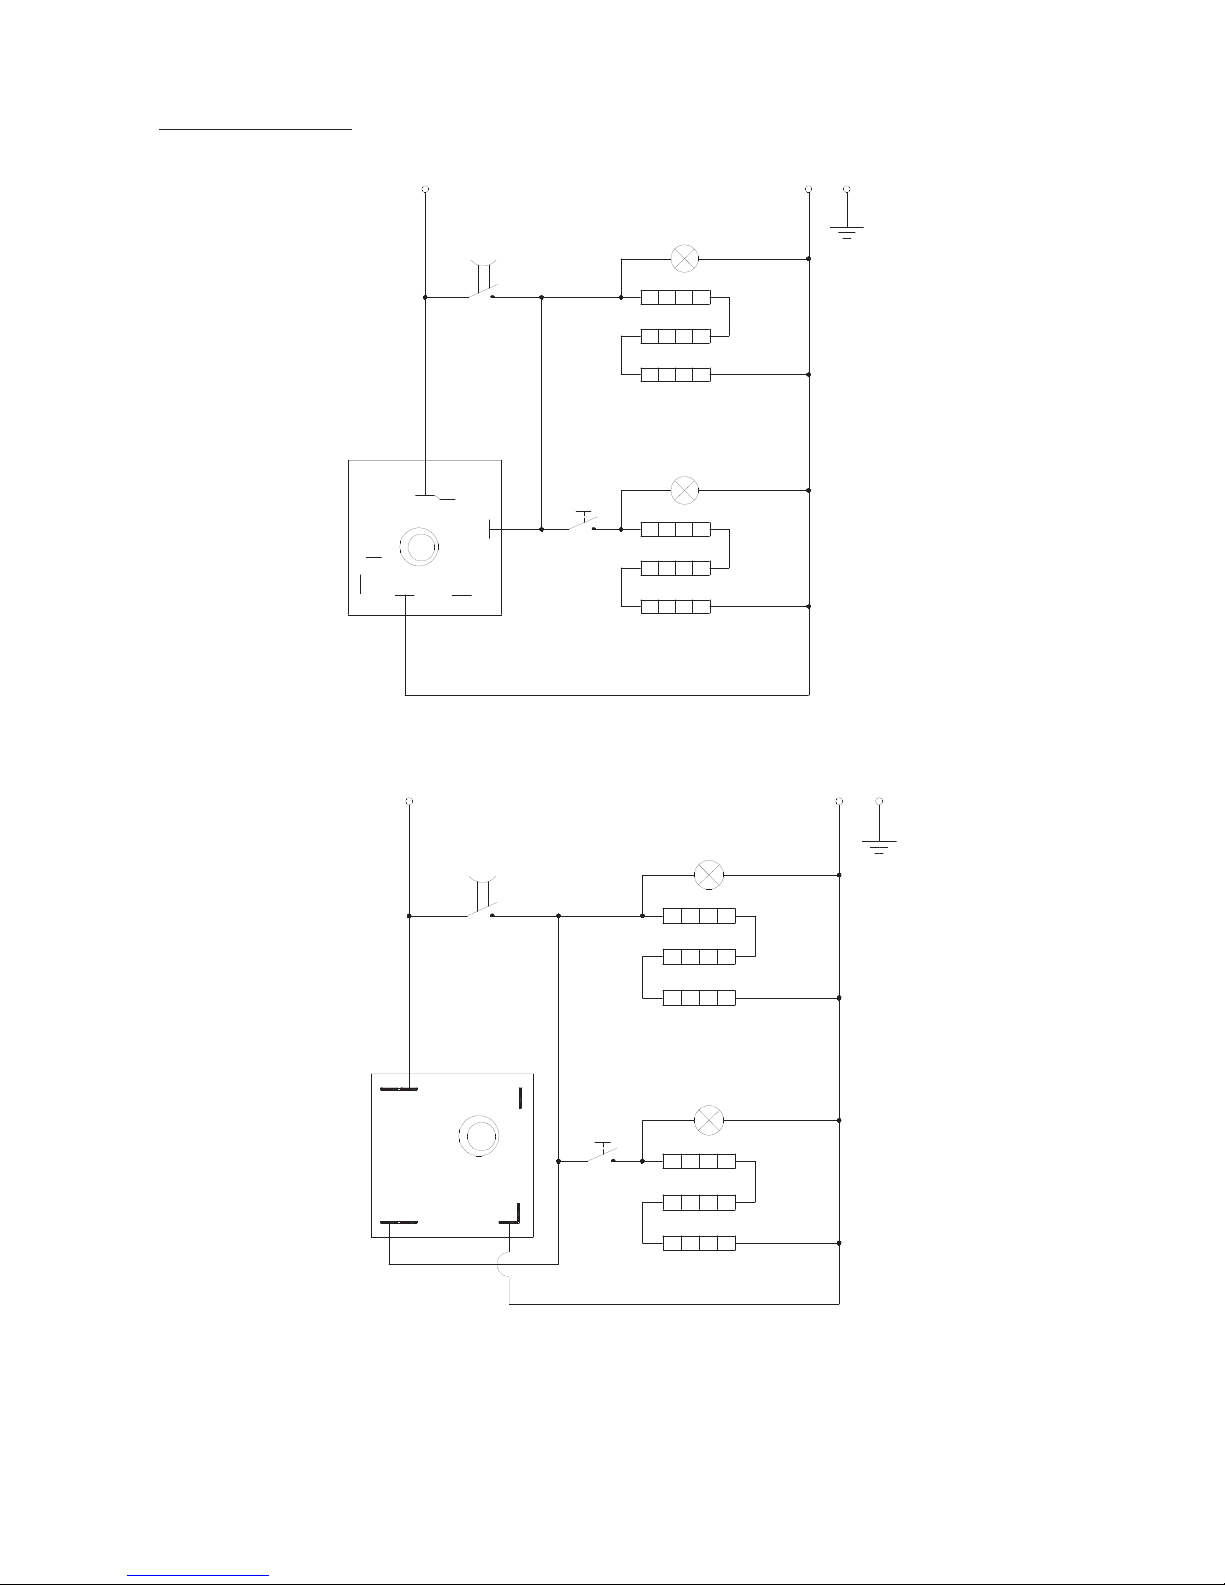
MODEL: 1002002
Electrical Diagram
MODEL: 1002001
The above circuit diagram has been provided to assist qualified technicians, Only Birko Foodservice agents
or Recommended Qualified Technicians should carry out repairs if needed. Do not remove any components
or service panels on this product.
Page 9
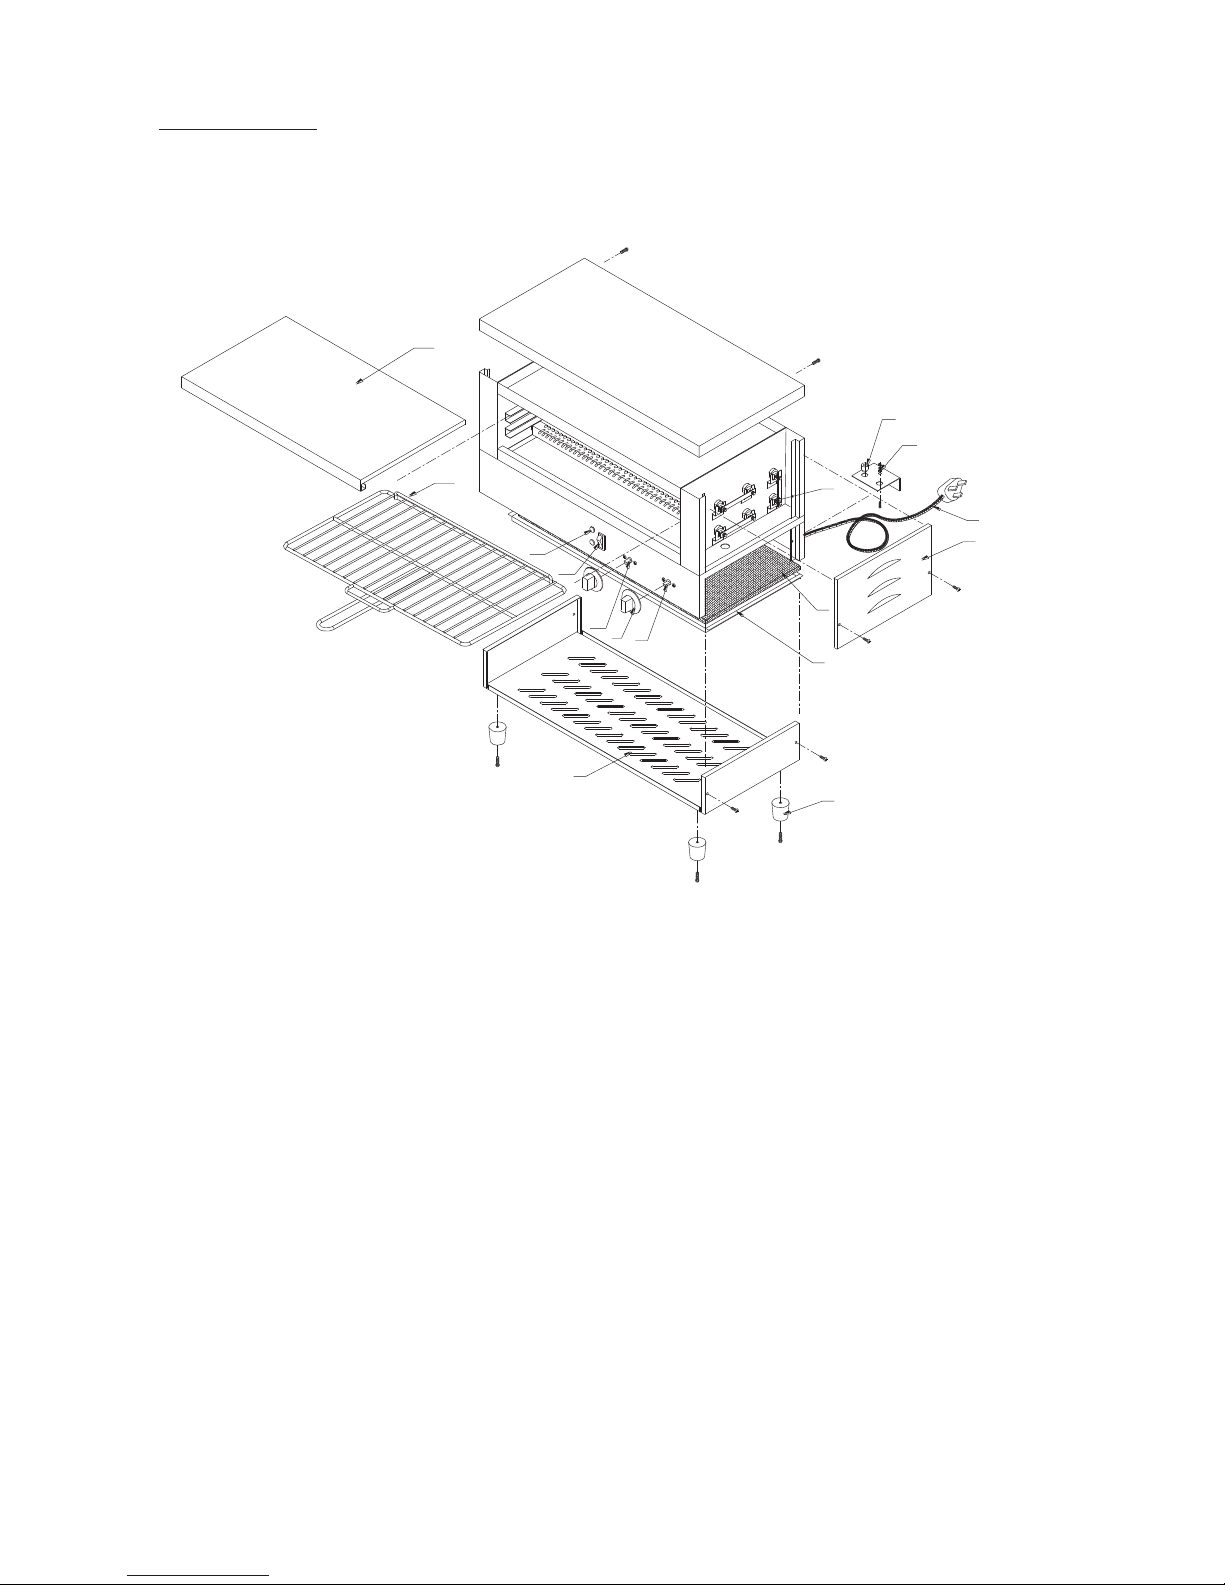
8
Explosion View
Page 10
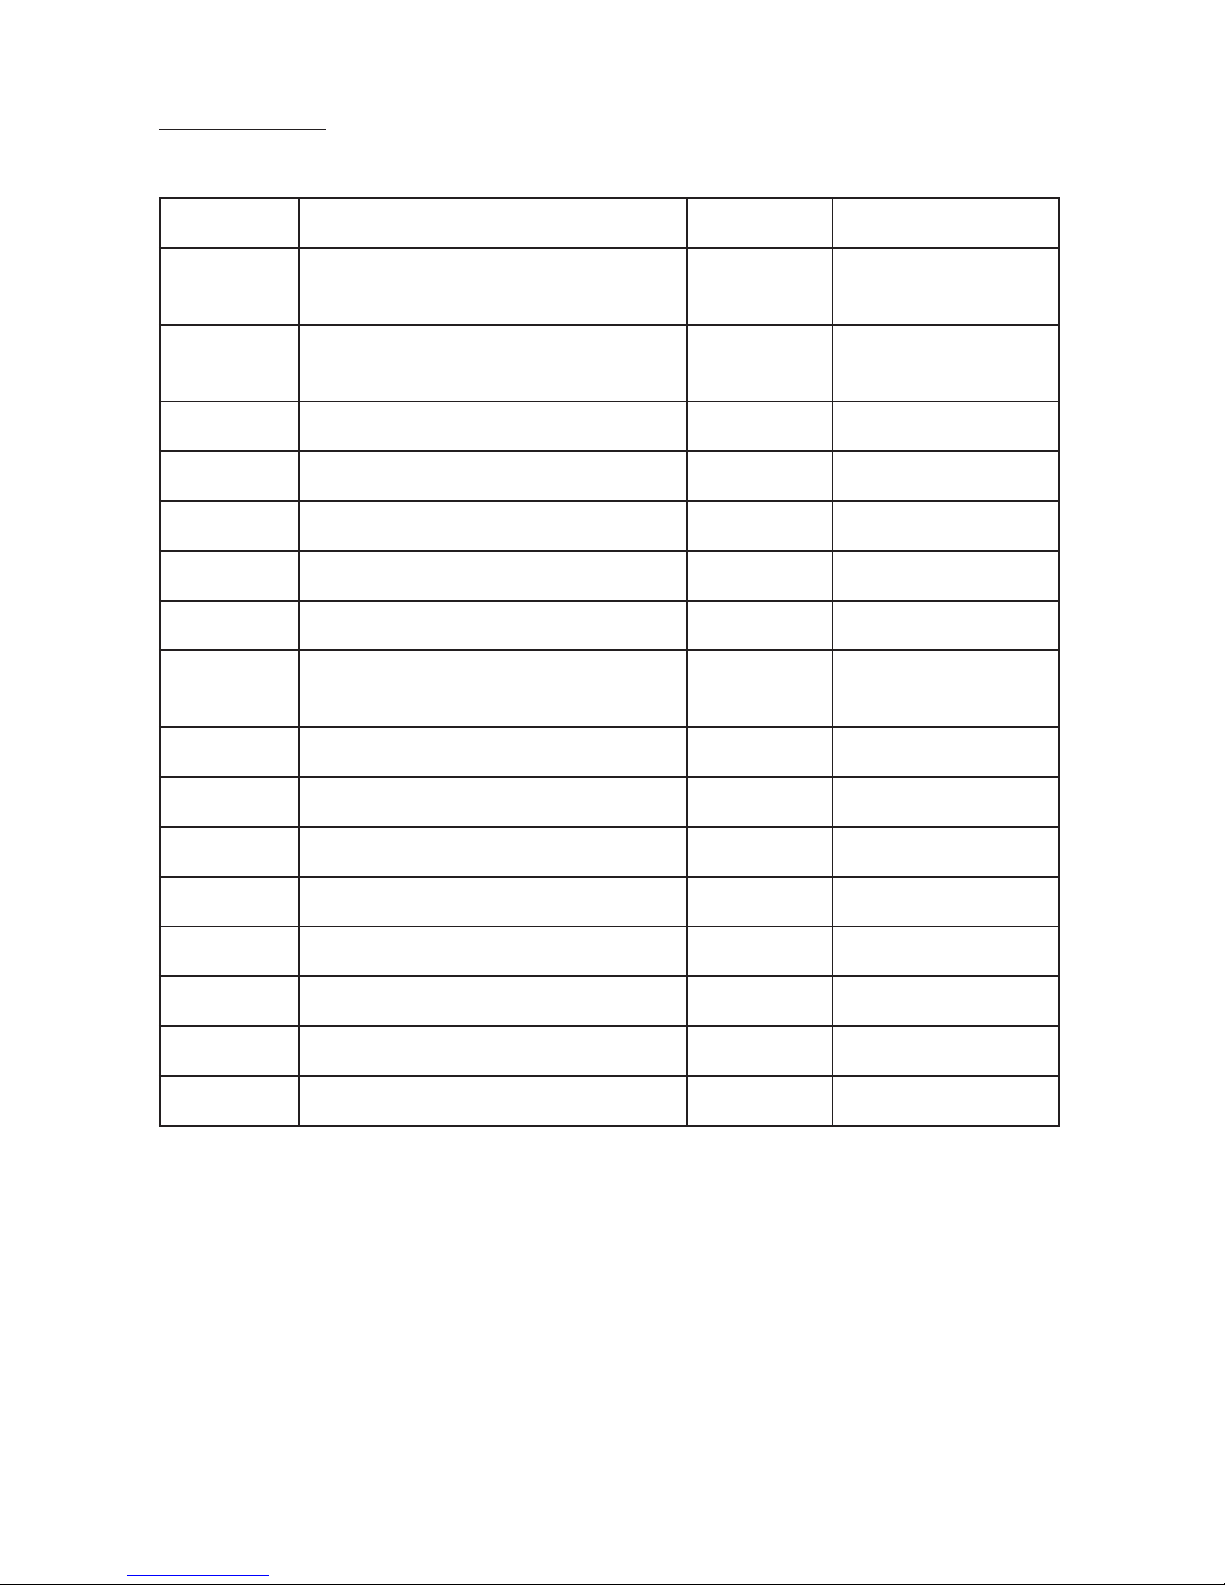
Spare Parts List
9
NO DESCRIPTION QTY CODE
1 QUARTZ ELEMENT 1002001
1002002
6
6
1315180
1315181
2 LEAD + PLUG 1002001
1002002
1 1315011
1315008
3 SIDE PANEL 2
4 INSULATION 1
5 INSULATION FIXING PLATE 1
6 FEET 4 1315009
7 BASE PLATE 1
8 ENERGY REGULATOR 1002001
1002002
1 1315185
9 DIAL 2 1315184
10 TIMER 1 1315186
11 ON/OFF SWITCH 1 1315187
12 INDICATER LIGHT 2 1315188
13 GRILLING RACK 1 1315005
14 CRUMB TRAY 2 1315189
15 CERAMIC TUBE 2
16 EARTH CONNECTING NUT 2
Page 11

Birko Heaters Australia Pty Ltd., ABN 39 103 881 625
67 Allingham St
Condell Park
N.S.W. 2200
AUSTRALIA
Local Ph: 1300 724 955
Local Fax: 1300 735 259
[email protected]
www.birkoheaters.com
The term ‘Birko’ is a registered trade mark of Birko Heaters Australia Pty. Ltd.
10
Zenith Heaters Limited,
IRD No. 95 640 729
Unit 2/15 Moselle Avenue,
Henderson.
Auckland. 0610
NEW ZEALAND.
Telephone: 0800 558055
Facsimile: 0800 559055
www.zenithheaters.co.nz
Contact Details
Page 12

Please keep this manual in a safe place for future use!
800515 - Rev: 05-12 v1.00
 Loading...