

Page 1
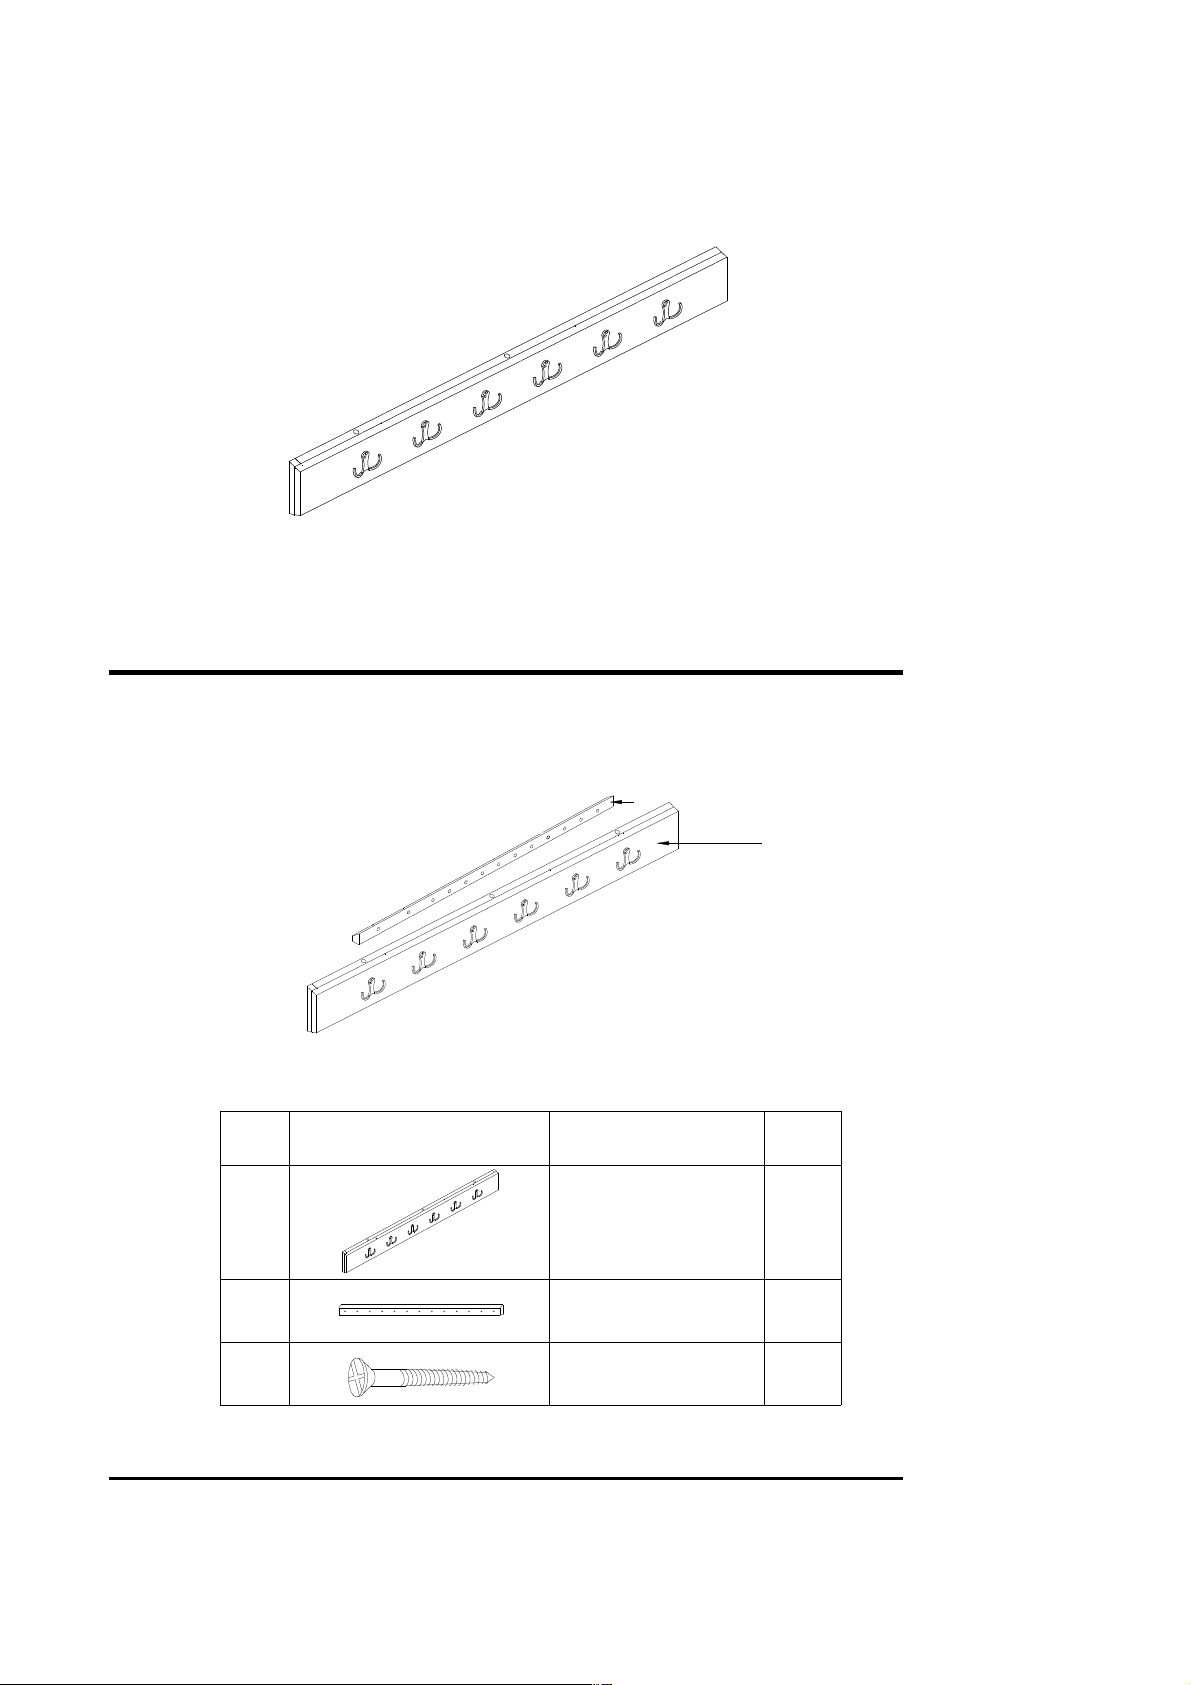
Step 1
Thank you for purchasing our Coat Hooks. Assembly of this product requires a screwdriver. We
have found it helpful to have a second person present in at least one step of the assembly.
Coat Hooks Assembly Instructions
Lay out all parts on a "non-abrasive" surface to avoid scratching furniture.
PARTS
A
B
Q'TY
DESCRIPTION
DRAWING
NO.
A
B
1
1
HOOK PLATE
FRENCH CLEAT
C
WOOD SCREW
4*50
4
Coat Hooks
1 of 2 Coat Hooks
Page 2
Read through these instructions thoroughly before beginning assembly. We have found this to be of great value when
first assembling this product.
Step 2
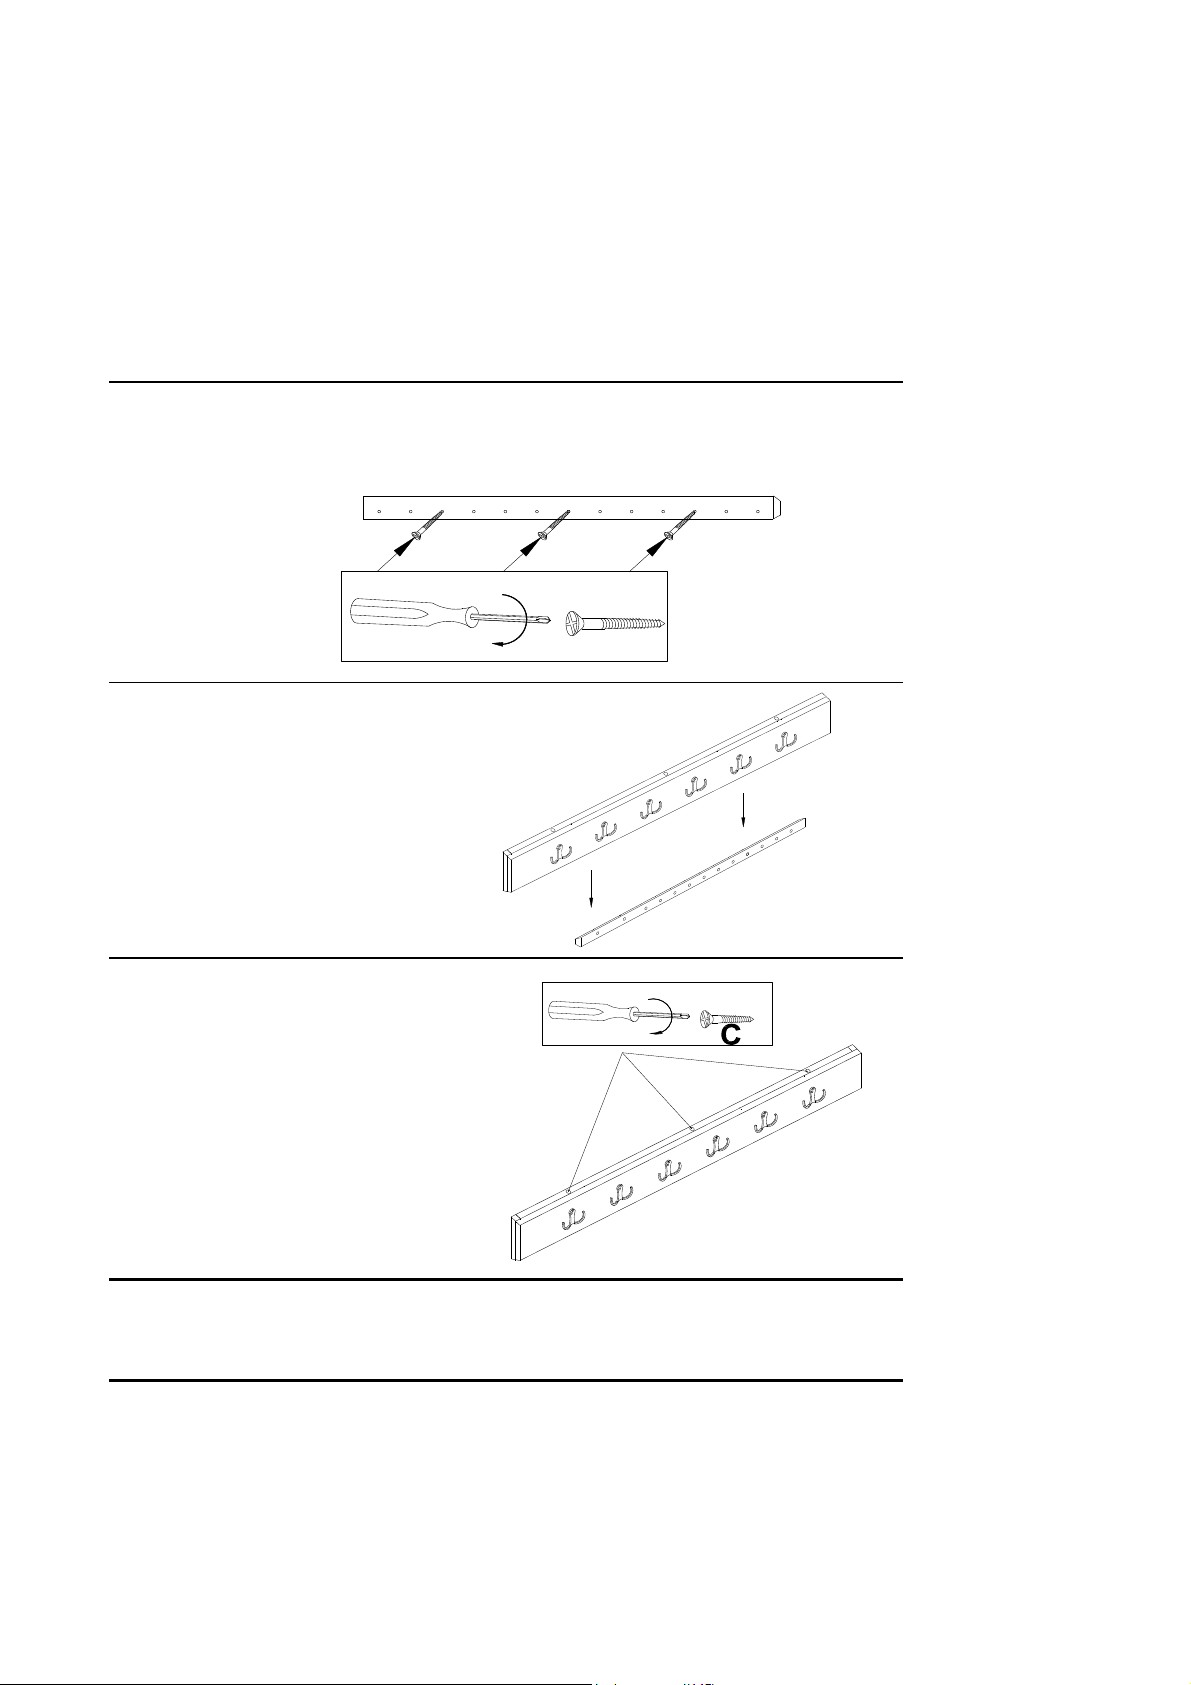
Remove all parts and hardware from packing material. Wooden pieces should be placed on a non abrasive surface
(like the carton or carpet) to prevent damage to the finish. Note the French Cleat (B) is pre-installed on the back
of the Hook Plate (A) with 3 of the Wood Screws (C).
Step 3
Remove the French Cleat (B) from the back of the Hook Plate (A) by unscrewing 3 of the pre-installed
Wood Screws (C) on the top of the Hook Plate (B). Locate studs behind drywall in desired location.
Attach French Cleat (B) to wall studs with 2 Wood Screws (C).
Step 4
Set Hooks Plate (A) on French Cleat (B).
Step 7
Attach Hook Plate (A) to French Cleat (B)
with 3 Wood Screws (C).
CARE
Clean with mild soap and wipe dry.
REPLACEMENT PARTS
Please do not contact the company you purchased from as we can help you faster.
B
C
A
Order replacement parts and hardware at our webiste.
2 of 2 Coat Hooks
 Loading...