

Page 1
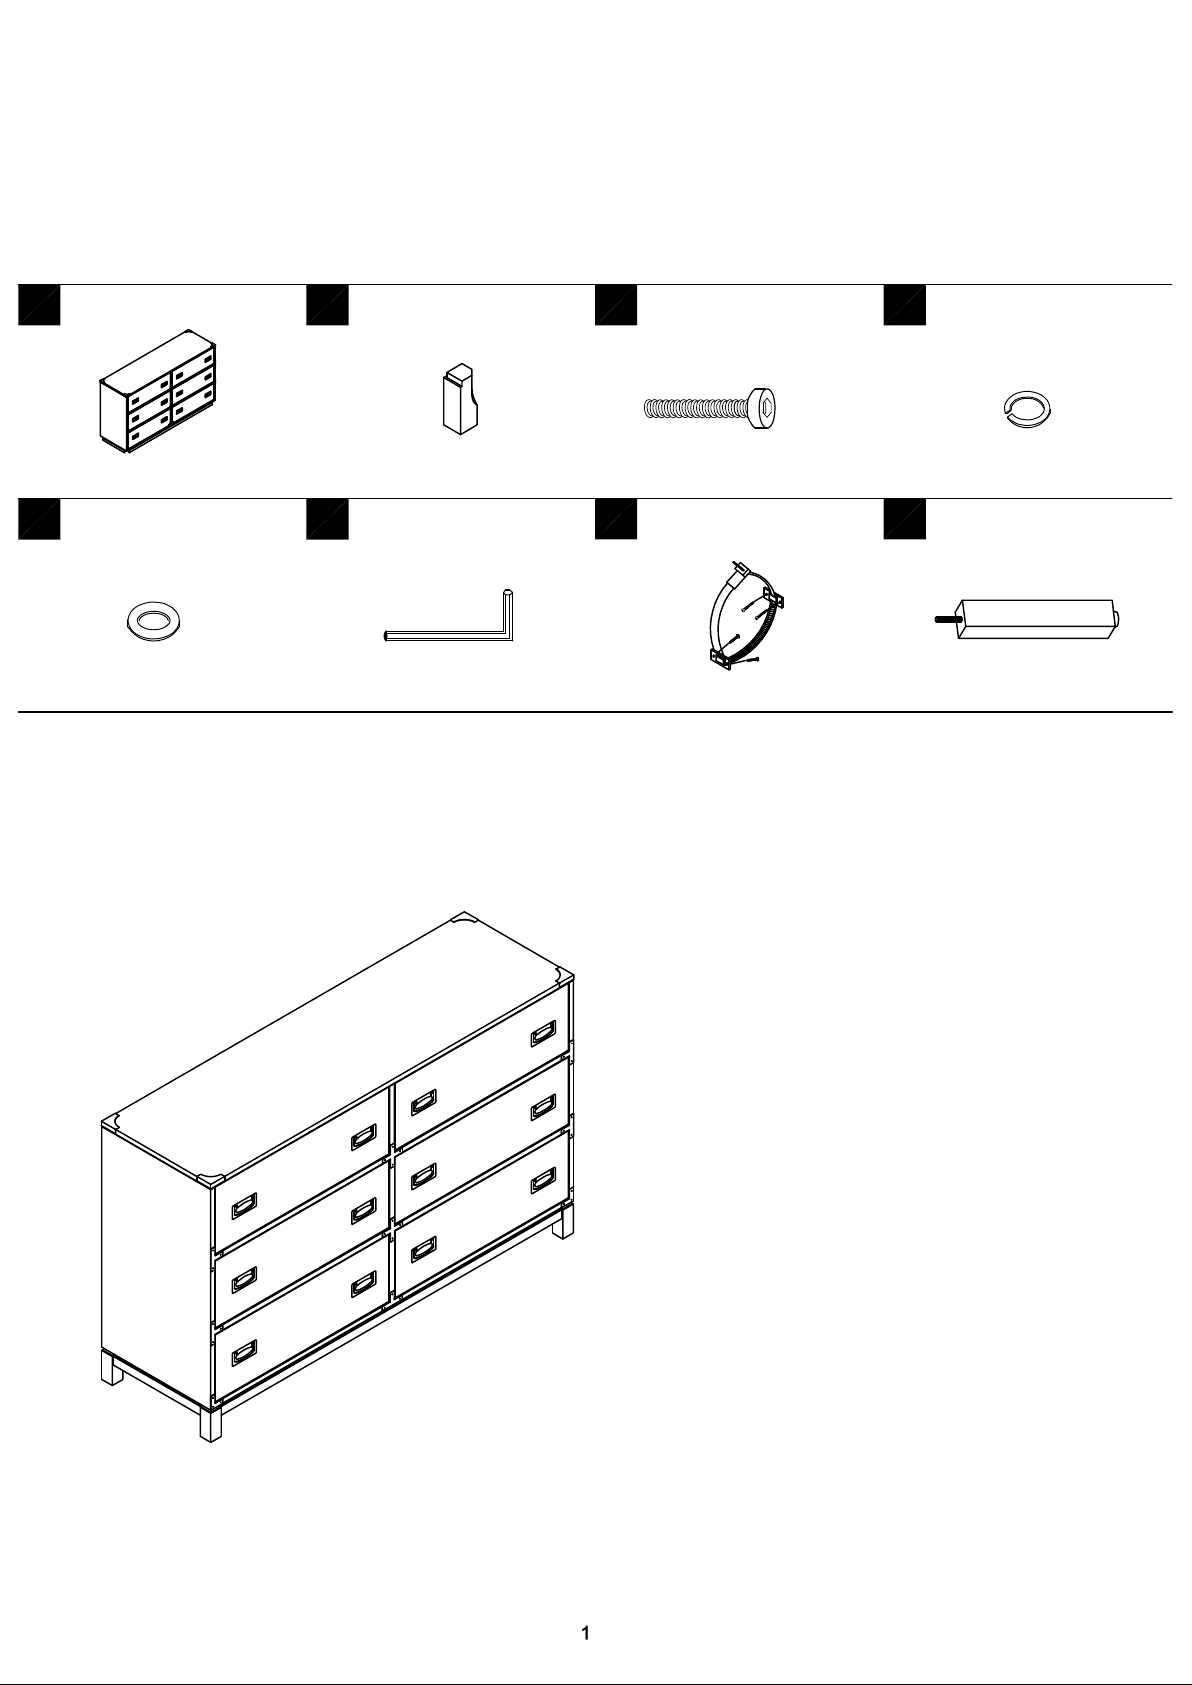
This page lists all the contents included in the box.
Please take the time to identify the hardware as
well as the individual components to this product.
As you unpack and prepare for assembly, place
the contents on a carpeted or padded area to
protect them from damage.
ASSEMBLY INSTRUCTION
Dresser
Flat Washer
Ø5/16"*19 mm
Leg
(Under Dresser)
Allen Bolt
Ø5/16"*55mm
Lock Washer
Ø5/16"
Allen Key
4 mm
Anti-tipping HW
Support Leg
A B
C D
E F G H
1 pc
8 pcs
4 pcs
8pcs
8 pcs
1 pc
1 set
1 pc
DRESSER
Page 2
1
2
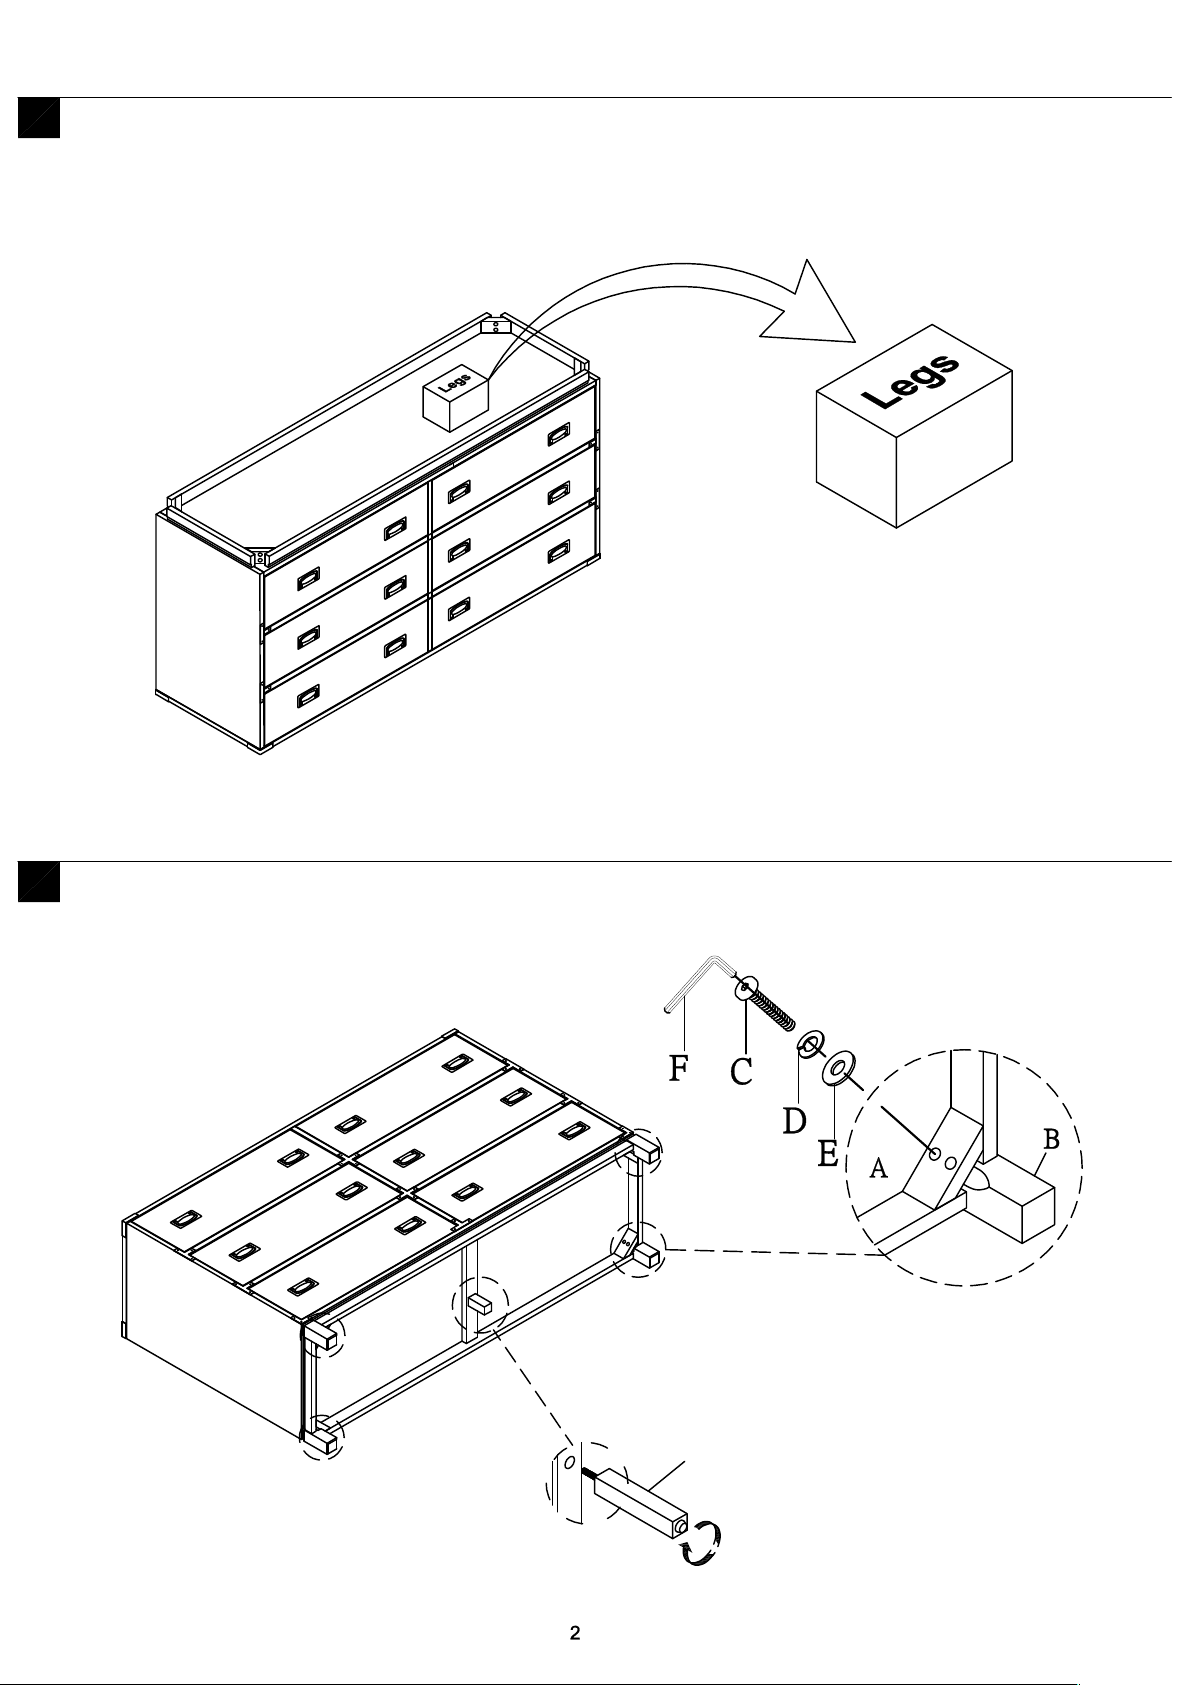
Attached four Legs(B) to the Dresser(A). Use Allen Bolt(C) Lock Washer(D) and Flat Washer(E)
on holes of Dresser(A). Turn the Allen Key(F) in Allen Bolt(C).Attached Support Leg(H) to the
Dresser(A). Adjust the leveler to make Dresser in level.
H
Take box Legs out the dresser bottom.
Page 3
Cleaning & Care
Treat surface with care. Surface is resistant to scratches but is not scratch resistant. Clean surfaces with a dry
or damp soft cloth. Do not use abrasive cleaners. Hardware may loosen over time. Periodically check that all
connections are tight.
3
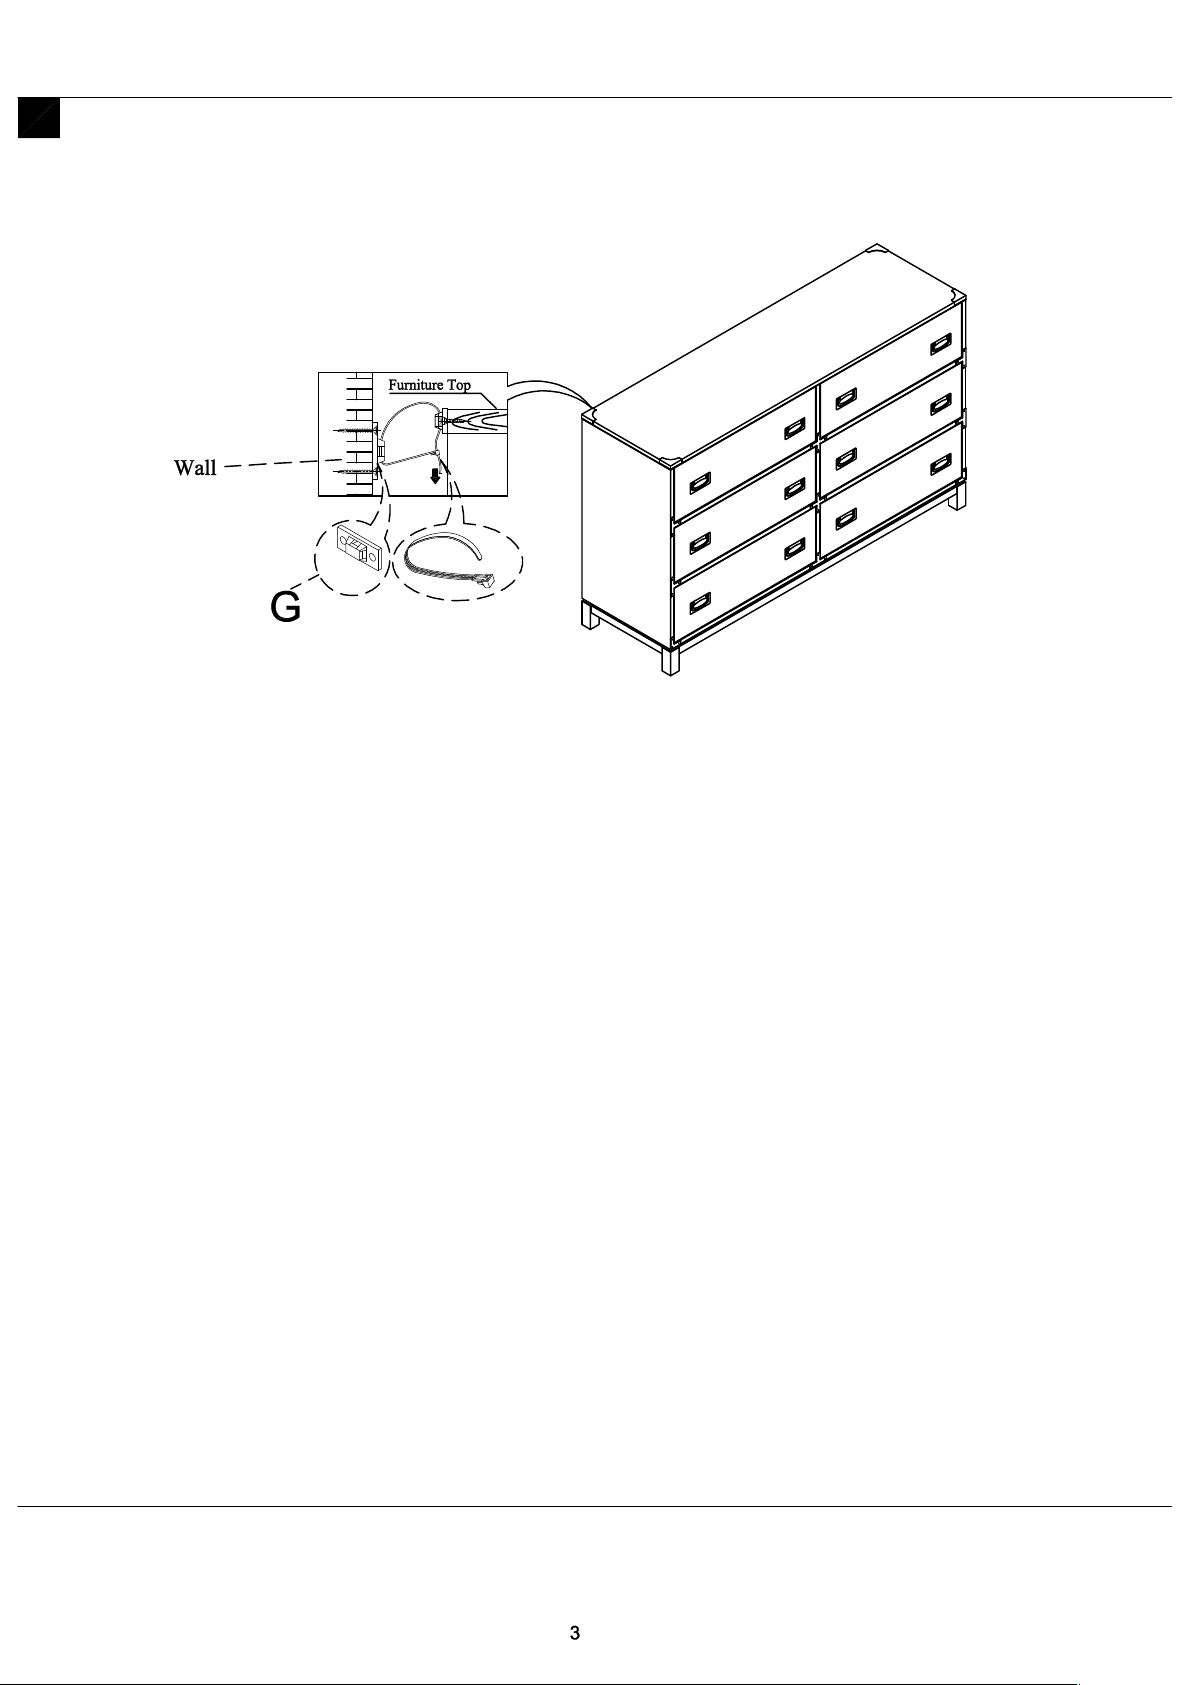
Attach Anti-tipping hardware(G) to wall: Attach bracket (vertically) to wall using 2 of the screws
provided; Attach bracket (horizontally) to furniture back (directly below top) with 2 of the screws
provided. Place bracket as close to center of furniture back as possible in relation to wall stud and
the desired position in the room; Move furniture to its final position. Thread the strap through
bracket, pull it tight.
 Loading...