


PIR 30
PIR 30/31
PIR 30/31/T
braun
brown
+ ~ 12-24 V AC
weiss
white
– ~ 12-30 V DC
48 V AC/DC
60VA/30W
grün
green
gelb
yellow
grau
grey
PIR 30/32
PIR 30/32 T
gelb
yellow
not connected
braun
brown
+~ 12-30 V DC
weiss
white
–GND
max. 200 mA
+U
L
max. 40 V DC
RL
GND
green
grün
grey
grau
b
1
1
A
26mm + A
24mm + A
2
2
2
3
3
Quality
international
level
EN ISO
9001
PIR 30 / PIR 30/T
Betriebsanleitung
Operating instructions
Instructions d’utilisation
Istruzioni per l’uso
Instrucciones de servicio
. Sicherheitshinweise/ Safety instructions/ Consignes de sécurité/ Avvisi di sicurezza/ Indicac. de seguridad
1
as Gerät darf nur an Schutzklein-
D D
spannung mit sicherer elektrischer
rennung betrieben werden.
T
ingriffe und Reparaturen nur durch
E
Ihren Lieferanten vornehmen lassen!
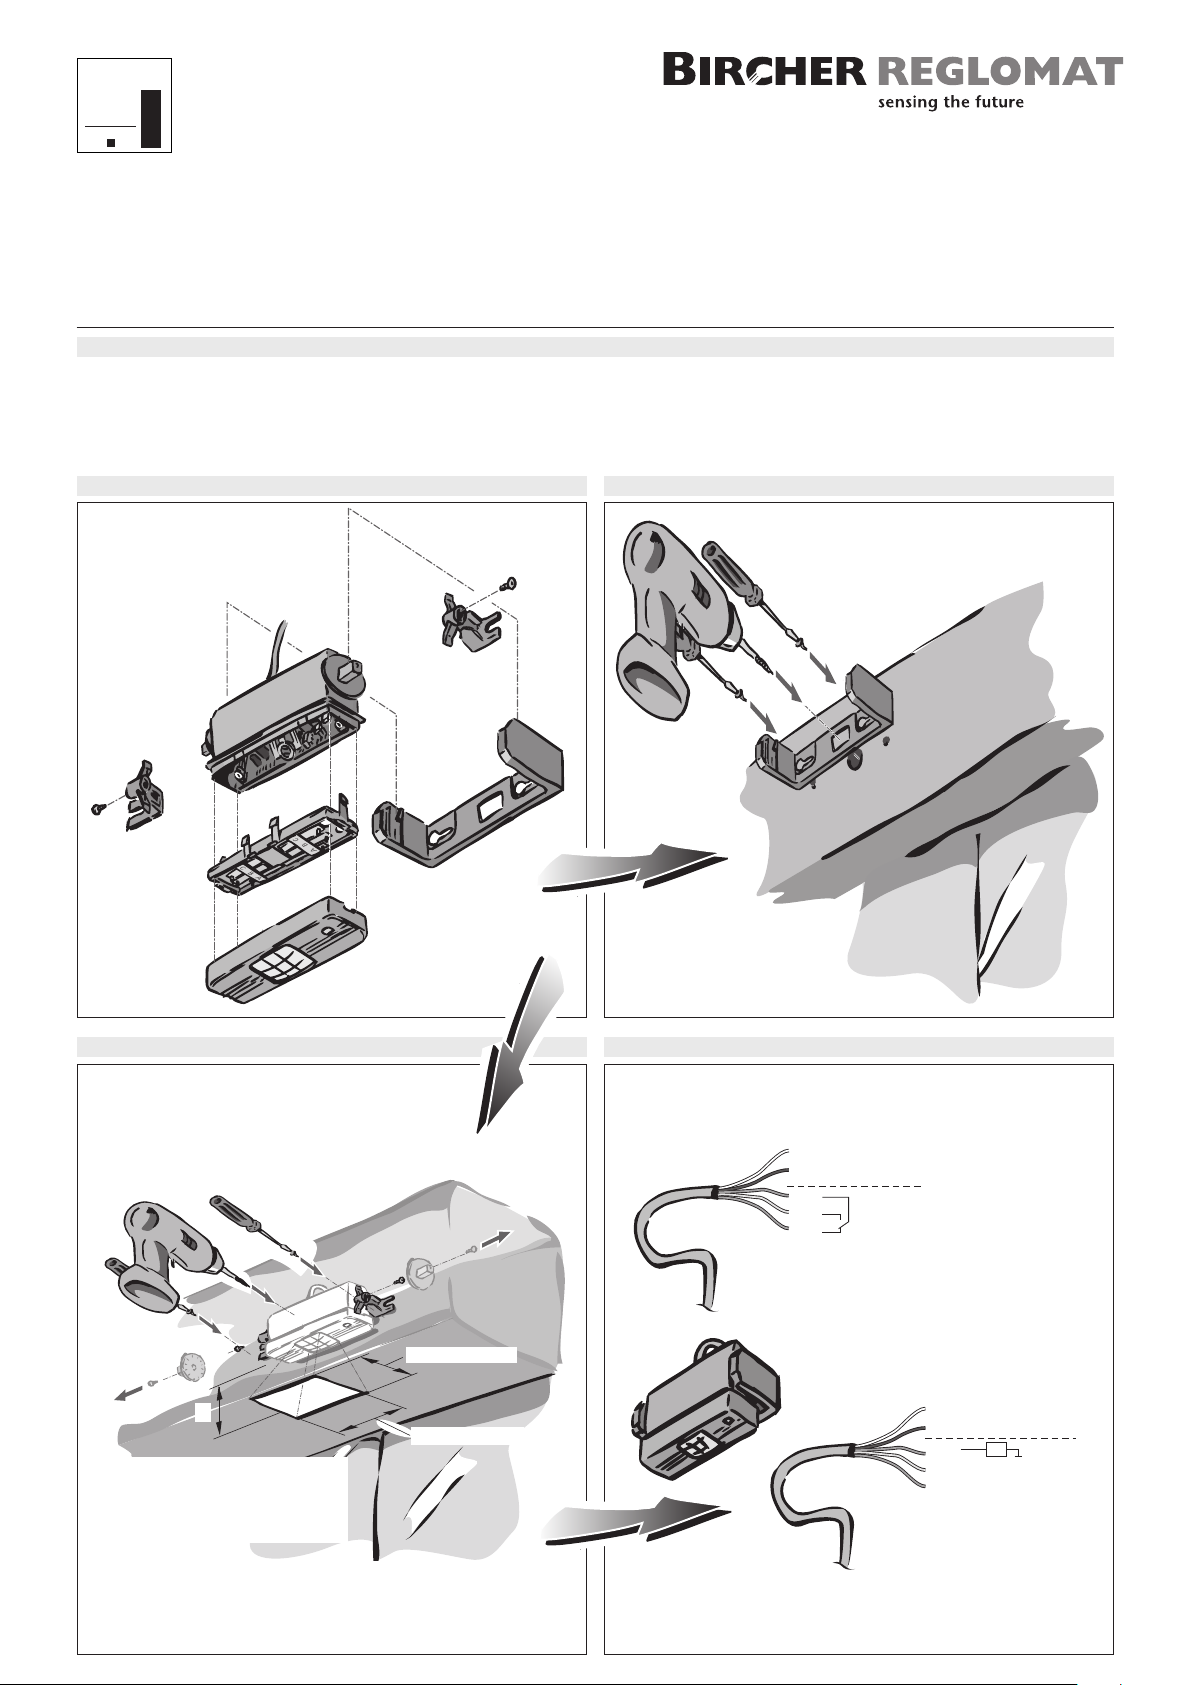
. Öffnen/Opening /Ouvrir/ Aprire/Abrir
2
he device must only be operated at a
E T
protective low voltage with safe
lectrical isolation.
e
nterventions and repair work must
I
only be performed by your supplier!
'appareil ne doit être raccordé qu'à
F L
une basse tension de protection
ossédant un isolement électrique sûr.
p
es interventions et réparations ne
L
doivent être effectuées que par votre
ournisseur !
f
Passiv-Infrarot-Bewegungsmelder
Passive Infrared Motion Detector
Détecteur de mouvement passif à infrarouge
Rivelatore di movimento passivo a raggi infrarossi
Detector de movimiento pasivo por infrarrojo
. Montage/Mounting /Montage/ Montaggio/Montaje
3
I L'apparecchio deve essere allacciato
olo ad una tensione inferiore con
s
eparazione elettrica sicura.
s
Interventi e riparazioni devono essere
ffettuati solo dal vostro fornitore.
e
ES
El aparato sólo debe ser conectado
a
u
¡Las intervenciones y reparaciones
d
s
una tensión baja de protección con
na separación eléctrica segura.
eben ser efectuadas únicamente por
u proveedor!
3a. Montage/Mounting /Montage/ Montaggio/Montaje
D Montage im Kämpfer
E Mounting in impost
F Montage dans le profilé du dormant
I Montaggio nella traversa
ES
Montaje en el travesaño
D A = Abstand zwischen Abdeckung und Gerät
E A = Distance between cover and device
F A = Distance entre recouvrement et appareil
I A = Distanza tra copertura ed apparecchio
ES
D 1. Rasterscheiben entfernen / 2. Befestigungswinkel montieren / 3. Gerät montieren
E 1. Remove grid plates / 2. Mount fixing bracket / 3. Mount device
F 1. Retirer les disques d’arrêt / 2. Fixer l’étrier orientable à angle / 3. Installer l’appareil
I 1. Togliere i dischi di arresto / 2. Montare le squadrette di fissaggio / 3. Montare l’apparecchio
ES
A = Distancia entre cubierta y aparato
1. Desmontar los discos de encastre / 2. Montar las escuadras de fijación / 3. Montar el aparato
4. Verkabelung/Wiring /Câblage/ Cablaggio/Cableado
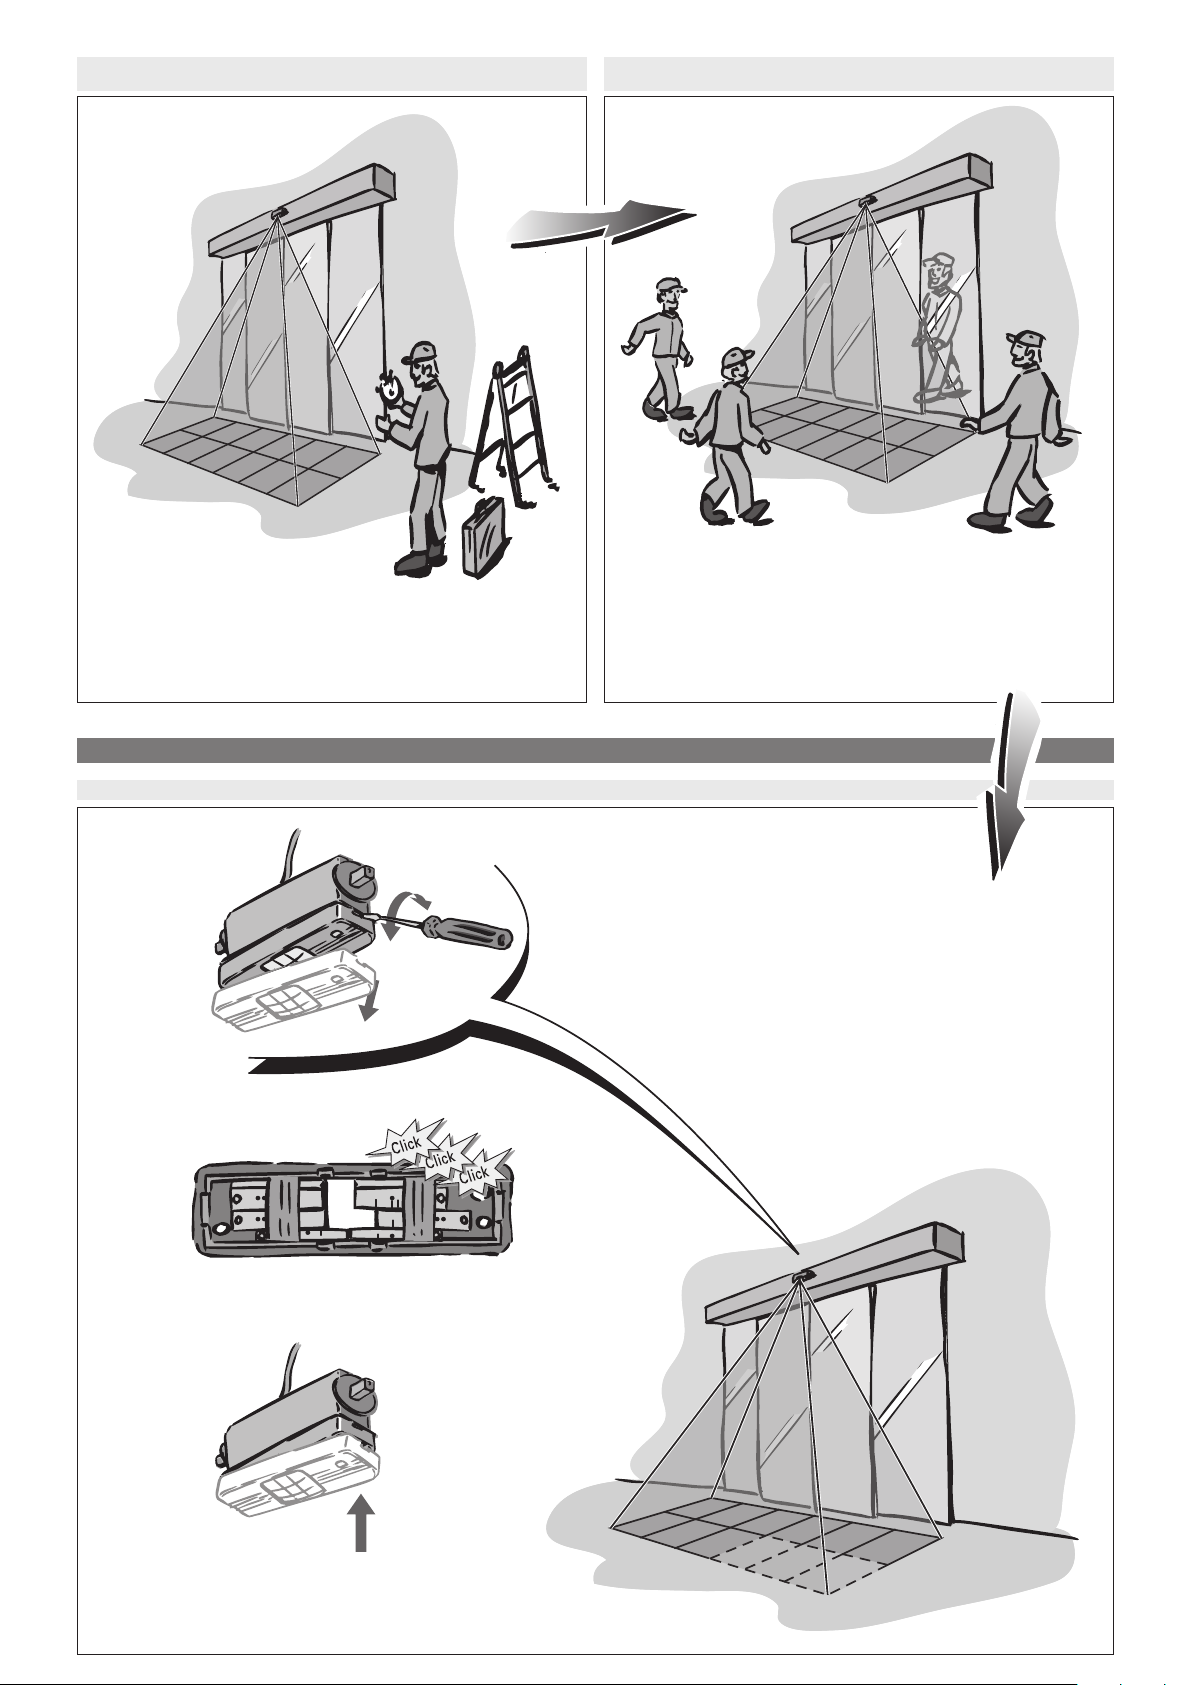
D Montage mit Drehbügel
E Mounting with swivel bracket
F Montage avec étrier orientable
I Montaggio con staffa girevole
ES
Montaje con soporte basculante
Anschliessen des Gerätes
D
E Connecting the device
F Raccordement de l’appareil
I Allacciamento dell’apparecchio
ES
Conexión del aparato
1
2
C
B
3
AAA
AAA
33112231
2
33112231
2
BBB
BBB
33112231
2
33112231
2
CCC
CCC
33112231
2
33112231
2
CC BB AAC B A
AA BB CCA B C
. Deckel auf Gerät und Einschalten/Putting cover on device and switching on /Couvercle sur l’appareil et mise
5
n marche/Montare coperchio sull’apparecchio e mettere in funzione /Montar la tapa en el aparato y encen derlo
e
. Überprüfen der Werkseinstellungen/Testing factory setting /Contrôle des réglages faits à
6
'usine/Controllo delle regolazioni effettuate in fabbrica /Comprobar los ajustes de fábrica
l
D Nach Montage einschalten und für 10 s Detektionsbereich verlassen
ürflügel dürfen nicht innerhalb des Detektionsfeldes sein
T
witch on after mounting and exit detection area for 10 s
E S
he door panels must not be inside the detection area
T
près le montage, mettre l’appareil en marche et sortir de la zone de détection pendant 10 s
F A
es battants de porte doivent se trouver en dehors du champ de détection
L
opo il montaggio, mettere in funzione e restar fuori dal campo di rilevamento per 10 s
I D
battenti della porta non devono essere nel campo di esplorazione
I
ESDespués del montaje, encenderlo y abandonar el campo de detección por 10 s
Las hojas de la puerta no deben estar dentro del campo de detección
OK
Sondereinstellungen/Special settings/Réglages spéciaux/Regolazioni speciali/Ajustes especiales
7. Ändern der Tastfelder/Changing scanning areas /Modification des zones de détection/ Modificare i campi di esplorazione/Modificar los campos de detección
D 1. Deckel entfernen
2. Schieber einklicken
unbedingt wieder auf Gerät klicken
3. Deckel
E 1. Remove cover
2. Click in slides
Always clip cover back onto device
3.
F 1. Retirer le couvercle
2. Enfoncer les curseurs
3. Emboîter
I 1. Togliere il coperchio
2. Impegnare i cursori
3.
ES
1. Retirar la tapa
2. Hacer engatillar los cursores
3. Volver a hacer engatillar
impérativement le couvercle de nouveau sur l’appareil
Assolutamente impegnare di nuovo il coperchio sull’apparecchio
sin falta la tapa en el aparato
D Nicht OK
E Not OK
F Pas OK
I Non OK
ES
No OK
 Loading...