

BIOTRONIK SE and KG CM08V-1 Users Manual
CardioMessenger®II-S TLine
Transmitter for BIOTRONIK Home Monitoring
®
Technical Manual
362453_D_GA_CM_II-S_TLine_US.ind1 1 17.04.08 16:29:59
©®by BIOTRONIK GmbH & Co. KG
All rights reserved. Specifications subject to
modification, revision and improvement.
2008-D-05
CardioMessenger is a registered trademark of
BIOTRONIK GmbH & Co. KG
BIOTRONIK mbH & o K
Woermannkehre 1
12359 Berln ermany
Tel +49 (0) 30 68905-0
Fax +49 (0) 30 6852804
BIOTRONIK, Inc
6024 SW Jean rd Bldg B
Lake Oswego, OR 97035
Phone (800) 547-0394 (24-hr)
Fax (503) 635-9936
salesbotronkcom
wwwbotronkcom
362453_D_GA_CM_II-S_TLine_US.ind2 2 17.04.08 16:30:00

Call back light (yellow, page 22)
Operating light (yellow/green, page 21)
Use only original power supply units (page 16)
Slot for the brief instructions guide (page 20)
Connection for the power supply (page 16)
Connections for the landline (page 9 - 14)
362453_D_GA_CM_II-S_TLine_innen_1 1 05.05.08 15:00:47

CM _II-S_TLine.book Page 1 T uesday, May 6, 2008 12:56 PM
Content
Introduction . . . . . . . . . . . . . . . . . . . . . . . . . . 3
How Home Monitoring works. . . . . . . . . . . 3
Check the completeness of the delivery . . . 5
Setup . . . . . . . . . . . . . . . . . . . . . . . . . . . . . . . 7
Connection . . . . . . . . . . . . . . . . . . . . . . . . . . . 8
Connection to the landline . . . . . . . . . . . . . 8
Connection to the power supply. . . . . . . . 16
Self-test . . . . . . . . . . . . . . . . . . . . . . . . . . . 18
Insert brief instructions guide . . . . . . . . . 20
Operate . . . . . . . . . . . . . . . . . . . . . . . . . . . . 21
Check lights . . . . . . . . . . . . . . . . . . . . . . . 21
Call back function . . . . . . . . . . . . . . . . . . . 22
Switching Off the System. . . . . . . . . . . . . 23
Debugging . . . . . . . . . . . . . . . . . . . . . . . . . . 24
Cleaning, maintenance, and disposal . . . . 28
Precautionary measures . . . . . . . . . . . . . . 30
Guidelines . . . . . . . . . . . . . . . . . . . . . . . . . . 33
Technical data . . . . . . . . . . . . . . . . . . . . . . . 37
Appendix . . . . . . . . . . . . . . . . . . . . . . . . . . . 39
Index . . . . . . . . . . . . . . . . . . . . . . . . . . . . . . 45
CardioMessenger II-S TLine
362453--D
1

CM _II-S_TLine.book Page 2 T uesday, May 6, 2008 12:56 PM
2
CM _II-S_TLine.book Page 3 T uesday, May 6, 2008 12:56 PM
Introduction
Dear patient:
You have received a pacemaker or implantable
cardioverter-defibrillator (ICD) with the
additional Home Monitoring function by
BIOTRONIK.With Home Monitoring, the state of
your heart's health and your implant are
surveyed on a daily basis while you are at
home. Your physician can catch up at regular
intervals on how your heart is doing.
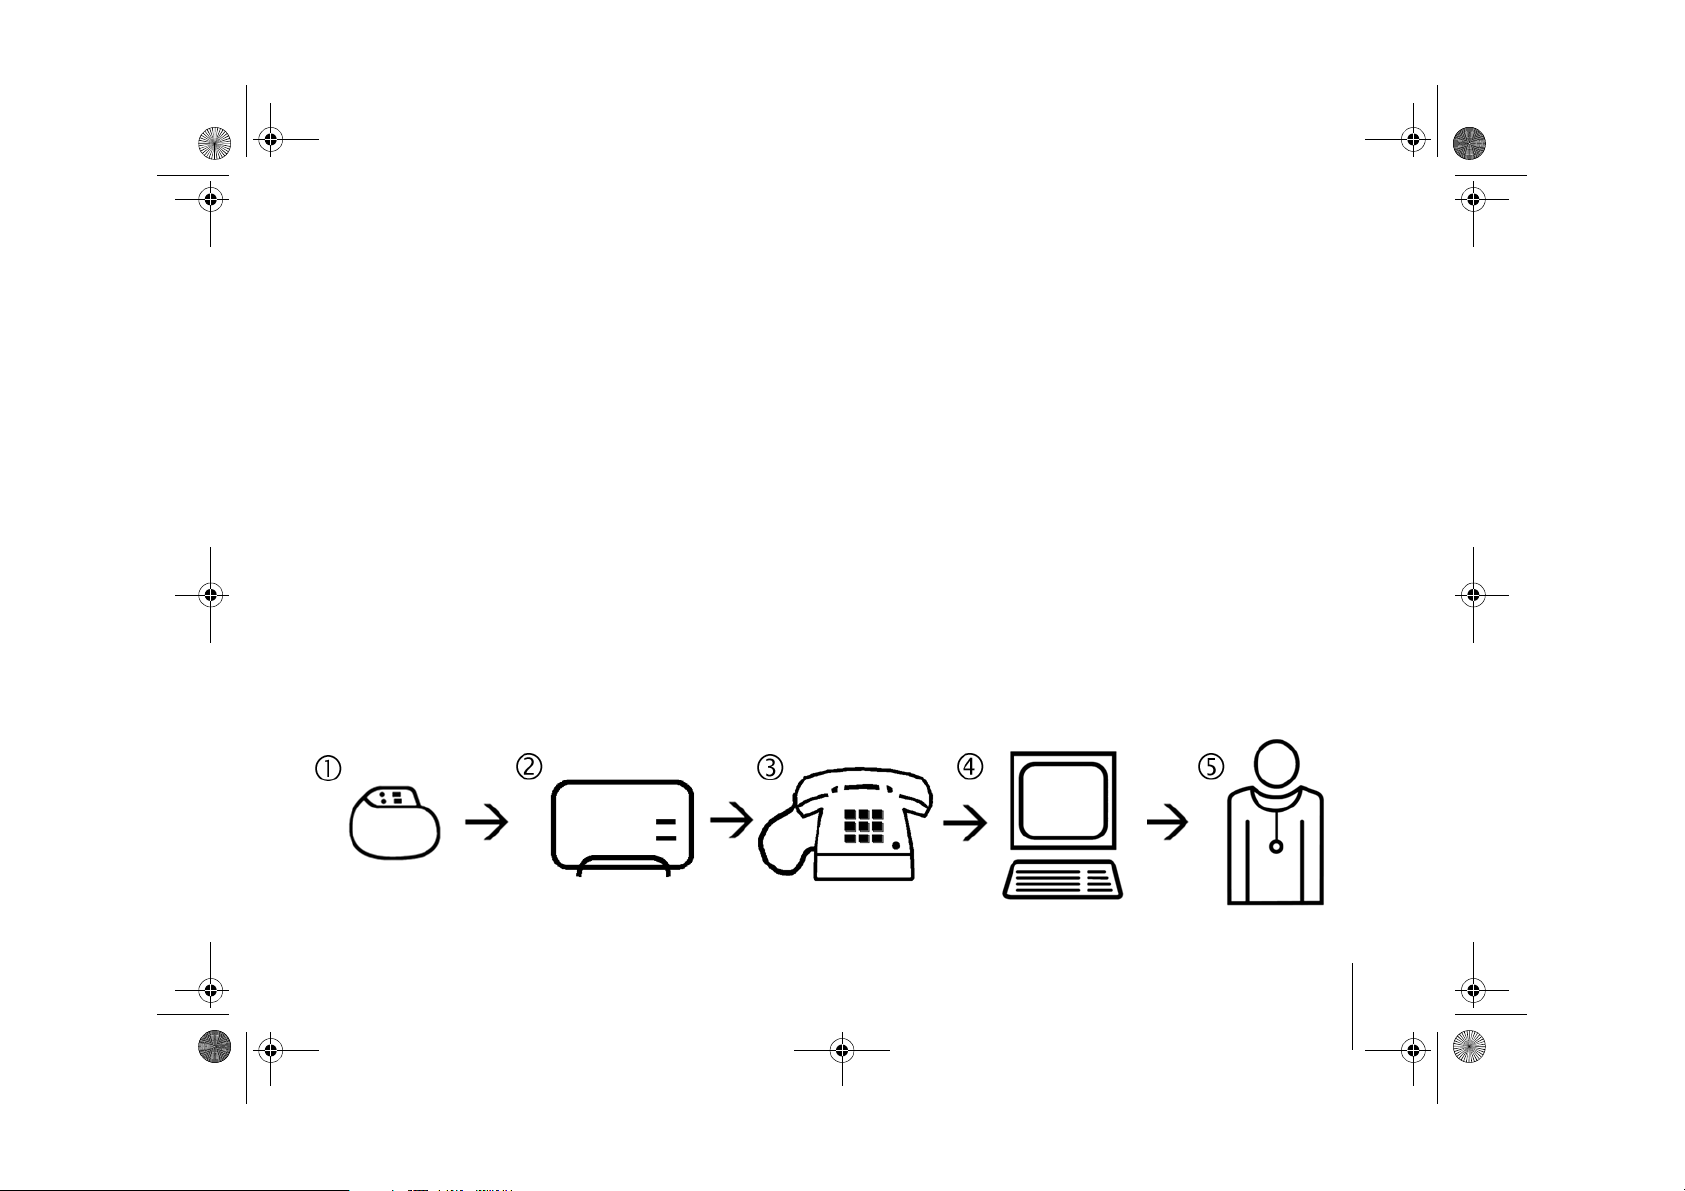
How Home Monitoring works
Your implant is equipped with a special
transmitter (1). Usually at night, the
transmitter sends daily information on your
heart to the patient device, your
CardioMessenger (2).
The transmission power from your implant is
low and does not impair your health in any way.
Its limited transmission range, however,
requires the use of the CardioMessenger.
The CardioMessenger collects the information
received from the implant and automatically
transmits it to the
CardioMessenger II-S TLine Introduction
3

CM _II-S_TLine.book Page 4 T uesday, May 6, 2008 12:56 PM
BIOTRONIK Service Center (4) as encoded
messages via a landline connection (3).
Here, the messages are decoded and made
available for viewing by your physician (5) on a
protected web site.
Based on the information received, your
physician can decide if your implant is best
configured, or if the therapy needs
adjustments. In this way, Home Monitoring
serves as a practical diagnostic aid to your
physician.
4
Introduction
CM _II-S_TLine.book Page 5 T uesday, May 6, 2008 12:56 PM
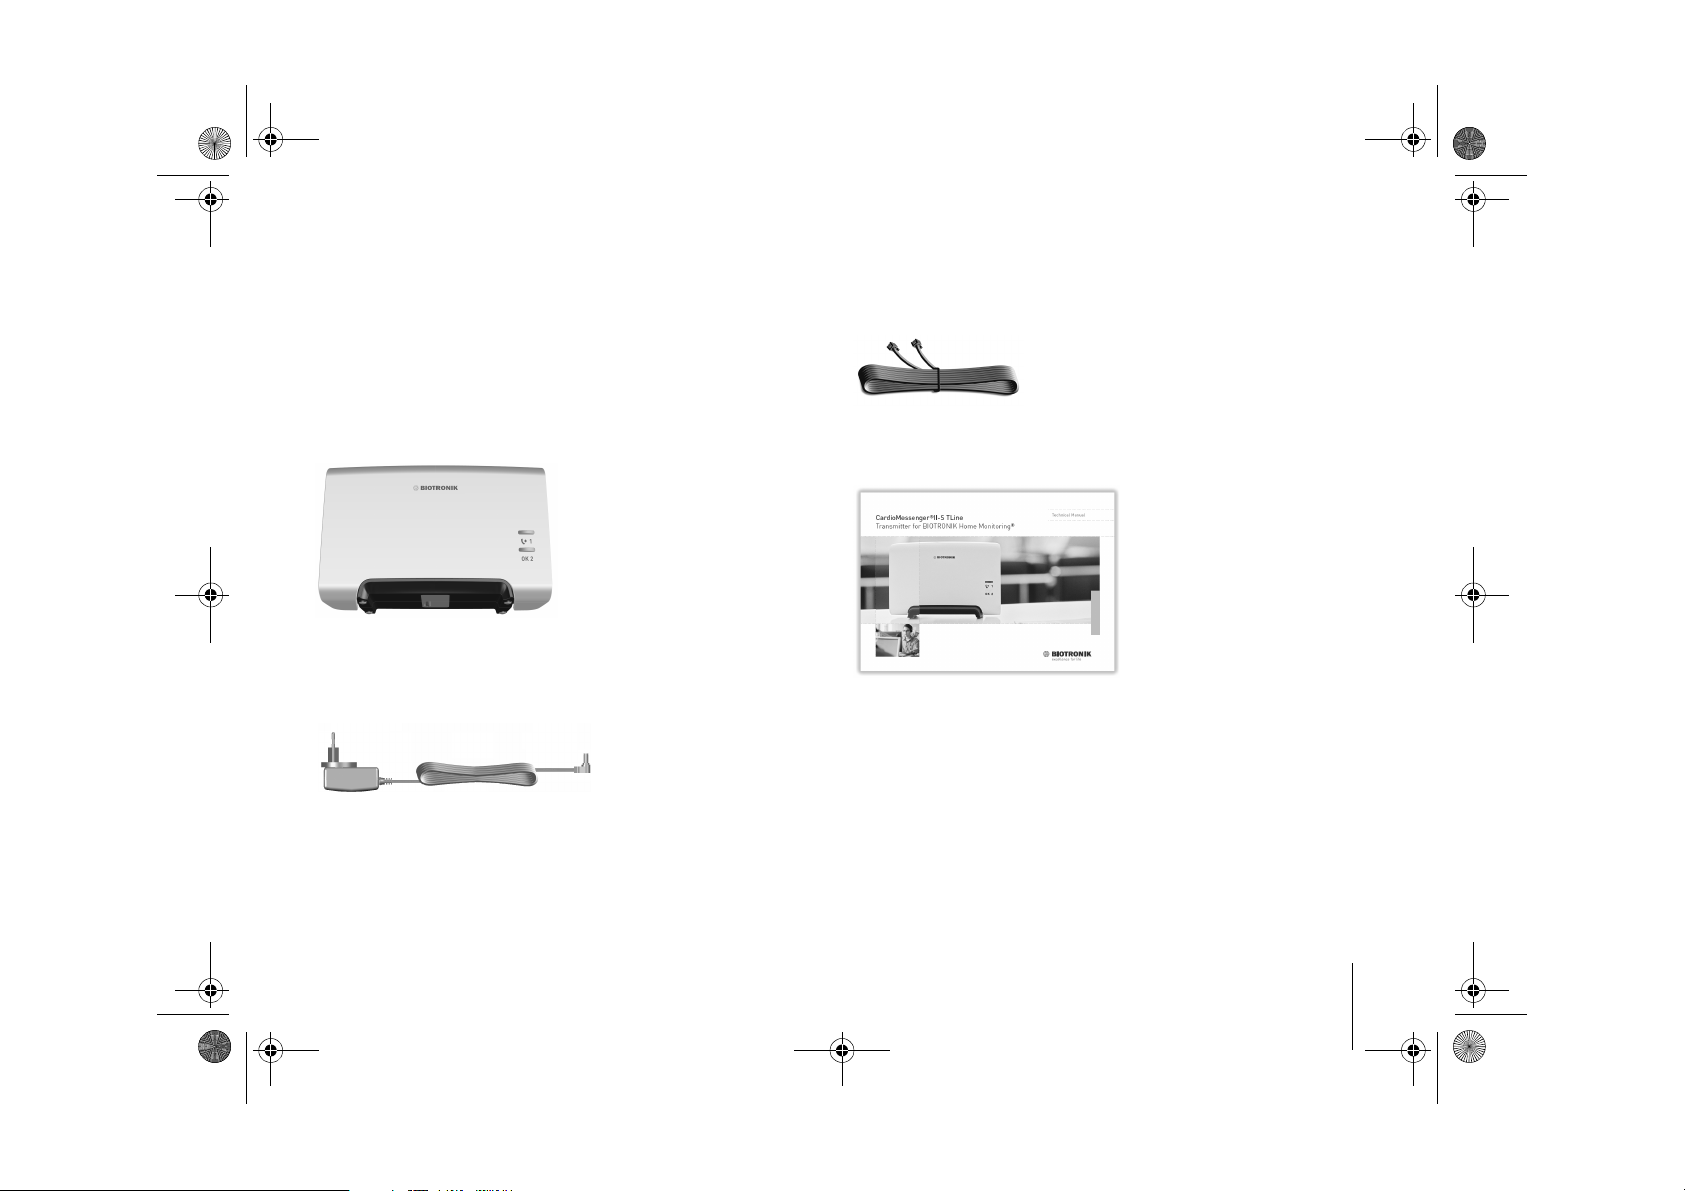
Check the completeness of the delivery
Check all components for visible damage
before using them. Use only components
which are undamaged.
The delivery includes the following:
Telephone cable
CardioMessenger II-S TLine
Technical manual with brief instructions guide
Warning!
Power supply unit with electricity cable and DC
plug
Use the CardioMessenger only if it is
undamaged. Return a damaged
CardioMessenger to your physician.
CardioMessenger II-S TLine Check the completeness of the delivery
5
CM _II-S_TLine.book Page 6 T uesday, May 6, 2008 12:56 PM
Warning!
Use only the original parts included (for
details, see "Technical data", page 37).
Other equipment may impair proper
functioning of the CardioMessenger and
increase the emitted interference and the
device's susceptibility to interference.
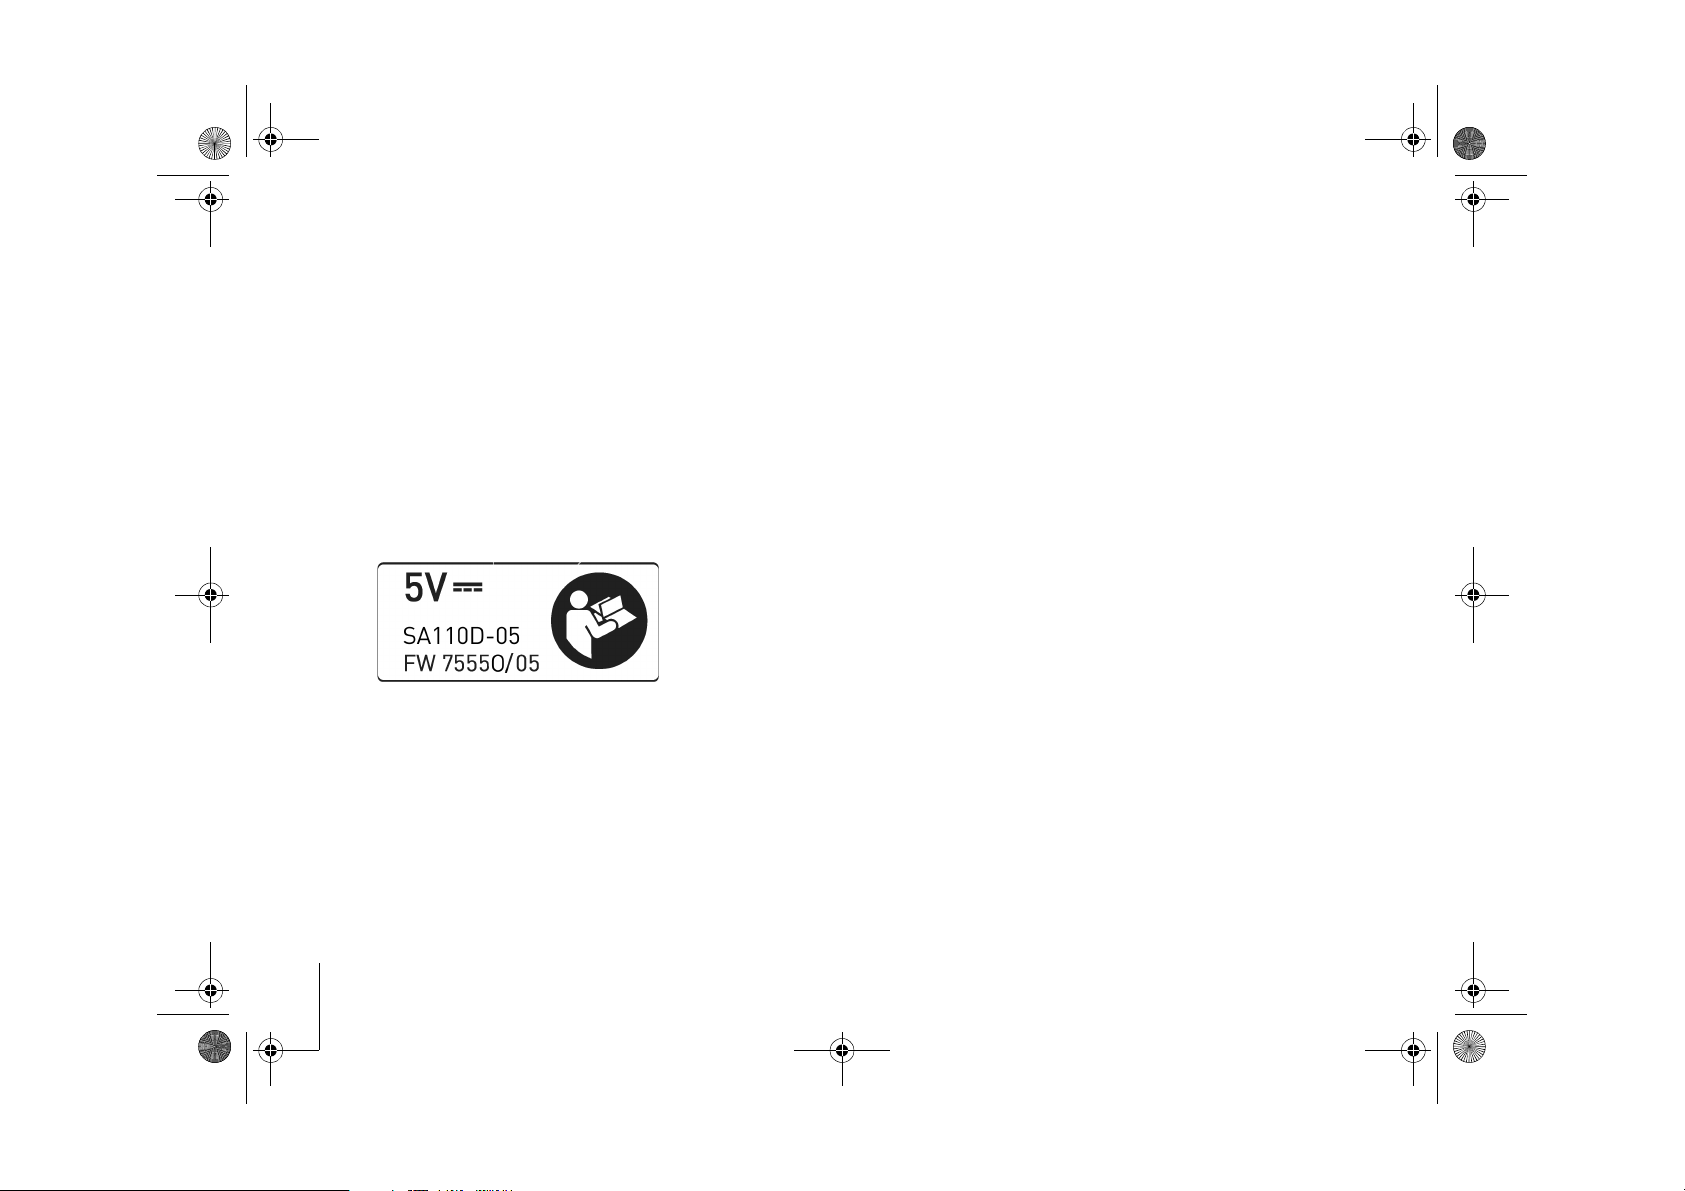
The label on the back side of the
CardioMessenger indicates the approved
power supply:
6
Check the completeness of the delivery
CM _II-S_TLine.book Page 7 T uesday, May 6, 2008 12:56 PM
Setup
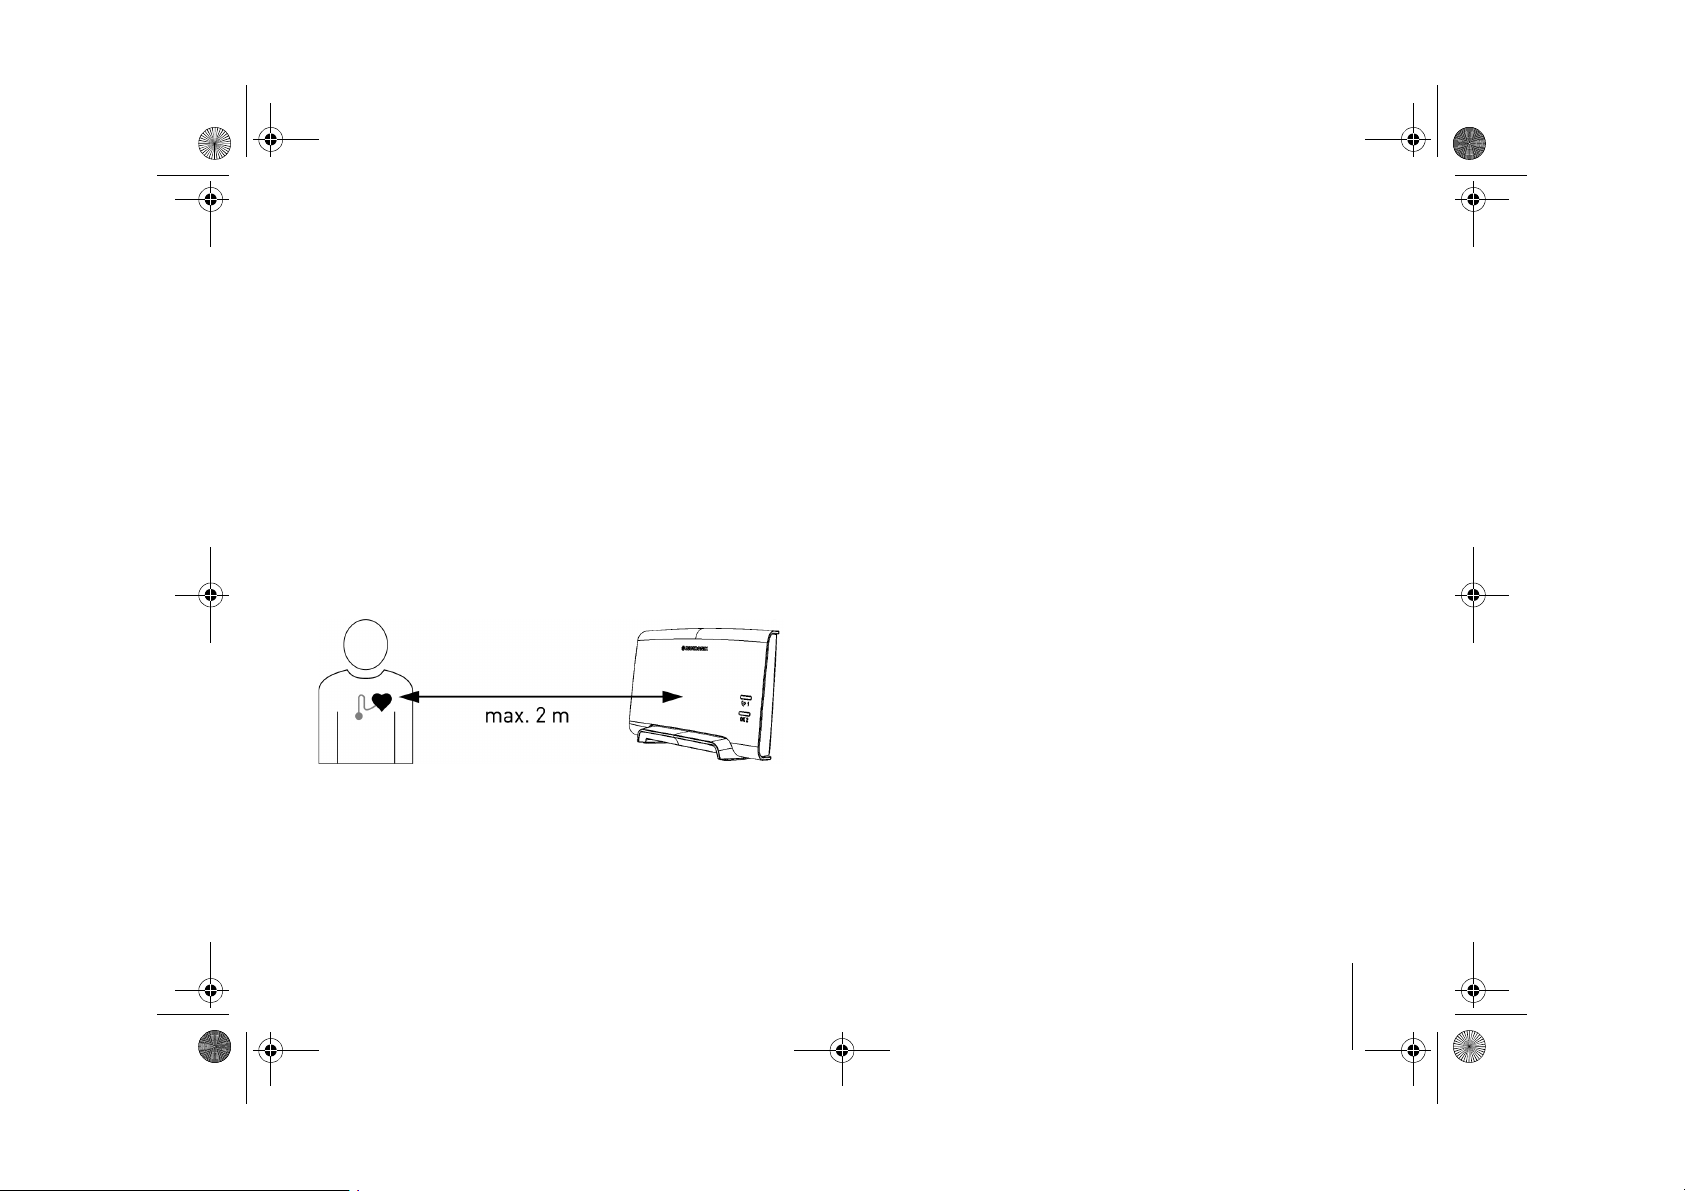
Place the CardioMessenger on your bedside
table. The bedside table is suitable because it
usually meets the following conditions:
2
The CardioMessenger is placed on a solid
base and cannot fall.
2
The distance to the implant is less than 2
meters so that regular data transmission at
night is assured.
Please take the following into consideration:
2
Place the CardioMessenger in such a way
that the lights can easily be viewed during
the day. If the lights disturb you in your
sleep, turn the CardioMessenger away from
you. Do not place the CardioMessenger on
the floor, next to, or under your bed.
2
Do not place the CardioMessenger next to a
television set, microwave oven, or a similar
source of electromagnetic interference.
2
Do not expose the CardioMessenger to
temperatures exceeding 40 °C (104 °F). Do
not put it on a place with direct sun light and
do not place it directly under a halogen
spotlight.
2
Do not expose the CardioMessenger to
temperatures lower than 10°C (50°F).
2
Protect the CardioMessenger against water
and high humidity. Do not place it in the
bathroom.
CardioMessenger II-S TLine Setup
7
CM _II-S_TLine.book Page 8 T uesday, May 6, 2008 12:56 PM
Connection
Connection to the landline
The CardioMessenger transmits the Home
Monitoring data via landline.
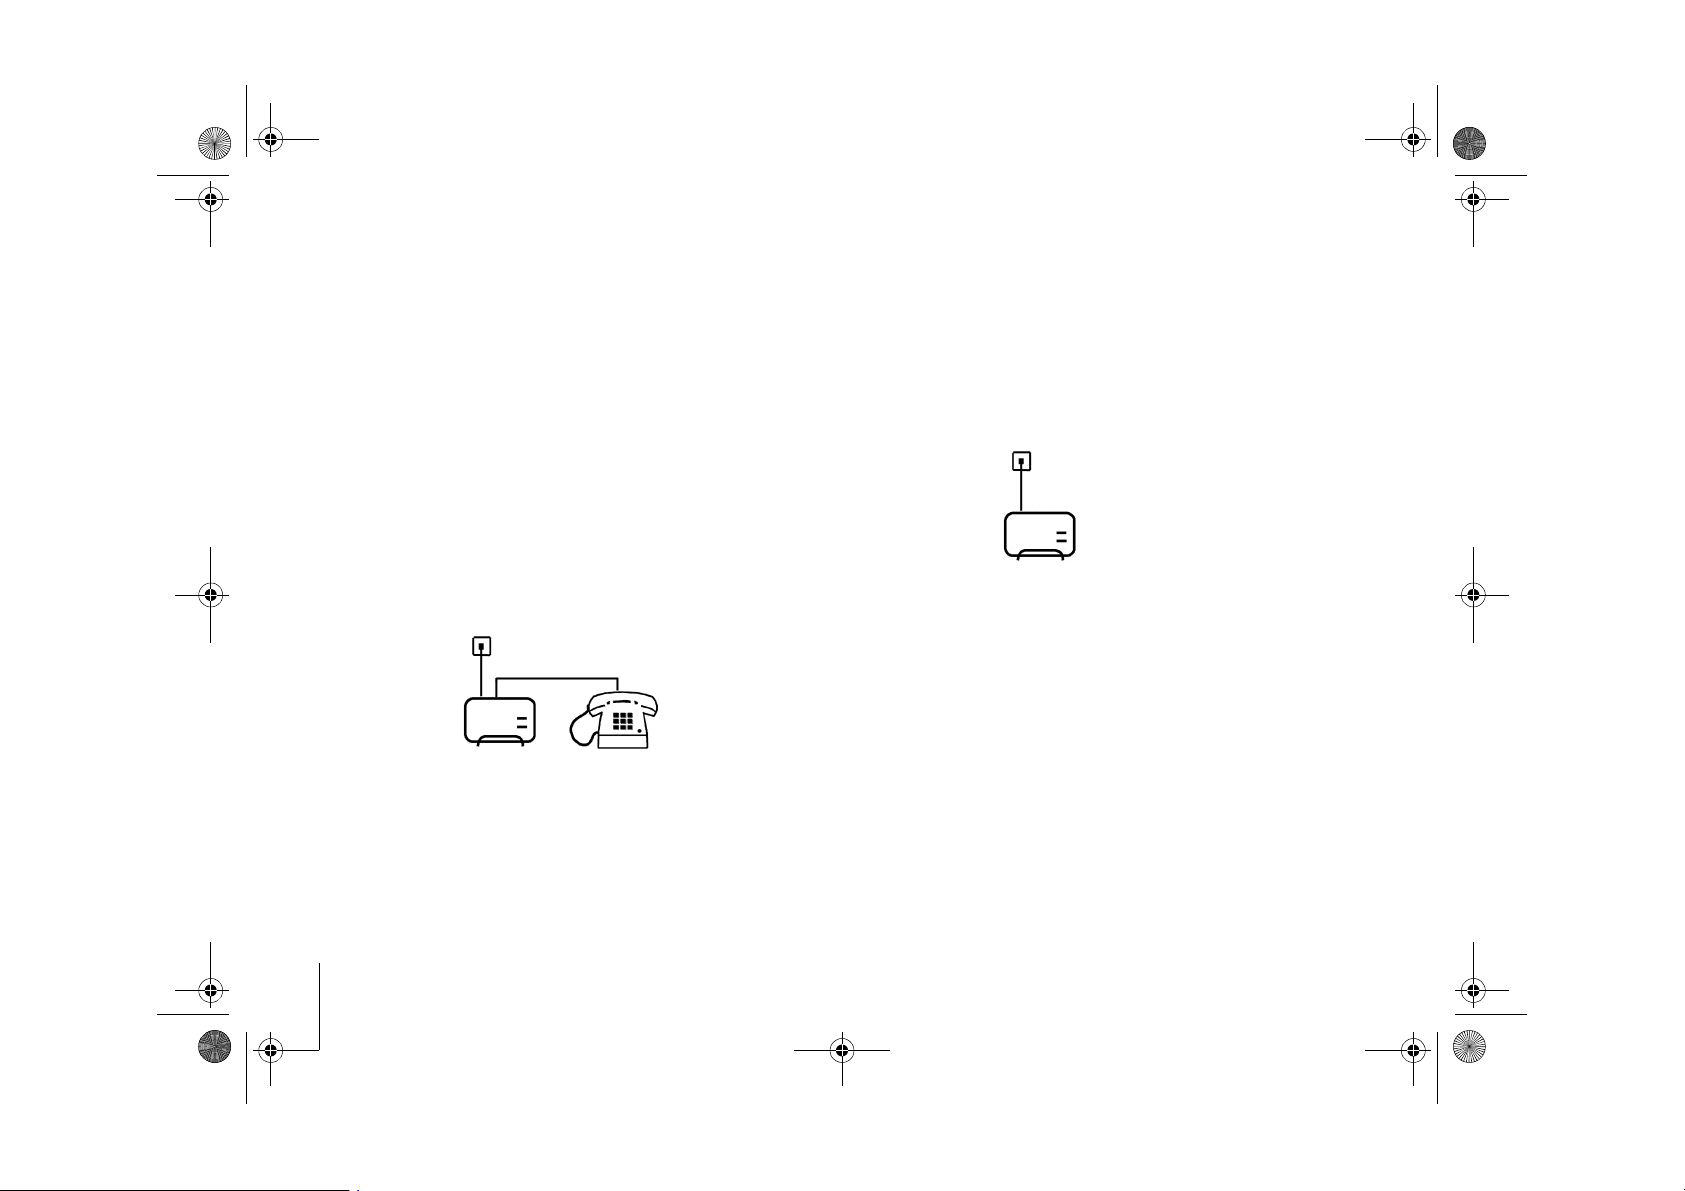
There are two ways to connect the
CardioMessenger to the landline:
2
Method A
CardioMessenger and telephone are
operated using the same telephone wall
jack.
2
Method B
The CardioMessenger is operated with a
telephone wall jack to which no other device
is connected.
In both cases, you can use your phone as
usual.
Note
The CardioMessenger has been designed
for use with an analog landline. Correct
operation cannot be ensured if using a
digital landline. If you are unsure what kind
of landline you are using, please contact
your telephone provider.
8
Connection
CM _II-S_TLine.book Page 9 T uesday, May 6, 2008 12:56 PM
Method A
To operate both the CardioMessenger and
the telephone using one telephone jack
To operate CardioMessenger and telephone
together in one telephone wall jack, proceed as
follows:
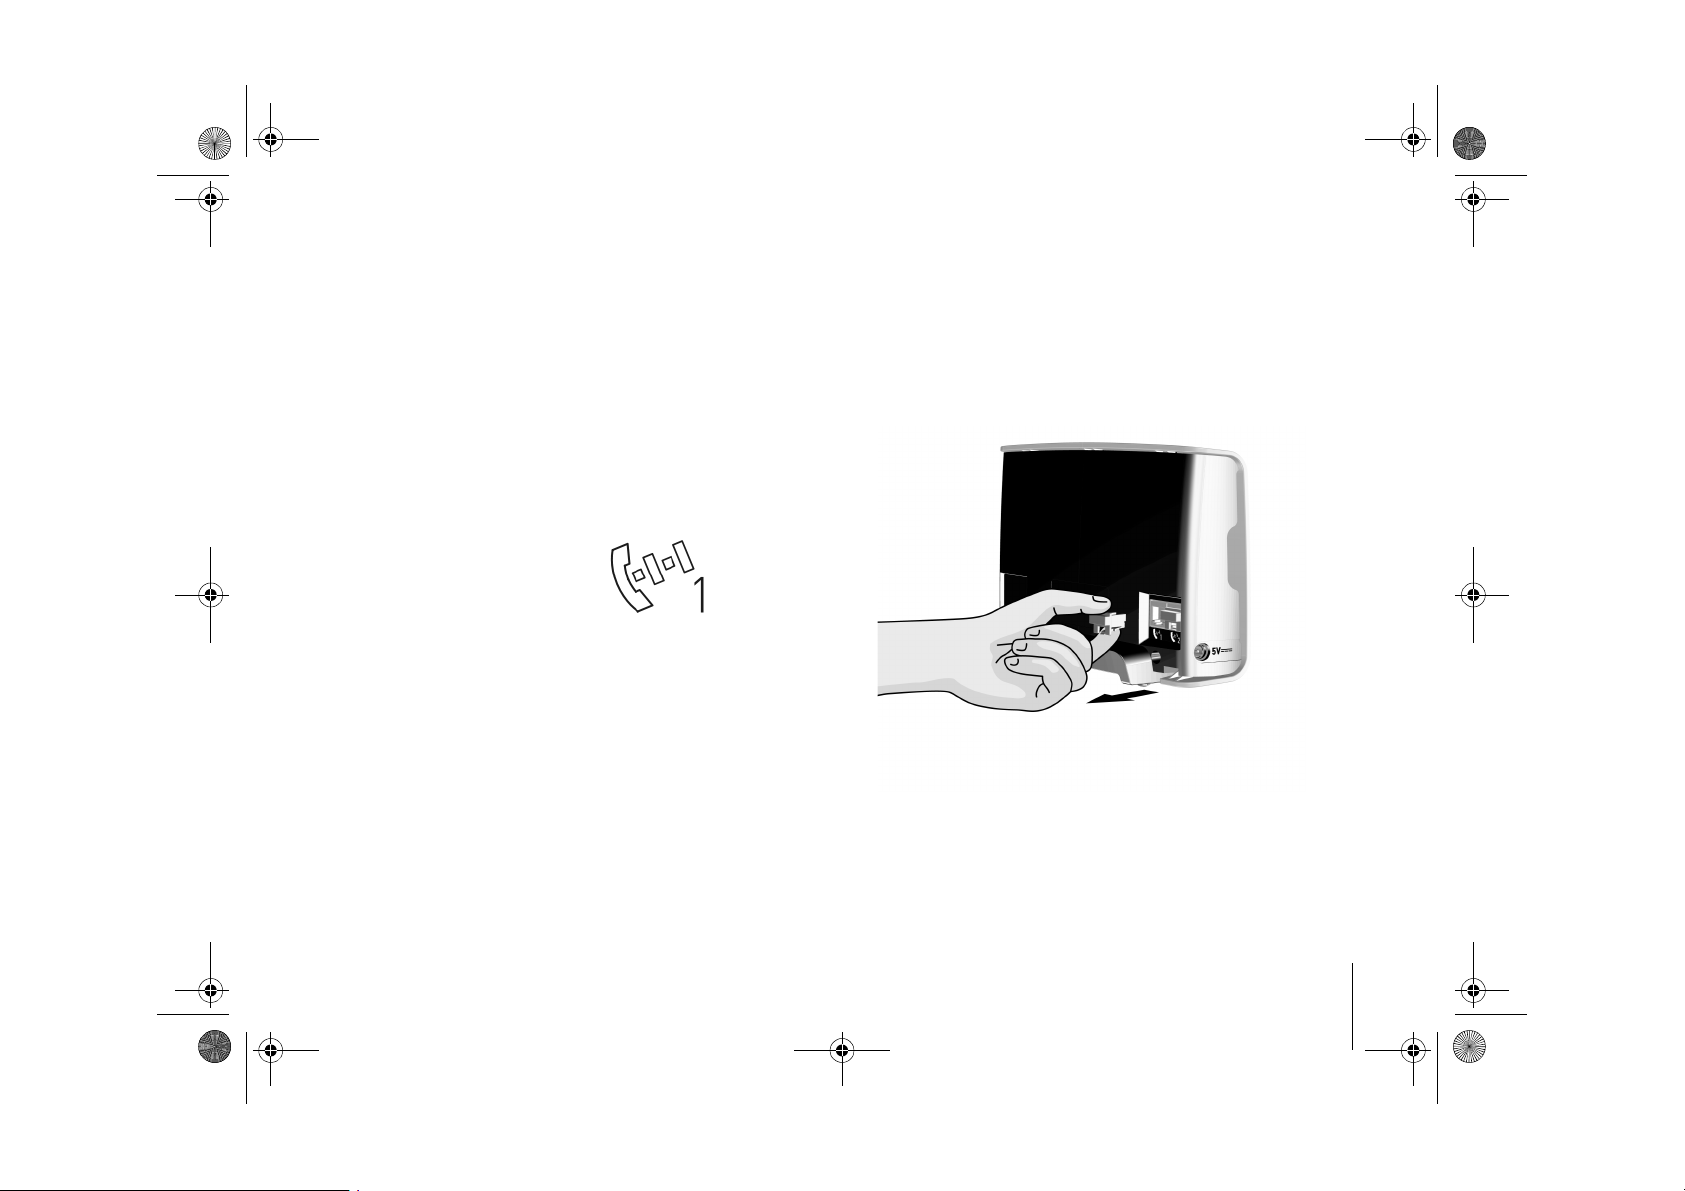
1. On the back side of the CardioMessenger:
Remove the sealing plug from phone inlet 1.
Phone inlet 1 is labeled
with the following
symbol:
2. Unplug the telephone cable from the
telephone wall jack.
CardioMessenger II-S TLine Connection
9

CM _II-S_TLine.book Page 10 T uesday, May 6, 2008 12:56 PM
3. Connect the free end of the telephone cable
to phone inlet 1 of the CardioMessenger.
The telephone is now connected to the
CardioMessenger.
4. Remove the sealing plug from phone inlet 2.
Phone inlet 2 is
labeled with the
following symbol:
10
Connection

CM _II-S_TLine.book Page 11 T uesday, May 6, 2008 12:56 PM
5. Take the supplied telephone cable and
connect one end to phone inlet 2.
6. Connect the other end of the supplied
telephone cable to the telephone wall jack.
7. Check the telephone connection. Lift and
listen to the receiver. The usual dialing tone
should be audible.
CardioMessenger II-S TLine Connection
11

CM _II-S_TLine.book Page 12 T uesday, May 6, 2008 12:56 PM
The telephone and CardioMessenger are now
connected to the landline.
As a next step, connect the CardioMessenger
to the power supply (see "Connection to the
power supply", page 16).
12
Connection
 Loading...