

Biotronic Technology 44424832303030 Users manual
Taiwan Biotronic
Technology Inc
.
Utrainer Personal Exercise Cruiser
User Manual
Meet your great life here !
We care so we create .
http www biotronic com tw
:// . . .
Welcome to LifeVisa Club~
Step 3:
TaiwanBiotronicTechnologyInc.
No.69,GongJiaoSt.,DaLiDist.,
TaichungCity412,Taiwan(R.O.C)
Tel:886422750988
Fax:886422766449
http://www.biotronic.com.tw
Email:info@biotronic.com.tw
and more
...

p
p
p
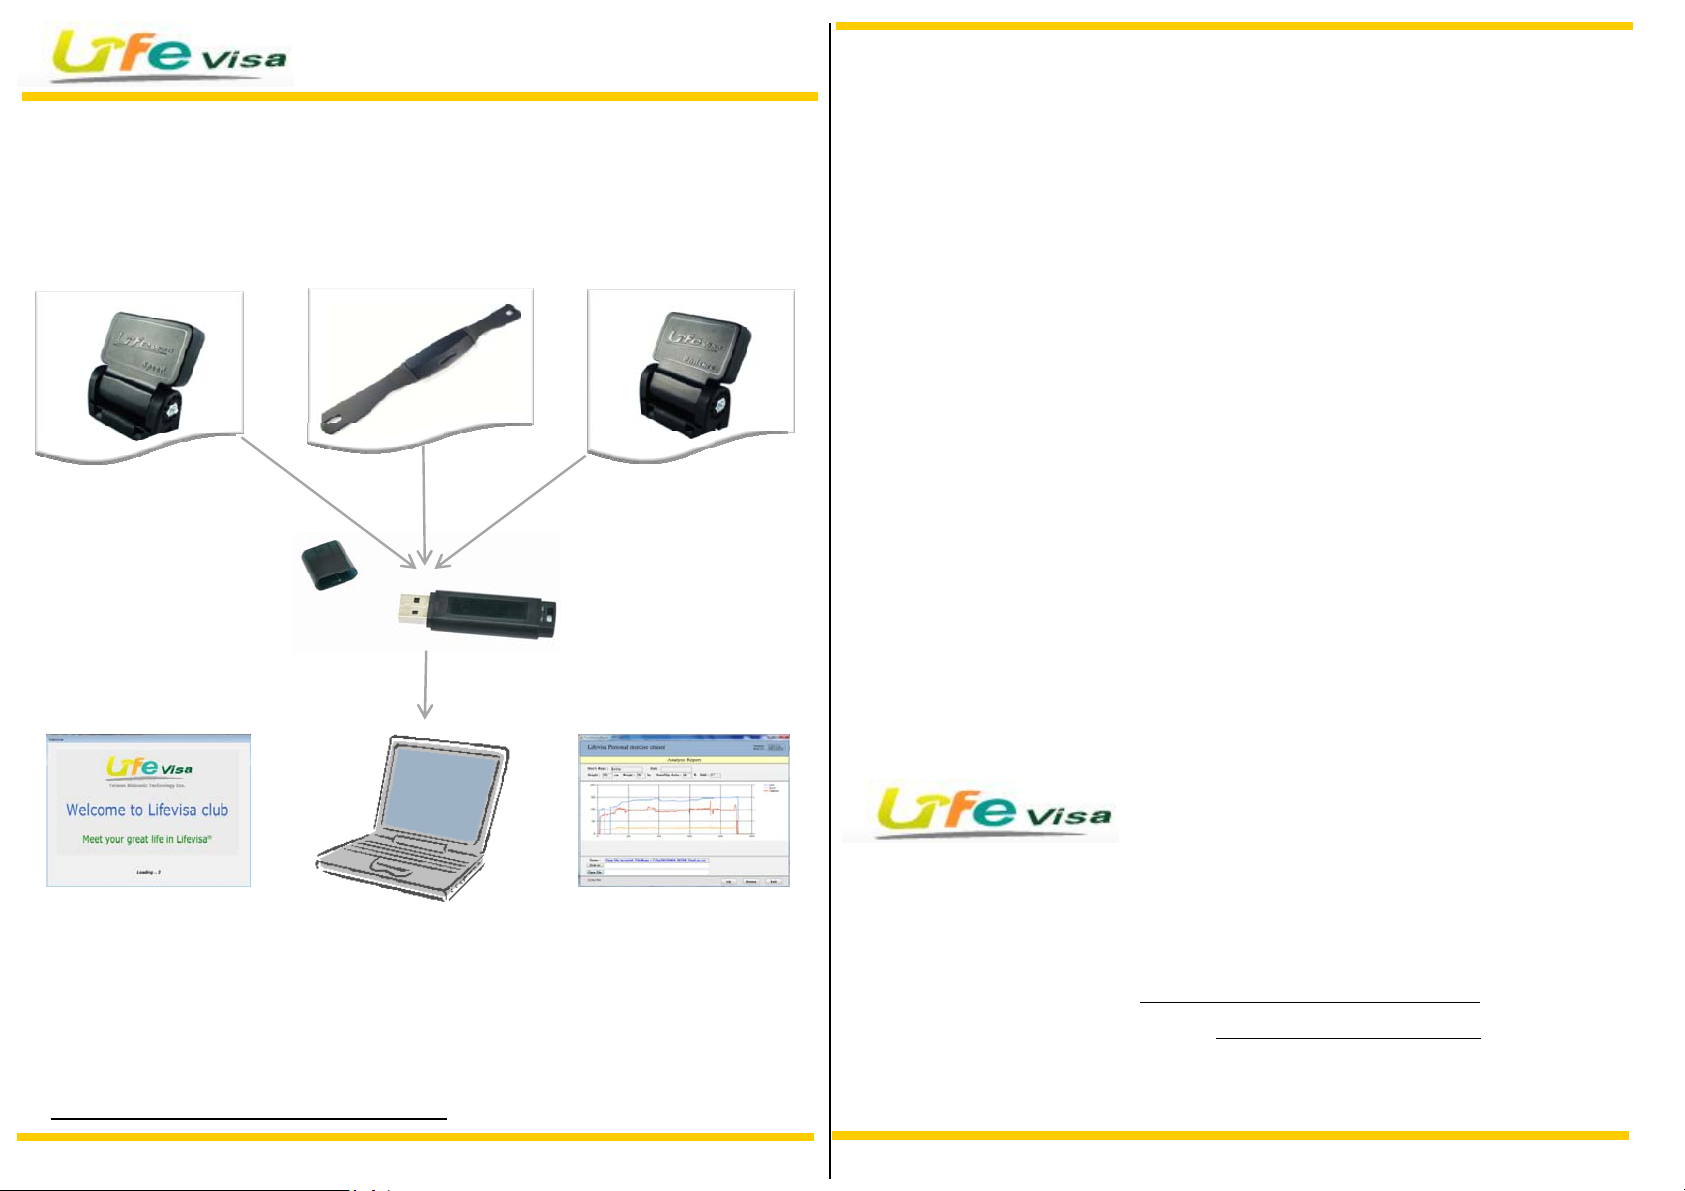
Thank you for purchasing LifeVisa products. This manual contains information
required to manipulate icoach program. Please follow below steps and enjoy
the workout!
1:
Ste
Double-click the icoach program to open it. (Fig. 01)
After inserting USB dongle, the status column will show "USB dongle is ready".
(Fig. 03) There are 3 simple steps in the main menu. Please start from
"Personal Information Setup".
※
Functions
1. Please start with this step for the first time use. You can always
update your personal information.
2. Press "Device Login" button to choose device types and set up
your exercise targets.
3. After all settings have been done, press "Run Program" button
to start your workout.
Lifevisa Utrainer
Ste
2:
After opening the program, please insert the USB dongle into a USB port or the
status column will show "Error: Could not open COM port! Checking COM port
…" to remind you. (Fig. 02)
Lifevisa Utrainer
Fig. 02
1
6
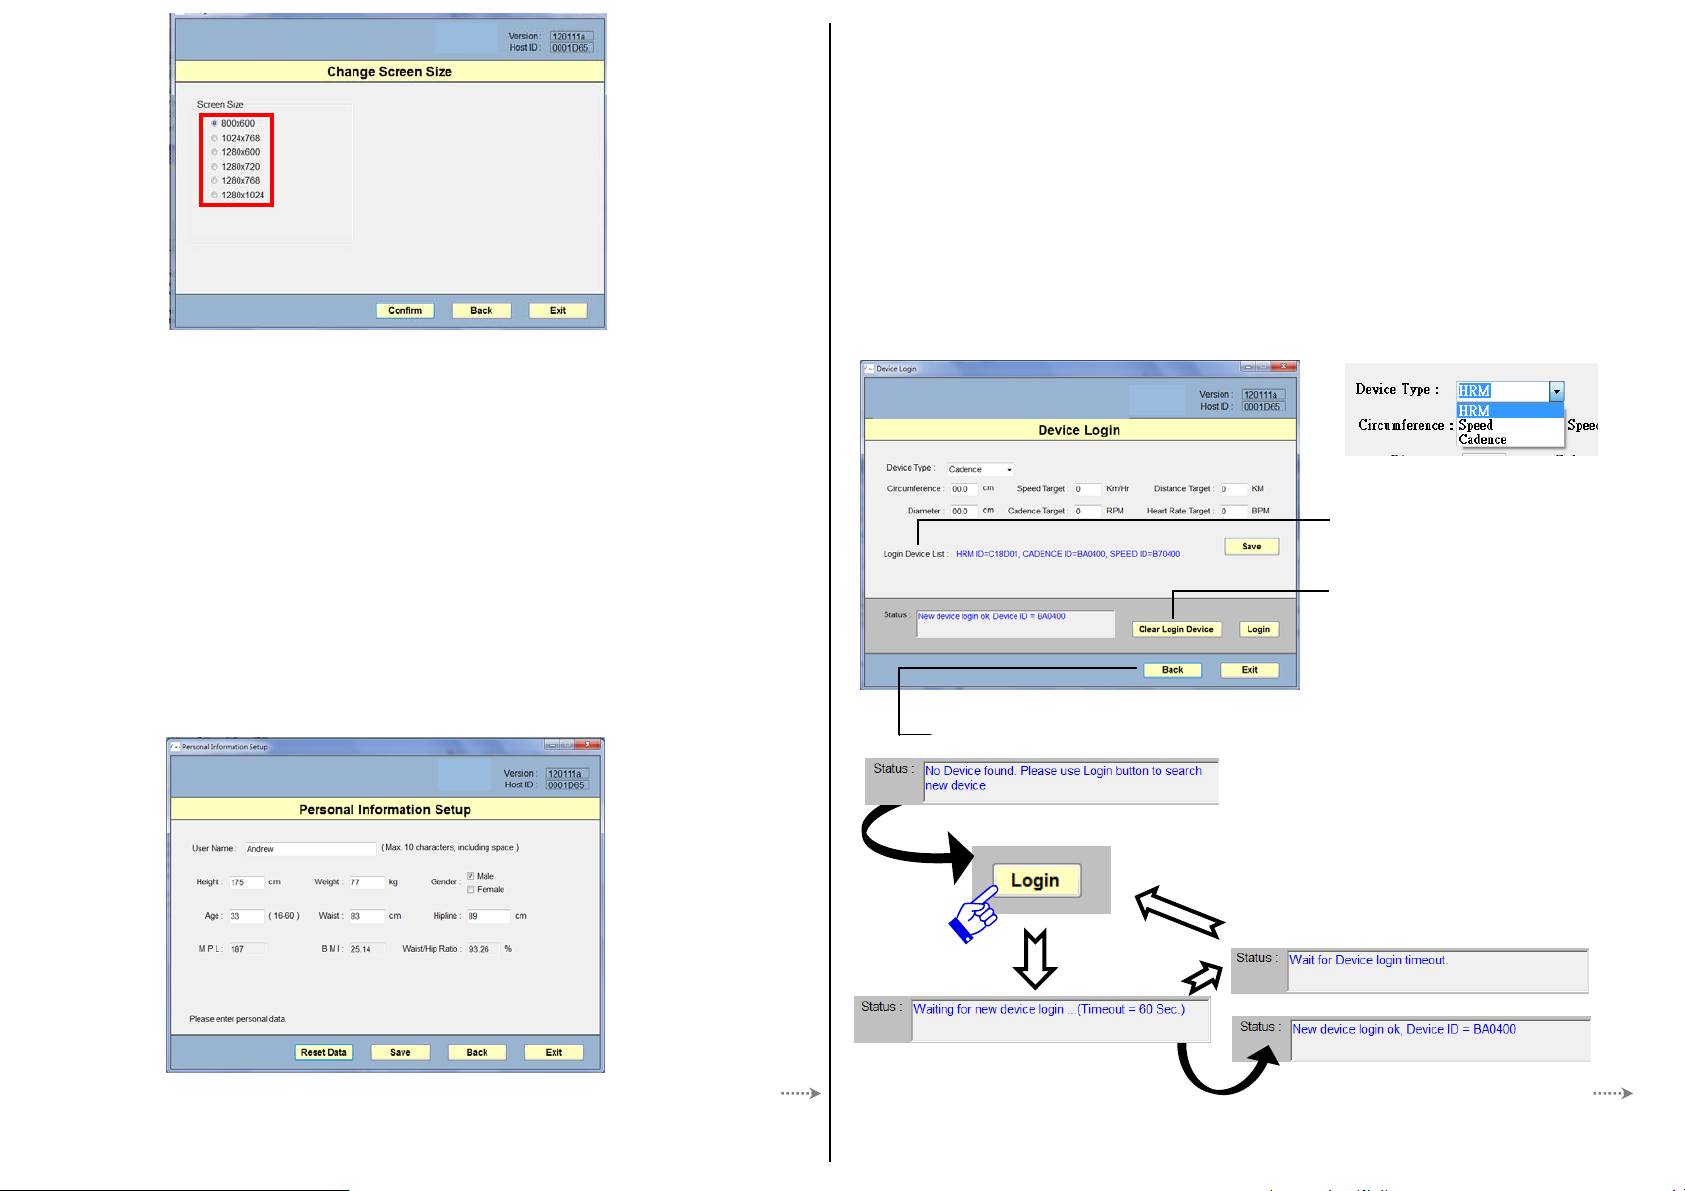
4. Press "Change Screen Size" button to fit your computer's
monitor. There are 6 sizes to choose. (Fig. 04)
After the screen size has been chosen, press "Confirm" and
then press "Back" to return to the main menu for next step.
5. Press "Exit" button to leave and close the program.
6. Status column shows if USB dongle is ready.
2
45
Fig. 03
3
1 2
Ste
5:
a. Press "Device Login" button in the main menu and it will go to below
p
p
)
Lifevisa Utrainer
Fig. 04
Ste
4:
Press the button of "Personal Information Setup" and it will go to below
window. (Fig. 05) Please enter your personal information, including name,
height, weight, gender, age, waist and hips. Other indexes, such as MPL, BMI
and WHR will be calculated accordingly and automatically. After filling in all
data, press "Save" button to save the data; then press "Back" button to return
to the main menu (Fig. 03) for next step.
window (Fig. 06). In the drop-down list, there are 3 types of device
to choose, including HRM (Heart Rate Transmitter), Speed and Cadence.
(Fig. 07)
b. Please choose the device type and press "Login" button to login the device.
The program will wait for 60 seconds to search available device. Now the
status column will show "Waiting for new device login....(Timeout= 60
Sec.)". If the login failed, it will show "Wait for Device login timeout", and
now you should login again. (Fig. 08)
c. After the login has been completed, the status column will show "New device
login ok; Device ID = XXxxxx". If you have purchased all devices, please
login each by each. The device(s) that has been logged in will be shown
after "Login Device List".
※
Functions
Lifevisa Utrainer
Fig. 07
This line will display which
device(s) has been logged in.
Note:
(i) Maximum length for name column should be within 10 characters, including
spaces.
(ii) Information of height, waist and hips should be given in centimeter (cm)
while it's kilogram (kg) for weight. (1 inch = 2.54cm; 1 lbs = 0.4536 kg)
Press "Back" button to go back to the main menu.
Lifevisa Utrainer
Fig. 05
Ste
6: Cadence (Cadence Sensor
3 4
Fig. 08
Choose Cadence in the drop-down list and enter the wheel's circumference ofAfter login has been completed, please choose the device type in the drop-
Press "Clear Login Device"
button, the logged device(s)
will be clear. Login again to
continue to the next step.
Fig. 06
Note:
If the program could not find available
device for login within 1 minute, the
status column will show "Wait for
device login timeout.". Please repeat
step 5 and login the device again.
 Loading...