

Page 1
!
!
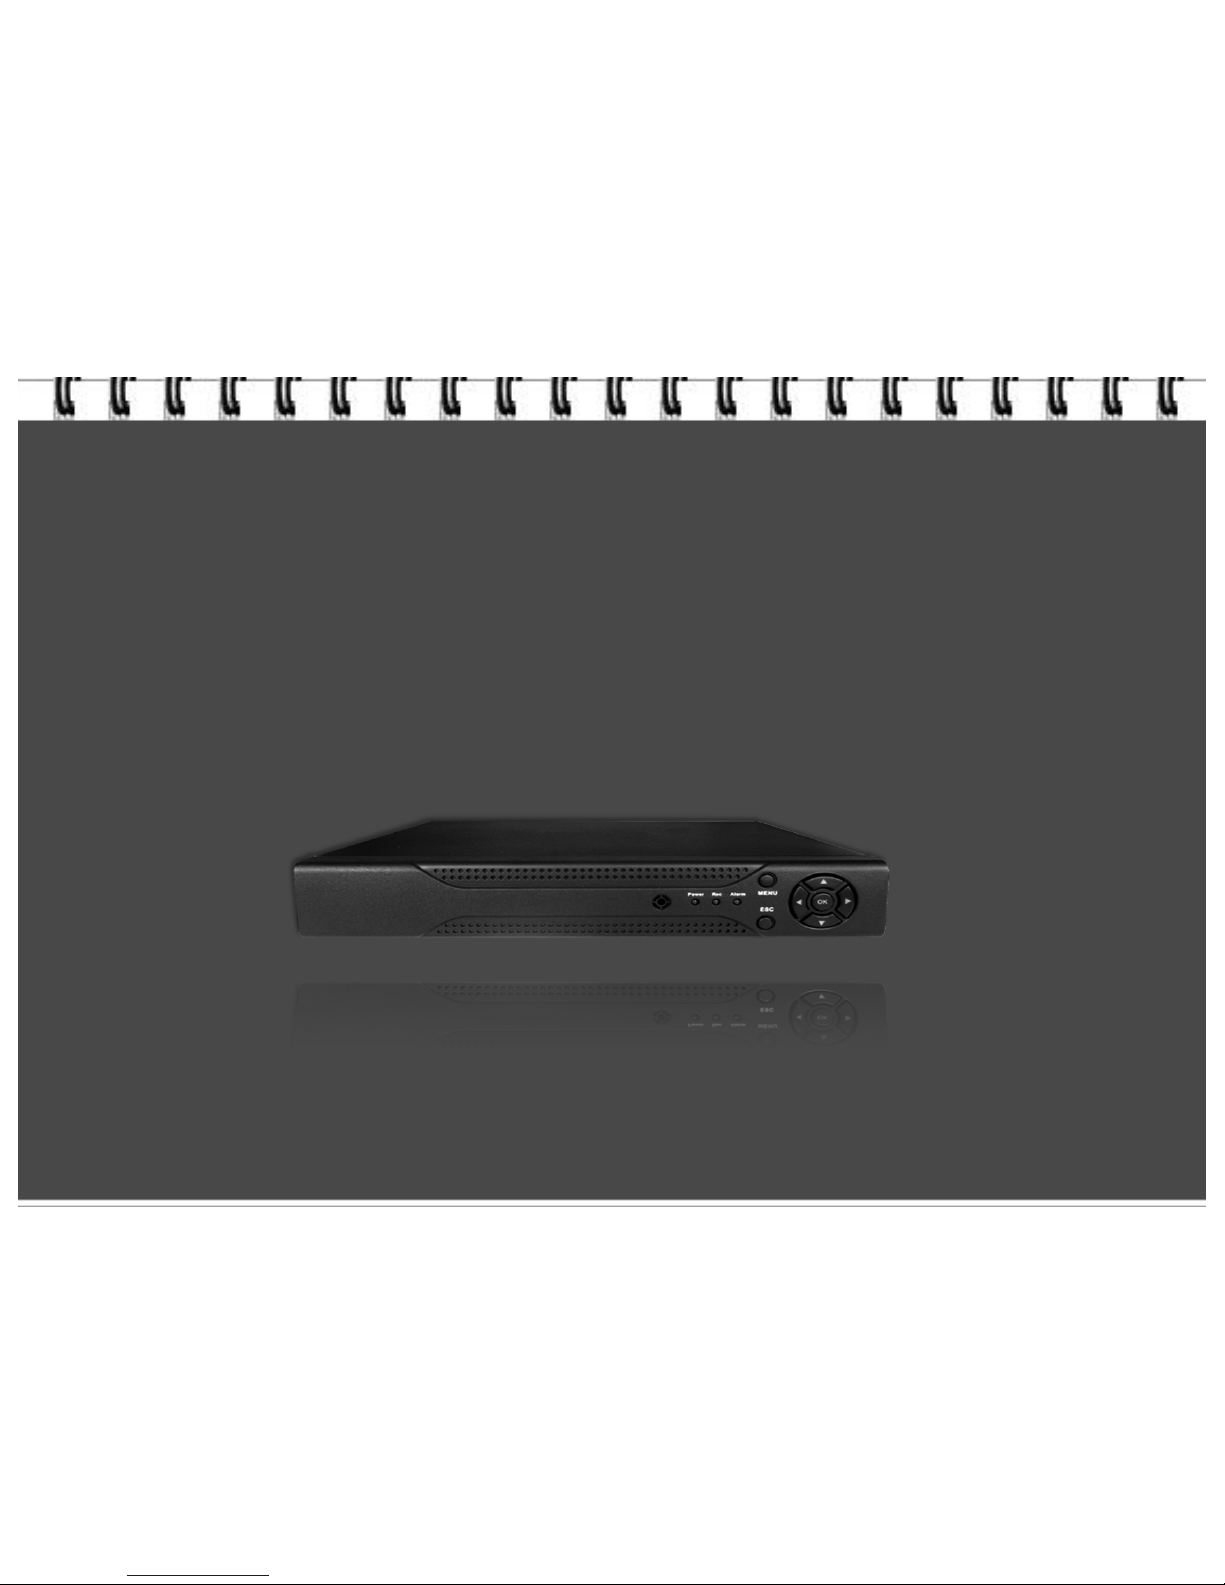
Quick!Start!Guide
ADR!(Analog!Digital!Recorder)
Version:!1.0!
Date:!October!2015!
!
!
Page 2
Safety Precautions
!
© Copyright 2015 VT-DVR Quick Start Guide 1 | Page
!
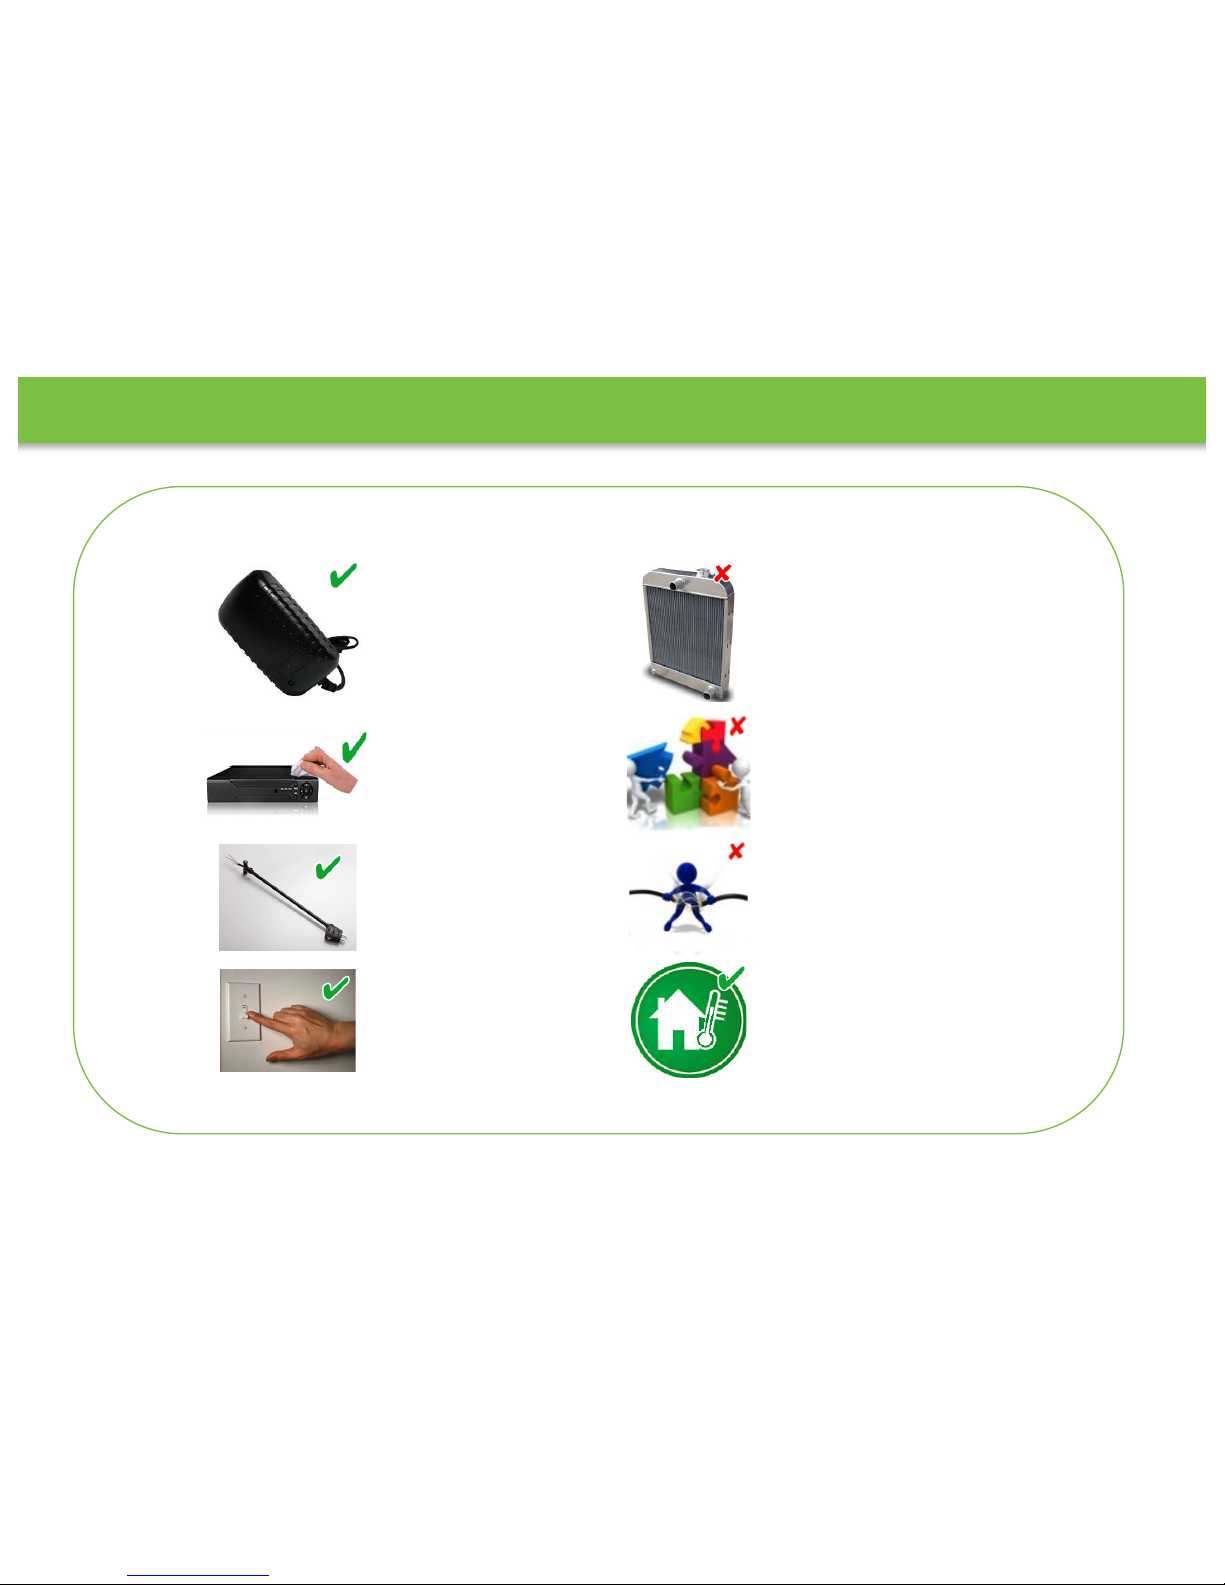
Please read the following precautions before startup.
Do use the AC adapter
that comes with this
device. Use of other AC
adapter may lead to
malfunction, heat up,
electr ical shock, fi re, or
injury.
Do not install any heat
sources such as radiators or
other devices near ADR.
When cleaning the
product, use a dry cloth to
wipe the exterior of the
device.
Do not disassemble or
attempt to fix or alter the
product yourself.
Keep the power cord
straight and without
being twisted, ben ded, or
scraped.
Damaged wire could cause
fire or electrical shock.
Make sure that the
product is switched off
before you i nstal l it.
Make sure that the room
temperature is lower tha n
350C (95°f).
Page 3
Product View
!
© Copyright 2015 VT-DVR Quick Start Guide 2 | Page
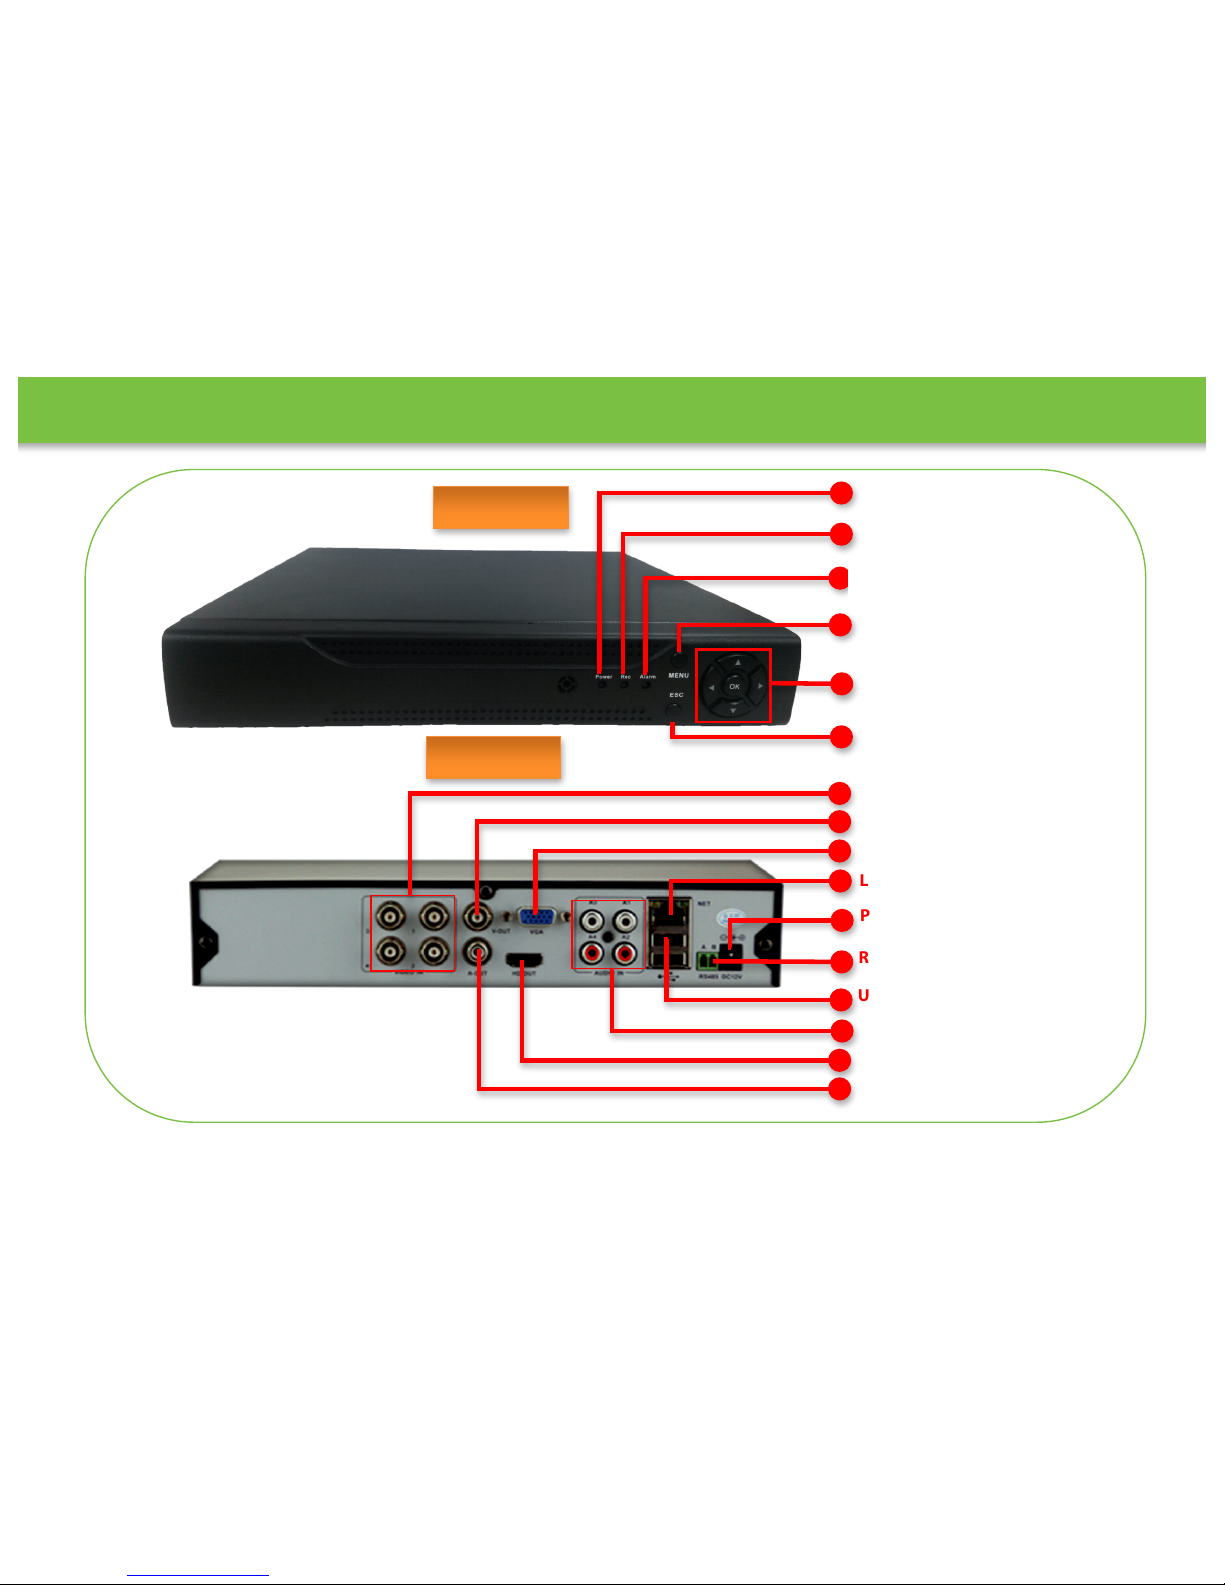
Power indicator light
Record indicator light
Alarm indicator light
Menu
Direction Keys & Enter
Esc
Video Input
Video Output
LAN
Power Input
RS485
USB Interface
Front View
Rear View
VGA
Audio Input
HDMI
Audio Output
Page 4
Hard Disk Installation
!
© Copyright 2015 VT-DVR Quick Start Guide 3 | Page
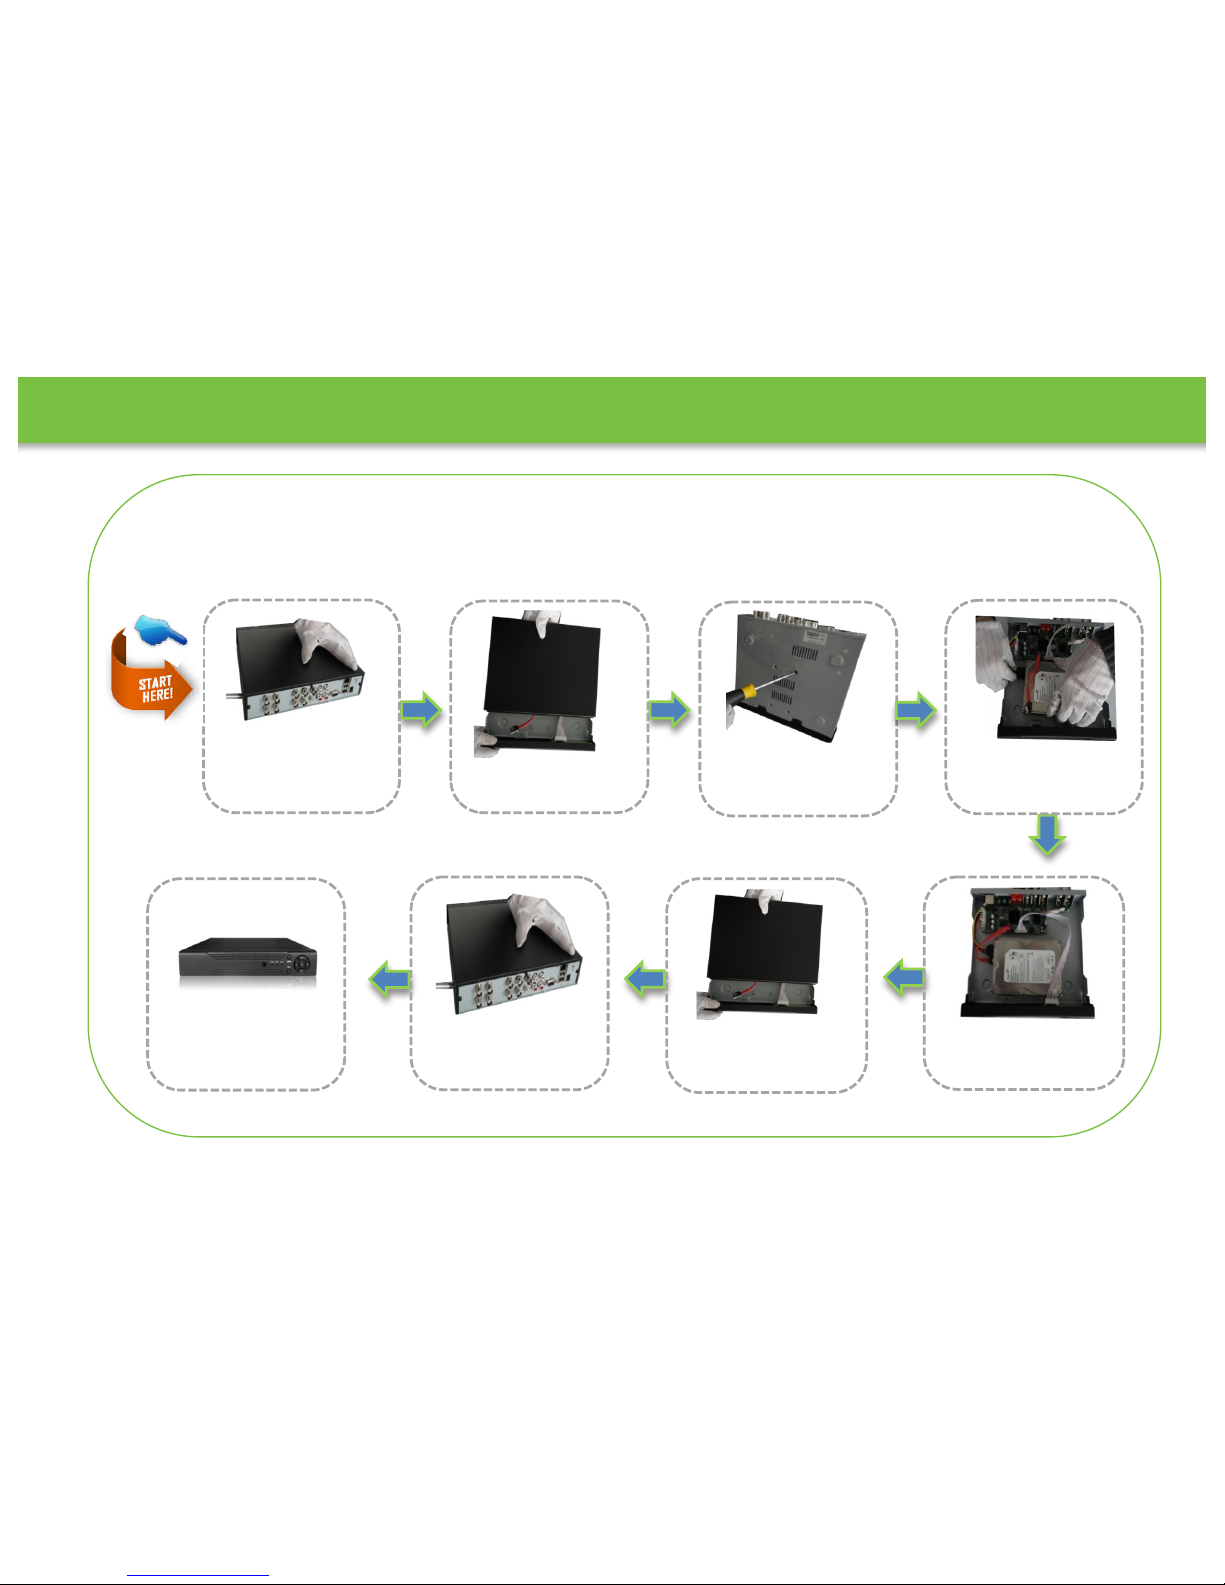
Please install hard disk in the device by following the below steps, when you are using the product for the first
time.
Remove the set
screws on the upper
cover of the device.
Remove the cover.
Fasten the hard disk
mounting screws.
Connect power cable
and data cable to the
hard disk.
After connectin g power
cable and data cable to
hard disk.
Close the chassis
cover.
Fix the cover.
Hard disk installed
successfully.
Page 5
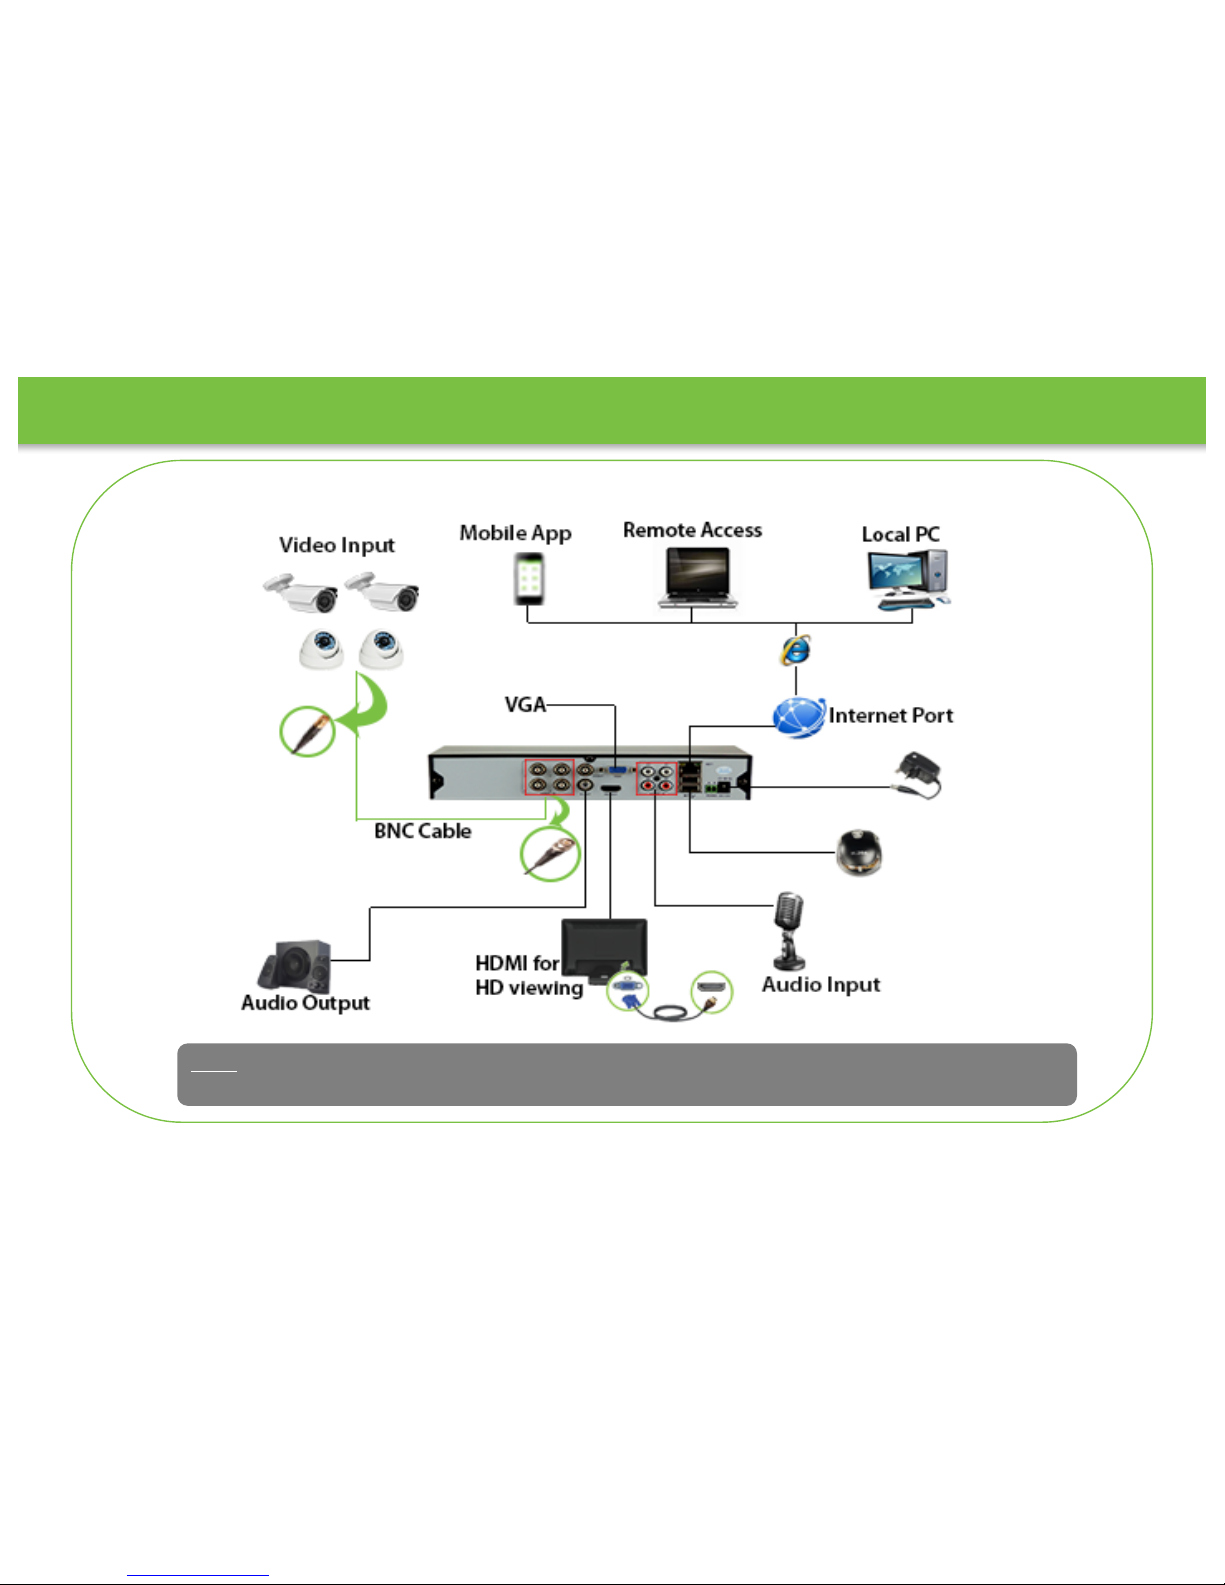
Basic Connection
!
© Copyright 2015 VT-DVR Quick Start Guide 4 | Page
The below diagram shows the basic connection of ADR with Analog ca mera.!
Note: If you want to connect IP Camera with ADR, please refer to Basic Connection section provided in NVR
Quick Start Guide.
Page 6
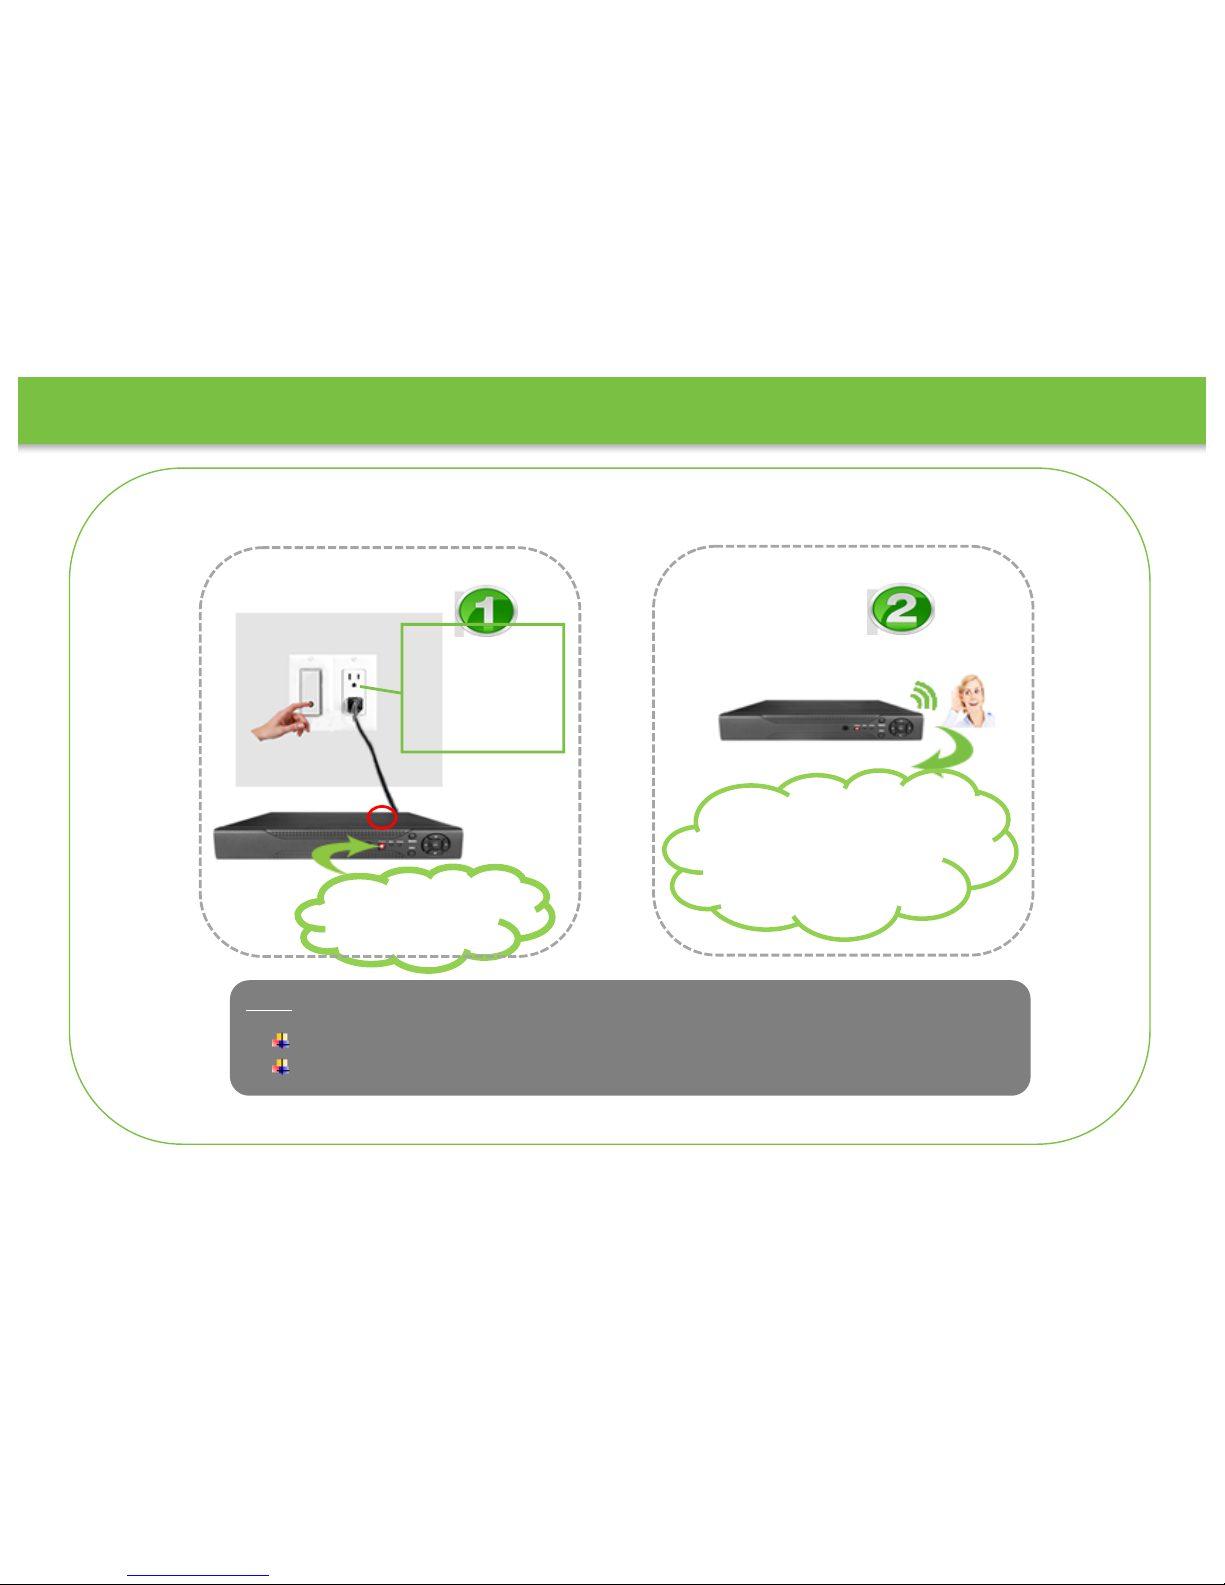
Power ON
!
© Copyright 2015 VT-DVR Quick Start Guide 5 | Page
After connecting the camera and ADR as per the above connection diagram, please follow the below steps for power ON.
Note:
! Make sure that the input volta ge corresponds with the switch of the ADR power supply.
! Power supply demands: 220V±10% /50Hz.
This%indicates%ADR%is%turned%
ON%
%
Plug the power
supply and turn
on the power
supply switch%
After%ADR%is%turned%ON,%you%will%
hear%a%beep!from%ADR.%This%
indicates%that%ADR%is%ready%for%
recording.!
Page 7
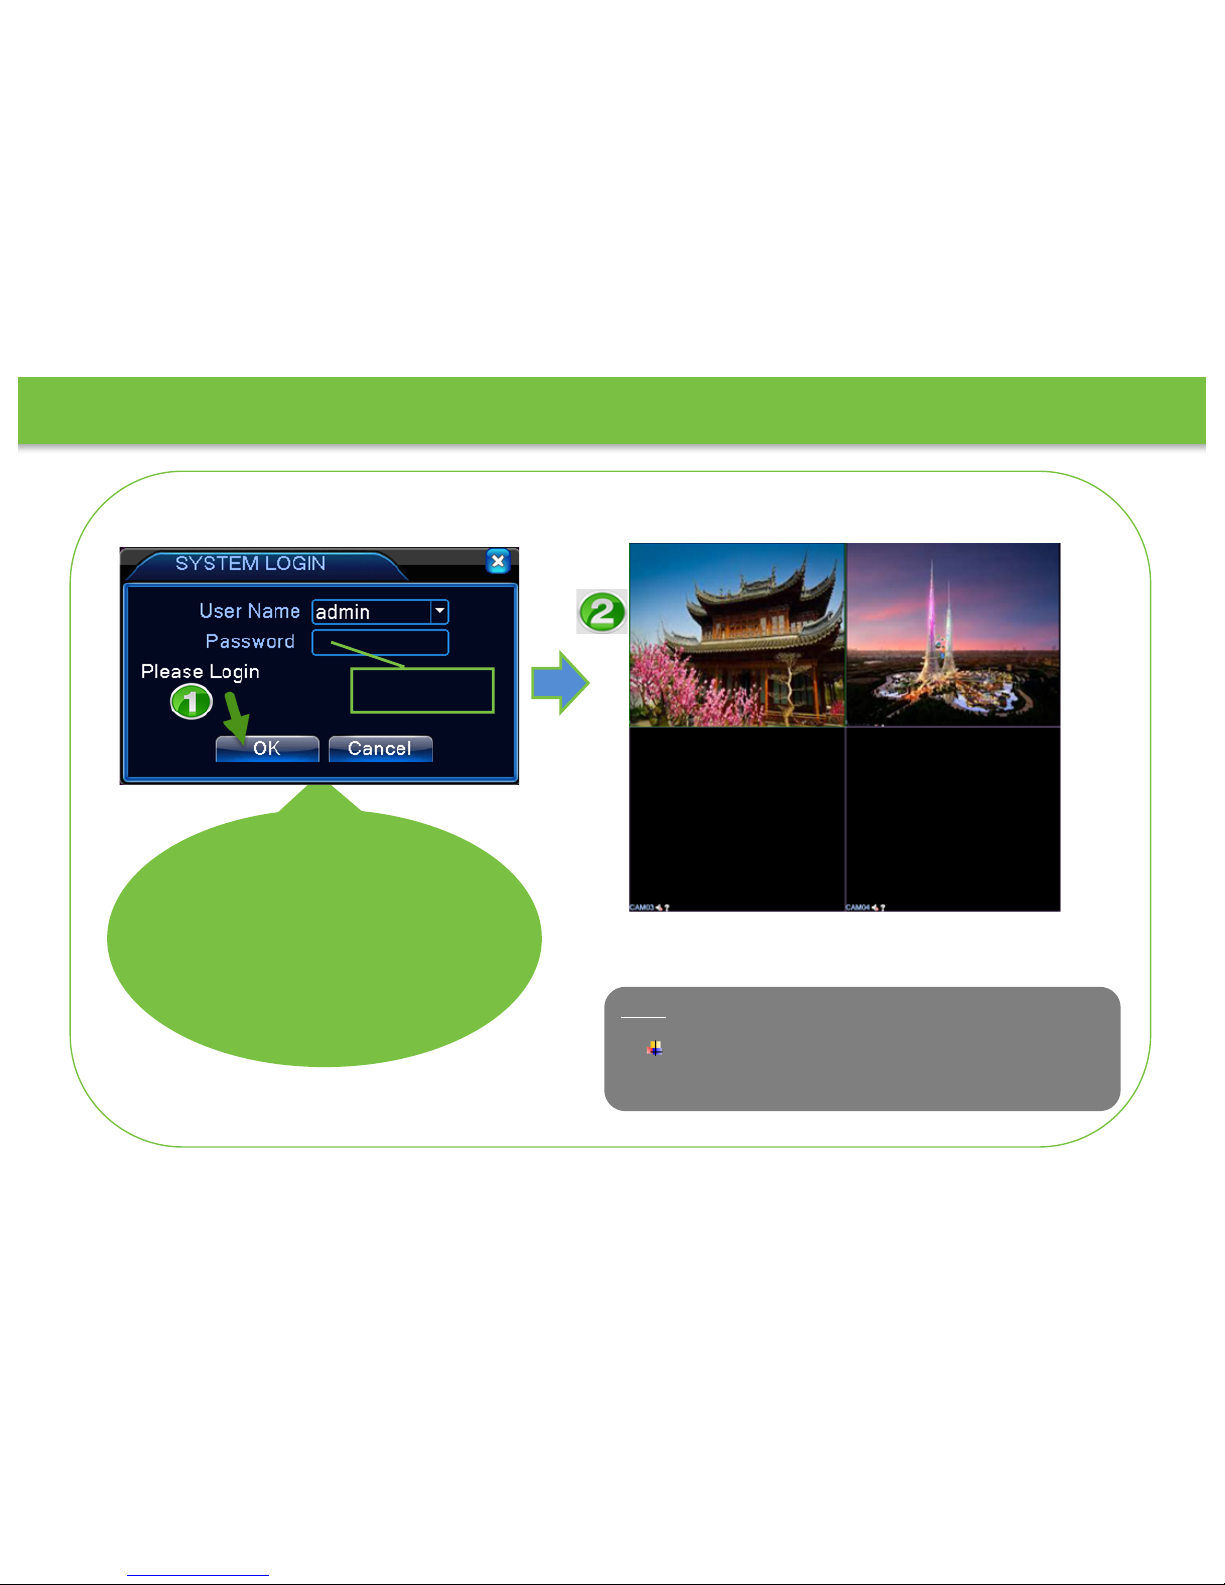
Preview in Analog Camera
!
© Copyright 2015 VT-DVR Quick Start Guide 6 | Page
After power ON, please follow the below steps for preview.
!
When ADR boots up, the user must login
and the system provides the corresponding
functions with the user purview.
While startup, default user will be admin
with no password.
No%Password%
Note:
! As you have connected Analog Camera, the
preview will be displayed immediately after login.
Page 8
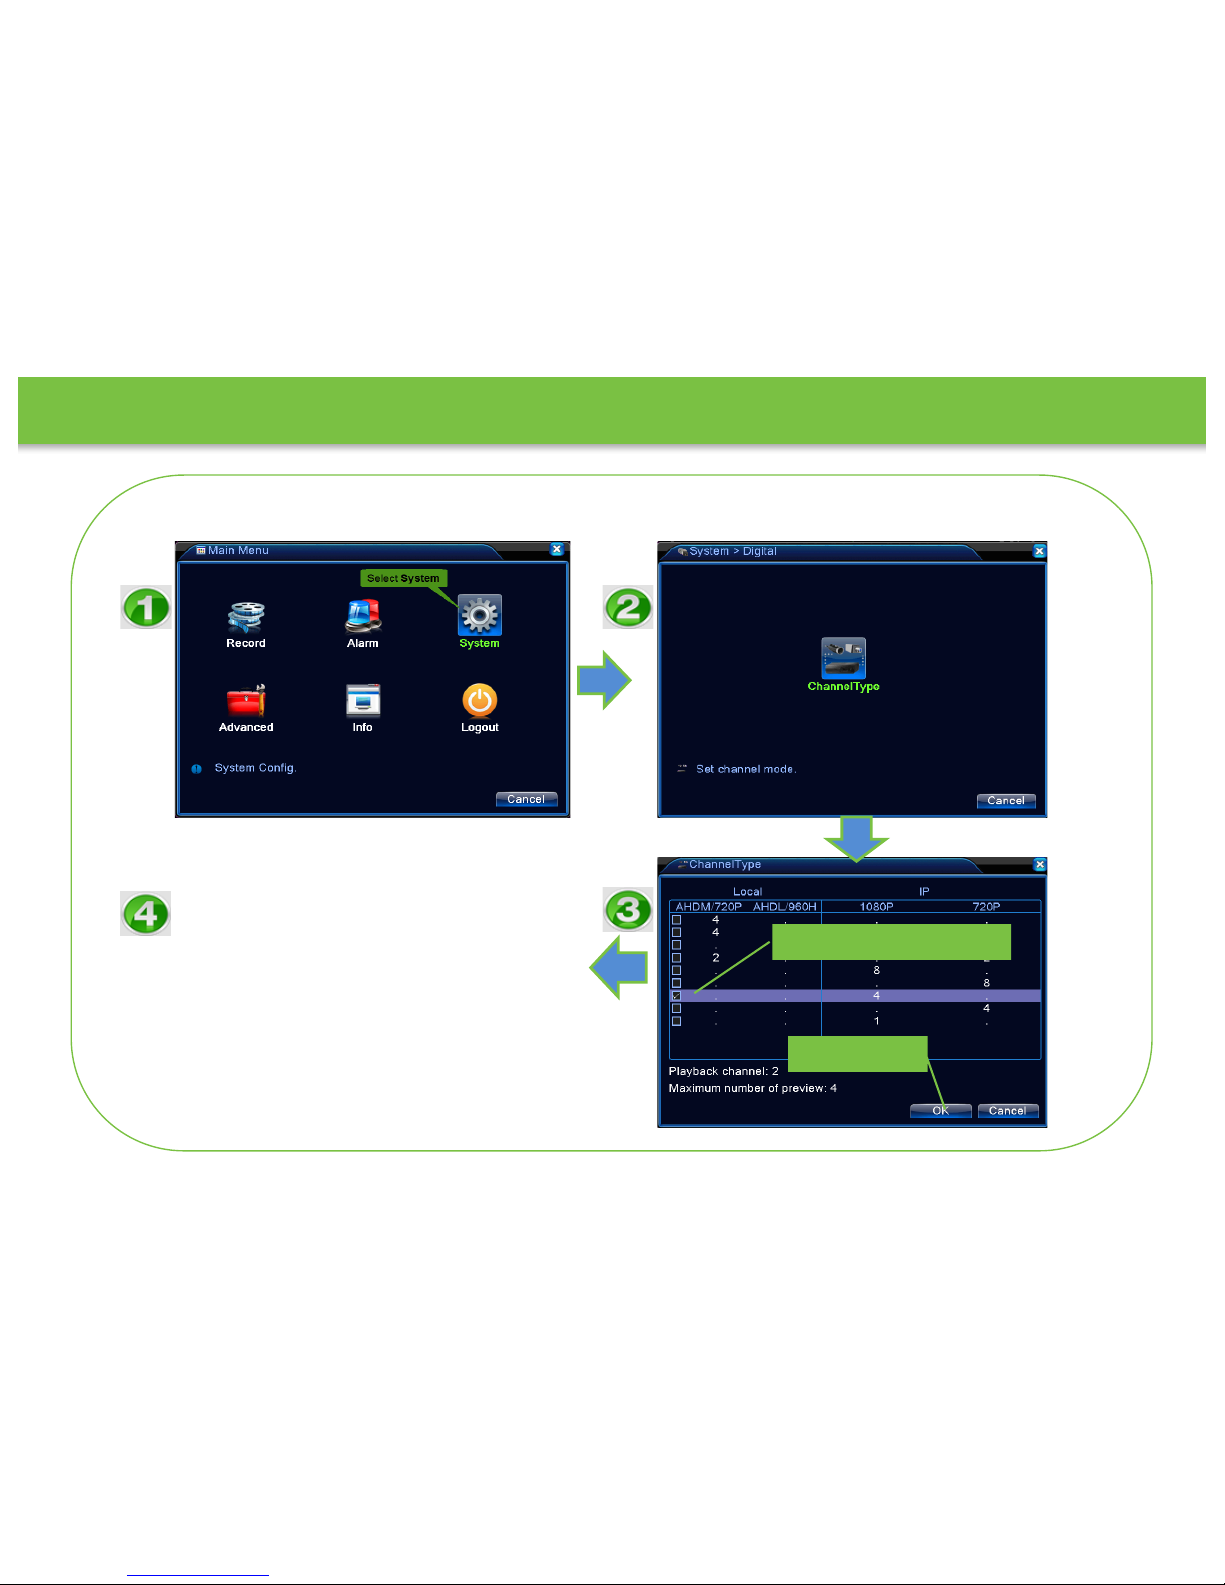
Preview in IP Camera
!
© Copyright 2015 VT-DVR Quick Start Guide 7 | Page
If you have connected IP Camera with ADR, then follow the below steps after login for preview.
1.!Select Channel Type
2.!Click OK
Note:Then follow the steps provided in NVR quick start
guide for preview.
Page 9

!
!
%
%
!
! ! ! ! ! ! ! ZK#Building,#Wuhe#Road,#Gangtou,#Bantian,#Buji#Town,#
Longgang#District,#Shenzhen,#China#–#518129#
######www.zkteco.com#
%
!
Functions and specifications of the product are subject to changes without notice due to quality enhancement or function
update. For any inquiry on the product, please contact us.
THANK YOU FOR CHOOSING
OUR PRODUCTS.
 Loading...