

Page 1
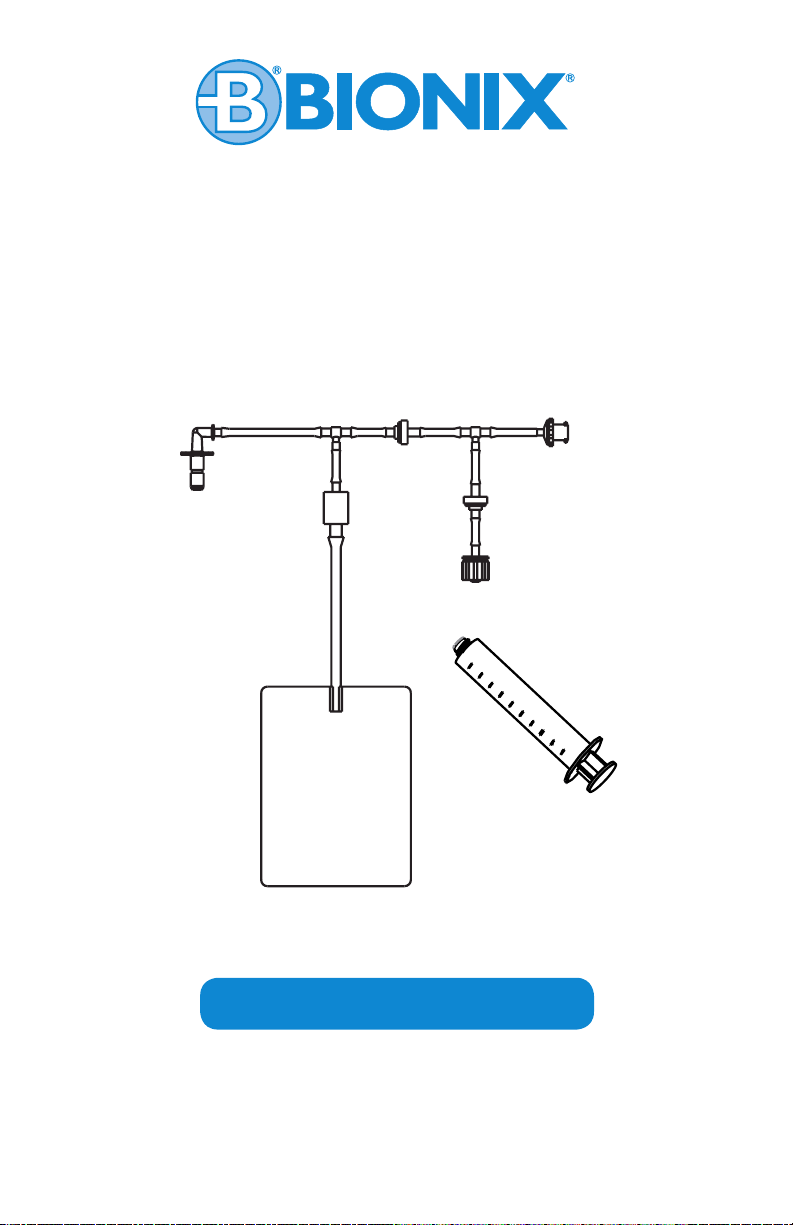
GastroFlush
™
Instructions For Use
PRODUCT OFFERING
#9510 - GastroFlush™ (10/box)
#9500 - Relish RL1501 Jet Lavage
Page 2
Bionix® GastroFlush™ Instructions for Use
Indications for Use:
GastroFlush is indicated for use in clearing occlusions/clogs from enteral feeding
tubes placed for nutrition and/or decompression in adult or adolescent patients
that have tube size 8Fr-24Fr and tube length no longer than 42 inches.
Contraindications:
1. GastroFlush is for enteral feeding tubes with integral ENFit connectors only.
It is NOT to be used with Drain Tubes or ENFit transition adapters.
2. GastroFlush is only for use with Relish RL1501 Jet Lavage (accessory)
3. Before proceeding with un-clogging the tube, ensure that the tube placement
and position are correct. If concern exists as to tube placement or positioning,
an x-ray or other verication procedure should be performed to ensure that:
a. Tube is correctly situated in the body.
b. Tube orientation is correct.
c. Tube has not migrated from its initial placement site.
If there is any reason to suspect that the tube has been incorrectly placed
or has moved or migrated from its initial placement site in the body,
REMOVE and REPLACE the tube. DO NOT attempt the un-clogging procedure.
4. If the integrity of the tube is compromised (example: a weakening or
aneurism in the tube wall, a rip, or break, REMOVE and REPLACE the tube.
DO NOT attempt the un-clogging procedure.)
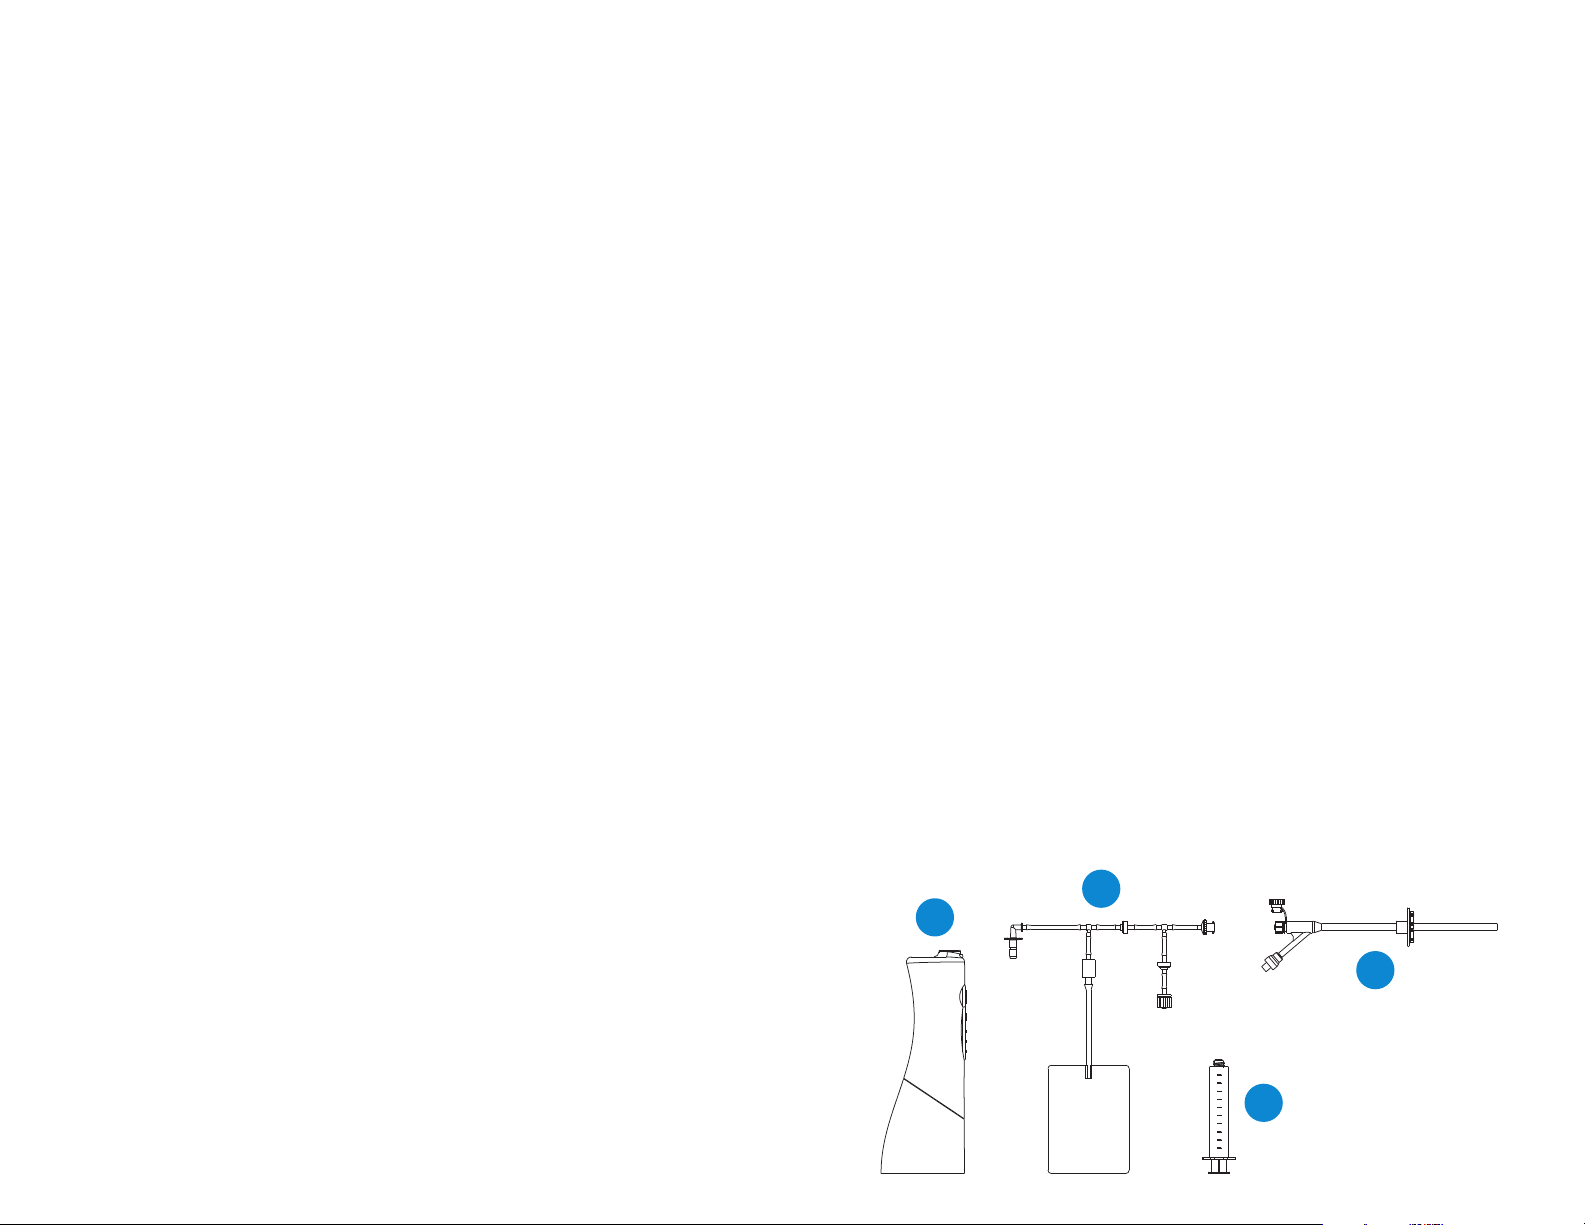
Please review the following parts before assembly.
A. Relish RL1501 Jet Lavage (ACCESSORY - NOT INCLUDED)
B. GastroFlush™ (Disposable Assembly)
C. ENFit® Feeding Tube (IN DWELLING - NOT PROVIDE D WITH PURCHASE)
D. ENFit Syringe (5ml)
B
A
C
D
Page 3
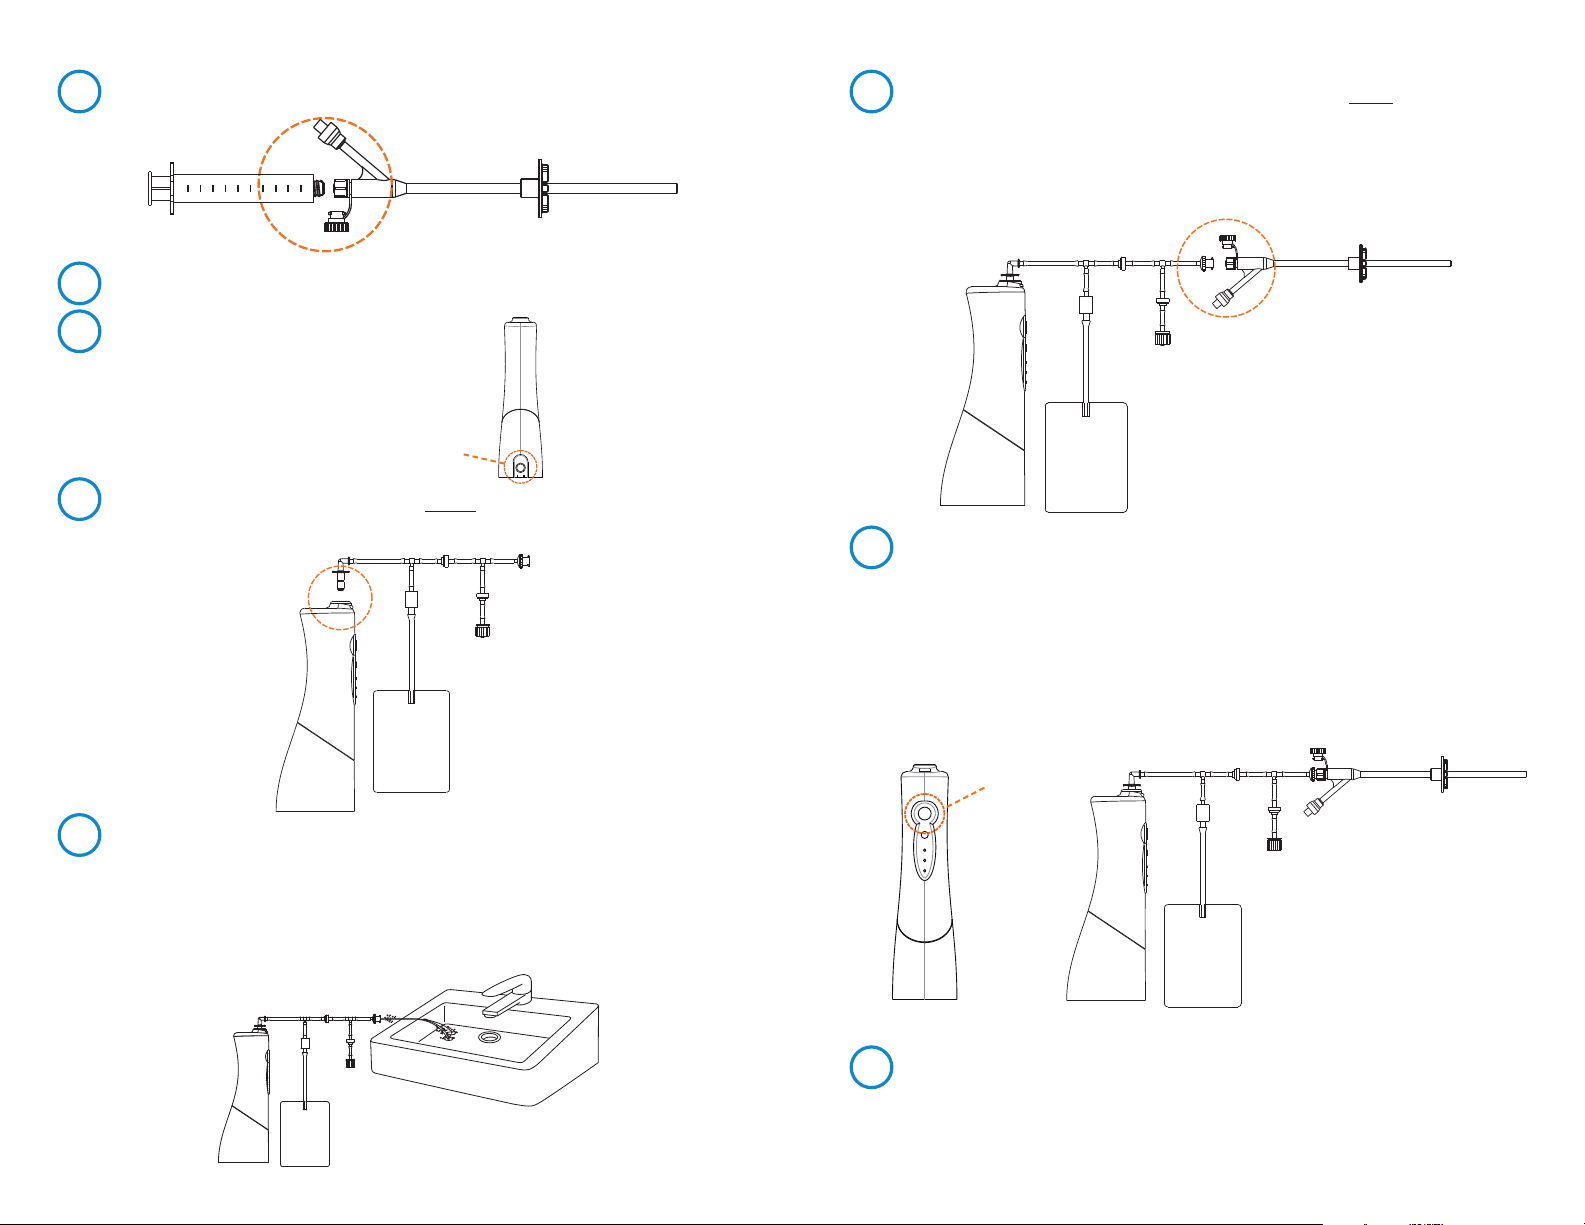
Use your ENFit® feeding syringe (D) to ush the clogged tube with water (C).
1
Disinfect the jet lavage prior to rst use. Refer to product cleaning instructions.
2
Fill the jet lavage reservoir with 50-60 mL
3
(1/3 of reservoir) of room temperature water.
Open hatch to ll
reservoir with water.
Attach GastroFlush (B) by inserting the white irrigation adapter into the
4
jet lavage (A) You should hear an audible click when secured.
Attach GastroFlush to the feeding tube by twisting the clear female
6
ENFit Connector onto the feeding tube (C) until snug.
NOTE: If your feeding tube has multiple input lines, ensure that all but one
line is closed using the proper ENFit cap. If more than one line needs
unclogged, repeat the unclogging process (Steps 6-9) separately for each line.
Once both ends of GastroFlush are attached, turn the jet lavage on to begin
7
procedure.
NOTE: The on button is on the front side of the jet lavage.
Press the button once to activate (Turn On). Once the procedure is
complete, press the button again to deactivate (Turn O).
NOTE: Irrigation water may ow into the overow bag during the procedure.
Be sure to note amount of water in overow bag.
GastroFlush needs to be primed before attaching to the feeding tube.
5
a. To prime GastroFlush, attach the GastroFlush disposable assembly
(B) to the jet lavage (A).
b. Activate the jet lavage into the sink for 1-2 seconds.
NOTE: If you’re not getting water out of your jet lavage,
prime GastroFlush again.
On/O
Button
Deactivate jet lavage when one of the following occurs:
8
a. Water is no longer owing into the overow bag.
b. Jet lavage is empty.
Page 4
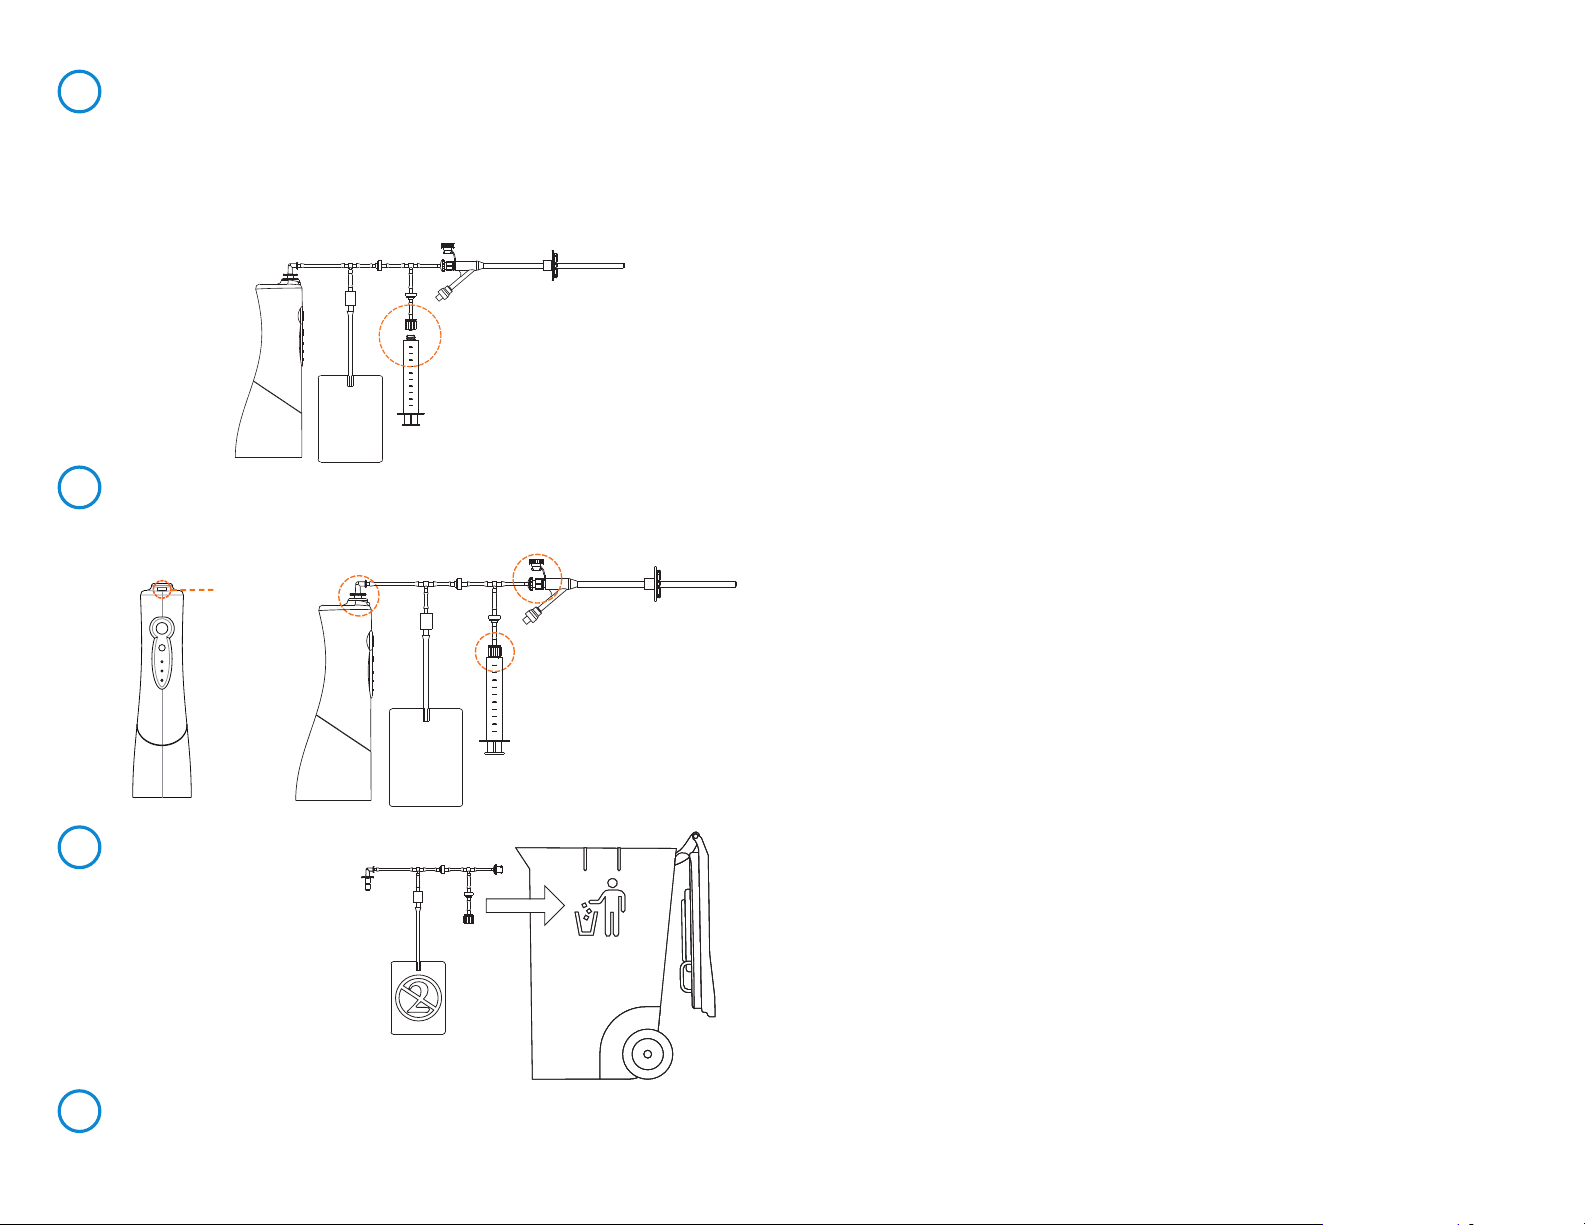
After deactivating the jet lavage, connect ENFit 5ml syringe to the Male
9
ENFit Connector and ush with water (D).
a. If you cannot ush with water, repeat steps 2-7 a maximum of 2 times.
NOTE: You should not introduce more than 50-60 ml of water into the
feeding tube once patency is restored. Jet lavage Reservoir volume is
160 ml. Overow volume is 1 L.
10
Once you can ush with water, untwist the female ENFit connector from the
feeding tube and disconnect irrigation adapter from jet lavage using release
button on front of unit.
Release
Button
11
GastroFlush is a single-use,
disposable device.
Dispose of GastroFlush
according to hospital
guidelines.
Jet Lavage Cleaning Instructions
After Each Use
• Dispose of any used irrigation assemblies.
• Empty any liquid left in the tank.
• Run the appliance for 2 to 3 seconds on ‘Normal’ until no liquid comes out.
• Fill tank approximately ½ full of 5% vinegar (acetic acid solution), then run
unit on ‘Normal’ until no liquid comes out.
• Fill tank with sterile water, then run unit until no liquid comes out.
• Allow unit to dry completely with cap open before storing.
Disinfection
• Wipe the exterior when necessary with a soft cloth and mild non-abrasive
cleanser.
• Do not wipe the appliance with solvents or alcohol .
• Do not wash using hot water (over 120°F (50°C)).
• Allow exterior to dry after washing with water.
• Empty any liquid left in the tank.
• Run the appliance for 2 to 3 seconds on ‘Normal’ until no liquid comes out.
• Prepare at least 1 cup of .55% Ortho-Phthalaldehyde solution.
• Fill tank approximately ½ full with the OPA solution.
• Run jet lavage until a small amount of OPA solution exits irrigation port
on top of unit. When solution is visible from irrigation port, deactivate unit.
• Follow the manufacturers recommendations on soak times for disinfection.
• When disinfection is complete, empty OPA solution from tank, then run unit
until no liquid can be seen exiting the irrigation port.
• Fill tank approximately ½ full of sterile water, then run unit until no liquid
exits the irrigation port.
• Repeat sterile water rinse 2 times.
• Allow unit to dry with tank port open when not using for a long period.
• Never immerse the unit in water.
• Do not clean the unit while it is connected to the charger.
• Store unit with reservoir cap open\) as these may damage the unit.
12
Completely empty jet lavage and clean according to instructions provided.
Page 5
DO NOT REUSE
CONSULT INSTRUCTIONS FOR USE
5154 Enterprise Blvd. • Toledo, Ohio 43612
Phone: 800.551.7096 • Fax: 800.455.5678
www.Bionix.com
©2018 Bionix Development Corp.
RM95-0950 • Rev. A • *Patent Pending
*ENFit® and NRFit™ are trademarks of GEDSA.
 Loading...