

Biohit eLINE 73032X, eLINE 73004X, eLINE 73010X, eLINE 73034X, eLINE 73036X User Manual
...
CONTENTS
Page/s
1. Biohit
e
LINE electronic pipettors 2
1.1. Biohit
e
LINE single-, 8- and 12-channel pipettors 2
1.2. Biohit tips 3
2. Unpacking 3
3. Pipettor description 4
3.1. Display and controls 4
3.2. Reset button 6
3.3. Start button 6
3.4. Tip sealing and Electronic tip ejection 6
3.5. Biohit Safe-Cone filters 7
4. Charging of the pipettor 8
4.1. Charging with the
e
LINE Charging Stand and Carousel 8
4.2. Charging through the direct charging system 9
4.3. Electrical specifications 10
5. Programming principle 10
5.1. Programming map 11
5.2. Speed adjustment 12
6. PIPET modes 12
6.1. Pipetting mode ( P ) and pipetting with mixing ( P+
MIXING ) 12
6.2. Reverse pipetting ( rP )14
6.3. Pipetting with cycle counter ( P
COUNT
)15
6.4. Manual pipetting ( P
MANUAL )16
7. MULTI modes 17
7.1. Multi-dispensing ( d )17
7.2. Diluting ( dd ) and diluting with mixing ( dd+
MIXING )19
7.3. Sequenced dispensing ( Sd )20
7.4. Multi-aspirating ( SA )21
7.5. Automatic dispensing ( Ad )22
8. PROG modes 24
8.1. Store operating mode to storage location 24
8.2. Recall stored mode from storage location 24
9. Pipetting recommendations 25
9.1. Dispensing with blow-out 25
9.2. Dispensing without blow-out 25
9.3. Other recommendations 25
10. Maintenance 26
10.1. Cleaning the outer surface of the pipettor 26
10.2. Cleaning and autoclaving the lower part of the 1-ch pipettors 26
10.3. Battery replacement 28
10.4. Storage 29
11. Performance Testing 29
11.1. Recalibration 31
12. Trouble-shooting 32
13. Warranty information 34
14. Performance specifications 34
1

1. Biohit eLINE electronic pipettors
The Biohit eLINE electronic pipettors offer you the latest technology and
innovations in the field of the hand held liquid handling devices. The attractive
and ergonomic design of the eLINE pipettors together with electronic tip
ejection operation take the effort out of pipetting and reduce the risk of
repetitive strain injuries (RSI) that are common in mechanical pipetting.
The microprocessor controlled system and the superior construction of the
Biohit eLINE pipettors enables maximum liquid handling performance with high
levels of accuracy and precision. The microprocessor controlled piston
movements reduces the possibility of human error and thus also contamination
of the pipettor interior. The tip cone design of the Biohit eLINE pipettors offer
the possibility to use replaceable Safe-Cone Filters to help prevent
contamination and damage of the pipettor.
The eLINE electronic pipettors offers a comprehensive range of liquid handling
protocols, typically required by laboratories currently. The simple keyboard and
easy-to-read display together with user-friendly operation and programming
allows these tasks to be performed quickly and effortlessly. The Biohit eLINE
pipettors operate on the air displacement principle and use disposable tips.
2
1.1. Biohit eLINE single-, 8- and 12-channel pipettors
X: 0 = Without AC-adaptor; 1 = With AC-adaptor, Euro; 2 = With AC-adaptor, U.S.;
3 = With AC-adaptor, U.K.; 4 = With AC-adaptor, Jpn; 5 = With AC-adaptor, Aus
Safe Cone Filters
Colour Chan- Volume 50 pcs/bag
Cat. No. Code nels Range Increment Tip Standard Plus
73002X Grey 1-ch 0.2–10 µl 0.05 µl 10 µl N/A N/A
73004X Yellow 1-ch 5–120 µl 0.50 µl 300 µl, 350 µl 721008 721018
73006X Orange 1-ch 10–300 µl 1.00 µl 350 µl 721007 721017
73008X Blue 1-ch 50–1000 µl 5.00 µl 1000 µl 721006 721016
73010X Green 1-ch 100–5000µl 10.00 µl 5000 µl 721006 721016
73032X Grey 8-ch 0.2–10 µl 0.05 µl 10 µl N/A N/A
73034X Yellow 8-ch 5–120 µl 0.50 µl 300 µl, 350 µl 721008 721018
73036X Orange 8-ch 10–300 µl 1.00 µl 350 µl 721007 721017
73039X Violet 8-ch 50–1200µl 5.00 µl 1200 µl 721006 721016
73042X Grey 12-ch 0.2–10 µl 0.05 µl 10 µl N/A N/A
73044X Yellow 12-ch 5–120 µl 0.50 µl 300 µl, 350 µl 721008 721018
73046X Orange 12-ch 10–300 µl 1.00 µl 350 µl 721007 721017
73049X Violet 12-ch 50–1200µl 5.00 µl 1200 µl 721006 721016

2. Unpacking
The Biohit eLINE electronic pipettors may be delivered with or without an ACadaptor, depending from the type of order. However, all Biohit eLINE pipettor
packages contains:
- Pipettor
- Tip
- Safe-Cone Filters and Filter Forceps (>10 µl)
- Grease (in single-channel units only)
- Instructions for use
- Performance certification in accordance with ISO 8655-6
Please check that all items are included and that no damage has occurred
during shipment.
Note: The pipettor leaves the factory fully charged. The battery is protected
against discharging during storage with a plastic protector. BEFORE USE
PLEASE REMOVE THE PLASTIC PROTECTOR UNDER THE BATTERY
COVER.
Note: It is recommended to recharge the pipettor for at least two hours before
initial use. The pipettor may only be charged with original Biohit
e
LINE charging
stand, charging carousel or Biohit eLINE AC-adaptor. (See Section 4. Charging
the pipettor.)
3
1.2. Biohit tips
The full range of Biohit pipettor tips
are recommended for use with Biohit
e
LINE pipettors. Biohit standard tips
are made of virgin polypropylene.
Biohit also offers a full range of filter
tips. Biohit standard tips are available
as bulk packages, space-saving refill
systems and autoclavable (121OC, 1
bar overpressure) trays. Pre-sterilized
tips in trays are also available (Fig. 1.)
Fig. 1.

4
Operating Mode Symbol
Mode Range
Aliquots/Counter Volume
Speed in/out Battery Symbol
Aspirating/Dispensing direction
Display:
3. Pipettor Description
Display
Keyboard
Tip Ejection Buttons
Start Button
Handle
Handle Locking Collar
MCP Connecting
Collar
Tip Ejector Collar
(e10–e1000)
Tip Cone Housing
Tip Ejector Bar
Tip Cone(s)
(excl. 5000)
Safe-Cone Filter
Battery Cover
Charging
Contacts
Reset Button
Finger Hook
Tip Cone
(e5000)
Tip Ejector
Assembly
(e5000)
3.1. Display and controls
The control and programming of the Biohit
e
LINE pipettor is performed using
the display, keyboard and operating buttons.
Note: When the pipettor is not connected to the charging unit the
pipettor/display will automatically switch off after 10 minutes of non-use.
Pipettor can be switched on by pressing any key.

5
Keyboard:
Select Arrow up/down Enter
- Press to select - Press to select - Press to confirm
the mode range or the operating the selections or
to activate/confirm mode or to make setting changes
setting changes setting changes
(volume, aliquots,
speed, etc.)
Operating buttons:
Start button Tip ejection buttons Reset button
- Triggers all piston - Press to remove tip - Press to reset the
movements pipettor
Mode Ranges and Operating Mode Symbols:
PROG
PROG 1-6
= 6 storage
locations
MULTI
d = multi-dispensing
dd = diluting
dd+
MIXING = diluting
with mixing
Sd = sequencial
dispensing
SA = multi-aspirating
Ad = automatic
multi-dispensing
PIPET
P = pipetting
rP = reverse
pipetting
P+
MIXING = pipetting
with mixing
P
COUNT = pipetting with
cycle counter
P MANUAL* = manual
pipetting
*Not available in multichannels

6
3.2. Reset Button
To reset the pipettor, press the reset button on the battery cover. The display
shows RESET and PRESS TIP in a blinking form and pressing the tip ejector
button will reset the pipettor to the first programming level in PIPET mode.
During the reset function the pipettor automatically determines the home
position for the piston and tip ejector by running the piston up and down.
During the reset function the display shows AUTO TEST and the completed
reset function is confirmed by showing the text DONE on the display.
Note: The pipettor must never be reset with the tip attached! The attached tip
can induce an error in home position determination. However, if resetting is
accidentally done with the tip attached reset the pipettor again without the tip
attached.
3.3. Start Button
The start button triggers the aspiration and dispensing operations according to
selected operating mode. Only a soft touch is required to operate the button. If
the start button is held down during dispensing, the piston will stop in the
lowest position until the button is released. In the operating modes with
automatic blow-out (P, dd) the piston will automatically return to the home
position after the start button is released.
If the start button is held down in the reverse pipetting mode or during the
dispensing of the last aliquot in the multi-dispensing modes the piston direction
symbol will change within one second and the pipettor will be ready to aspirate
the next sample when the start button is released.
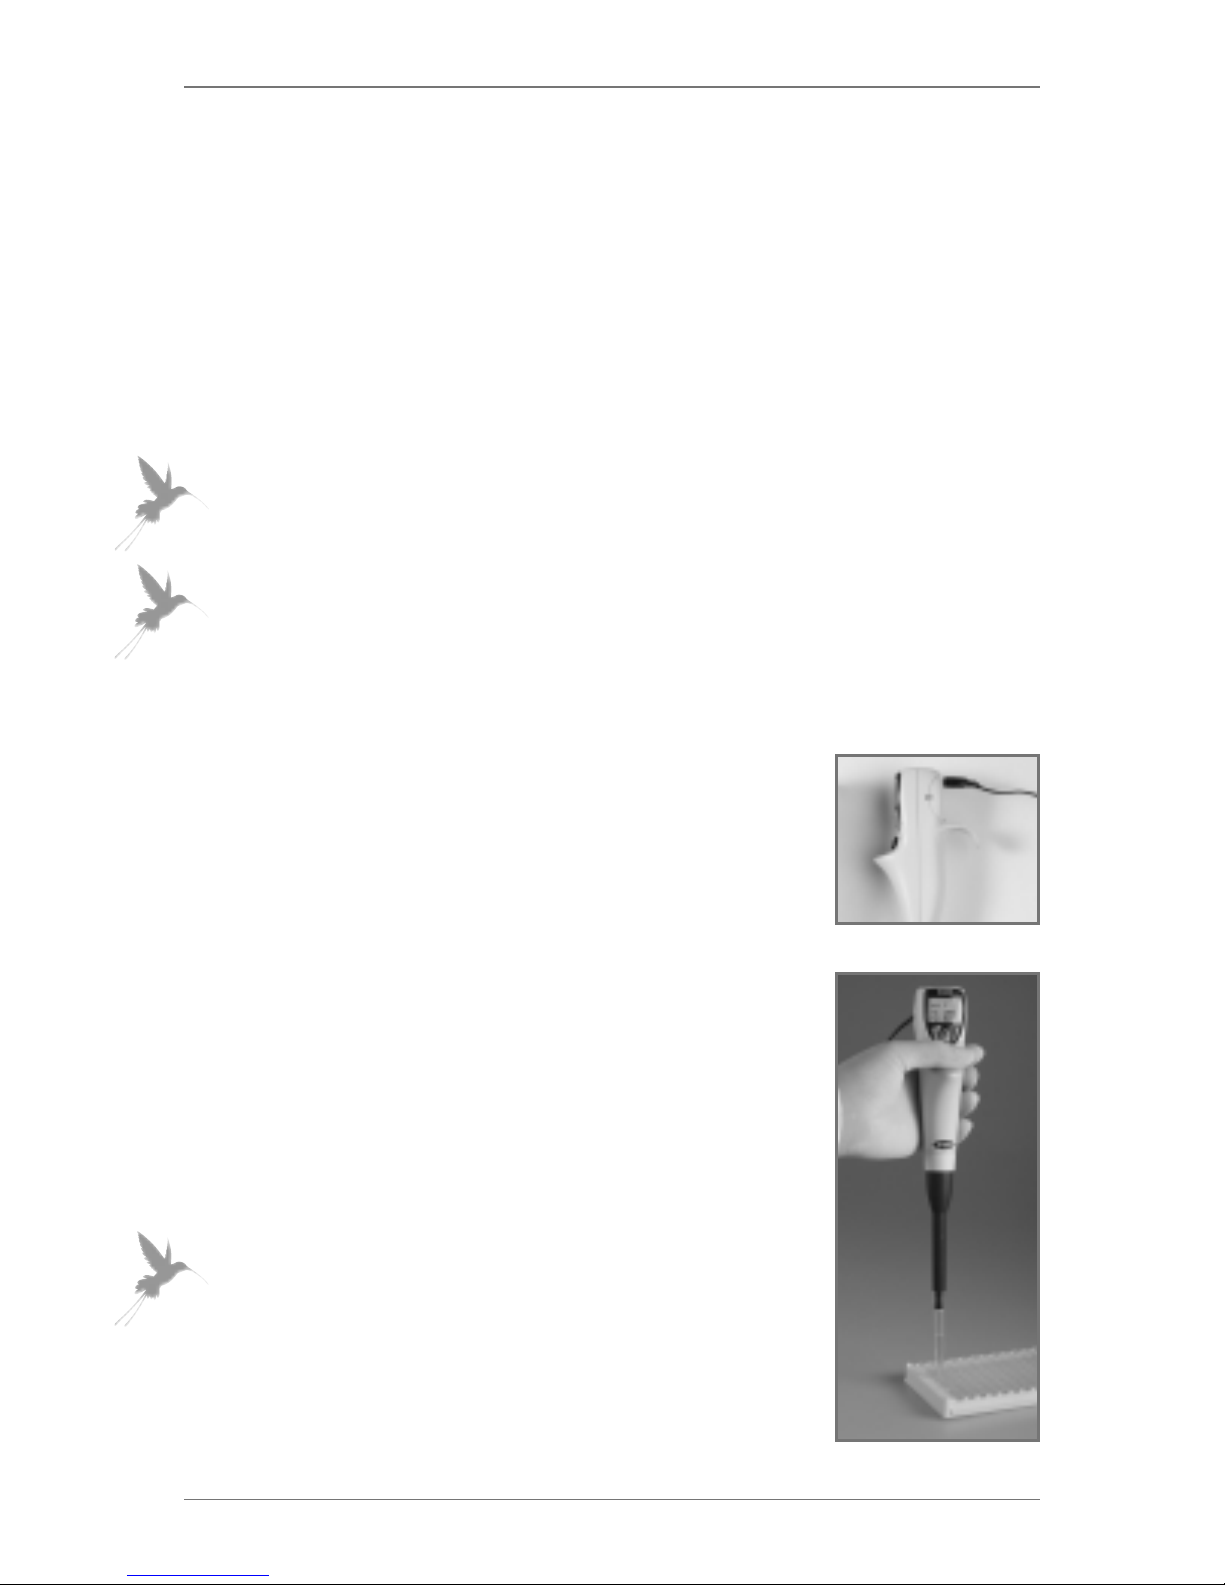
3.4. Tip sealing and Electronic tip ejection
The Biohit pipettor tips are recommended for use
with Biohit
e
LINE pipettors. The eLINE multichannel
pipettors are provided with a spring loaded
OPTILOAD tip cones for optimal sealing.
For easy and effortless tip ejection all Biohit eLINE
electronic pipettors are equipped with the new
electronic tip ejection feature (Fig. 2). There are two
tip ejection buttons conveniently placed on the
either side of the start button to ensure easy reach
for both right and left handed users. In singlechannel models the tip ejector collar can be
adjusted to optimise the tip ejection function when
other than manufacturer’s original tips are used
(excluding the e5000).
Fig. 2.

7
Tip ejection:
When the pipetting cycle is completed, either of the buttons can be depressed
to eject the tip.
Note: The tip ejection function is frozen during the pipetting cycle and can only
be activated after the tip is emptied. If needed the pipetting cycle can be
interrupted by pressing the enter button. The display will show E (E=empty) and
the tip is then emptied by pressing the start button.
Adjusting the tip ejector collar (excluding the e5000):
The tip ejector collar can be adjusted by unscrewing the collar anti-clockwise
until the collar almost touches the attached tip. The adjustment range is 4 mm.
Note: The e5000 model is equipped with an inner tip ejection mechanism and
does not have an adjustable tip ejector collar.
3.5. Biohit Safe-Cone Filters
The tip cone design of the Biohit
e
LINE
pipettors (>10 µl) allows the use of Biohit
Safe-Cone Filters in the tip cones. These
removable filters prevent liquids and liquid
vapours from entering the pipettor and thus
protects the pipettor from cross
contamination and damage.
The Safe-Cone Filters are available as
Standard or Plus versions. It is
recommended to use the Standard Filter for
general applications and the Plus Filter for
more demanding applications. The filters
need to be changed regularly. The interval
for filter changing is application dependant
but the recommendation is to change the
filter daily (after 50 – 250 pipetting cycles)
and always in case of over-aspiration. The
Biohit Filter Forceps should be used to
avoid touching the soiled filters by hand
(Fig. 3). (See Chapter 1.1. for ordering
information.)
Fig. 3.

Cat. No. Product
73098X Biohit eLINE Charging Stand
73099X Biohit
e
LINE Charging Carousel
Note: If the battery is fully discharged, the display will be empty and there will
be no response from the operating buttons. After a few minutes on charge, the
battery symbol will be displayed and the + and – symbols will continue to blink
until the battery is fully charged.
8
4. Charging of the pipettor
The Biohit eLINE pipettors leave the factory fully charged. The battery is
protected against discharging during storage with a plastic protector. BEFORE
USE PLEASE REMOVE THE PLASTIC PROTECTOR UNDER THE BATTERY
COVER. However, should the battery become discharged during storage and
recharging is required, a battery symbol will be observed in the bottom right
corner of the display (Fig. 4).
The Biohit eLINE Charging Stands and
Carousels are bench top charging units.
The Charging Stand accommodates one
Biohit eLINE pipettor and the Charging
Carousel four Biohit eLINE pipettors. The
e
LINE Charging Stands and Carousels
operate through the metal contacts placed
in the sides of the pipettor and in the head
of the Charging units (Fig. 5.).
Before operating the AC-adaptor must be
connected to the socket at the rear of the
Charging Stand (Fig. 5) or at the side of the
Charging Carousel as well as to the
electrical outlet. Before connecting the ACadaptor to the electrical outlet, check that
its voltage settings corresponds to the
voltage settings of your electrical outlet.
4.1. Charging with the Biohit
e
LINE Charging Stand and Carousel
X: 1 = Euro, 2 = U.S., 3 = UK., 4 = Jpn, 5 = Aus
Fig. 5.
Fig. 4.
The Biohit eLINE pipettors should be charged
using the original Biohit eLINE Charging Stand or
Charging Carousel. However, the Biohit eLINE
also features direct charging by using the Biohit
e
LINE AC-adaptor.
9
1. Check that the battery protector is removed and the battery cover is
properly closed.
2. Place the pipettor into the Charging unit. Make sure that the metal
contacts at the rear of the pipettor are properly fitted to the tracks of the
metal contacts in the top of the Charging unit.
3. When charging, the battery symbol will be displayed with the + and –
symbols flashing. The charging time for completely discharged batteries
is 4 hours.
4. When the battery is full the battery symbol disappears from the display. If
display shows RESET and PRESS TIP, press the tip ejection button to
reset the pipettor, the pipettor will then be ready for use.
Note: Never reset the pipettor with the tip attached as the attached tip can
induce an error in the home position determination of the piston and tip ejector
collar!
Note: When the pipettor is not in use it is recommended to keep the pipettor in
the Charging unit. This ensures that the battery is kept char ged and the pipettor
is ready for use.
4.2. Charging through direct charging system
The AC-adaptor supplied with the Biohit
e
LINE pipettor
or Charging Stand can be used for direct charging of the
Biohit eLINE electronic pipettor. The socket for the ACadaptor is placed at the back of the pipettor (Fig. 6).
1. Before connecting the AC-adaptor to the electrical
outlet, check that its voltage settings corresponds
to the voltage settings of your electrical outlet.
2. Check that the battery protector is removed and
the battery cover is properly closed.
3. Connect the AC-adaptor to the electrical outlet as
well as to the socket at the back of the pipettor.
4. The charging time is 4 hours for a completely
discharged battery.
Note: It is possible to continue pipetting while the
eLINE
pipettor is charged through the AC-adaptor (Fig. 7). With
fully discharged battery a 5 minute initial charging is
required before continuing the pipetting.
Fig. 7.
Fig. 6.

10
4.3. Electrical specifications
Battery - Rechargeable NiMH battery pack with protection circuit
- 4.8 V, 500 mAH
- Charging time max 4 hours for empty batteries
AC-adaptor for Charging Stand or direct charging
- Input voltages and main plug according to local requirements
- Output voltage 7.5 VDC, 300 mA
AC-adaptor for Charging Carousel
- Input voltages and main plug according to local requirements
- Output voltage 9 VDC, 1200 mA
5. Programming principle
The Biohit eLINE pipettors features 10-11 different operating modes and six
different storage locations for frequently used modes with user-selected
settings. The operating modes are divided in to three Mode Ranges (PIPET,
MULTI, PROG) and each Mode Range includes the following operating modes:
Mode Range: Operating Modes:
PIPET P, rP, P+
MIXING, P COUNT, P MANUAL*
MULTI d, dd, dd+
MIXING
, Sd, SA, Ad
PROG 1, 2, 3, 4, 5, 6 (=storage locations)
Programming is performed by using the Select, Enter and arrow keys. The
mode range is selected with the Select key, the desired operating mode is then
selected with the arrow key and selection confirmed with Enter key.
The setting changes (volumes, aliquots, etc.) are made with arrow keys and
confirmed with either Select or Enter key. In the shortcut programming the
changes are confirmed with the Enter key. In the shortcut programming the
speed adjustment is not possible. The use of the Select key in confirming the
setting changes enables also the speed adjustment.
Note: When the programming or pipetting cycle is completed it is possible to
make the setting changes inside the operating mode simply by pressing the
arrow key and confirming with Enter or Select.
The Biohit
e
LINE pipettor includes also six storage locations (Prog 1–6). The
operating mode with user-selected settings can be stored in to the storage
location under PROG mode for future recalls. After completing the setting
changes of the selected operating mode simply press Enter and Select keys
simultaneously, choose the storage location (PROG 1-6) with arrow key and
press Enter. The stored operation mode can now be recalled from the PROG
mode.

11
PIPET MULTI PROG
P d PROG 1
rP dd PROG 2
P + MIXING dd + MIXING PROG 3
P MANUAL* Sd PROG 4
P COUNT
SA PROG 5
Ad PROG 6
To change all settings To change settings When pre-stored
including speed: excluding speed: Prog 1–6 was chosen
Start pipetting
Store the
operating
mode with
Change selected
settings with settings to
Prog 1–6
+
Start pipetting +
* P MANUAL is not available in
multichannel models. Start pipetting Start pipetting
or
or
Repeat until
programming
is complete
5.1. Programming map
or

12
5.2. Speed adjustment
There are 9 speeds available for both dispensing and aspiration. The speed is
indicated in the bottom left hand corner of the display. The default speed is 5
for all operating modes.
Speed can be adjusted during the programming by completing the setting
changes with the select key. In every operating mode the speed adjustment is
the last programming step. After adjusting the “speed out” the programming is
completed with enter or select key and the pipettor is then ready for operation.
Note: The P
MANUAL mode includes 5 different dispensing and aspirating
speeds.
6. PIPET modes
The mode range PIPET includes 5 different operating modes.
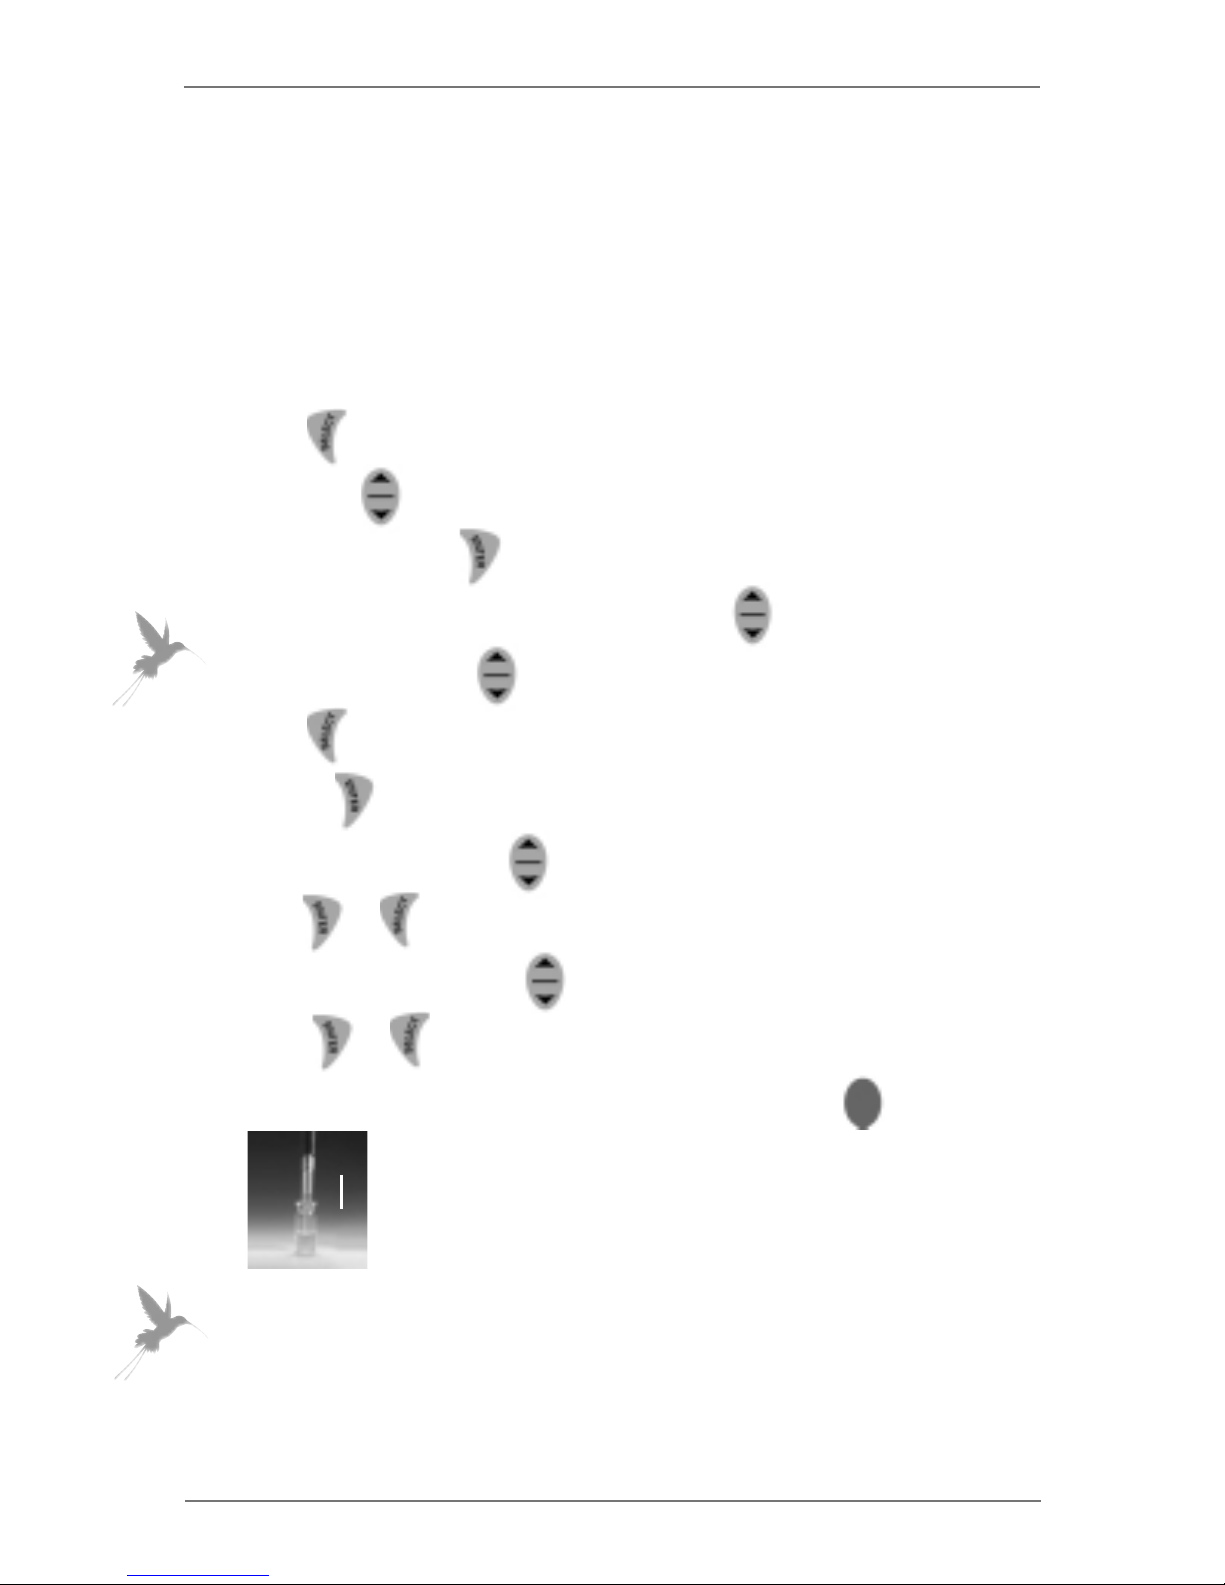
6.1. Pipetting mode (P) and pipetting with mixing (P+
MIXING)
In pipetting mode (P) the eLINE performs pipetting with blow-out. In pipetting
with mixing mode (P+MIXING) pipetting is followed by a mixing function.
1. Press to display PIPET
2. Scroll with until the symbol P or P+MIXING is displayed.
3. Confirm by pressing
4. Select the desired pipetting volume by using the
Note: When holding down the the volume display starts to scroll faster.
5. Press to confirm selection and to display the speed in
or press and continue from Step 10.
Symbol Description
P Pipetting with automatic blow-out
rP Reverse pipetting without blow-out
P +
MIXING
Pipetting with blow-out followed with mixing function
P
COUNT
Pipetting with blow-out and displayed cycle counter
P
MANUAL
Manual pipetting with on-line volume display

13
6. Select the speed in with (1= Min and 9 = Max)
7. Press or to confirm selection and to display the speed out
8. Select the speed out with (1= Min and 9 = Max)
9. Press or to confirm selections
10. Position the tip to aspirate and press the START button
11. Position the tip to dispense. Press the START button to dispense the
sample. The tip is emptied with blow-out and the piston returns
automatically back to the home position.
Step 10. Step 11.
Note: When the START button is held down during dispensing the piston will
stop in the lowest position. When the start button is released the piston will
automatically return to the home position.
To mix:
1. Position the tip in to the solution, then press and hold the START
button.
Mixing is performed automatically as long as the START button is
held down.
2. Position the tip to dispense. Press START button twice
Note: The mixing is performed with about 70% of the total volume.
▲
▼

▲
▼
▼
6.2. Reverse pipetting (rP)
A selected volume plus and excess is aspirated into the tip. After dispensing
the selected volume the excess volume remains in the tip and is discarded.
1. Press to display PIPET
2. Scroll with until the symbol rP is displayed.
3. Confirm by pressing
4. Select the desired pipetting volume by using
Note: When holding down the volume display starts to scroll faster.
5. Press to confirm selection and to display the speed in
or press and continue from Step 10.
6. Select the speed in with (1= Min and 9 = Max)
7. Press or to confirm selection and to display the speed out
8. Select the speed out with (1= Min and 9 = Max)
9. Press or to confirm selections
10. Position the tip to aspirate and press the START button
11. Position the tip to dispense. Press the START button
12. Position the tip to discard excess liquid and press the
START button twice
Step 10 Step 11 Step 12
Note: It is also possible to continue to aspirate and dispense the same volume
without the empty function. To continue, keep the START button depressed
during dispensing and within one second the direction arrow will change.
Continuing to hold the START button down, place the tip into the liquid again
and then release the START button to aspirate the next sample.
14

▲
▼
6.3. Pipetting with cycle counter (P COUNT
)
The
e
LINE performs pipetting with blow-out and the cycle counter function. The
cycle counter counts up to 99 pipettings and then returns back to 0. It is
possible to choose the cycle number to begin with. It is also possible to change
the cycle number or reset the counter during the pipetting by using the arrow
keys.
1. Press to display PIPET
2. Scroll with until the symbol P and
COUNT is displayed.
3. Confirm by pressing
4. Select the desired pipetting volume by using the
Note: When holding down the volume display starts to scroll faster.
5. Press or to confirm selection.
6. Cycle counter will show 1. Use to select the sample number you
want to begin with (0-99).
7. Press to confirm the selection and to display the speed in
or press and continue from Step 12.
8. Select the speed in with (1= Min and 9 = Max)
9. Press or to confirm selection and to display the speed out
10. Select the speed out with (1= Min and 9 = Max)
11. Press or to confirm selections
12. Position the tip to aspirate and press the START button
13. Position the tip to dispense and press the START button . The tip is
emptied with blow-out and the piston returns automatically back to the
home position. The pipettor is ready for next pipetting.
Step 12 Step 13
Note: To change the cycle number or to reset the counter during the pipetting,
press the to display the desired cycle number and confirm with .
15
16
6.4. Manual pipetting (P MANUAL)
(Not available in multichannel models)
In the manual pipetting mode the aspiration and dispensing are controlled
manually. The aspiration or dispensing continues as long as the START button
is held down (within the selected volume range). The aspiration/dispensing
direction can be changed during pipetting by using the arrow key. In the manual
pipetting mode the display always shows the actual amount of sample in the
tip.
1. Press to display PIPET
2. Scroll with until the symbol P MANUAL is displayed.
3. Confirm by pressing
4. Select the desired pipetting volume by using
Note: When holding down the volume display starts to scroll faster.
5. Press to confirm selection and to display the speed in
or press or continue from Step 10.
6. Select the speed in with (1= Min and 5 = Max)
7. Press or to confirm selection and to display the speed out
8. Select the speed out with (1= Min and 5 = Max)
9. Press or to confirm selections
10. Position the tip to aspirate and press the START button
Step 10
Note: The aspiration can be interrupted at any time simply by releasing the
START button and continued by pressing the START button again. The
aspiration/dispensing direction can be changed at any time by pressing the
arrow key.
▲

17
11. Press the to change the aspiraton/dispensing direction.
12. Position the tip to dispense. Press the START button
13. When the tip is empty (volume reaches 0 µl), within one second the display
will show E. Position the tip to empty the tip with blow-out and press the
START button twice.
Step 12 Step 13
7. MULTI modes
The mode range MULTI includes 6 different operating modes.
7.1. Multi-dispensing (d)
The pipettor performs repetitive dispensing of a selected volume. The sum of
the dispensing aliquots and an automatically selected excess volume is
aspirated into the tip. The excess volume is needed to ensure equal operating
conditions for each dispensing step.
1. Press to display
MULTI
2. Scroll with until the symbol d is displayed.
3. Confirm by pressing
4. Select the desired dispensing volume by using
Note: When holding down the the volume display starts to scroll faster.
Symbol Description
d Multi-Dispensing
dd Diluting
dd +
MIXING
Diluting with mixing function
Sd Sequenced dispensing
SA Multi-aspirating
Ad Automatic multi-dispensing with selected interval
▼
▼

18
5. Press or to confirm the selection and to display the aliquots
6. Select the desired number of aliquots with
7. Press to confirm selection and to display the speed in
or press and continue from Step 12.
8. Select the speed in with (1= Min and 9 = Max)
9. Press or to confirm selection and to display the speed out
10. Select the speed out with (1= Min and 9 = Max)
11. Press or to confirm selections
12. Position the tip to aspirate and press the START button . The display
shows PRE OUT and arrow down to indicate the reset function.
13. Position the tip to discard priming excess and press the start button .
14. To dispense, position the tip, press START button and repeat until the
cycle is complete.
15. Finally position the tip to discard any remaining excess and press the
START button twice .
Step 12 Step 13 Step 14 Step 15
Note: It is also possible to continue to aspirate and dispense the same volume
without the empty function. To continue, keep the ST ART button pr essed during
the last dispensing and within one second the direction arrow will change.
Keeping the START button depressed, place the tip into the liquid again and
then release the START button to aspirate the next sample.
▲
▼
▼
▼

19
7.2. Diluting (dd) and diluting with mixing (dd+MIXING)
Two different solutions separated with an air gap are aspirated and then
dispensed together with an automatic blow-out. The purpose of the air gap is
to avoid contamination when aspirating the second volume but it will not
prevent the two liquids from mixing in the tip. In dd+MIXING the dilution is
followed with the mixing function.
1. Press to display MULTI
2. Scroll with until the symbol dd or dd+MIXING is displayed.
3. Confirm by pressing
4. Select the desired diluent volume (volume 1) by using
Note: When holding down the volume display starts to scroll faster.
5. Press or to confirm the selection
6. Select the desired sample volume (volume 2) with
7. Press to confirm selection and to display the speed in
Step 12
or press and continue from Step 12.
8. Select the speed in with (1= Min and 9 = Max)
9. Press or to confirm selection and to display the speed out
10. Select the speed out with (1= Min and 9 = Max) Step 13
11. Press or to confirm selections
12. Position the tip to aspirate the volume 1 and press
the START button
13. With the tip in the air press the START button Step 14
again to aspirate an air gap
14. Position the tip to aspirate the volume 2 and press
the START button
15. Position the tip to dispense and press
the START button Step 15
▲
▲
▼
▲

20
To mix:
1. Position the tip in to the solution, then press and hold the START
button
The mixing is performed automatically as long as the START button
is held down.
2. Release the START button and position the tip to dispense.
3. Empty the tip by pressing the START button twice
Step 1 Step 3
Note: The mixing is performed with about 70% of the total volume.
7.3. Sequenced dispensing (Sd)
A series of different volumes of same solution can be delivered in any desired
order. The sum of dispensed volumes can not exceed the nominal volume of
the pipettor.
1. Press to display MULTI
2. Scroll with until the symbol Sd is displayed.
3. Confirm by pressing
4. Select the number of dispensing steps by using
5. Press or to confirm the selection
6. Select the first dispensing volume with
Note: When holding down the volume display starts to scroll faster.
7. Press or to confirm selection and to select the next dispensing
volume.
8. Press to confirm the last volume selection to display speed in
or press and continue from Step 13.
▲
▼
▼

21
9. Select the speed in with (1= Min and 9 = Max)
10. Press or to confirm selection and to display the speed out
11. Select the speed out with (1= Min and 9 = Max)
Step 13
12. Press or to confirm selections
13. Position the tip to aspirate and press the START button .
The display shows PRE OUT and arrow down to indicate
the reset function.
Step 14
14. Position the tip to discard priming excess and press the
start button
15. Position the tip to dispense and press the START button
Repeat until the cycle is complete.
Step 15
16. Finally position the tip to discard any remaining excess and
press the START button twice.
Note: It is also possible to continue to aspirate and dispense
the same volumes without the empty function. To continue,
keep the START button pressed during the last dispensing Step 16
and within one second the direction arrow will change.
Keeping the START button depressed, place the tip into the liquid again and
then release the START button to aspirate the next sample.
7.4. Multi-aspirating (SA)
The pipettor performs consecutive aspiration operations of the programmed
volume. This mode allows e.g. emptying a microwell plate, sample pooling and
other special applications.
1. Press to display MULTI
2. Scroll with until the symbol SA is displayed.
3. Confirm by pressing
4. Select the desired aspirating volume by using
Note: When holding down the volume display starts to scroll faster.
▲
▼
▼
▼

22
5. Press or to confirm the selection
6. Select the desired number of aspirations with
7. Press to confirm selection and to display the speed in
or press and continue from Step 12.
8. Select the speed in with (1= Min and 9 = Max)
9. Press or to confirm selection and to display the speed out
10. Select the speed out with (1= Min and 9 = Max)
11. Press or to confirm selections
12. Position the tips to aspirate and press the START button repeating the
action until the cycle is complete. The total volume is displayed.
13. Position the tips to dispense and press START button twice.
Step 12 Step 13
7.5. Automatic dispensing (Ad)
The pipettor performs repetitive dispensing of a selected volume automatically
at the specified interval (0.1 – 9.9 seconds). The sum of the dispensing aliquots
and an automatically selected excess volume is aspirated into the tip. The
excess volume is needed to ensure equal operating conditions for each
dispensing step.
1. Press to display MULTI
2. Scroll with until the symbol Ad is displayed.
3. Confirm by pressing
4. Select the desired dispensing volume by using the
Note: When holding down the volume display starts to scroll faster.
▲
▼

23
5. Press or to confirm the selection and to display the aliquots
6. Select the desired number of aliquots with
7. Press or to confirm selection
8. Select the desired dispensing pace with (0.1 - 9.9 seconds)
9. Press to confirm the selection and to display the speed in
or press and continue from Step 14.
10. Select the speed in with (1= Min to 9 = Max)
11. Press or to confirm selection and to display the speed out
12. Select the speed out with (1= Min to 9 = Max)
13. Press or to confirm selections
14. Position the tip to aspirate and press the START button . The display
shows PRE OUT and arrow down to indicate the reset function.
15. Position the tip to discard priming excess and press the START
button .
16. To dispense, position the tip, press the START button once and the
pipettor dispenses the aliquots at the specified pace.
17. Finally position the tip to discard any remaining excess and press the
START button twice .
Step 14 Step 15 Step 16 Step 17
Note: It is possible to stop the second counter and interrupt dispensing at any
time by pressing the START button. Releasing the START button activates the
counter again and dispensing continues.
Note: It is also possible to interrupt the dispensing by pressing the START
button and then ENTER key simultaneously. The display will show E and the tip
can be emptied by pressing the START button.
▲
▼
▼
▼

24
Note: Furthermore it is possible to continue to aspirate and dispense the same
volume without the empty function. To continue, press the START button
immediately after E is displayed and within one second the direction arrow will
change. Keeping the START button depressed, place the tip into the liquid
again and then release the START button to aspirate the next sample.
8. PROG mode
The Prog mode includes six different storage locations (Prog 1 – 6). The
favourite operating modes with user-selected settings can be stored to these
locations for future recalls.
8.1. Store operating mode to storage locations:
To store an operating mode to Prog 1–6 locations
1. Complete the programming of the selected operating mode as described
in paragraphs 6 and 7
2. Press first and then simultaneously to display the PROG 1
3. Choose the desired storage location (Prog 1–6) with
Note: The display shows simultaneously the mode symbol of the previously
stored mode in the storage location in question.
4. Press to store the operating mode in to the selected storage location
Note: This procedure overwrites the possible previously stored mode from the
selected storage location.
8.2. Recall stored mode from the storage location
To recall a stored mode from Prog 1–6:
1. Press to display PROG
2. Scroll with until the desired storage location is displayed (1–6)
Note: The display shows simultaneously the mode symbol of the operating
mode stored in to the storage location in question.
3. Confirm by pressing

25
4. The pipettor is ready to perform accor ding to the stored mode. Position the
tip to aspirate and press START button .
9. Pipetting recommendations
The wide selection of different operating modes makes is possible to perform
several different liquid handling tasks with BiohiteLINE pipettors. The
operating modes P, P+MIXING, P COUNT, dd, dd+MIXING and SA feature an
automatic blow-out and others leave an excess liquid in the tip. The user should
follow the recommendations below to ensure optimal performance.
9. 1. Dispensing with blow-out
The automatic blow-out function, in different pipetting and diluting modes, is
followed by an immediate return of the piston to the home position. To avoid
accidental aspiration of the liquid back into the tip, it is recommended that the
dispensing is always performed above the liquid surface.
By holding the START button down during dispensing the piston will stop in the
lowest position. This allows the tip to be placed under the liquid surface or
against the bottom or the wall of the container during dispensing. Once the
liquid is dispensed, the tip can be removed from the container and the START
button released.
9.2. Dispensing without blow-out
The pipettor will not perform the blow-out function in modes rP, P MANUAL, d,
Ad, and Sd. Therefore it is recommended that dispensing in these modes is
always performed with the tip set against the wall or bottom of the container.
9.3. Other recommendations
- Hold the pipettor vertically when aspirating the liquid and place the tip only
a few millimetres into the liquid.
- Pre-rinse the tip before aspirating the liquid by filling and emptying the tip
for three to five times. This is important especially when pipetting liquids
with a viscosity and density greater than water.
- Check that the pipettor, tip and liquid are at the same temperature.
- To avoid the contamination, do not rest the pipettor on its side especially
when the tip attached.
- Change the tip cone filter regularly.
- Always place the pipettor in the charging unit when not in use.

26
- Never strike the tip cone against the tip tray when mounting the tips as this
can damage several internal components.
- Do not use excessive force when mounting the tips as this can hamper the
tip ejection.
- Avoid rough handling, light pressure is all that is required when using the
keyboard or mounting the tips.
- Do not drop the pipettor or charging unit as this may cause excessive
shock.
- Avoid exposing the unit to extreme temperature changes, humidity and
dust (operating temperature from 15
O
C to 40OC and maximum humidity
80%).
10. Maintenance
To ensure trouble-free operation it is recommended to apply regular
maintenance and cleaning to Biohit eLINE electronic pipettors.
Note: Remove the battery pack from the pipettor prior to servicing!
It is recommended always to use gloves when cleaning the pipettor.
Change the tip cone filter regularly with the tool provided.
10.1. Cleaning the outer surface of the pipettor
To clean and decontaminate the outer surface use Proline
®
Biocontrol (Cat.no.
724004, 5 litres) and a soft lint-free cloth. Gently clean the surface of the
pipettor with moistened cloth and wipe dry. It is also possible to use ethanol
(70%) isopropanol (60%) or a mild detergent as a cleaning agent.
Note: Do not let the liquid enter the pipettor handle!
10.2. Cleaning, decontaminating and autoclaving
the lower part of the 1-channel pipettors
The lower parts of the
e
LINE single-channel
pipettors are autoclavable (see Fig. 8. Note: The
e5000 model does not have parts no. 2, 3, and 5). To
clean, decontaminate or autoclave the lower parts of
the pipettor follow these steps:
Disassembling:
1 . Remove the battery pack (1).
2. e10, e120, e300, e1000: Unscrew the tip ejector
collar (2) anti-clockwise and remove it.
Fig. 8.
2
3
4
5
6
1

27
e5000: Unscrew the green tip cone (4) anti-clockwise and remove it.
Release the black tip ejector assembly from the tip cone by turning it anticlockwise and then pull it out. Remove the tip cone filter if fitted and
continue from Step 4.
3. Unscrew the tip cone holder (3) anti-clockwise and remove the tip cone
holder (3), tip cone (4) and spring (5). Remove the tip cone filter if fitted.
4. Unscrew the exposed piston (6) anti-clockwise and remove it.
Cleaning:
To clean the exposed parts use Proline
®
Biocontrol, ethanol (70%), isopropanol
(60%) or mild detergent and soft lint-free cloth. The interior of the tip ejector
collar and tip cone can be cleaned with a cotton swab. Rinse with distilled
water if needed. Let the parts dry. Grease the piston thinly with the grease
provided.
Decontaminate:
For complete decontamination place the
tip ejector collar (2), tip cone holder (3),
tip cone (4), spring (5) and piston (6) into
a beaker containing Biohit Proline
®
Biocontrol and leave for at least 30
minutes (Fig. 9), rinse the parts with
distilled water.
Note: The corresponding parts in the
e5000 model are the green tip cone (4),
the black tip ejector assembly and the
piston (6).
Let the parts dry . Gr ease the piston thinly
with the grease provided.
Fig. 9.
Autoclaving:
The tip ejector collar (2), tip cone holder (3), tip cone (4), spring (5) and piston
(6) of the
eLINE pipettor can be steam autoclaved (121
O
C, 1 bar overpressure
for 20 minutes), see Fig. 8. These parts can be autoclaved as one unit or
separately as individual parts. It is also possible to clean the parts and grease
the piston prior to autoclaving.
Note: The autoclavable parts in the e5000 model are the green tip cone (4), the
black tip ejector assembly and the piston (6).
Note: Avoid excess grease. Use only the grease provided with the pipettor.
Note: Before reassembling check that no lint or particles are on the surface of
the piston.

Reassembling:
1 . Screw the piston (6) clockwise into position.
2. e10, e120, e300, e1000: Place the spring (5) around the piston.
e5000: Attach the green tip cone by screwing it clockwise. Place the tip
ejector assembly to the tip cone and attach by turning it clockwise.
Replace the tip cone filter with the tool provided and continue from Step
5.
3. Push the tip cone (4) into position and attach it by screwing the tip cone
holder (3) back. Replace the tip cone filter with the tool provided.
4. Attach the tip ejector collar (2) by screwing it clockwise.
5. Replace the battery pack (1). Reset the pipettor and press the start button
several times to test the movement. Test the tip ejection operation.
Note: When reassembling the pipettor do not over tighten the parts.
Note: It is always necessary to check the performance of the pipettor after inhouse service or maintenance (see paragraph 11).
10.3. Battery replacement
The design of the Biohit
e
LINE pipettors enables fast and easy battery
replacement. The battery replacement pack includes 4 NiMH batteries fixed to
the battery cover. If the batteries do not hold a sufficient charge for proper
operation follow these steps for replacement of the battery pack.
Note: The battery pack fits in to the compartment one way only. If the pack is
inserted incorrectly the battery cover will not close properly.
Note: Only use battery packs supplied by the manufacturer. The use of any
other type of battery will immediately invalidate the warranty!
Note: Dispose the used battery pack in accordance of your local regulations.
28
1. Hold the pipettor in a horizontal position
with the display facing up.
2. Press the two charging contacts
simultaneously to release the battery
pack. (Fig. 10.)
3. Place the new battery pack into the
battery compartment and close the
battery cover by pressing it lightly.
Fig. 10.

29
10.4. Storage
When not in use it is recommended that the pipettor is always stored in the
e
LINE Charging Stand or Carousel. However, during long storage periods
(several months) it is recommended to disconnect the Charging Stand and
Carousel from the mains outlet.
It is also advisable to remove the battery pack from the pipettor. This protects
the batteries against discharging during the long storage period.
11. Performance Testing
It is recommended to check the performance of your Biohit
e
LINE pipettors
regularly (e.g. every 3 months) and always after in-house maintenance.
However, users should establish a regular testing routine for their pipettors
having regard to the accuracy requirements of the application, frequency of
use, number of operators using the pipettor, nature of the liquid dispensed and
the acceptable maximum permissible errors established by the user. (ISO 8655-1.)
Performance test should take place in a draught-free room at 15–30
O
C,
constant to ±0.5OC and relative humidity above 50%. The pipettor, tips and the
test water should have stood in the test room sufficient time (at least 2 hours)
to reach equilibrium with the room conditions. Use distilled or de-ionised water
(grade 3). Use an analytical balance with a readability of 0.01 mgs.(ISO 8655-6.)
Weighting:
1. Adjust the desired test volume V
s
.
2. Carefully fit the tip onto the tip cone.
3. Fill the tip with test water and expel to waste five times to reach a humidity
equilibrium in the dead air volume.
4. Replace the tip. Pre-wet the tip by filling it once with the test water and
expel to waste.
5. Aspirate the test water, immersing the tip only 2–3 mm below the surface
of the water. Keep the pipettor vertical.
6. Withdraw the pipettor vertically and touch the tip against the side wall of
the test water container.
7. Pipette the water into the weighing vessel, touching the tip against the
inside wall of the vessel just above the liquid surface at an angle of 30
O
to
45O. Withdraw the pipettor by drawing the tip 8–10 mm along the inner wall
of the weighing vessel.
8. Read the weight in mgs (m
i
).
9. Repeat the test cycle until 10 measurements have been recorded.
10. Convert the recorded masses (m
i
) to volumes (Vi) by multiplying the mass
with the correction factor Z (Z-values in the table below):
Vi= mi*Z

Z-values (µl/mg):
Temp. (
O
C) Air Pressure (kPa)
95 100 101.3 105
20.0 1.0028 1.0028 1.0029 1.0029
20.5 1.0029 1.0029 1.0030 1.0030
21.0 1.0030 1.0031 1.0031 1.0031
21.5 1.0031 1.0032 1.0032 1.0032
22.0 1.0032 1.0033 1.0033 1.0033
22.5 1.0033 1.0034 1.0034 1.0034
23.0 1.0034 1.0035 1.0035 1.0036
23.5 1.0036 1.0036 1.0036 1.0037
Note: This method is based on ISO 8655.
14. Compare the systematic error (inaccuracy) and random error (imprecision)
to the performance specification values in chapter 14., or to the specifications
of your own laboratory.
Note: Systematic error is the difference between the dispensed volume and the
selected test volume. Random error is the scatter of the dispensed volumes
around the mean of the dispensed volume. (ISO 8655-1.)
Note: Biohit specifications are achieved in strictly controlled conditions (ISO
8655-6). Users should establish acceptable maximum permissible errors based
on the field of use and the accuracy requirements placed on the pipettor (ISO
8655-1).
30
13. For conformity evaluation calculate the random error of the measurement:
Σ(V
i
–V)
2
n = number of measurement (10)
as standard deviation s =
n –1
or as coefficient of variation CV = 100s/V
11. Calculate the mean volume (V) delivered:
V = (ΣV
i
)/10
12. For conformity evaluation calculate the systematic error e
s
of the
measurement:
in µl: e
s
= V –V
s
Vs= selected test volume
or in %: e
s
= 100 (V –Vs)/V
s

31
11.1 Recalibration
The Biohit
e
LINE electronic pipettor’s calibration has been factory checked and
certified at 22OC using grade 3 distilled water according to ISO 8655. The
pipettor’s specifications are guaranteed only with genuine Biohit tips.
Note: Biohit offers an accredited calibration service. Please contact your local
Biohit representative for further information.
The length of the piston stroke is electronically monitored and the pipettor does
not normally need recalibration. However, for special applications the Biohit
e
LINE pipettors can be recalibrated in PIPET modes (excluding P MANUAL) for
one selected volume at a time as follows:
1. Press to display PIPET
2. Scroll with until the desired mode (P, rP, P+MIXING or P COUNT) is
displayed
3. Confirm the selection by pressing
4. Select the pipetting volume to be recalibrated by using
5. Press START and simultaneously to enter the recalibration mode
Note: When pressing the both buttons the display will be blank except for the
µl and CAL sign. Releasing the buttons will display the volume to be
recalibrated.
6. Use the to increase or decrease the volume in incremental steps
(±4 increments).
7. Press to confirm the recalibration and to display speed in or
press and continue from point 12.
8. Select the speed in with (1= Min to 9 = Max)
9. Press or to confirm selection and to display the speed out
10. Select the speed out with (1= Min to 9 = Max)
11. Press or to confirm selections

32
12. Position the tip to aspirate and press the START button
13. Position the tip to dispense and press the START button
Note: After recalibration the display will show the operating mode symbol
followed with letters CAL to indicate that the mode and the volume in question
is recalibrated to give out the new volume.
Note: Changing the mode will reset the recalibration. However, it is possible to
store the recalibrated mode to the storage location in PROG mode as
described in paragraph 8.
12. Trouble shooting
The Biohit eLINE pipettors have a onboard monitoring program to control the
performance of each pipetting action. If any error message appears to the
display it means that the pipettor has been unable to perform the attempted
action properly. In case of an error the display will show Error and PRESS Ent.
message. To clear the message please follow these steps:
1. As this procedure will reset the pipettor and the tip ejector please first
remove the tip by hand.
2. Recharge the pipettor for 15 minutes.
3. Clear the error message by pressing . The display will show RESET
and PRESS TIP.
3. Reset the pipettor by pressing either of the tip ejector buttons .
Note: Repeated occurrence of error messages indicates an internal error
causing failure of the
e
LINE to complete the execution of the pipetting. The
e
LINE therefore needs to be returned to the nearest Biohit Service Centre or
your local Biohit service representative for repair.

33
Symptom Possible cause Solution
Droplets left inside the tip Unsuitable tip Use original tips
Leakage or pipetted Non uniform wetting Attach new tip
volume too small of the plastic
Tip incorrectly attached Attach firmly
Unsuitable tip Use original tips
Foreign particles Clean the tip cone,
between tip and cone attach new tip
Instrument Clean and grease
contaminated the piston and the
tip cone
Insufficient amount of Grease accordingly
grease on a piston and
o-ring
Pipettor out of Instrument damaged Return to your
established specifications Biohit service
representative
for servicing
Pipettor blocked, aspirated Liquid has penetrated Clean and grease
volume too small tip cone and dried the piston and
the tip cone
Tip ejector jammed or Tip ejector collar has Remove and clean
moves erratically been contaminated ejector collar and
tip cone
Continuous error Instrument damaged Return to your
messages Biohit service
representative
for servicing

34
13. Warranty information
Biohit eLINE electronic pipettors ar e covered by a warranty for one year against
defects in materials and workmanship. (Battery packs are covered for three
months.) Should your eLINE pipettor fail to function according to specifications
at any time, please contact your local Biohit representative immediately.
ANY WARRANTY WILL, HOWEVER, BE DEEMED AS VOID IF FAULT IS
FOUND TO HAVE BEEN CAUSED BY MALTREATMENT, MISUSE,
UNAUTHORIZED MAINTENANCE OF SERVICE OR NEGLIGENCE OF
REGULAR MAINTENANCE AND SERVICE, ACCIDENTAL DAMAGE,
INCORRECT STORAGE OR USE OF THE PRODUCTS FOR OPERATIONS
OUTSIDE THEIR SPECIFIED LIMITATIONS, OUTSIDE THEIR
SPECIFICATIONS, CONTRARY TO THE INSTRUCTIONS GIVEN IN THIS
MANUAL OR WITH OTHER THAN THE MANUFACTURER’S ORIGINAL TIPS.
Each Biohit
eLINE electronic pipettor is tested before shipping by the
manufacturer. The Biohit Quality Assurance Procedure guarantees that the
Biohit eLINE electronic pipettor you have purchased is ready for use.
Each Biohit eLINE electronic pipettor is CE marked, fulfilling the requirements
of the EN 55014, 1993 and EN 55104, 1995.
14. Performance specifications
Note: The manufacturer’s specifications below should be used as guidelines
when establishing your own performance specifications in accordance with ISO
8655.
Volume Test Number of
Cat.No. Channels Range Volume Inaccuracy Imprecision Dispensings
730020 1-ch 0.2–10 µl 10 µl 0.90% 0.40%
5 µl 1.00% 0.70%
1 µl 2.50% 1.50% 1–50
730040 1-ch 5–120 µl 120 µl 0.40% 0.15%
60 µl 0.60% 0.20%
12 µl 2.00% 1.00%
5 µl 3.50% 1.50% 1–24
730060 1-ch 10–300 µl 300 µl 0.40% 0.15%
150 µl 0.60% 0.20%
30 µl 1.50% 0.80%
10 µl 3.50% 2.00% 1–30
730080 1-ch 50–1000 µl 1000 µl 0.40% 0.15%
500 µl 0.60% 0.20%
100 µl 1.50% 0.50%
50 µl 2.00% 1.00% 1–20
730100 1-ch 100–5000 µl 5000 µl 0.50% 0.15%
2500 µl 0.80% 0.20%
500 µl 1.00% 0.40% 1–50

35
Volume Test Number of
Cat.No. Channels Range Volume Inaccuracy Imprecision Dispensings
730320 8-ch 0.2–10 µl 10 µl 0.90% 0.50%
5 µl 1.50% 0.80%
1 µl 4.00% 3.00% 1–50
730340 8-ch 5–120 µl 120 µl 0.50% 0.20%
60 µl 0.70% 0.30%
12 µl 2.00% 1.50% 1–24
730360 8-ch 10–300 µl 300 µl 0.40% 0.20%
150 µl 0.70% 0.30%
30 µl 2.00% 1.00% 1–30
730390 8-ch 50–1200 µl 1200 µl 0.50% 0.20%
600 µl 1.00% 0.30%
120 µl 2.50% 1.00% 1–24
730420 12-ch 0.2–10 µl 10 µl 0.90% 0.50%
5 µl 1.50% 0.80%
1 µl 4.00% 3.00% 1–50
730440 12-ch 5–120 µl 120 µl 0.50% 0.20%
60 µl 0.70% 0.30%
12 µl 2.00% 1.50% 1–24
730460 12-ch 10–300 µl 300 µl 0.50% 0.20%
150 µl 0.70% 0.30%
30 µl 2.00% 1.00% 1–30
730490 12-ch 50–1200 µl 1200 µl 0.50% 0.20%
600 µl 1.00% 0.30%
120 µl 2.50% 1.00% 1–24

36
Notes
 Loading...