

Page 1
PARTS LIST
Solutions Murales PROSLAT inc.
225 Industriel blvd
Chateauguay (Quebec)
J6J 4Z2
ASSEMBLY INSTRUCTIONS
1. (8) Horizontal Crossbars
2. (4) Center Verticals
3. (2) Left & Right Rear Corner Verticals
4. (1) Left Front Corner Vertical
5. (1) Right Front Corner Vertical
6. (4) Wall Mount Flanges
7. (4) Wall Mount Extension Tubes
8. (12) Horizontal Sliderails
FASTENER LIST
1. (60) #08 x 3/4" Fastening Screws
2. (08) #08 x 1-1/2" Wall Mount
#7
#1
#2
#3
#4
#5
#6
#8
Extension Tube Fastening Screws
3. (12) #10 x 1-1/4" Wall Mount
Flange Screws
4. (12) Plastic Wall Anchors
TIP
Separate All Parts into
Groups (as shown)
and Familiarize
#2
#1
#3 #4
Page 2
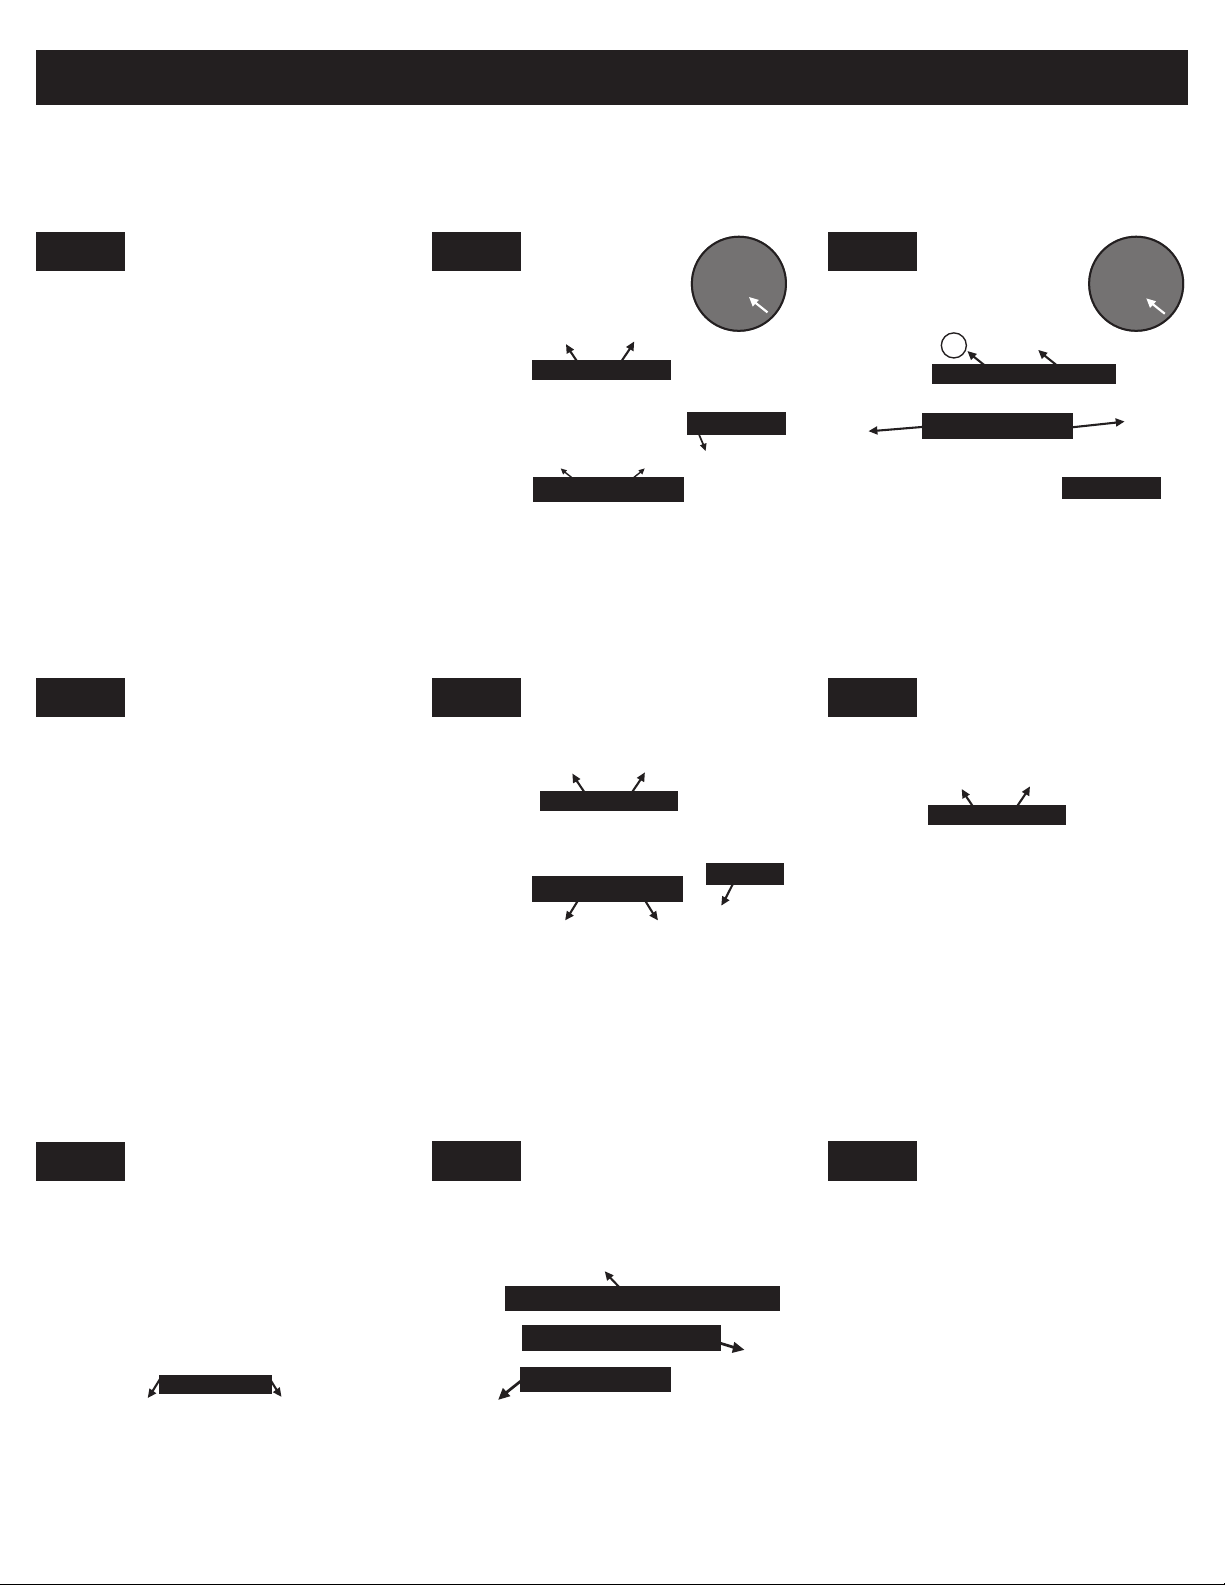
IMPORTANT: Do not install any fasteners until instructed!
Numbers in BOLD indicate item number from Parts/Fastener Lists.
FRONT GRID ASSEMBLY
Step 1
Step 2
#1
#2
#4
#1
#5
#1
#1
#1
Parts Needed:
4 of #1 2 of #2
1 of #4 1 of #5
4 Horizontal Crossbars (#1) inserted through
2 Center Verticals (#2)
Tip: When installing second Center Vertical, stand
assembly with Horizontal Crossbars placed on floor
and push down second Center Vertical to Alignment
Dimples.
REAR GRID ASSEMBLY
Step 1
#1
#2
#3
Step 2
#1
#1
#1
Top
Alignment Dimples
#2
Short side down
#2
#1
Alignment Dimples
#2
Short side down
#2
Holes down
Holes up
Step 3
Top
Alignment Dimples Down
#4
Warning Labels
#5
Holes down
1 Left Front Corner Vertical (#4) and 1 Right Front
Corner Vertical (#5)
Step 3
Alignment Dimples
#3
#3
Parts Needed:
4 of #1 2 of #2
2 of #3
2 Center Verticals (#2) on 4 Horizontal Crossbars (#1)
Tip: When installing second Center Vertical, stand
assembly with Horizontal Crossbars placed on floor
and push down second Center Vertical to Alignment
Dimples.
SLIDERAIL ASSEMBLY
Step 1
#8 #8 #8
#8 #8 #8
#8 #8 #8
#8 #8 #8
Short side down
Horizontal Sliderails (#8) inserted in Rear Grid Fastening Horizontal Sliderails (#8) in Rear Grid
Step 2
Fasten from Bottom Hole Only
Tilt Sliderails Forward
Short side down
using 12 - #08 x 3/4" Fastening Screws (#1)
Note: Start at top row and work down
Top
2 Left and Right Rear Corner Verticals (#3)
Step 3
All Horizontal Sliderails fastened to Rear Grid
Note: Fastener in Bottom Hole Only
Page 3

IMPORTANT: Do not install any fasteners until instructed!
JOINING FRONT TO REAR GRID
Step 1 Step 2 Step 3
Short Side Down
Insert Bottom Sliderails (#8) into Front Grid
Assembly and fasten (making sure fully inserted)
using 3- #08 x 3/4" Fastening Screws (#1)
Note: Fasteners in Bottom Hole Only
Insert and fasten next 3 rows of Sliderail to Front
Grid using 9 - #08 x 3/4" Fastening Screws (#1)
Note: Fasteners in Bottom Hole Only
Turn unit upright and place firmly against wall where
unit is to be mounted.
FASTENING VERTICALS & WALLMOUNT TUBES
Step 1 Step 2 Step 3
#7
Alignment Dimple
Fasten all Verticals to Horizontals. Make sure all
joints are pressed firmly together, tight and against
alignment dimples.
32 - #08 x 3/4" Fastening Screws (#1)
Note: 1 Fastener Per Joint, each grid, Front Side Only
Move unit away from wall and insert 4 Wallmount
Extension Tubes (#7) at 4 Locations.
Fasten With 8 - #08 x 1-1/2" Extension Tube
Fastening Screws (#2)
Note: 1 Fastener Per Joint Front Side Only
Wallmount Flange (#6)
Slide Wallmount Flange (#6) into Wallmount Tube (#7)
Place unit against wall where it is to be mounted and
mark Wall Flange holes.
Note: Do NOT fasten at this time. Make sure unit
remains in position at all 4 locations while marking
holes.
FASTENING BIN WAREHOUSE TO WALL
Mark Holes on Wall
Move unit away from wall and remove Wall Flange
from Tube and mount Flange to wall using 12 #10 x
1-1/4" Wall Mount Flange Screws (#3) and Plastic
Wall Anchors (#4) if needed.
Note: If mounted into Masonry or Drywall, drill
three 1/4" holes to accept Plastic Wall Anchors.
Slide unit back against wall while inserting all 4
Wallmount Extension Tubes (#7) into Wallmount
Flanges (#6) and fasten with 4 - #08 x 3/4 Fastening
Screws (#1).
Note: 1 Screw per Flange
Unit must be attached to wall to prevent from
tipping over!
Congratulations! We Hope You Enjoy Your Bin Warehouse!
 Loading...