

Page 1

User’s
Wearable Smart Device with HD Camera and
Model:
SMARTCOLLAR5000
Guide
The features described in this User's Guide are subject to
Wi-Fi® Internet Viewing
modifications
without prior
notice.
User’s
Wearable Smart Device with HD Camera and
Model:
SMARTCOLLAR5000
Guide
Wi-Fi® Internet Viewing
The features described in this User's Guide are subject to
modifications
without prior
notice.
Page 2

Welcome...
to your new Motorola Pet
Thank you for purchasing the Motorola Pet Monitor. Integrated with a
720p wide-angle camera and connects via Wi-Fi
Pet Camera streams
allowing you to see the world through your dog's
Please retain your original dated sales
warranty service of your Motorola product, you will need to provide a
copy of your dated sales
not required for warranty
For product related questions, please ca
This User Guide provides you with
most from the product and
part of our ongoing effort to
displays may change from time to time.
website
Before using this
•
•
•
Got
•
•
•
•
•
www.mo
Visit our website
Guide
.
Read and follow the instructions in the User Guide along with
Safety Instructions from
Upgrade the product’s
everything?
1 x Pet Camera (with integrated battery)
1 x Leatherette Collar Strap for the Pet Ca
1 x Power Adapter for the Pet
1 x Quick Start
1 x User Gu
video of what your dog is doing to
receipt to confirm warranty status. Registration is
coverage.
US and Canada
Email:
ide
support@motorolamonitors.com
is
improve
torolamonitors.com
product:
Guide
www.motorolamonitors.com to get the
pages 6 -
app and firmware (see
Monitor!
devi
For
n-screen
visit our
the
lbs
the
er
.
®
& mobile network,
your smart
eyes.
receipt for your records.
ll:
1-888-331-3383
all the information you need to get
accurate at the time it was completed. As
our products,
We recommend you to
to get the latest User
8.
Camera
feat
ures and o
Guide.
latest Us
page
34).
- Best Fits Pets Over 15
mera
the
ce,
Overview of the Pet
1
2
Camera
3
4
5
9
10
on
s
Mode.
8
5.
White LED Light See what
dogs sees in dark places and at
ni
ght
6. Speaker
Two way communi
7.
Status Indicator LED Lights up in
solid green when it
Lights up in solid red
charging.
connected to a smart
8.
Integrated
Local recording in 720p
9.
Micro USB
(with waterproof cover)
10.
Power
(with waterproof cover)
is
switched ON
is
switched
Blinks in
Memory
Charging Sock
On/Off button
OFF
;
;
OFF
cation
is
powered
when
green when it is
device.
;
(HD)
the
et
on.
6
7
1.
GPS
Antenna
Tracking - locate the dog’s
GeoFencing - notify you when
dog leaves the defined
2.
Wide angle
Videostreaming - see what yo
dog sees
Tak e pictures
Record video
3.
Micr
ophone/G-Sensor
Detect environmental sound.
G-sensor discriminates your dog’
bark from other external no
4. Wi-Fi
Stay in touch with the
Stream what the dog sees
Activate local recordin
Transmit voice wirele
®
camera
s
boundary
dog
g
ssly
positi
ur
ise.
the
Behavior of the Status Indicator LED
1.
Visible white light -
2.
Solid Green - When powering the device ON and
3.
Solid Red - Charging when the device
4.
Solid Orange - Charging when the device
5.
Blue - Switching to Wi-F
Flas
h;
i
®
Direct
Page 3

How the Pet Monitor
®
The
Wi-Fi
angle 720p resolution camera, GPS, bark sensor, sp
quick and easy way for you to track the location of your dog, see what
and mobile network enabled Pet Camera
works
is
integrated with a wi
de-
eaker and more. It offers a
they’re
doing and receive notifications when they are barking. The Pet Camera streams
video and sends alerts to your smart device through an App called
Important guidelines when using the Pet
•
Do not make your dog wear the Pet Camera for more than 12 hours
continuously to avoid skin irrita
Do not connect a leash to the Pet
•
•
When connecting a separate collar for the leash, make sure that it does
add pressure on the Pet
Check the contact area on your
•
rash or sore, discontinue use until the
veterinarian if the condition pers
•
Use of other 2.4 GHz
systems
or microwave ovens may cause interference with
products, such as other wireless networks, Blue
the Pet Camera away from these types of
appear to be causing int
•
Always ensure that you have a good
erference.
tion
Camera.
dog’s neck for signs of irritation. If there is
ists.
.
Camera.
skin is
Wi-F
Monitor
completely healed. See a
products, or turn them OFF if the
®
i
or mobile connection avai
"Hubble".
this
product. Keep
toot
not
®
h
lable.
a
6
7
8
8
8
9
12
16
17
21
22
22
24
26
28
30
32
34
34
34
35
36
37
39
46
51
ENGLISH
Table of
1.
Safety Instructions
System Requirements
2.
3.
Basic
3.1
3.2
3.3
3.4
4.
Connecting Devices................................................................................
4.1
4.2
4.3
y
4.4
5.
Overview of the features in Hubble App
5.1
5.2
5.3
5.4
5.5
5.6
5.7
5.8
6.
App and Firmware Upgrades ..................................................................
6.1
6.2
7.
Working with
Disposal of
8.
9.
Cleaning and Care ..................................................................................
10.
Help
11.
Troublesho
12.
General Information
13.
Technical Specifications
contents
.....................................................................................
...............................................................................
Setup ................................................................................................
Charge the Pet
Attach the Adjustable Strap to the Pet
Fit the Pet Camera on your
Power On/Off the Pet
User Account and Camera Setup on Android™ Devices
Home Screen of Hubble App on Android
User Account and Camera Setup: Working with
Home Screen of Hubble App on iOS
Modes of oper
®
Wi-F
Wi-F
Mobile Connection Mode ........................................................................
Camera Settings ........................................................................................
Account Settings
Add another Pet Camera to your Hubble Account..................................
Reset or remove a Pet Camera from your Hubble
App Upgrade
Firmware Upgrade
i
Local
®
i
Direct Mode ..................................................................................
the Device (Environment)....................................................
..........................................................................................................
oting
Camera ..............................................................................
Camera .........................................
Dog’s Neck ....................................................
Camera
.................................................................
.......................
Devices ..................................
iPhone®/iPad® ..........
Devices
........................................
................................................
ation ...................................................................................
Mode....................................................................................
.......................................................................................
Account
.............................................................................................
....................................................................................
PC/Notebook
...................................................................
....................
......................................................................................
................................................................................
.........................................................................
10
11
33
33
38
Table of co
ntents
5
Page 4

1. Safety
Instructions
WARNING:
As with any electrical device, supervision of your pet's usage should
exercised until your pet is
to chewing, we strongly recommend that you keep this and all
electrical devices out of its
RISK
•
OF
SKIN
DAMAGE
Determine a proper fit of the Pet Camera on your dog’s
worn for too long or the fit is too tight, it may cause skin da
•
Check your dog’s neck area daily for signs of skin irrit
•
Discontinue use immediately
•
AVOID wearing for more than 12 continuous hours a day.
•
Clean your dog’s neck area and the Pet Camera
acclimated to the product. If your pet
reach.
neck. If
mage.
ati
on.
if a rash or sore is found on the neck area.
with a soft damp
other
weekly.
is
prone
clot
be
h
2. System
Web
Porta
l
Windows
•
Mac OS
•
•
Chrome™
Internet Explorer®
•
Safari®6
•
Java™
•
•
Firefox
•
Adobe
Android™ Syst
Version 4.2 or
•
iPhone®/iPad
Version 7.0 or
•
High Speed (Wi-F
®
7
®
®
18.0
Flash
Requirements
®
7
10.7
24
9
®
em
above
®
iOS
above
Player
i®)
15.0
Internet
ENGLISH
WARNING
standards and
Therefore, always read the
using the
•
This product
This product
•
Test this product and
•
actual use.
Only use the Power Adapter
•
•
Do not use other power adapters as this
•
Never use extension
•
Do not touch the plug contacts with sharp or metal objects.
Keep this User's Guide for future reference.
•
6
This Pet Monitor
is,
when handled as descri
product.
is
not a toy. Do not allow children to play with it.
is not a substitute for resp
all its functions so that you are familiar with it prior
cords with Power Adapters.
is
compliant with all relevant
bed in the User’s Guide, safe
instructions in this User’s Guide
onsible supervision of your
provided.
may damage the
electromagnetic field
to
use.
carefully
before
dog.
to
device.
Safety Inst
ruction
At least 0.6 Mbps upload bandwidth per Pet Monitor (you can test yo
•
internet speed on this site:
s
System
Requirem
ents
http:/
/www
.sp
eedtest.net)
ur
7
Page 5

3. Basi c
3.1
Setup
Charge the Pet
Camera
1.
Connect the power adapter to an electrical outlet and
the micro USB
adapter (5V
The status indicator LED lights up solid red, which indicates that it is
2.
charging.
NOTE
Only use the
take approximately 6
depending on how often you use i t. The
battery
switch off the Pet
is
low. To conserve battery life, press and hold the
socket on the Pet Camera. Only use the supplied powe
DC / 1000mA) with the Micro
enclosed power adapter (5V
hours
to charge. The average battery life
status indicator LED blinks in red when
Camera
when it
is not in use.
USB pl
DC / 1000mA). The battery pack will
insert the plug into
ug.
POWER KEY
r
is up to 2 weeks,
to
3.3
Fit the Pet Camera on your Do
g’s
Neck
1.
Have your dog stand in a balanced position on a fl
even surface.
2.
Put the strap over your dog’s neck, centering
Pet Camera underneath
that the Motorola logo
3.
String the end of the strap through the strap
4.
Pull the end of the strap until the desired level of
tightness is
through the nearest strap hole, then insert the strap
through the remaining strap buckle to secure
Check to ensure that the Pet Camera
5.
center underneath the neck of your
its neck and making
is
upright facing yo
reached and push the retainer
is in
dog.
u.
the
the
sur
buckle.
bar
it.
at,
ENGLISH
e
3.2
1.
2.
3.
8
Attach the Adjustable Strap to the Pet
Set the Pet Camera facing
With the front side
the first slot, moving it towards the second
Slot
Continue to thread through the second sl
of the buckle facing down, thread the strap through
down.
ot.
slot
Camera
.
Slot
Basic
Setu
p
6.
Check the fit again after your dog
minutes or as
NOTE The Pet Camera should fit snugly on your dog’s neck such that you
only fit two fi
neck.
Basic
Setu
p
your dog gets more comfortable with it.
ngers
undernea th it. It should not be abl e to rotate around
has
worn the Pet Camera for several
can
the
9
Page 6

3.4
press and hold the
Power
On/Off
POWER
the Pet Camera
KEY
To power on the
seconds. The LED lights up in solid green and a melody
To power off the Pet Camera,
seconds until a melody
is
press and hold the
POWER
played. The LED lights up in solid
off.
Pet
for about
is
played.
KEY
for at least
green before it go
Camera,
3
es
3
4. Connecting
How does it
Pet Camera
work?
Wi-Fi
Router
Devices
Access your
Camera locall
Hubble Serv
y
ice
ENGLISH
View your
any compatible devi
remote
Camera from
ly
ce
When a user tries to access
user’s identity before it grants access to the Camera
the Camera, the Hubble
server will authenticate
.
Important
Make sure that the battery level
plugged in before starting
is
more than 70% or the power ad apter is
installation.
Setup
Connect the power adapter to an electrical outlet and
•
micro USB socket
Press
•
and hold the POWER
on the Pet Camera
KEY
.
for about 3
When switched on, the LED lights up in solid green and a mess
indicating that the device
The Pet Camera must be within range of the
•
is
ready for connection
Wi-F
insert the plug into
seconds to switch it
age
is
play
ed.
®
i
router with which yo
want to connect. Make sure that you have the password of the router for
setup process
Note You can only setup via a compatible smart device,
smartphone or tablet, and not via
.
such as
a PC.
on.
the
the
u
the
10
Basic
Setu
p
Connecting Devices
11
Page 7

4.1
What you
•
•
•
4.1.1
•
•
User Account and Camera Setup on Android™
need
Pet
Camera
Pet Camera Power
Device with Android™
Power On the Pet
Connect the power adapter to an electrical outlet and
micro USB socket
Press
and hold the POWER
When sw
indicating that the device
itched on, the LED lights up in solid green and a
Adapter
system version 4.0 and
Camera
on the Pet
Camera.
KEY
is
ready for connection
for about 3
Devices
above
insert the plug into
seconds to switch it
messa
ge
is play
ed.
on.
the
4.1.4
•
Add Camera to your
Tap on the top right corner of the screen to add camera. (Picture
account
A2)
ENGLISH
TM
d
oi
r
And
4.1.2
•
•
4.1.3
•
•
Note If you already have a Hubble App account , please select
have an Account? to go to the next step.
Download Hubble for Motorola Petcam
Go to Google Play™
Download
install it on your
Ensure that your Android™ device
Run
"Hu
information, read through the Terms
of Use"
"Hubble for Motorola Petcam"
Run
Hubble for Motorola Petcam app on Android™
bble for Motorola Petcam"
before you tap
Store to search for "Hubble for Motorola Petcam".
App from Google Play™ Store
Android™ device
Create account.
is
connected to your Wi-Fi
App, tap
of Service, then select "I agree to the Terms
(Picture
Get Started,
A1)
App
enter your
A1
12
and
device
®
router
account
Already
Connecting Devices
A2
•
The following setup instructions will appear on the screen. (Picture
.
A3
Tap
•
Connecting Devices
Continue.
A3)
13
Page 8

•
The following setup instructions will appear on the screen. (Picture
A4
Tap
•
•
•
Continue.
The App will automatically search for the Pet Camera. (Picture
Tap to select the Pet
Camera.
A5)
A4)
®
•
Select your Wi-F
(Pictures A6,
A6
•
It will take a few minutes for the Pet Camera to connect to the Wi-F
network before showing the connection
•
If connection
i
Network, enter your password and then tap
A7)
A7
status. (Picture
fails, please tap
Retry
and repeat the steps starting from
A8, A9)
Connect
®
i
.
4.1.4.
ENGLISH
TM
d
oi
r
And
14
A5
Connecting Devices
•
Tap
View Camera
Connecting Devices
A8
to go into live streaming
mode.
A9
15
Page 9

4.2
Home Screen of Hubble App on Android Device
Tap to acces
Camera
enter Account
Settings.
Tap to enter live
streaming
list or
mode.
s
on.
.
®
the
ad
ENGLISH
®
iOS
s
Tap to
Camera
enter
Settings.
4.3
User Account and Camera Setup: Working with
What you
•
Baby Unit
Power adapter for the
•
iPhone
•
4.3.1
•
Connect the power adapter to an electrical outlet and insert the plug into
micro USB socket on the Pet
•
Press
When switched on, the LED lights up in solid green and a
indicating that the device
4.3.2
•
Go to App Store to search for "Hubble
•
Download
4.3.3
•
Ensure that your iPho
•
Run the
through the Terms of Service, and then select "I agree to the
before you tap
Note: If you already have a Hubble App account, please select Alre
have an Account? to go to the next step (Picture
need
(Camera)
®
/ iPad
Power On the Pet
and hold the POWER
Came
ra
®
with iOS version 7.0 and
Camera
Camera.
KEY
is
ready for connection
for about 3
above
seconds to switch it
is
Download Hubble for Motorola Petcam
for Motorola Petcam
"Hubble
Run Hubble App on your
"Hu
for Motorola Petcam" App and install it on your iP
iPhone®/iPad
®
ne®/iPad
bble for Motorola Petcam"
Create. (Picture
is
connected to your Wi-Fi
App, enter your account information, re
i1)
i1).
play
iPho
mess
ed.
App
".
hone®/iPad®.
®
®
Terms of Service"
ne®/iPad
age
Router
ady
16
Connecting Devices
Connecting Devices
i1
17
Page 10

4.3.4
•
Add the Camera to your
account
Tap on the top right corner of the screen
to add camera. (Picture i2).
•
The following setup instructions will appear on the
screen.
ENGLISH
®
iOS
i2
The following setup instructions will appear on the screen. (Picture
•
i4
•
Tap
Continue.
i3
i3)
i4 i5
®
•
Press the Home Key on
(Pictures i4,
•
Select your Pet Camera from the
Return to the Hubble app to resume
•
Name the location of your Pet Camera and tap
•
i5).
iPho
ne®/iPad
and go to
list of networks (Picture i
setup.
i7
®
Select your
•
Wi-F
i
network and tap
Continue.
Settings > Wi-Fi
Continue. (Pic
i8
(Picture
i9)
i6
6).
tures i7,
menu
i8)
18
Connecting Devices
Connecting Devices
19
Page 11

•
Enter your
Wi-F
®
i
password
and tap Next.
(Picture
i10)
4.4
Home Screen of Hubble App on iOS De
vice
s
•
It will take a few
minutes for the Pet Camera to connect to the
network before showing
i1
0
the connection
Wi-F
status (Picture i11, i12).
Tap to enter live
streaming
mode.
Tap to
Camera
Settings.
enter
ENGLISH
®
iOS
®
i
Tap to acces
Camera
list
s
.
Tap to en
Settings
ter Accoun
.
t
i11
•
If connection
Tap Vi ew Live Camera
•
20
fails, please tap
Retry
to go into live streaming
i12
and repeat the steps starting from
mode.
Connecting Devices
4.3.4.
Connecting Devices
21
Page 12

5. Overview of the features in Hubble
√
√
√
√ √
T
pic
√
√ √Ni
v
isi
√
√
√
√ √
2
√
√
√
√ √Locati
v
iew
√ √Locati
√ √
√
√
5.1
The Pet Camera supports 3 modes of operation:
•
•
•
Live streaming
Record
ake
Download
Share pictures
vi
-way
Modes
of
operation
Wi-Fi® Local (s
Point)
mart device c
onnects
to Pet Camera via local
Wi-Fi ® Direct (smart device connects directly to Pet Camera via Wi-Fi®)
Mobile (smart device connects to Pet Camera via 2G/GP
®
Wi-Fi
Local
Wi-Fi® Direct Mobile
RS)
video
tures
ght
on
and
&
deo*
Wi-F
x
x
App
i
communication
Playback pre-
recorded
or
warning
reward
messages
on
(mobile, GPS)
on
(mobile, GPS)
tracking
x
x
®
Access
^
r
of
ENGLISH
®
iOS
Geo
(GPS)
Bark
Fencing
Detection
x
n/a
n/a
n/a
Notes
*
Once a video is
^
You will receive a notification when the battery level falls below 20%. The Pet
Monitor will go into power saving mode. All functions will be deactivated
mobile
^
areas.
connection.
You must have a 2G network subscription plan and be within
Send Pre-recorded Reward or Warning Message (see Section
You can record reward or warning messages and send
through the Pet Collar when the pet behaves or misbehaves.
Two-way Communication (see Section
Listen and speak back to your dog through the Pet Collar, issue
offer a soot
Geo Fencing (see Fence Settings in Section
Set up
the set
virtual boundary
boundary.
Location Tracking (see Bark and GPS Settings in Section
Find the dog’s current location via
Note Location tracking will be based on the mobile network
downloaded, it will be removed from the Pet
5.2)
hing voice for your agitated
dog.
5.3)
and receive notifications when your dog ventures out
GPS.
Came
2G coverage
5.2)
them to your
commands o
5.3)
first (with
ra.
except
dog
a
tolerance of around 0.6miles), then by GPS satellite (with a tolerance of around
30
feet).
22
Overview of the features in Hubble
App
Overview of the features in Hubble
App 23
Page 13

5.2
•
•
•
Wi-Fi® Local
Run
Hubble for Motorola Petcam App on your smart device and log into your
Hubble
If you have more than 1 Pet Camera in your account: For iOS Devices,
tap
For Android
camera
Tap on the video image to show the op
account.
Devices
list
TM
Devices,
Mode
to select a camera from the camera
tap >
Cameras to se
tions avai
lect a camera from
lable.
Take
Photo/
Activate
Vision
Record
Video/
Night
Tap t o t a ke a
your Pet Camera or activate night visi
(the white LED light on the Pet Camera will
light
up).
photo ,
record a video from
Two-wa
co
y
mmunicatio
Send
Reward/
Warning
Messages
Tap to activate the function. Tap on the roun
button
n
Camera. Toggle the button again to
the audio feedback from the Pet Camera.
Tap to send
warning
Pet
Camera.
once to speak through the Pe
a pre-recorded reward o
message to your dog through the
lis
on
t
listen
r
to
t
the
d
Photo/Video
Galler
y
Tap to enter photo or video gallery where yo
can download, share or delete the photos
have taken and videos you have recorded
your Pet
Camera.
u
you
on
ENGLISH
24
Overview of the features in Hubble
App
Overview of the features in Hubble
App 25
Page 14

5.3
•
•
•
•
•
•
Wi-Fi® Direct
Run
Hubble for Motorola Petcam
Hubble
If you have more than 1 Pet Camera in your account: For iOS Devices, tap
Devices
Android
camera
Tap on
Tap
about 1 minute to establish a connection and you will hear a voice
notifying you that the connection
Ta p
to show the
Tap
account.
TM
Devices,
list
Settings
Wifi Direct Mode
View Camera
EXIT WIFI DIRECT
icon to enter Camera
at the bottom of the screen and then tap on the video
options a
Mode
App on your smart device and log into your
to select a camera from the camera list For
tap >
to connect to your Pet Camera via Wi-Fi
vailable.
and then tap OK to exit Wi-Fi
Cameras to se
has been
Settings
established.
®
lect a camera from
.
Direct
®
Direct. It
mode.
prompt
the
takes
image
Location
Tracking
Geo
and
Fencin
g
Two-wa
communicatio
and
Reward/
Warning
Messages
y
Send
Tap
Yo u r
Note that location tracking will be based on
mobile network
0.6miles), then by GPS satellite (with a
tolerance of around 30
Tap
Tap on the round
through the Pet Camera. Toggle the
n
again to listen to the audio feedback from
Pet
Tap to send a pre-recorded reward o
warning
Pet
>
Track
to track the location of your
pet’s location is
to set the radius for Geo
Camera.
message to your dog through
Camera.
identified by a blue
first (with a
button
tolerance of around
feet).
Fencing.
once to
button
pet.
dot.
the
speak
the
r
the
ENGLISH
26
Take
Photo/
Record
Video/
Activate
Vision
Night
Tap to take a
your Pet Camera or activate night visi
(the white LED light on the Pet Camera will
light
up).
photo ,
record a video from
Overview of the features in Hubble
on
Photo/Video
Galler
y
Tap to enter photo or video gallery where yo
can download, share or delete the photos
have taken and videos you have recorded
your Pet
Camera.
u
you
on
App
Overview of the featur es in Hubble
App 27
Page 15

5.4
•
•
•
•
Mobile Connection
Run
Hubble for Motorola Petcam
Hubble
If you have more than 1 Pet Camera in your account: For iOS Devices, tap
Devices
Android
camera
If your smart device
connected by mobile network
Tap
account.
TM
Devices,
list
in the center of the screen to show the
tap >
is
not connected to any local Wi-F
Mode
App on your smart device and log into your
to select a camera from the camera list For
Cameras to se
automatically
.
lect a camera from
®
i
network, it will
options available.
Take
Record
Photo/
Vide
Tap t o t a ke a
from your Pet Ca
o
photo ,
record a video
mera.
28
Location
Tracking
Geo
and
Fencing
Tap >
Your pet’s
Note
mobile network
0.6miles), then by GPS satellite (with a
tolerance of around 30 feet).
Tap
Track
to activate location tracking.
location is
that location tracking will be based on
to set the radius for Geo Fencing.
identified by a blue dot.
first (with a
Overview of the features in Hubble
tolerance of around
Send
Reward/
Warning
Messages
Tap to send a pre-recorded reward or
warning
Pet
Camera.
message to your dog through the
the
be
Photo/Video
Galler
y
Tap to enter photo or video gallery where yo
can download, share or delete the photos
have taken and videos you have recorded
your Pet
Camera.
you
on
u
the
App
Overview of the featur es in Hubble
App 29
ENGLISH
Page 16

5.5
•
•
•
•
Camera
Run
Hubble for Motorola Petcam
Hubble
If you have more than 1 Pet Camera in your account: For iOS Devices, tap
Devices
Android
camera
Tap on
Tap Save after you have modified the se
account.
TM
list
Settings
Settings
Devices,
tap >
icon to enter Camera
App on your smart device and log into your
to select a camera from the camera list For
Cameras to se
Settings
ttings.
lect a camera from
.
General
Bark and GP
Settings
30
Settings •
•
•
•
S
•
•
•
•
•
Clock: 12h or 24h
Time Out (Recording): 1m
will stop recording after the set time
du
ration.
Units: Meter or Feet
Email
Bark notification: On
available)
Bark Sensitivity:
not av
ailable)
Recorded Tone: Record Reward Tone an
Warning
GPS Notification:
GPS Mode: Tap to s e l e c t
Tone
- 5m The Pet Ca
or Off (currently no
Low, Medium or
On or Off
Battery Saving or Trackin
out
t
High
(currently
Overview of the features in Hubble
mera
d
Fencing
the
Camera Details
Wifi Direct
Memory
Battery Level
Updates
Logout
Settings
Mode
Set up virtual boundary and receive
when your dog ventures out of the set
•
Fence Notification: On or Off
Fence Sensitivity: Low,
•
Narrow: 50m to 1
•
•
Medium: 101m to
•
Large:
•
Tolerance:
•
Change camerana
•
Change
Hubble account by taking a photo or take a
snapshot of the
Tap to switch connection mode to Wifi
Check memory available on the Pet
Check battery level on the Pet
Shows the status of the software ap
Tap to logout of Hubble
301m to
snapshot of the Pet
500m
5m to
00m
20m
camera’s
200
m
me
account.
Medium or
image.
notification
boundary.
Hig
Camera in yo
Direct.
Camera.
Camera.
plication.
s
h
ur
g
App
Overview of the featur es in Hubble
App 31
ENGLISH
Page 17

5.6
•
•
For iOS Devices, tap Accoun
•
Profile
Account
Run
Hubble for Motorola Petcam
Hubble
For Android
You can modify the following
account.
Settings
TM
Devices, tap
Username:
shows current user email
choose Celsius or Fahrenheit
change Password
debug scr
Log
out
App on your smart device and log into your
t
>
Accoun
t
settings:
shows current userna
een
:
Debug Screen:
me
Email:
Temperature:
Pass
word:
Go
to
5.7
•
•
5.8
Add another Pet Camera to your Hubble
In the home screen of the Hubble app, tap to add another Pet Camera
to
your account (follow 4.1.4 for Android devices and 4.3.4 for iPho
de
vices
)
You can add up to 4 Pet Monitors to one ac
count.
Reset or remove a Pet Camera from your
Account
ne/iPad
Hubbl
e
ENGLISH
Account
If your Pet Camera is
or you have setup issues, then the Pet
Go to Camera Settings menu of the Pet Camera you wish to remov
•
(see Section
moved from one router (e.g. home) to another (e.g. office)
Camera
5.3).
must be reset.
e
Subscription
Notifications
Remote
Co
nnectio
Setting
About
n
Hubble
Shows your subscription pl
Do Not Disturb:
minutes
minute to 60 minutes or disabled.
sound:
check or uncheck the checkbox to
or disable.
the checkbox to enable or disable
a call:
check or uncheck the checkbox to enable or
disa
ble
Remote View Timeout:
checkbox to enable or
View Terms and
Shows the current App version
disabled, or from 1 minute to
Notification frequency:
Notify me by vibration:
check or uncheck
Condit
an.
immediately,
disa
ble
ions
Notify me by
check or
Notify me when on
the
number.
180
1
enable
uncheck
•
Tap the trash bin icon on the top right corner of the
•
Tap
Yes
to remove the Pet Ca
The Pet Camera will be de-registered from your Hubble Account and all
•
settings will be
reset to default.
mera.
scr
een.
32
Overview of the features in Hubble
App
Overview of the features in Hubble
App 33
Page 18

6. App and Firmware
6.1
You can find the latest version of Hubble App by visiting your mobile
app store
what's new with the app and install the latest
Occasionally, Hubble Server will
of the app is
running efficiently, and some
recommend that you complete the upgrade
Upgrade will only be performed in
App
Upgrade
(e.g.:
iTunes App Store, Google PlayTM). From there, you can
available. While some of the upgrades simply keep your system
are critical to system functionality. We strongly
Upgrades
version.
also
send you a notification that a latest
as soon as possible. Soft
®
Wi-Fi
mode.
device’s
see
versio
ware
n
7. Working with
•
Go to:
Enter your User Name and Password and then click Login if you have already
•
created an
•
Click
iPhone®/iPad®.
screen. You can easily stay
stre
You can also change the settings by following the Menu instructions on
•
website
http:/
/www.hubbleconne
account.
the Camera list paired in your account via Android™ device
The video captured by the Pet Camera will
aming.
.
PC/Notebook
cted.c
om/
mot
orola/logi
connected with your dog with live
n/
or
appear on the
video
ENGLISH
the
6.2
Firmware updates will be sent to the Pet Camera over Wi-F
Firmware
Upgrade
®
i
or GPRS
network.
34
App and Firmware
Upgr
ades
Working with PC
/Noteboo
k
35
Page 19
8. Disposal of the De vice
At the end of the product life cycle, you should not dispose of this
product with normal househ
point for the recycling of electrical and electronic equipment.
symbol on the product, user's guide and/or box in
Some of the
point. By reusing some parts or raw materials from used products you make
an important contribution to the protection of the
Please contact your local authorities in case you need more information on
collection points in your
Dispose of the battery pack in an environmentally-friendly manner according
your local
product
regulations.
materials
old waste. Take this product to a collection
can be reused if you
area.
(Environment)
The
dicates
take them
environment.
this.
to a
recycling
the
to
9. Cleaning and
•
Check your
Every effort has been made to ensure high standards of reliability of your
•
Pet Monitor. However, if so
repair it yourself – contact Customer Service for
dog’s
neck area for irritation and wash neck
Care
weekly.
mething does go wrong, please do not try
assist
ance.
to
ENGLISH
36
Disposal of the Device (Environment)
Cle
aning
and Car
e
37
Page 20

10.
/
e
e
Help
11.
Troubleshooting
Noise
•
•
Lost
•
If you forgot your password
Forgot Password to submit your e- mail address. A new password will be
your e-mail address
interference
To avoid background noise or echoes, ensure that there
between your device and the Pet Monitor.
Use of other 2.4 GHz
ovens, may cause interference with
least 5 feet (1.5 meters) away from these types
they appear to be causing in
products, such as Bl
terfer
ence.
ueto
this
product. Keep the Pet Monitor at
®
oth
systems or
of products, or turn them off if
connection
®
Check
the Pet Monitor
network.
your Wi-F
i
settings. If necessary, reconnect your
is
switched ON. Wait a few minutes to connect to the
If you do not remember your
immediately.
is
enough di
microwave
Wi-F
i®. Ensure
password, tap
stance
that
Wi-Fi
sent to
Category
Account
Account
Account
®
Account
Came
ra
Problem Description
Error
I am not able to login
after
registration.
I receive an error message
saying: "Email ID is
registered".
What do I do if I forget
password?
I did not receive a
password although I have
used the
Password" option
When I try to view the
Monitor, I get a prompt fo
Pet Camera
upgrade. What should
do?
"Forgot
firmware
new
.
even
not
my
Pet
r
I
Solution
Please check your user
and
password.
Please ensure that you
registered an account with us.
Tap Create Account to
an
account.
Click on the
on the website
ww
w.hubbleconnected.c
mo
toro
Android™ or iOS
An email will be sent to your
registered email address.
1.
The e-mail might have
sent to your Junk Mail
Please check your
Folder
There might be a delay in
2.
getting your e-mail. Please
wait for a few
refresh your email
Please upgrade your
This takes around 5 minutes.
push
upgrades
to improve Pet Camera feat
"Forgot Password"
la/login/ OR on
.
name
have
crea
http://
om/
your
application.
been
Folder
Junk Ma
minutes
from time to tim
and
acco
unt.
firmware.
ures.
te
link
W
ENGLISH
.
il
38
Help
Troubleshootin
g
39
Page 21

V
Connectivity
I
ssu
Connectivity
I
ssu
Connectivity
I
ssu
Connectivity
I
ssu
40
es
es
es
es
I get a message: We
having
access
proble
ms
ing your Ca
This could be due to
lack of an internet
connection. Please
and try again
I am not able to access
Pet Ca
Even though I
accessing my Pet
mera.
later.
from the same Wi-Fi
network, my Pet Camera is
still shown as
remote. I
only access it for
at a
time.
I foundin
caused by my othe
terference
webcam devices
mera.
wait
am
Camera
®
5 minutes
r
.
are
the
my
can
Please try again in a
1.
minutes. This could be
to an issue with yo
internet
2.
If the problem
connection.
please restart your Pe
Camera to check
the
problem.
Please restart your Wire
3.
Router
.
4.
Rebooting your sm
phone/
smart device coul
also resolve the
Please
within Wi-F
check
ifthePetCamera
®
i
range. If the
on your Pet Camera
slowly, please try to move
few
ur
persis
ts,
t
if this fixe
art
problem.
LED
is fl
ashi
the
due
less
d
ng
Pet Camera closer to the router
®
for better Wi-F
and try
again.
i
conne
ctivit
y
Please check your wireless
router settings. For
there is an option
Isolation on Buffalo
routers. Please disable
option.
ideost
reaming
related to internet
especially if you have 2 or
vi
deo streaming devices that
working through the sa
example,
called Wire
less
brand
thi
s
performance is
bandwidth,
more
are
me
router.
is
s
Features
The sound alert
threshold
is not
Features How many users
General
access
one
What are the
the Pet Camera at
time?
supported
browsers for access
my
PC/
Mac®?
General Which platforms
supported for ac
Pet
Camera?
setting
right.
can
fro
m
are
cess to my
You can adjust Sound Sensitivit
to trigger notifications under
y
the
Pet Camera Settings menu. (See
Section
If you areaccessing
mode, two users
5.3)
in lo
cal
are supported.
If there are more than two users,
all streaming will go through
the
remote server. This allows for
unlimited user access
Pet Camera at one
We recommend
Chrome™ 24 or
to a single
time.
using
Google
above.
However the following browsers
are also supported:
Explorer
Safa
Firefox
or
Minimum
Windows 7*
9.0® or above (for
®
ri
6.0 or above (for Mac)
®
18.0 or above (both
Mac).
requirement:
*Java browser plug-in
Mac OS version
Chrome™
version
Internet Explorer version
Safari version
Java™
version
Firefox version
Adobe Flash Player
Android™ 4.2 iPhone
iOS version
7.0
Internet
PC),
or
PC
needed
10.7
24
9
6
7
18.0
15.0
/iPad
ENGLISH
Tr
oublesh
ooting
Troubleshooting
41
Page 22
f
General
General
42
I do not hearsound when
am a
ccessing a remote
Camera.
What isthe meaning o
"Local Camera" and
"Remote Camera"?
Pet
I
You can tap on the Speakericon
in the video stream screen
hear audio. By default, the audio
is OFF when you are a
remote Pet
When you are accessingyour
Pet Camera from the same
wireless network (Home) in
which it
Camera. When you ar
accessing your Pet
away from your home, it
Remote Camera. You may
using 3G, 4G or 4G LTE or a Wi
Fi ® connection outside of yo
home.
Camera.
is
configured, it
ccessing a
is a
e
Camera
is
to
local
a
be
ur
General
-
What
LED fl
is
the significance
ashi
ng?
of
A flashing LED
following
Slow flashing: 1. Your
Camera
can add the Pet Camera to
account in this mode. Out of
box, the Pet Camera
mode. To reset to Setup
see Section
Slow flashing: 2. The Pet Ca
is either connecting to the router
or has lost the link to the
Please ensure that the
Camera
range.
LED is
connected to the Wi-Fi
network.
is
is in the Wi-Fi
stable: The Pet Camera is
indicates
status:
Pet
in setup mode. You
is in Se
5.8.
Pet
®
®
the
you
the
tup
mode,
mera
router.
si
gna
l
Tr
oublesh
ooting
Troubleshooting
43
ENGLISH
r
Page 23

f
f
V
General
Setting
Setting
44
Up
Up
How do I download
Application for
and iOS devices
While I am adding a
Pet Camera to my ac
I
am not
Camera to
Duringsetupondevices
for Android™ and iOS,
am not able to find my Pet
Camera during the
step and the setup fails.
able to find any Pet
add.
the
Android™
?
new
count,
I
las
t
An
droid™
- Open the
your Android™
- Select
- Type "Hubble for
Petcam"
- The results will show
Hubble for Motorola Petcam
App
- Select to install
iOS
Device:
- Open the App Stor
- Select
- Type "Hubble for
Petcam"
- The results will show
Hubble for Motorola Petcam
App
- Select to install
If you are trying to add a
Camera which
been a
another account, you will
have to reset
reset the Pet Camera,
Section
Please reset the Pet
Setup mode and try again.
reset the Pet Camera,
Section
:
Google Play Store
device
Search
Motorola
it
Search
Motorola
it
has
previously
dded into
5.8.
5.8.
your account
the Pet Camera.
the
SM
e
the
Pet
firs
see
Camera
see
Tr
oublesh
t
to
To
on
or
To
ooting
Settingup
iewing
Came
ra
When the video
the application attempts
reconnect and
in lost sound and
vi
deo
.
When I am in
Mode", the video stops
after 5 minutes. How do
view it for
is cut
this re
choppy
"Remote
longer?
off,
sults
You will need to turn o
to
lock function on your
device to
video/audio feeding.
When you are accessing your
Pet Camera via a
I
different from your
network (over the internet)
video will time-out after
nutes.
mi
You can click on the Pet Camer
again from the
application to start streaming
ag
ain.
If you are accessing
web browser, you can press
Reload
video stream from your
Camera again
ensure continuo
network
home
Android™/iOS
from your
button to start viewing
.
the
smart
us
5
Pet
aut
you
the
the
o
a
Troubleshooting
45
ENGLISH
r
Page 24

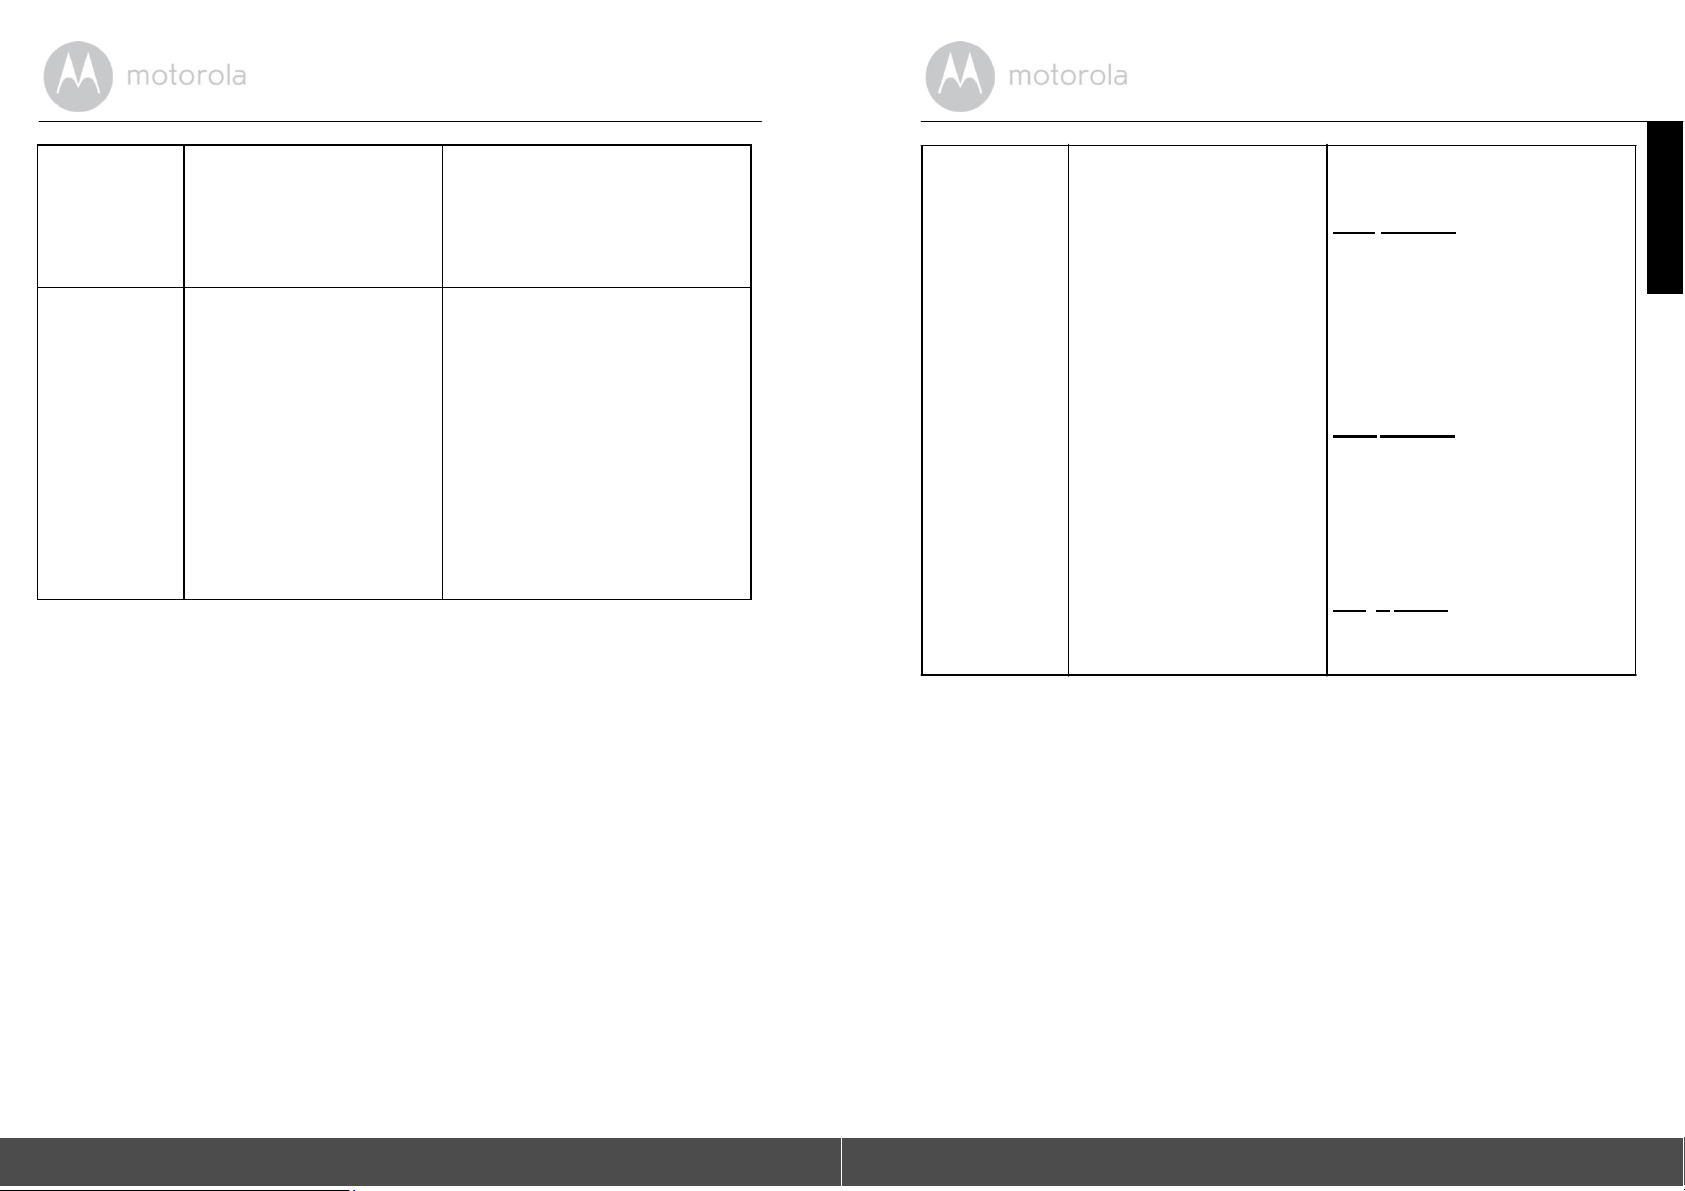
12. General
lf your product is not working
1.
Read this User's Gu
Contact Customer Service: US
2.
and Canada 1-888-
Email:
support@motorola
Information
properly....
ide.
331-3383
monito
rs.co
m
Consumer Products and Accessories Limited Warranty
you for purchasing this
by Binatone El
ectronics International LTD
What Does this
below, BINATONE warrants that
certif
ied accessory
manufactured to be free from
normal consumer
exclusive warranty and is not
Who is
This Warranty extends only to
covered?
Motorola branded product manufactured under
("BI
Warranty Cover?
this
Moto
("Access
usage for the period
ory") sold for use with this product that it
defects in materials
transferable.
the first
consumer purchaser, and is not tr
NATONE
Subject to the
rola branded product
outlined below. This Warranty
").
exclusions
and workmanship un
contained
("Product") or
der
is
ansferable.
Th
ank
license
your
What Other Limitations Are There?
INCLUDING WITHOUT LIMITATION THE IMPLIED WARRANTIES
MERCHANTABILITY AND
LIMITED TO THE DURATION OF THIS LIMITED WARRANTY,
THE REPAIR
WARRANTY
OR REPLACEMENT PROVIDED UNDER THIS
IS
THE EXCLUSIVE REMEDY OF THE CONSUMER, AND IS
PROVIDED IN LIEU OF
NO EVENT SHALL
MOTOROLA OR BINATONE
CONTRACT OR TORT (INCLUDING NEGLIGENCE) FOR DAMAGES
EXCESS OF THE PURCHASE PRICE
OR FOR ANY INDIRECT, INCIDENTAL, SPECIAL OR CONSEQUENTIAL
DA
MAGES
BUSINESS,
OUT OF OR IN
OF ANY KIND, OR LOSS
LOSS
OF INFORMATION OR OTHER FINANCIAL
CONNECTION WITH THE
PRODUCTS OR ACCESSORIES TO THE FULL EXTENT
MAY BE
DISCLAIMED BY LAW.
FITNESS FOR A PARTICULAR PURPOSE, SHALL BE
ALL
OTHER WARRANTIES, EXPRESS OR IMPLIED.
ANY IMPLIED
WARRANTIES,
OF
OTHERWISE
EXPRESS LIMITED
BE LIABLE,
OF
THE PRODUCT OR ACCESSORY,
OF
REVENUE OR PROFITS, LOSS
WHETHER
LOSS
ABILITY OR INABILITY TO USE THE
THESE DAMAGES
IN
IN
IN
OF
ARISING
ENGLISH
Some jurisdictions do not allow the limitation or exclusion of incidental or
consequential damages, or limitation on the length of an implied warranty, so
the above limitations or exclusions may not apply to you. This Warranty gi
you sp
ecific
legal rights, and you may also have other rights that vary from
jurisdiction to
another.
ves
one
What will BINATONE do?
option and within a commercially reasonable time, will at no charge repair
BINATONE or
its authorised distributor at its
or
replace any Products or Accessories that does not conform to this Warranty.
We
may use functionally equivalent
new Products, Accessories or parts.
46
reconditioned/
refurbished/ pre-owned or
General Inf
ormat
ion
General Inf
orm
ation
47
Page 25
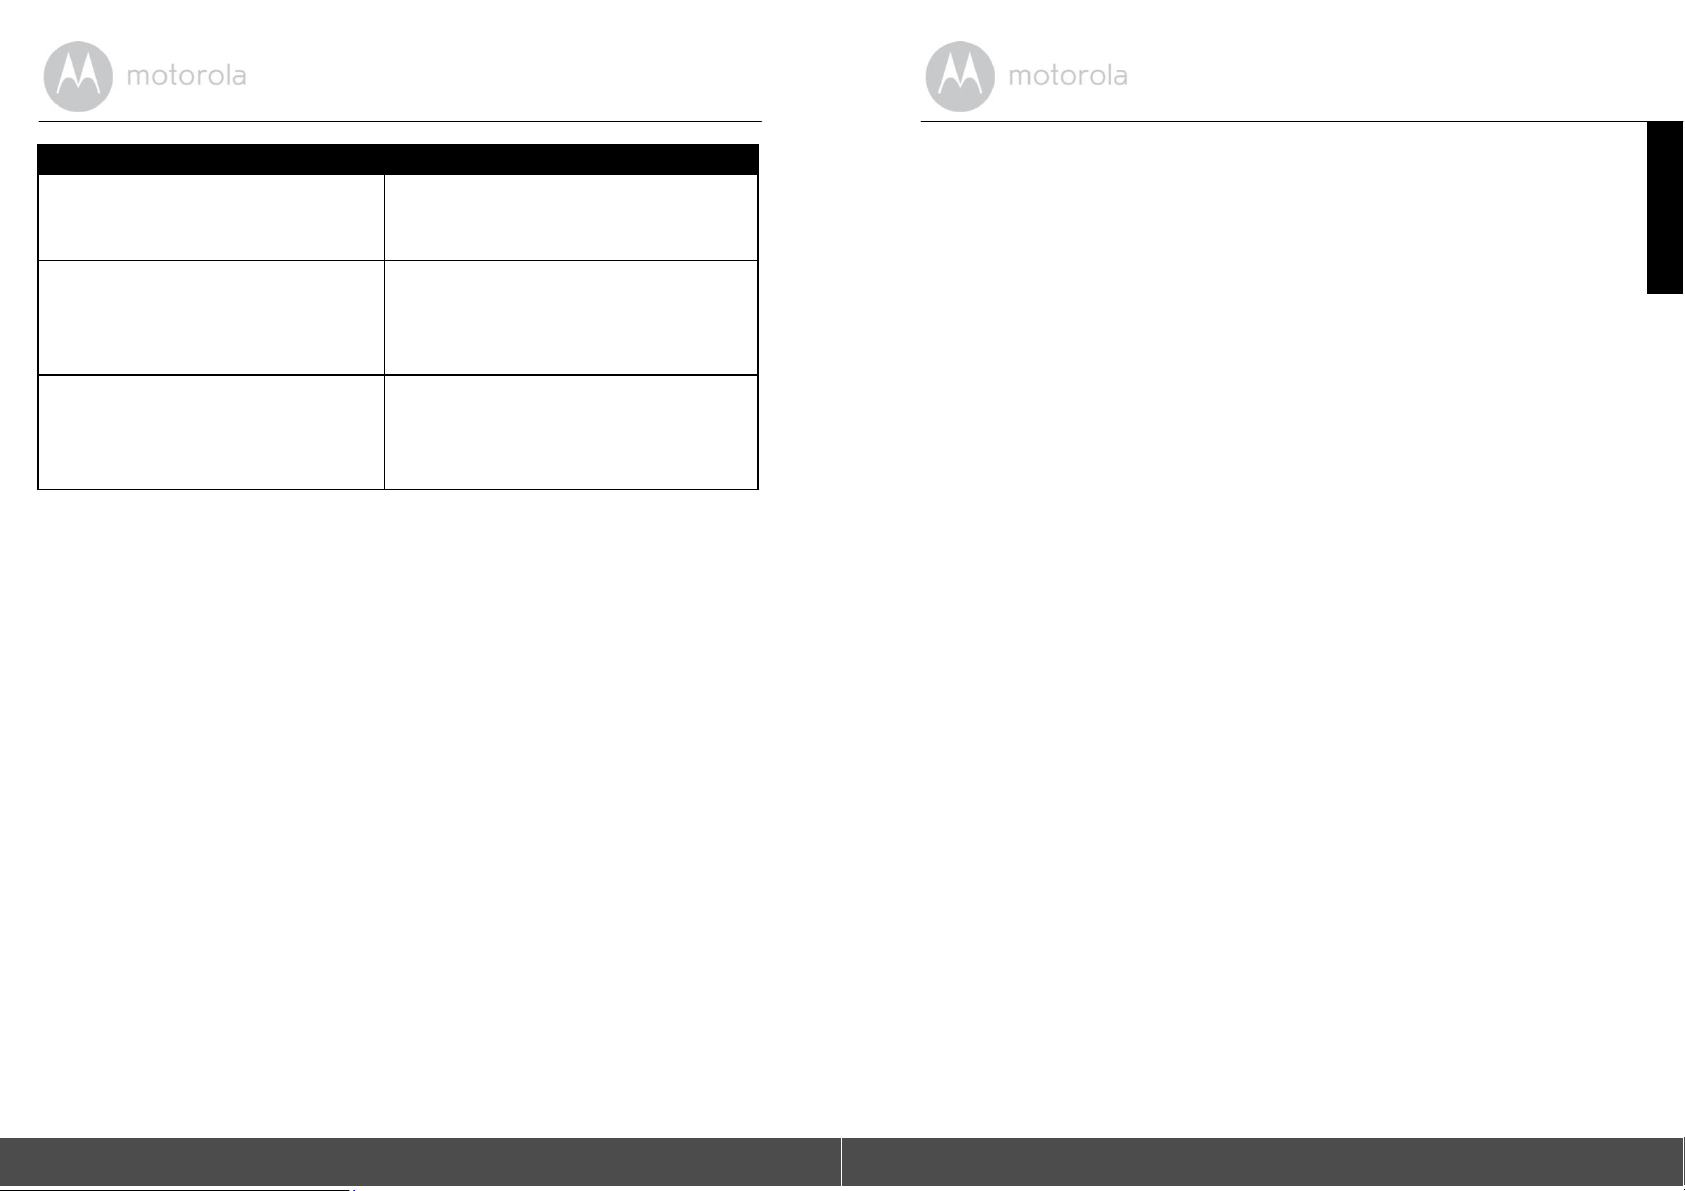
Products
r
Consumer
Covered
Produc
ts
Length of
One (1) yearfrom the date of
Coverage
the
products original purchase by the first
Consumer
Acce
sso
ries
consumer purchaser of the
Ninety (90) days from the date of
accessories original purchase by
first consumer purchaser of
product.
the
the
the
product.
Consumer Products
that are Repaired or
andAc
cessories
Replaced
The balanceofthe
for Ninety (90) days from the da
original warranty
te
o
returned to the consumer, whichever is
longer.
Ex
clusio
ns
Normal Wear and Tear. Periodic maintenance, repair and replacement of part
due to normal wear and tear are excluded from
Batteries. Only batteries whose
fully charged capacity
rated capacity and batteries that leak are covered by this
Abuse & Misuse.
storage,
misuse or abuse, accident or neglect, such as physical damage (cracks,
Defects or damage that result from: (a) improper
coverage.
falls
Warranty.
below 80% of their
operation,
scratches, etc.) to the surface of the product resulting from misuse; (b) contac
with liquid, water, rain, extreme humidity or heavy
perspiration,
sand, dirt or
the
like, extreme heat, or food; (c) use of the Products or Accessories for
commercial purposes or subjecting the Product or
usage or conditions; or (d) other acts which are not the fault of
BINATONE, are excluded from
coverage.
Use of Non-Motorola branded Products and Accessories.
that result from the use of Non-Motorola branded or certified Products
Accessories or other peripheral equipment are excluded from
Unauthorised Service or Modification.
service, testing, adjustment, installation,
modification in any way by so
meone other than
Defects or damages resulting
maintenance, alteration, or
authorized service centers, are excluded from
Accessory to abnorma
MOTOROLA
Defects or damage
coverage.
MOTOROLA,
BINATONE or its
coverage.
l
or
from
s
t
or
Altered Products. Products or Accessories with (a) serial
that have been removed, altered or obliterated; (b) broken
evidence of tampering; (c) mismatched board
nonconforming or
coverage.
non-Motorola
branded housings, or parts,
serial numbers; or
Communication Services. Defects, damages, or the
Accessories due to any communication se
or use with the Products or Accessories
rvice or signal you may subscribe to
is
excluded from
How to Obtain Warranty Service or Other Informat
numbers or date tags
seals or that
(d)
are excluded from
failure of Products
coverage.
ion?
show
or
To obtain service or information, please call:
US and Canada 1-888-
Email:
support@motorola
331-3383
monito
rs.co
m
You will receive instructions on how to ship the Products or Accessories at your
expense and risk,
To obtain service, you must include: (a) the Product or Accessory; (b)
original proof of purchase (receipt) which includes the date, pl
the Product; (c) if a warranty card was included in your box, a
warranty card showing the serial number of the Product; (d) a
description of the problem; and, most importantly; (e) your address an
telephone
number.
These terms and conditions constitute the complete warranty
betw
een you and BINATONE regarding the Products or
by you, and su
representations made in any literature publications or promotional
issued by BINATONE or
of BINATONE, that may have been made in connection with the said
to a BINATONE Authorized Repair
Centre.
completed
written
agreement
Accessories
persede any prior agreement or representations,
representations made by any agent employee or staff
the
ace and seller of
d
purchas
ed
including
materials
purc
hase.
ENGLISH
48
General Inf
ormat
ion
General Inf
orm
ation
49
Page 26

FCC,
WARNING Changes
approved by the party
authority to operate the
NOTE
a Class B digital device, pursuant to Part 15 of the Federal
Commission (FCC)
protection against harmful interference
equipment generates,
installed and used in accordance with the
interference to radio communications. However, there
interference will not occur in a particular installation. If
cause harmful interference to radio or television reception, which can
determined by turning the equipment off and on, the
to correct the interference by one or more of the following measures:
•
•
•
•
device complies with Part 15 of the
following two conditions: (1) this device may not cause harmful inte
and (2) this
ACTA and Industry Canada
or modifications
responsi
ble for compliance could void the user’s
(IC) regulations
to this
equipment not expressly
equipment.
This
equipment
has been tested and found to comply with the limits
Communications
rules. These limits are designed to provide
reas
onable
in a residential installation. This
uses
and can radiate radio frequency energy and, if
instructions, may cause ha
is
no guarantee
this
equipment
rmfu
that
does
be
user is
encouraged to
Reorient or relocate the receiving antenna
Increase the separation between the equipment and re
Connect the equipment into an outlet on a circuit different from that
which the receiver
is
connected.
.
ceiver.
to
Consult the dealer or an experienced radio/TV technician for help. This
FCC
rules.
Operation
is subject to
the
rferen
device must accept any interference received,
including
interference that may cause undesired operation. Privacy of communica
may not be ensured when using this
To ensure safety of users, the
FCC
radio frequency energy that can be safely absorbed by a user or byst
according to the intended usage of the product. This product has been
and found to comply with the
complies with Canadian ICES-003. CAN ICES-3(B
device.
has established criteria for the amount of
FCC
criteria. This Class B digital
)/NMB-
3(B)
appa
ander
tested
ratus
for
not
l
try
ce,
tions
13. Technical Specificat
®
Wi-F
sensor
Lens
LED
Power
i
Adapter
802.11
b/g/n Image
Color CMOS 1M Pixe
f = 2.3mm, F =
5 colors
2.4
Input: 100-240V AC, 50/60Hz,
Output: 5V DC,
1000mA
ions
ls
ENGLISH
300mA
50
General Inf
ormat
ion
Technical Specific
ations
51
Page 27

TocomplywithRFexposurerequirements,aminimum
separationdistanceof20cmmustbemaintainedbetween
theuser’sbodyincludingtheantenna.
Manufactured, distributed or sold by Binatone Electronics International
official licensee for this
trademarks or
and
are used
registered in
Inc. Google Play, Android,
a trademark of the Wi-Fi Alliance. Internet Explorer and Windows
trademarks of the Microsoft group of companies. Firefox
trademark of the Mozilla Foundation. Adobe and Flash are either
trademarks or trad
trademark of Oracle and/or
of their respective owners.
registered trademarks
under license. Apple logo
the U.S. and
US_EN Version
product. MOTOROLA
other countries. App Store is a
and Chrome
emarks of Ad
its affiliates. All
©
4.0
of Motorola Trademark Holdings, LLC.
obe Syst
2015 Motorola Mobility LLC. All rights reserved
and the Stylized
and Safari are trademarks of Apple Inc
are trademarks of Google Inc. Wi-Fi is
ems Incorporated.
other trademarks are the prop
M logo are
service mark of
is a registered
Java is a
LTD.,
Apple
are
registere
register
d
ed
erty
.,
.
 Loading...