

Billy Goat PW30AOV Owner's Manual
Hose
Replacement high pressure
hose to connect the pump
to the spray gun.
P/N 80012618
Nozzle Tips
Replacement quick
connect tips for spray
gun.
P/N 210600
Spray Gun
Replacement spray gun.
P/N 80016529
Wand
Replacement wand for
spray gun.
P/N 80013797
PW30AOV Owner’s Manual
This pressure washer is rated in accordance to the Pressure Washer Manufacturers Association (PWMA) standard
PW101-2010 (Testing and Rating Performance of Pressure Washers).
IMPORTANT- READ CAREFULLY BEFORE USE AND KEEP FOR FUTURE REFERENCE
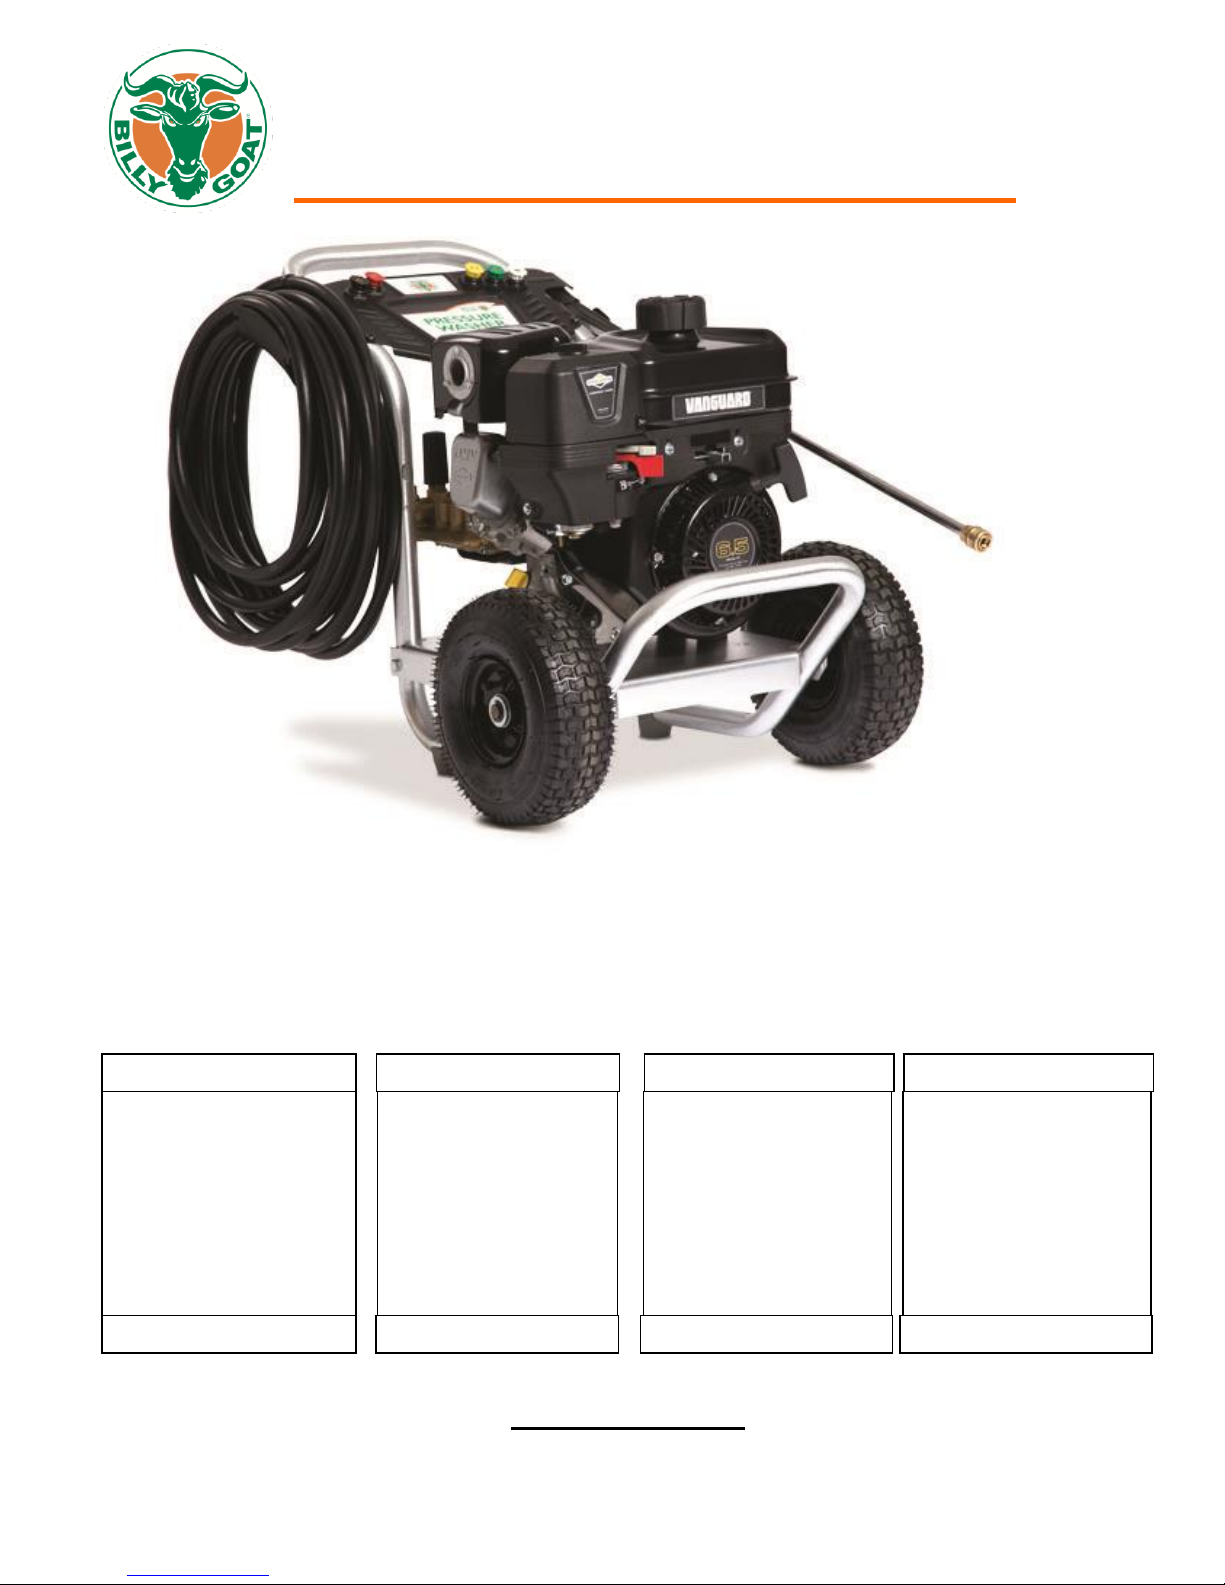
PRESSURE WASHER Owner's Manual
PW30AOV
Beginning Serial #: 021816001
Replacement Parts
Original Instructions
Part No 210500 1 Form No F021816A

PW30AOV Owner’s Manual
2
SPECIFICATIONS AND INTENDED USE 3
INSTRUCTION LABELS 4
SAFETY INFORMATION AND SAFETY INSTRUCTIONS 4-7
PACKING CHECKLIST & ASSEMBLY 8-10
OPERATION 10-13
MAINTENANCE AND TROUBLE SHOOTING 14-16
WARRANTY INFORMATION 16
ILLUSTRATED PARTS & PARTS LIST 17
CONTENTS
Part No 210500 Form No F021816A
PW30AOV Owner’s Manual
3
Engine: cc
205cc
Engine:
VANGUARD
Engine: Fuel Capacity
3.5 qt. (3.3 L)
Engine: Oil Capacity
0.63 qt. (0.6 L)
Total Unit Weight:
88# (40Kg)
Length
40.” (1.3m)
Width
20”( .5m)
Height
23” (.6m)
Max. operating slope
15o
SPECIFICATIONS
PW30AOV
INTENDED USE
EQUIPMENT DESCRIPTION
This pressure washer operates at a maximum of 3,000 PSI (206 BAR) at a flow rate of up to 3.0 gallons (11.3 liters) per minute.
This high quality commercial system features 10 in. (25.4 cm) wheels, Triplex pump with stainless steel pistons, automatic cool
down system, detergent siphoning system, quick connect spray tips, heavy duty 50 ft. (15.2 m) hose, and more.
Every effort has been made to ensure that information in this manual is accurate and current. However, we reserve the right to
change, alter, or otherwise improve the product and this document at any time without prior notice.
The Emission Control System for this pressure washer is warranted for standards set by the Environmental Protection Agency
and the California Air Resources Board.
DO NOT OPERATE IF EXCESSIVE VIBRATION OCCURS! If excessive vibration occurs, shut engine
off immediately and check for damage or loose engine
HANDLING & TRANSPORTING
Always use two or more people to lift these machines. Lift holding on either side of the machine, using the handles and the
frame. Secure in place during transportation. See specifications for unit weight.
For safety use gloves when lifting.
Never lift any machine while the engine is running.
Part No 210500 Form No F021816A
PW30AOV Owner’s Manual
4
WARNING Chemical Burn Hazard.
The safety alert symbol indicates a potential personal injury hazard. A signal word (DANGER, WARNING, or CAUTION) is
used with the alert symbol to designate a degree or level of hazard seriousness. A safety symbol may be used to represent the
type of hazard. The signal word NOTE is used to address practices not related to personal injury.
DANGER indicates a hazard which, if not avoided, will result in death or serious injury.
WARNING indicates a hazard which, if not avoided, could result in death or serious injury.
CAUTION indicates a hazard which, if not avoided, could result in minor or moderate injury.
NOTE address practices not related to personal injury.
WARNING The engine exhaust from this product contains chemicals known to the State of California to cause cancer, birth
defects, or other reproductive harm.
WARNING This product contains lead and lead compounds, known to the State of California to cause birth defects or
other reproductive harm. Wash your hands after handling this product.
WARNING POISONOUS GAS HAZARD
Engine exhaust contains carbon monoxide, a poisonous gas that could kill you in minutes. You CANNOT smell it, see it, or
taste it. Even if you do not smell exhaust fumes, you could still be exposed to carbon monoxide gas. Some chemicals or
detergents could be harmful if inhaled or ingested, resulting in death, serious injury, nausea, fainting or poisoning.
•
Operate this product ONLY outside far away from windows, doors and vents to reduce the risk of carbon
monoxide gas from accumulating and potentially being drawn towards occupied spaces.
•
Install battery-operated carbon monoxide alarms or plug-in carbon monoxide alarms with battery back-up
according to the manufacturer’s instructions. Smoke alarms cannot detect carbon monoxide gas.
•
DO NOT run this product inside homes, garages, basements, crawlspaces, sheds, or other partiallyenclosed spaces even if using fans or opening doors and windows for ventilation. Carbon monoxide
can quickly build up in these spaces and can linger for hours, even after this product has shut off.
•
ALWAYS place this product downwind and point the engine exhaust away from occupied spaces.
If you start to feel sick, dizzy, or weak while using this product, get to fresh air RIGHT AWAY. See a doctor.
You may have carbon monoxide poisoning.
•
Use a respirator or mask whenever there is a chance that vapors may be inhaled when using chemicals.
Read all instructions with mask so you are certain the mask will provide the necessary protection against
inhaling harmful vapors when using chemicals.
WARNING Starter cord kickback (rapid retraction) will pull hand and arm toward engine faster than you can let go which could
cause broken bones, fractures, bruises, or sprains resulting in serious injury.
•
NEVER pull starter cord without first relieving spray gun pressure.
•
When starting engine, pull cord slowly until resistance is felt and then pull rapidly to avoid kickback.
•
After each starting attempt, where engine fails to run, always point spray gun in safe direction, press red button and squeeze
spray gun trigger to release high pressure.
•
Firmly grasp spray gun with both hands when using high pressure spray to avoid injury when spray gun kicks back.
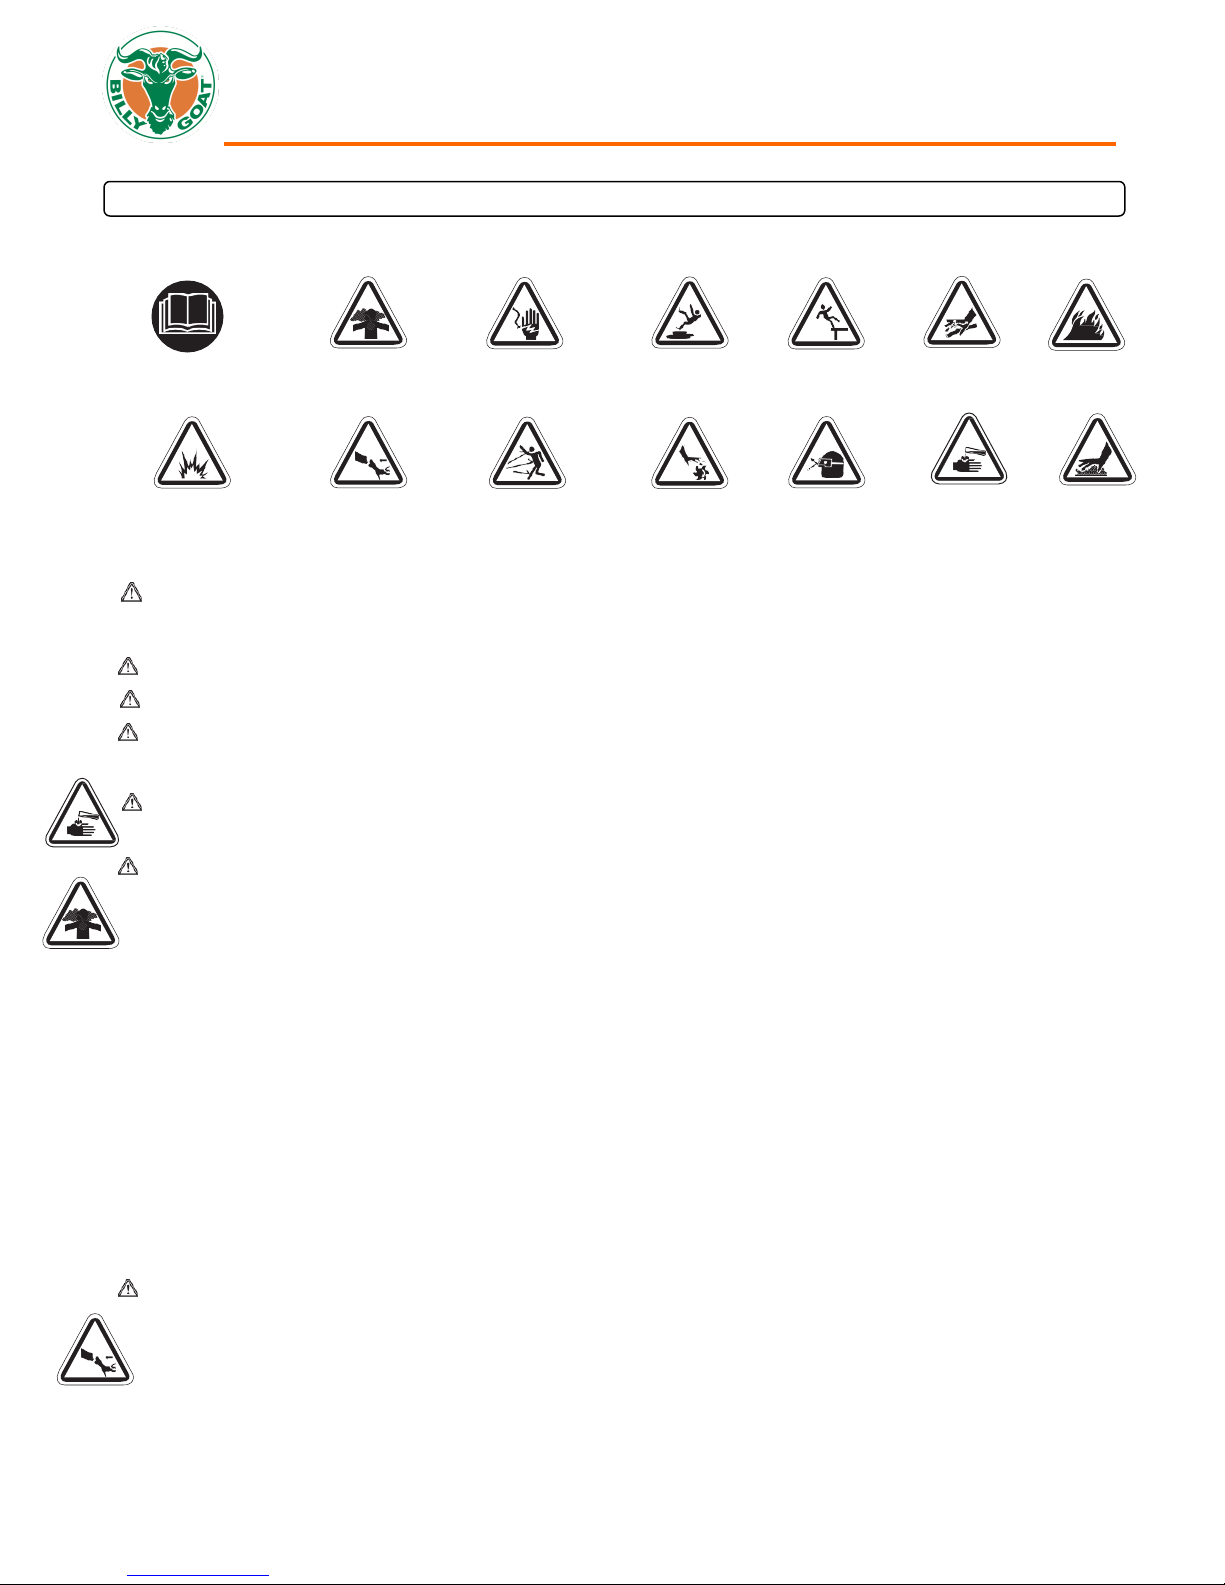
SAFETY SYMBOLS AND SAFETY INSTRUCTIONS
SAFETY SYMBOLS
Operator’s manual Toxic Fumes Electrical shock Slippery Surface Fall Fluid injection Fire
Explosion Kickback Projectile Moving Parts Flying Objects Chemical Burn Hot Surface
SAFETY INSTRUCTIONS
Part No 210500 Form No F021816A
PW30AOV Owner’s Manual
5
WARNING Exhaust heat / gases could ignite combustibles, structures or damage fuel tank causing a fire, resulting in death or
serious injury.
Contact with muffler area could cause burns resulting in serious injury.
•
DO NOT touch hot parts and AVOID hot exhaust gases.
•
Allow equipment to cool before touching.
•
Keep at least 5 ft. (1.5 m) of clearance on all sides of pressure washer including overhead.
•
It is a violation of California Public Resource Code, Section 4442, to use or operate the engine on any forest- covered, brushcovered, or grass-covered land unless the exhaust system is equipped with a spark arrester, as defined in Section 4442,
maintained in effective working order. Other states or federal jurisdictions may have similar laws.
Contact the original equipment manufacturer, retailer, or dealer to obtain a spark arrester designed for the exhaust system
installed on this engine.
•
Replacement parts must be the same and installed in the same position as the original parts.
WARNING Fuel and its vapors are extremely flammable and explosive which could cause burns, fire or explosion resulting
in death or serious injury.
WHEN ADDING OR DRAINING FUEL
•
Turn pressure washer engine OFF and let it cool at least 2 minutes before removing fuel cap. Loosen cap slowly to relieve
pressure in tank.
•
Fill or drain fuel tank outdoors.
•
DO NOT overfill tank. Allow space for fuel expansion.
•
If fuel spills, wait until it evaporates before starting engine.
•
Keep fuel away from sparks, open flames, pilot lights, heat, and other ignition sources.
•
Check fuel lines, tank, cap and fittings frequently for cracks or leaks. Replace if necessary.
•
DO NOT light a cigarette or smoke.
WHEN STARTING EQUIPMENT
•
Ensure spark plug, muffler, fuel cap, and air cleaner are in place.
•
DO NOT crank engine with spark plug removed.
WHEN OPERATING EQUIPMENT
•
DO NOT operate this product inside any building, carport, porch, mobile equipment, marine applications, or enclosure.
•
DO NOT tip engine or equipment at angle which causes fuel to spill.
•
DO NOT spray flammable liquids.
WHEN TRANSPORTING, MOVING OR REPAIRING EQUIPMENT
•
Transport/move/repair with fuel tank EMPTY or with fuel shutoff valve OFF (0).
•
DO NOT tip engine or equipment at angle which causes fuel to spill.
•
Disconnect spark plug wire.
WHEN STORING FUEL OR EQUIPMENT WITH FUEL IN TANK
•
Store away from furnaces, stoves, water heaters, clothes dryers, or other appliances that have pilot light or other ignition
source because they could ignite fuel vapors.
WARNING The engine exhaust from this product contains chemicals known to the State of California to cause cancer, birth
defects, or other reproductive harm.
WARNING This product contains lead and lead compounds, known to the State of California to cause birth defects or other
reproductive harm. Wash your hands after handling this product.
SAFETY INSTRUCTIONS CONTINUED
WARNING Use of pressure washer could create puddles and slippery surfaces causing you to fall resulting in death or serious
injury. Kickback from spray gun could cause you to fall resulting in death or serious injury.
•
Operate pressure washer from a stable surface.
•
The cleaning area should have adequate slopes and drainage to reduce the possibility of a fall due to slippery surfaces.
•
Be extremely careful if you must use the pressure washer from a ladder, scaffolding, or any other similar location.
•
Firmly grasp spray gun with both hands when using high pressure spray to avoid injury when spray gun kicks back.
Part No 210500 Form No F021816A
PW30AOV Owner’s Manual
6
SAFETY INSTRUCTIONS CONTINUED
WARNING Risk of electrocution.
Contact with power source could cause electric shock or burn resulting in death or serious injury.
•
NEVER spray near power source.
WARNING Risk of eye or bodily injury.
Spray could splash back or propel objects resulting in serious injury.
•
Always wear indirect vented (chemical splash) safety goggles marked to comply with ANSI Z87.1 when using or in vicinity of
this equipment.
•
NEVER substitute safety glasses or dry-condition goggles for indirect vented safety goggles.
•
Always wear protective clothing such as a long-sleeved shirt, long pants and close-toed shoes.
•
NEVER operate pressure washer when barefoot or wearing sandals or shorts.
CAUTION
Excessively high operating speeds could result in minor injury.
Excessively low speeds impose a heavy load.
•
DO NOT tamper with governor spring, links or other parts to increase engine speed. Pressure washer supplies
correct rated pressure and flow when running at governed speed.
•
DO NOT modify pressure washer in any way.
NOTE: High pressure spray could damage fragile items including glass.
•
DO NOT point spray gun at glass when using red (0°) spray tip.
•
NEVER aim spray gun at plants.
WARNING The high pressure stream of water that this equipment produces could cut through skin and its underlying
tissues, resulting in serious injury and possible amputation.
Spray gun traps high water pressure, even when engine is stopped and water is disconnected, which could result in serious
injury.
•
If cut by fluid, call physician immediately. DO NOT treat as a simple cut.
•
DO NOT allow CHILDREN to operate pressure washer.
•
NEVER repair high pressure hose. Replace it.
•
NEVER repair leaking connections with sealant of any kind. Replace o-ring or seal.
•
NEVER connect high pressure hose to nozzle extension.
•
Keep high pressure hose connected to pump and spray gun while system is pressurized.
•
ALWAYS point spray gun in safe direction, press red button and squeeze spray gun trigger to release high pressure,
every time you stop engine.
•
NEVER aim spray gun at people, animals, or plants.
•
DO NOT secure spray gun in open position.
•
DO NOT leave spray gun unattended while machine is running.
•
NEVER use a spray gun which does not have a trigger lock or trigger guard in place and in working order.
•
Always be certain spray gun, nozzles and accessories are correctly attached.
WARNING Unintentional sparking could cause fire or electric shock resulting in death or serious injury.
WHEN ADJUSTING OR MAKING REPAIRS TO YOUR PRESSURE WASHER
•
Disconnect the spark plug wire from the spark plug and place the wire where it cannot contact spark plug.
WHEN TESTING FOR ENGINE SPARK
•
Use approved spark plug tester.
•
DO NOT check for spark with spark plug removed.
Part No 210500 Form No F021816A
PW30AOV Owner’s Manual
7
Read entire operator’s manual before you attempt to assemble or operate your new pressure washer.
TAKE CAUTION when removing the unit from the box.
Boxing Parts
Checklist
Owner’s Manual
P/N-210500
High Pressure
Hose P/N- 80012618
Spray Gun P/N-
80016529
Wand P/N-
80013797
Oil Pouch P/N-
317999
Engine Manual Per
Model
Vanguard
PARTS BAG & LITERATURE ASSY
Warranty card P/N- 400972, Owner’s Manual P/N-210500, Quick Setup Literature P/N-210501
NOTE: Improper treatment of pressure washer could damage it and shorten its life.
If you have questions about intended use, ask dealer or contact qualified service center.
NEVER operate units with broken or missing parts, or without protective housing or covers.
DO NOT by-pass any safety device on this machine.
•
DO NOT tamper with governed speed.
•
DO NOT operate pressure washer above rated pressure
•
DO NOT modify pressure washer in any way.
Before starting pressure washer in cold weather, check all parts of the equipment to be sure ice has not formed
there.
NEVER move machine by pulling on hoses. Use handle provided on unit.
•
This equipment is designed to be used with Billy Goat Industries authorized parts ONLY. If equipment is used with parts that
DO NOT comply with minimum specifications, user assumes all risks and liabilities
WARNING Starter and other rotating parts could entangle hands, hair, clothing, or accessories resulting in serious injury.
•
NEVER operate pressure washer without protective housing or covers.
•
DO NOT wear loose clothing, jewelry or anything that could be caught in the starter or other rotating parts.
•
Tie up long hair and remove jewelry.
SAFETY INSTRUCTIONS CONTINUED
PACKING CHECKLIST
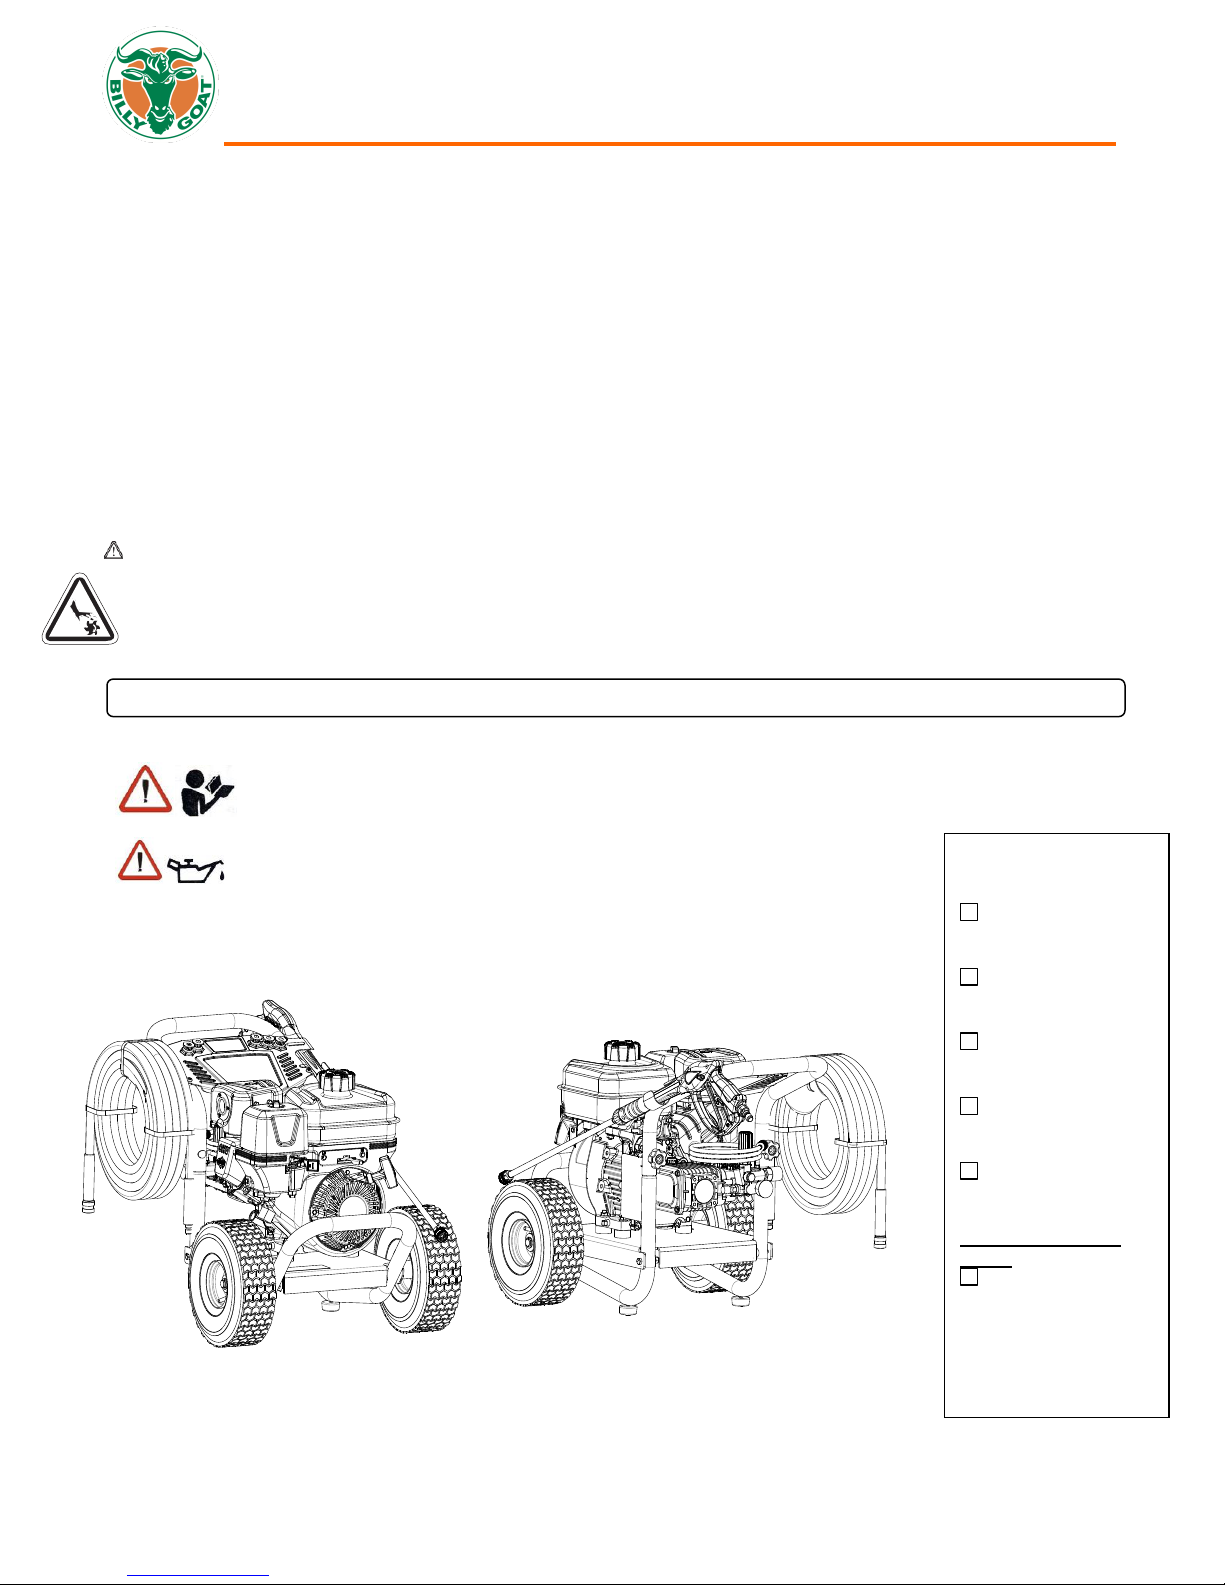
Your Billy Goat pressure washer is shipped from the factory in one carton, final assembly will be required before use.
PUT OIL IN ENGINE BEFORE STARTING
Part No 210500 Form No F021816A
PW30AOV Owner’s Manual
8
1. Verify oil dipstick (A) has been installed into pump. (See Fig. 1)
2. Place handle (B) onto handle supports (C) connected to main unit. Make
sure holes in handle align with holes on handle supports. (See Fig. 2)
3. Insert handle carriage bolts (D) through holes from inside of unit and attach a
plastic knob (E) from outside of unit. Tighten by hand. (See Fig. 3 next page)
4. Add oil to engine crankcase.
5. Add fuel to fuel tank.
6. Connect high pressure hose to spray gun and pump (See Lubricating O-
Rings Section).
7. Connect water supply to pump.
8. Attach nozzle extension to spray gun (See Lubricating O-Rings Section).
9. Select/attach quick connect spray tip to nozzle extension.
Fig. 1
Fig. 2
Fig. 3
ASSEMBLY
ASSEMBLY CONTINUED
LUBRICATE O-RINGS
LUBRICATING O-RINGS
Lubrication of o-rings is extremely important for installation and operation. The use of a lubricant (petroleum or synthetic grease)
during assembly helps seat o-rings properly and provides an improved seal. It also helps protect the o-ring from damage by
abrasion, pinching or cutting and extends the life of the o -ring.
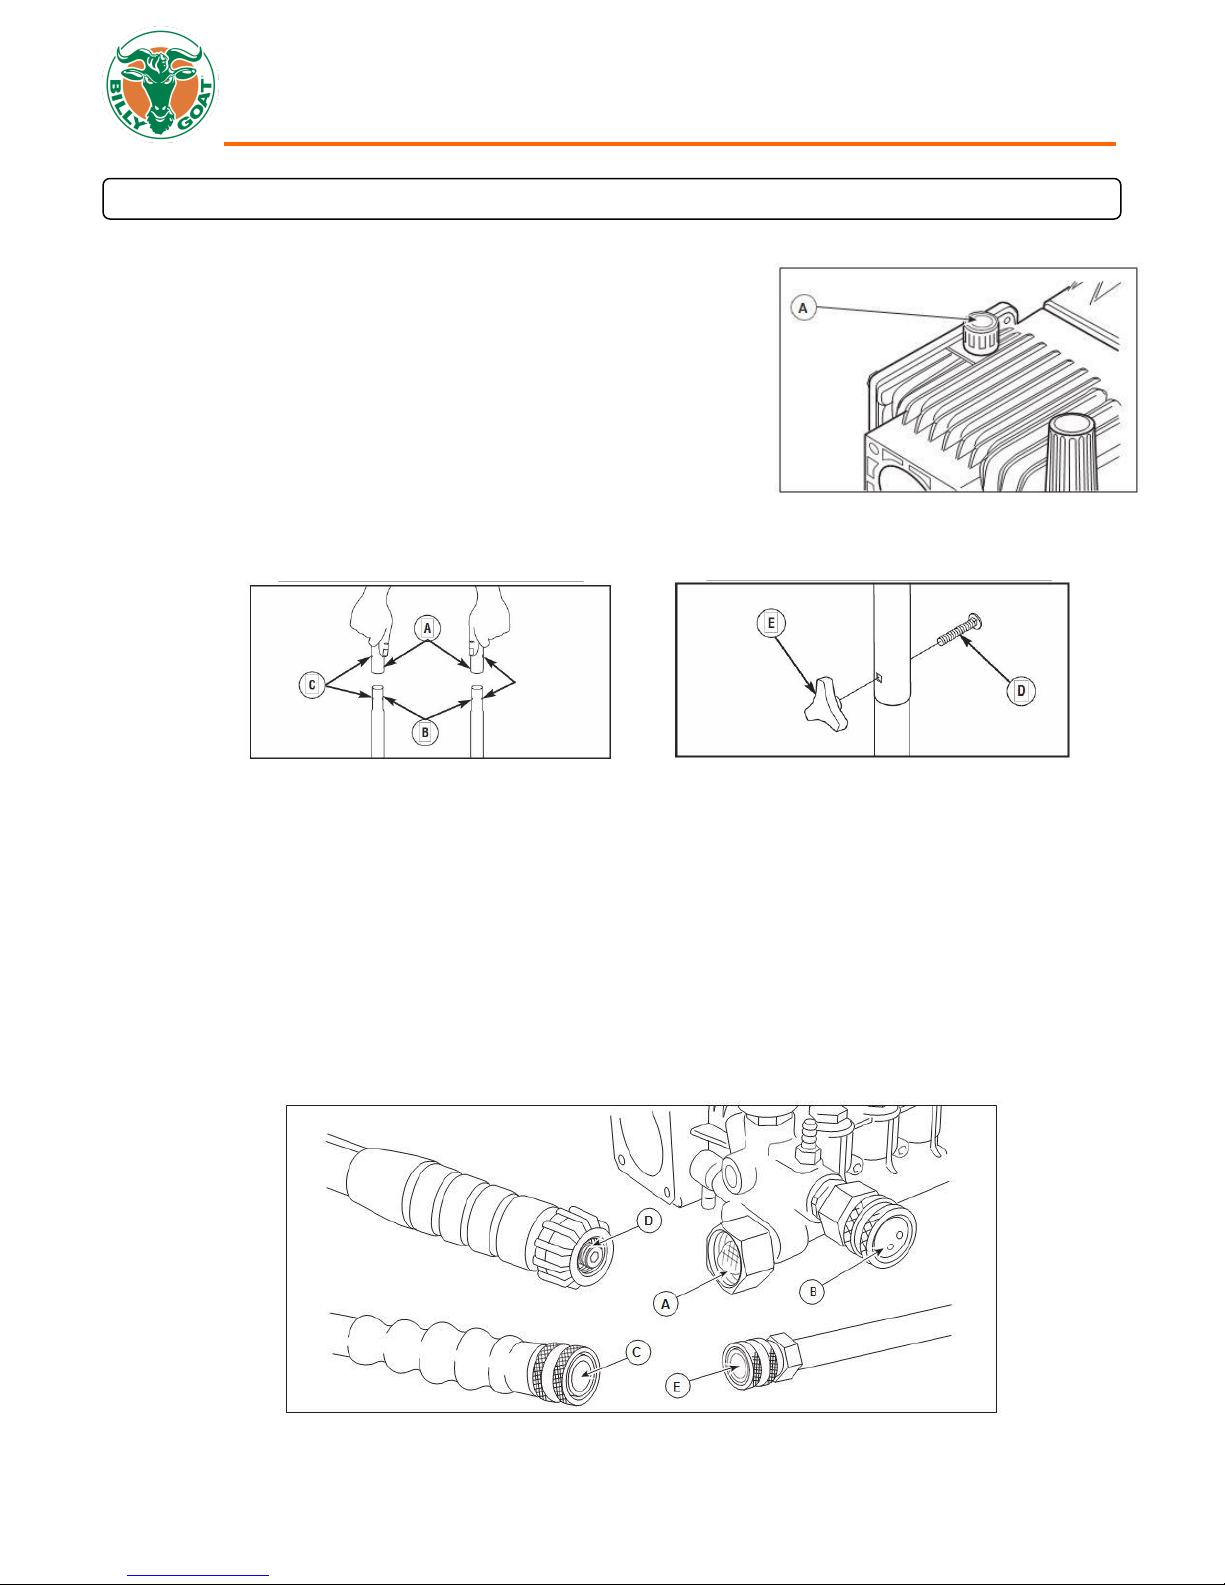
NOTE: ALWAYS apply a small amount of lubricant on o-rings prior to assembling the garden hose to the pump inlet (A),
high pressure hose to pump outlet (B), high pressure hose (C), spray gun (D), and nozzle extension (E).
Lubricate all connections shown below (Fig. 5), following these instructions:
1. Inspect and clean connecting surfaces prior to lubrication and assembly.
2. Use lubricants sparingly during assembly; a light film is all that is required.
3. Use a small brush or cotton swab to apply grease directly to o-rings where they are not accessible (QC fitting, M22 fitting).
Part No 210500 Form No F021816A
PW30AOV Owner’s Manual
9
Fig. 5
NOTE: DO NOT run the pump without the water supply connected and turned on. Damage to
equipment resulting from failure to follow this instruction will void warranty.
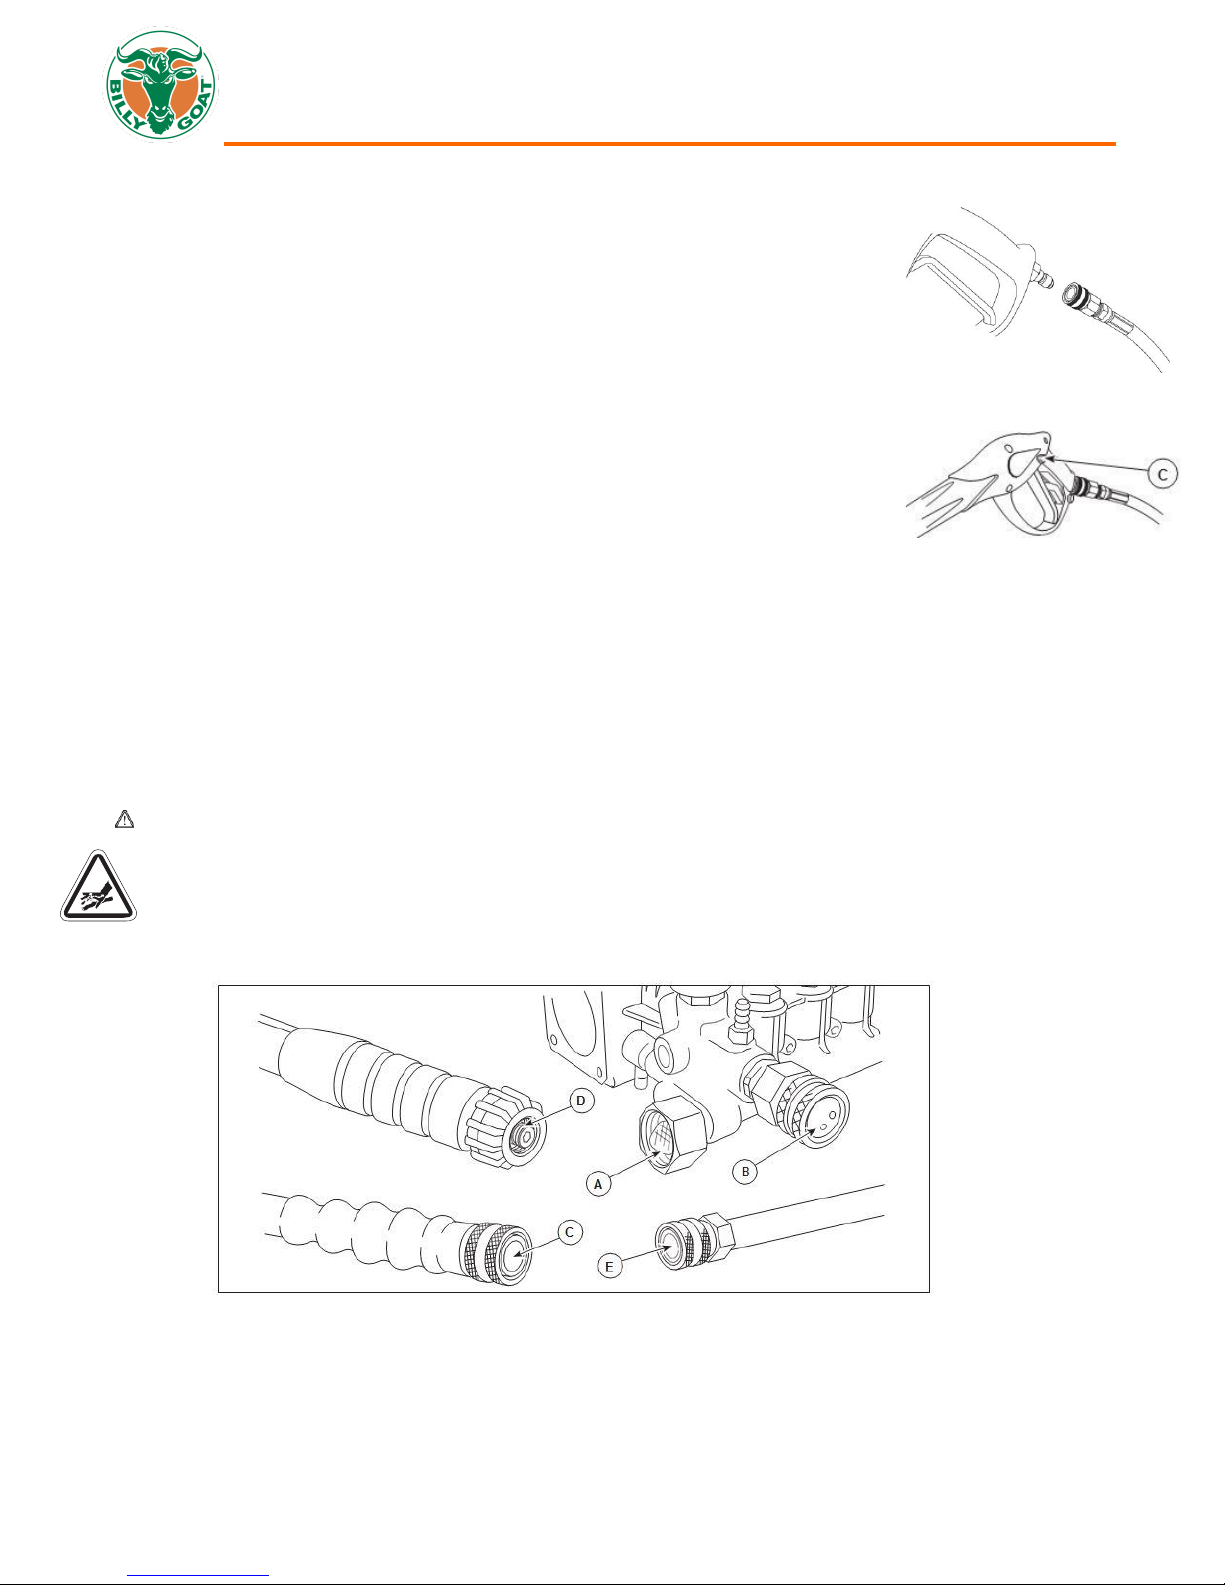
1. Uncoil high pressure hose and attach quick connect end of hose to base of spray gun. Pull
down on collar of quick connect, slide onto spray gun and let go of collar. Tug on hose to
be sure of tight connection.
2. Similarly, attach other end of high pressure hose to high pressure outlet (B) on pump (See
Fig. 5). Pull down on collar of quick connect, slide onto pump and let go of collar. Pull on
hose to be sure of tight connection.
3. Before connecting garden hose to water inlet, inspect inlet screen (A) (See Fig. 5). Clean
screen if it contains debris or have it replaced if damaged. DO NOT run pressure washer if
inlet screen is damaged.
4. Run water through your garden hose for 30 seconds to clean out any debris.
5. Connect the garden hose (not to exceed 50 ft. (15 m) in length) to the water inlet. Tighten
by hand.
6. Turn ON the water, press red button (C) on the gun and squeeze the trigger to purge the
pump system of air and impurities. (See Fig. 7)
Fig. 6
Fig. 7
Connect Hose and Water Supply to Pump
NOTE: Using a One Way Valve (vacuum breaker or check valve) at pump inlet could cause pump or inlet connector
damage.
NOTE: DO NOT siphon standing water for the water supply. Use ONLY cold water (less than 100°F (38°C)).
•
There MUST be at least 10 ft. (3 m) of unrestricted garden hose between the pressure washer inlet and any
device, such as a vacuum breaker or check valve.
•
Damage to equipment resulting from failure to follow this instruction will void warranty.
WARNING The high pressure stream of water that this equipment produces could cut through skin and its underlying tissues,
resulting in serious injury and possible amputation.
NEVER connect high pressure hose to nozzle extension.
Keep high pressure hose connected to pump and spray gun while system is pressurized.
Always be certain spray gun, nozzles and accessories are correctly attached
Part No 210500 Form No F021816A
PW30AOV Owner’s Manual
10
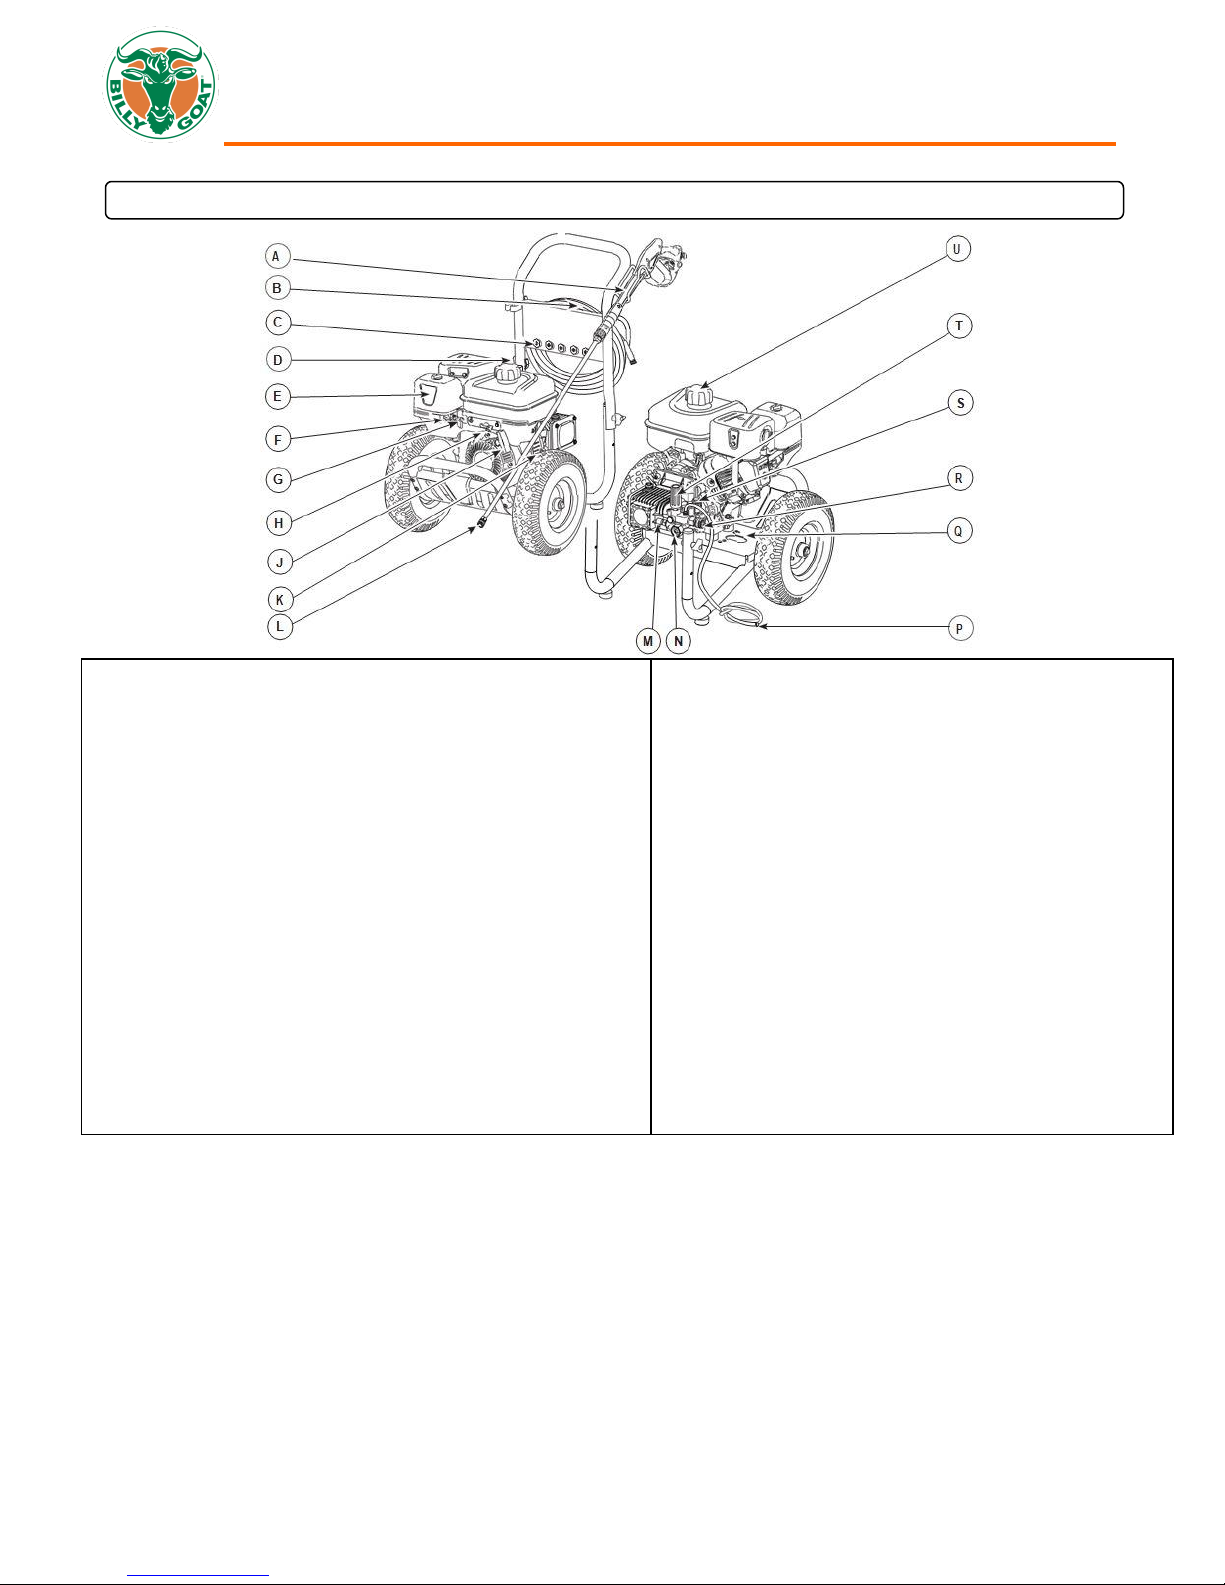
A - Spray Gun — Controls the application of water onto cleaning
surface with trigger device. Includes trigger lock.
B - High Pressure Hose — Connect one end to water pump and
the other end to spray gun.
C - Spray Tips — Detergent, 0°, 15°, 25° and 40°: for various
high pressure cleaning applications.
D - Warning/Operating Instructions Tag — Identifies hazards
and proper procedure to start/stop pressure washer.
E - Air Filter — Protects engine by filtering dust and debris out
of intake air.
F - Choke Lever — Prepares a cold engine for starting.
G - Fuel Valve — Used to turn fuel supply on/off to engine.
H - Throttle Lever — Sets engine in starting mode for recoil
starter and stops a running engine.
J - Recoil Starter — Used for starting the engine manually.
K - Oil Fill/Dipstick — Check and add engine oil here.
L - Nozzle Extension with Quick Connect — Allows you to
switch between five different spray tips
M - Automatic Cool Down System — Cycles water through
pump when water reaches 125°-155°F (51°-68°C). Warm
water will discharge from pump onto ground. This system
prevents internal pump damage.
N - Water Inlet — Connection for garden hose.
P - Detergent Siphoning Tube/Filter — Use to siphon
pressure washer safe detergent into the low
pressure
stream.
Q - Identification Label — Provides model and serial
number of pressure washer. Please have these readily
available if calling for assistance.
R - High Pressure Outlet — Connection for high pressure
hose.
S - Pump — Develops high pressure.
T - Pressure Control Knob — Varies pressure of high
pressure spray.
U - Fuel Tank — Fill tank with regular unleaded fuel. Always
leave room for fuel expansion.
OPERATION
CONTROLS
Automatic Cool Down System (Thermal Relief)
If you run the engine on your pressure washer for 3‑5 minutes without pressing the trigger on the spray gun, circulating water in
the pump can reach temperatures above 125°-155°F (51°-68°C). The system engages to cool the pump by discharging the
warm water onto the ground.
Part No 210500 Form No F021816A

PW30AOV Owner’s Manual
11
STARTING ENGINE
See engine manufacturer’s instructions for type and amount of oil and gasoline used.
Engine must be level when checking and filling oil and gasoline.
1. Place pressure washer near an outside water source capable of supplying water
at a flow rate greater than 3.5 gallons (13.25 liters) per minute and no less than
20 PSI (1.4 BAR) at pressure washer end of garden hose. DO NOT siphon
supply water.
2. Check that high pressure hose is tightly connected to spray gun
and pump. See Assembly section.
3. Make sure unit is in a level position.
4. Connect garden hose to water inlet on pressure washer pump.
NOTE: DO NOT run the pump without the water supply connected and turned on.
Damage to equipment resulting from failure to follow this instruction will void
warranty.
5. Turn ON the water, press red button on spray gun and squeeze the trigger to
purge the pump system of air and impurities.
Attach nozzle extension to spray gun. Tighten by hand. (See Fig. 8)
6.
Choose spray tip you want to use, pull back on collar of nozzle extension, insert
spray tip and release collar. Tug on spray tip to make sure it is securely in place.
See How to Use Spray Tips. (See Fig. 9)
7.
Move fuel shut-off valve (A) to ON (I) position. (See Fig. 10)
8.
Move throttle control lever (B) to FAST position, shown on engine as a rabbit.
9.
Move choke lever (C) to CHOKE position.
NOTE: For a warm engine, be sure the choke lever is in the RUN position.
NOTE: Before starting the pressure washer, be sure you are wearing safety
goggles as described below.
10.
When starting engine, position yourself as recommended in Fig. 11, grasp
starter grip handle and pull slowly until you feel some resistance. Then pull
rapidly to start engine.
11.
Return starter grip handle slowly. DO NOT let rope “snap back” against starter.
12.
When engine starts, slowly move choke lever to RUN position, as engine
warms. If engine falters, move choke lever to CHOKE position, then to RUN
position.
13.
After each starting attempt, where engine fails to run, always point gun in safe
direction, press red button and squeeze spray gun trigger to release high
pressure. Move choke lever to RUN position, and repeat steps 11 through 13.
14.
If engine fails to start after six pulls, move choke lever to RUN position, and
repeat steps 11 through 13.
NOTE: Always keep the throttle lever in the FAST position when operating the
pressure washer.
If your unit fails to start, check trouble shooting section in operator’s manual and also see engine
manual. NOTE: Honda engines are equipped with a low oil sensor to prevent engine damage. When it senses a low oil
condition (i.e. unit is operating or sitting on a steep slope) the engine shuts down. The low oil condition must be corrected
before the engine can be restarted. See the engine owner’s manual for more information.
Fig. 11
Fig. 10
Fig. 9
Fig. 8
Part No 210500 Form No F021816A
 Loading...