

Billy Goat OS901SPS, OS901SPH Owner's Manual

1
OS901SP Owner’s Manual
A convenient way to
enclose the seed box
P/N 351600
Allows the user to ride
behind the unit and
decrease fatigue from
walking
P/N 351601
Use to replace worn or
damaged reels
P/N 351603
Use to replace worn or
damaged blades on the
reel
P/N 351610
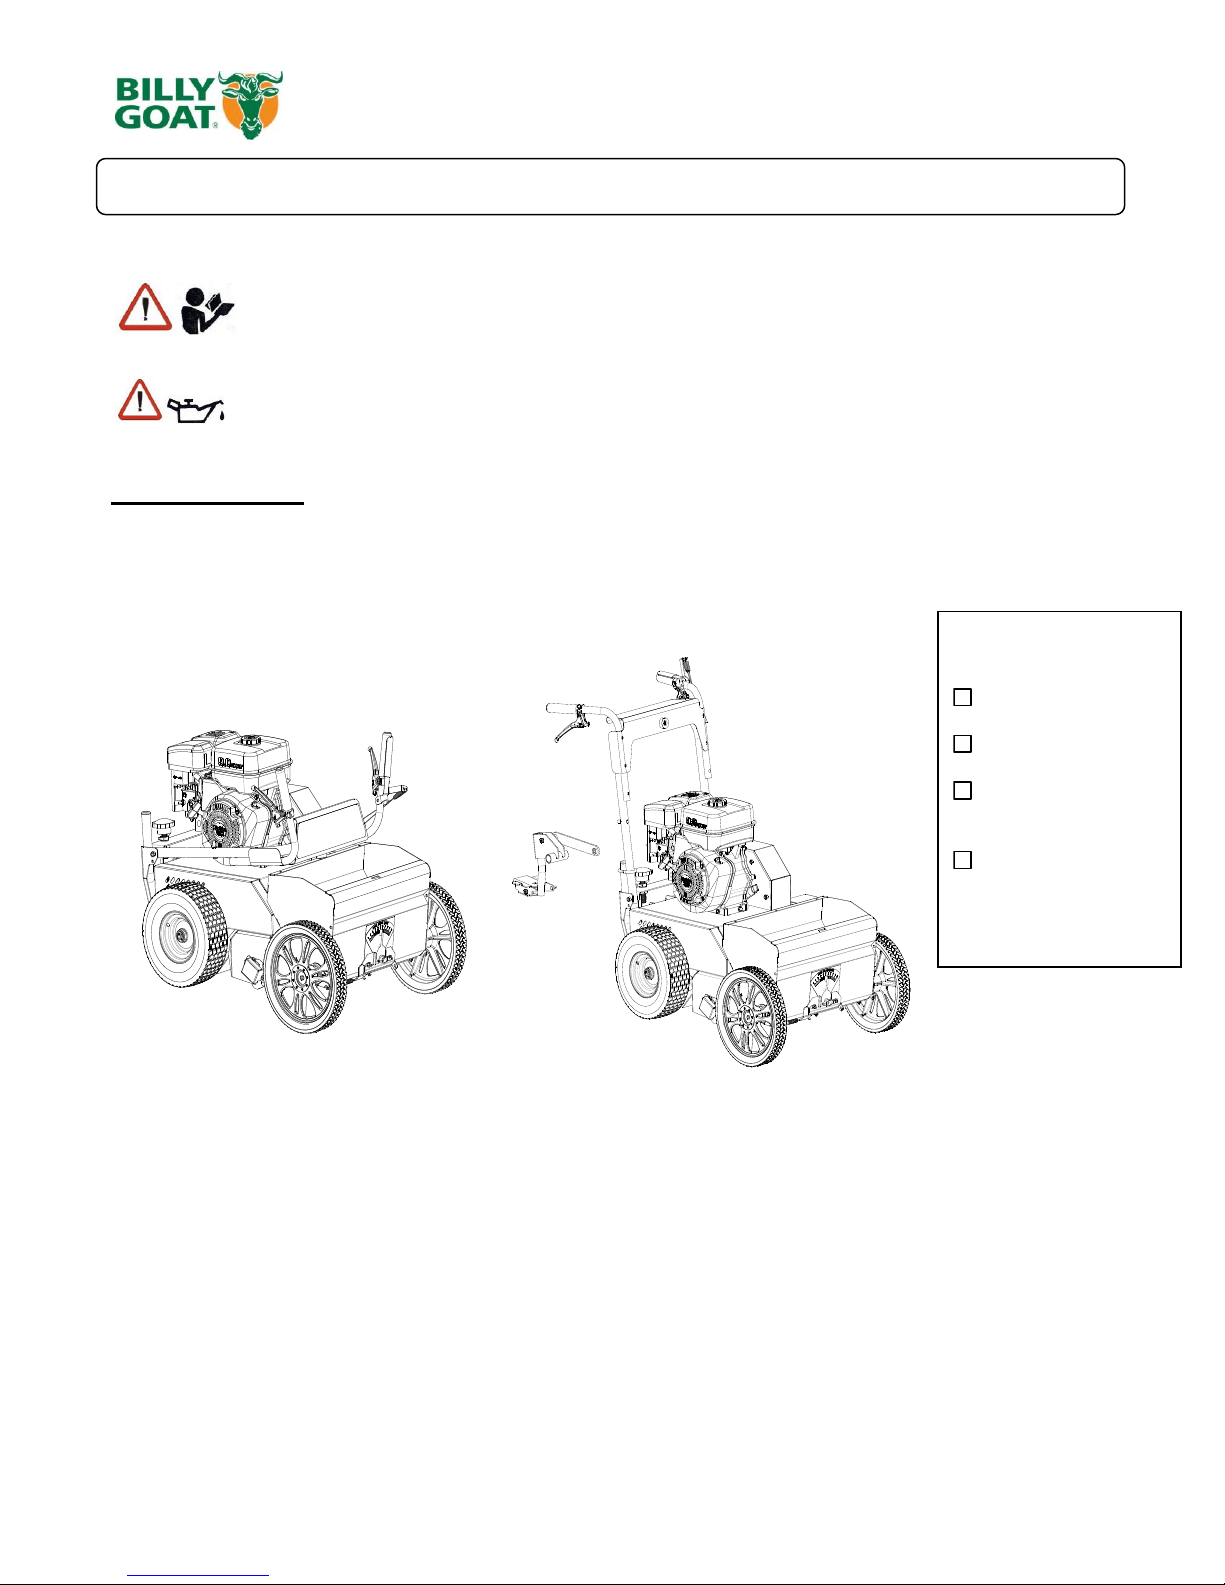
BILLY GOAT SELF PROPELLED OVERSEEDER
Accessories Replacement Parts
Part No 351520 Form No F022513A
Unit shown with Seed Box Lid, sold separately
OS901SPS, OS901SPH
Owner's Manual

2
OS901SP Owner’s Manual
SPECIFICATIONS AND SOUND/VIBRATION ___ 3
INSTRUCTION LABELS 4
PACKING CHECKLIST_ __________5
ASSEMBLY ___________________________________________________________6
OPERATION 7-8
MAINTENANCE 9
TROUBLESHOOTING____________________________ 10
PARTS LIST____________ 11-22
CONTENTS
Part No 351520 Form No F022513A

3
OS901SP Owner’s Manual
Engine: HP’
9.0 HP (6.7kW)
9.0 HP (6.7kW)
Engine: Model
EX270D50021
GX270K1QA2
Engine: Type
Subaru
Honda
Engine: Fuel Capacity
6.4 qt. (6.1 L)
5.6 qt. (5.3 L)
Engine: Oil Capacity
1.06 qt. (1 L)
1.16 qt. (1.1 L)
Total Unit Weight:
314# (142 kg)
323# (147 kg)
Max. operating slope
15o
20o
Sound test in accordance with 2000/14/EC
104 dB(a)
104 dB(a)
Sound at operators ear
84 dB(a)
84 dB(a)
Vibration at operator position
0.81g (7.95 m/s2)
0.81g (7.95 m/s2)
General Conditions: Sunny
Temperature: 73oF (23oC)
Wind Speed: 11 mph (17 kmh)
Wind Direction: South West
Humidity: 27%
Barometric Pressure: 30.34Hg (770 mm Hg)
General Conditions: Sunny
Temperature: 66oF (19oC)
Wind Speed: 3 mph (4.8kph)
Wind Direction: East
Humidity: 30.2%
Barometric Pressure: 29.9Hg (101.3kpa)
104
Specifications
OS901SPS OS901SPH
SOUND
Sound tests were conducted in accordance with 2000/14/EC, and were performed on 10-13-2010 under the conditions listed below.
Sound power level listed is the highest value for any model covered in this manual. Please refer to serial plate on the unit for the sound
power level for your model.
VIBRATION DATA
Vibration levels at the operator’s handles were measured in the vertical, lateral and longitudinal directions using calibrated vibration test
equipment. Tests were performed on 10-13-2010 under the conditions listed below.
Part No 351520 Form No F022513A
SOUND LEVEL 84 dB(a) at Operators Position
VIBRATION LEVEL .81g (7.95m/s2)

4
OS901SP Owner’s Manual
SUBARU HONDA
INSTRUCTION LABELS
The labels shown below were installed on your BILLY GOAT ® Overseeder. If any labels are damaged or missing, replace them before operating
this equipment. Item numbers from the Illustrated Parts List and part numbers are provided for convenience in ordering replacement labels. The
correct position for each label may be determined by referring to the Figure and Item numbers shown.
LABEL DANGER KEEP HANDS LABEL CLUTCH ITEM #142 LABEL TRANS. RELEASE
AND FEET AWAY P/N 500177 ITEM #146 P/N 351507
ITEM #145 P/N 400424
LABEL CAUTION GUARDS LABEL DEPTH GAUGE
ITEM #133 P/N 900327 ITEM #59 P/N 351504
LABEL INSTRUCTIONS SEEDER BOX LABEL SEED METERING
ITEM #56 P/N 351501 ITEM #66 P/N 351503
(page 12) (page 12)
ENGINE LABELS
.
Part No 351520 Form No F022513A
5
OS901SP Owner’s Manual
READ all safety instructions before assembling unit.
TAKE CAUTION when removing the unit from the box the Handle Assembly is attached to the
unit and cables could snag.
Boxing Parts
Checklist
Subaru 9 HP
Honda 9 OHV
Parts bag
P/N-351009
Foot pedal
assembly
PARTS BAG &
LITERATURE ASSY
Warranty card P/N- 400972, Owner’s Manual P/N-351520, General Safety and Warnings Manual P/N100295, Declaration of Conformity P/N-351508.
PACKING CHECKLIST
Your Billy Goat Overseeder is shipped from the factory in one carton.
PUT OIL IN ENGINE BEFORE STARTING
Part No 351520 Form No F022513A
6
OS901SP Owner’s Manual
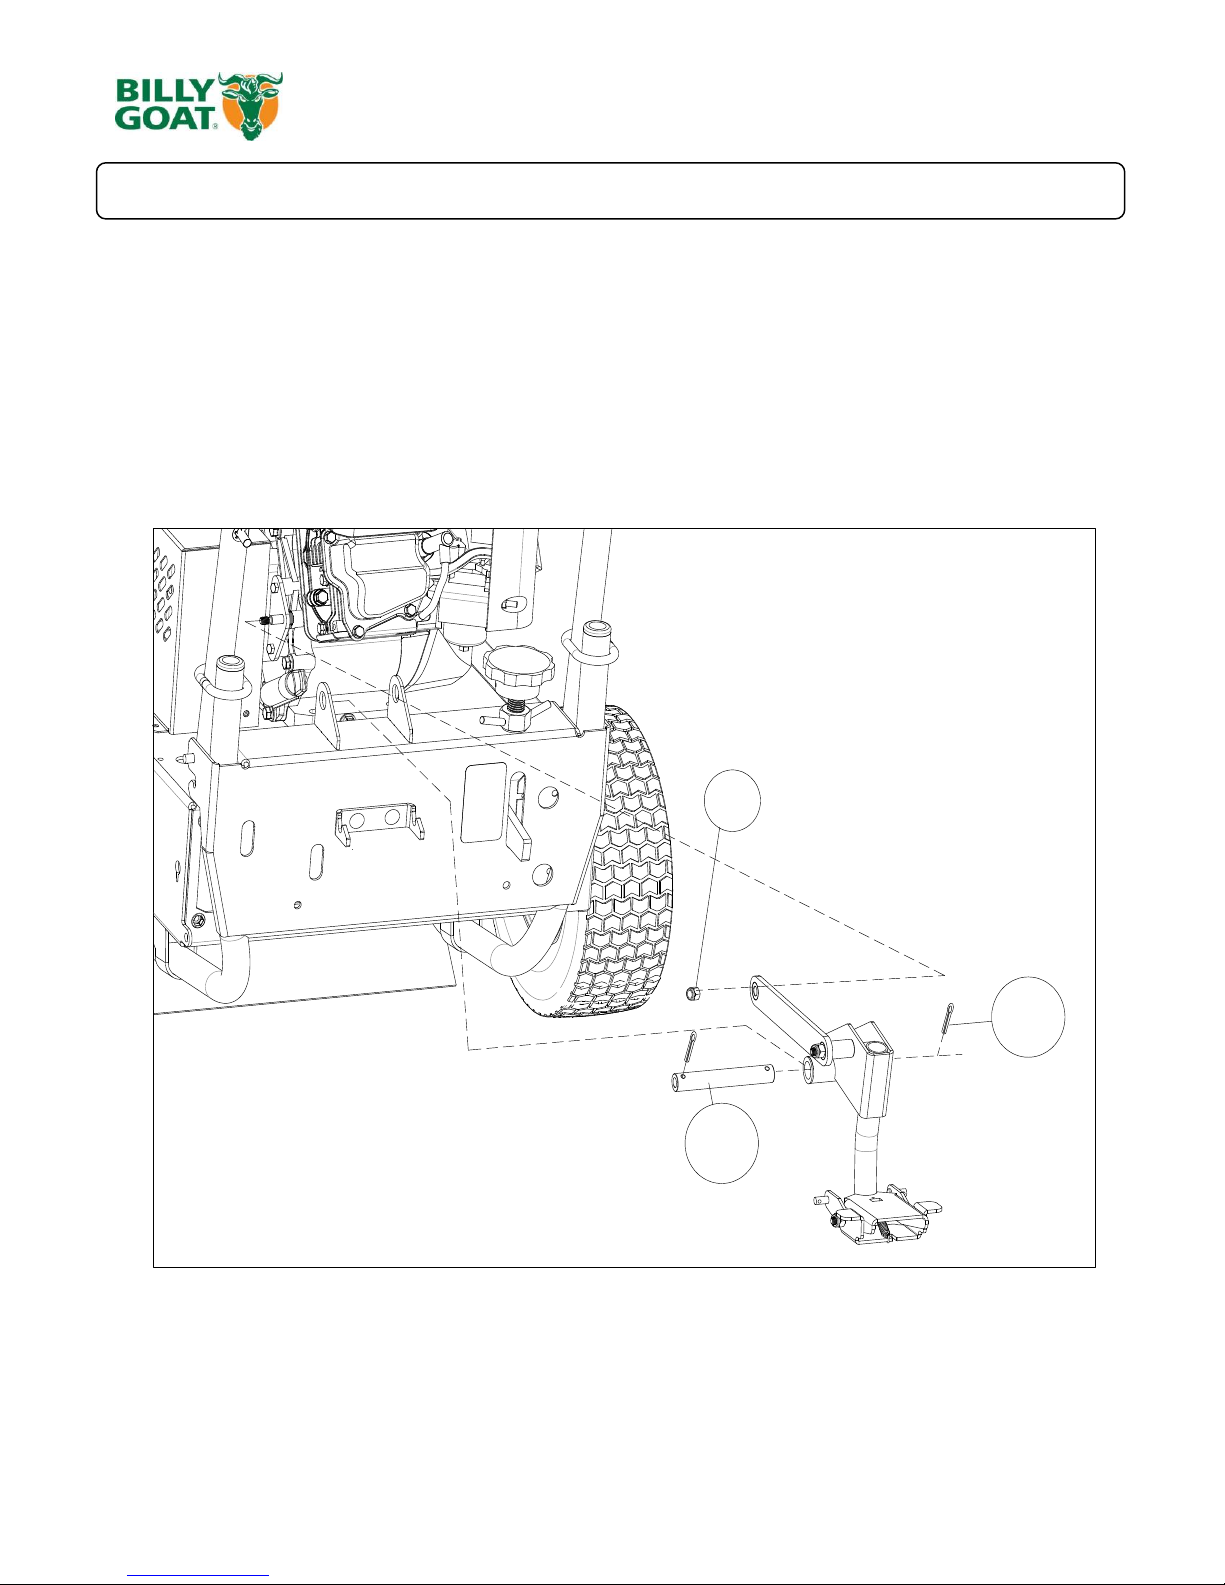
1. UNFOLD the upper handle and slide handle lock loops (item 35) into place to secure the upper handle to the
lower.
2. ATTACH the bar of the foot pedal to the bracket located on the engine. Use the lock nut (93) from the parts bag.
3. ATTACH the pedal section to the rear of the frame between the two brackets by aligning the holes and inserting
the tube (201) from the parts bag.
4. Tap the two pins (202) into both ends of the tube installed in step 3, and using pliers, spread the cotter pins to
keep it from coming out.
5. CHECK engine oil level and fill to proper level with engine manufacturers recommended grade of oil. Make sure
to adjust the machine so that the engine is level during checking. See engine manufacturers’ instruction manual.
6. CONNECT spark plug wire.
93
201
202
ASSEMBLY
Part No 351520 Form No F022513A
7
OS901SP Owner’s Manual
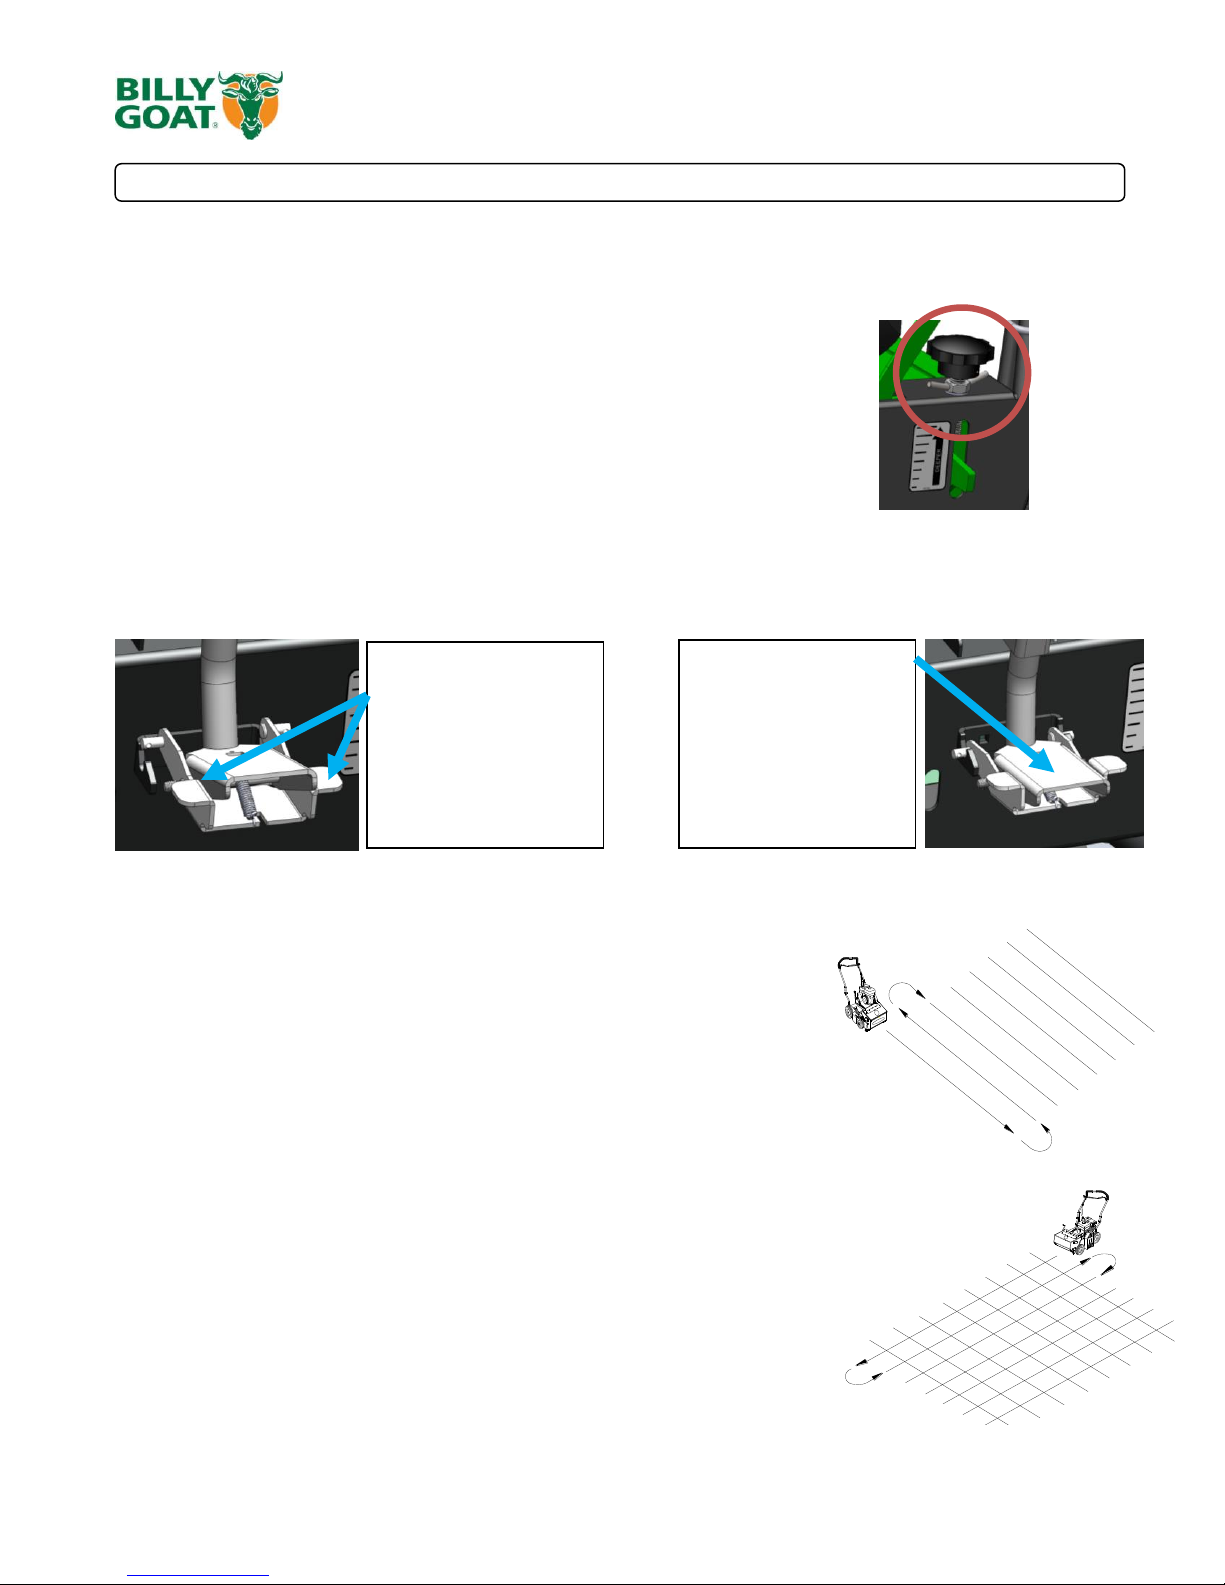
ADJUSTING BLADE DEPTH
The depth of the blades can be raised or lowered by rotating the knob
located at the rear of the machine. The relative depth of the blades can be
gauged by using the depth scale located on the rear of the machine and the
bar next to it.
SLICING TIPS
Before beginning, it is best to evaluate the condition of the lawn by cutting one or more core
samples from area to be treated. A core can be cut using a piece of pvc, or metal pipe.
Hammer the pipe into the ground, remove it, push the core out of the pipe and inspect it to
determine the depth of thatch in your yard.
THATCH: Thatch is a dense layer of dead grass, clippings, and roots that builds up over time
at the base of the lawn preventing air, water, and fertilizer from reaching the soil. This can
cause shallow root development and make a lawn more susceptible to drought and disease.
Thatch also provides an ideal environment for insects to hide and multiply. Periodic removal of
thatch will keep your lawn in good health.
HEAVY THATCH: Lawns with an excessive amount of thatch will require multiple treatments
for effective removal. Trying to remove excessive thatch (greater than 3/4"[19 mm] deep) in
one treatment will damage or destroy the living part of the lawn. It is best to remove heavy
thatch in seasonal treatments (i.e. spring, and fall).
SLOPES: Rake slopes across not up and down. This is much easier and safer for the operator
and is better for the lawn. Raking across will help to reduce runoff during watering and allow
the sloped ground to hold more seed, fertilizer, and water. The unit’s maximum operating slope
is 35% or 19°.
DEPTH: The wide range of depth adjustment on your unit is provided to allow for blade wear.
Setting the reel deeper will not produce better, or quicker results. The slicing reel should be set
even with the ground for verti-slicing work, and set to a maximum 1/2" depth for overseeding
jobs. Setting the reel deeper than this will only result in premature wear on the unit (i.e. failed
belt). If you desire to work the ground deeper than the above guidelines allow, it should be
done gradually in multiple passes..
VERTICUTTING / OVERSEEDING: Mow the lawn to shorter than the normal cut height before
starting (i.e. approximately 2" tall for fescue grass). For the best result, Slice/Overseed in crisscross pattern (See Fig. 1 and See Fig 2).
FOLDING HANDLE
This unit is equipped with a folding upper handle for easier storage and transportation. The handle can be folded by
sliding the handle lock loops (item 35) up. This releases the upper handle, allowing it to be folded over the unit.
BLADE POSITION & DEPTH CONTROL LEVER
The blades can be raised or lowered into the ground by height adjustment foot pedal at the rear of the unit.
The blades will be in their lowered position when the foot pedal is unlocked from the bracket and will be in
transport position when the pedal is locked to the bracket. See images below for operation. The resulting
blade depth can be adjusted higher or lower.
See ADJUSTING BLADE DEPTH above.
Fig. 1
Fig. 2
Pressing on the
outside tabs of the
pedal will allow it to
unlock from the
bracket and lower
into position.
Pressing on the
center of the pedal
and pushing it into
the bracket will
allow it to be locked
in transport position.
OPERATION
Part No 351520 Form No F022513A
 Loading...