

Page 1

BiPAC 5200 Series
(802.11g) ADSL2+ Firewall Router
Quick Start Guide
Page 2
Billion BiPAC 5200 Series ADSL2+ Firewall Router
g
A
PLEASE READ THE QUICK START GUIDE AND FOLLOW THE
STEPS CAREFULLY. THIS QUICK START GUIDE WILL HELP YOU
INSTALL THE DEVICE PROPERLY AND AVOID IMPROPER USAGE.
IF YOU NEED MORE INFORMATION ON THIS SOFTWARE
CONFIGURATION, PLEASE REFER TO THE USER’S MANUAL ON
THE CD-ROM.
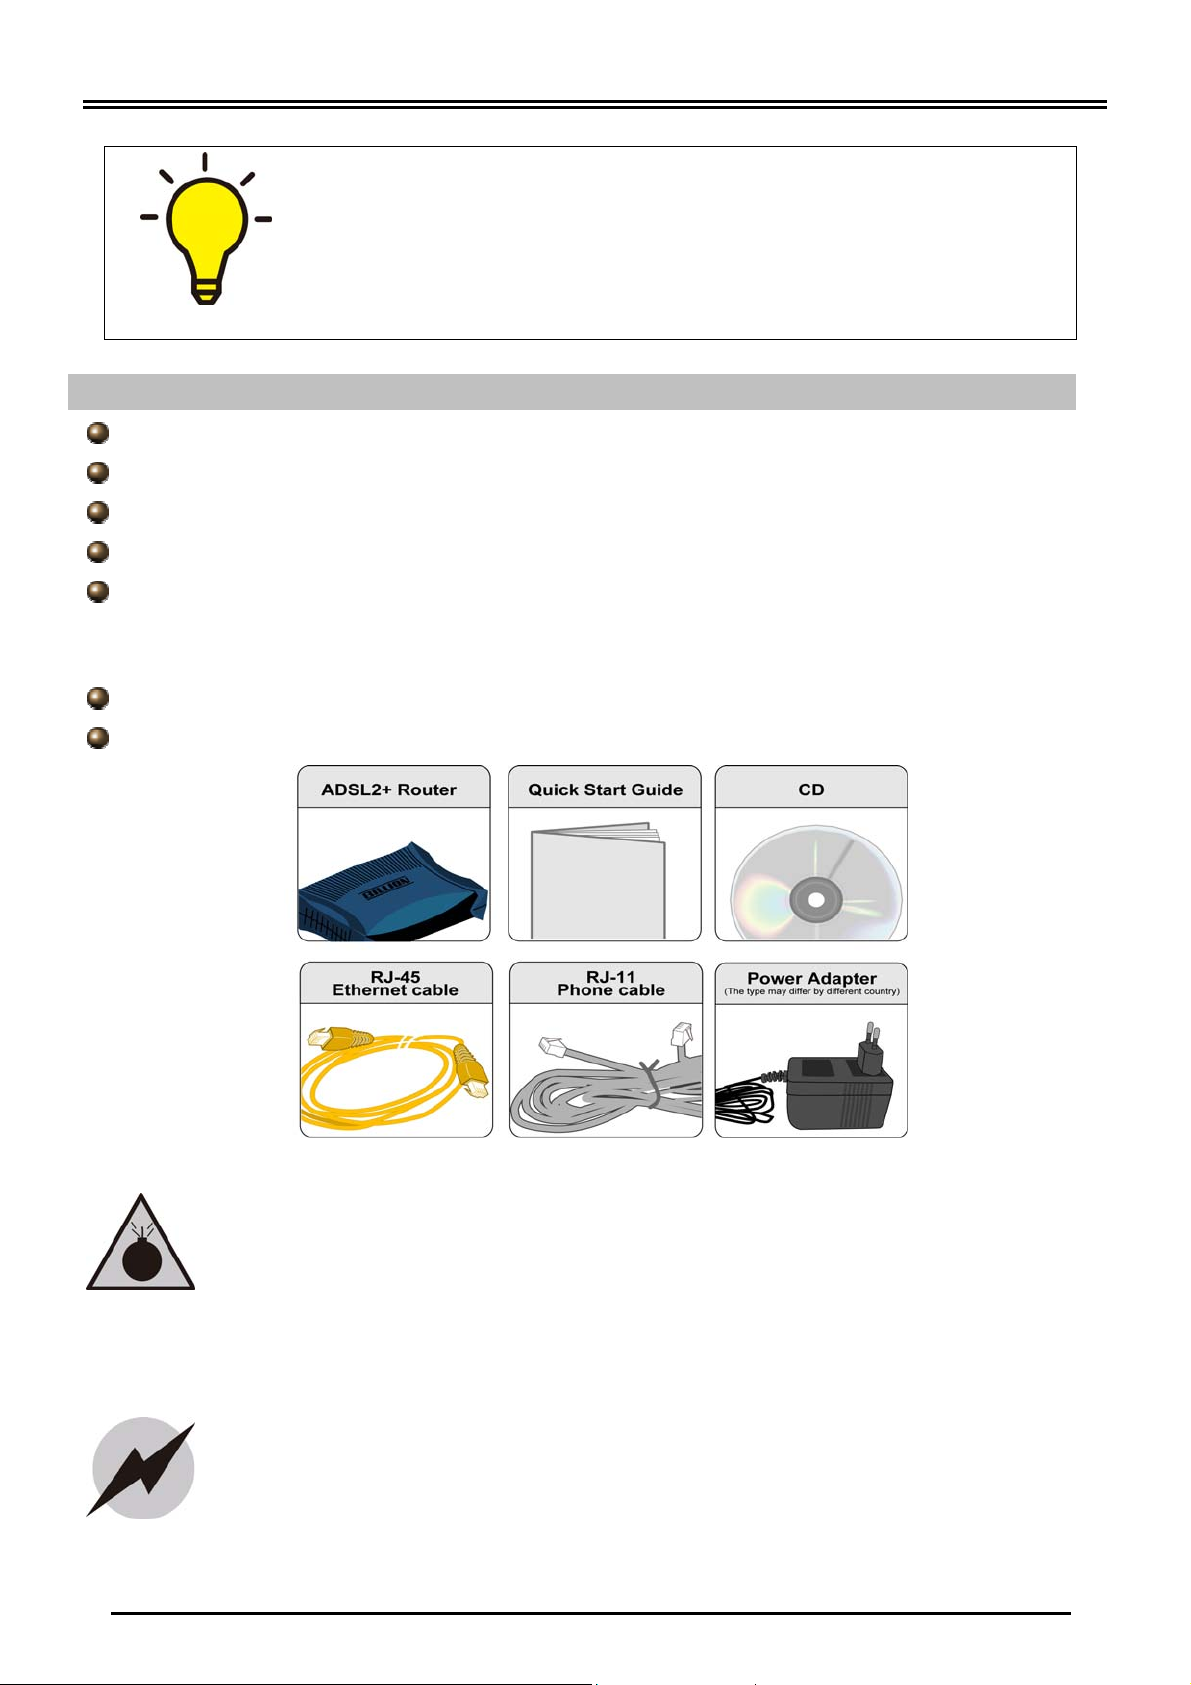
Package Contents
BiPAC 5200 Series ADSL2+ Router
CD containing the on-line manual
RJ-11 ADSL/telephone cable
Ethernet (CAT-5 LAN) cable
AC-DC power adapter (12VDC, 1A): for 5200 / 5200R3 / 5200G
AC-AC power adapter (12V AC, 1A): for 5200S / 5200SR2 / 5200SR3 / 5200GR2 /
5200GR3 / 5200GR4 / 5200GR5
This Quick Start Guide
Splitter/ Micro-filter (Option)
Do not use the router in high humidity or high temperatures.
Do not use the same power source for the router as other
equipment.
Do not open or repair the case yourself. If the router is too hot,
turn off the power immediately and have it repaired at a qualified
service center.
Avoid usin
Warning
this product and all accessories outdoors.
Place the router on a stable surface.
ttention
Only use the power adapter that comes with the package. Using a
different voltage rating power adaptor may damage the router.
1
Page 3
Quick Start Guide
a
dev
ce
j
Hardware Overview
BiPAC 5200G/ 5200GR2/ 5200GR3/ 5200GR4/ 5200GR5
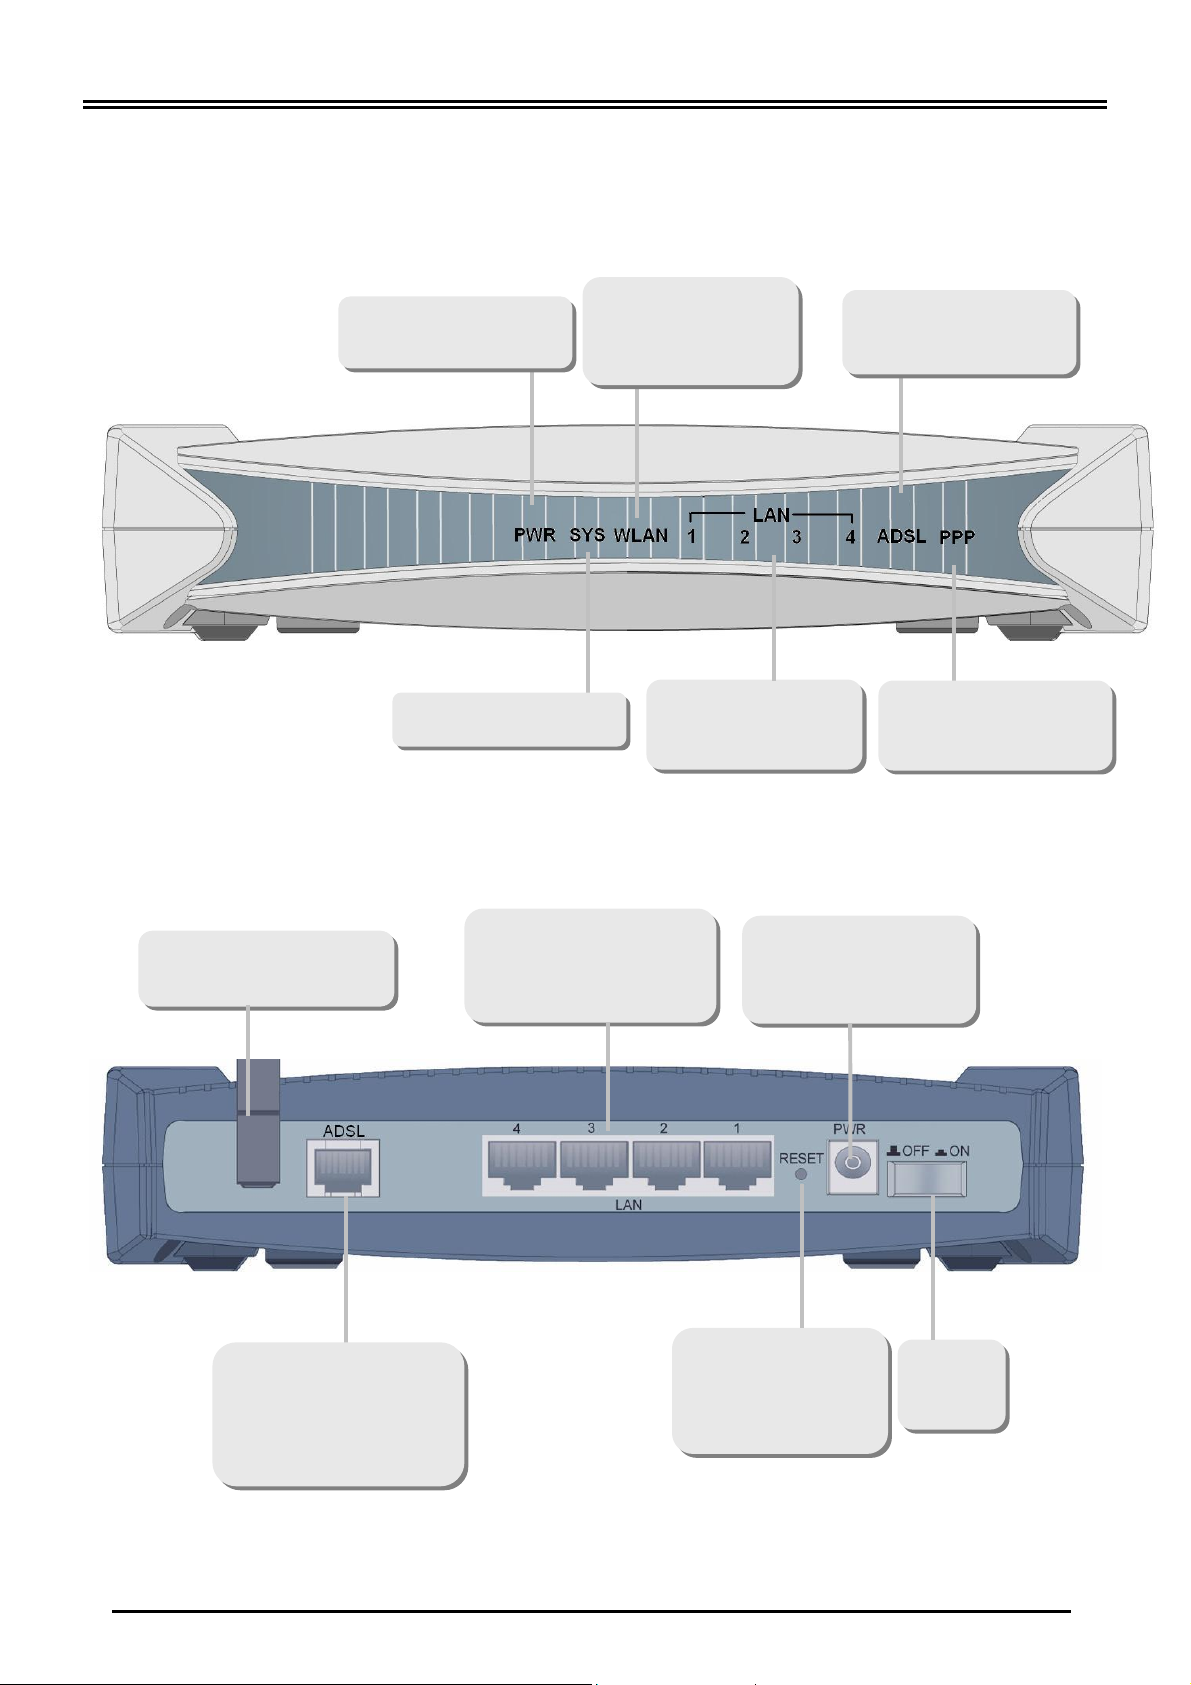
The Front LEDs
Lit when power is ON
Lit green when the
wireless connection
is established
Lit when successfully
connected to an ADSL
DSLAM
connection.
Lit when the
system is ready
Lit when connected to
n Ethernet
i
Lit steady when there
is a PPPoA / PPPoE
The Rear Ports
Connect the
detachable antenna
Connect the supplied
RJ-11 cable to this
port when connecting
to the ADSL/telephone
network
Connect your
computer to a LAN
port, using the
Connect the supplied
power adapter to this
ack
Press it to reset
the device or
restore to factory
default settings
Power
ON/OFF
switch
2
Page 4

Billion BiPAC 5200 Series ADSL2+ Firewall Router
A
A
BiPAC 5200/ 5200R3
The Front LEDs
Lit steady when
there is a PPPo
/ PPPoE
Lit when connected
to an Ethernet
device
Lit when power is ON
Lit when successfully
connected to an ADSL
DSLAM
connection.
Lit when the
system is ready
The Rear Ports
Connect the
supplied power
adapter to this
jack
Press it to reset
the device or
restore to factory
default settings
Connect your
computer to a LAN
port, using the
included Ethernet
cable
Connect the supplied
RJ-11 cable to this
port when connecting
to the
network
DSL/telephone
3
Page 5

Quick Start Guide
A
BiPAC 5200S/ 5200SR2/ 5200SR3
The Front LEDs
Lit when
power is ON
Lit when
connected to an
Ethernet device
Lit steady when
there is a PPPo
/ PPPoE
Lit when the
system is ready
Lit when successfully
connected to an ADSL
DSLAM connection.
The Rear Ports
Attention: BiPAC 5200S has not supported the ON/OFF switch
Connect your
computer to a LAN
port, using the
included Ethernet
cable
Connect the
supplied power
adapter to this
jack
Connect the supplied
RJ-11 cable to this
port when connecting
to the ADSL/telephone
network
Press it to reset
the device or
restore to factory
default settings
Power
ON/OFF
switch
4
Page 6

Billion BiPAC 5200 Series ADSL2+ Firewall Router
Hardware Connection
BiPAC 5200G/ 5200GR2/ 5200GR3/ 5200GR4/ 5200GR5
BiPAC 5200/ 5200R3
BiPAC 5200S/ 5200SR2/ 5200SR3
5
Page 7

Quick Start Guide
Hardware Installation
1. Power Connection
Plug the supplied power adapter to the wall jack and the other side to the router.
Please note that the plug type may differ according to different countries.
2. LAN Connection
Connect the supplied RJ-45 Ethernet cable to one of the Ethernet ports, and the
other side to the PC’s Ethernet interface.
3. ADSL Connection
Connect the supplied RJ-11 phone cable to the router’s ADSL port, and the other
side to the phone jack on the wall.
6
Page 8

Billion BiPAC 5200 Series ADSL2+ Firewall Router
4. Splitter/ Micro-filter Connection
Splitter / Micro-filter are important for ADSL installation. High-frequency signals are
directed to the ADSL modem, and low-frequency signals are directed to the
telephone or other analog voice-channel device to prevent inter-modulation
distortion and also to get good speed and stable ADSL sync rate.
a) Splitter connection
If the installation has only a single telephone and a single ADSL modem, then a
splitter can be employed.
b) Micro-filter connection
If the installation has several telephones or other analog devices, then an internal
micro-filter can be employed at each analog device.
Setup Utility
After you complete the hardware installation, insert the CD-ROM to the CD-ROM drive to
perform the Setup Utility for network configuration. The Setup Utility will auto-run. Follow the
step-by-step configuration wizard, the utility will guide you to complete the basic network
configuration.
7
Page 9

Quick Start Guide
Troubleshooting
1. None of the LEDs are on when you turn on the router.
Check the connection between the adapter and the router. If the error persist s, you may have
a hardware problem. In this case you should contact technical support.
2. You have forgotten your router login and/or password.
Try the default login and password, please refer to Chapter 3. If this fails, you can restore
your router to its factory settings by holding the Reset button on the back of your router for 6
seconds or more.
3. Can’t ping any PCs on the LAN.
Check the Ethernet LEDs on the front panel. The LED should be on for a port that has a PC
connected. If it is off, check the cables between your router and the PC. Make sure you have
uninstalled any software firewall for troubleshooting. V erify that the IP address and the subnet
mask are consistent between the router and the workstations.
4. Frequent loss of ADSL linesync (disconnections).
Ensure that all other devices connected to the same telephone line as your router (e.g.
telephones, fax machines, analogue modems) have a line filter connected between them and
the wall socket (unless you are using a Central Splitter or Central Filter installed by a qualified
and licensed electrician), and ensure that all line filters are correctly installed and the right
way around. Missing line filters or line filters installed the wrong way around can cause
problems with your ADSL connection, including causing frequent disconnections. If you have
a back-to-base alarm system you should contact your security provider for a technician to
make any necessary changes.
Product Support and Contact Information
Most problems can be solved by referring to the Troubleshooting section in the User’s Manual.
If you cannot resolve the problem with the Troubleshooting chapter, please contact the dealer
where you purchased this product.
Contact Billion
WORLDWIDE: http://www.billion.com
8
 Loading...