

Page 1

BIPAC-645
DSL/Cable Router Plus ISDN Router
With 4-Port 10/100M LAN Switch
Quick Start Guide
Page 2

Package Contents
1. BIPAC-645
2. AC Power Adapter (9V 1Amp)
3. RS-232 cable (Null modem type)
4. RJ-45 ISDN cable
5. RJ-45 LAN cable
6. CD containing the online manual
7. This Quick Start Guide
The Front Panel LEDs
Quick Start Guide
LED Meaning
1 Power Lit when AC power is connected.
LAN 1-4 /
2
ACT/COL
WAN /
3
ACT/COL
PPP Lit when PPPoE connection is activated.
4
ISDN / SYNC Lit when ISDN Layer 1 is activated.
5
Lit Green when connected to a LAN device.
Flashes Green when sending/receiving data.
Flashes Yellow when collisions happen.
Lit Green when connected to a WAN device.
Flashes Green when sending/receiving data.
Flashes Yellow when collisions happen.
Lit Green when B1 channel is activated.
Lit Yellow when B2 channel is activated.
ISDN / B1/B2
6
Lit Green +Yellow when B1 an d B2 channels
are activated.
1
Page 3

BIPAC-645 DSL/Cable Router plus ISDN Router
The Rear Ports
Power
(jack)
Console
(port)
ISDN So
(RJ-45
connector)
LAN 1-4
(RJ-45
connector)
WAN
(RJ-45
connector)
Connect the supplied power adapter to this jack.
Connect the supplied RS-232 cabl e to this port when
connecting to a PC’s RS-232 port (9-pin serial port).
Connect an RJ-45 cable to this port when connect ing
to the ISDN.
Connect an UTP Ethernet cable to this port when
connecting to a LAN such as an office or home
network.
Connect an UTP Ethernet cable to this port when
connecting to the Internet or making other WAN
connections.
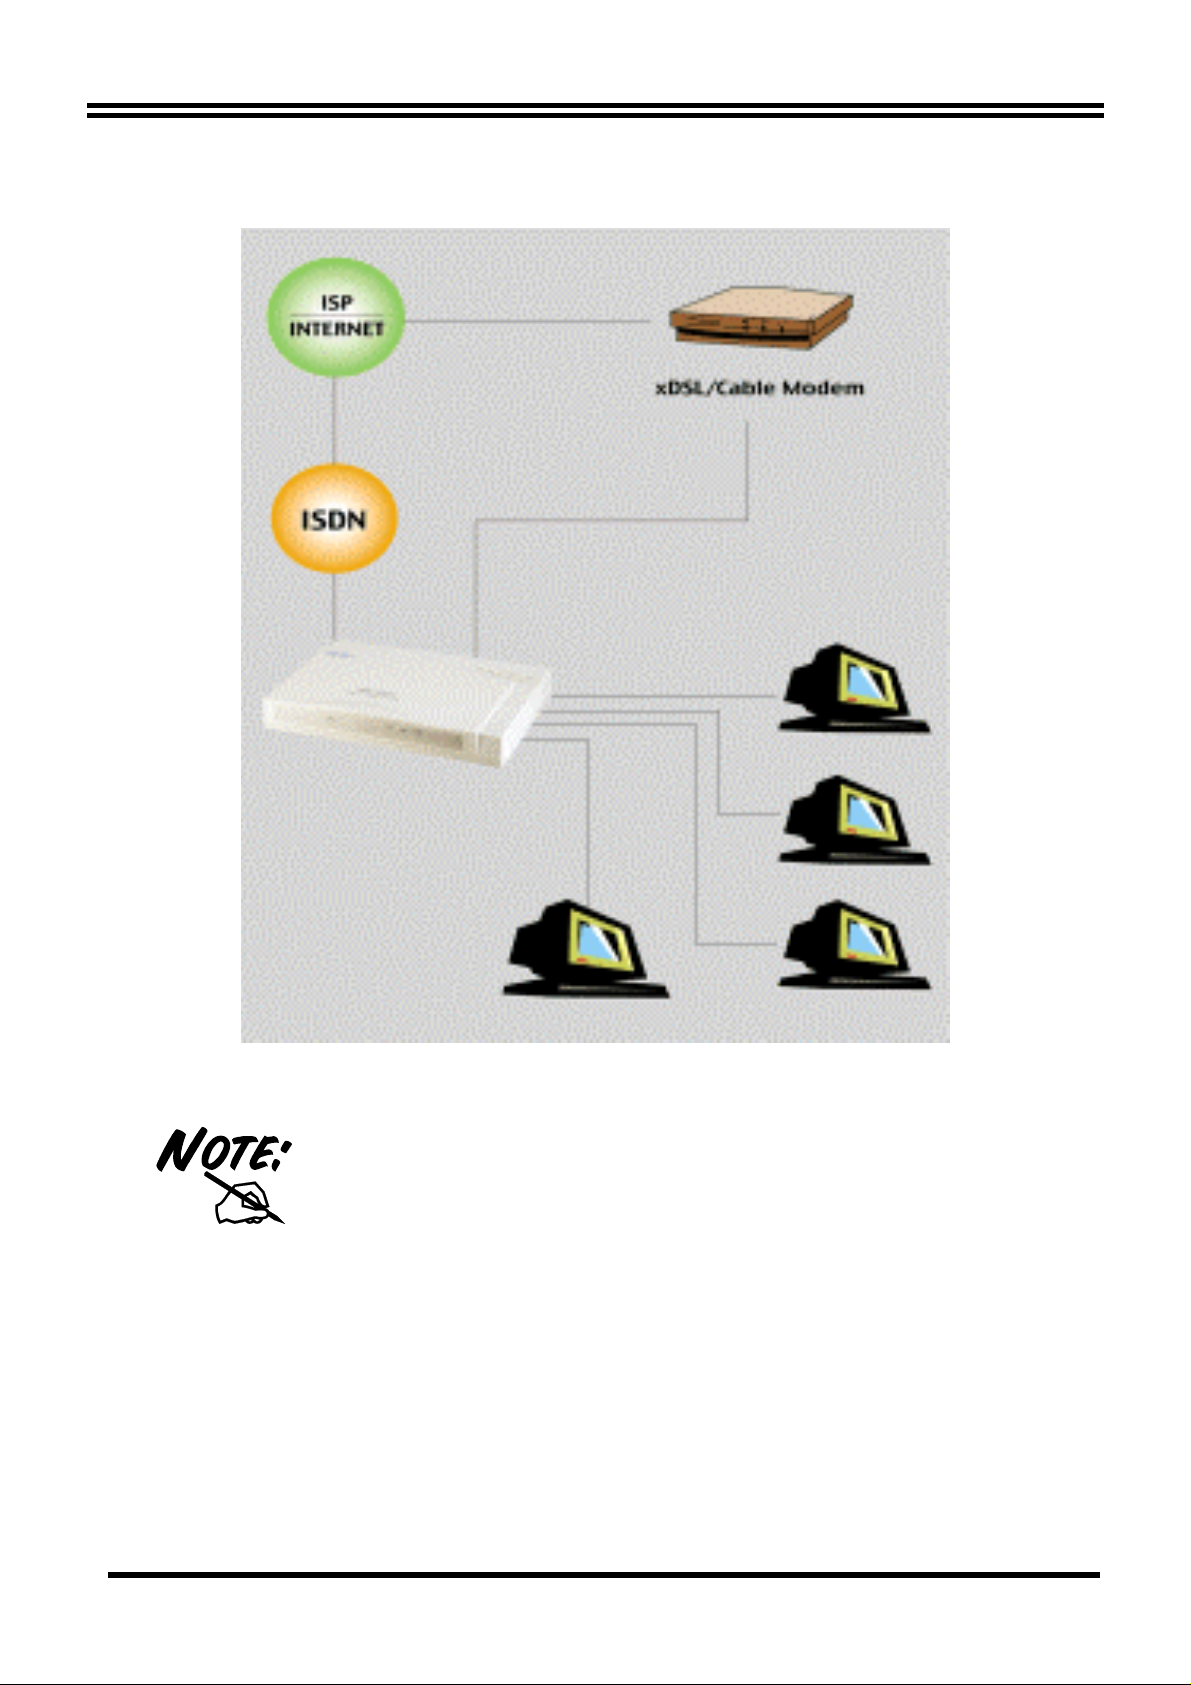
Connecting the BIPAC-645
1. Connect the BIPAC-645 to a LAN (Local Area Network)
and the WAN or ISDN.
2. Power on the device.
3. Ensure the Power and LAN LEDs are lit.
2
Page 4
Quick Start Guide
For more detailed instructions on configuring
and using the device, please refer to the on-line
manual.
3
Page 5

BIPAC-645 DSL/Cable Router plus ISDN Router
Configuring PC in Windows 95/98/ME
1. Go to Start / Settings /
Control Panel. In the
Control Panel
double-click on Network
and choose the
Configuration tab.
2. Select TCP/ IP ->
NE2000 Compatible, or
any Network Interface
Card (NIC) in your PC.
Then click Properties.
3. Select the Obtain an IP
address automatically
radio button.
4
Page 6

4. Then select the DNS
Quick Start Guide
Configuration tab.
5.
Select the Disable DNS
radio button and click
OK to finish the
configuration.
Configuring PC in Windows NT4.0
1. Go to Start / Settings /
Control Panel. In the
Control Panel double
click on Network and
choose the Protocols tab.
2. Select TCP/IP Proto col
and click Properties.
5
Page 7

BIPAC-645 DSL/Cable Router plus ISDN Router
3. Select the Obtain an IP
address from a DHCP
server radio button and
click OK.
Configuring PC in Windows 2000
1. Go to Start / Settings /
Control Panel. In the
Control Panel
double-click on Network
and Dial-up
Connections.
2. Double-click Local Area
Connection.
6
Page 8

3. In the Local Area
Connection Status
window click
Properties.
Quick Start Guide
4. Select Internet Protocol
(TCP/IP) and click
Properties.
7
Page 9

BIPAC-645 DSL/Cable Router plus ISDN Router
5. Select the Obtain an IP
address automatically
and the Obtain DNS
server address
automatically radio
buttons.
6. Click OK to finish the
configuration.
Configuring PC in Windows XP
1. Go to Start / Control
Panel (in Classic
View). In the Control
Panel, double-click on
Network Connections.
2. Double-click Local
Area Connection.
8
Page 10

3. In the Local Area
Connection Status
window, click
Properties.
Quick Start Guide
4. Select Internet
Protocol (TCP/IP) and
click Properties.
9
Page 11

BIPAC-645 DSL/Cable Router plus ISDN Router
5. Select the Obtain an
IP address
automatically and the
Obtain DNS server
address automatically
radio buttons.
6. Click OK to finish the
configuration.
Configuring the BIPAC-645
1. Start a web browser on any one of the PCs in the LAN and enter the
following URL: http://192.168.168.230
following screen.
. You should see the
2. The default password (“password”) has already been entered for you.
You can just click “Log On!” to log on.
Tools” menu to change the password later.
10
You may use the “System
Page 12

Quick Start Guide
Make a decision either Internet access via EWAN or ISDN.
3.
For EWAN
1. You need to make a decision about Obtain IP Address Automatically.
Available options are via PPP over Ethernet, via DHCP, via PPTP
or No.
11
Page 13

BIPAC-645 DSL/Cable Router plus ISDN Router
2. If you choose via DHCP for the selection of Obtain IP Address
Automatically. The following screen will be displayed. Enter the
following information and then Click Apply.
3. If you choose via PPP over Ethernet for the selection of Obtain IP
Address Automatically. The following screen wi ll be displayed. Enter
the following information and then Click Apply and Test.
4. If you choose via PPTP for the selection of Obtain IP Address
Automatically. The following screen will be displayed. Enter the
following information and then click Apply and Test.
12
Page 14

Quick Start Guide
5. If you choose No for the selection of Obtain IP Address
Automatically. The following screen will be displayed. Enter the
following information and then Click Apply.
13
Page 15

BIPAC-645 DSL/Cable Router plus ISDN Router
For ISDN
1. Select I use Internet Access over ISDN and then click Next.
2. Select “Basic Internet Access” and press “Next”
3. Enter the information about ISP.
14
Page 16

Quick Start Guide
If the test is successful, your users will be ready to
access the Internet. If not, the device will try to give
you enough information to let you know why the
connection is not successful.
15
 Loading...