

Page 1
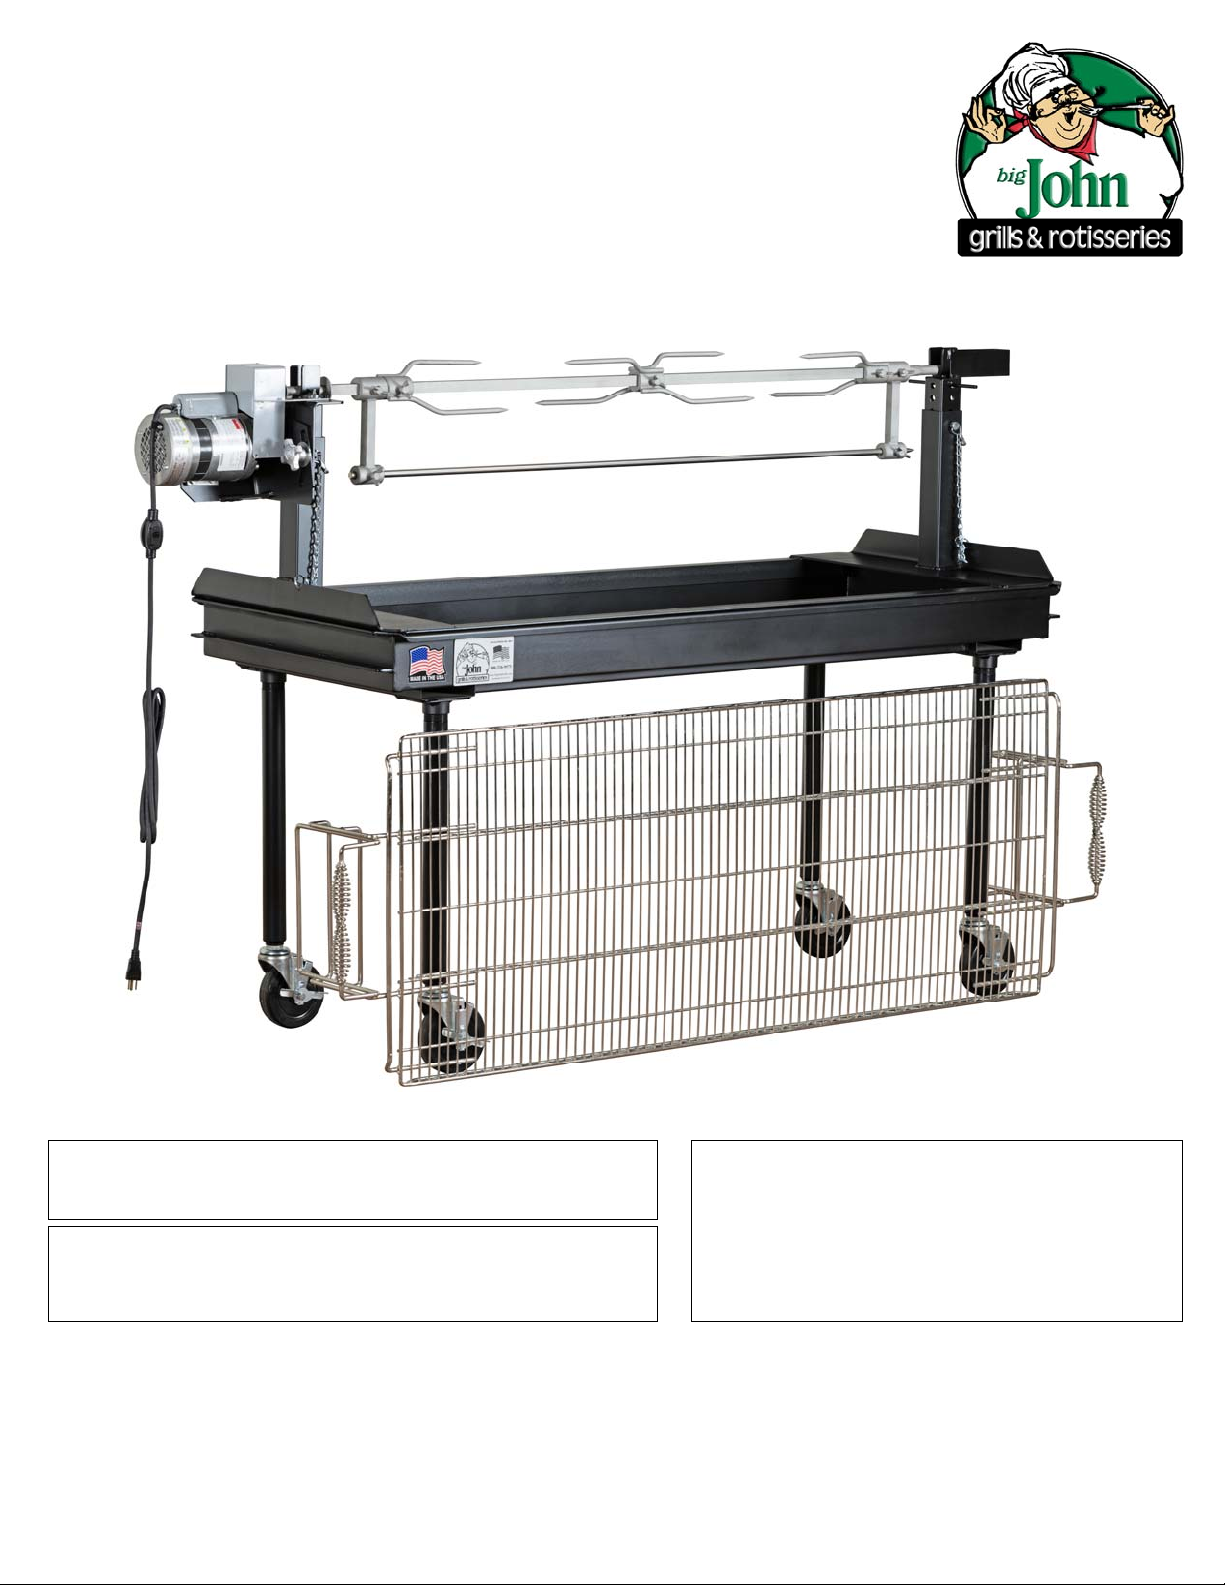
Owner’s Manual
for Assembly, Operating & Maintenance of
Model M-250B Charcoal Grill
& Rotisserie Combination
www.bigjohngrills.com
YOU MUST READ THIS OWNER’S MANUAL
BEFORE OPERATING YOUR CHARCOAL GRILL.
WARNING: Do not ignite this grill without reading
the LIGHTING INSTRUCTIONS first.
WARNING: DO NOT store or use
gasoline or other flammable liquids/
vapors in this grill or in the vicinity of this
grill.
THIS CHARCOAL GRILL IS DESIGNED FOR OUTDOOR USE ONLY.
526 EAST ROLLING RIDGE DRIVE, BELLEFONTE, PA 16823
P: 814-359-2755 F: 814-359-2621 [email protected]
1
Page 2

TABLE OF CONTENTS
1. GENERAL INFORMATION Page 3
2. ASSEMBLY INSTRUCTIONS Page 4
3. SET-UP INSTRUCTIONS Page 5
4. OPERATING INSTRUCTIONS Page 6
5. CLEANING & CARE INSTRUCTIONS Page 7
6. PARTS LIST Page 8
7. ACCESSORY LIST Page 9
8. WARRANTY Page 10
9. WARNINGS Page 11
2
Page 3

GENERAL INFORMATION
Thank you for purchasing a The Original Big John Charcoal Grill & Rotisserie Combination! We take
pride in producing and selling equipment made right here in America and are pleased that you recognized the quality and durability of our products. Your new Big John Charcoal Grill is a commercial
grade, outdoor piece of cooking equipment. With this grill, you will be able to cook a variety of foods
quickly and easily. This grill is portable meaning you can take it and use it anywhere. Big John charcoal grills are used at offsite catering events & festivals, restaurants, hotels & resorts, rental stores, golf
courses, personal homes and many more.
Big John products are designed for OUTDOOR USE ONLY! Only operate this equipment in a well-
ventilated area. Do not use in garage, building, or other enclosed area. Operation of this equipment
indoors or in a poorly ventilated area may cause an explosion, fire, personal injury, or death.
Do not retrofit any equipment or accessories to the unit that is not part of the original equipment
provided by Big John Grills & Rotisseries. Replacement parts must be obtained from the manufacturer. Any attempt to change or modify this unit could result in an explosion, fire, personal injury to
yourself or someone else, or death.
Do not touch or allow any contact with the sides, back, or top of grill after lighting - the unit is EX-
TREMELY HOT! Allow the grill to cool completely before touching any surface.
DO NOT operate grill within 12” of a combustible or non-combustible surface. Provide adequate
clearance and ventilation at all times
DO NOT perform any maintenance or cleaning until grill is completely cooled down.
DO NOT burn logs or sticks of wood in this grill. Wood burns hotter than charcoal and will cause
damage to the firebox with long term use.
DO NOT pour water over hot coals or grate as it may cause the metal to warp and void the warranty.
Wood Pellets can be used to add the smoke flavor to food by throwing a handful in on top of the
charcoal
DO NOT pout water over hot coals or grate. This will cause the metal to warp and void all warranty.
3
Page 4

ASSEMBLY INSTRUCTIONS
This unit ships 90% assembled and we make sure the instructions for the rest are easy to follow and
perform. Please follow the instructions below to ensure your grill is properly assembled for safe operation and remember this is a commercial piece of equipment and therefore the materials used to build it
are of the best quality. Because of this, the grill weight is considerable and will require 2 people to unpackage, assemble, and set-up the unit.
1. Unbox grill and remove all packaging materials, tape, and plastic coverings. Leave grill top banded
to firebox.
2. Turn grill firebox upside down so leg sockets are on top.
3. Screw legs firmly into the sockets on the bottom of the firebox.
4. IF YOU PURCHASED WHEEL LOCKS
a. You will need a 9/16” Wrench & a 1/2” Wrench to complete the installation
b. Disassemble current casters by taking off nut and pulling old bolt out (discard old bolt)
c. Put new caster brake on yoke by inserting the tab on the brake into the slot on the side
fork of the yoke while lining up the slotted hole with the bolt hole on yoke. The shoe of
the brake will be on the inside of the yoke near the top.
d. Put wheel between forks of yoke and insert the new, longer bolt from the kit with the
taps facing outward away from the wheel with the “ON/OFF” symbols facing upward.
e. Attached the nylon lock nut to the bolt and tighten. Do not over tighten or wheel will not
spin.
f. Screw wheel into leg of grill.
5. Flip grill upright and secure wheels so they will not move. Cut the banding and remove the grill top.
6. Unbox rotisserie and remove all packaging.
7. Rotate the motor end mount and point protector end mount 180° degrees so they are facing out
8. Adjust both end mouths to the lowest height setting and secure with stainless steel pins.
9. Carefully lift rotisserie frame, with spit removed, and place it on charcoal firebox ensuring both grill
and rotisserie frame fit together securely.
4
Page 5

SET-UP INSTRUCTIONS
1. Place grill on a level area clear of combustible items and remove the grill top.
2. Line the firebox with heavy duty aluminum foil to improve heat reflection and for easy clean-up.
3. Start with 30-40 lbs. of charcoal briquettes.
4. Place charcoal briquettes in 2 or 3 even piles in the firebox and ignite according to manufacturer’s
recommendations. Follow all caution and safety measures set forth in this manual and on the charcoal manufacturer’s packaging.
5. When the coals are ready, bank charcoal long both 5 ft. sides of the firebox keeping the middle clear.
If desired, add a layer of sand in the middle of the firebox to absorb any drippings. Do not place
charcoal directly under spit.
6. Place the rotisserie frame on top of the grill body without spit.
7. Cover with hot coal covers.
8. Make sure motor is unplugged.
5
Page 6

OPERATING INSTRUCTIONS
1. Follow Set-Up Instructions on Page 5 of this Manual, then follow instructions below.
2. Place the rotisserie frame on top of the grill body without spit.
3. Place one support bar clamp (shaped like a dog bone) on the spit and side the clamp all the way to
the end of the bar.
4. Place a skewer with prongs facing inward on spit and slide down to clamp.
5. Insert the point end of the spit through the center of the length of meat. Before proceeding, make
sure the meat is balanced on the spit.
6. When meat is balanced, place the 2nd skewer on the spit and secure into meat, followed by 2nd
support bar clamp.
7. Install support bar through support bar clamps and tighten.
8. Move support bar, clamps, and skewers as needed on the spit to center meat between the rotisserie
height adjustment posts.
9. Tighten all of the thumb screws on the stainless steel hardware. As the meat cooks, shrinkage oc-
curs so the skewers and support bar clamps may need to be adjusted to hold the meat firmly.
10. When charcoal is ready, remove the chain guard by loosening the wing nut. Place the rotisserie spit
with the meat centered on the frame with the pointed end in the point protector end mount and the
other end with the sprocket in the motor end mount.
11. Use WD-40 to lubricate the 2 spots where the point end joins the point end mount and where the
other end meets the motor end mount.
12. Loosen the aluminum knob (locking washer must be in place) on the adjustable motor mount so the
chain slips over both of the drive sockets. Adjust the slide action so that the chain is taut.
13. Retighten the aluminum knob and install chain guard properly. DO NOT OPERATE ROTISSER UN-
LESS CHAIN GUARD IS IN PLACE.
14. Plug in the motor using a UL approved, type 3, outdoor extension cord and approved outdoor electri-
cal outlet.
15. Turn the motor on and remove the hot coal covers to begin cooking.
16. Add 10-15 lbs. of charcoal each hour while the grill is in use to maintain temperature
17. When meat is cooked, place hot coal covers over the charcoal and carve the meat directly from the
spit, or remove the meat from the spit and take it to a carving table.
18. After the coals are cold, crumble the aluminum foil with ash inside and dispose of it in an approved
manner.
6
Page 7

CLEANING & CARE
1. When finished cooking, turn off motor and unplug from electrical outlet
2. After the coals are cold, crumble the aluminum foil with ash inside and dispose of in an approve
manner. WARNING: Never pour water over hot coals to extinguish as this can warp the firebox and
will void your warranty.
3. Clean firebox and stainless steel components with a solution of hot soapy water and dry completely
before storing. The firebox must be clean to protect the black powder coat finish.
4. Remove excessive carbon build-up on the stainless steel hardware with a non-metallic scouring pad
like Scotch-Brite.
5. If necessary, black paint can be used to touch up deep scratches or gouges in the black powder coat
finish.
7
Page 8

PARTS LIST
Item # Description
102319 2’ x 5’ Firebox, Black Powder Coat Finish
102325 2’ x 5’ Grill Top, Nickel Plated Steel
102339 Firebox Plate with Socket for Universal Leg
102328 Universal Leg with Socket, Black Powder Coat Finish
102338 5” Swivel Caster
102336 Caster Brake for 5” Caster
102344 Caster Wrench
102337 Caster Socket
202425 5’ Stainless Steel Spit with Sprocket
202437 2 Prong Stainless Steel Skewer
202438 3 Prong Stainless Steel Skewer
201320 2-Way Stainless Steel Skewer
202440 Stainless Steel Support Bar
202441 Stainless Steel Support Bar Clamp
202443 Stainless Steel Thumb Screw
202450 Electric Motor with Power Cork and Sprocket
202452 Sprocket
202453 Key for Sprocket
202454 Drive Chain
202456 Chain Guard
202464ab Conduit Box, Powder Coated
202416 Rotisserie Frame, Black Powder Coat Finish
202458 Stainless Steel Pin with Chain
202444E Motor End Mount, Black 2” Post
202444F Swivel Plate, Black
202474 Shoulder Bolt
202470 Aluminum Knob
202446 Point Protector End Mount, Black 2” Post
202468 Set of 2 Hot Coal Covers
8
Page 9

ACCESSORIES
Item # Description
301167BK VC-76: 76” Black Vinyl Cover for M-250B
301167A VC-76: 76” Green Vinyl Cover for M-250B
201305 OV-5 Rotisserie Oven
202438 3 Prong Stainless Steel Skewer
201320 2-Way Stainless Steel Skewer
9
Page 10

WARRANTY INFORMATION
Big John Corporation provides a warranty, to the original purchaser, for all Big John finished units for a
period of 1 year from the date of sale. Any unit, or part thereof returned, freight prepaid, to our Sales &
Logistics facility, will be repaired or replaced to our commercial standard, free of charge, and returned to
the purchaser. Labor and transportation costs are NOT covered by this warranty. Misuse, neglect, or
alteration of the product is not covered by this warranty. This warranty is established automatically upon
receipt of the goods. No warranty card or registration procedures are required.
Outgoing warranty shipments must be F.O.B. factory (Bellefonte, PA). All items requested for return
must be received within 30 days of the return authorization being granted to the customer or no warranty credit will be considered.
10
Page 11

WARNINGS
FAILURE TO FOLLOW THE DANGERS, WARNINGS, CAUTIONS, AND INSTRUCTIONS OUTLINED IN THIS
MANUAL MAY RESULT IN SERIOUS BODILY INJURY OR DEATH, OR CAUSE DAMAGE TO PROPER TY BY
FIRE OR EXPLOSION.
Do not use this grill/rotisserie unless all parts are in place. This unit must be assembled properly according to the assembly & set-up
instructions listed in this manual. Failure to do so is dangerous.
Do not store or use gasoline or other flammable liquids or vapors in the vicinity of this product.
Combustible materials should never be within 12 inches of this grill in any direction.
Do not put anything flammable in the area under the grill/rotisserie.
No Big John Grills & Rotisseries equipment should used by children.
Accessible parts of the grill may be very hot. Keep children away when in use.
Big John equipment should never be left unattended or moved while in operation.
You should exercise reasonable care when operating your grill/rotisserie and remember it will be hot during cooking and cleaning.
Never lean over an open grill or place hands or fingers on or under grill - surfaces and firebox are very hot.
Should a flare-up occur, have a spray bottle with water close by to spray that area to cool it.
Clean your Big John grill thoroughly on a regular basis.
Keep any electrical cords or fuel supply hose away from heated surfaces at all times, especially when in use.
Use heat-resistant barbecue gloves or mitts when operating grill.
DO NOT store or lean items against grill/rotisserie surface while operating.
11
 Loading...