

Page 1

Big Dipper Laser Science And Technology Co., Ltd
REV: 1.01
LED Spot Light
User Manual
Model:LS90
Please read this manual carefully before operating
®
Page 2

Warnings:
Please check the package whether any damage is caused by
transportation after you got the lig hts. If there is any dama ge, please do
not use this fixture, and contact the dealer or manufacturer as soon as
possible.
1. This product is only suitable for professional use, and does not apply
to security for other purposes.
2. Be cautious to prevent the impact that is caused by the device. The
use of this product should pay attention to: fire, heat, electric shock,
ultraviolet radiation, the lamp to explode or Shedding caused serious or
fatal injury.
3. Need to read the instructions before use energized or installing.
Follow through the operation of security methods and pay attention to
the warning signs on the specification and equipment.
4. This product is only suitable for indoor use, protection class IP20.
5. Lamps should be kept dry t o avoid Moisture, overheating or dusty
environment. Shall stop working once the using environment exceed
40℃.
6. Prevent lamps come into contact with water or any other liquid.
7. Please replace the protection screen, optical lens, UV screen if any
visible damage, i.e. function no use, crack or gash caused.
8. Make sure the facilities and h ooks can wit hstand at least 10 times the
weight of the fixtures when hanging the devices.
9. Please make sure the hardware strong enough and do not have any
damage, or use safety rope to increase the safety of the fixtures.
10. Please reduce the height of the hanger rod to a safe position when
installing or dismantling the fixtures.
11. Avoid eye exposure to the lighted LED lamp. Do not use the fixture
without lens or protection cover.
12. Please replace the relevant component if any damage caused.
13. Please make sure the voltage used comply with the voltage for the
fixture, moreover to have overload and leakage protection. Every fixture
shall earth correctly accordingly to the relevant and professional
standard when installing the fixtures.
Page 1
Page 3
Maintence
Optical components should be cleaned gently,Do not use disruptive
solvent, otherwise it will damage the plastic or coated surface.
1. After the power if off, cooled completely, then open the case.
2. Blowing machine with a vacuum cleaner or pressure blower, gently
blow away dust and floating objects.
3. Use odorless paper or cotton cloth soaked with water or distilled
water to wipe particulate, do not rub surfaces, blow any floating object
with a pressurized gas.
4.Dip cotton of the alcohol or unscented tissue paper to remove dust
and residues, glass cleaner may also be used, but residues must be
removed with distilled water, to the circle on each side, wipe from the
Center, and then wiped dry with a soft cotton cloth.
5.Using a soft brush, cotton paper, air cleaners or stress on
stomatal and hair dryers that the dust from the fan out .
Excessive dust, smoke and damag e caused by non-normal use,
out of the scope of warranty.
Declare
The product is with good performance and complete package when it is
delivered. The end-user of this product should follow all the above
instructions and warnings. Any damage caused by misuse, malfunction
and problem caused by ignoring the instructions are not included in
the repair guarantees of the manufacturer or dealers.
All products made from Big Dipper L a s e r Company have an ti - fake
identification. please verify the anti-counterfeit label at the bottom of
the case to ensure the interests of consumers.
Interpretation of matters set forth in this manual
belongs to Big Dipper Company
Page 13
LED Spot Light
1. Adopt high brightness LED light source
2. 6 kinds of glass patterns and 8 kinds of metal patterns create perfect
effect
3. Optical zoom lens
4. Positioning accuracy, operation flexibly
5. A pp l i cation to bar, disco, performance, wedding etc.
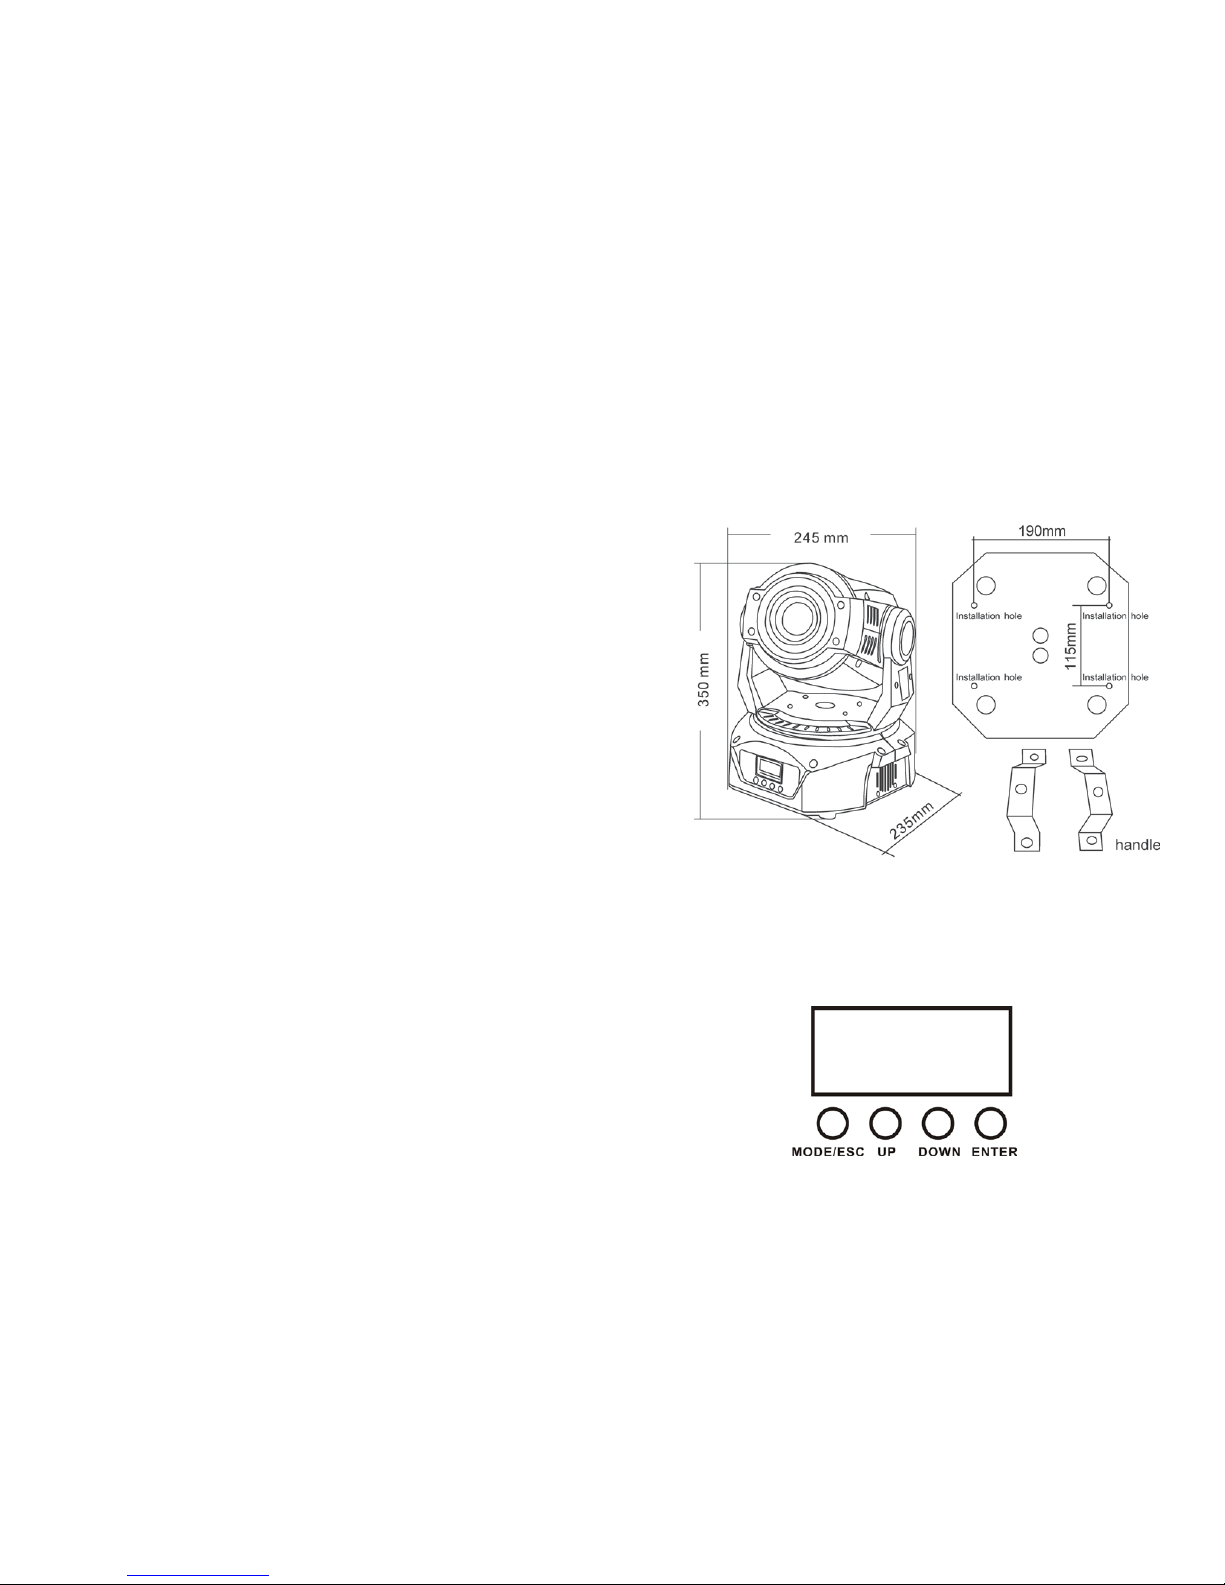
Diameter of the installation hole 6MM, screw used: 6*12M M
Control Panel Instruction:
[ MODE/ESC ] Menu Selection Button.
[ UP ] Scrolls through menu items and numbers in ascending order.
[ DOWN ] Scrolls through menu items and numbers in descending orde r.
[ ENTER ] Used to select and confirm/store the current selection.
Page 2
Page 4
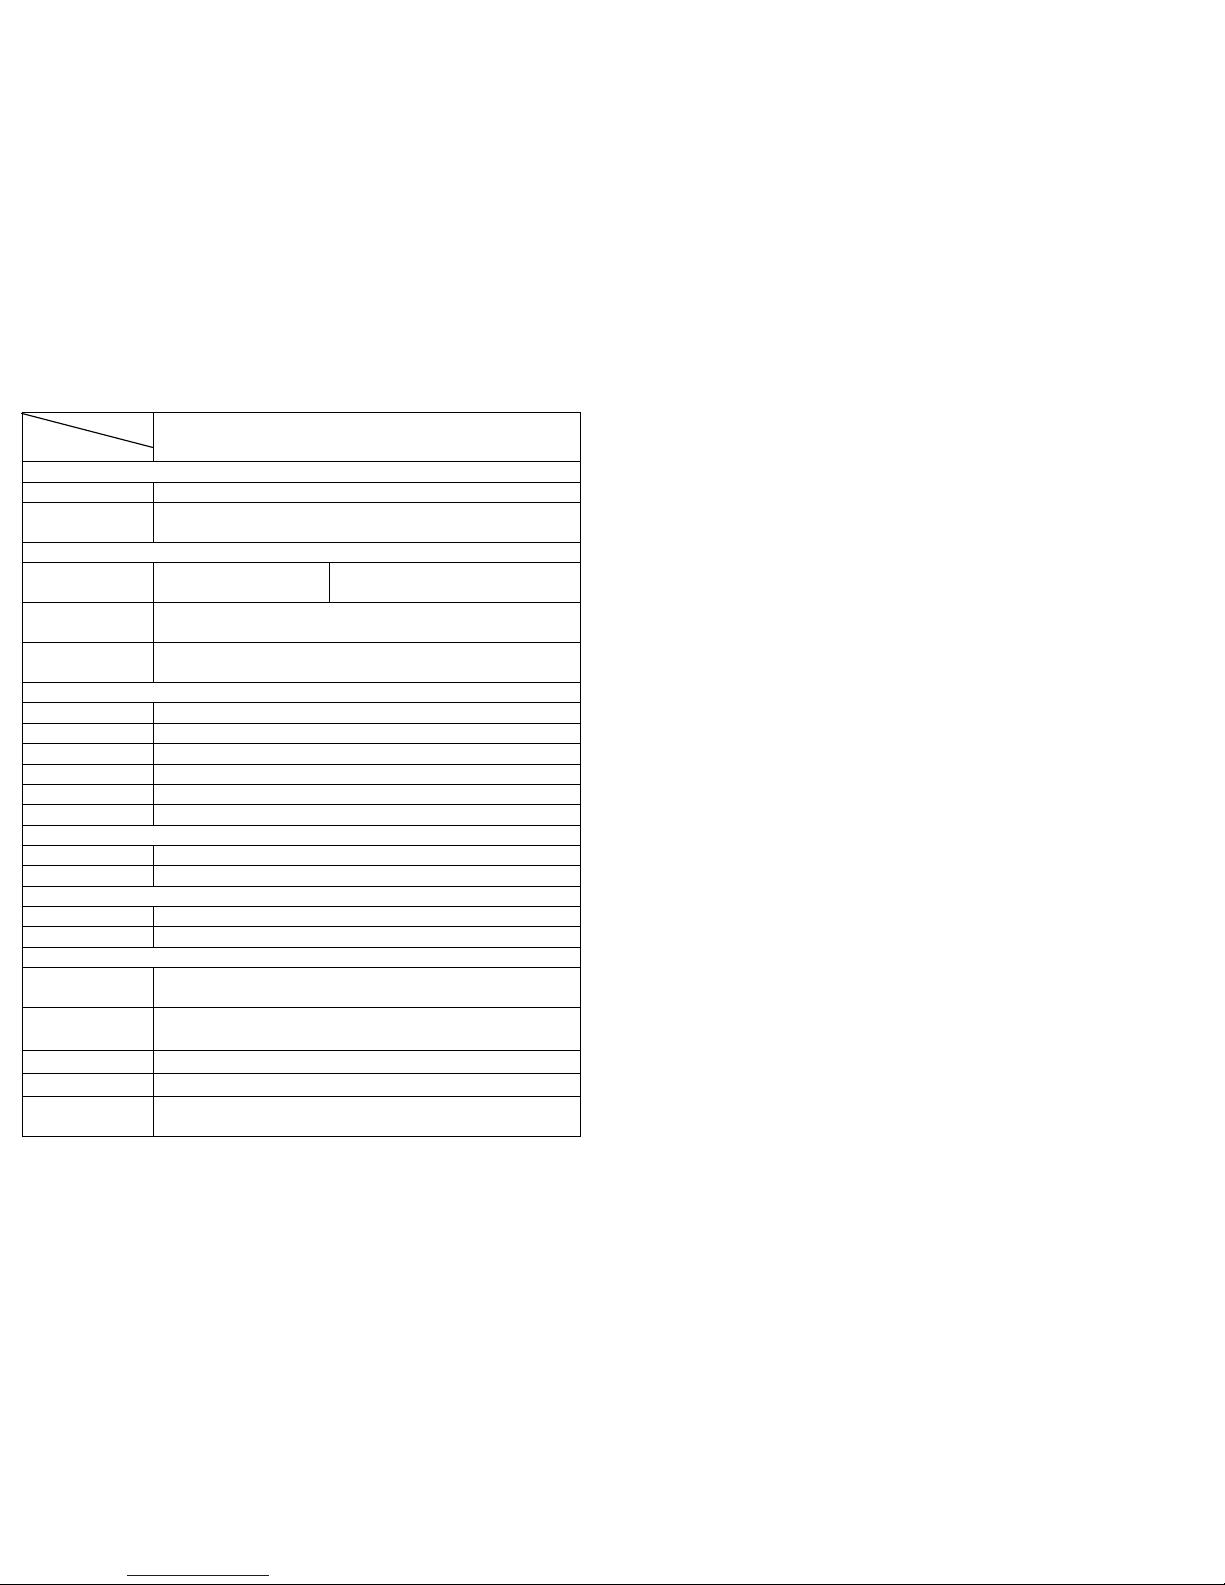
Technical parameters
Model
Parameters
LS90
Power
Power supply 100-240V/50-60HZ
Power
consumption
150W
Light Source
LED
Specifications
90W White
Luminous Flux:4500Lm
Color
Temperature
8000 K
Average
Lifespan
30000 Hours
Color/Gobo
Color 7 Color + Blank Color
Gobo 14 fixed gobo + blank gobo
Prism Rotation 3-face prism , Bilateral rotation
Lens
High precision optical lens, with zoom
Focusing
Linear adjustment
Dimmer
0-100% linear dimmer
Scanning Angle
PAN 540°
TILT 270°
Operation
Control Mode
Auto / Sound/ DMX / Master-slave
DMX channels 16
Security & Package
Work
environment
Indoor: 0°C-40°C
Macro functions
Reset/ lamp on or off can be controlled by controller;
Thermal shutdown circuit;Over-current Protection Circuit
Size
245*235*350mm
N.W./G.W.
7.0/9.0KG
Spare parts
including
Power Cable x1 ,H andle x2,Screw x4,User Manual x1
Page 3
Inspection
In order to use the product securely and properly, please
read the manual before using and follow the instructions
strictly to prevent personal saf ety trouble and product damage
caused by misuse.
Take care of the product, check the possibility of the product
damage caused by transportat ion and check all the listed items
are present upon receipt of the product:
LED Spot Light 1 Use Manual 1
Power cable 1 Handle 2
Installation
1. Make sure there is no flam mable or explosive subj ects within
min 1.5 meter nearby the installation, the distance between
wall and the light shall be min 0.5M
2.Before installation, please check and make sure the power
supply voltage m eet request of the system.
3. Please check ventilation and fans or exhaust passages are
cleared.
4. The equipment should be fixed firmly .
5. For security reasons, the appliance must be earthed.
Page 12
Page 5
Speed – channel 13
Bit
Effect
Remark
0--255
X-axis, Y-axis Motor
Speed Adjustment
Pan fine tuning– channel 14
Bit
Effect
Remark
0--255 Pan fine tuning 1°
Tilt fine tuning– channel 15
Bit
Effect
Remark
0--255
Tilt fine tuning 1°
Reset– channel 16
Bit
Effect
Remark
201-255 Reset OFF All motors run
self-checking
program and
return to original
position
150--200 Reset ON
0--149
Reset OFF
Page 11
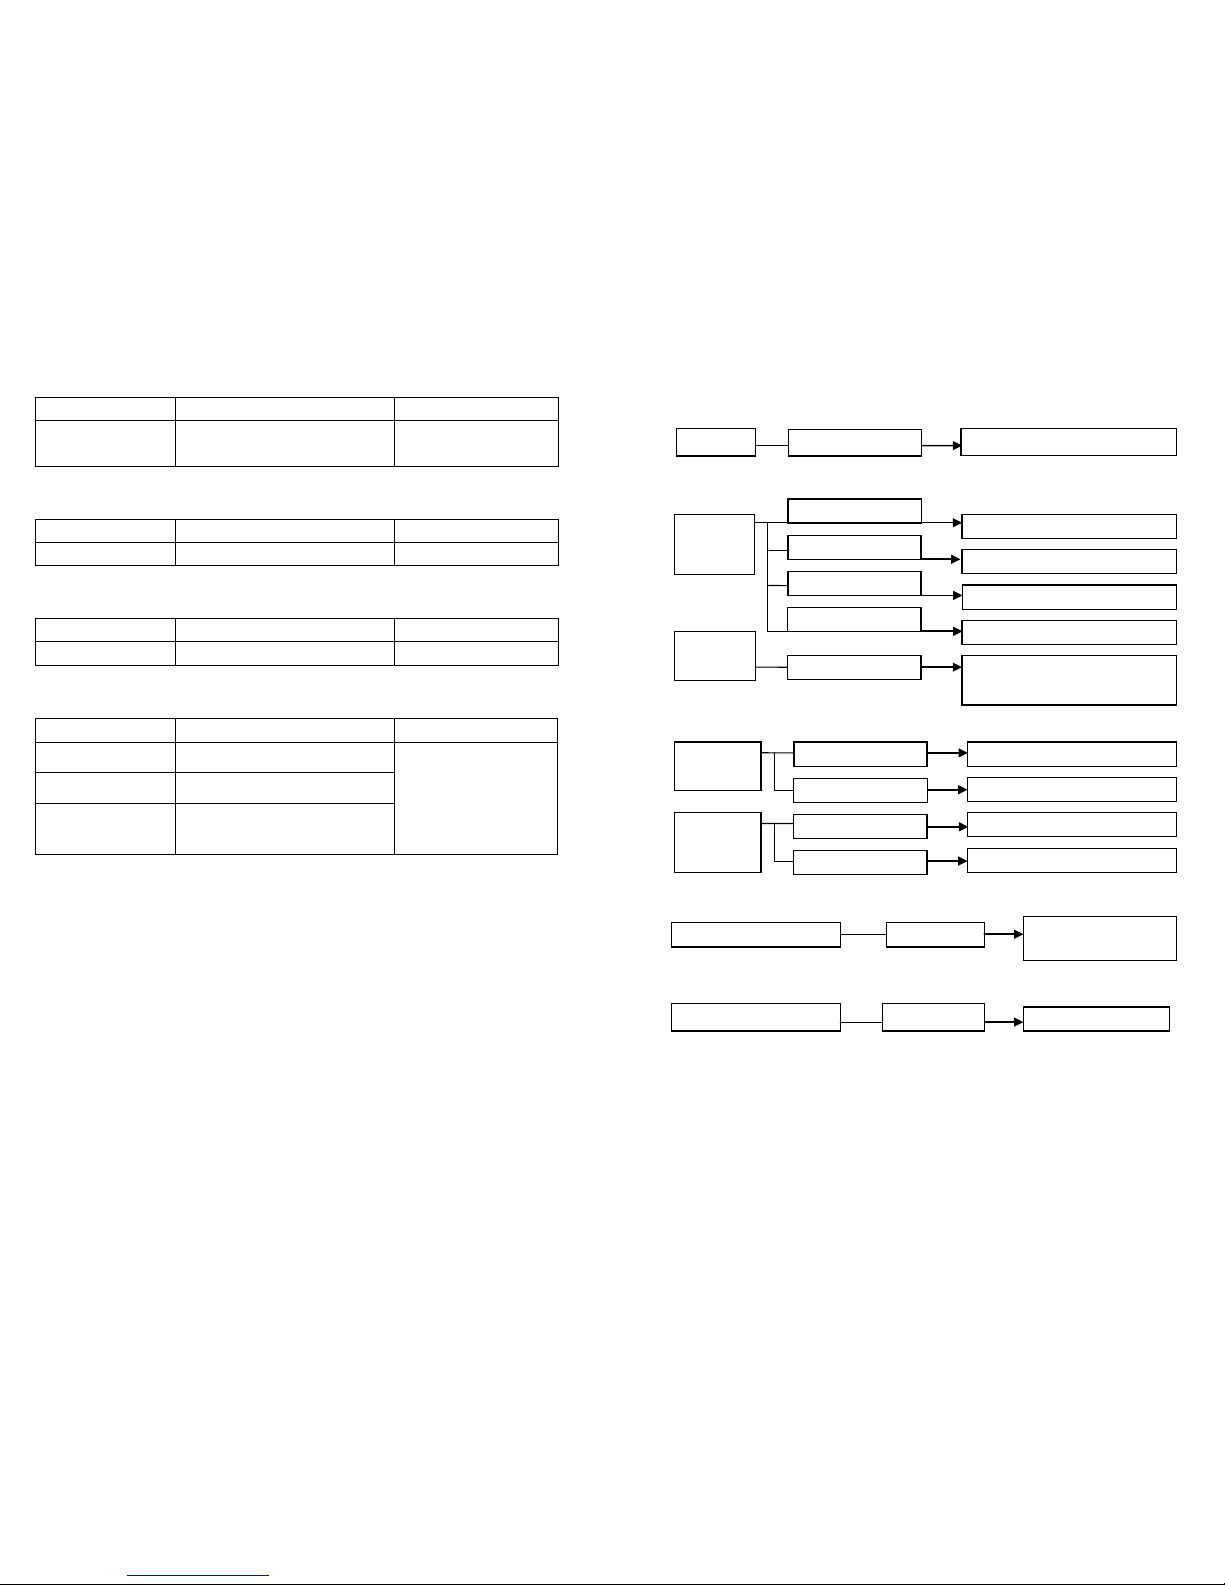
Operation Instr uction
Control Console Setting
Control Mode Setting
Motor Rotation S etting
Reset
Initialize Setting
Remarks: Please confirm the selected operation mode after
selecting an operation mode.
Page 4
DMX SET
001-512
512 address setting
Show
Mode
Dmx Mode
Control Console Mode
Fast Mode
Fast Running Mode
Sound Mode
Sound Activated Mode
0-99
Sound Sensitivity
Adjustment
Slow Mode
Slow Running Mode
Pan
Inverse
OFF
X motor positive rotated
ON
OFF
Y motor positive rotated
ON
Y motor reverse rotated
X motor reverse rota t ed
Default confirm
YES
Initialize Factory
Default
Fixture REST
System Reset
Tite
Inverse
YES
Sound
Sense
Page 6
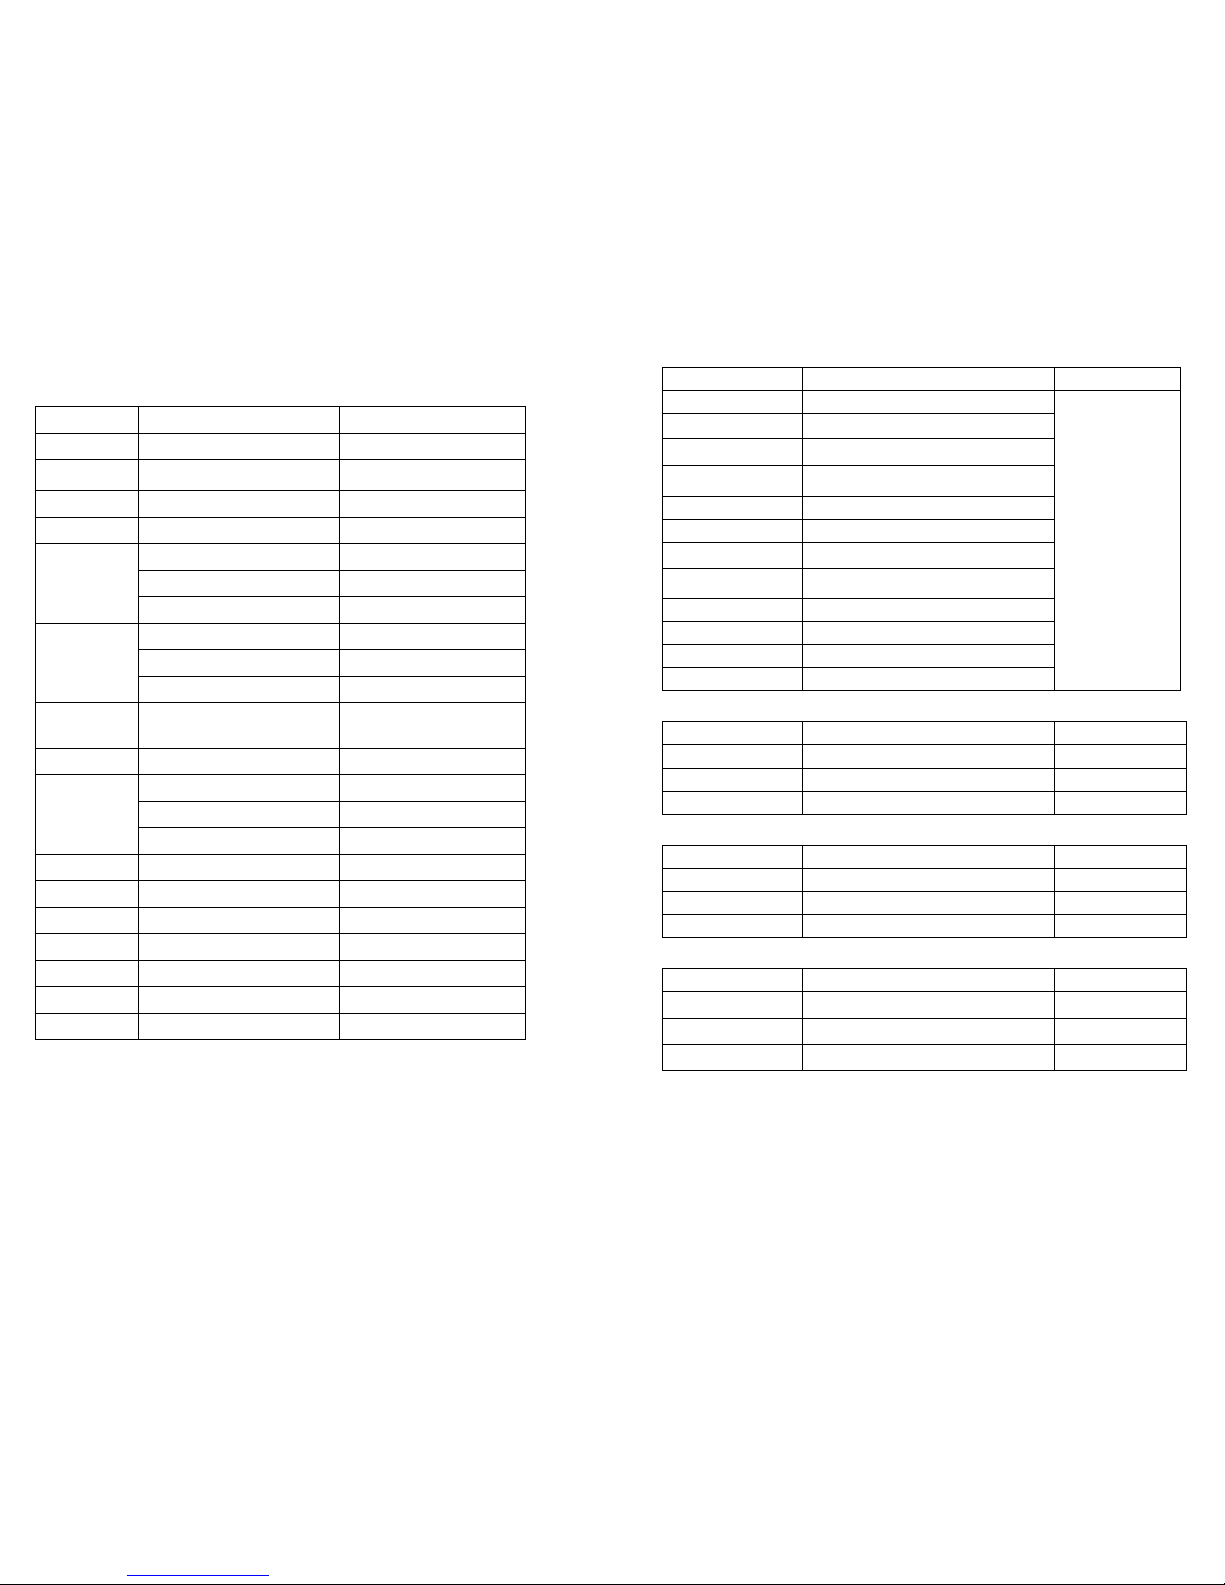
16 Channel Mode
Function Bit Instruction
CH1
0-255
Pan moving
CH2 0-255 Tilt moving
CH3
0-255
Dimming
CH4
0-255
Strobe
CH5
Color Panel
0-159 Fixed Color
160-255 Color Stream
CH6
Glass gobo
0-219
Fixed Gobo
220-255
Gobo Rotation
CH7 0-255
Gobo Automatically
Rotate
CH8 11-249
Gobo Shake
CH9
Metal gobo
0-219
Fixed Color
220-255
Gobo Rotation
CH10 11-249
Gobo Shake
CH11 0-255
Focusing
CH12 0-255
Prism Rotation
CH13
0-255
Speed
CH14
0-255
Pan Fine Tuning
CH15
0-255
Tilt Fine Tuning
CH16
150-200
Reset
Page5
Bit
Effect
Remark
255 Patterns auto running- Fast
……
Gobo 7 to Glass gobo4)
220 Patterns aoto running- Slow
215-219
Gobo14
189-214 Glass gobo3
162-188 Glass gobo2
135-161 Glass gobo1
108-134 Glass gobo0
81-107 Gobo 9
54-80 Gobo 8
27-53 Gobo 7
1-26 White
Metal Gobo Shake – channel 10
Bit
Effect
Remark
251-255 Gobo Shake OFF
10-250 Gobo Shake ON Gradually Fast
0-10 Gobo Shake OFF
Focusing – channel 11
Bit
Effect
Remark
255 Focusing 100%
…… ……
0 Focusing 0%
Prism Inserted / Rotatio n - channel 12
Bit
Effect
Remark
101-255
Postive Rotation (Gradually
50-100 Prism Inserted
0-49 Prism Excluded
Page10
Page 7
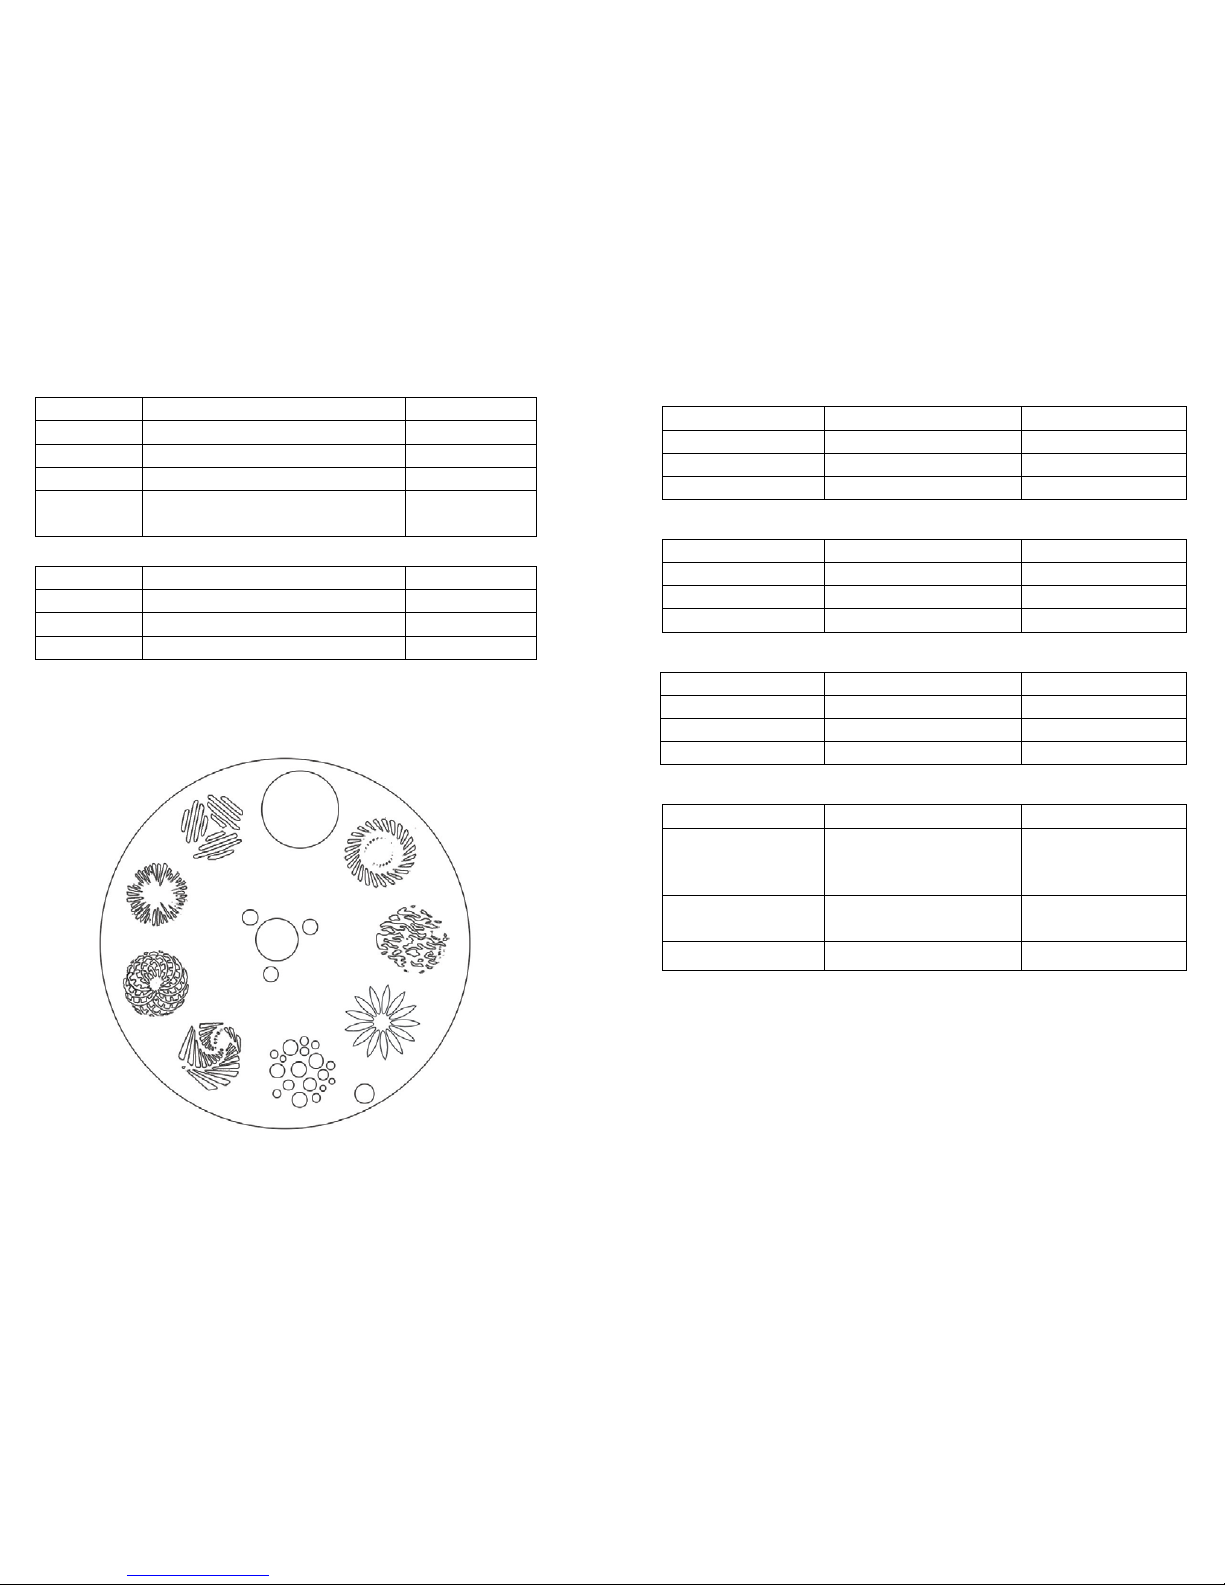
Glass Gobo Rotation – Channel 7
Bit
Effect
Remark
179-255
Gobo Rotation (Forward)
Gradually Fast
167-178
Gobo Rotation Off
90-167
Gobo Rotation (Reverse)
Gradually Fast
0-89 Gobo Rotation by Manual
Control
Glass Gobo Shake – Channel 8
Bit
Effect
Remark
251-255
Gobo Shake Off
10-250
Gobo Shake On
Gradually Fast
0-10
Gobo Shake Off
Metal Gobo – Channel 9
White
14
7
13
8
12
9
11
10
Page 9
Pan– Channel 1
Bit Effect Remark
255
Pan Tuning 540°
……
0°to 540°
0 P an Tuning 0°
Tilt – Channel 2
Bit
Effect
Remark
255 Tilt Tuning 270°
…… 0°to 270°
0 Tilt Tuning 0°
Dimming - Channel 3
Bit
Effect
Remark
255 Brightness 100%
……
…… 0
Brightness 0%
Strobe – Channel 4
Bit
Effect
Remark
250-255 Keep Lighting
Control via
Dimming Channel
3
11-249
Strobe (Gradually
Fast)
0-10 Keep Lighting
Page 6
Page 8
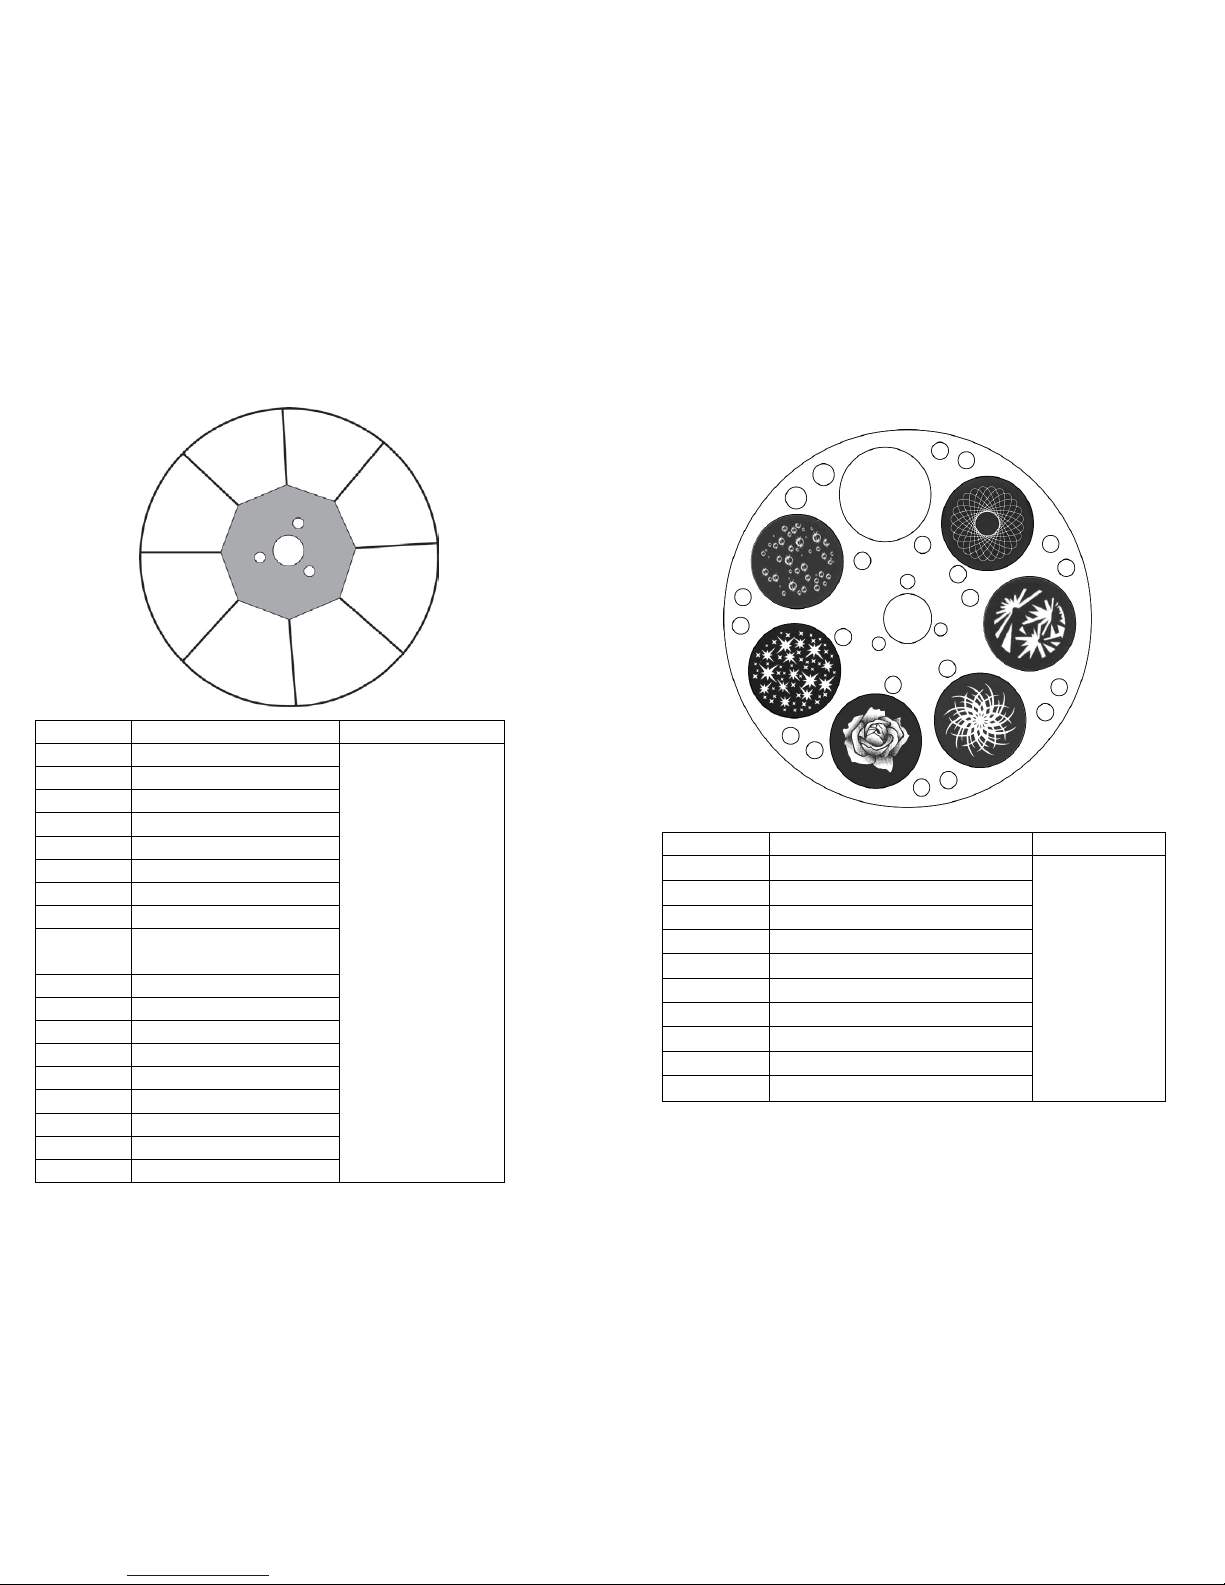
Color Panel - Channel 5
Fuschia Blue-green
Yellow Dark Yellow
Bule White
Green Red
Bit
Effect
Remark
255 Fast Rotation
For convenience,
color value has
been setted in
multiple of 10.
…… Red to Dark Yellow
150 Slow Rotation
140 Green + Red
130 Blue + Green
120 Yellow + Blue
110 Fuschia + Yellow
100 Blue-green + Fuschia
90
Dark Yello w +
lue-green
80
White+ Dark Yellow
70
Dark Yello w
60
Blue-green
50
Rose Color
40
Yellow
30
Blue
20 Green
10 Red
0 White
Page7
Glass Gobo – Channel 6
White
6
1
5
2
4
3
Bit
Effect
Remark
255
Postive Rotation Fast)
…… Glass gobo to Gobo 6
220- Postive Rotation Slow
216-219
Gobo 6
180-215 Gobo 5
144-179 Gobo 4
108-143 Gobo 3
72-107
Gobo 2
36-71 Gobo 1
0-35 White
Page8
 Loading...