


How to
upgrade a
1 gang socket
Plan It
Things you’ll need:
Socket Screwdrivers Pliers Small spirit level
Green and yellow sleeving (if required)
Upgrading a 1 gang socket
To start, make sure you are familiar with the safety
warnings in this leaflet, the instructions supplied
with the product and the mains supply is turned off.
2.1.
At the consumer unit, find the trip switch which protects
the circuit and turn it all the way off. The indicator
window should stay green.
4.3.
Test power is not supplied to the socket by using a plug in
socket tester or multimeter. Unscrew the retaining screws
on the socket so that it is released from the mounting box.
Gently ease the socket from the mounting box to show
the wiring.
Upgrading a 1 gang socket (continued)
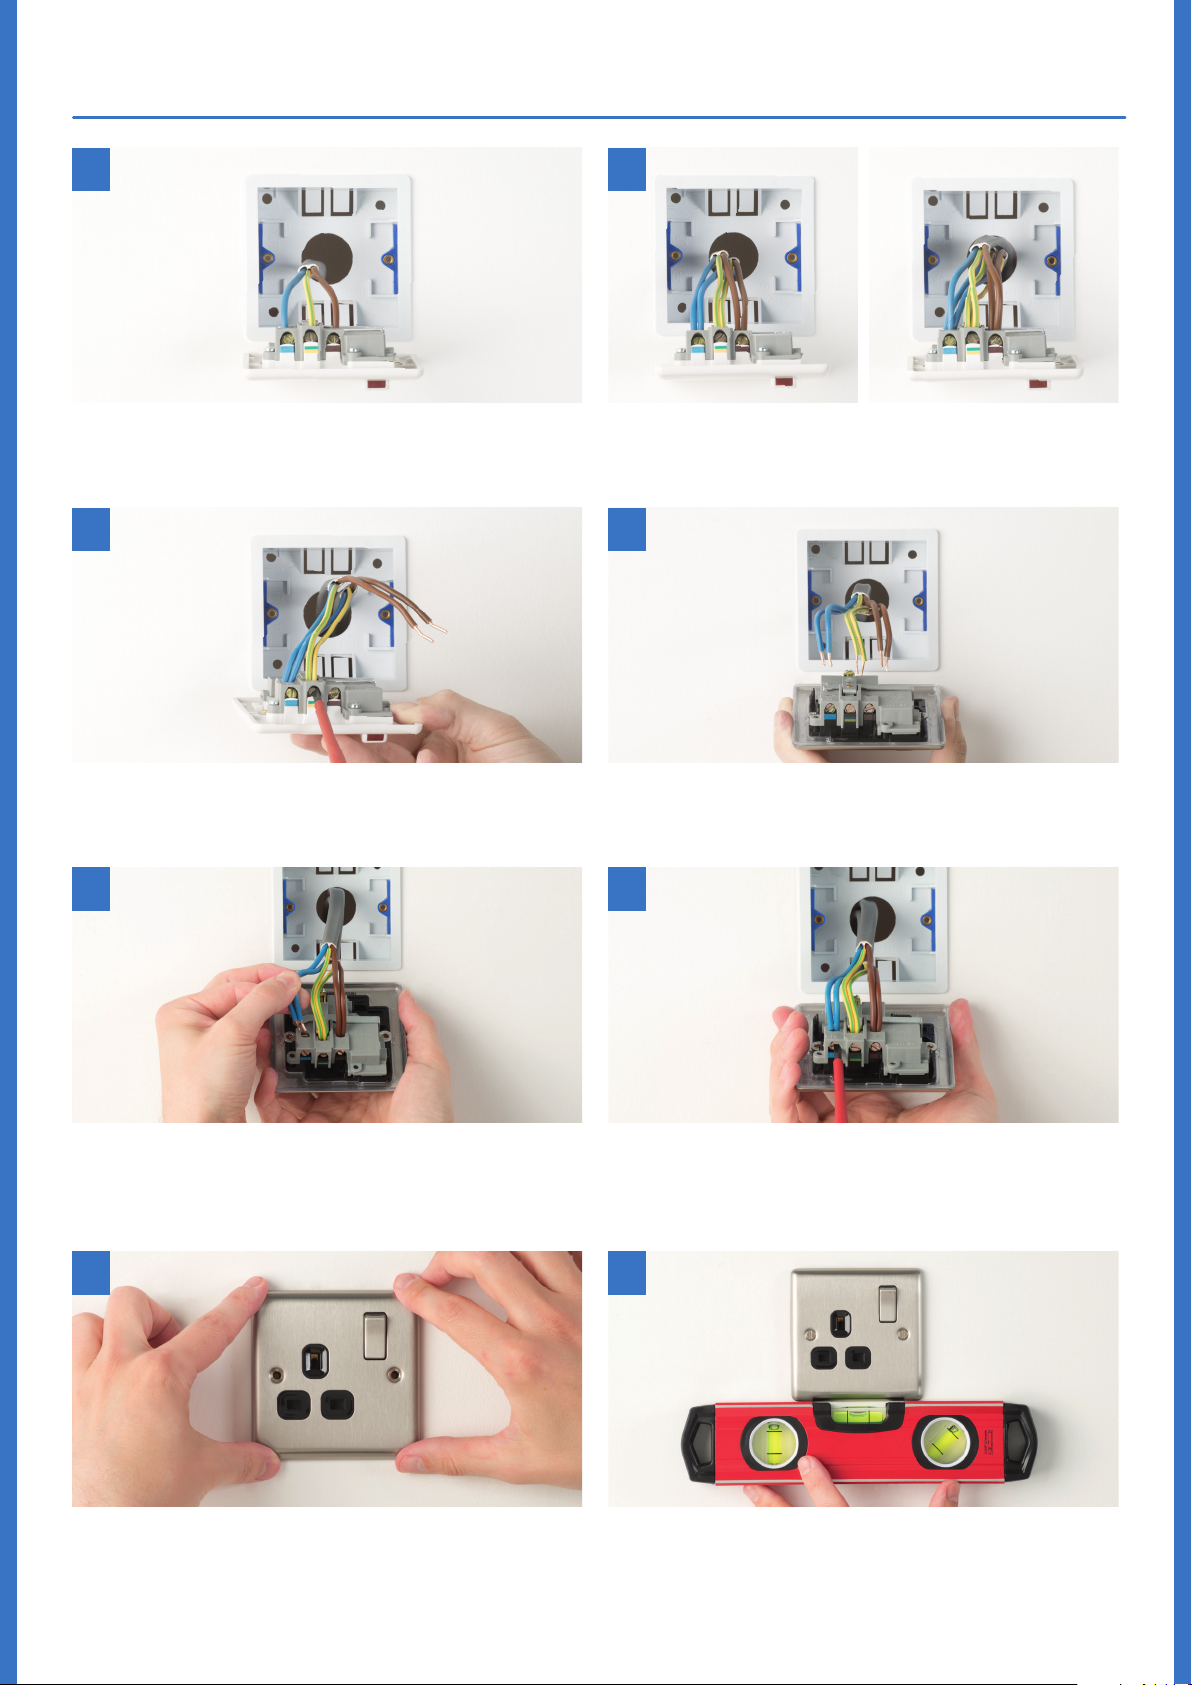
5.
There will generally be three different wiring configurations.
This photo shows a single wire of each colour connected
to each terminal.
7.
6.
Alternatively, there could be two or three wires of each
colour connected to each terminal.
8.
Whichever wiring configuration you find, unscrew each
terminal screw to release the wires. You should now
be able to remove the socket and place it to one side.
9.
Place the blue wire(s) into the neutral terminal, brown
wire(s) into the live terminal and the green/yellow wire(s)
into the earth terminal. The terminals on the socket are
colour-coded to help locate the correct one.
11.
Line up the new socket and take note of where each
terminal is located.
10.
Make sure that the wires are fully inserted into the terminal
and that no bare copper wire is visible. Tighten the screws
securely onto the copper wire, not the outer sheeting.
12.
Gently press the socket back into place over
the mounting box. Take care not to trap any wires
between the wall and the socket.
Insert and tighten the retaining screws provided.
Use a spirit level to make sure that the socket is level.
Restore the power at the consumer unit and test.
 Loading...